Boho Honeycomb Quilt


Hi!  My name is Erica and I blog over at Kitchen Table Quilting.  I am so excited about Moda’s new honeycomb pre-cut and this is a fun, quick way to put them to good use.  There are no Y seams involved and it yields a generously sized lap quilt.


1 Honeycomb Hexagons in Natural
2 Boho Jelly Rolls
2 Yards Moda Bella in Sienna
4.5 Yards Boho Wild Child Rain
2/3 Yard Boho Basic Earth
Batting at least 80″x90″


1. Unroll your jelly rolls and put the matching strips into pairs.  You will need 36 pairs of strips.

 
2.  Leave the strips folded in half and subcut the first strip into pieces 5.75″, 8″, and 8″.  Since you left your strip folded, this will give you two pieces each time you cut.  CUT CAREFULLY.  There is very little wiggle room here.  
3.  Leaving the strip folded again, subcut the second strip in the pair into pieces 10.25″, 3.5″, and 5.75″.  
4.  Separate the strips into two piles.
  • Pile for the inner ring: two 3.5″ pieces, 2 of the 5.75″ pieces, 2 of the 8″ pieces.
  • Pile for the outer ring: two of the 5.75″ pieces, two of the 8″ pieces, two 10.25″ pieces.  

5.  Each honeycomb hexagon will need a set for the inner ring and a set for the outer ring.  Take a hexagon and sew a 3.5″ piece to the top and bottom of the hexagon.  Make sure to center your jelly roll piece over the side of the hexagon so a little bit hangs over on each side.

6.  Press and then trim two opposite sides by lining up your ruler with the side of the hexagon.  You only need to trim the two opposite sides because the other sides will be trimmed later.
It should now look like this.
7.  Add two 5.75″ pieces to the sides you just trimmed.
8.  Press and trim.
9.  Now add your 8″ pieces to the two remaining sides.  
10.  To trim down to a hexagon shape, line the 2.25″ inch mark on your ruler with the edge of your hexagon in the center.  Trim around each side.  

11.  Now, using a different print, add two 5.75″ pieces to two opposite sides of your hexagon, press, and trim.  

12.  Add the 8″ pieces, press, and trim.

13.  And then add the 10.25″ pieces, press, and trim just like before by lining up the 2.25″ mark on your ruller with the inner ring (the blue print here).  

14. Cut your solid yardage into seven inch x width of fabric strips.  You will need 9 strips, each strip yields 8 equilateral triangles.

15.  To make equilateral triangles, lay a 7 inch strip (folded in half) on your cutting mat.  Line up the 60 degree mark on your ruler with the top of the fabric.

16.  Cut along the edge of the ruler.

17.  Flip your ruler over and line up the 60 degree mark with the bottom of the fabric to make an equilateral triangle.

18.  Sew the triangle to one side of your hexagon by centering the triangle over one side of the hexagon.  A little of the solid fabric should hang over each side.  Once it has been sewn on and pressed, it should line up with the adjacent hexagon side as shown in the photo below.  
You will need 6 total hexagons with 1 triangle, we will call these the “B” hexagon.  It doesn’t matter which side you add the triangle to since they are all of the same.  

19.  Take the 30 remaining hexagons and add a triangle to the opposite side.

20.  You will need 24 total  of these “A” hexagons with 2 triangles added, so take the remaining 6 hexagons and we will add a third triangle.

21.  Add a third triangle to make three “C’ hexagons.

22.  And a third triangle to make three “D” hexagons.

23.  Arrange your blocks into this layout:

24.  Piece the horizontal rows together.  Do this by taking two hexagons at a time.

And flipping the hexagon on the right up to sew the parallel edge together.  
25. Sew the rows together to finish the quilt top.

26.  Once you have the finished quilt top, two of the sides will need to be trimmed.  Use your ruler and rotary cutter to square up the bottom of the quilt and make this edge straight.

27.  Baste, quilt, and bind as desired.

Finished size: 76″x80″

Erica Jackman
{kitchentablequilting.blogspot.com}

Noteworthy Labyrinth Quilt


Hello again!  This is Karin Vail from Cascade Quilts and I am happy to bring you my third Moda Bake Shop project!  This would look wonderul in just about any Moda collection!
I showed a preview picture of the pattern to a quilter friend of mine, and she said it looked like a labyrinth or maze, so the name was born.  This quilt came together pretty quickly – it looks complicated, but if you keep your consistent 1/4” seam, you should have no problems 🙂  This quilt top finishes at approx. 87”x87”.


2 jelly rolls (Noteworthy by Sweetwater)
3 1/2 yards Bella solids (Snow)
5 yards backing (#5500 15  ”Daisy” from Noteworthy collection)


We will be using 1/4” seam allowance throughout.

First, we’ll be cutting loads and loads of narrow strips from your Bella solid.

CUT:
8 WOF strips @ 1.75” for the border
66 WOF strips @ 1.5” wide for the sashing (30 are for your strip sets)
     Subcut 28 of the 1.5” strips into:
          45 pieces @ 16.5”
          50 @ 8”

Set aside 30 WOF @ 1.5” for your strip sets, and 8 WOF @ 1.5” for your sashing.

To get the most out of your solids, you can get two 16.5” pieces and one 8” piece from each WOF – so, from 22 strips, cut 44 pieces @ 16.5” and 22 pieces @ 8” – then from one strip, cut 1 piece @ 16.5” and 3 pieces @ 8” – then from 5 strips, cut 25 more pieces @ 8”.   This should give you the least amount of waste.

Take the remaining eight 1.5” strips and join into 4 longer strips @ 88” (sashing strip to join the rows together.)

Join the eight WOF 1.75” strips into 4 @ 88” for your border.

Open your two jelly rolls and choose 30 strips from each jelly roll for a total of 60 strips.  Some of the remaining jelly roll strips will be used for scrappy binding, so keep that in mind when choosing strips.  Also keep in mind what you choose if you might want to make matching pillows. Unfortunately, I left out the white/white prints and lower value prints and didn’t think about using the remaining for pillows until the top was already all assembled.  I wish I would have thought ahead further so I could have a matching pillow or two.

Anyhow, for each of the strip sets, you will choose 3 jelly roll strips and join together alternating with 2 of the 1.5” solid strips.  Press all seams to one side.

You will sew together 20 of these strips sets.  Each strip set should measure 8.5” wide.

Cut each strip set into five 8.5” squares.  There will be VERY LITTLE waste here, so cut cautiously.  After you have cut all your strip sets into 8.5” squares, you will take pairs keeping the seams orientated in the same direction, and cut them diagonally in opposing directions.

It is imperitive that you cut the angles in opposing directions for this to work.

Now, swap the upper pieces from each block and align and you will start to see the sub-block emerging!

If you pressed the seams to one side, and kept them in the same direction when you cut the blocks, your seams will all nest pefectly when you go to join the triangles back into a square!  The bias edge helps a LOT to make sure your seams line up.

Sew the blocks together and press.  You can press open or to one side here, your choice.  I chose to press to the side because it’s faster 🙂

At this point, carefully trim your blocks so they are 8” square.  You should have VERY little to trim, if anything at all.  The blocks will go together much nicer if these are all nice and square though 🙂
Continue cutting/sewing your sub-blocks – you should have a total of 100 for this quilt.

To assemble the 25 blocks, you will stitch an 8” x 1.5” solid between pairs of sub-blocks, press toward the solid.  Then, assemble pairs of those with the 16.5” x 1.5” strip for your finished blocks.  There will be 25 total.  Using your final twenty 16.5” x 1.5” strips, sew the blocks into rows of 5 – then use your 1.5” x 88” strips to join your rows.  Finally, use your final four 1.75”x 88” strips to add a border for a final quilt top finish of 87”x87”.

Now you can layer, baste, quilt, and bind using 9 of your remaining jelly roll strips!  (You will have 11 leftover jelly roll strips from the 2 jelly rolls and a small amount of the solid – maybe make some pillows to match?!)


One beautiful 87”x87” quilt!

Hop on over to my website to see the quilt in it’s post-washed crinkly goodness!

{cascadequilts.com}

Searching the Moda Bake Shop

Desperately seeking cupcakes! No, not really, but we have heard (and noticed) that the search function on the Moda Bake Shop is not working. This blog is hosted by Blogger and the search problem seems to be quite widespread. We know you can’t live without your recipes so Oda May has a workaround for you until the issue is corrected.

It’s very easy…do a Google search! The search function is basically a Google search that is restricted to just this blog. So if you are looking for an Easter project here on the Bake Shop, go to Google and type “Moda Bake Shop” + “Easter.” The relevant projects will be at the top of the results. 

Oh Pinwheels! Lap Quilt

Hi everyone! Debbie Taylor here from Fat Quarter Shop & It’s Sew Emma! I’m really happy to share with you my first project on Moda Bake Shop, Oh Pinwheels! I love this fun quilt with colorful sprinkles of pinwheels and oblong rings. While I usually make quilts as gifts for others, since I used my current favorite fabric Noteworthy, this one is a gift for moi!

In case you love my version, Fat Quarter Shop is offering kits of Oh Pinwheels in Noteworthy!

  • 1 Noteworthy Jelly Roll
  • 2 1/2 yards cream tonal for background, sashing and inner borders − I used Vanilla Fly a Kite SKU # 5501-21
  • 5/8 yard pink tonal for binding − I used Kisses Fly a Kite SKU # 5501-13
  • 3 1/4 yards for backing − I used Vanilla Bucket List SKU # 5500-11


Cutting

  1. Choose 25 strips from your Noteworthy Jelly Roll.
    From 9 strips, cut:
    • 2 – 2.5″ x 8.5″ strips
    • 2 – 2.5″ x 4.5″ strips

    From 8 strips, cut:

    • 1 – 2.5″ x 13.5″ strips
    • 8 – 2.5″ squares

    From 8 strips, cut:

    • 1 – 2.5″ x 10.5″ strips
    • 8 – 2.5″ squares
  2. For background, sashing and inner borders, cut:
    • 21 – 4.5″ x 8.5″ rectangles
    • 16 – 2.5″ x 4.5″ rectangles
    • 116 – 2.5″ squares
    • 8 – 4.5″ squares
    • 9 – 2.5″ x WOF strips, subcut into:
      • 6 – 2.5″ x 40.5″ strips
      • 2 – 2.5″ x 52.5″ strips
  3. For binding, cut 7 – 2.5″ x WOF (width of fabric) strips

All seams are sewn with a 1/4″ seam allowance.

Piecing
 
1. With right sides facing, layer a 2.5″ cream tonal scribbles square with a 2.5″ jelly roll square. Stitch together along center line. Press toward the darker color and trim off excess. Half-square triangle should measure 2.5″ x 2.5″. Repeat 115 more times. Make 116.

2. Assemble two 2.5″ x 8.5″ rectangles of the same fabric and one 4.5″ x 8.5″ cream tonal scribbles rectangle. Press toward the 2.5″ x 8.5″ rectangles. Unit should measure 8.5″ x 8.5″. Repeat eight more times. Make nine.

3. Assemble two 2.5″ half-square triangles of the same fabric and one 2.5″ x 4.5″ rectangle. Press toward the rectangles. Unit should measure 2.5″ x 8.5″. Repeat with the same fabrics once for two identical units. Repeat eight more times. Make nine pairs of identical units.


4. Assemble Oh Block as shown with matching fabrics. Press toward the 8.5″ x 8.5″ unit. Oh Block should measure 8.5″ x 12.5″. Repeat eight more times. Make nine.


5. Assemble two 2.5″ half-square triangles with different fabrics. Press toward the darker color. Unit should measure 2.5″ x 4.5″. Then assemble two 2.5″ x 4.5″ half-square triangle units of different fabrics and press toward the darker color. Pinwheel unit should measure 4.5″ x 4.5″. Repeat nineteen more times. Make twenty.

6. Assemble two 2.5″ x 4.5″ cream tonal scribbles rectangles and one 4.5″ x 4.5″ pinwheel unit. Press toward the pinwheel. Unit should measure 4.5″ x 8.5″. Repeat five more times. Make six. Assemble two 4.5″ x 8.5″ cream tonal scribbles rectangles and one 4.5″ x 8.5″ cream/pinwheel unit as shown. Press toward the cream/pinwheel units. Pinwheel Block should measure 8.5″ x 12.5″. Repeat five more times. Make six.

7. Assemble three Oh Blocks and two Pinwheel Blocks as shown. Press toward Pinwheel Blocks. Large Row should measure 12.5″ x 40.5″. Repeat two more times. Make three.

8. Assemble two 2.5″ x 4.5″ cream tonal scribbles rectangles, five pinwheel units and four 4.5″ cream tonal scribbles squares as shown. Press toward the cream tonal scribbles. Small Row should measure 4.5″ x 40.5″. Repeat one more time. Make two.

9. Assemble three Large Rows, four 2.5″ x 40.5″ cream tonal scribbles sashing strips and two Small Rows as shown. Press toward sashing. Quilt Center should measure 40.5″ x 52.5″.

10. Assemble four different 2.5″ x 13.5″ jelly roll rectangles as shown. Press toward darker colors. Side Border Unit should measure 2.5″ x 52.5″. Repeat one more time. Make two. Piece 2.5″ cream tonal scribbles strips end to end. Subcut into two 2.5″ x 52.5″ strips for the side borders. Assemble one Side Border Unit and one 2.5″ x 52.5″ cream tonal scribbles strip as shown. Press toward cream tonal scribbles print. Side Border should measure 4.5″ x 52.5″. Repeat one more time. Make two.


11. Assemble four different 2.5″ x 10.5″ jelly roll rectangles. Press toward darker colors. Top and Bottom Border Unit should measure 2.5″ x 40.5″. Repeat one more time. Make two. Assemble one Top and Bottom Border Unit and one 2.5 x 40.5 cream tonal scribbles strip. Press toward cream tonal scribbles print. Top and Bottom Border Row should measure 4.5″ x 40.5″. Repeat one more time. Make two. Then assemble two pinwheel units and one Top and Bottom Border Row as shown. Top and Bottom Border should measure 4.5″ x 48.5″. Repeat one more time. Make two.

12. Attach Side Borders to the Quilt Center. Press toward borders. Unit should measure 48.5″ x 52.5″. Second, attach Top and Bottom Borders to Quilt Center as shown. Quilt should measure 48.5″ x 60.5″.

Quilt and bind as desired! Natalia Bonner quilted mine with a leafy motif and cheerful flowers inside the Oh blocks.


One fresh 48.5″ x 60.5″ lap quilt for Spring! Hope you enjoy!

Debbie Taylor
{fatquartershop.blogspot.com}
{www.itssewemma.com}

Honey Honey Layer Cake Quilt

Hi.  My name is Trish and I blog over at notes of sincerity.  I am so happy to be back at the Moda Bake Shop sharing another tutorial.  Let’s get started, shall we?!

You can use layer cakes or charm squares for this project. I used a Layer Cake, hence the name!

1 layer cake OR 4 charm packs Honey Honey by Kate Spain
1 layer cake OR 4 charm packs Bella Solids in Snow (background fabric**)
5/8 yard binding fabric
4 yards backing fabric (Honey Honey in Sunset)

**If you prefer to use yardage for your background fabric, you will need 2 3/4 yards.
 

one.
Open layer cake and choose 36 of the 42 prints you would like for the blocks, set the other 6 aside.
 

two.
Cut each layer cake into 5″ squares.  If you’re using charm squares, lucky you! Jump to step three.
 

You should have  144 5″ squares.  

three. 
I used yardage for my background fabric and the instructions below tell you how to cut your pieces. If you are using layer cakes, cut into quarters as shown above. You will need 156 squares. If you are using charm packs, jump on down to step four and start sewing.

From your background fabric, cut 20 5″ strips x width of fabric.  Sub cut each strip into 5″ squares – you will get 8 from each strip.  You will need 156 squares.

four.
Pull out 48 pattern squares and 60 solid squares.  Trim to 4.5″.  Set aside. (These are your filler squares.)

five.
Pair remaining 96 solid and pattern fabrics, making half square triangles.  Press seams open, trim to 4.5″ square.

six.
Arrange squares and sew block together in above pattern, one row at a time.  Pressing seams open when finished to reduce bulk.  Each block measures 20.5″.

seven.
Sew quilt together 3 blocks by 4 blocks.

Cut strips of 2.5″ x width of fabric and piece for length to make binding.

eight.
Quilt, bind, and enjoy!  
Beautifully long arm quilted by Kathy.  

 
61″ x  84″ Honey Honey Layer Cake Quilt

Trish Poolson
{notesofsincerity.blogspot.com}

Q&A with Oda May: Fabric Scale

Today Oda May tells it like it is when it comes to fabric scale.

{fabrics shown are from Avalon by Fig Tree and Co.}


Dear Oda May,
I like to design my quilts in a software program before I make them. I love that Moda provides jpegs of fabric lines but how can I tell the scale?
Scaled Out in Schenectady

Dear Scaled Out,
Start with the PDF for the collection. You can find them all{here}. The green scissors icon is for the PDFs. Here is the PDF file for Fig Tree and Co.’s newest line, Avalon.

www.unitednotions.com/fcc_avalon.pdf

All of the fabric swatches shown in the PDF are scaled down by 50% – unless otherwise indicated. Certain extra large repeats and panels are often reduced by 75%.  Knowing the scale of a fabric is also helpful for other quilters who are hunting for just the right polka dot, stripe, or damask (or whichever print strikes your fancy!).

Trimmed and Squared,

Sweet as Candy Pincushion


Hello! It’s Lisa Calle of Vintage Modern Quilts here with a quick recipe using your favorite pieces of Moda Candy.  I came up with this cute and fast little pincushion as a way to use some of my Moda twill tape. I’ve saved every piece of it since I started buying pre-cuts (Please tell me I’m not the only one who does this?!). They’re just tucked away and looking lonely in a jar on the shelf.

I just had to make use of them! Even with the small-scale piecing, this pincushion is a fast and simple project.

1 package of Moda Candy (I used Mama Said Sew by Sweetwater)
6 pieces of Moda twill tape from a Jelly Roll or Fat Quarter Bundle OR 108 inches of binding
12 charm squares OR 12 pieces of 5″x5″ scraps
12 pieces of 5″x5″ batting
Filling (I used crushed walnut shells)


These instructions show you how to make 1 pincushion. A package of Moda Candy plus the ingredients listed above will yield 6 pincushions.

1. Choose seven pieces of Candy for your pincushion top: four pieces for the 4-patch, 2 sashing fabrics, and 1 center fabric

2. Mark a line down the center of two of your 4-patch pieces. (I press a line with my iron). Place 1 marked piece and one unmarked piece right sides together and sew 1/4″ away from the line.

Cut along the line and press. Repeat for your other two 4-patch pieces.

3. Mark or press a line down the center of the 4-patch strips you’ve sewn, going perpendicular to the seam. Repeat the process of sewing 1/4″ from each side of the line, cutting, and pressing. You now have four itty bitty 4-patch blocks.

4. Cut your sashing squares in half: each sashing strip will measure 2.5″ x 1.25″ (with about 0.5″ of the length as excess that you’ll trim off later). Set aside.

5. Cut your center square. I chose a cute portion of one fabric to fussy cut a star and some text. This center square measures 1.25″ x 1.25.”

6. Assemble your block in rows. Press your seams towards the sashing on the 4-patch rows and towards the center block on the middle strip.

7. Match points, pin, and sew your block together.

8. Layer up with one charm square, your batting piece, and your block on top. Quilt as desired. If you don’t want any quilting, at least baste the edges together. Use your ruler and rotary cutter to square up to 4.25 inches.

 You now have a cute mini quilt pincushion top!

Optional – sew a length of Moda twill tape that reads “Moda” on the backing square for your pincushion. I hand-stitched mine on because I only thought of this after I’d made the pincushion.

9. Place your pincushion top wrong sides together with your backing charm square. Sew a 1/4″ seam all around your pincushion, leaving a small opening for the filler. I like to mark my stopping point with a pin or Clover clip.

10. Sew a zig zag stitch at one end of your Moda twill tape.This will help prevent fraying. You can also use fray check if you have some on hand.

11. Attach your Moda twill tape as binding. Start just after the opening you’ve left and sew on just like bias tape, folding the twill tape at each corner to miter them.

12. Fill the pincushion with crushed walnut shells. (NOTE: You can find these in the bird section of a pet store. The bag is huge so share with a couple of friends.)

13. Stitch the opening closed and finish adding your twill tape binding. Be sure to zig zag the end to prevent fraying. Overlap the beginning of the twill tape by an inch or so. It is helpful to use your zipper foot for this step.


 One Sweet as Candy Pincushion! (That’s my son’s little hand in the photo. He just had to touch those yellow pins.)

Repeat x 5 to use up your entire pack of Moda Candy. Each pincushion measures about 4.5″ square. These can also be used as pattern weights. They make a great gift for your sewing friends and this pincushion looks sew stylish in solids (the Bella Solids 2012 colors are available as Moda Candy.) See what other Moda Candy is available {here} and check your favorite LQS to see which ones they have in stock.

Hope you enjoyed this recipe. If you make a pincushion, be sure to brag about it in the {Moda Bake Shop group on Flickr}.

Happy sewing!

Lisa Calle
{vintagemodernquilts.com}

Comma, Pyramid, Hexagon Quilt


My name is Sara and you can find me at www.knottygnome.com. This is my first bakeshop tutorial and I’m excited to bring you this hexagon quilt in two sizes. I love to play with color in textiles. In addition to quilting I engage in many crafts, like knitting, spinning, dyeing, crochet, embroidery, and sewing. Be sure to stop by my blog for a bonus tutorial that uses scraps from this quilt to make an improv pillow cover.


Stroller blanket:
1 Comma FQ bundle + 1/2 yd Bella solid 9900-11 (Snow);
155in binding using your preferred method
Batting: 40×48

Lap quilt:
1 Comma FQ bundle + 1 2/3 yd Bella solid 9900-11 (Snow);
2 1/4 yd yardage for backing;
290in binding using your preferred method
Batting: 76×80


I used the Fons & Porter Pyramid ruler, but I’ve also included a triangle template that can be found in the printer friendly version of this post.


Step 1: Choose your fabrics. Each fat quarter will yield 24 triangles, or 6 per 21” strip. A strip cut from yardage will give you 12 triangles.

For the Stroller blanket you will need 150 triangles. I chose extra fabrics for more variation but remember to keep 7 FQ intact for the backing
36 Black: 1.5 FQ
36 Grey: 1.5 FQ
12 Green: .5 FQ
12 Orange: .5 FQ
12 Yellow: .5 FQ
42 Snow: .5 yd

For the Lap quilt you will need 558 triangles. Remember to keep 8 FQ intact for the backing.
120 Black: 5 FQ
120 Grey: 5 FQ
60 Green: 2.5 FQ
48 Orange: 2 FQ
60 Yellow: 2.5 FQ
150 Snow: 1 2/3 yd

Step 2: Press your fabrics. I laid mine out 4 layers deep to save time. Square up your edge and cut fabrics into 4.5” strips.

Step 3: Line up your triangle ruler or template close to the edge of your strip. If using the template, align your cutting ruler with the edge of the template to help you cut a straight edge.

Step 4: Cut both sides of the template to complete your triangle.

Step 5: Remove 1/4″ from each tip to get rid of the “dog ears” and make the triangles easy to align when piecing.

Step 6: Flip the template and align it with the cut edge of the strip to begin your next triangle. Repeat Steps 2-6 until you have the correct number of triangles from Step 1.

Step 7: If you have a design wall, lay out your triangles according to the diagram. I do not have a design wall, so I laid out a few rows at a time.

Stroller blanket: 10 rows of 15 triangles
Lap quilt: 18 rows of 31 triangles

Step 8: Stitch your triangles into rows using 1/4″ seam. Be sure to keep them in order when chain piecing. Press seams open, being careful not to stretch the triangles out of shape.

Step 9: Piece rows together in groups of 2 to form complete hexagons. Stitch rows together to complete top.

Step 10: Trim the 2 uneven sides 1/4″ beyond the first whole triangle in the row, making the top rectangular.

Step 11: Choose fabrics for the back, cut and layout according to the diagram. The Stroller blanket requires 7 fat quarters and the lap quilt requires 8 fat quarters plus 2 1/4 yd for the center panel. Piece together using 1/4″ seams.

Step 12: Make a quilt sandwich, baste, quilt, square up, and bind using your preferred method.


Stroller blanket: 31.5 wide x 40 long
Lap quilt: 67.5 wide x 72 long

Be sure to stop by blog.knottygnome.com for a tutorial on using up those trimmings.

Sara Peterson
{www.knottygnome.com}

Out the Door Charm Quilt

Out the Door - Cover photo


When Lisa told me that Moda Bake Shop was doing a series of texty projects, I instantly knew what I wanted to make.  My boys had been telling me for months that I needed to make it. 

Out the Door
A mock-up of my idea done in PB&J by Basic Grey
I showed this picture to them….they loved the idea….then informed me that I got it wrong.  It seems that this is NOT the order in which I whisper my instructions to them as they head out the door.  They assured me that “BE GOOD” comes first….every time.
Out the Door

My boys have gotten big.  I have three, ages 20, 17, and 14 1/2 (yes, you have to include that half).  They are the best thing that ever happened to me.  I know it sounds like a cliche.  I’d wager, if you have children you know exactly what I am talking about.  Every day they get a little bit older and every day they grow a little bit further away from needing me at arms reach.   Even so, there will never be a day when I won’t pray these parting words over them as they head out the door. 

Out the Door 

Fabric
  • 4 charm packs
    • I used Round Robin by Kathy Schmitz
  • 1 1/2 yards for outer border
    • I used #6046 11 little birds on  poppy red from Round Robin
  • 1/3 yard for inner border 
    • I used #5746 73 golden rod crackle from Round Robin
  • 5/8 yard for lettering
    • I used #5746 73 golden rod crackle from Round Robin
  • 1/2 yard for binding
    • I used #6043 18 black with golden pin dots from Round Robin
  • 4 yards for backing
    • I used #6046 14 little birds on golden rod from Round Robin
Tools – these were used to make the letters.  I chose to reverse applique them by hand.  These are the tools I used.  If you want to applique the letters using a different method, alter your supplies accordingly.
  • 9 pieces of regular printer paper
  • black Sharpie marker (for use on the paper only)
  • fabric marker  – I tried several different ones to see which I liked best for this project.
    •  My Frixion pen was great….although hard to see on dark fabrics as it is red. 
    •  I also tried a Clover white marking pen….I had a hard time seeing what I was doing, but it worked well.
    • I ended up using a Sewline mechanical pencil with white led.  I love this product!
  • Fray Check – I chose to reverse applique my letters by hand.  This product is great for keeping the little pieces from fraying at the corners.
  • Light box – If you do not have one don’t worry.  You can use a roll of masking tape and a window. 
  • Small pair of very pointy, sharp fabric scissors.
  • Applique pins – these are very short – 3/4″ long.  They are big enough to hold the applique pieces in place while you sew without getting in the way.  Normal pins will work too; however, I am not responsible for any words learned by your children while you are using them for this project.
  • pearl cotton
  • fusible web
Out the Door is made from 154, 5″ blocks set in a grid of 11 x 14.  32 of those blocks have letters on them.  It has NO sashing and two simple borders.  The finished quilt measures 66″ x 80″, perfect for tossing on the couch and snuggling under.
Cutting Instructions:

Out the Door

  • For letters
    • cut 4, 5″ x width of fabric (WOF) strips
    • sub cut strips into 8, 5″ x 5″ squares each for a total of 32 squares
  • For inner border
    • cut 6, 1 1/2″ x WOF strips
  • For outer border
    • cut 7, 7 1/2″ x WOF strips
  • For binding
    • cut 7, 2 1/2″ x WOF strips

Out the Door
Lettering Instructions:  This is the most difficult step in Out the Door , and by difficult I really mean time consuming.  There is nothing hard about it.  The following instructions tell you how I did the lettering.  I wanted the words to appear in negative space…so the fabric line could shine, but my words would still be visible.  I did this by reverse appliqueing.  In this process the lettering fabric is hidden behind the background fabric and revealed as the background is cut out of the way.
You can get a better idea by looking at my sampler (also a Moda Bake Shop pattern L.O.V.E.).
L.O.V.E.
Made using 4,  slices of layer cake from Marmalade by Bonnie & Camille
O.
The letter O was drawn to the striped fabric.  I then layered that patch atop the floral.  I snipped the top fabric about 1/4″ from the drawn line (starting with the center, else it would fall away.) flipped the edge under and hand sewed along the tracing line (now at the edge of the patch.)  I continued that process until the whole letter had been revealed.
You can follow a similar process by machine….
L.
The letter L was drawn onto the floral fabric.  I then layered the patch atop a striped charm and machine sewed a scant 1/4″ to the outside of my traced line.  Once the L was completely traced with stitches I carefully trimmed away the top layer (leaving about 1/8″ raw edge) and fray checked the loose edges. 

I am a long arm quilter and have found that loose edges can cause problems.   To minimize the floppiness I went back and hand embellished the edges with pearl cotton.  You could do the same thing with this project. (although the pearl cotton is not listed in the ingredients and I have no idea how much it would take.)  Another option would be to use your machine and do some decorative stitching to hold the edges down.

It would be perfectly acceptable, and probably a lot easier to fuse the letters.  If you choose to do it this way, the templates can do double duty.  Use the box around each letter to help center the letters on each charm.

Out the Door
Getting down to business
  • Select 32 charms that highly contrast to your lettering fabric.  Set them aside.
  • Print letter templates from the Printer Friendly Version at the end of this blog post.
    • There are 16 different letters, and one shape used in this quilt.
    • There are 2 templates per page.
    Reverse Applique
    •  Each template is drawn in 5″ square.  When you print them, make sure that the square measures 5″.
    • Trace letter/shape with sharpie marker.
    •  You need to be able to see the outlines of the letters/shape through the fabric.  I found the lines printed by my printer to be insufficient to this task.
    •  To fix the problem I drew on them with a sharpie marker.
    • WARNING – be careful of your writing surface, you don’t want to ruin your cutting mat with Sharpie bleed through.
  • Using light box, or masking tape and a window, trace letters onto the right side of charm squares.  One on each of the 32 squares that you set aside.
    Reverse Applique
    • The following chart shows how many of each letter/shape you will need.

  • Layer each charm square atop one letter fabric square. 
Reverse Applique
    • Layer them so that both right sides are up….like pages in a note pad.
    Reverse Applique
    • Using large basting stitches, sew 1/8″ from each edge.
      • This will hold your pieces together while you are working with the fabric in the middle to reveal the letters.
      • The smaller than normal “seam allowance” will ensure that the stitching doesn’t show when you put all of the blocks together.
  • Applique letters onto blocks.
    • If you are continuing by hand –
      Reverse Applique
      • Snip the top fabric about 1/4″ from the drawn line (starting with the center if you are working on something with a floating piece like an O or R.)  Make your cut only about an inch or two long so that you are only cutting what you are working on at the moment. Clip curves, and corners to make flipping under the edge easier.
      • Flip the edge under
      • Pin in place as needed.
      • Sew along the tracing line (now at the edge of the patch.) with a hidden stitch like you would use if you were binding your quilt or hemming something.  Continued that process until the whole letter is revealed.
    • If you are continuing by machine –
      • Sew a scant 1/4″ to the outside of the tracing lines.
      • Trim the fabric on the tracing lines
      • Secure edges as desired.
    • If you are continuing by some other method –
      • Have a great time!  Don’t burn yourself on the iron.
  • Sew letters into words.  Be careful to get the letters right side up and spelled correctly.
    • You need,
      • 3, BE
      • SAFE
      • SMART
      • GOOD
      • HAVE
      • FUN
      • LOVE
  • Sew words into sentences.
    • Using remaining charm squares, (represented below by an X)
      • X BE X GOOD X X X
      • X BE X SAFE X X X
      • X BE X SMART X X
      • X HAVE X FUN X X
      • X X HEART X LOVE X U X
    • Sew  9 additional  rows of 11 blocks each.  
    • You should now have 14 rows of 11 blocks each.
    • Sew rows together to make center of quilt.
  • Add borders
    • Gather
      • 6, 1 1/2″ x WOF inner border strips
      • 7, 7 1/2″ x WOF outer border strips
    • Sew Inner border
      • Long ends
        • Sew two sets of two strips together at the skinny end
        • Iron seams open
        • Attach to long ends of top
        • Trim excess and set aside.
        • Iron towards inner border
      • Narrow ends
        • Sew one remnant to each remaining strip at skinny end.
        • Iron seams open
        • Attach to narrow edges of top
        • Iron towards inner border
    • Sew Outer border
      • Narrow ends
        • Cut one strip in half.
        • Sew two sets of one half strip and one full strip together at the skinny end.
        • Iron seams open
        • Attach to narrow ends of top
        • Trim excess
        • Iron towards outer border
      • Long ends
        • Sew two sets of two strips together at the skinny end
        • Iron seams open
        • Attach to the long edges of top
        • Trim excess
        • Iron towards outer border.

Sandwich layers and quilt as desired.
Don’t forget to take a photo of your finished quilt an add them to the Tops to Treasures Flickr group.

A memory, stitched with love, and etched into the soul of your kids.  This stuff is important.
WARNING:  This quilt may be requested by each of your children.  Be prepared to make it more than once.
Out the Door
Don’t ever miss an opportunity to say it.  You never know when it might be the last chance you get.

Cindy Sharp
{topstotreasures.blogspot.com}

Happy Happy Quilt

Hello, everyone! It’s Crystal Hendrix from over at Hendrixville! I am bringing you another fun, quick, and simple happy quilt! This quilt will bring a smile to your face with it’s fun and bright colors! You can be as creative as you like and name this quilt with any line of fabric that uses an “H”….how creative can you get?


1 Jelly Roll Eat {Your Fruit & Veggies by Pat Sloan}
5/8 yard – 1st Border (43010 14)
¾ yard – 2nd Border (43040 62)
½ yard – Binding (43010 16)
4 yards – Backing (43010 107)


Special notes:
*Use a ¼” seam allowance throughout quilt.*
** WOF – Width of Fabric, RST means right sides together. WST means wrong sides together. **
***Images shown are using both the regular and batik style of the line. ***
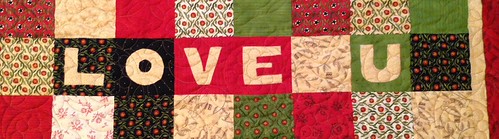
This quilt is made up by a simple “H” style block. You will need to make a total of 56 blocks. 
Cutting Instructions:
Background fabric of block – 112 : 2.5” x 2.5”
Letter fabric of block – 112 : 2.5” x 6.5” and  56 : 2.5” x 2.5”
Border #1 – Cut 5 strips of 2” x WOF
Border #2 – Cut 6 strips of 4” x WOF
Binding – Cut 6 strips of 2.5” x WOF
Backing – Cut 2 : WOF x 66” 
For your background and letter fabric, I chose to keep my background a more neutral color and then chose to have my letter fabric to be all the same color. You can do this or you can make your letter be made up of different colors. I would suggest keeping your background a constant color so that your “H” blocks will stand out more. 
            
Block Instructions:
I’m a visual person so I liked to lay my blocks out in the desired pattern before I begin my sewing as shown below. You will assemble your blocks like the following:

Start by sewing your middle squares together to make a single column. Press open seams. 
Now sew together you 3 strips to make 1 block. Press open seams.
Trim your block down to 6” if needed.
 
Now you have your finished block! See how simple that is! But assembled all together it makes a neat effect! Finish making the other 55 “H” blocks.
Assemble Quilt:
We will be assembling this quilt in a 7 x 8 layout. When laying out the blocks, you will be setting down one in the normal “H” position and then add another one with a 90 degree clockwise turn or a “sideways H”.  See below:
Lay out your blocks until you have a total of 7 blocks. After you have a “sideways H” you will then add another “H” block. See below:
Create a total of 8 rows. Make sure that when you start you’re your next row that you have the opposite of the block above. See below:
Once you have sewn your rows together and have pressed the seams, sew the rows together to make your quilt top. Make sure to press your seams after you attach each row.
Borders:
 Now take your fabric that you cut for your Border #1 and make the following:
2 – 2” x 42.5” and 2 – 2 “x 51.5”
Sew the two 2” x 42.5” to the top and bottom of your quilt top and press seams. Then take your two 2” x 51.5” and sew to the side of your quilt and press seams.
Now take your fabric from your Border #2 and create the following:
2 – 4” x 45.5” and 2 – 4” x 58.5”
Sew the two 4” x 45.5” to the top and bottom of your quilt top and press seams. Then take your two 4” x 58.5” and sew to the side of your quilt and press seams.
You have now created your quilt top.
 Basting:
To assemble your backing, Use the following diagram for your guide. You will need to cut your fabric into two 66”xWOF” strips. Then you will take your second strip of 66” x WOF and trim it down to 66” x 20”. Sew the two pieces together and press open.
Sandwiching Your Quilt:
There are many different ways to sandwich your quilt, you can use any method you want or use the one that I used. In a large flat area lay the quilt backing down with the RST of the fabric facing the ground, so your WST will be facing up. Using masking tape, tape down the corners of your quilt and then approximately every 5”. *TIP* the more tape you use, the more secure it will be and easier to baste the quilt top to. Once your quilt backing is securely taped to the floor take your batting and lay it out on top of the backing. Arrange it to where you want it to be and then take your quilt top and arrange it on top of the backing and batting. Now pin (using safety pins) or basting spray to secure the quilt top to the batting and the backing. Once finished and you are satisfied with how securely sandwiched your quilt is, cut approximately 2” from the quilt top around the entire quilt.
Machine or Hand quilt as desired.
Binding:
 Once again there are several different ways that you can attach the binding to your quilt You may use any method you desire or you can do what I did. Take your 6 strips of binding and sew the ends together.  Press in half lengthwise. On any side of the quilt, in the middle pin the top of your binding down and then about 4” down pin it again. You will be stitching through all the quilt layers with the raw edges of binding matching the raw edges of the quilt. When you get to the corner, stop ¼” before the corner. Backstitch, remove the quilt from under your presser foot and fold binding upwards making sure the quilt top and binding are forming a straight line. (Image #1) Holding the fold in place, bring the binding down in the line with the quilt edge. (Image #2) Start stitching at the top of the fold and continue stitching the binding to the quilt, doing the same to the rest of the corners. When you get back to where you started, leave about a 4” strip of binding unsewn. Measure the binding to where you will sew the two end pieces of the binding together. Cut and sew ends together. Now finish sewing the rest of your binding down. Now trip the edge of your quilt so that all you have left is the ¼” seam allowance from your binding stitching. Turn quilt over and fold over the binding. Machine bind or hand bind making sure to miter your corners.
Now your quilt is finished!


This pattern produces a quilt approximately 54” x 60”. You can use this as a nice throw on your couch or do what I do and add it to my “living room quilts”. I keep it in the living to display the season as well as to give my kids a nice quilt to snuggle up with while watching a movie.  Whatever you decide to do with your quilt I am sure you will enjoy it!
To see other quilts that I have made for the Moda Bake Shop and others please visit me at my blog: Hendrixville.blogspot.com. There you can see my wild autism family and many of my different projects.  Please feel free to send me any questions or pictures (I would love this) of any quilts that you have made using one of my different tutorials.
Crystal Hendrix

{hendrixville.blogspot.com}