Candy Bar Pinwheels

Bake shop

Hello it Doug Leko from Antler Quilt Design, I am excited to share with you my second Moda Bake Shop Recipe with you.
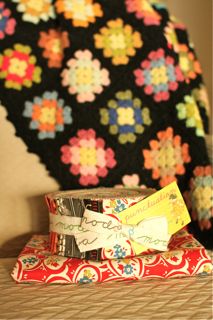
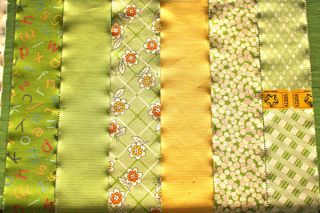
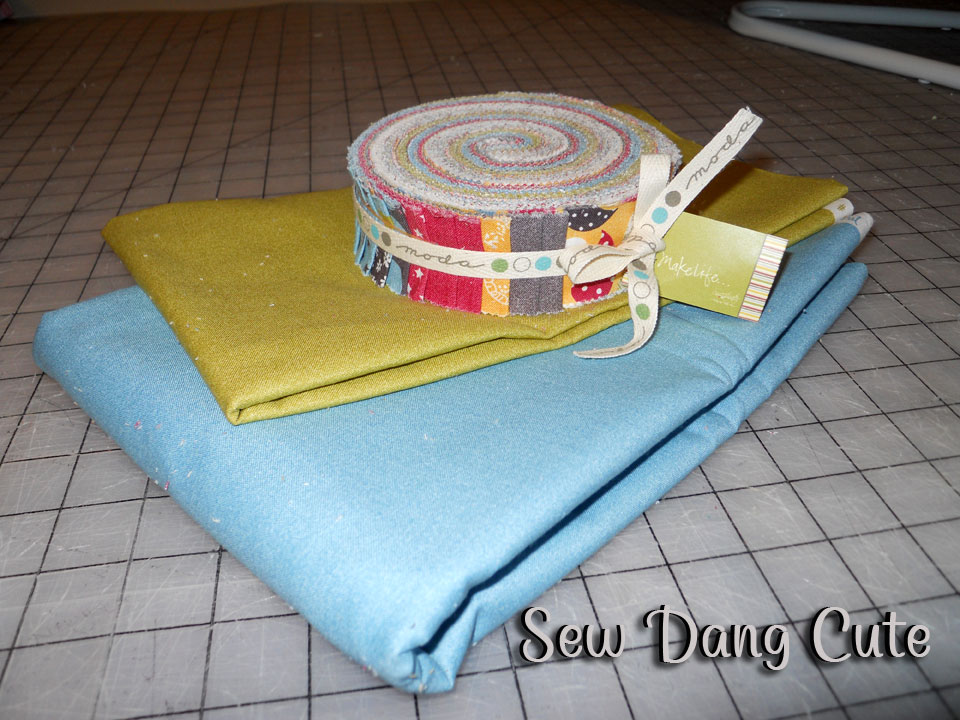
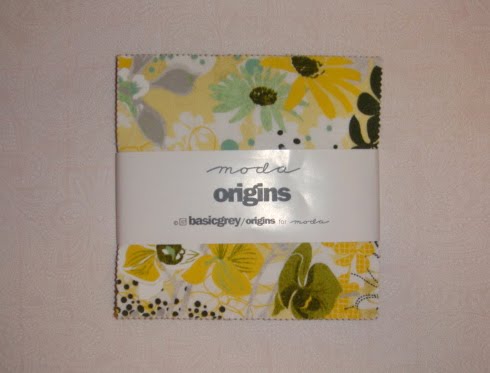
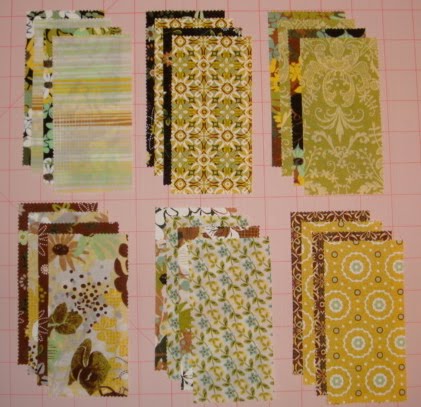
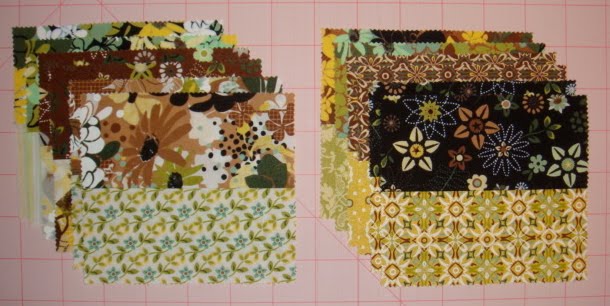
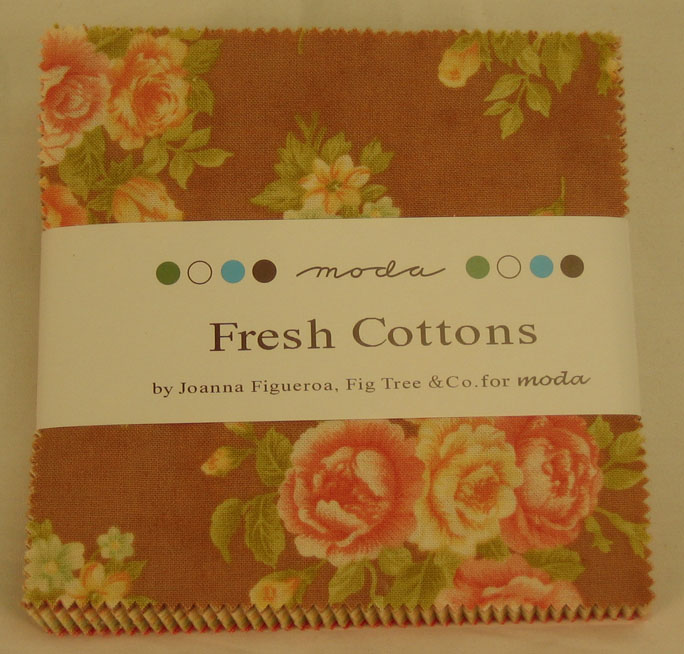
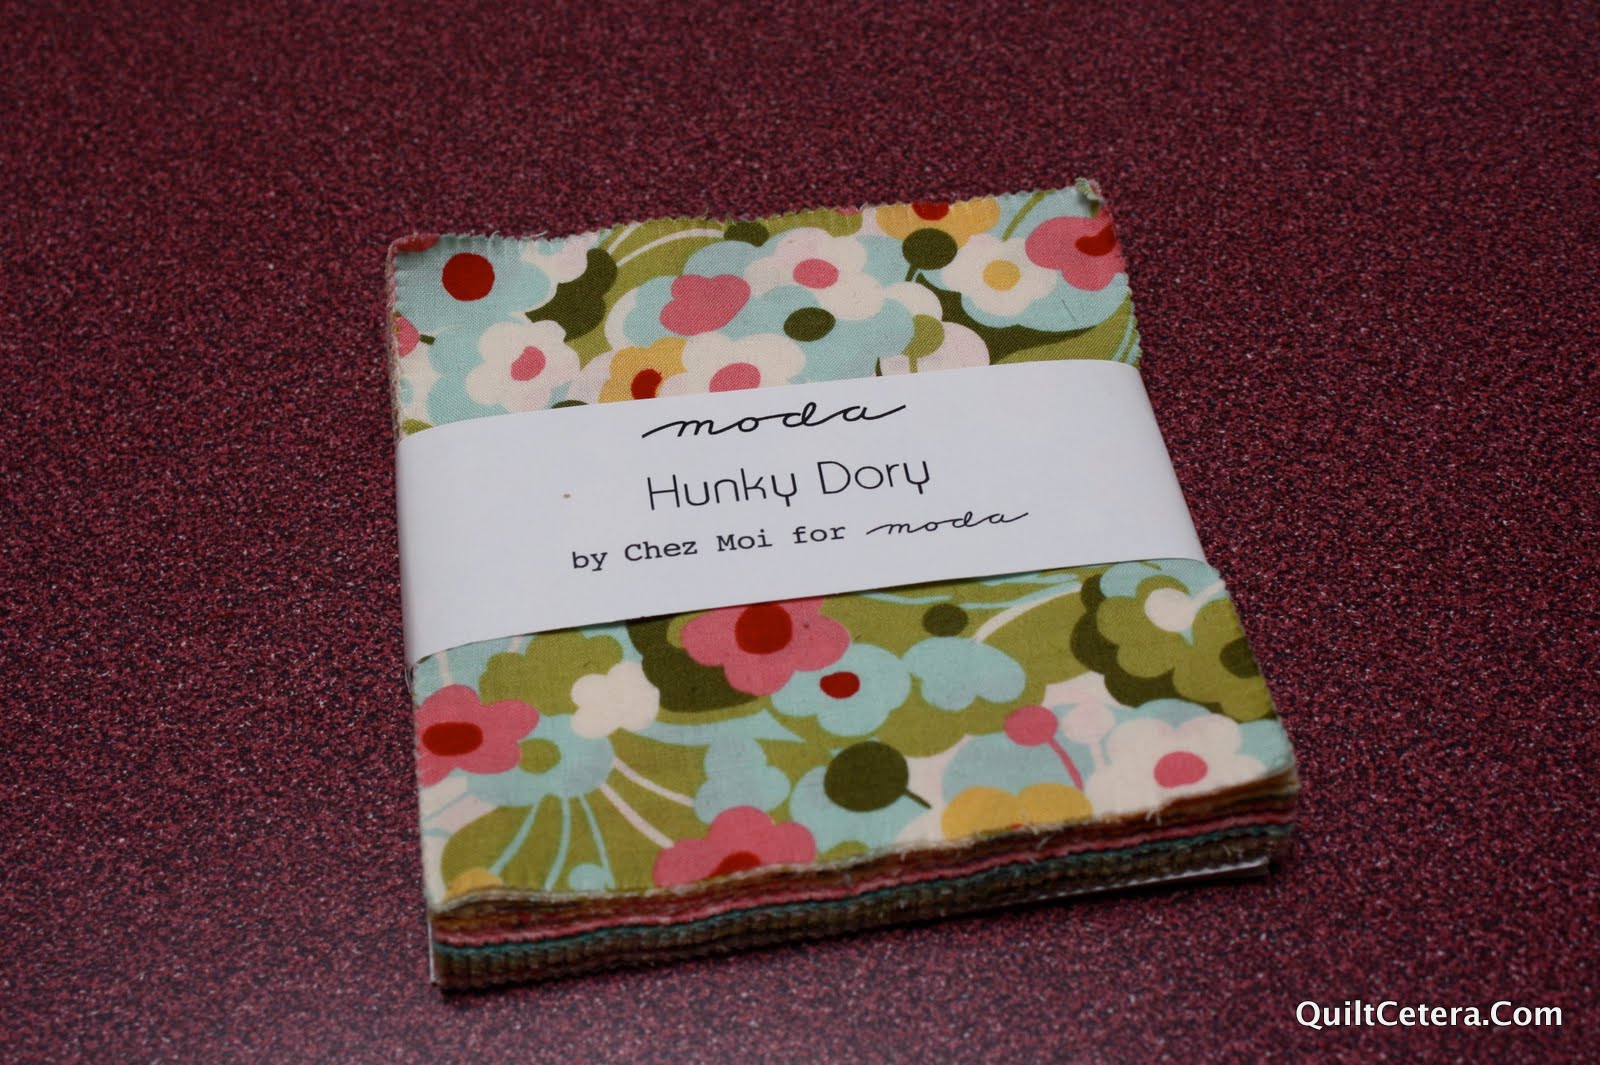
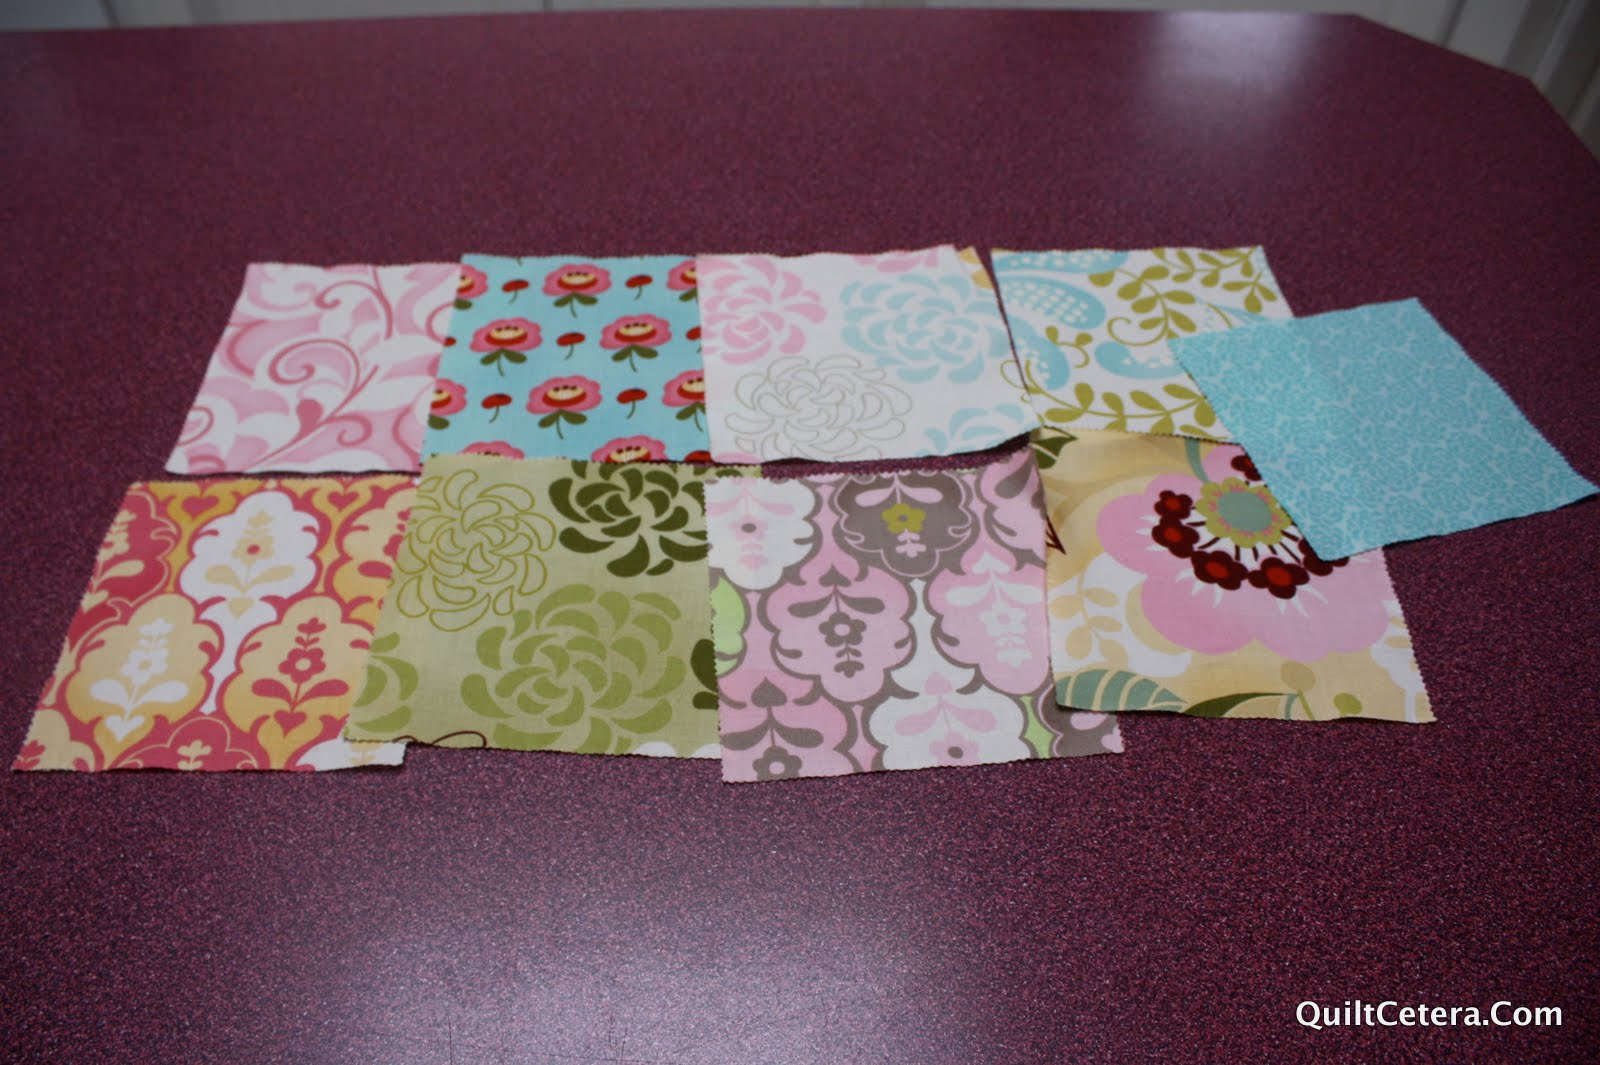
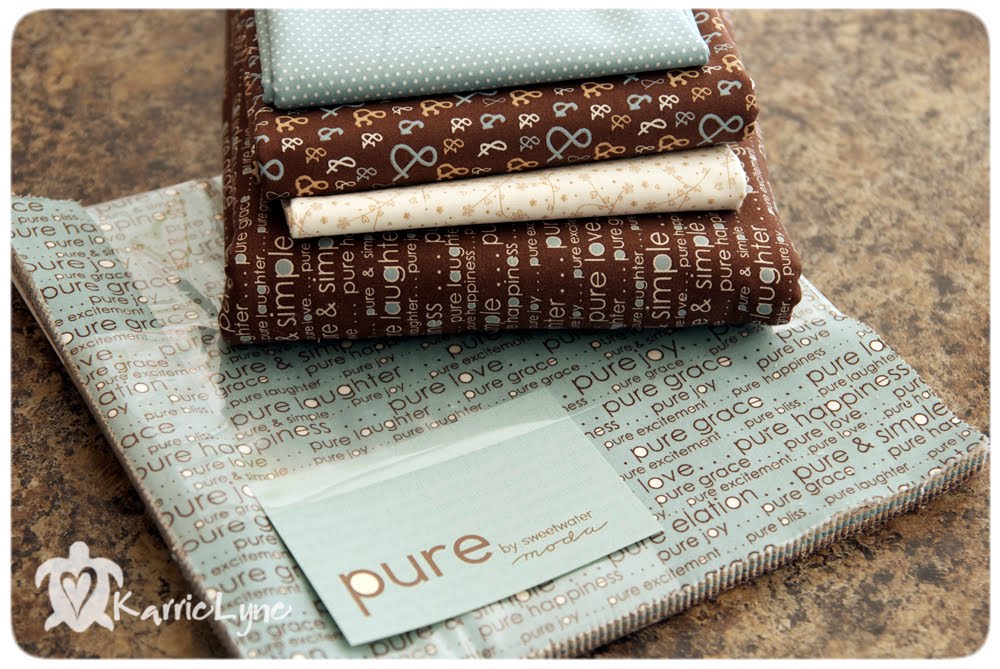
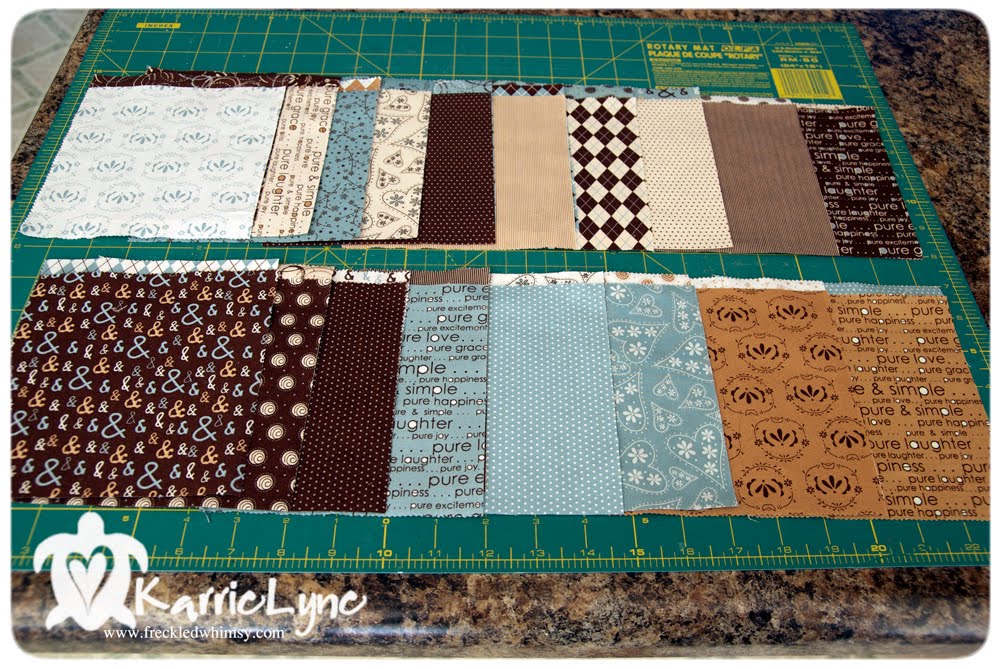
PICT0031


  • 1~ Candy Bar Bundle
  • 5/8yd Background (Cream 14660-24)
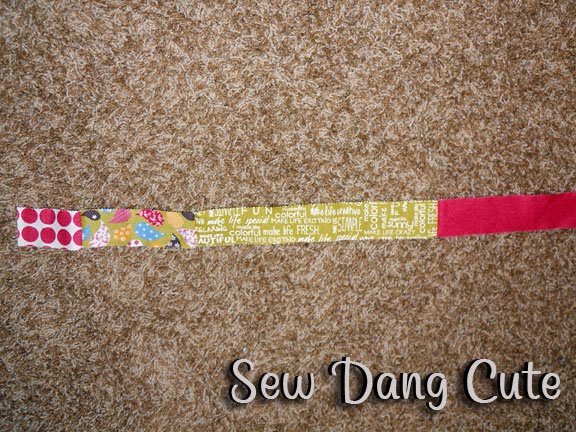
  • 1/4yd Inner Border (Red 14660- 22)
  • 5/8yd Outer Border (Blue 14860-11)
  • 3/8yd Binding (Blue 14860-11)


1/4” seam allowance used throughout.
WOF = width of fabric


Cutting Instructions:
From the Background Fabric Cut:
Three (3) 4 1/2” WOF Strips. Sub-cut into forty-eight (48) 2 1/2” x 4 1/2” rectangles.


From the Inner Border Fabric Cut:
Four (4) 1 1/2” WOF Strips.


From the Outer Border Fabric Cut:
Four (4) 4 1/2” WOF Strips.


From the Binding Fabric Cut:
Four (4) 2 1/4” WOF Strips.


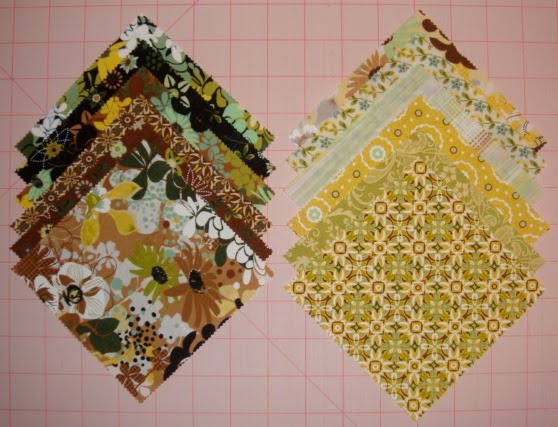
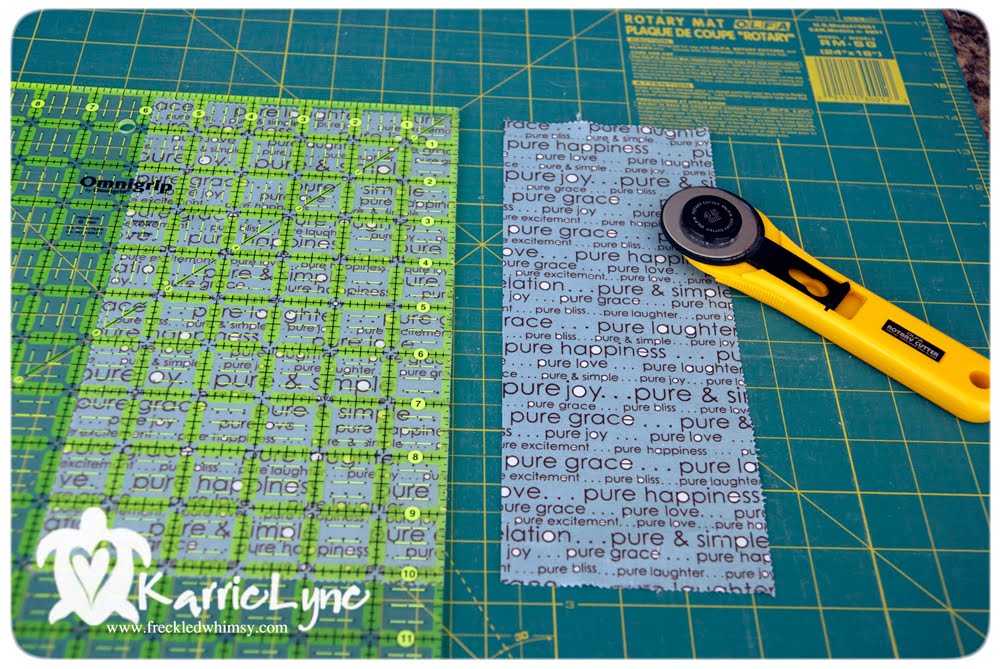
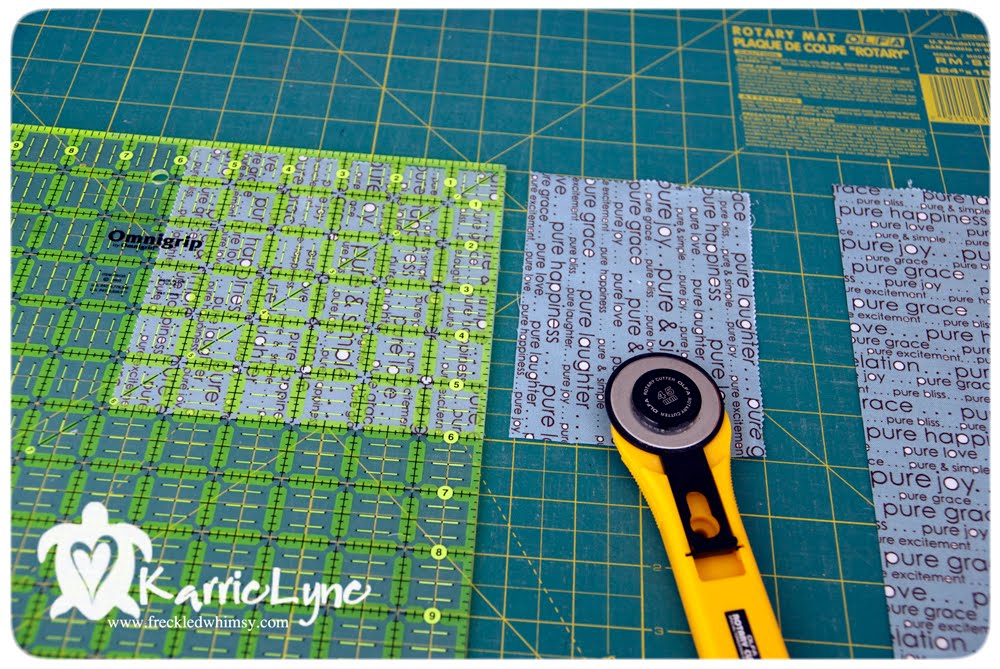
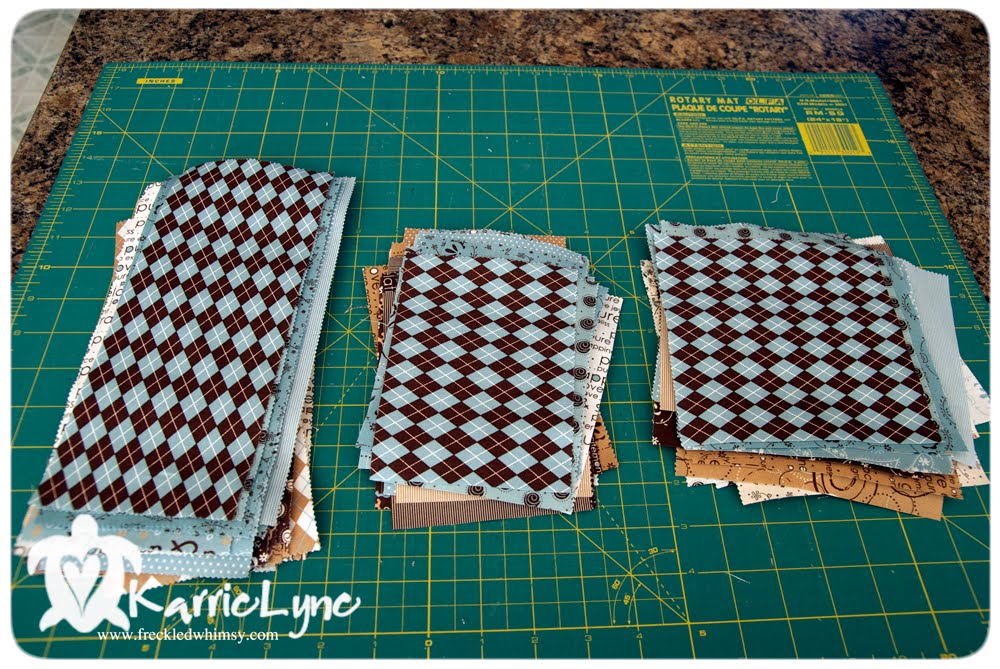
From the Candy Bar Cut:
Thirty-six (36) 2 1/2” x 5” rectangles, into seventy-two (72) 2 1/2” squares.
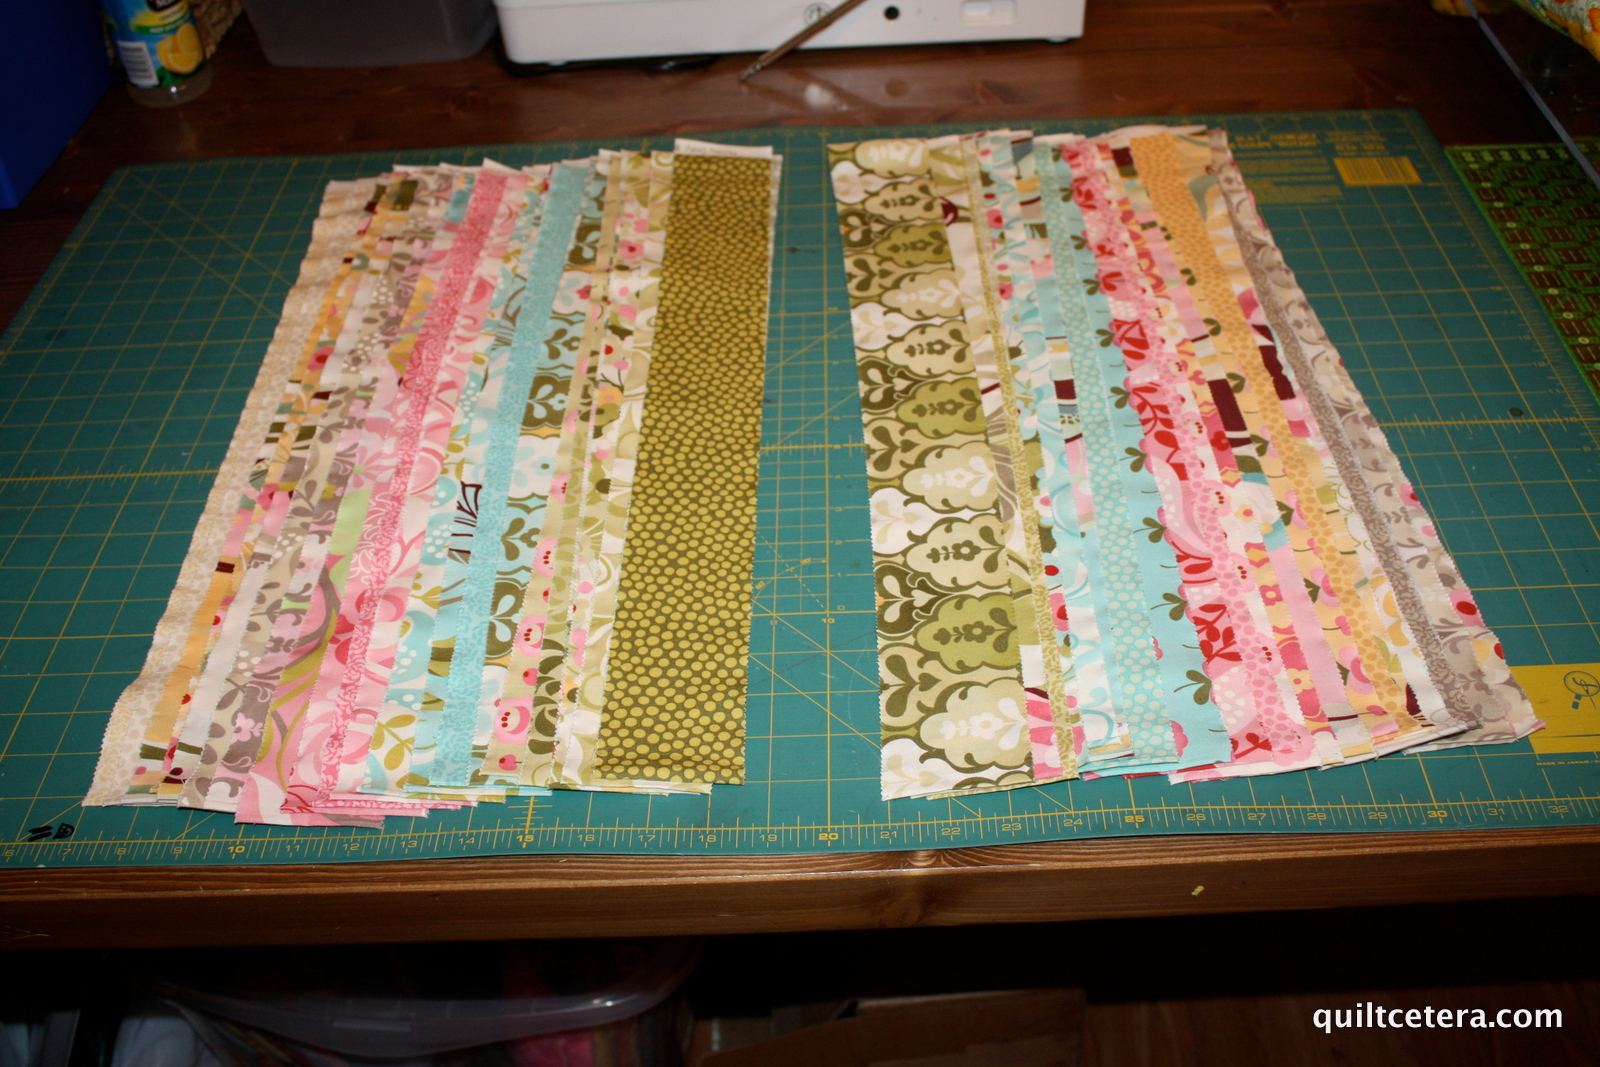


PICT0032
PICT0036


Block Construction:
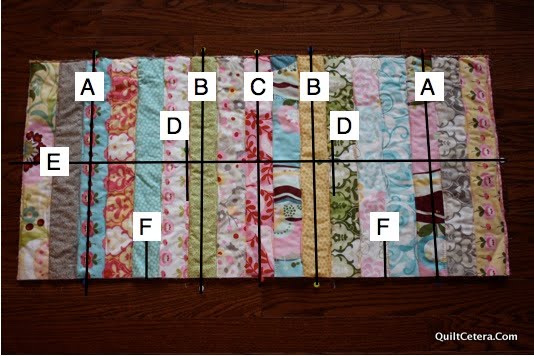
Draw a line from corner to corner on wrong side of the 72 2 1/2” squares.

  PICT0037


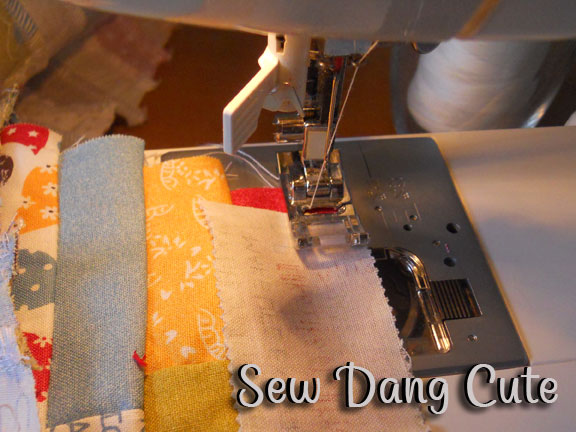
1.  Place one (1) 2 1/2” onto the right corner on one (1) the background rectangle.  Sew from corner to corner and trim 1/4″ past seam line. Repeat with seventy-two (72) units as shown. Press out.

PICT0039PICT0040PICT0041


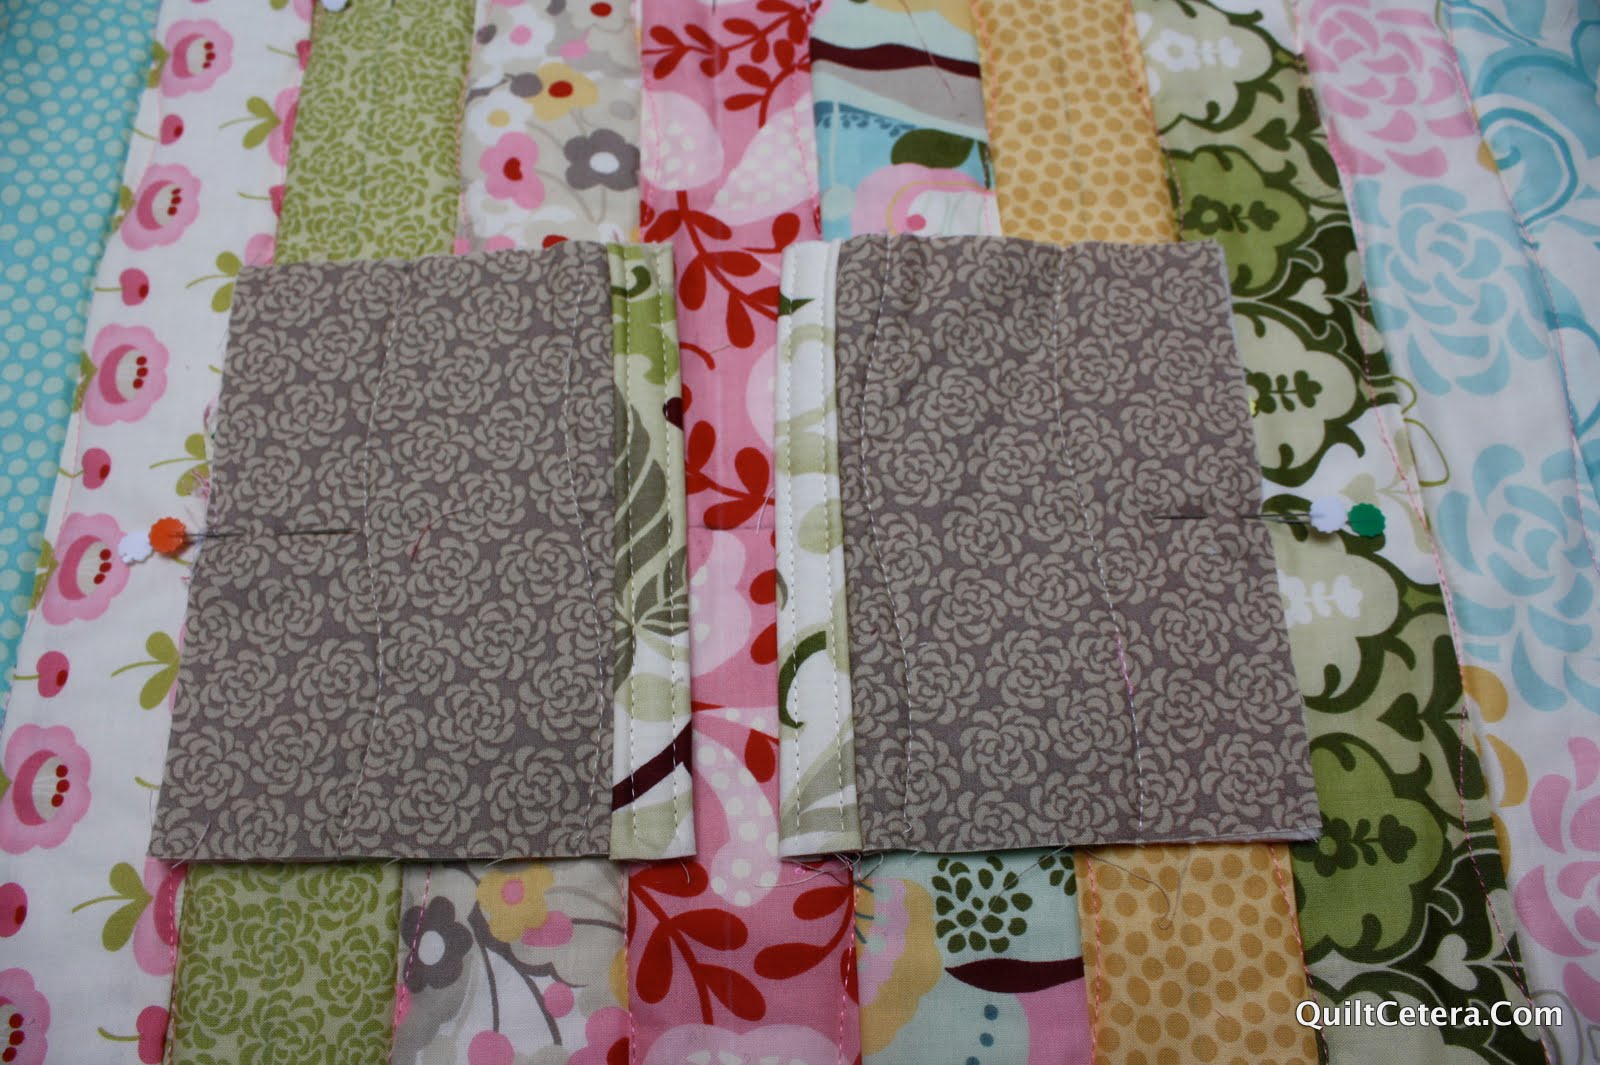
2.  Gather twenty-four (24) of the units made in Step 1. Place a 2 1/2” square into the left corner of the unit. Sew from corner to corner and trim 1/4” past seam line. Repeat with twenty-four (24) units as shown. Press out.


PICT0043PICT0045PICT0047

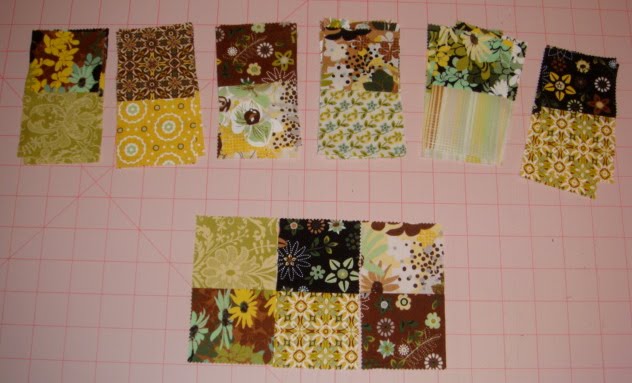
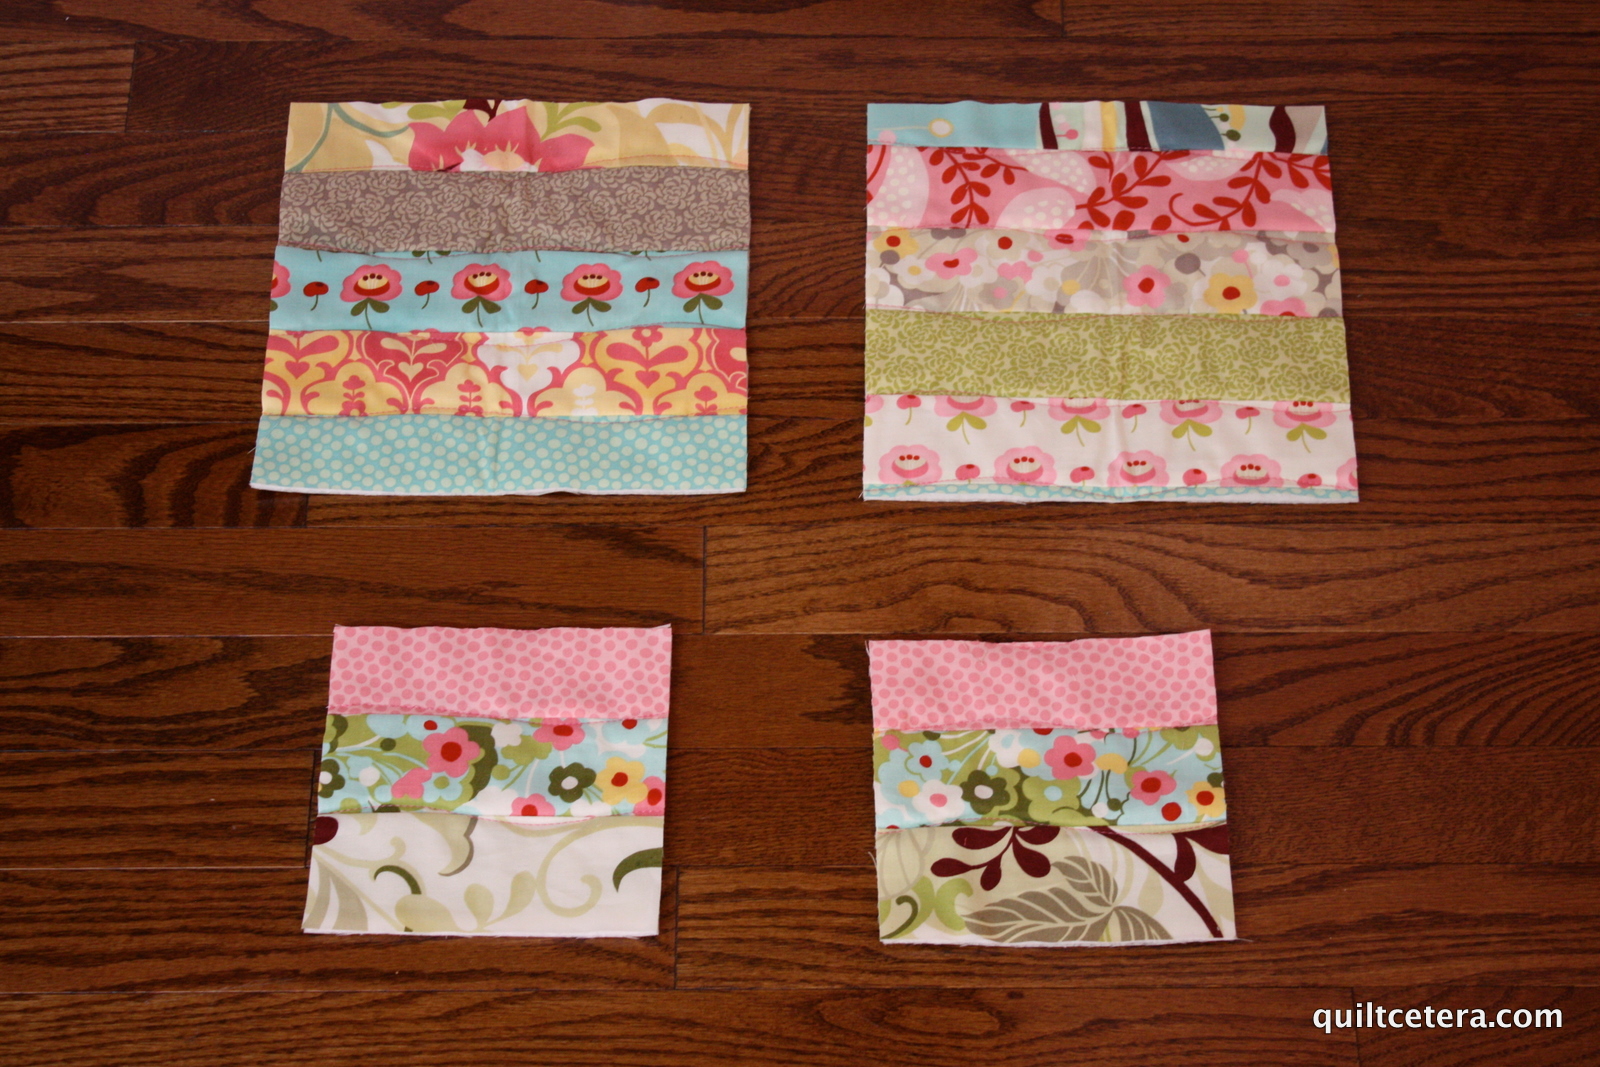
3. Gather twenty-four (24) of the units made in Step 1 and twenty-four (24) of the units made in Step 2. Sew them together with one (1) unit made in Step 2 on Top and one (1) Unit made in step 1 on Bottom. Repeat to make twenty-four (24) 4 1/2” square. Press down.


PICT0047PICT0049

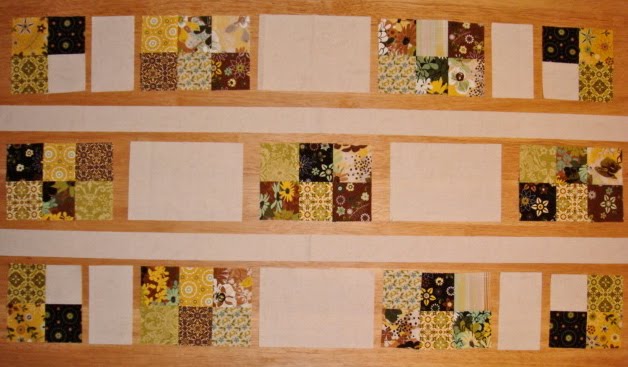
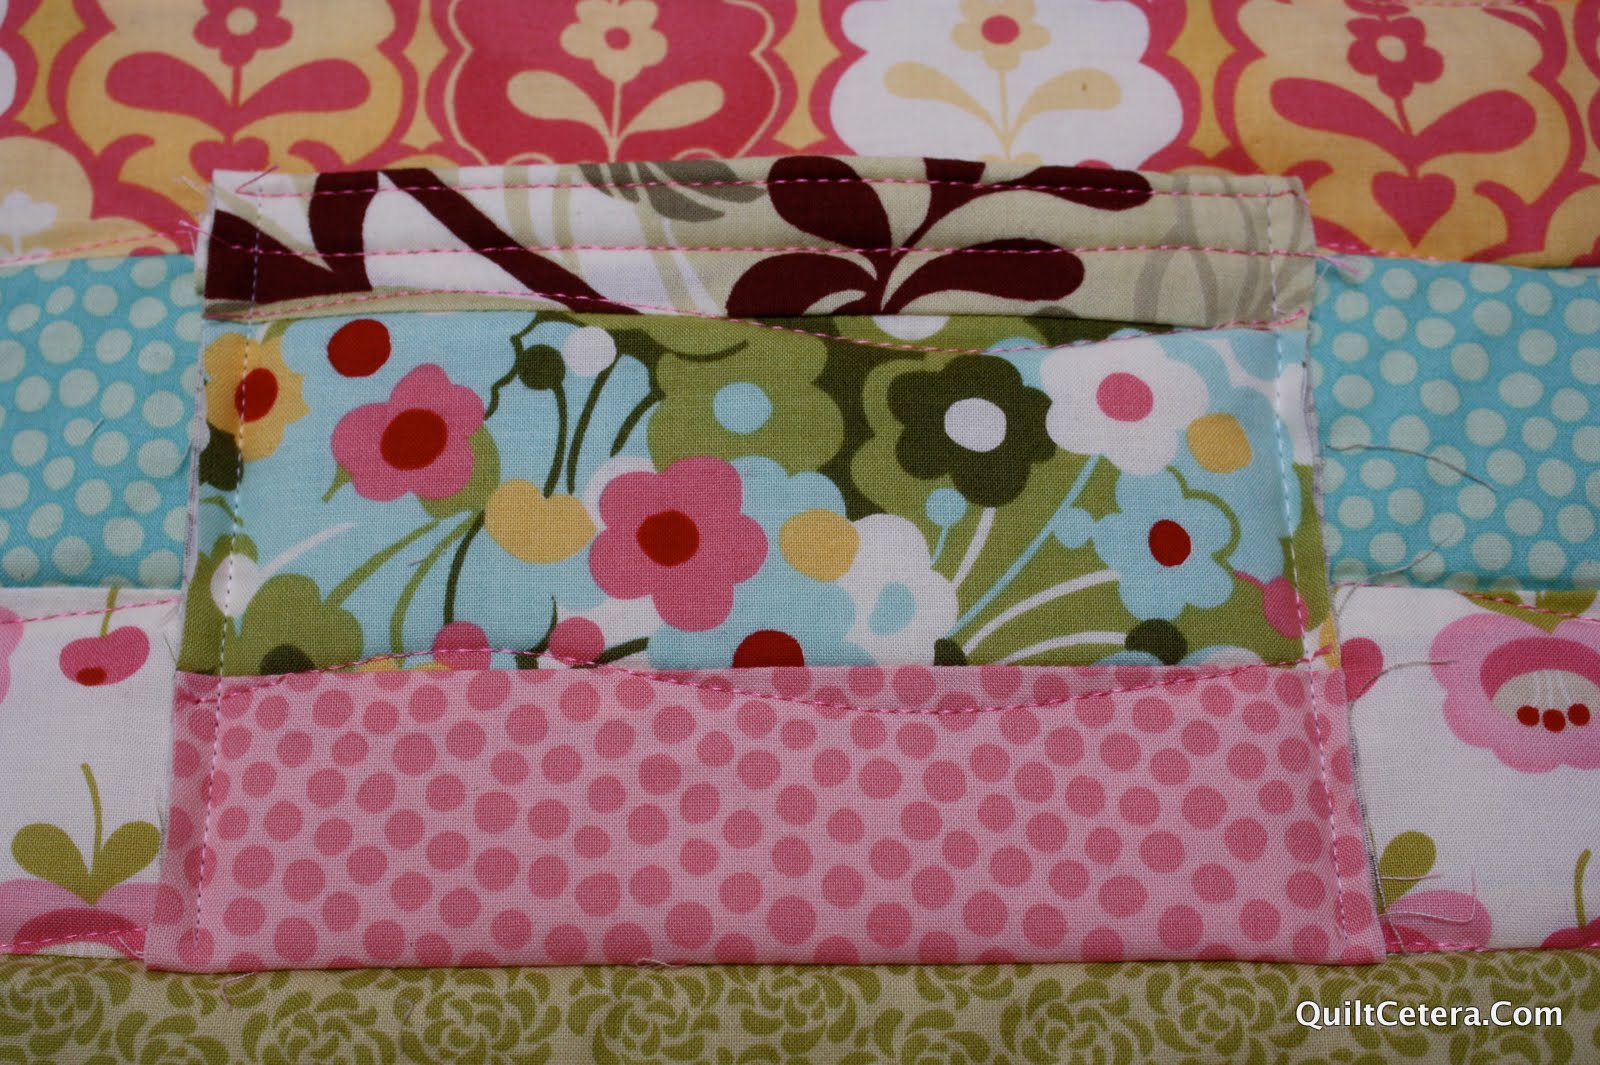
4. Gather the twenty-four (24) units made in Step 3 and sew them in units as shown below. Repeat to make twenty-four (24) 4 1/2” x 8 1/2” rectangles. Press toward the right unit.

PICT0058PICT0053

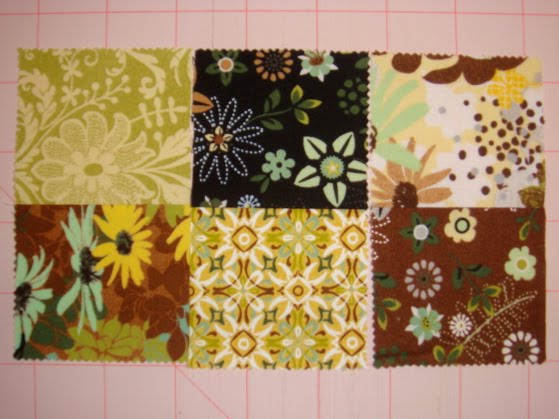
5. Gather the twenty-four (24) units made in Step 4 and sew them into units as shown below. Repeat to make three (3) units 8 1/2” x 16 1/2” rectangle. Press toward the left unit.
               
 PICT0056


6. Gather three (3) units made in Step 5 and sew them into the center as shown below. Repeat to make one (1) unit 16 1/2” x 24 1/2” rectangle. Press towards right.


 P1010781

7. Attach Inner Border starting with sides first and then top and bottom. Repeat with Outer Border. Press out.
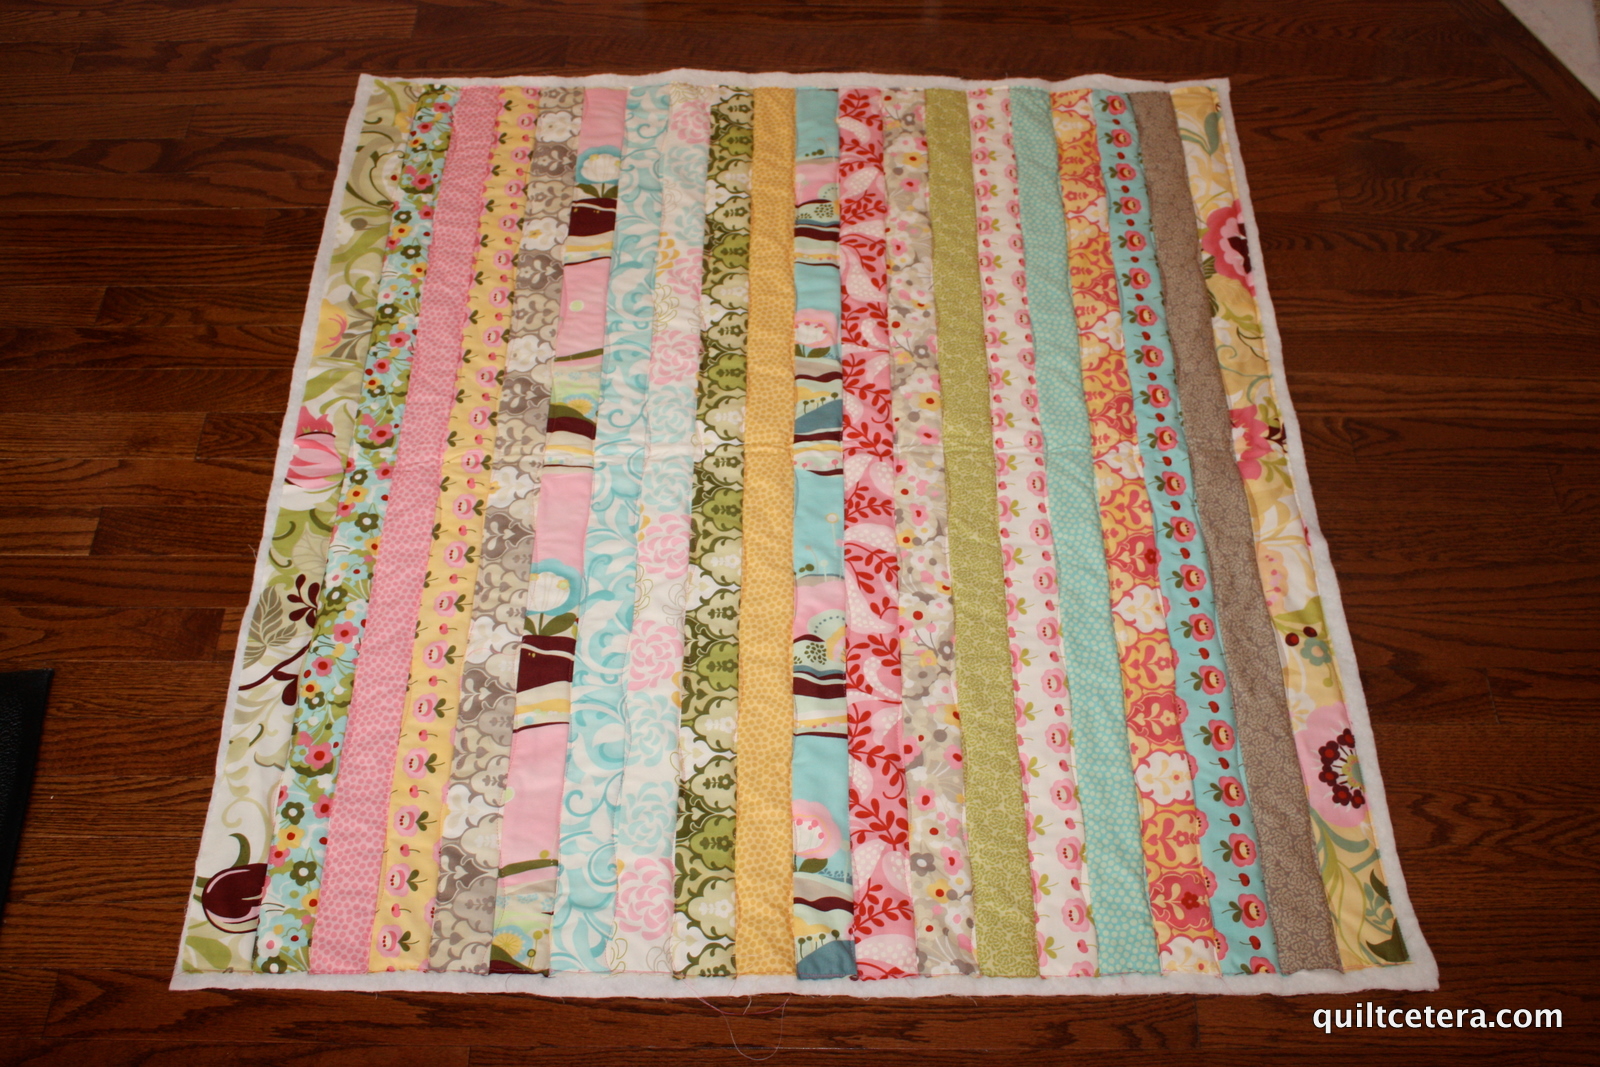

 P1010882


Quilt as desired,
Bind using your favorite method

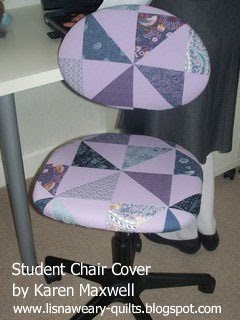
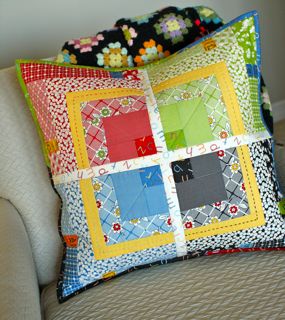
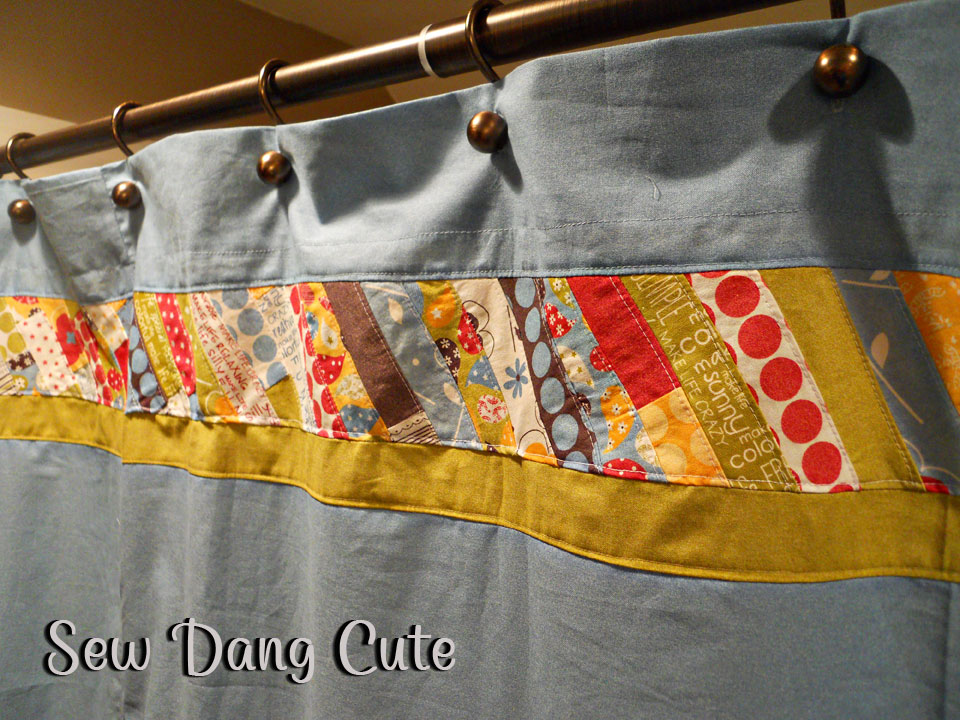
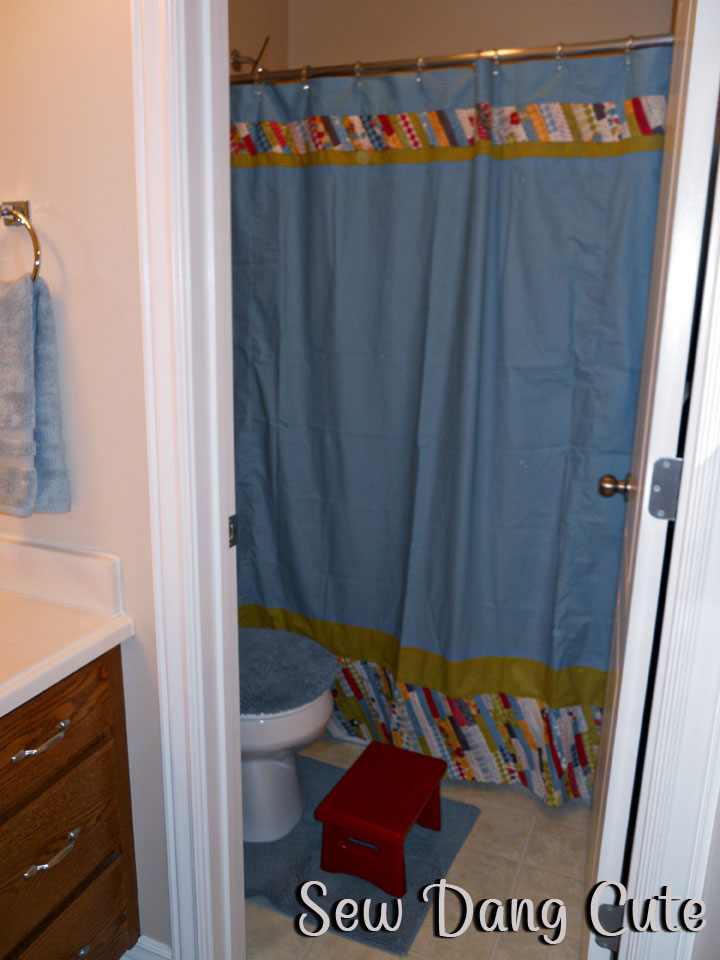
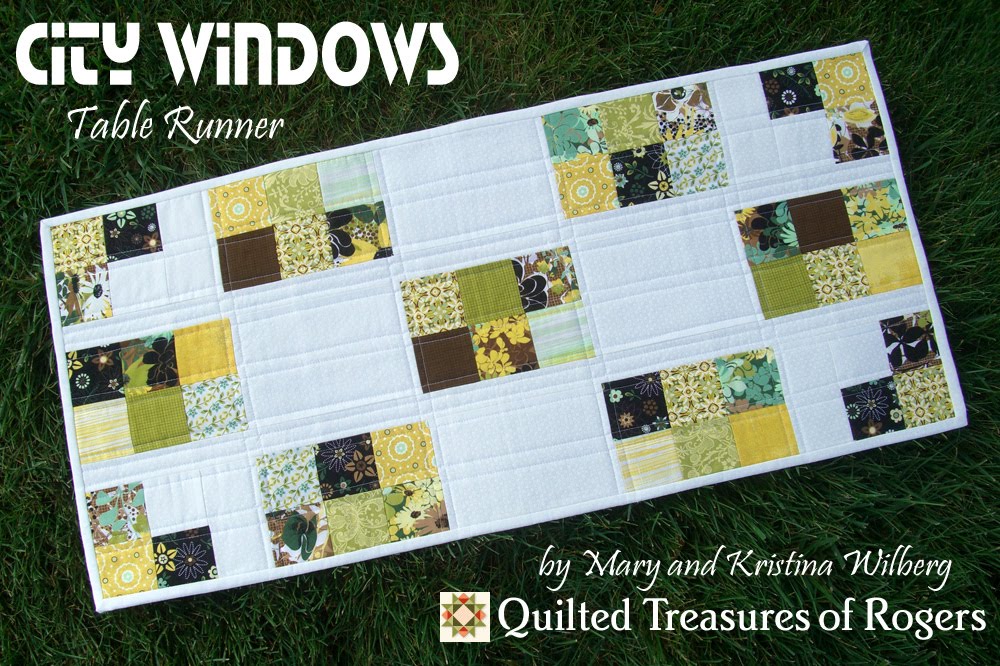
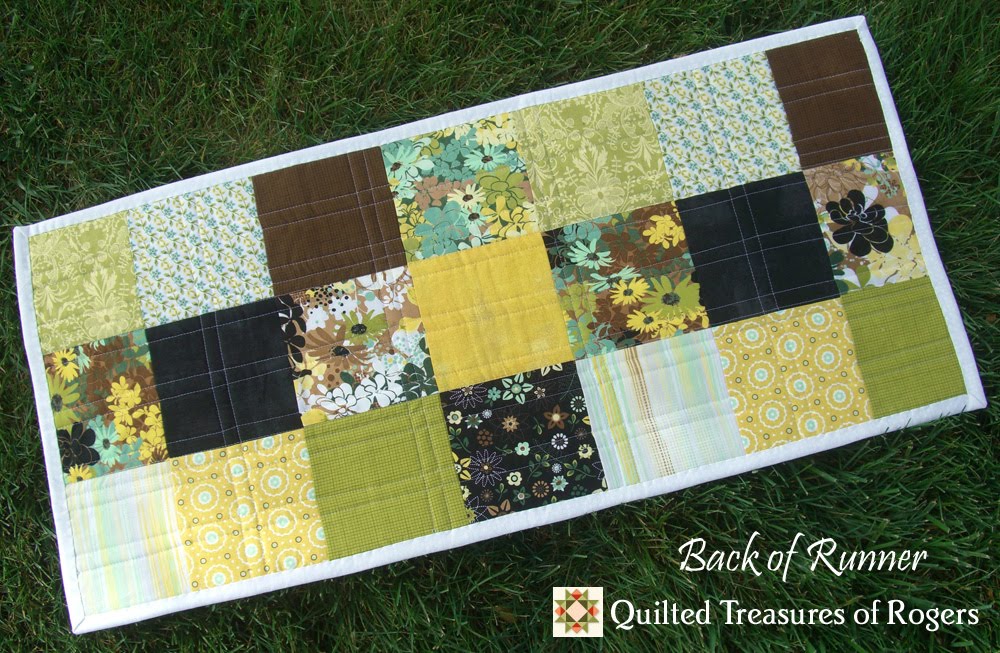
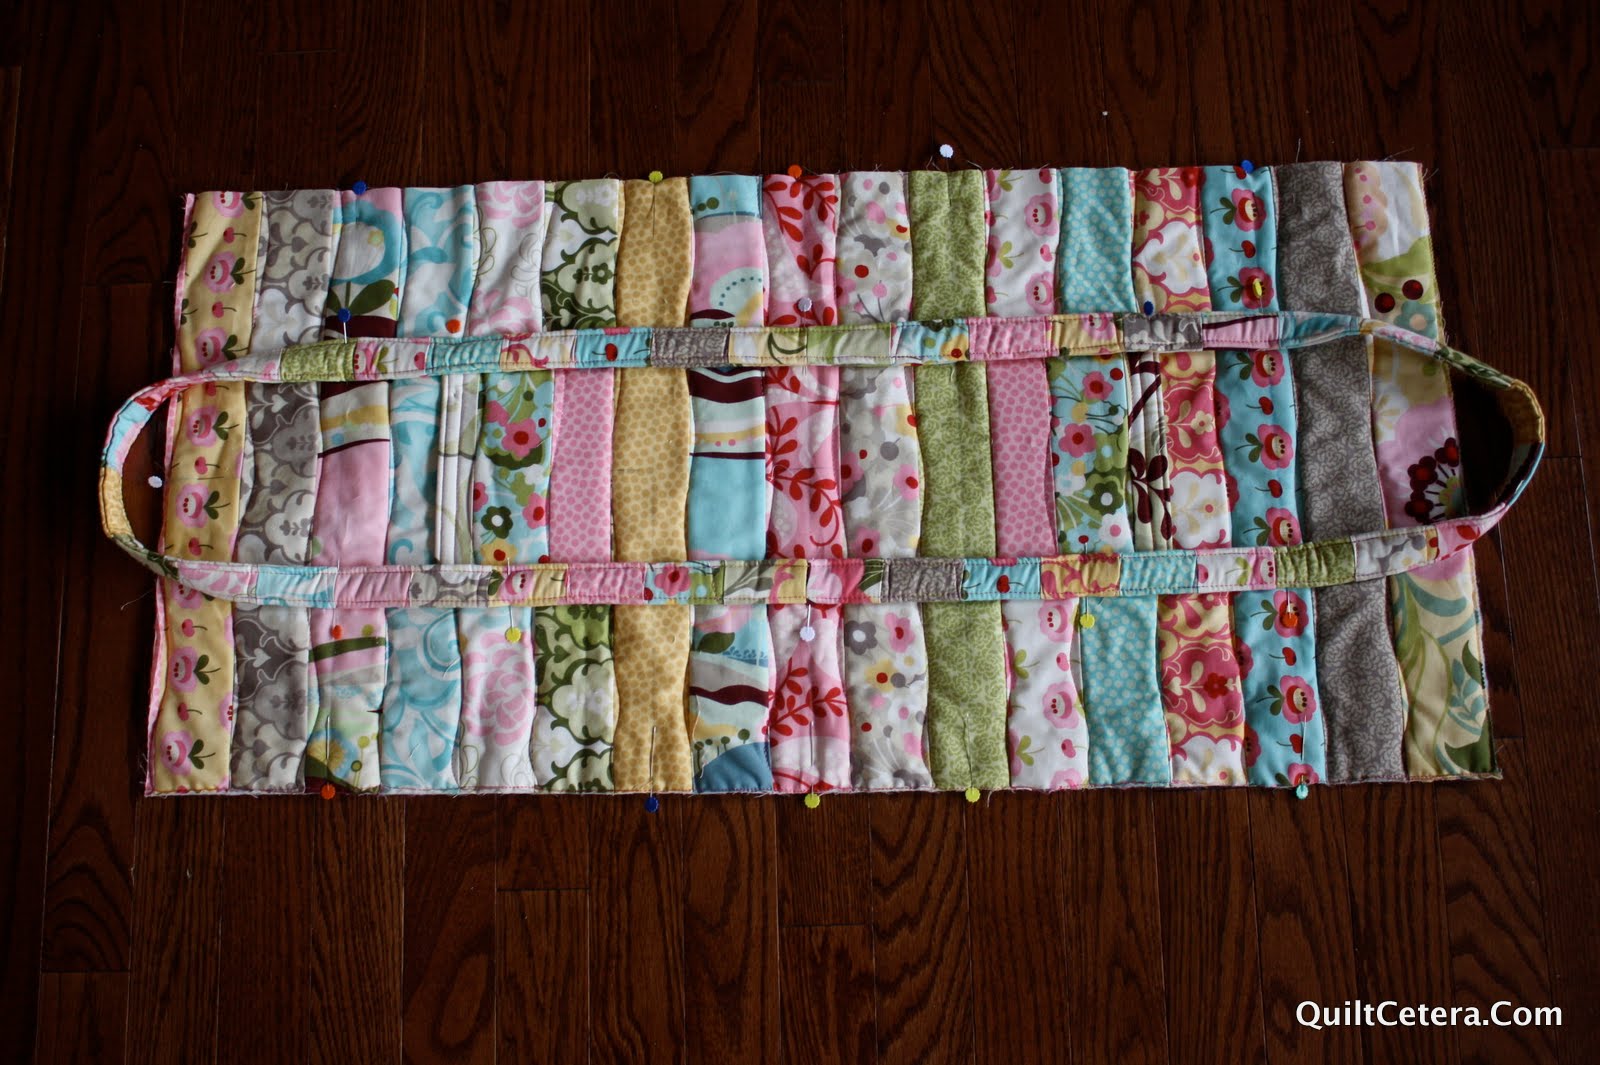
A Candy Bar Pinwheels Topper. Size Approximately  26” x 34”
Bake shop

I hope you enjoy your new topper.
Check out other great patterns at {www.antlerquiltdesign.com}

Thanks,
Doug Leko

Student Chair Cover


Hello, my name is Karen Maxwell from Lisnaweary Quilts. I am just thrilled to bring you my first Moda Bake Shop tutorial. So everyone is back at school and lets face it, who doesn’t need a little encouragement to open the books and start studying? Use this tutorial to brighten up someone’s workspace!


1 Layer Cake A Morris Tapestry
5/8yd Moda Bella Solid Lilac
4yds 20mm Cotton bias binding
1 1/4yd 1/4″ elastic

1. Take 16 of your favourite squares from the layer cake and cut out a 5 7/8″ square from each.

2.Cut 16 5 7/8″ squares from the plain fabric.

3. Half Square Triangles:Mark a diagonal line, from corner to corner, on each of the plain squares, using a watersoluble marker. The pen mark will be your sewing guide.

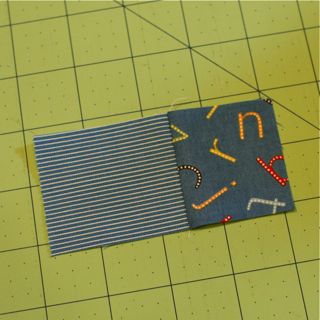
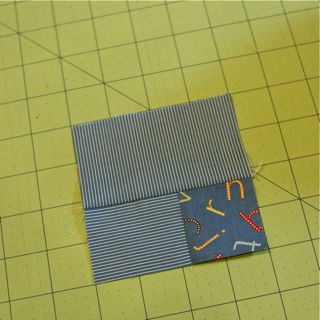
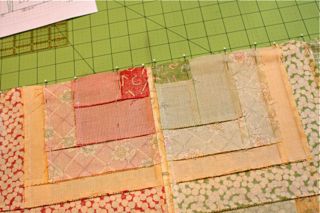
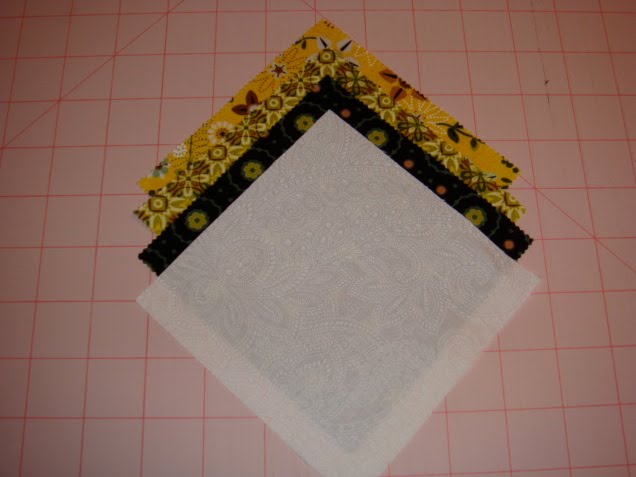
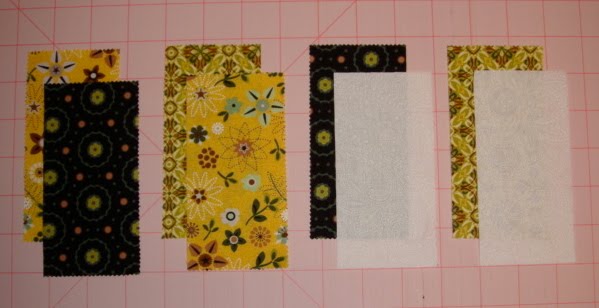
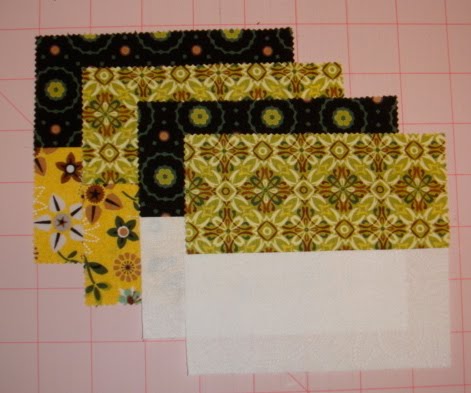
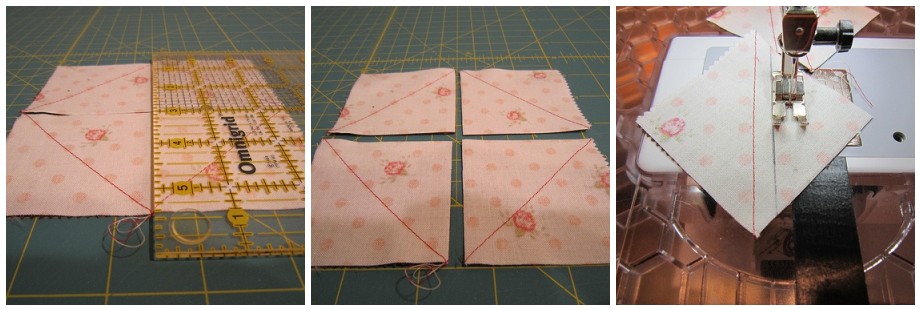
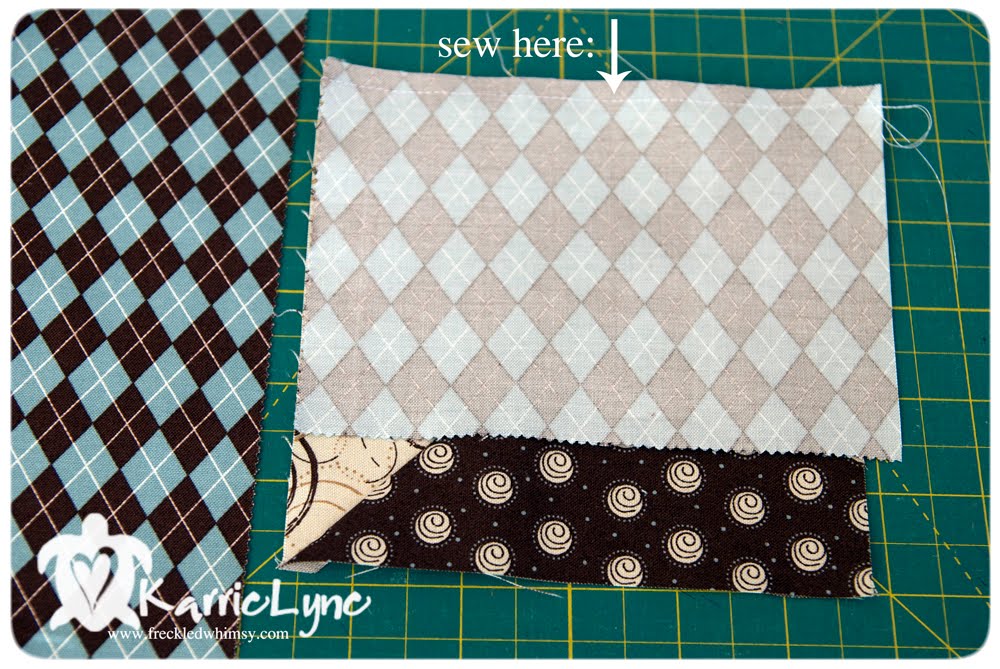
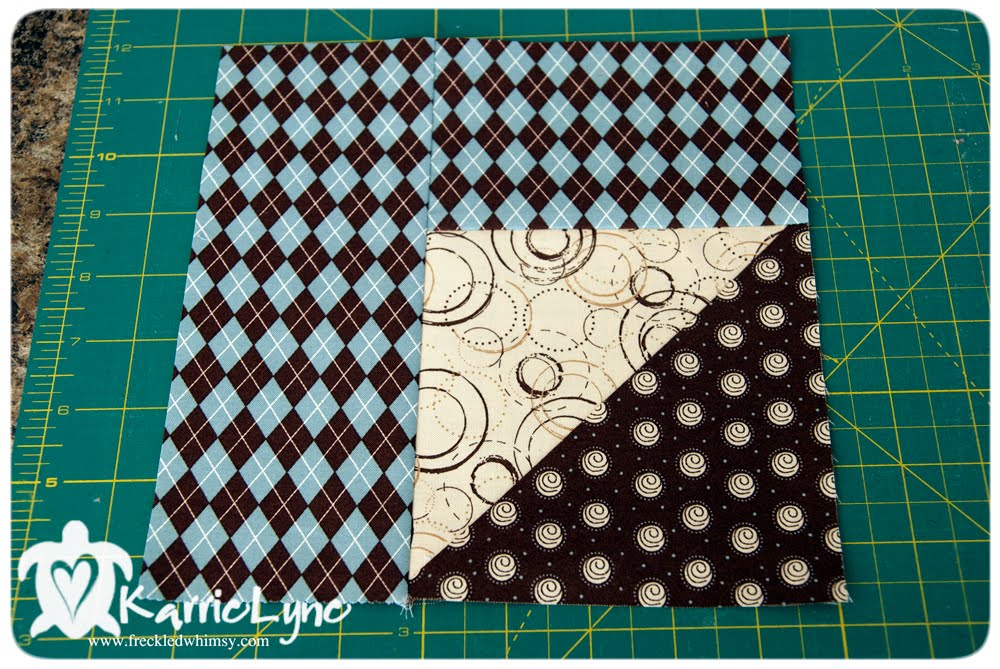
4. Place a plain square on top of a patterned square, right sides together.

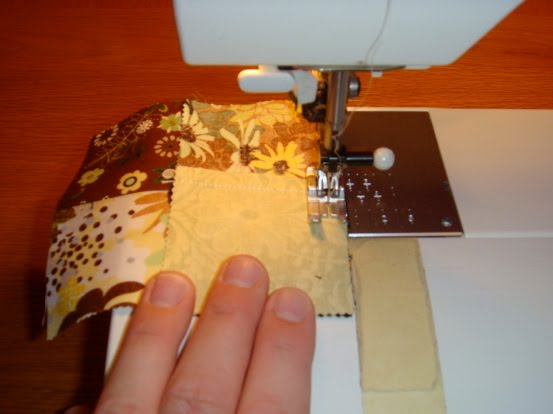
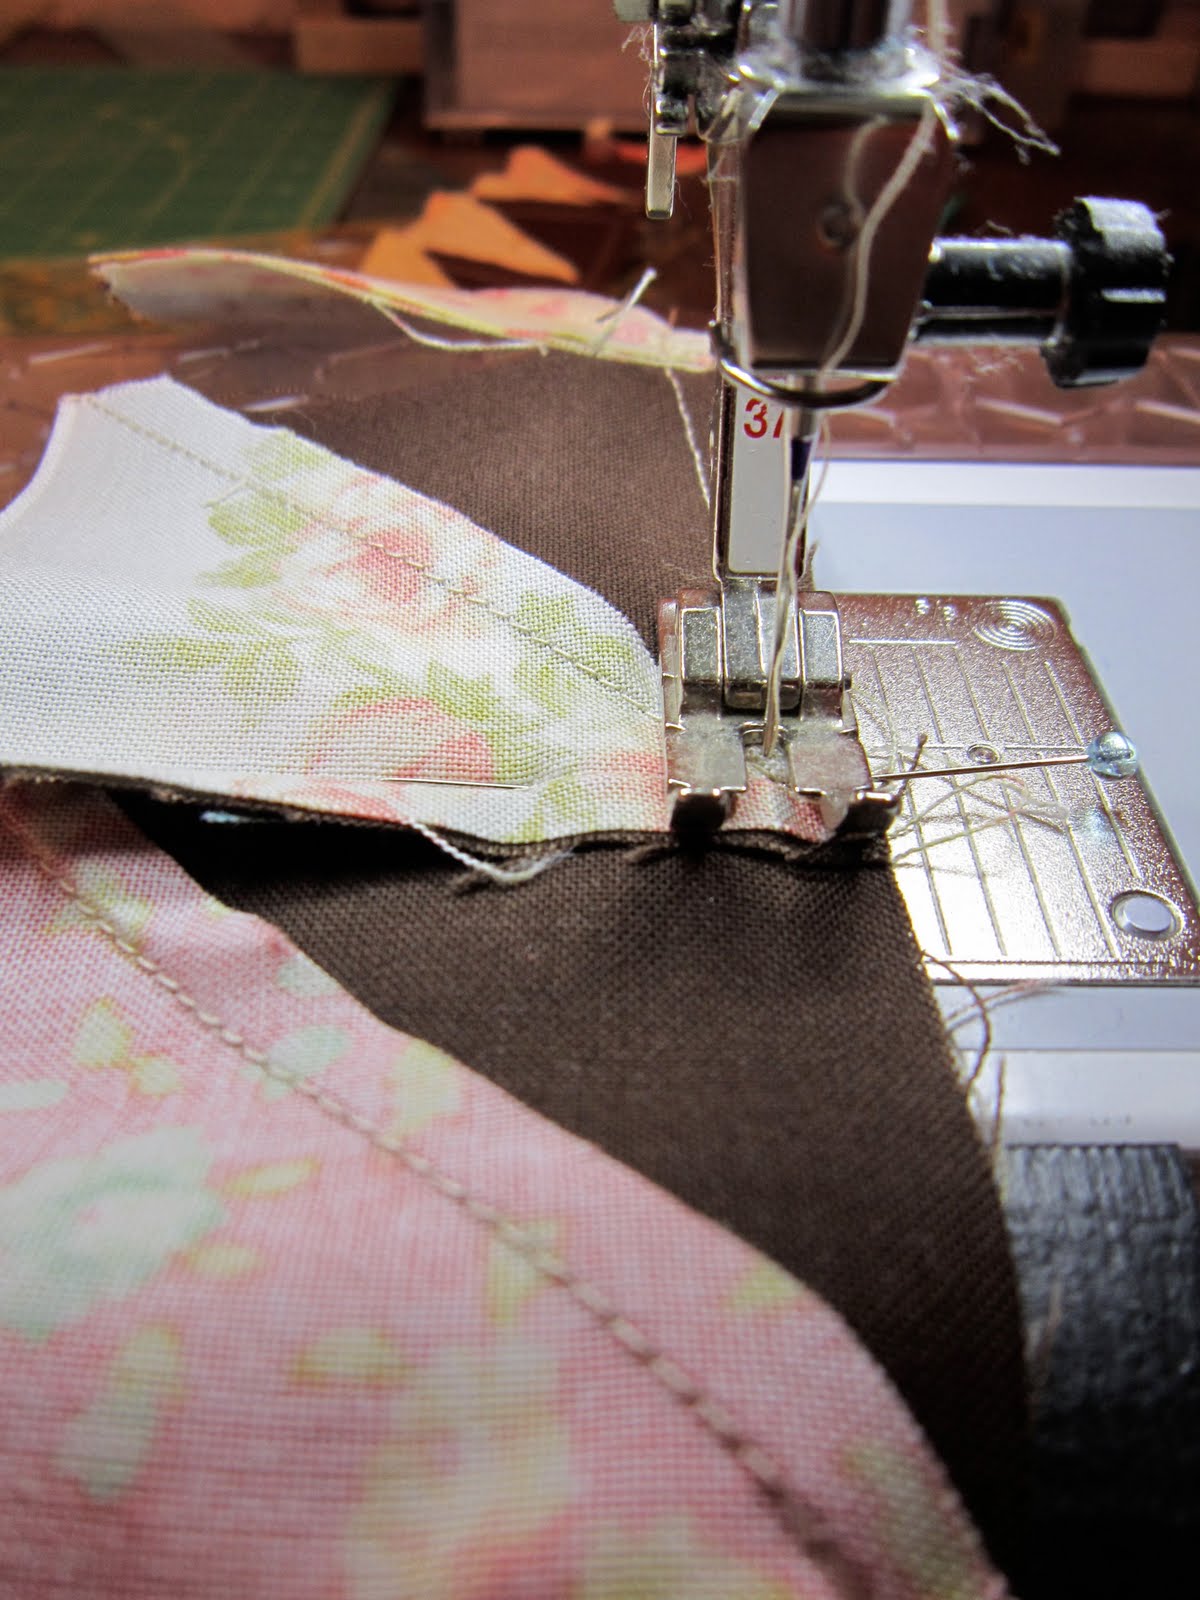
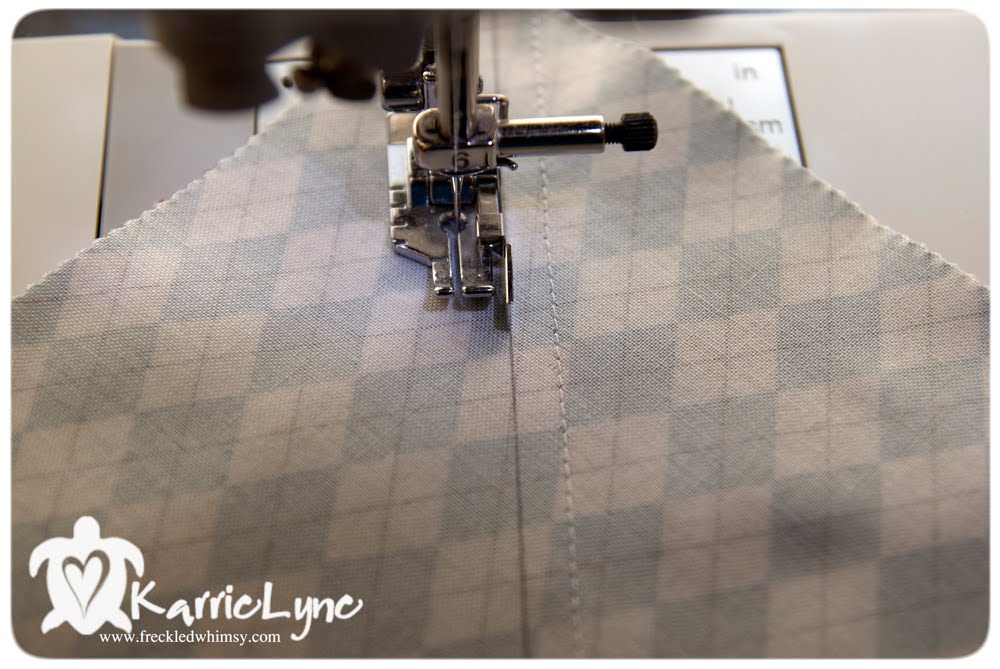
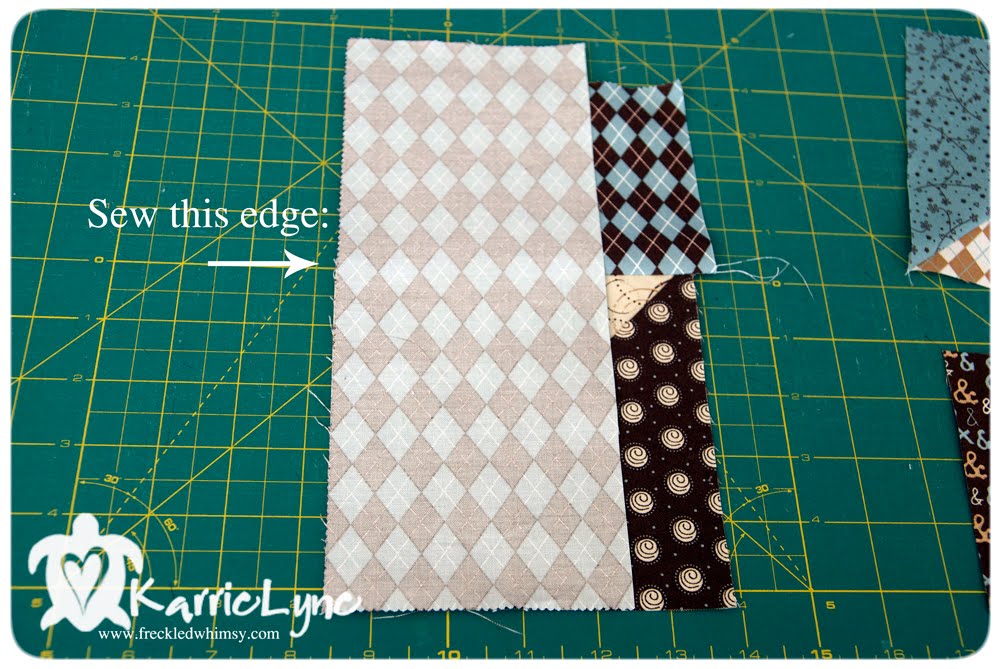
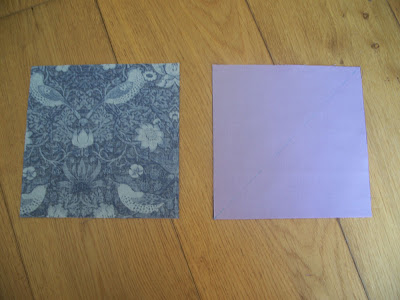
5. Sew a 1/4″ seam on both sides of the diagonal line that is marked on the fabric.

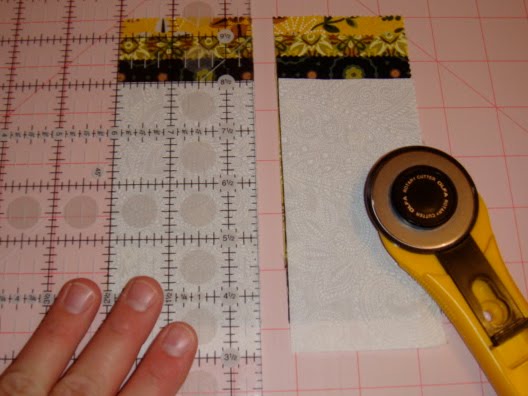
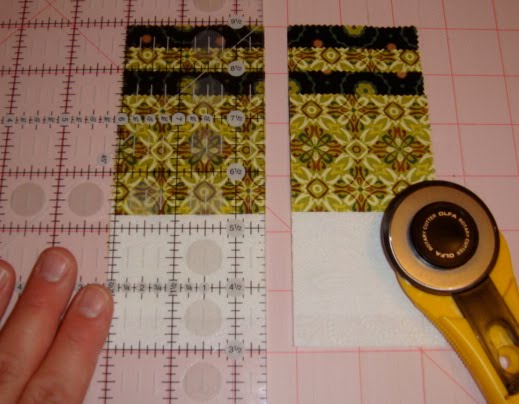
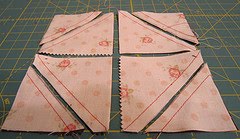
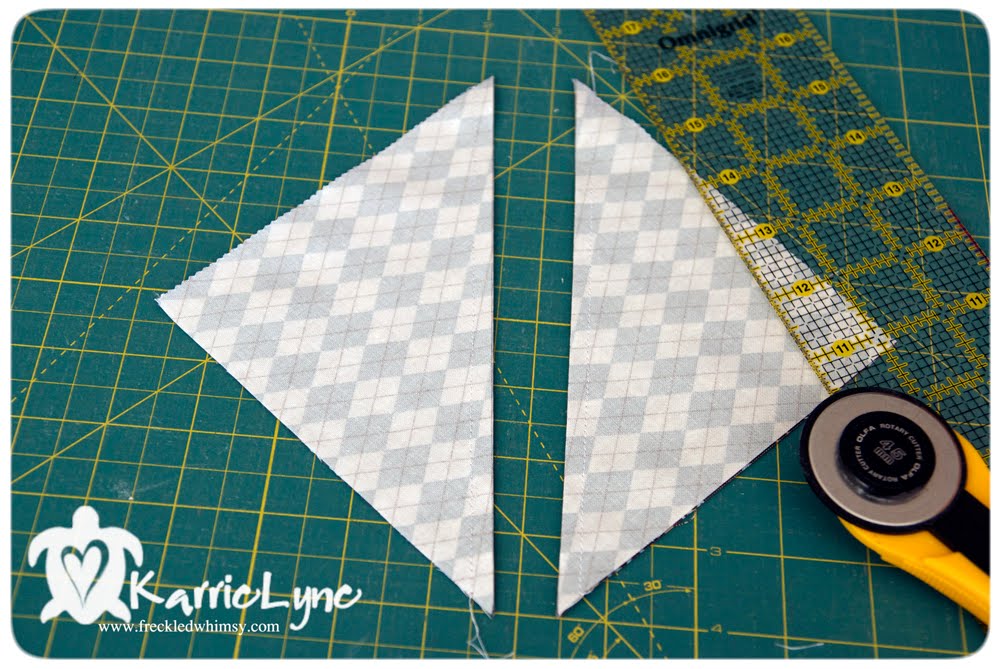
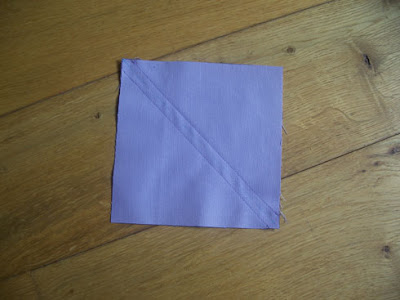
6. Cut along the pen line marked on the square.

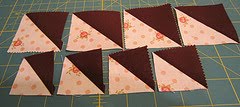
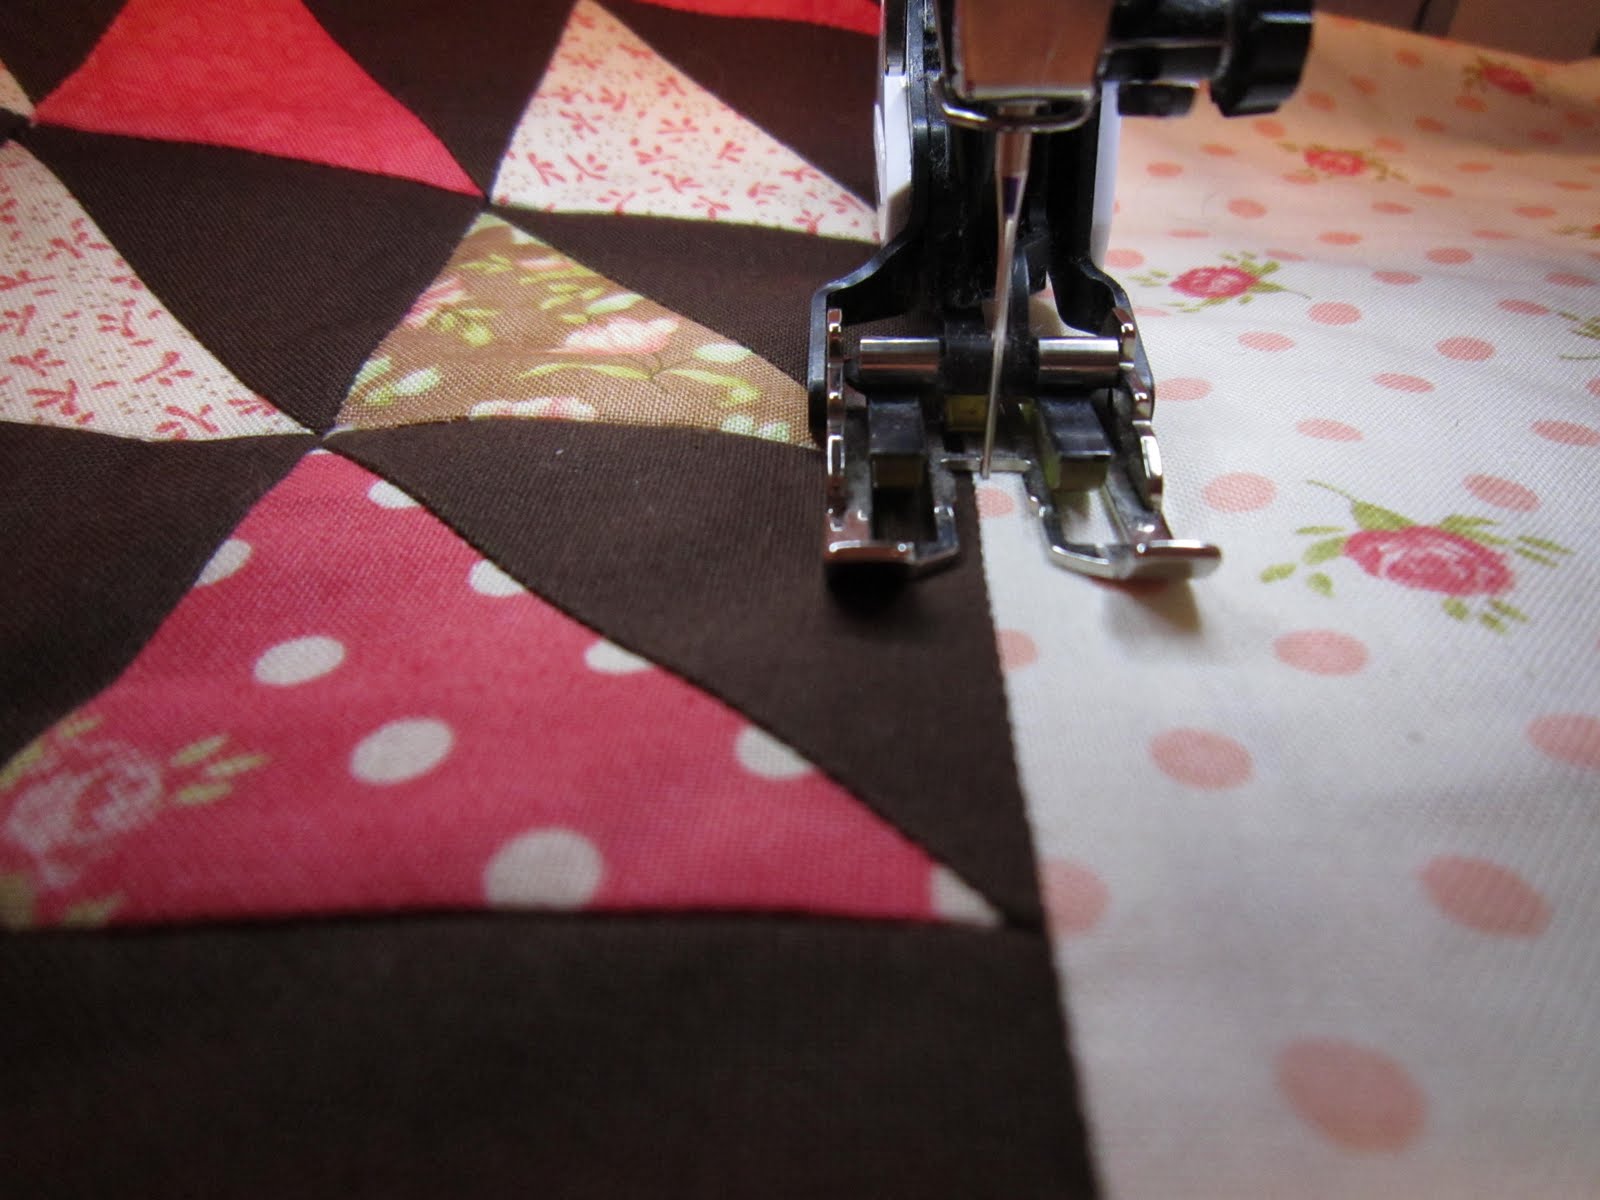
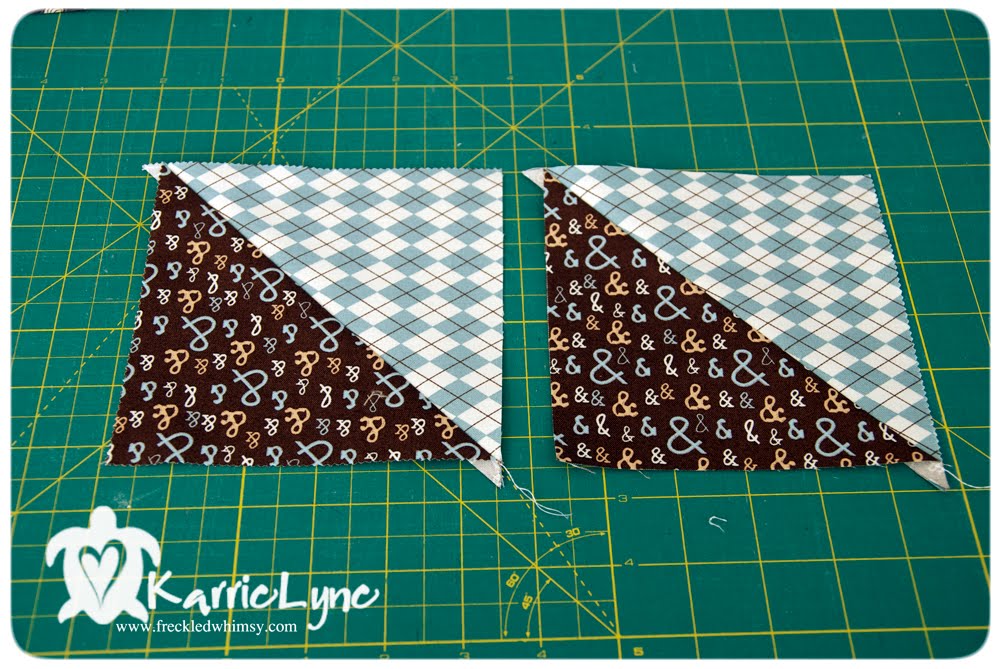
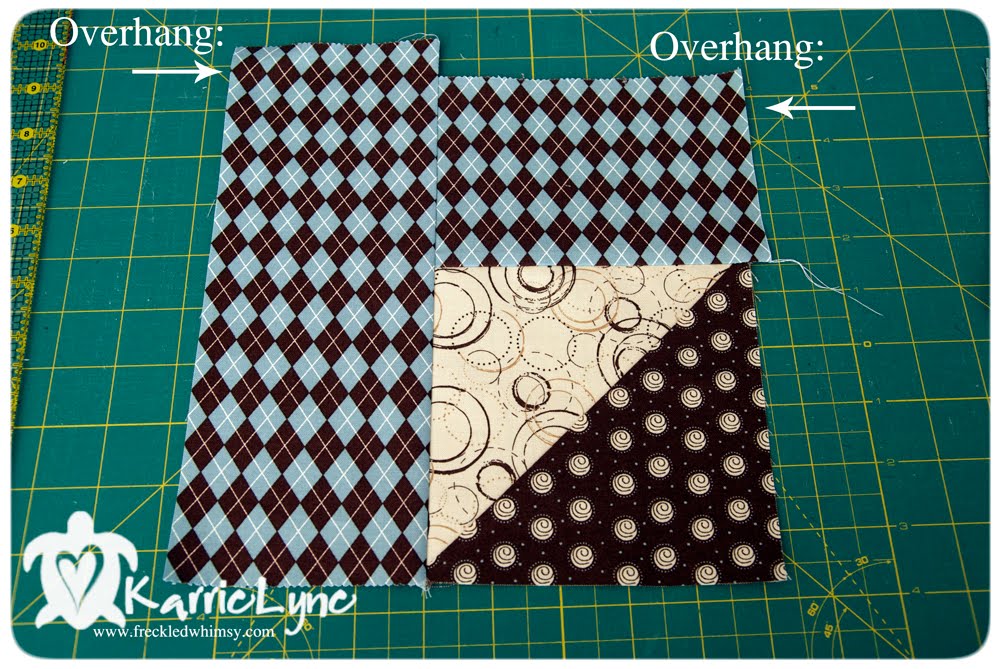
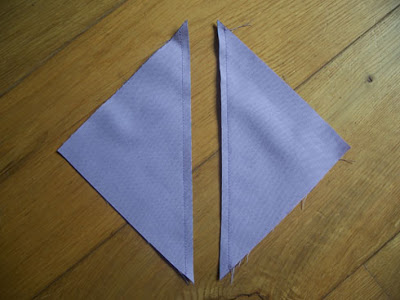
7.Press the triangles open to give two squares. Trim off any the ‘ears’ at both edges of the square. You should have 16 matching pairs Half Square Triangles (32 in total!).

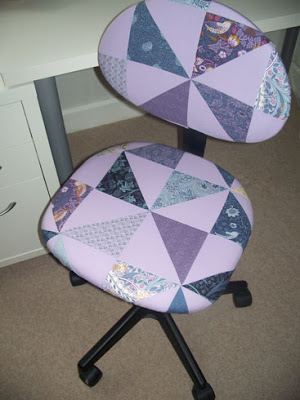
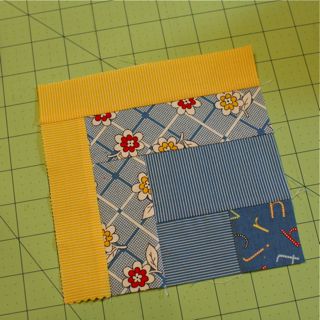
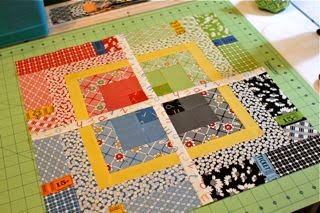
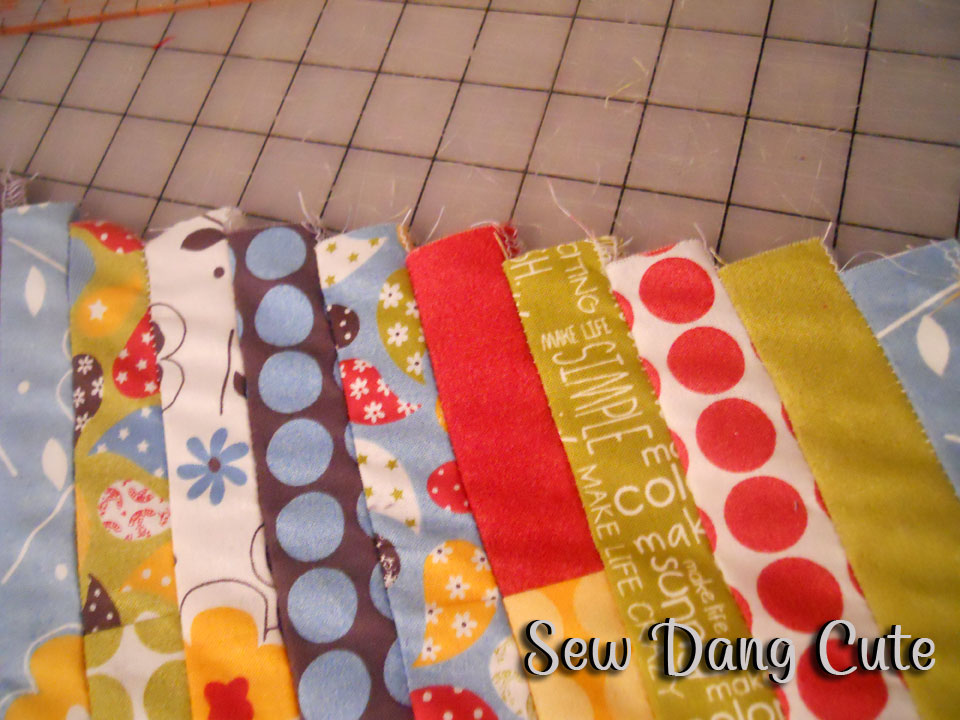
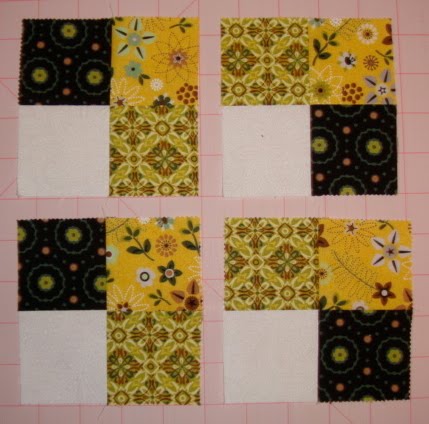
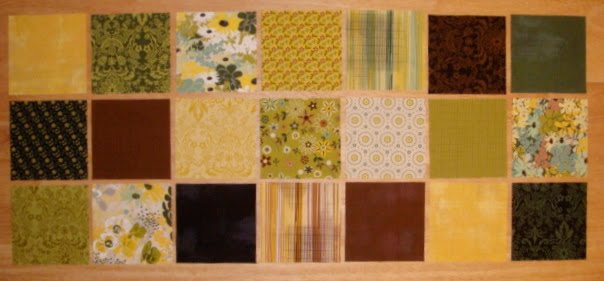
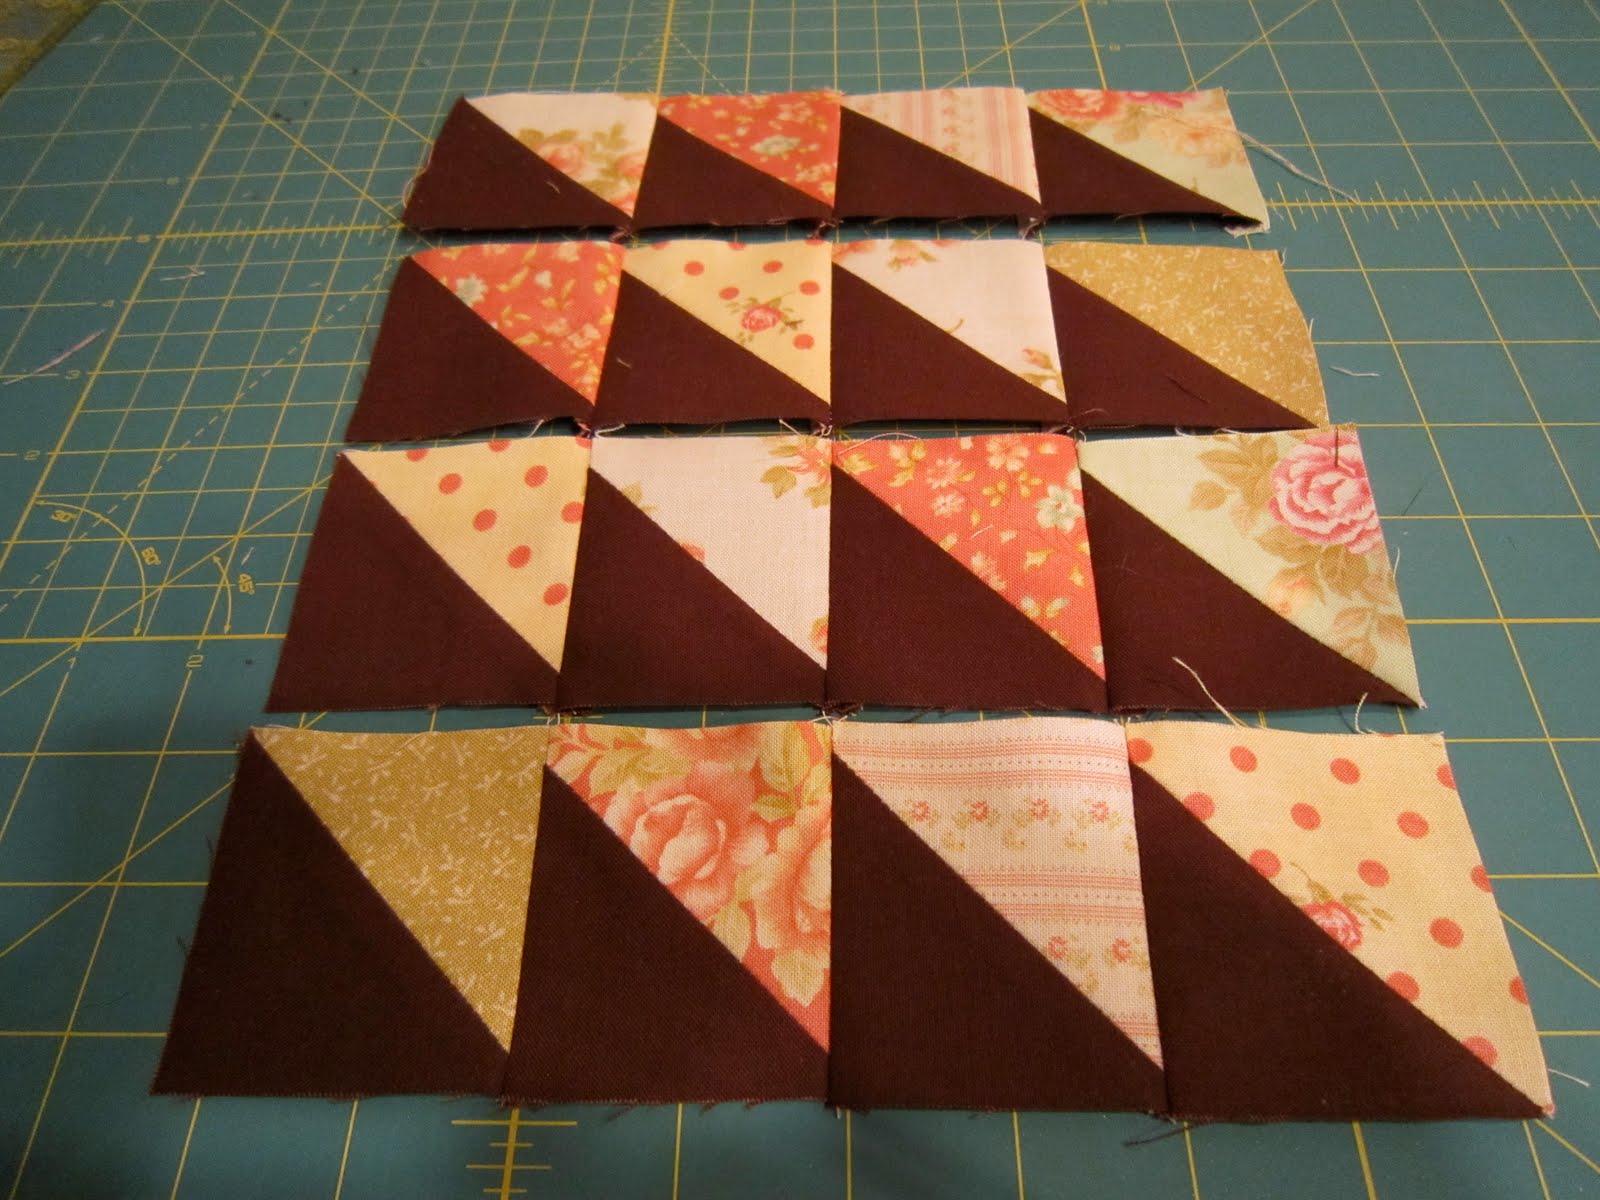
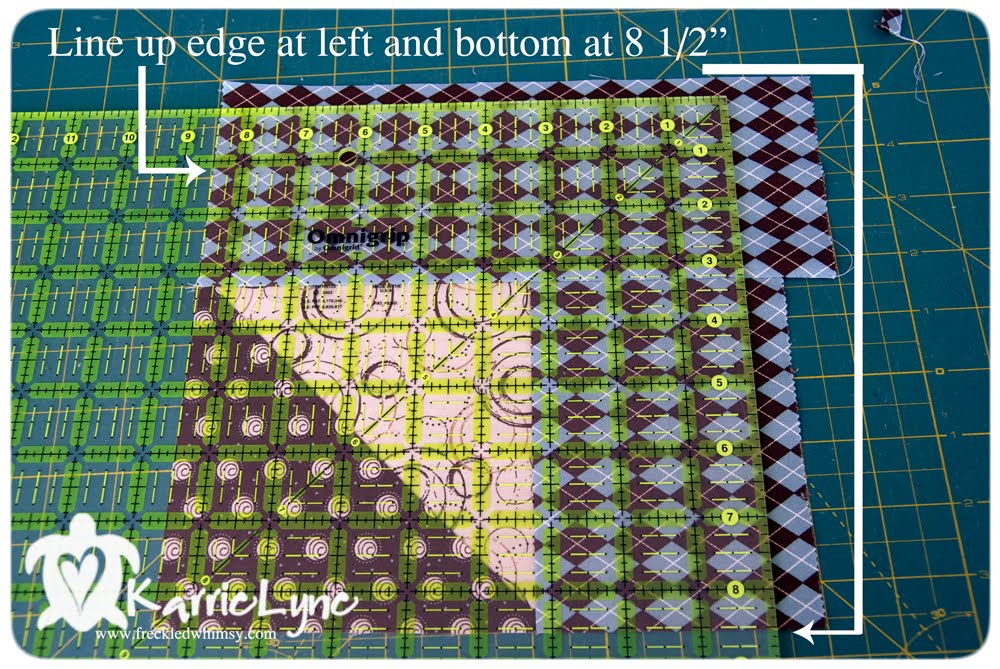
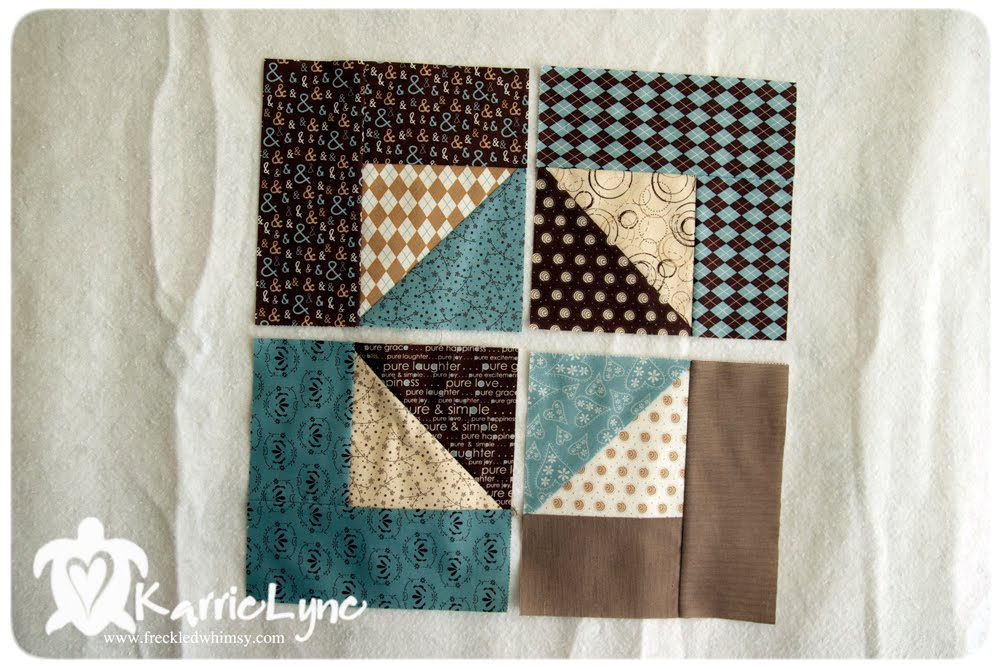
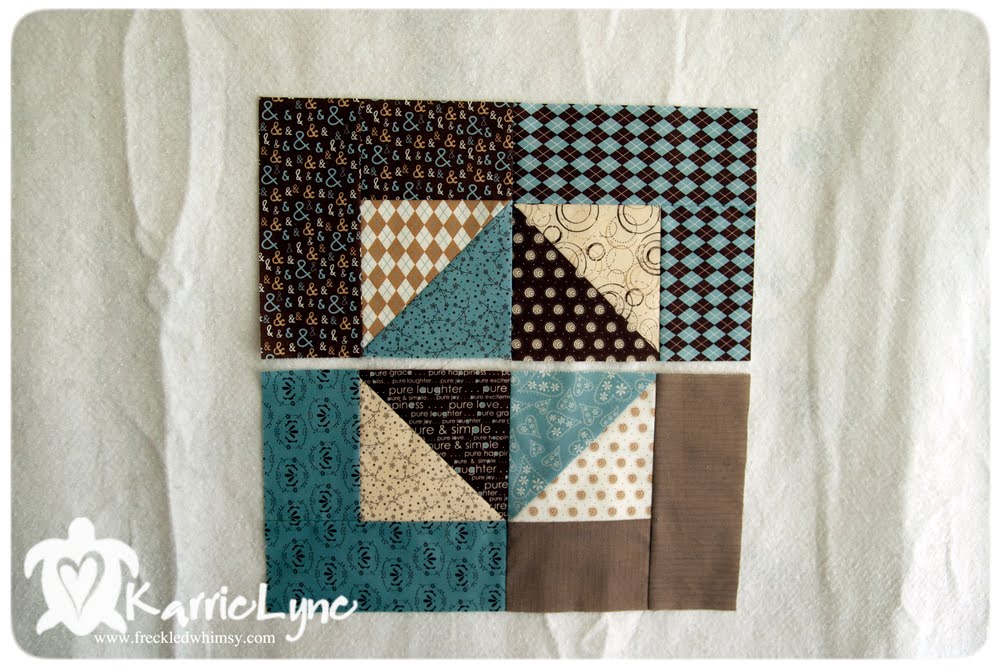
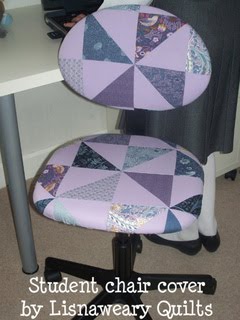
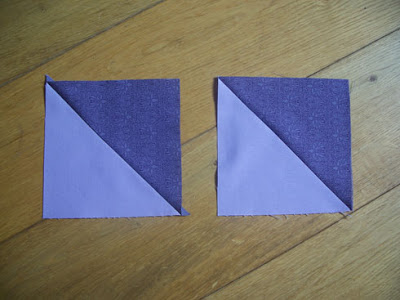
8. Take one of each fabric pattern and arrange Half Square Triangles in a 4×4 grid. Keep swapping them about until you are happy with the arrangement. Remember, the centre four will be the ones which will be seen on the on the seat. Sew the Half Square Triangles together.

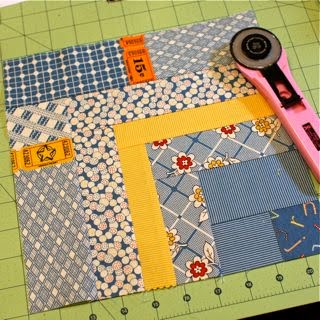
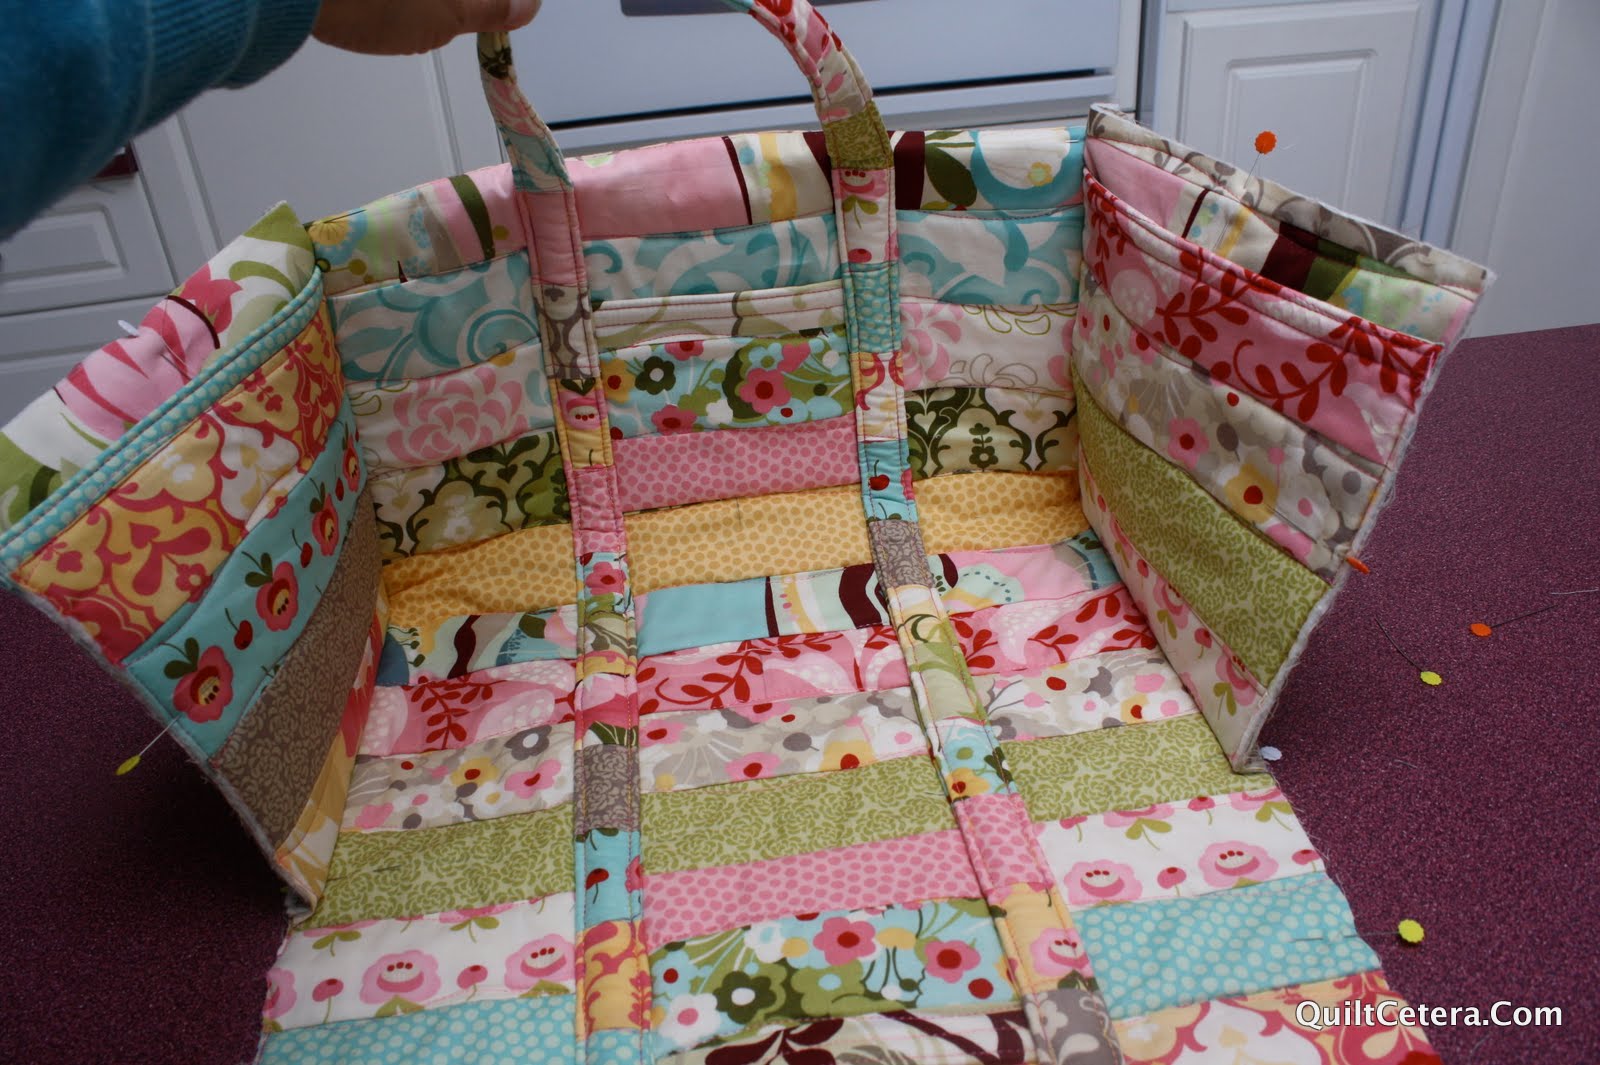
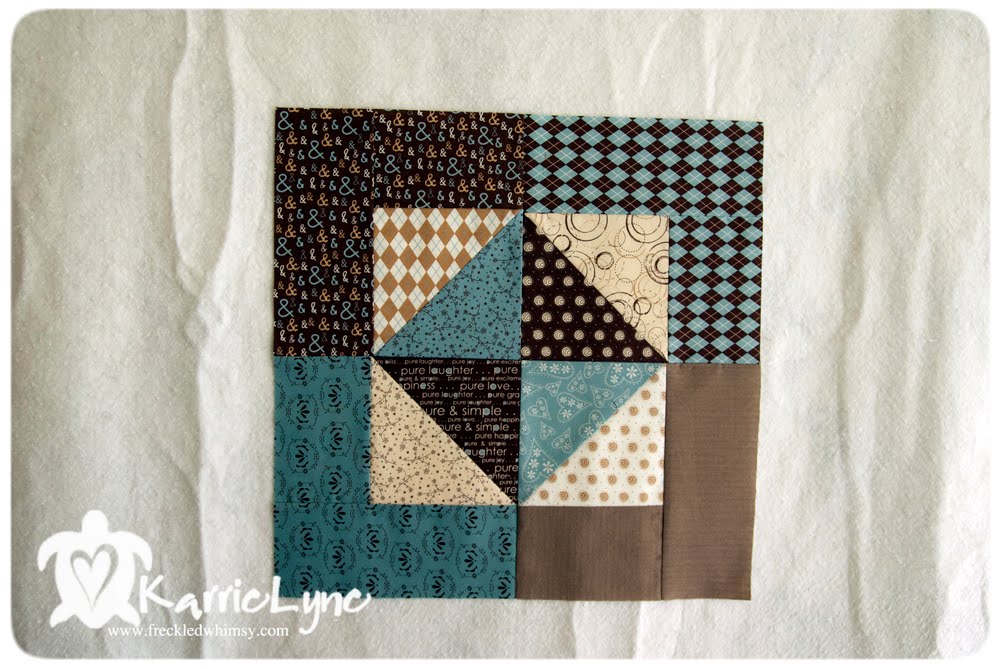
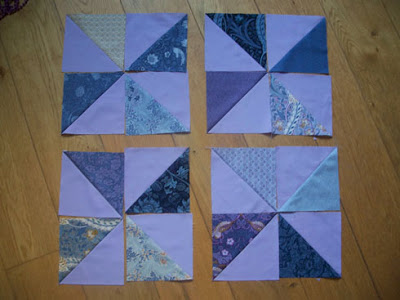
9. Make another 4×4 grid for the chair back, again swap them until you are happy with the arrangement!

10. There are two choices when making the templates for the chair cover.
EITHER: use the original cover as a template, which will be the exact size you need. (This is the original cover for my chair back):

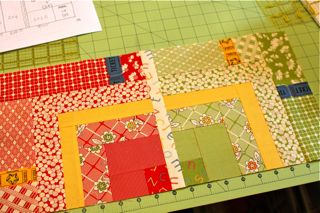
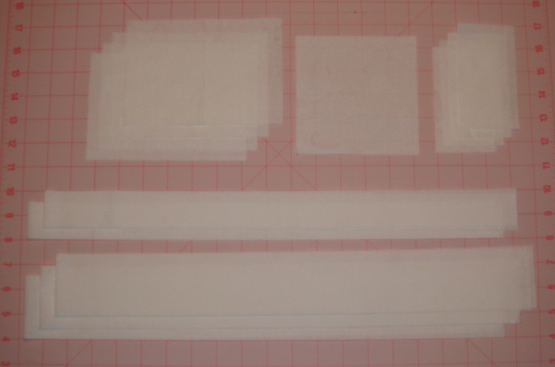
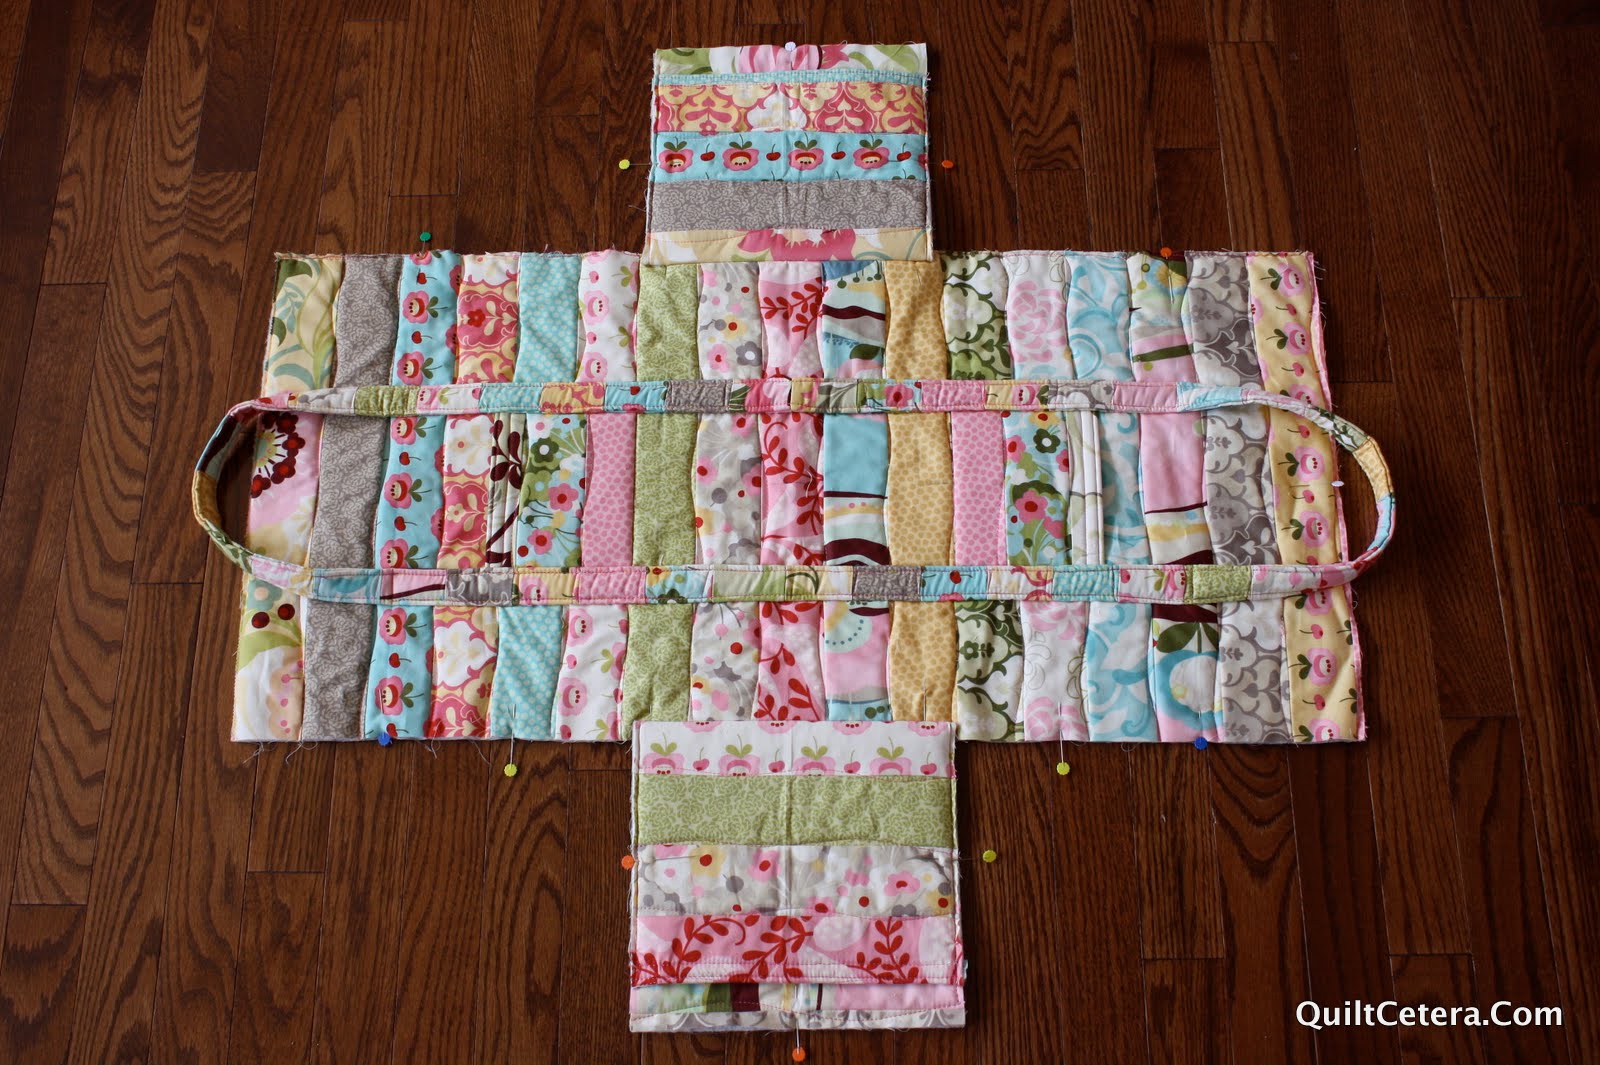
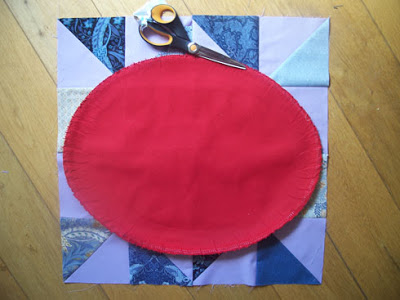
OR Place some heavy weight paper on top of the chair seat and using a felt tip pen, trace around the edge of the chair. Repeat for the back of the chair.

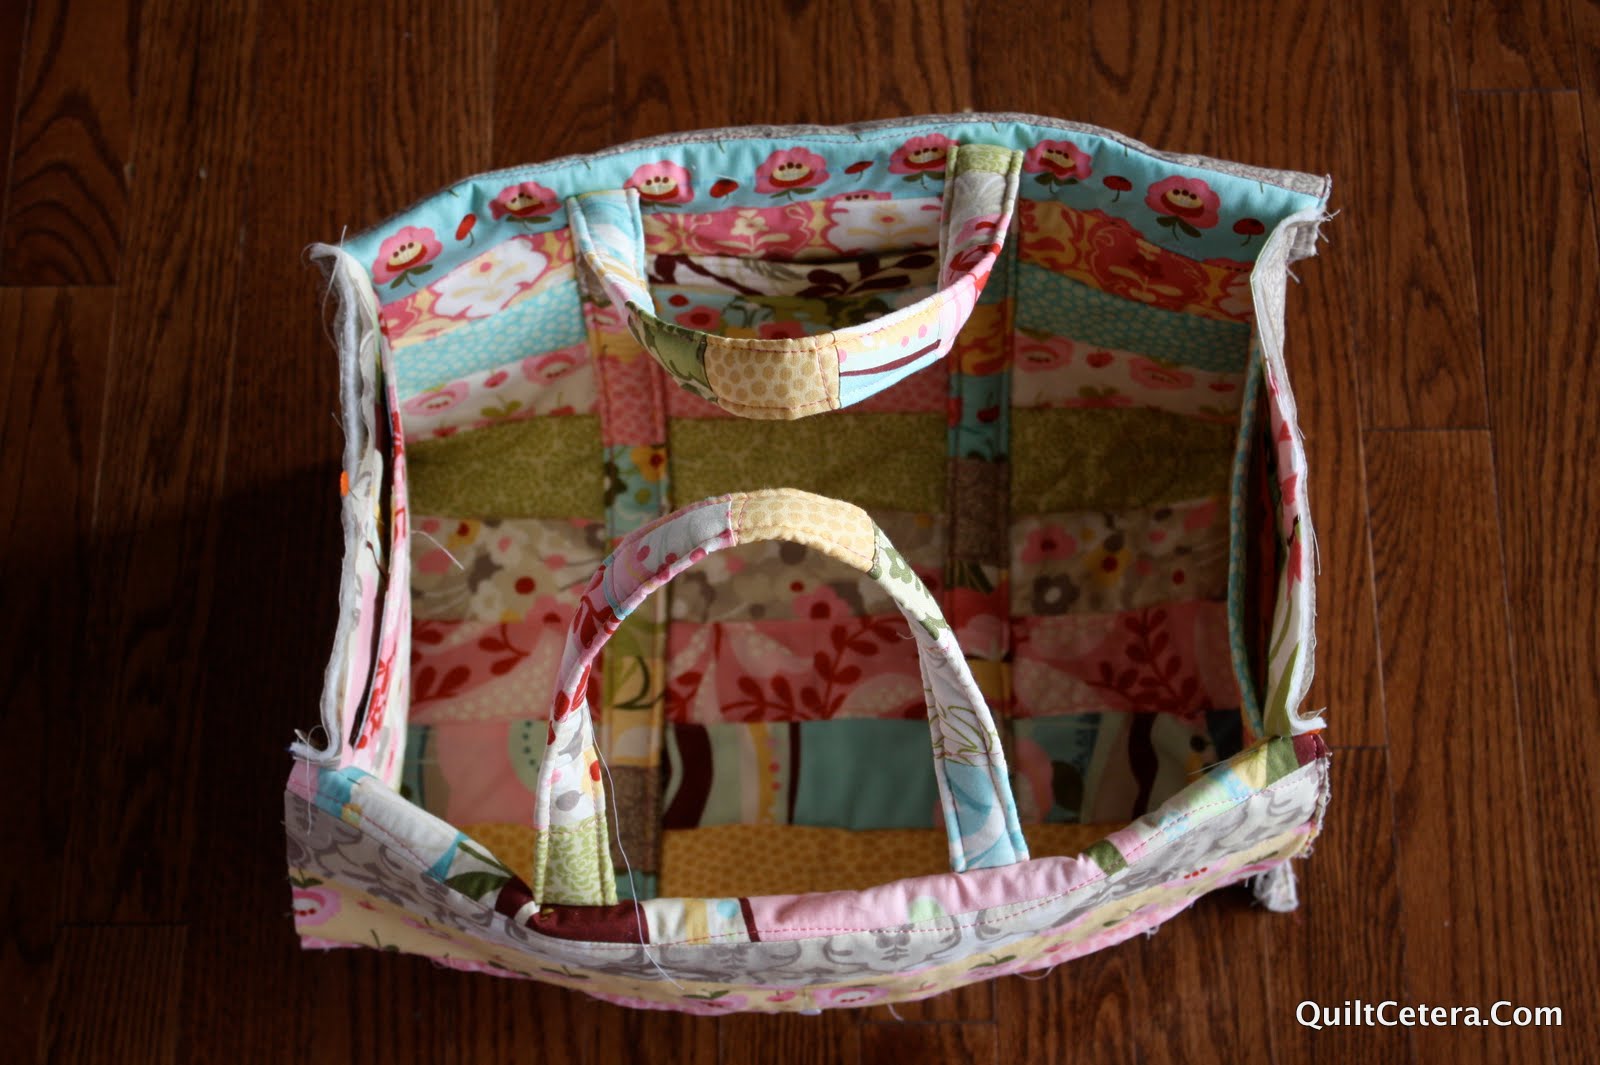
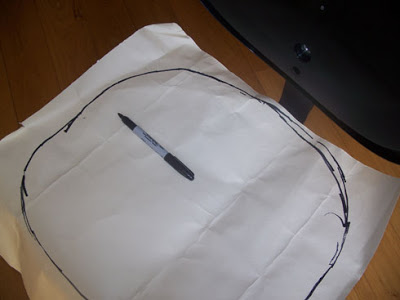
Cut out template. Place template on top of the seat to make it is the correct shape. Repeat for the back template.

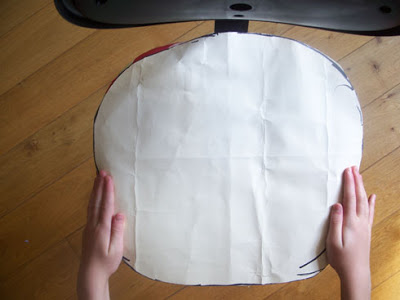
Add on approx. 2″ around the edge of the templates for both the seat cover and the back cover.
Cut out.

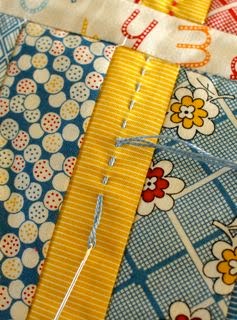
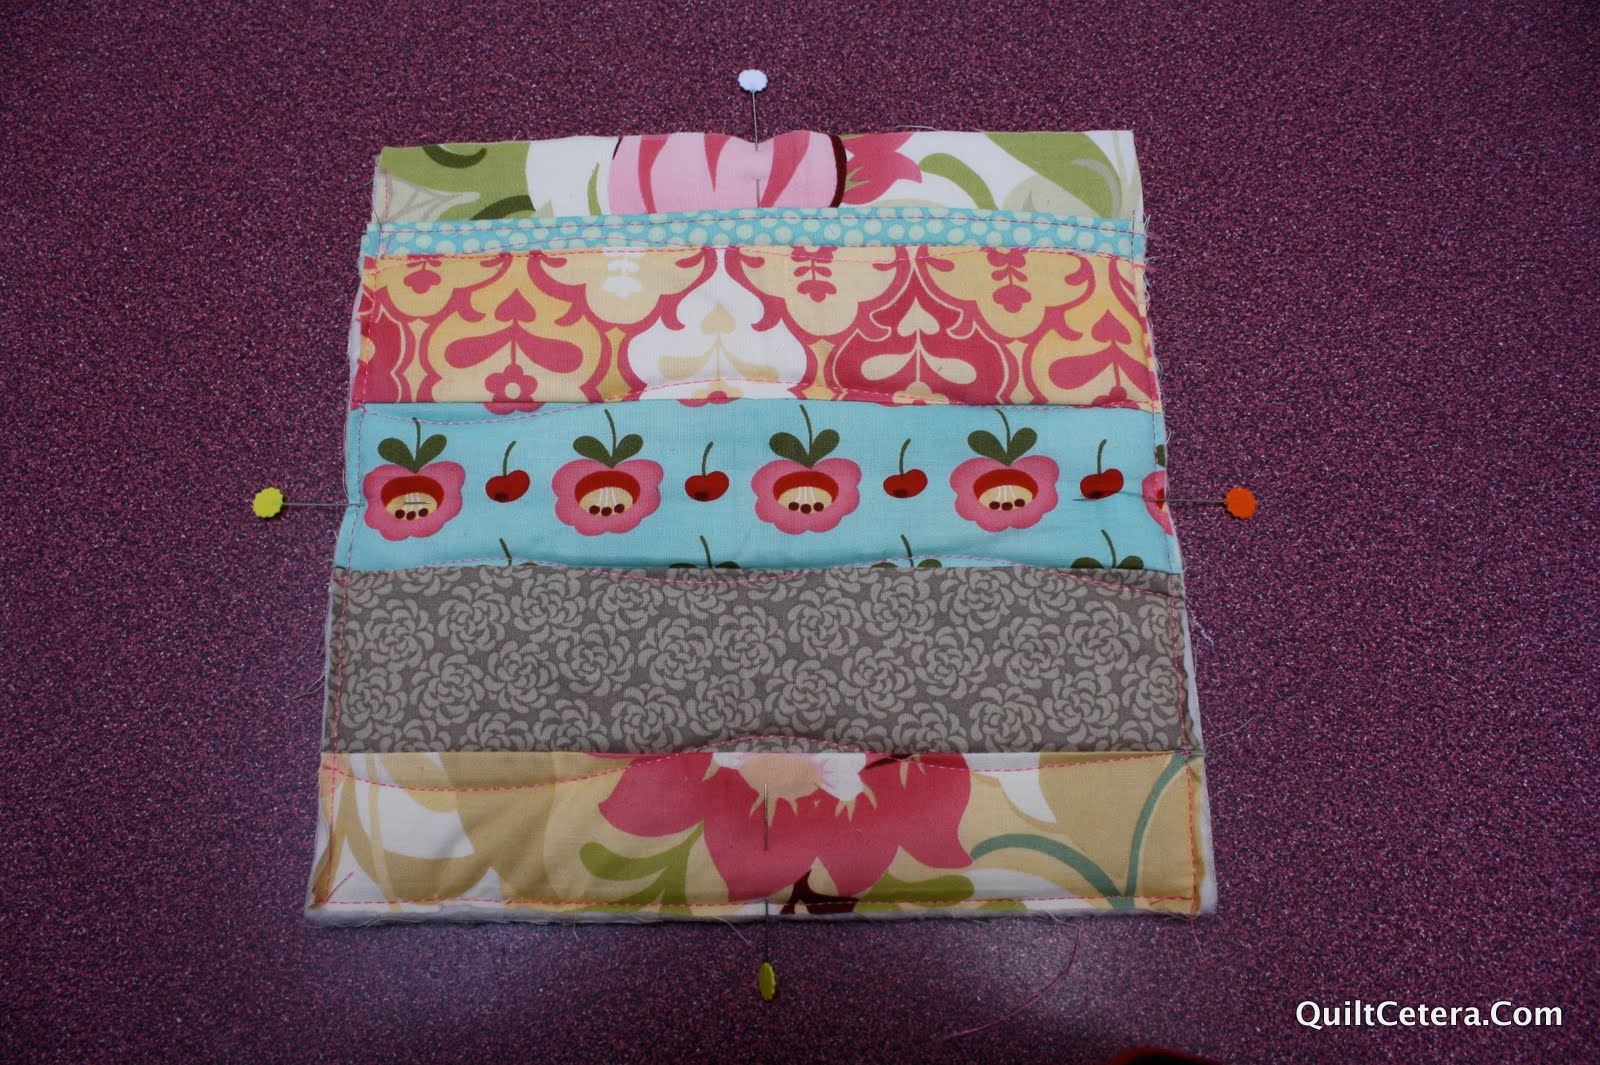
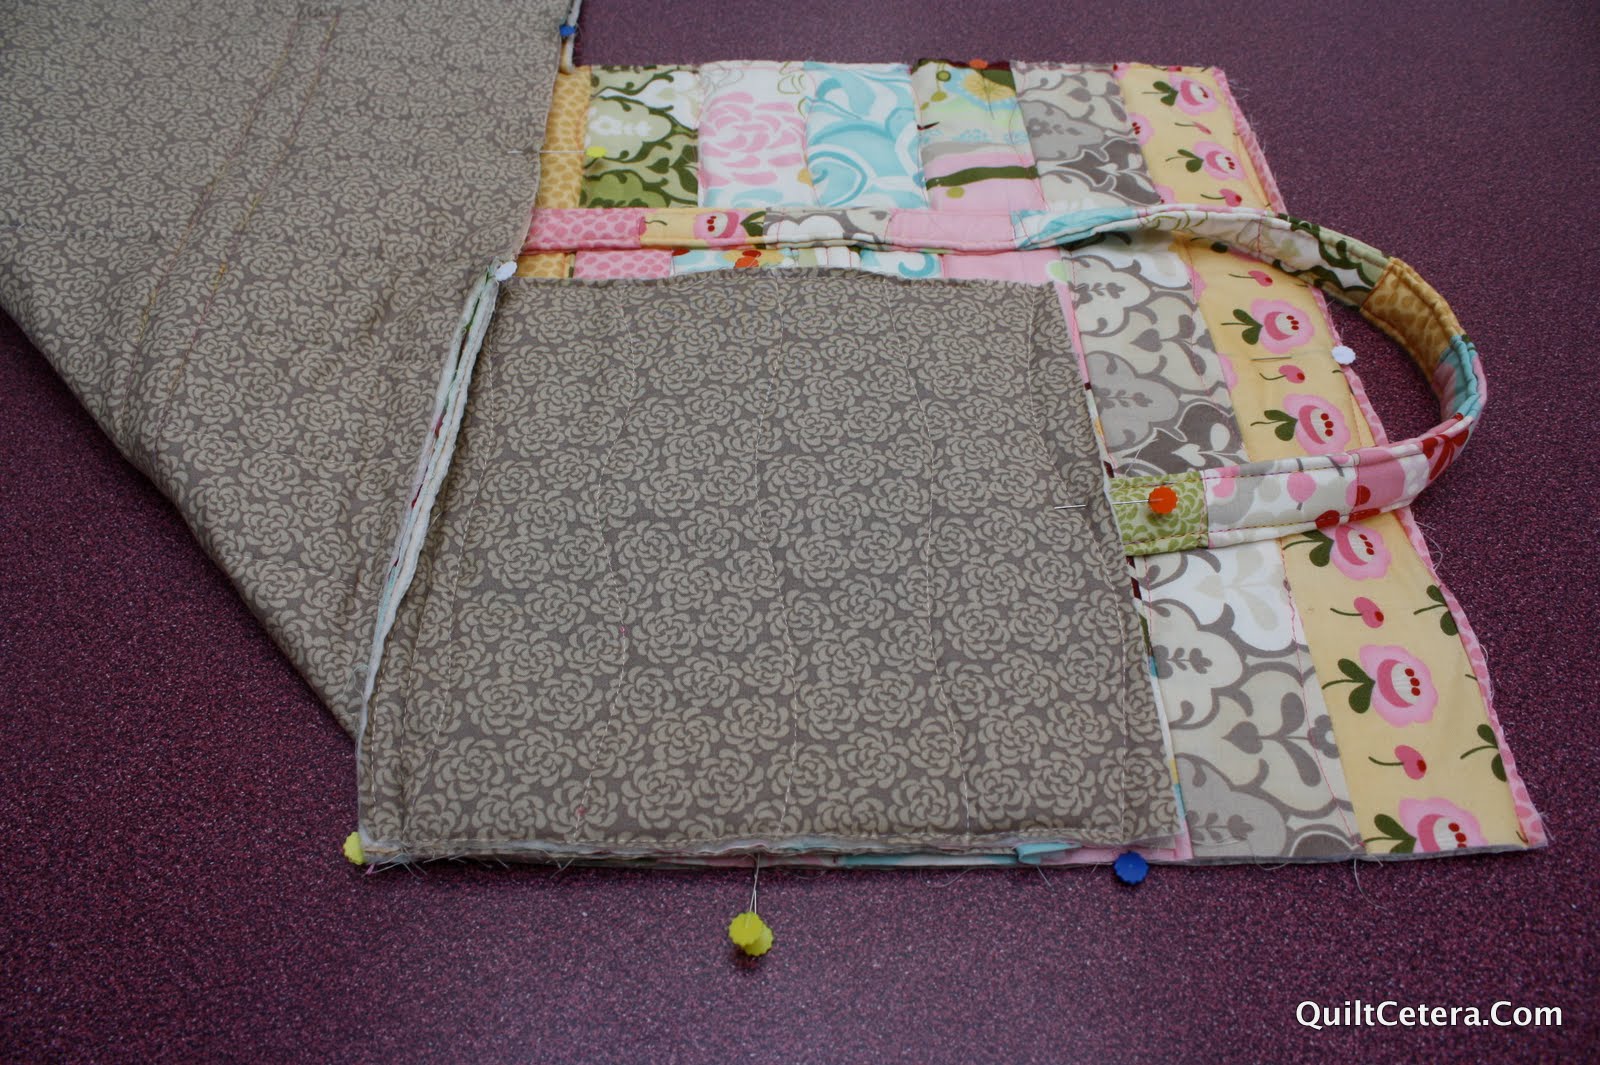
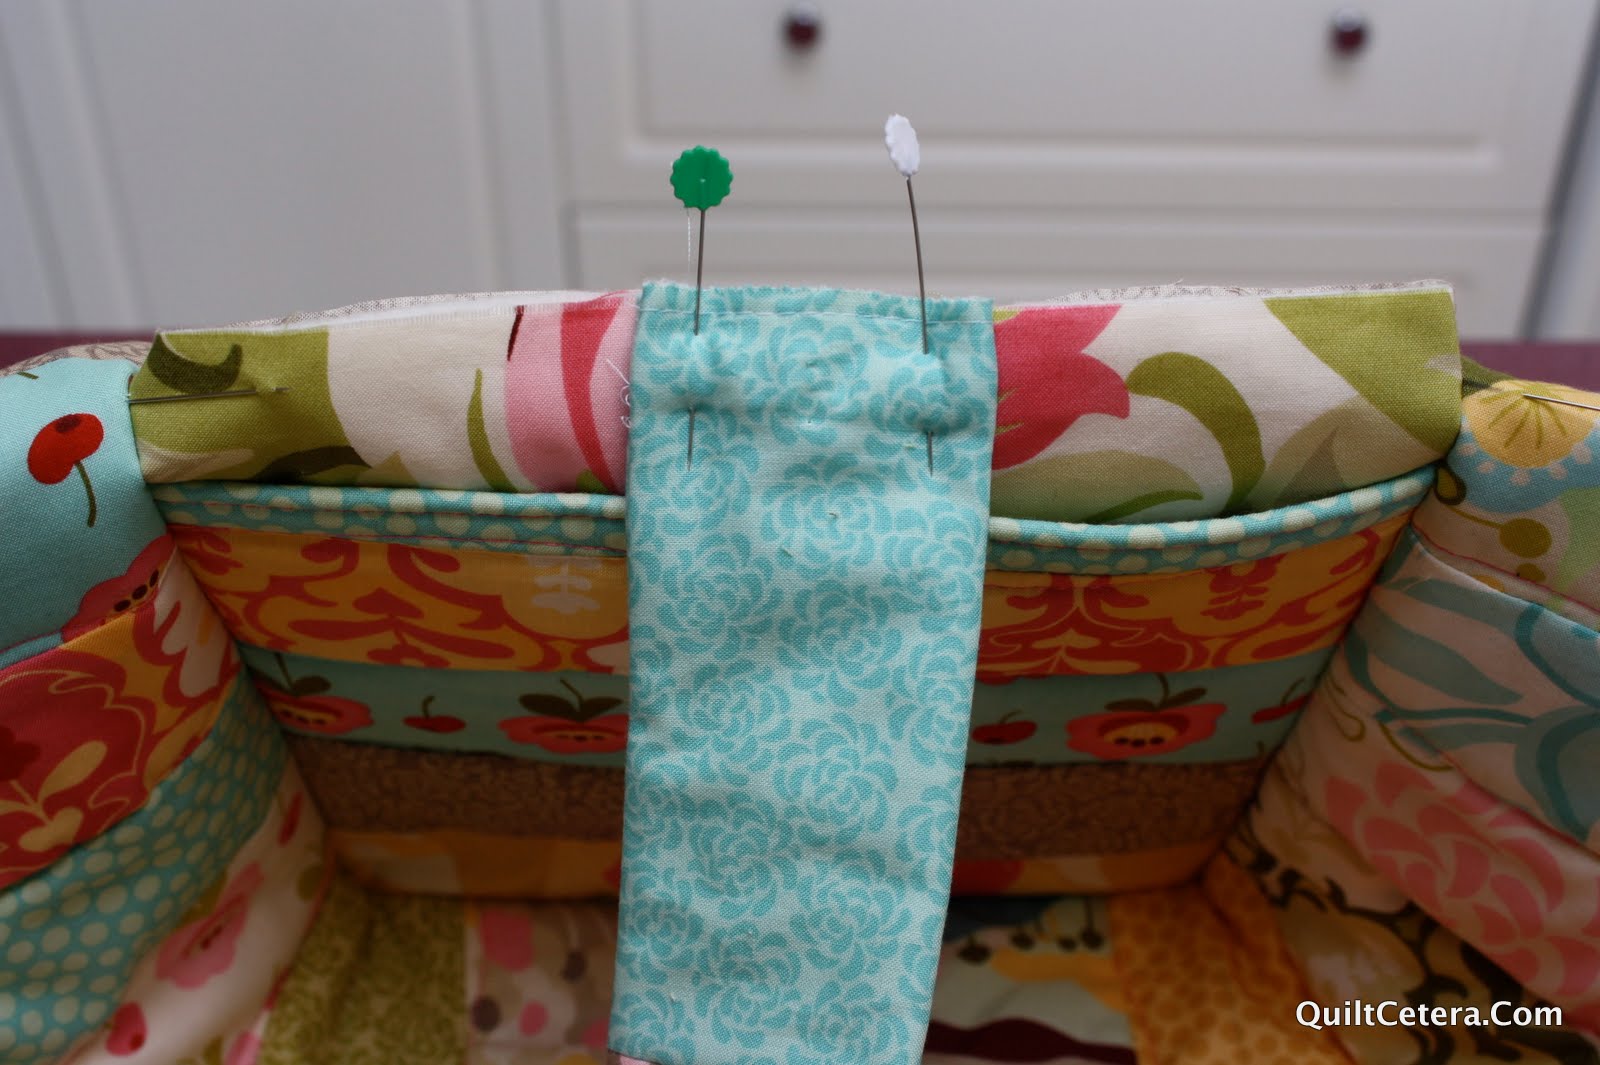
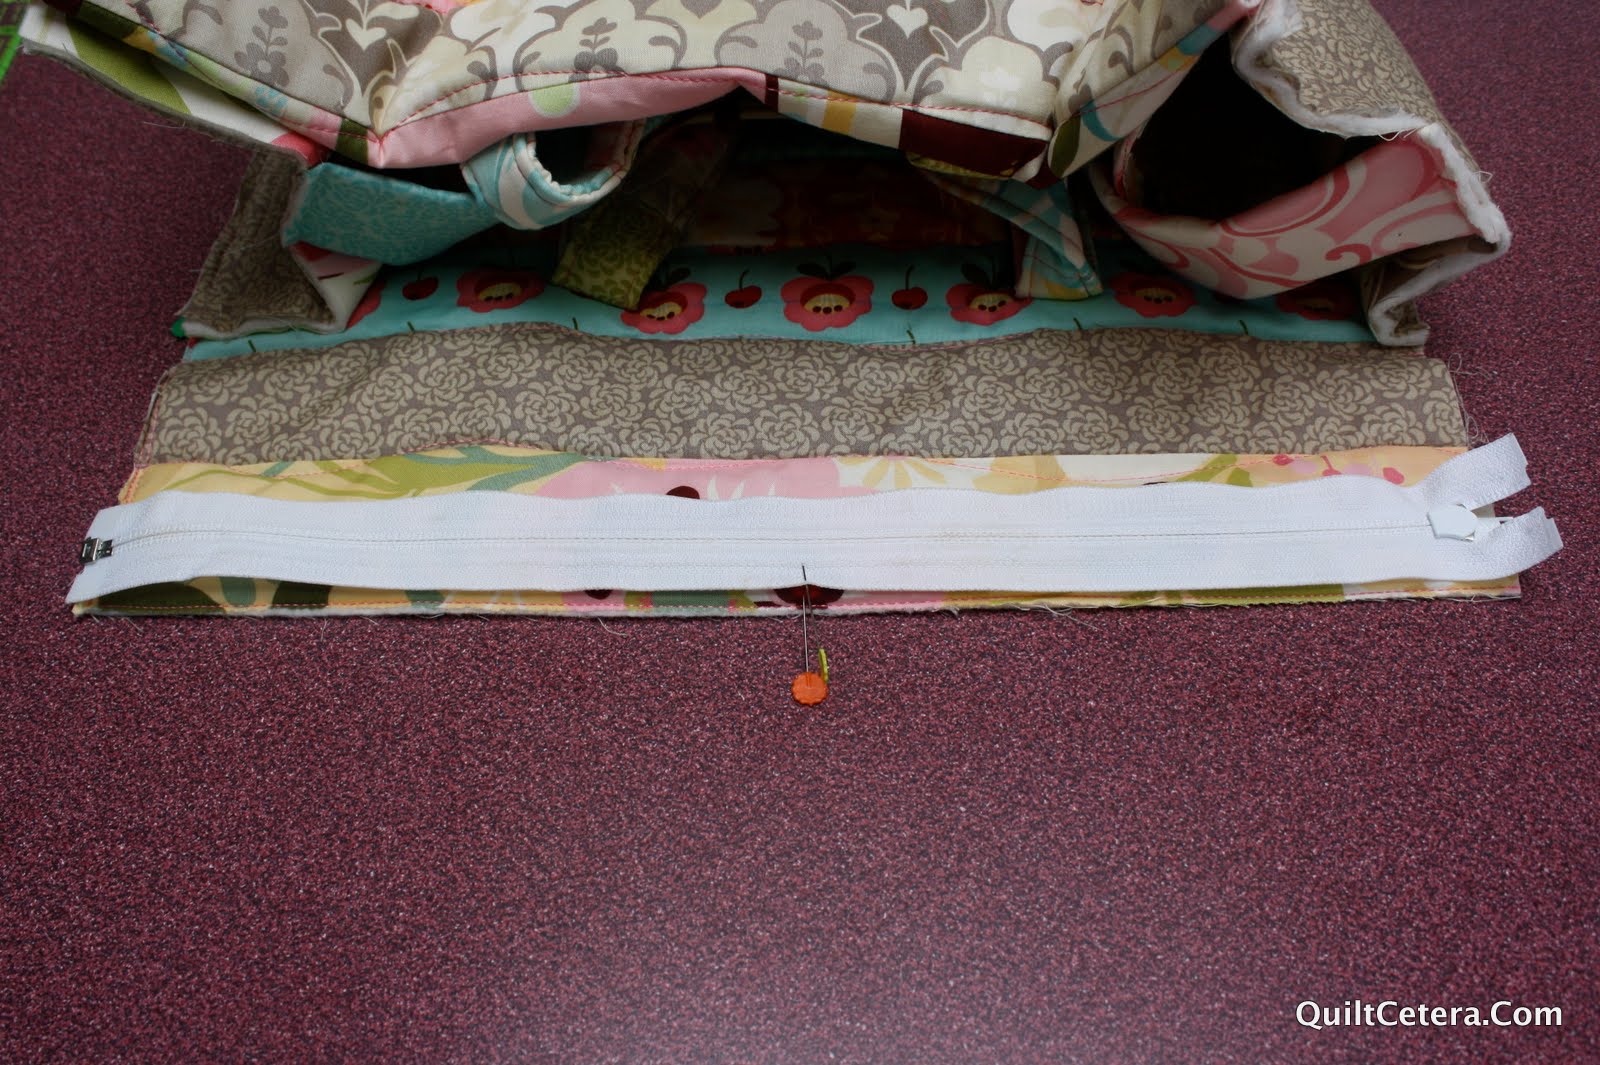
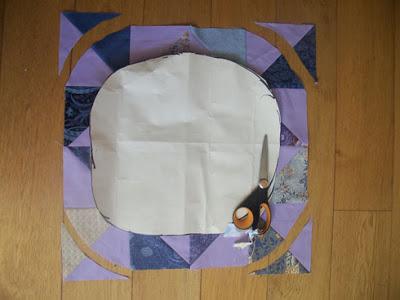
11. To make the casing for the elastic, fold in 1/2″ of the end of the bias binding, place on top of the seat cover, right sides together.

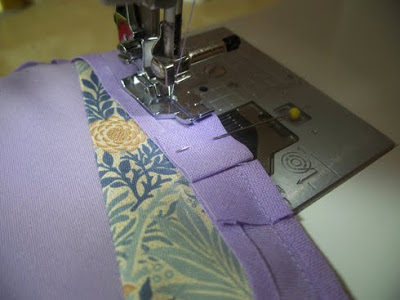
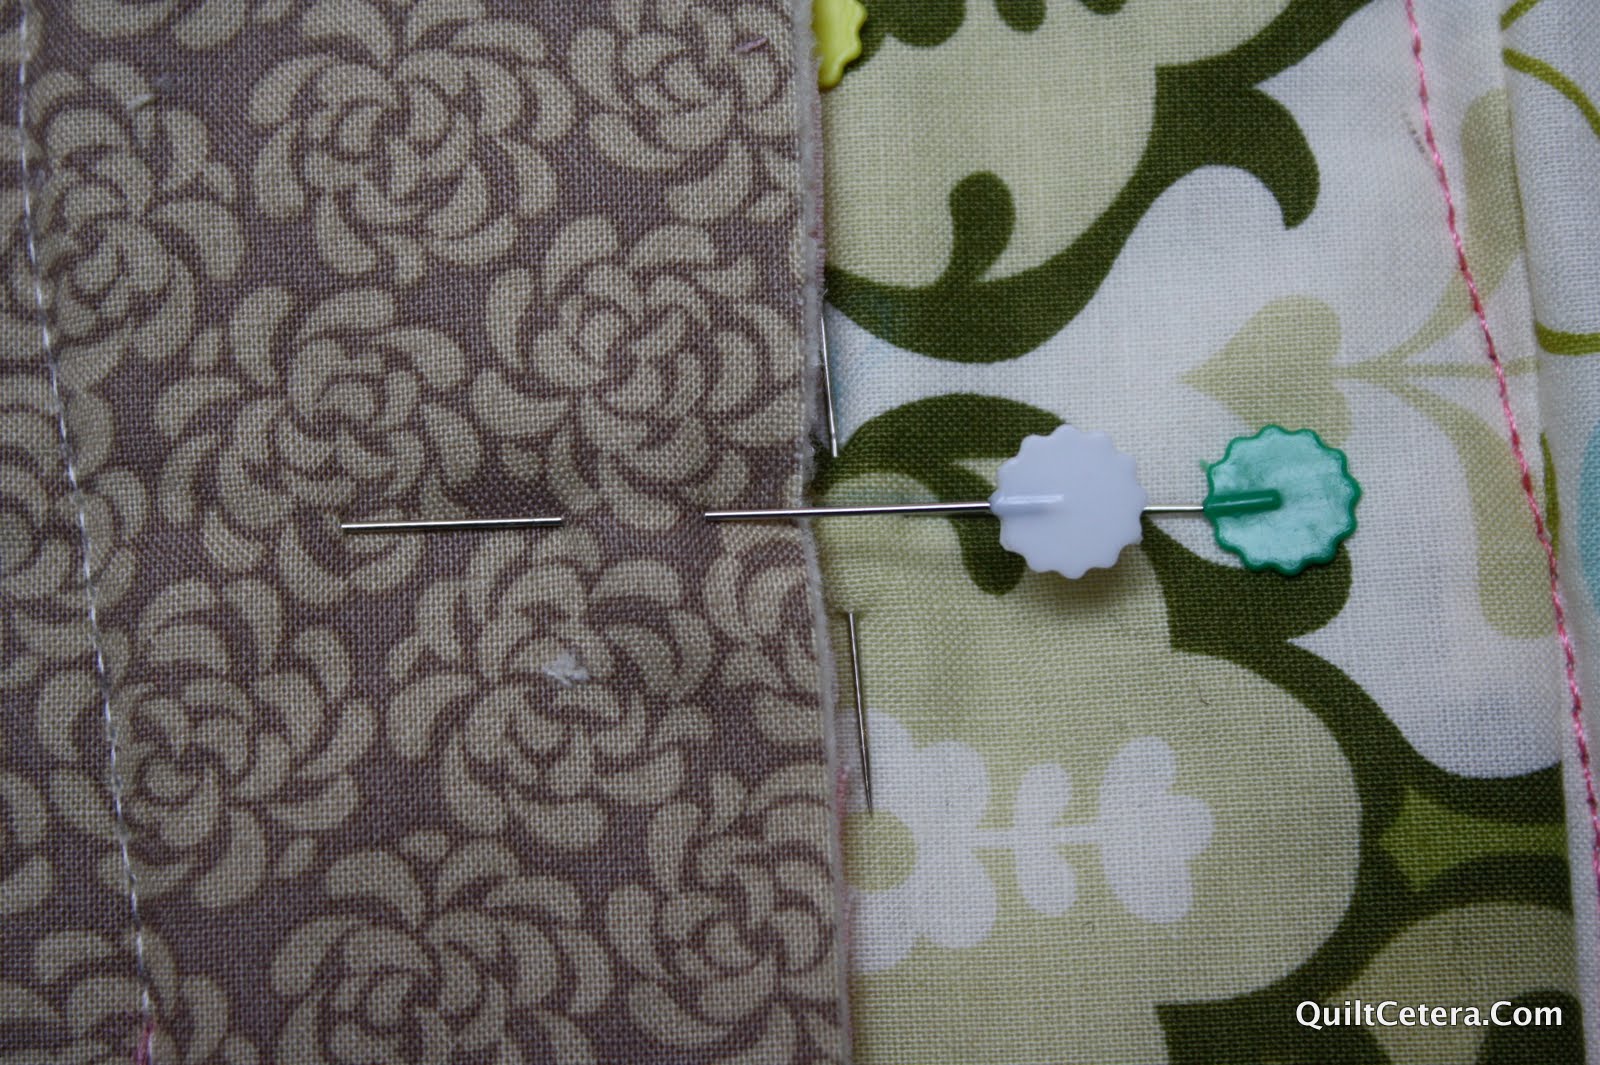
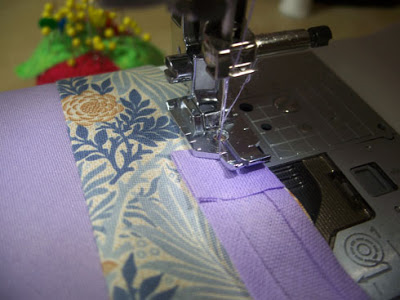
12. Using a scant 1/4″ seam, stitch in place around the entire seat cover, stopping 2″ from where the stitching was started. On the bias binding mark with a pin where the bias binding overlaps, cut off the binding 1/2″ from this pin.


13.Fold the binding back so that it meets the starting point, but does not overlap it. Sew in place.

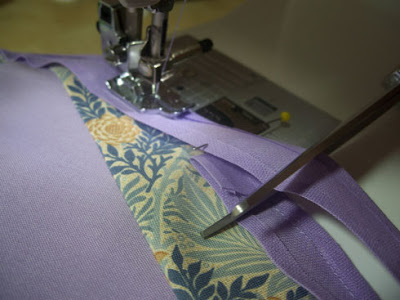
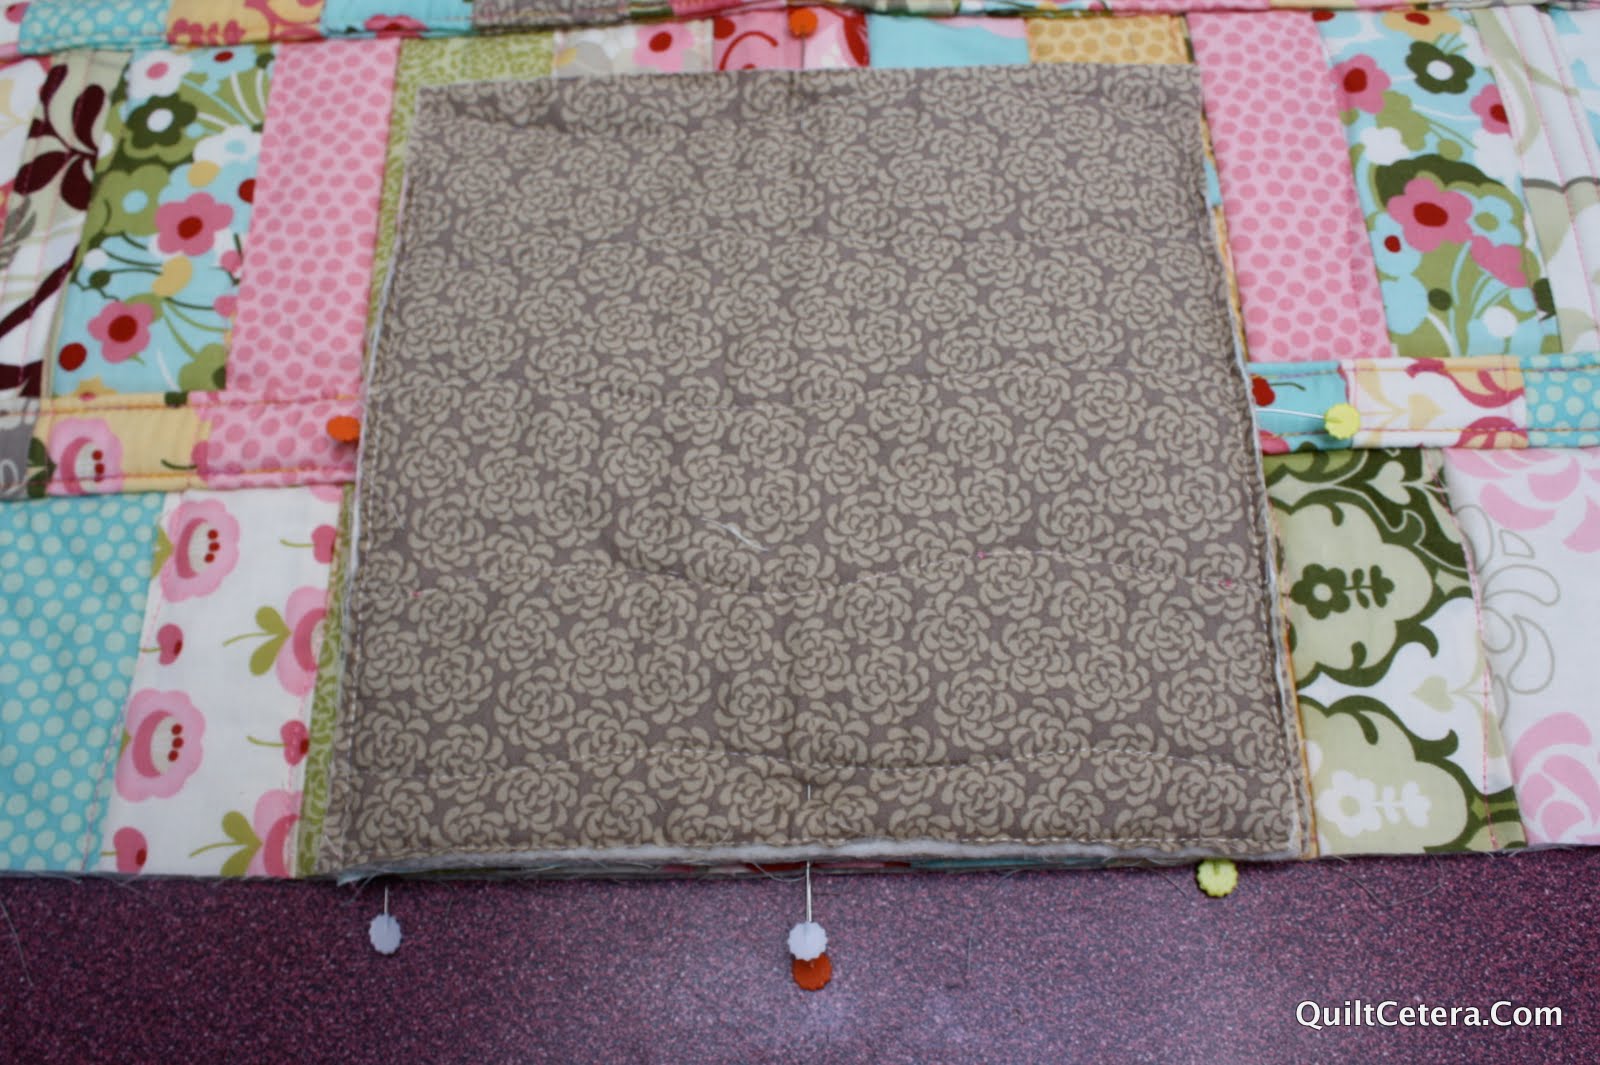
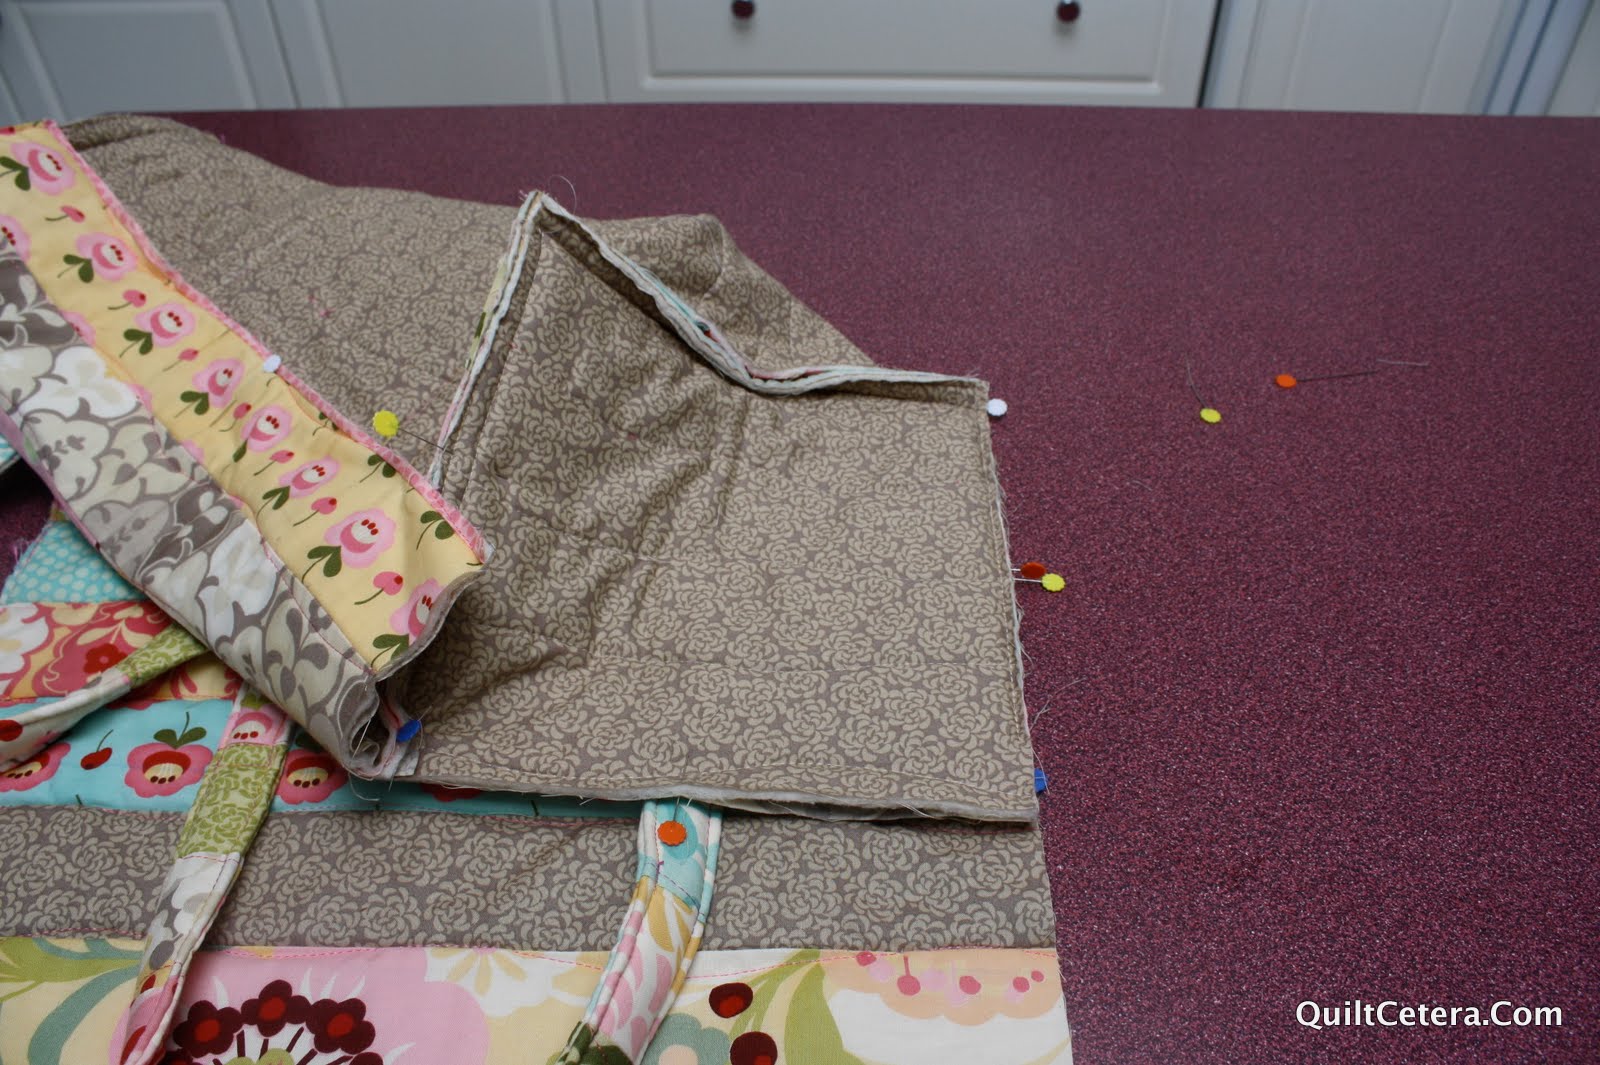
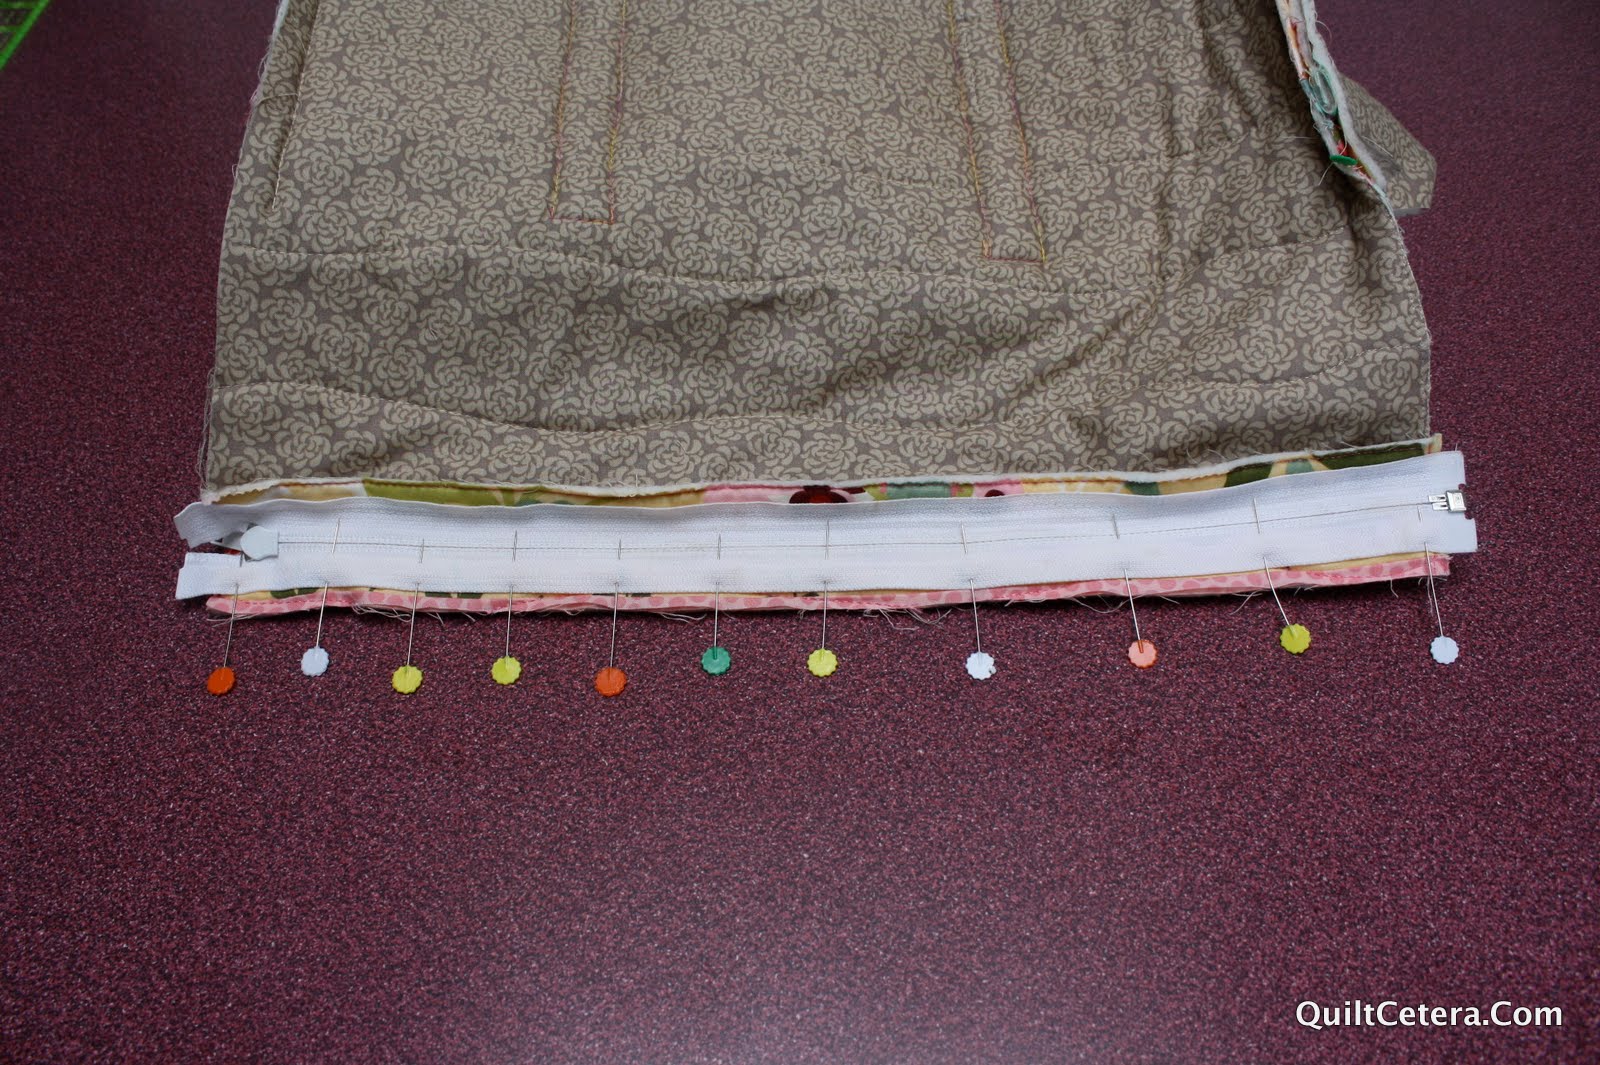
14. Fold the bias over onto the wrong side of the cover and pin in place.

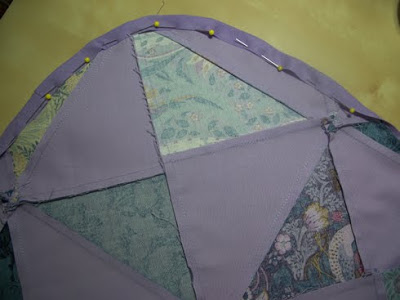
  15. Sew around the inside edge of the bias binding to complete the elastic casing.

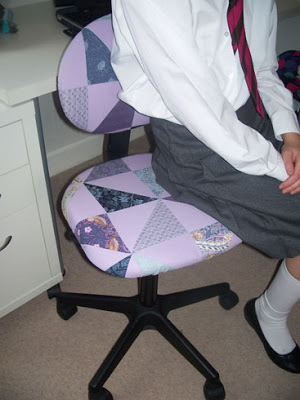
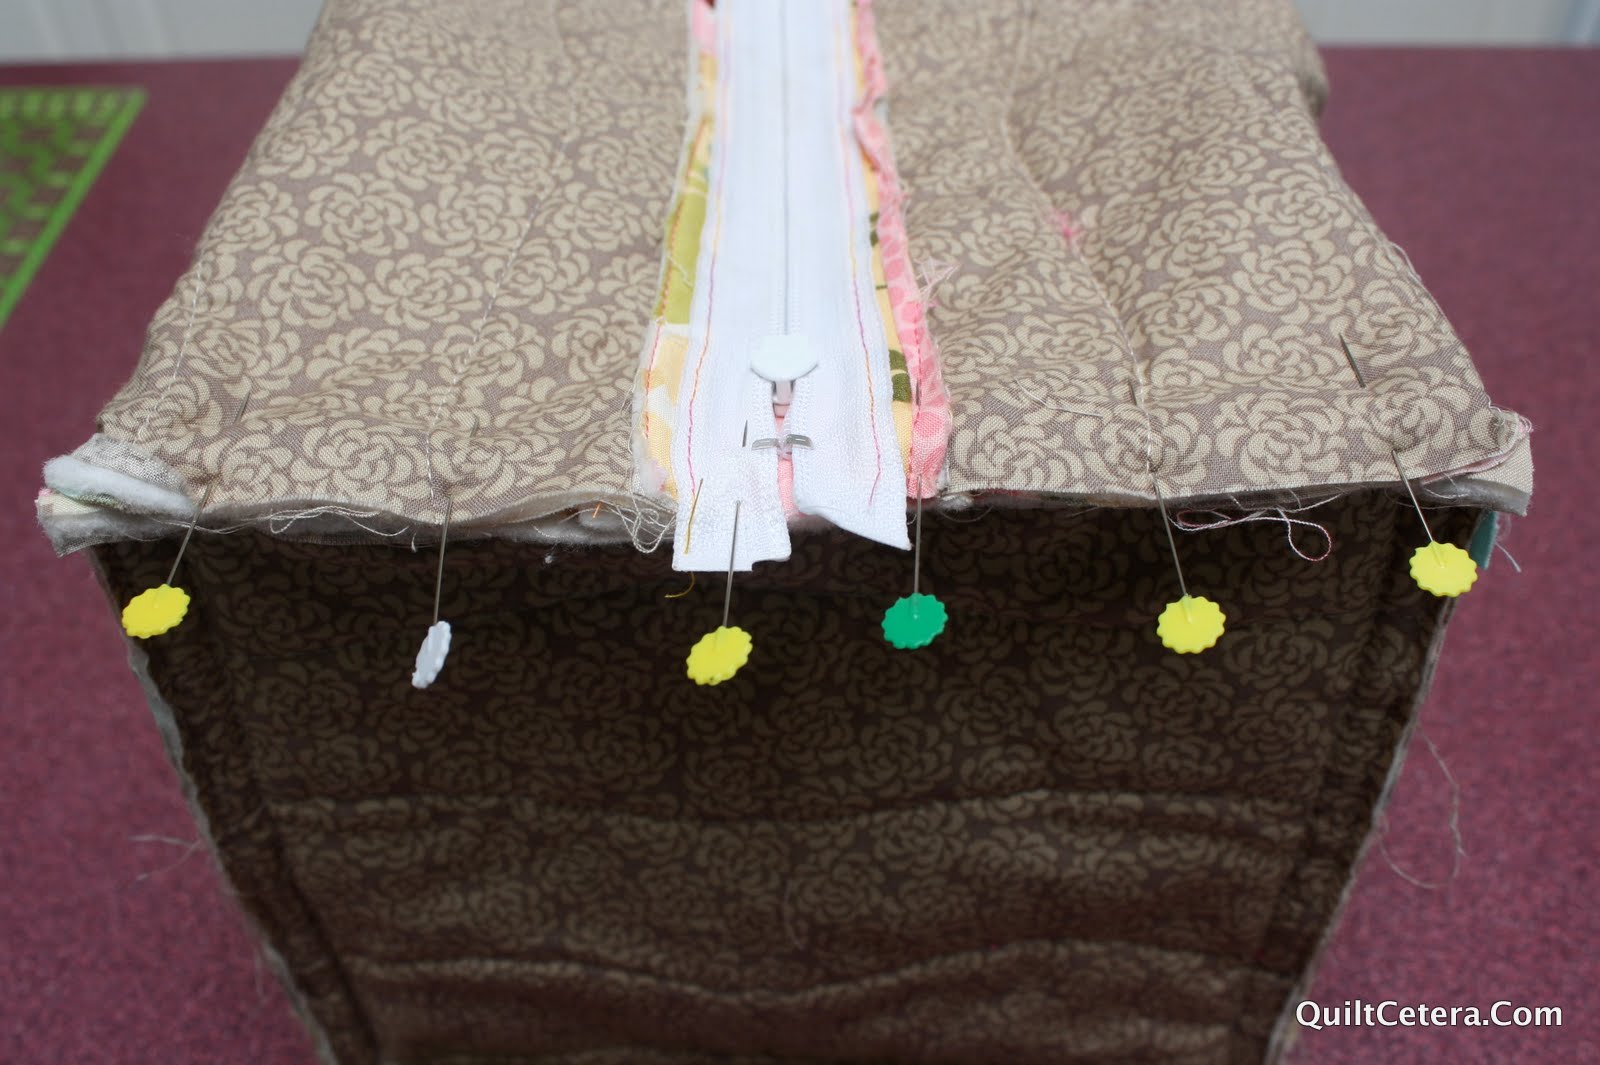
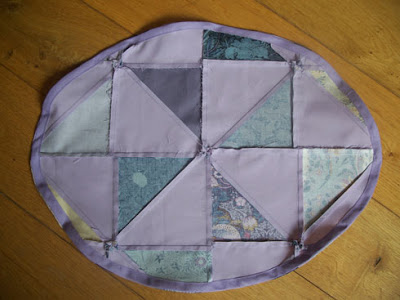
16. For the chair seat, cut a piece of elastic 22″ long and for the chair back, cut a piece 17″ long. Place a safety pin on the end of the elastic and thread it through the casing.
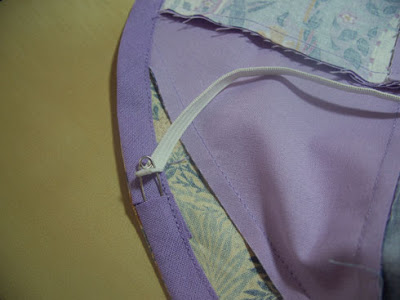
17. Pin the ends of the elastic on top of eachother and sew together to secure in place.

18. Fit the cover on the seat and the chair back. Centre the pinwheel in the middle of the seat and on the chair back.


A bright and cheery chair cover!

Sit back, relax and study!

I hope you enjoy making this project, check out my blog to see it made in an alternative colourway.

Karen Maxwell

Lisnaweary Quilts

http://www.lisnaweary-quilts.blogspot.com/

That’s the Ticket Pillow!

Hi my name’s Kelly and I’m SO excited to bring you my very first Moda Bake Shop
tutorial. I hope you enjoy it! If you’re looking for a way to perk up your home decor, this pillow’s just the ticket! 🙂

One Punctuation Jelly Roll
One yard of coordinating fabric from the Punctuation line


4 colors of Perle Cotton for hand-stitching- black, red, green and blue
Pillow form (the pillow finishes at about 19″ but I used an 18″ pillow form)


Choose your strips to make up your 4 blocks. For each block, I used the alphabet fabric, the stripe, the plaid floral, yellow stripe (1/2 a strip per block), dot fabric, and ticket fabric.
You’ll use the cream alphabet strip for the sashing through the center of your pillow.

Now, let’s cut each set of fabrics into the following sizes:
Alphabet- 2″ square (set aside left overs for binding)
Stripe- 2.5 x 2 and 2.5 x 4
Plaid Floral- 2 x 4 and 2 x 5.5
Yellow Stripe- 1.5 x 5.5 and 1.5 x 6.5
Polka Dots- 2 x 6.5 and 2 x 8
Tickets- 2.5 x 8 and 2.5 x 10

Cream Alphabet- 1.25 x 9.75 (2 pieces) and 1.25 x 19.75
Let’s make your squares. We’ll make one of each of the four colors.
Start with your center square and add the 2.5 x 2 stripe piece to the side.
Add the 2.5 x 4 stripe piece to the top of this unit.
Keep adding pieces to the block. First the side piece and then the top piece.
Each block will have a yellow stripe piece in the center of it.
When you’ve added all the strips, your block will look like this:
Make one block in each color: red, blue, black and green. Your blocks should measure about 9.75″ square. Attach the cream alphabet sashing between two of the blocks. Repeat for the other two blocks.
Attach the longer cream alphabet sashing piece to one of the sets of blocks. Carefully, pin the two units together matching the seams up and stitch together.
Now your pillow top is complete and ready to be quilted. Put together a quilt sandwich (top, batting and backing) and quilt as desired. (I quilted my pillow with clear thread and stitched in the ditch between the blocks with a bit of diagonal quilting for added dimension)
Now, let’s do a little bit of hand-stitching through the yellow stripe fabric in the center of your blocks to add a little dash of something to the mix. Use one ply of perle cotton and stitch through the center of your yellow strips matching your perle cotton to the color of your block.

For your backing, cut your yardage into two pieces- 19.75 x 13

Turn under the raw edge of the backing piece (along the 13″ edge) and hem the edge.

For the piece of backing that will be the outer overlap, I added a coordinating piece to dress it up a bit. Just use one of your left over jelly roll strips and treat the edge of the backing like the edge of a quilt and “bind it”. Overlap the two backing pieces and pin the together with a measurement of 19.75 square. Layer backing (wrong side up) and pillow top (right side up) and stitch around the piece to form your pillow. Make your binding. I used the leftover alphabet fabric strips from the first blocks of my squares and did a scrappy binding for my pillow but you have enough yardage from your backing material to use that if you’d prefer something a little more streamlined. Attach your binding and finish as you would a regular quilt. Insert your pillow form. Sit back and relax and enjoy your new pillow!


One deliciously colorful pillow perfect for nap time or ANYtime!

Hope you’ve enjoyed this tutorial! With a little bit of planning and a bit more yardage for backing, you can make two pillows from one Jelly Roll so why not cut out two and sew them up at the same time? I’d love to hear from you if you make this project. I’m working on sewing every day in September. Stop by and say hi!

Kelly Lautenbach
{www.kellylautenbach.typepad.com}

Make Life Shower Curtain

Hey everybody! I’m Tam from Sew Dang Cute, and I’m excited to be back here on the Moda Bake Shop to share another project with you – a shower curtain!

If you like free fabric, hurry over to my blog to enter a HUGE giveaway I’m having right now. Let’s get started on that shower curtain, shall we?

*All seams 1/4″ unless otherwise noted.


– 1 honey bun
– 1/2 yd fabric
– 3 yds fabric
– Coordinating thread

1. We are going to start with our diagonal stripwork. Randomly cut some pieces from your honey bun strips. Go ahead, just cut whatever sizes makes you happy. You’ll end up using the entire honey bun. I laid mine out on my cutting board and started in the corner. Once you’ve determined your angle, start laying pieces down like so, until you’ve reached 17″, which is as tall as we will go. Sew your cut pieces RST (right sides together) along the 1 1/2″ sides to form a strip. Finish the seams by either serging or zig-zag stitching. From here you just keep cutting pieces to form strips, then we need to sew all the strips together. As you sew the strips together, start the next strip about a 1/4″ down like so. They should look something like this. Finish the seams. Continue until your you have one big piece that is 74″ long. Press the seams all in one direction. Topstitch all the seams down. Trim the piece so you have one big rectangle measuring 17″ x 74″, then cut it into two pieces – 4 1/2″ x 74″ and 12 1/2″ x 74″.

2. From here I thought a pattern/diagram would be easiest to refer to instead of pictures. If needed, click on image to enlarge.
*Note: We are going to assume the width of the fabric is 42″.

Take your 1/2 yd of fabric (green), and cut (2) 5″ pieces and (2) 2″ pieces. From those cut them so you have the following pieces:

– (2) 18″ x 5″
– (1) 42″ x 5″
– (2) 18″ x 2″
– (1) 42″ x 2″

Sew the three 5″ pieces together to along the 5″ edge to form a row with the 42″ piece in the middle. (Refer to the diagram above). Finish seams and press. Repeat with the 2″ pieces.

3. Take your 3 yds of fabric (blue), and cut (2) 50″ pieces and (1) 7″ piece. From those cut the following:

– (2) 18″ x 50″ (You will need to get this first, then unfold to get the 18″ x 7″ pieces below)
– (1) 42″ x 50″
– (2) 18″ x 7″
– (1) 42″ x 7″

Sew the 7″ pieces together the same way as used in step 3. Finish seams and press. Repeat on the 50″ pieces. After pressing the 50″ seams, topstitch the seams down. (The other rows are so short that I didn’t bother topstitching them, however if you would like to, feel free to do so).

4. As a reminder, here’s the pattern again. 5. Now we are going to sew all our rows together as follows:

1. 7″ blue
2. 4 1/2″ diagonal strips
3. 2″ green
4. 50″ blue
5. 5″ green
6. 12 1/2″ diagonal strips

Finish seams. Press and topstitch. Trim all your sides up if necessary.

6. Let’s hem those sides and bottom edge. Fold a side edge 1/2″ towards the wrong side of the fabric. Press. Fold another 1/2″ and press. Stitch down. Repeat on the other side and the bottom.

7. Now for the top edge. I serged the top raw edge and folded it down 3″ and pressed. If you don’t have a serger, fold 1/4″ down and press, then fold another 2 3/4″ down and press. Stitch that hem down. You should now have something that looks like this. 8. The last thing we need to do is make some buttonholes for our curtain rings to go through. Lay your curtain out flat on the ground and mark where you want your buttonholes. I grabbed a shower curtain and laid it on top to mark mine. You should have 12 marks now, each about 1″ long and 6″ apart. Set your sewing machine to its buttonhole settings. Attach your buttonhole foot. **Check your machine’s manual for specific sewing instructions, because each machine can be different. My machine won’t sew buttonholes. In theory, you are supposed to be able to place a button of the desired size in the foot, then push down on the pedal and it should sew the buttonhole. I have yet to get my machine to do this. I used my mom’s. On hers you sew down as far as you need to go, then push the buttonhole button located by the stitch selection buttons and it sews the rest. You’ll end up with 12 marks that look like this. Grab your seam ripper and place it between the stitchings and rip about halfway up. Then switch to the other end and rip the rest of the way. You can just rip all the way with that first rip, but I like to switch so you can prevent accidentally ripping too much and going through the stitching. Repeat on all 12 buttonholes and it’s all done! Place your curtain rings through those buttonholes and hang up your new shower curtain!
One shower curtain measuring 72″ x 72″.

Tamarynn Bennet
Sew Dang Cute

City Windows Table Runner


CITY WINDOWS TABLE RUNNER

Finished Size: 14″ x 30″
Seam Allowance: 1/4″ unless otherwise stated


We are very excited to be sharing our first recipe on the Bake Shop! City Windows is a versatile runner that works great with any fabric style. We love it because it requires just one charm pack and an additional 1/2 yard of fabric to complete the entire project: front, back and binding! You’ll want to keep this pattern on hand as you check out all the new Moda lines. Be sure to order a charm pack of your favorites!

For more information on our quilt shop, please visit www.quiltedtreasures.net. Stop by our blogs and say hello, we’d love to hear from you! Visit Mary at Pieces of Work and Kristina at Sew Domestic. ENJOY!!!

1 charm pack
1/2 yard background and binding
1/4 yard binding (only if you’d like something other then the background fabric)
STEP ONE: Select TWELVE of your favorite charm squares (5″ squares) from your fabric pack.

STEP TWO: Cut 5″ squares in half so you have 24- 2 1/2″ x 5″ units

STEP THREE: Match up TWELVE pairs of 2 1/2″ x 5″ charm units.

STEP FOUR: Chain stitch pairs together along the 5″ edge.
STEP FIVE: Press towards the dark. You should now have TWELVE units that measure 4 1/2″ x 5″
STEP SIX: Cut units (4 1/2″ x 5″) in half again to make 24- 2 1/2″ x 4 1/2″ units
STEP SEVEN: Sew THREE pairs of 2 1/2″ x 4 1/2″ units together to make SEVEN groups of six squares. Alternate light and dark so that seams match up better.

Make SEVEN. Finished units should measure 4 1/2″ x 6 1/2″

(please note: you will have a couple of 2 1/2″ x 4 1/2″ units leftover)

STEP EIGHT: Cut your background and binding. (WOF= width of fabric)


first cut: 1-5″ x 18″ subcut: 1- 5″ x 5″ square AND 4 units- 2 1/2″ x 4 1/2″

first cut: 1 strip- 4 1/2″ x WOF subcut: 4 units- 4 1/2″ x 6 1/2″

first cut: 2 strips- 1 1/2″ x WOF (sashing)

first cut: 3 strips- 2 1/2″ x WOF (join for binding)

Here’s what you should end up with:

STEP NINE: Select THREE charm squares from your pack and your ONE 5″ background square.
STEP TEN: Cut charms in half so you have EIGHT units that measure 2 1/2″ x 5″
STEP ELEVEN: Pair up units as shown below, combining prints and background.
STEP TWELVE: Sew units together along 5″ edge and press towards the dark.
STEP THIRTEEN: Cut units in half again so you have EIGHT units that measure 2 1/2″ x 4 1/2″
STEP FOURTEEN: Sew units together as shown below. Finished squares should measure 4 1/2″
STEP FIFTEEN: Layout the front of your runner as shown below. Sew long rows together first, pressing towards the prints. Next, sew pieced rows to sashing, pressing long rows away from the sashing.
STEP SIXTEEN: Layout back of runner with remaining 21 charm squares (3 x 7 set). Please note: you will have a couple of charms leftover. Recommendation: use scant 1/4″ seam allowance when sewing runner back together.
STEP SEVENTEEN: Layer with batting, quilt as desired, bind and enjoy!

One speedy Table Runner 14″ x 30″

Sunday Best Quilt

50″ x 50″

SUNDAY BEST

Hello! Back with another Moda Bake Shop project, and I hope you love it! Just in case you are getting a little scared by all of those triangles, don’t be…I’ve come up with the best fabric trick ever to make this quick and fun.

The words ‘Sunday Best’ brings back so many memories of growing up in my mother’s home. Sunday Best referred to how we dressed for church, how we behaved, the meal we ate, how we spoke, and how we treated one another. Extra care was given, a little more time was taken to prepare. Sundays were special, and this was reflected in all that we did. Sunday Best is the perfect name for this little quilt in my mind…beautiful, delicate fabric, lots of little triangles, and a little extra effort make this quilt something to treasure.

Please be sure and visit me at http://www.cherryhousequilts.com/

Cherri


3 Charm Packs of Moda Bella Solid – Brown *

3 Charm Packs of Fresh Cottons*

1/4 yard Moda Bella Solid Brown – BINDING

Cut (6) 2 1/4″ x width of fabric strips, join

1 yard Fresh Cottons Chantilly Cream Pinafore Skirt 20133-14 BORDER
Cut (5) 5″ x width of fabric strips, join

3 yards Fresh Cottons Chantilly Cream Medallion Fleur 20132-14 QUILT BACK
Divide the fabric evenly, join lengthwise, and press
58″ x 58″ batting

*For a larger quilt use Layer Cakes, cut into 5″ squares
Create 8 HST (half square triangles) from 2 Charm Squares: 1 Solid, and 1 Print

Use 1/4″ seam allowance throughout
The numbered instructions are listed from left to right:


1. Evenly layer 1 solid charm square, and 1 printed square (right side down)

2. Fold in half, press firmly on the fold for a solid crease

3. Open the folded square, refold in the opposite direction, press firmly on the left side fold, but do not press out the original crease.

4. Press again on the right side fold. The creases will become your sewing guide, so you don’t want to press it out.

5. Open the pressed unit, and pin the center to keep the fabric from shifting.

6. Sew on the diagonal, around the entire charm square unit on all four sides. Marking the lines isn’t necessary – but you can if you would feel more comfortable.

7. Once you have sewn around all four sides, lay unit on a cutting mat (a rotating mat is helpful if you have one), using your ruler, cut the unit into 4 even squares (2 1/2″ each)

8. Using a ruler and marking tool (thin pencil works well), draw a line 1/4″ from either side of the seam line, on all four units.

9. Sew a 1/4″ from the drawn line on all four units

10. Cut units apart on the drawn line


11. Open units, press…all these blocks from 2 5″ squares! 4 2 1/2″ HST, and 4 1 3/4″ HST


12. Set aside the 1 3/4″ HST (these are a bonus, not part of this quilt)

13. Make 100…this will yield 400 HST 2 1/2″ units 


14. Sew a row of four HST


15. Sew together four rows for a block

16. Arrange the blocks in a 5 x 5 grid

17. Sew by rows, join rows, press

18. Adding the border strips: Cut two strips to 41″ each, and two strips to 50″ each (in case of seam allowance variables, it is recommended that you measure the quilt top, before cutting the strips)

19. Add the 41″ border strips to the top, and bottom of the quilt top, press to the borders

20. Add the 50″ left & right side border strip to the l/r sides, press to the borders

21. Layer quilt top, batting, and backing. Quilting with a walking foot is a good solution with all of those seams


Bind and label
Enjoy!


    2 Charm Squares (one solid/one print) yield 4 2″ HST finished units, and 4 1 1/4″ HST finished units.

    1 Charm pack yields 168 2″ HST finished units

    1 Layer Cake yields 672 2″ HST finished units
    This quilt is made with 400 2″ HST finished units


    What to do with all of the 1 1/4″ HST units? Pinwheels…lots of pinwheels!

    BONUS PATTERN:

    Take four tiny HST, sew together to form a pinwheel, make two

    Place two pinwheels together, right sides facing

    Sew around the entire unit, leaving a small opening

    Carefully turn inside out, poke out the corners

    Fill with your favorite filling

    Stitch closed

    Add a small button to the center, stitching through the entire pincushion.

    I hope you enjoy this quilt, and this new HST trick! I haven’t tried it on a 10″ Layer Cake, but I’m certain the same method would apply to those as well.

    Cherri
    http://www.cherryhousequilts.com/

    Baby On The Go Diaper Bag

    Hello Moda Precut Lovers! It’s Bradie, from A Quilty Kind of Girl here to share my Baby on the Go Diaper Bag Tutorial. I have made this bag a couple of times now, and every Mommy who gets one just loves it! A single jelly roll will yield two bags!

    For this project you will need:

    One Jelly Roll of Hunky Dory by Chez Moi.
    One Charm Pack of Moda’s Hunky Dory.
    1 1/2 yards of coordinating fabric for inside of ONE bag.
    17 inch zipper.
    44 X 48 inch piece of batting.
    6 inch by 45 inch piece of batting.

    Separate the jelly strips into two piles of 20. Each pile of 20 will make one diaper bag.

    Layout your strips for the diaper bag in the order you like. Then sew the strips together, first in pairs, stitching from top to bottom. Then sew the remaining seams in the opposite direction, bottom to top. This will keep your piecing nice and straight. Your finished piece will measure 40.5 X 44 inches.

    Sandwich like a quilt top with batting and the bag lining fabric. Quilt however you like. Mine has wavy lines stitched along the seams. Quick and Easy! Trim away the extra batting and backing so your piece measures 40 X 44.

    Now you can cut the following size pieces from your diaper bag quilt sandwich:


    Main Body of Bag 33 X 16 inches
    Sides 2 Pieces 9 X 9 inches.
    Side Pockets 2 Pieces 9 X 9 inches.
    Front Pockets 2 pieces 6 X 6 inches.
    Handles 2 pieces 4 X 40 inches.

    The remaining pieces are extra and may be set aside for some other creative endeavor!

    Now to prepare the pockets. You need TWO (9 X 9) inch squares, and the TWO (6 X 6) inch squares. Fold 1/2 inch of the top edge over to the wrong side and press. Then fold another half inch and pin in place. Stitch in place to create a finished edge for the top of the pocket. Repeat for the other pockets.

    Use this diagram to make the following markings on the bag body. Use a marking method which will wipe away easily once project is complete.

    MAIN BODY OF BAG – MARKINGS:
    A – 12 INCHES FROM VERTICAL CENTER
    B – 4 INCHES FROM VERTICAL CENTER
    C – VERTICAL CENTER
    D – BOTTOM OF SMALL POCKETS – 5 INCHES FROM CENTER
    E – HORIZONTAL CENTER
    F – 8 INCHES FROM VERTICAL CENTER (mark both sides of bag)

    Mark the center of the two smaller pockets, and place the two pockets face down on the bag body, lining up the pocket center with the pocket marking line.

    Pin in place and stitch 1/4 away from raw edge. Stitch only the bottom of the pocket. Repeat for second pocket.

    Fold pocket up so right side is showing and pin in place. Baste the sides of the pocket to the bag body. We will stitch over these again when we attach the handles.

    Stitch the two handle strips together at both ends to form a long circular handle 80 inches long. Lay handle right side down on ironing board. Fold the two long edges in to meet in middle. Then fold the entire strap in half, pressing as you go to hold in place. Stitch down the long side with matching thread to hold handle together. Lay out the handle on the bag body. Center handle over the sides of the two pockets to cover the raw edge of the pocket. Pin handle in place.

    Stitch handle to bag body using same thread used for quilting. Stitch up to and along the 12 INCH marking line, then cross the strap and stitch down the other side of the strap. You do not want the handles stitched onto the top portion of the bag.

    A close up view of the handle and pocket after stitching.

    Oh! The charm pack! What are we going to do with these…

    Now to make a shoulder strap for your diaper bag! Choose nine squares….

    Sew them together in one long row. Place right side up on top of the 6 inch by 45 inch piece of batting. Stitch around the entire strap about 1/8 inch from the edge.

    Trim away all the excess batting.

    Fold strap in half the long way, with right sides of fabric facing each other. Stitch down the long side, leaving the short sides open. Turn strap right side out and press with seam to one side. Top stitch the strap with your matching thread, about 1/4 inch from edge, on both long sides of the strap.

    Now this is my favorite part… I know I’m getting soooo close to being DONE!! Mark the center of all four pocket sides. See picture….

    Place pocket, right sides facing, on the center marking line of the bag body. Line up the center pocket marking, with the center bag line and pin in place. Repeat with second pocket on opposite side of bag. Begin stitching (with a HALF INCH seam allowance) half an inch from edge of pocket, and finish stitching half an inch from pocket edge. This will give your bag nice square corners. 🙂 Repeat for pocket on other side of bag.

    This is how the bag will look, once pockets have been attached.

    Now we will stitch the side of the pocket to the side of the bag. Fold the pocket over top of the bag to line up the pocket center marking with the EIGHT INCH marking line on the bag. Pin in place. Again you begin stitching half an inch from pocket edge, and finish stitching half an inch from pocket edge. Repeat for second pocket.

    Look! You’re getting closer!!

    Now fold the pocket over to line up the other side of the pocket. Pin in place and stitch the same way as you did the other two sides.

    Another peek…

    Now… let’s attach the shoulder strap, k? Mark the center of the short side of strap and pin to the center of the pocket TOP. Make sure your strap is NOT twisted, (Don’t ask…) and pin to the other side of bag as well.

    Baste the strap to the bag. We will reinforce these stitches when we finish this edge of the bag.

    NOw to attach the zipper… keep the bag inside out. Pin the zipper, right sides facing to the raw edge of the bag top. Stitch 1/4 inch from zipper edge.

    Pin other side of zipper to other side of bag top. Stitch in place.

    Turn the bag right side out, and top stitch along the edge of zipper with your matching thread. Stitch about 1/8 inch from the edge.

    Now, believe it or not!!! it’s time to finish those last two edges of the bag! Pin the opening in place and stitch closed. It is wise to stitch with the zipper side up to anticipate the metal fixtures on the zipper (Again, don’t ask….)
    It is a good idea to go back along the inner seams of the bag and finish them either with seam binding, or even a simple zig zag stitch in the seam allowance. This will improve the durability of your bag and it will hold up better if laundering is required. 🙂

    One ridiculously cute diaper bag to carry baby’s every need! Bag is large finishing at 16 X 8 X 8 inches. Shoulder strap has a 17 inch drop.

    Bradie Sparrow
     A Quilty Kind of Girl

    Blueberry Chocolate Squares

    Hello again, my friends!

    I am so happy to be back at Moda Bake Shop and presenting you with Blueberry Chocolate Squares! Mmmm…everyone loves chocolate, right? 🙂

    This quilt is really simple and it goes together so fast. I actually pieced AND quilted it in 3 days!!(Results may vary. I’ve always wanted to say that…lol)

    Once you’re finished here, I’d love for you to come visit me over at Freckled Whimsy! More dorkiness guaranteed. 😀

    Also, Leah over at Burgundy Buttons is kitting this up, just for you and at a reduced price!!! Click HERE to snag one up before they are gone!  She also has the backing on sale HERE! Thanks Leah!!!

    Isn’t it cute?! 🙂

    Enjoy…Blueberry Chocolate Squares….

    • 1 Pure Layer cake 
    • 1/2 yard for 1″ border (I used 5431-12)
    • 1 1/4 yards for 4″ border (I used 5438-18)
    • 1/2 yard for binding (I used 5436 16)
    • 4 yards for backing (I used 5430-21)

    Note: All seams are sewn with a 1/4″ seam allowance. 

    From  your layer cake, choose 36 squares. The more contrasting they are, the better.

    For each of the 36 pieces, follow these cutting steps.

    1.  Cut a 5 7/8″ strip from layer cake piece

    2. Turn that SAME piece 90 degrees and cut it at 5 7/8″. You should now have a 5 7/8″ square.

    3. As you cut each piece, put them in 3 separate piles.  You may want to keep lights and darks separate.

    You should have 36 each of:

    • 5 7/8″ squares
    • 4 1/8″ x 5 7/8″ rectangles
    • 4 1/8″ x 10″ rectangles

    Note: You *can* cut all pieces of the layer cake this way. (Most will have 40-42 pieces). Doing this will give you some of each fabric and more variety. You will just have extra pieces when you are done. 🙂

    Once you have all of these cut, you can start piecing your quarter blocks.

    Begin by taking the 5 7/8″ squares and pairing them up. Choose contrasting colors. You need 18 pairs. (Remember if you cut all your layer cake pieces, you may have extras here. Just put those in your scrap bin.)

    Taking your first pair, on one side of one of the squares, draw a line from corner to corner on the WRONG side.

    Place this piece RIGHT sides together with the contrasting square and sew 1/4″ on either side of that drawn line.

    Now, cut on that drawn line, yielding two half square triangles (HST). Press to the darker fabric.

    You should now have 36 half square triangles.

    Each HST will be paired up with the other rectangles you cut from the layer cake. One in each size in the SAME print.

    Choose a HST and the border print. Contrast is good here too.

    Take the smaller rectangle and sew it to the top of the HST. Make sure the edges are lined up on the LEFT side. Sew across the top edge. You will have some overhang on the right. This is ok. Just leave it for now. 🙂

    Press toward the piece you just sewed on. 

    Make sure you mix up the positioning of your HST. Example: In the photo below, the light color fabric is in the upper right corner. Change this up using some lights, some mediums, and some darks, in each of your blocks.

    Next you will sew on the larger rectangle. Line up the LEFT and BOTTOM edges. Again, you will have hangover, this time at the top.

    Press to the rectangle.

    This is what your block should look like.

    Next up is trimming.

    First, trim the overhang on the right side, lining up your ruler with the edge of the HST. Cut.

    Rotate the block 90 degrees CLOCKWISE. (See photos)

    Line up the LEFT and BOTTOM edge of the block with the 8 1/2″ marks on your ruler.

    Trim the right side and top.

    Your quarter block should now measure 8 1/2″ square. 

    Repeat until you have 36 of these quarter blocks.

    Note: To make this go faster, stack up your HST and chosen rectangles, one on top of each other, still in 3 piles,  until you have all 36 stacked. Then you can chain piece, starting by sewing on all the smaller rectangles to the HST, press, then adding the larger rectangles, press.

    Time to arrange your blocks.

    Choose 4 of your quarter blocks. Arrange them so the HST are in the center.

    Sew the top two blocks together, pressing to one side.
    Sew the bottom two blocks together, pressing to the opposite side as the top. 

    Sew the top and bottom together.

    Repeat this process until you have 9 blocks that measure 16 1/2″ (unfinished).

    Arrange in a pleasing order and sew the blocks as a 3 x 3 grid.

    From the first border fabric cut 1 1/2″ strips and sew in place.
    From the second border fabric, cut 4 1/2″ strips and sew in place.

    Now you are ready to sandwich your quilt, baste, quilt, and bind. 🙂


    This quilt will measure about 58″ x 58″.  Isn’t it cute? 😀

    I hope you have enjoyed this tutorial! If you make this quilt, please oh please share it with me? You can email a photo of it to me HERE or you can add it to my Flickr Group HERE.  I would love to feature them on my blog! 🙂

    Much Love and Happy Quilting!!

    Karrie Lyne
    {http://www.freckledwhimsy.com}

    Clermont Farms Shower Curtain + Bonus!

    A decorative shower curtain that’s simple to construct using a Layer Cake and Jelly Roll. This curtain adds color to your bath and shows off your quilting talents in a whole new way.

    1 Clermont Farms Layer Cake by Minick & Simpson
    1 Clermont Farms Jelly Roll
    4 1/2 yards Clermont Farms solid cream fabric or backing of your choice

    Front

    Step 1: Arrange all 42 10″ x 10″ Layer Cake samples as pictured below. (I photographed small cuttings so you can see a clearer picture of my rotation). You can create any layout you’d like. It’s a simple matter of arranging them in a manner that appeals to your design sensibility. Note: All of the samples are being used uncut from the Layer Cake.

    Step 2: Mark each row in a naming convention that works best for you. I like to use small sticky notes marked with the row number and the direction in which the blocks should be sewn together. Typically, I start from the left side, and collect each block going across to the end of the row. Therefore, the bottom sample in my stack is the last block in the row. When I’m ready to sew I can simply layout each row and I’m ready to begin. Another trick I use is to take a quick picture of the whole layout. It’s a fast and effective means of double-checking.

    Step 3: First sew each of the 6 rows across.

    Step 4: Now connect each of the rows together to complete the layout. Remember to insure the connecting joint points are meeting up snuggly. You can feel if they’re in place by rubbing your finger along the two joints. They’ll fit together like a glove when matched up. Pop a pin into each joint so they won’t slip while sewing across the row. If you feel a lump, it’s most likely going to create a problem when the two seams are sewn together. The key to an eye catching set of blocks is having the points meeting up perfectly. It’s just a matter of taking your time.

    Step 5: For the bottom and final row, l created a design element to add interest. Using the Clermont Farms Jelly Roll, select the first 5 patterns represented in each row vertically starting from the top. Pictured below are the patterns for the first block.

    Step 6: Sew the 5 patterns together to create a block.

    Step 7: The 5 patterns will yield a block a bit larger then 10″ x 10″. Simply trim the block on both the left and right sides by approximately 1/4″.

    Step 8: Sew the final row together, but turn every other block horizontally to create the decorative effect.


    Step 9: Sew the the row to the bottom of the curtain.

    Side Borders

    Step 1: Measure the sides of your curtain. My measurement was 66 1/2″.

    Step 2: From the Jelly Roll, select 12 patterns to be used for the side borders. I decided to use a blue combination on the outer border column, and a beige combination on the inside border column.

    Pictured below are my selections.

    Step 3: Each column will have 3 patterns sewn together vertically to make the column. Determine the rotation of the patterns and cut each 23″ x 2 1/2″ (the width of the Jelly Roll).

    Step 4: Sew the 3 patterns together to create 4 vertical border strips.

    Step 5: Sew the coordinating left and right panels together (meeting the joints at each intersection).

    Step 6: Sew the completed border to each side of your shower curtain.

    The left border completed and sewn to the shower curtain.


    Top and Bottom Borders

    Step 1: Select another 12 patterns from the Jelly Roll for the top and bottom borders. Again I decided to use a blue combination on the outer border column and this time chose a red combination on the inside border

    Pictured below are my selections.

    Step 2: Follow Steps 3 through 6 from the Side Border directions.

    The bottom border completed and sewn to the shower curtain.


    Quilting

    Step 1: Measure your shower curtain top both by length and width.

    Step 2: Determine the fabric you’d like to use as the backing. I used Clermont Farms in the solid cream. Measure out the length of your quilt and add approximately 3 inches to both the top and bottom. Use your new total measurement and layout the backing fabric. There are many ways to make a backing. In this project, I chose to sew selvage to selvage. After opening up my sewed fabric, my width is clearly achieved. Since I’m going to quilt the project, the seam line will not be noticeable. Additionally, this side of the curtain will be facing the plastic shower lining so no worries at all!

    Step 3: I want my curtain to have flow, and also have ease of movement. I did as little quilting as possible. The more you quilt the firmer the piece becomes as a whole. I chose a simple diamond pattern that intersects every other block. I also added a free motion pattern around all 4 borders to add an accent.

    Step 4: I used the random leftover strips from my Jelly Roll to create a classic binding.


    Buttonholes

    Step 1: Measure across the top of the shower curtain.
    Note: After quilting and binding, the measurement will change a bit.

    Step 2: Divide the amount of shower rings by the total width of your curtain. Mine measured 72″. I allowed for 3 inches on each side and spaced out the rings in 6″ intervals. I used household clothes pins to mark the buttonhole position.

    Step 3: Practice some test buttonholes on a “sandwich” in a similar weight as your curtain. I used some leftover fabric and a piece of my batting. It’s important to play around with buttonhole sizes. I used my current shower curtain as a guide.

    Step 4: I used a buttonhole length of 3/4″. I selected the setting for a buttonhole normally used for heavier material. If you have your manual, it’s a good idea to check out the buttonhole options you have available on your machine.

    Step 5: After you sew the buttonholes be extra careful when opening up the seam. You don’t want to cut outside the sewn seams.

    Wash and dry your shower curtain as you would a quilt. Hang it up and give yourself a pat on the back for a job well done.

    Congratulations!

    Bonus: Matching Guest Hand Towel

    Step 1: Purchase a hand towel of your choice. I used a simple white towel. The Clermont Farms fabrics will add both color and interest to the border.

    Step 2: Select 11 patterns from the Jelly Roll and cut them 2″ x 2″.

    Step 3: Sew them across horizontally.

    Step 4: Press a seam 3/8″ on the reverse side of all 4 sides of the row.

    Step 5: Align and measure your newly sewn row in relationship to the width of your towel. Trim accordingly.

    Step 6: Pin the row to the border of the hand towel and sew a 1/4″ seam around the row. Sewing at 1/4″ will give the edge a nice lip to add a decorative touch.

    Presto! You have a hand towel ready for your guests.

    1 shower curtain. Measures 72″ x 72″. Machine washable.
    1 decorative guest hand towel.

    Glenn Dragone
    http://yarnneedle.blogspot.com

    Vintage Dreams Quilt


    Hi there!  I’m Amy from Amy’s Creative Side, where I’m gearing up for the next installment of Blogger’s Quilt Festival.  Stop over and learn what it’s all about. I’m excited to share my quilt project here with you today (it’s my first MBS tutorial!!).  These soft prints from Urban Chiks inspired me to look through vintage quilting books and design this quilt, with a nod to our rich quilting heritage.  I hope you give it a try, and share your pictures!

    Dream On  Layer Cake
    5/8 yard Grass 31064-24 for center squares
    2 yards Blue Moon 31065-14 for triangles
    2 yards Crush 31063-21 for inner border
    2 3/4 yards Pink Passion 31061-11 for outer border
    3/4 yard Grass 31062-13 for binding
    6 yards Moonlight Blue 31067-16 for backing


    To make 30 blocks, select 30 layers from your Layer Cake, and cut 4 – 4 3/4″ squares from each.  I chose the layers with the most contrast to the yardage that I added.

    Cut 30 – 4 3/4″ squares from the green floral

    Cut 60 – 4″ squares, then cut on the diagonal once.

    Cut 30 – 7 1/4″ squares, then cut on the diagonal twice.

    Lay out pieces in block formation.

    Working on the diagonal, using 1/4″ seams, sew the 3 squares together in the center, and the quarter-triangles on both sides of the individual square.

    Next, add the half-triangle to the corners.

    Trim the center piece, pin and sew the sides in place.

    Trim and square each block to 12 1/2″ – using my 12 1/2″ ruler, I lined up my center points at 6 1/4″ to ensure square blocks.

    Lay out your blocks 5 across and 6 down.  Sew the blocks into rows, and the rows into a complete quilt top.

    Cut borders from the length of fabric, at 3 1/2″ for the inner, and 6 1/2″ for the outer border.  Measure through the center of the quilt top for the best fitting borders.  Add the borders to the sides, then top and bottom.

    Quilt, bind and enjoy your new quilt!

    1 – 78″x 90″ Vintage Dream Quilt

    What do you think?  Any Vintage Dreams in your future?  I hope so!
    Happy Quilting!
    Amy