![]()
Hi, my name is Michelle and I enjoy all kinds of Quilty Stuff. That’s the name of my blog and I hope you will join me at www.QuiltyStuff.com for all sorts of things related to quilting.
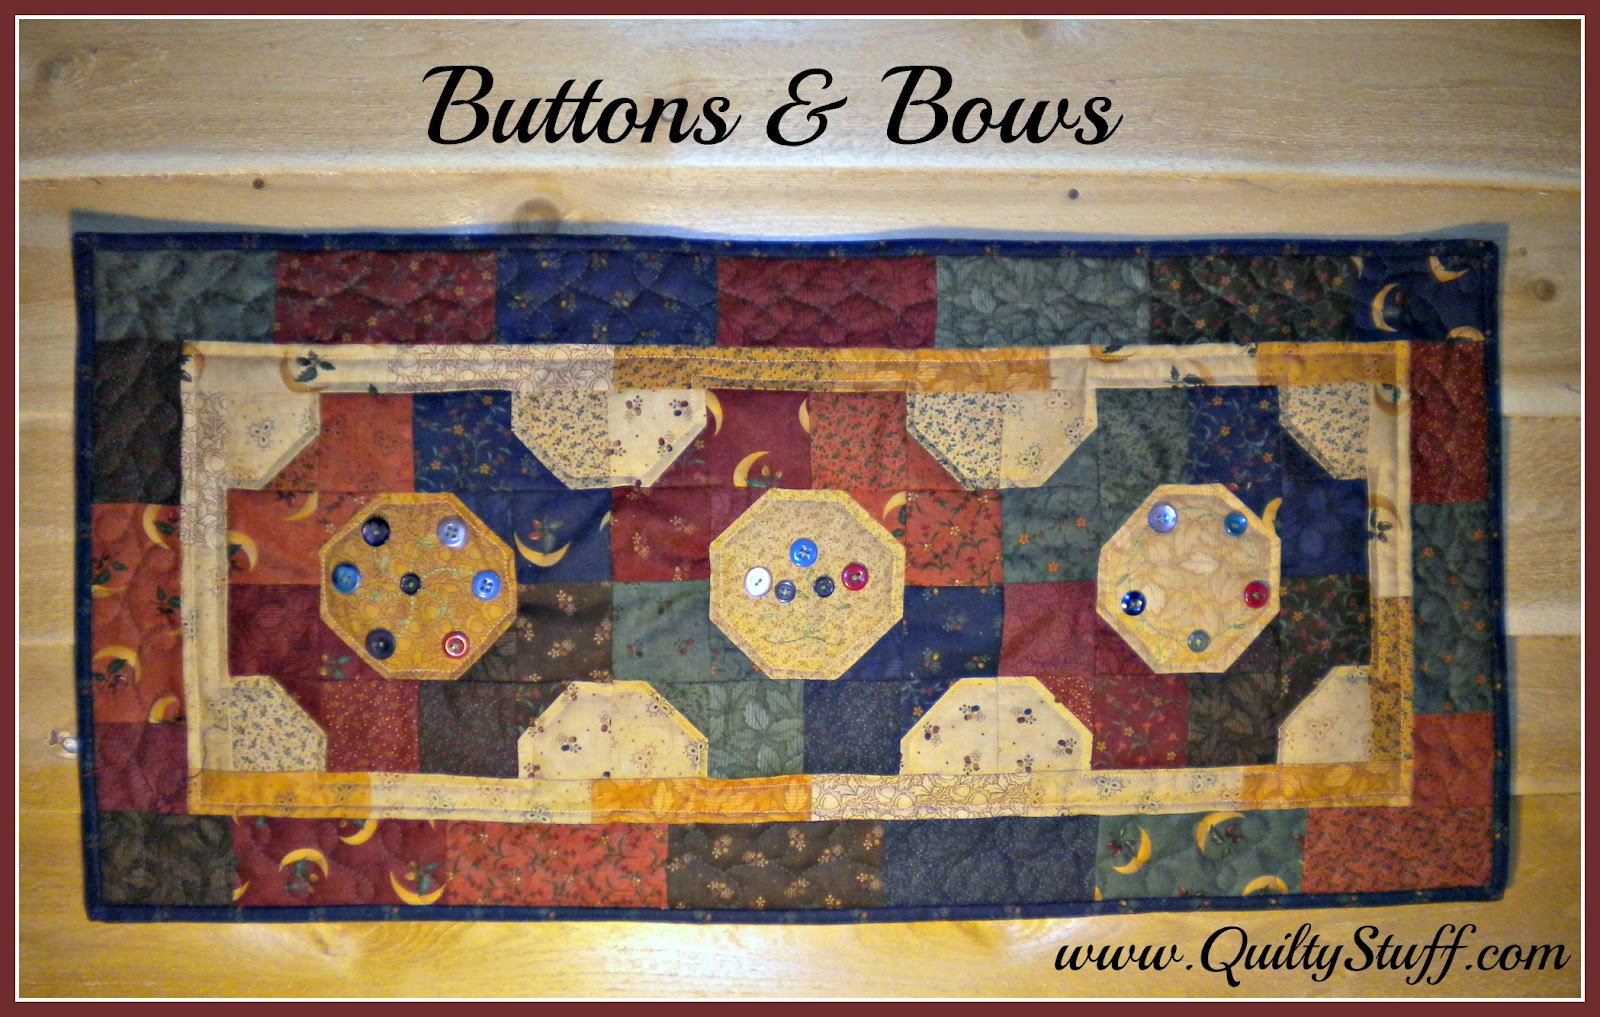
I especially enjoy embellishing quilted projects like this small runner or wall hanging I call “Buttons and Bows”.

1 Moda Charm Pack (I used Harvest Moon by Kansas Troubles.)
3/4 yd fabric for backing and binding (Pattern 9372)
18″ x 36″ piece of batting


Green Embroidery Thread
15-20 assorted 1/2″ buttons
Something round to trace around (a cover to a canning jar works great or a glass drinking cup.)
Erasable marking pen


Getting Started:
Divide your charm pack into 2 piles, one for lights, one for darks.
Choose:
- 12 light charms
- 24 dark charms (Try to have even numbers for your colors. For instance 4 blues, 6 reds, 8 greens, etc. This will make block construction easier later.)
Cutting:
From the 11 light charms:
- 3 – For Block Centers
- Cut down to 4 ½” x 4 ½” squares
- 3 – For Block Corners
- Cut each square into 4 2 ½” x 2 ½” squares (Total 12 squares)
- 6 – For Borders
- Cut each square into 3 1 ½” x 5” rectangles (Total 18 rectangles)

From the 24 dark charms
- From each square cut
- 1 2 ½” x 5″ rectangle (reserve for outer border)
- 1 2 ½” x 2 ½” square
- 1 1 ¾” x 1 ¾” square

Planning:


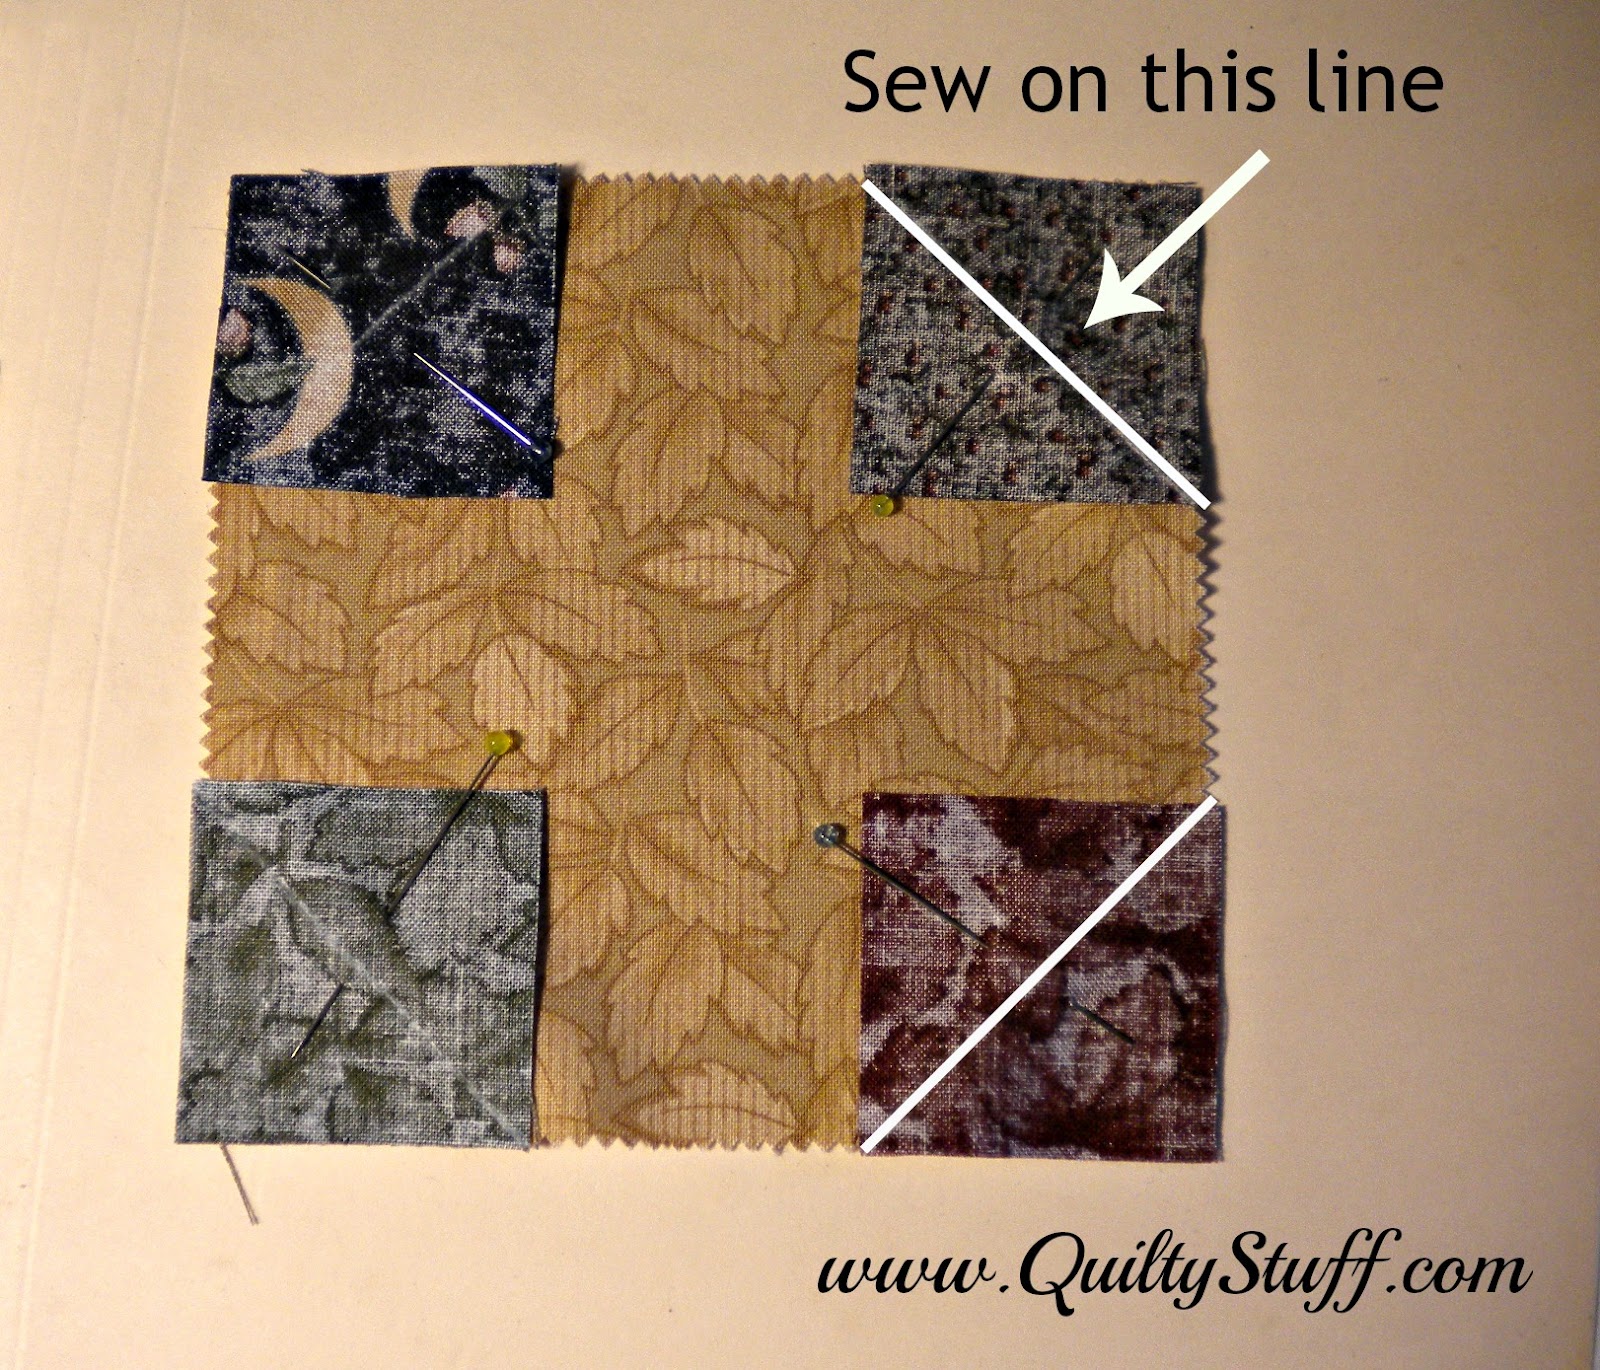
Piecing: The real fun begins!
Sew directly on the line.
Press the corner back and cut away the excess fabric if you wish.
Make a total of 3 centers.
Make your corners.
The corners of the block are constructed the same as above.

Piece the rest of the block as pictured below.


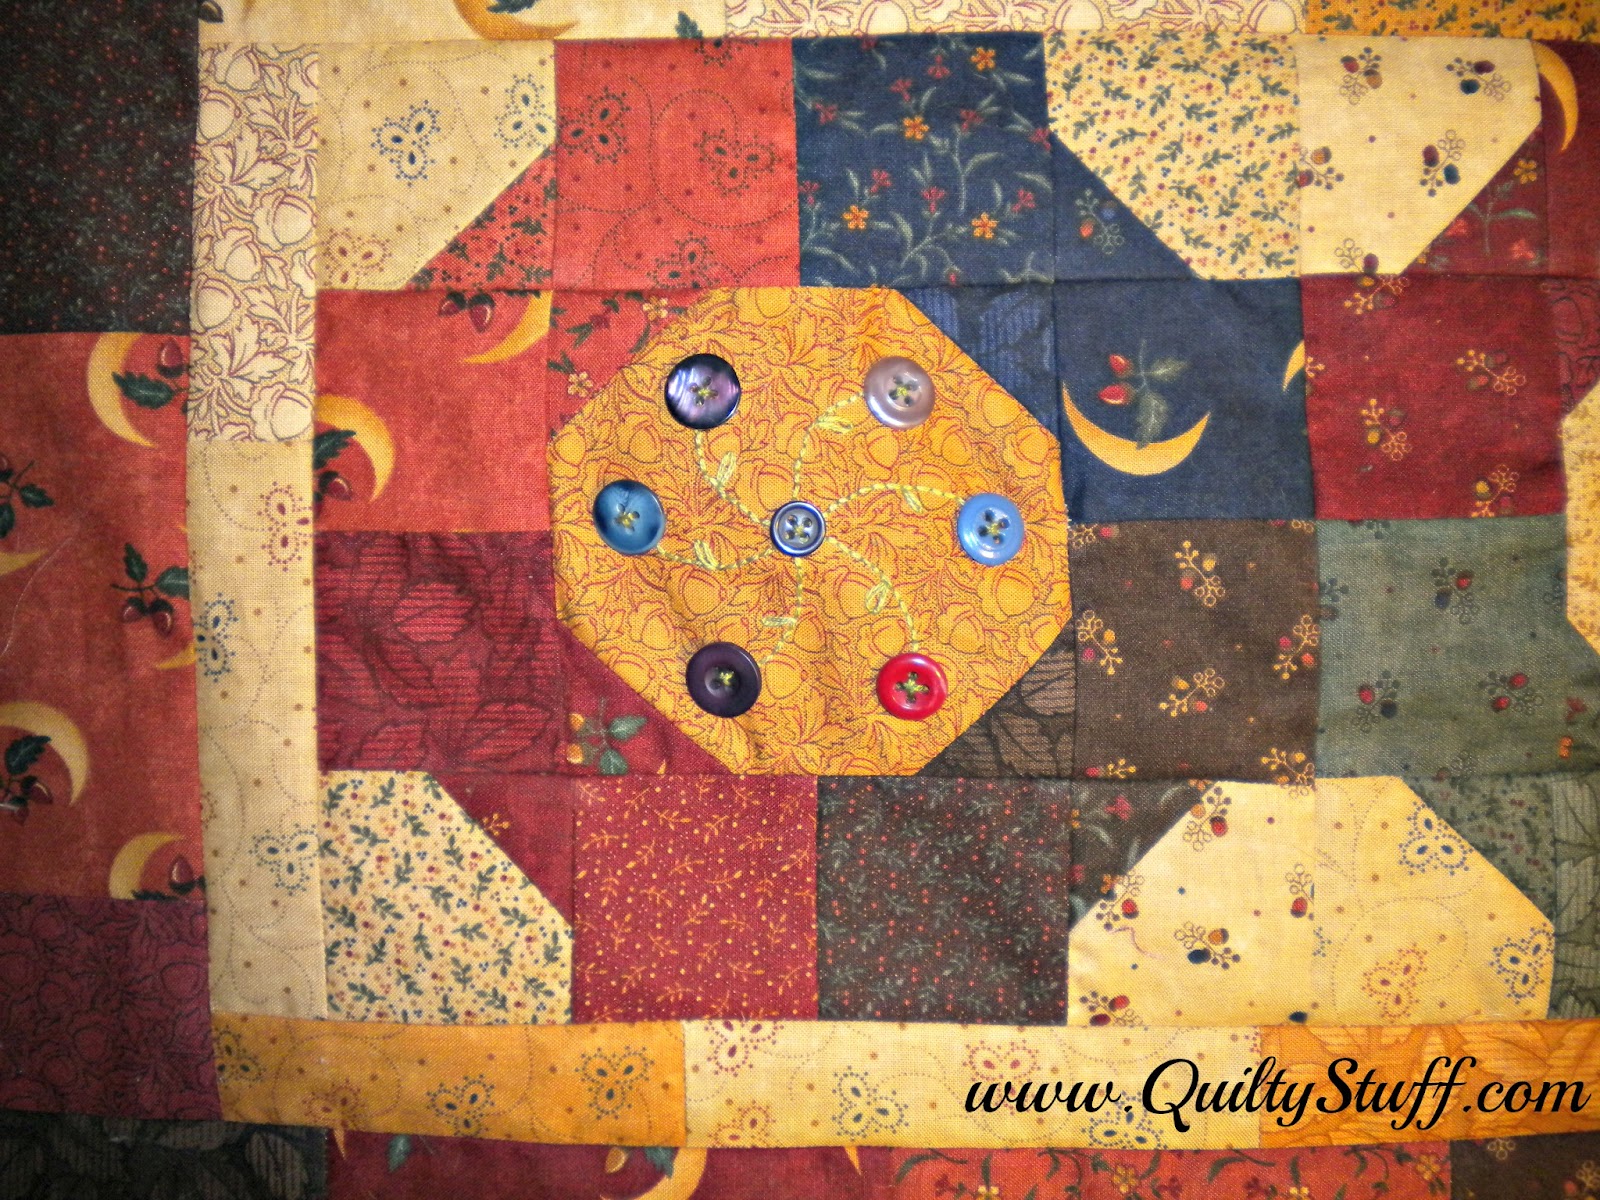
Embellishments:
This part is completely optional. The runner looks great without it, but it looks even better with it, in my humble opinion.
Trace around your canning lid or drinking glass to make a circle guide. Scatter the buttons around and stitch stems and leaves in a random way. They can radiated from the center or circle or look like they are growing out of the ground. Let your creative side take over here.
If you don’t know how to stitch the stems you can go here for a short tutorial.


Piece all 3 blocks together. Just like in the pictures above because I forgot to take pictures before sewing them together.
Borders:
Inner border
Repeat with the outer border using

Bind and enjoy your little masterpiece.

One table runner or wall hanging 14″ x 30″.

Thank you for letting me share my little project with you. I hope you have as much fun making it as I did. I’d love to see it if you make one. Stop by at www.QuiltyStuff.com and say “HI!”.
Have a Quilty Day!!!
Michelle Sargent
{www.QuiltyStuff.com}
![]()
