Hi, y’all! This is Marion from MyQuiltDiet.blogspot.com. I am so excited to share this fun project with you here at the Moda Bakeshop! I just started quilting a little bit ago, but I have been making bags for years. They are one of my favorite projects to make 🙂 …especially ones with zippers some where in them ;D
This tote is the perfect must-have bag for every need. Haul around your hand sewing or maybe groceries. Lug some books home from the library or clothes for an overnight. This is particular bag is the first of two that I will share with you here at the Moda Bake Shop. This one is more medium sized and made from jelly roll strips. Watch for the second tutorial in a few weeks. The Honeycomb Haul-It-All is larger and made with a honeycomb pre-cut.
One of the beauties of this project is that one jelly roll will make several bag exteriors 😉 PARTY! Break out a new jelly roll and create a few scrappy delights or use up left over jelly roll scraps you’ve got laying around in your stash. So much fun to be had!

1 jelly roll for the tote exterior & straps
18″ x 28″ coordinating fabric for tote interior
11.5″ x 18″ coordinating fabric for interior zipper pocket
12″ x 20″ coordinating fabric for large interior pocket
10″ zipper
3/4 yard heavy weigh fusible interfacing 45″ wide ( I use Pellon 809)
22″ x 32″ piece of batting

Start out with your favorite jelly roll 🙂 This sweet pile of GORGEOUS is American Jane’s Potluck.
I prefer to start by sorting my colors into piles 🙂
To begin the chop chop, line up one edge of a jelly roll strip with a grid line on your cutting mat.
Using Jaybird’s Hexy ‘n More ruler, line up the 4-1/2″ Triangle line on the ruler with the bottom edge of the jelly roll strip. (You will note that the 1-1/2″ triangle line on the ruler will match up with a mat line to help you know you are doing it right 😉
***You may use any 60 degree triangle ruler or line on your ruler. The wide bottom base is 5.5″ and the narrow top of the half hexy is 2.5″***
Cut a total of 84 “half hexy” pieces. Two from each strip.
[Four of your remaining strips will be used for the straps]
***OCD Side Note- After all of my pieces are cut, I prefer to separate my like prints into two piles of 42 each. I work from one pile first and then the second to ensure better distribution of the prints in my project. …I then sort my two piles by color for more OCD fun 😉 Someday I will get brave and toss them all into a bag and go for true randomness. If you try the random bag method, leave me a comment and let me know how it went 🙂 ***
Now it’s time to line up your first few pieces as seen below.
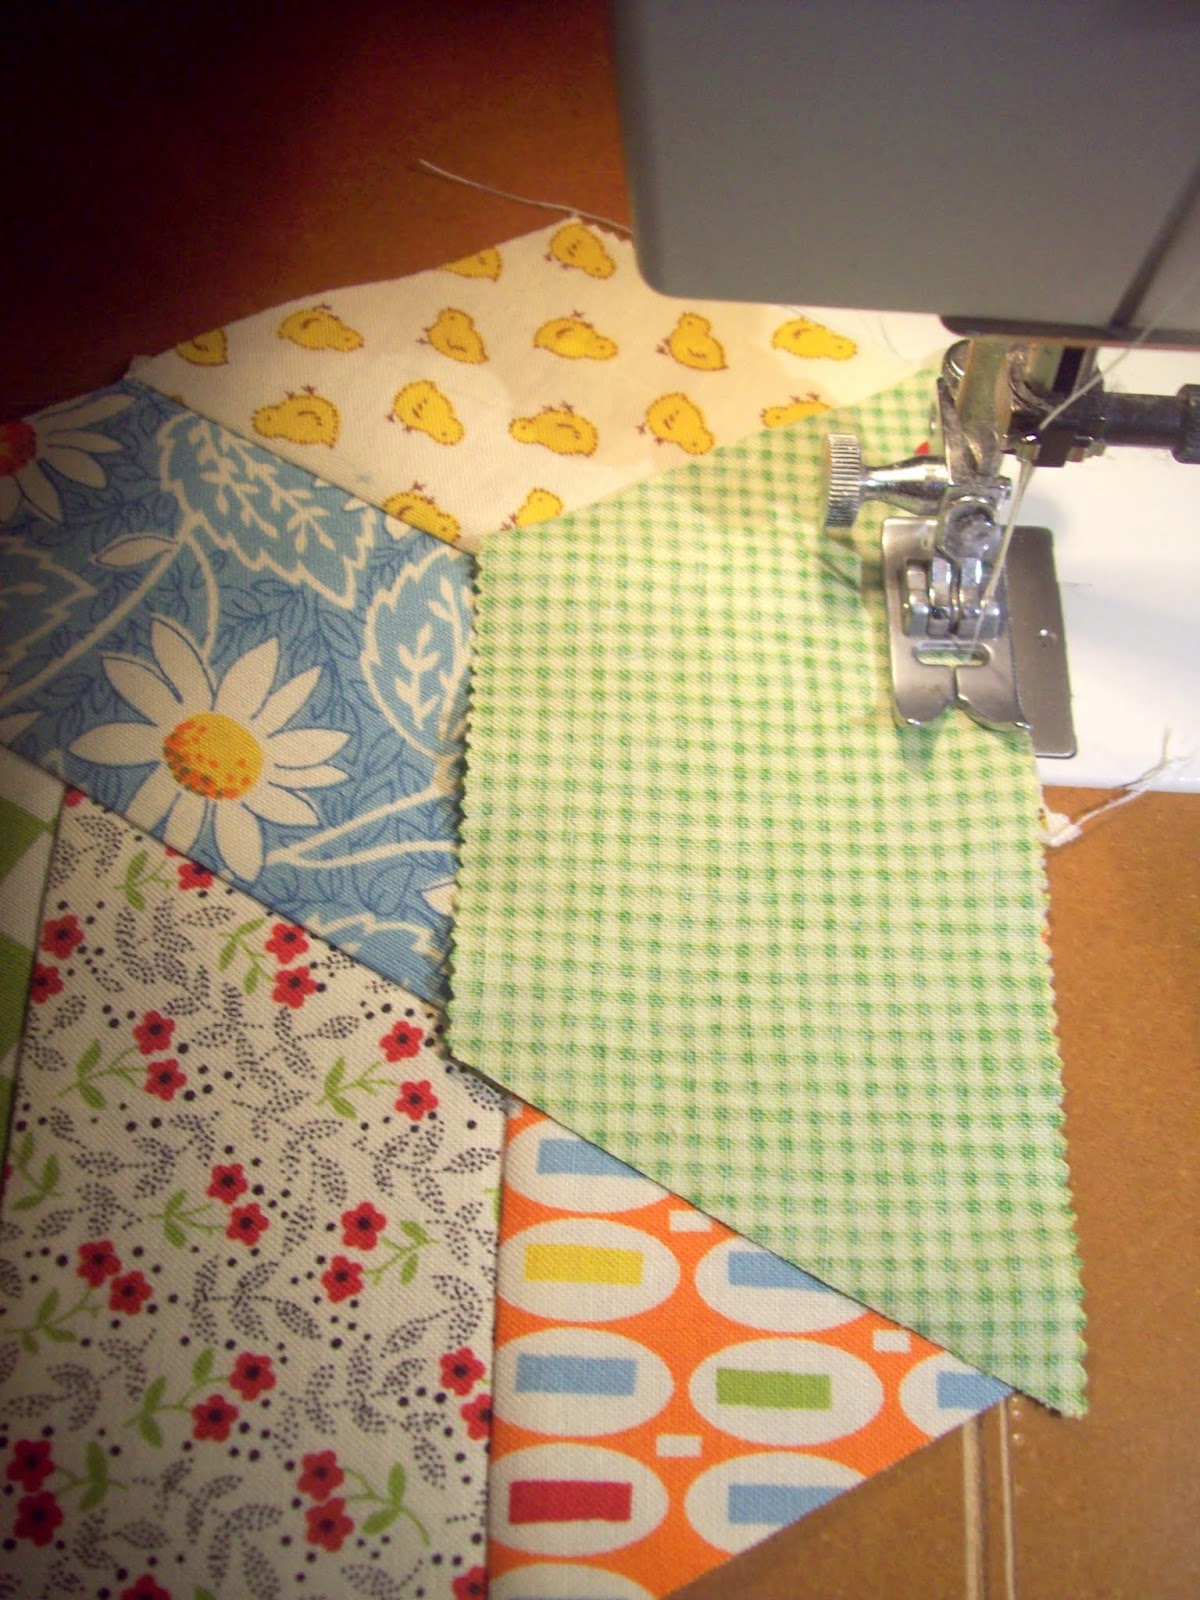
Are you ready to sew yet? We are going to start with this first seam… the one I am pointing too 🙂
Lay the small red flower print over the top of the green check, like so. Make sure there is a 1/4″ over lap as seen below…see how the red floral print corner is hanging over the green check on the top-left of center edge?
Then sew it up 🙂
You will just need to sew to the edge of the green check.
Press, and put back into your layout.
Take the next half hexy (the blue daisy here) and lay over the previously sewn piece.
Center it. The bottom corner/points will poke over by about a 1/4 inch. You want the new piece to poke over evenly on each side.
Sew & press 🙂 Isn’t it looking fun?
Repeat!
Oh NO!!! I hate it when my thread does that!

Just keep sewing….
…and sewing…
Pretty soon, you will have them ALL sewn together into a beautiful long herringbone 🙂
Now for those pesky ends…
Line them up and chop them off! ….”OFF WITH THEIR HEADS”….or tails as it may be ;D
Ta- Da!
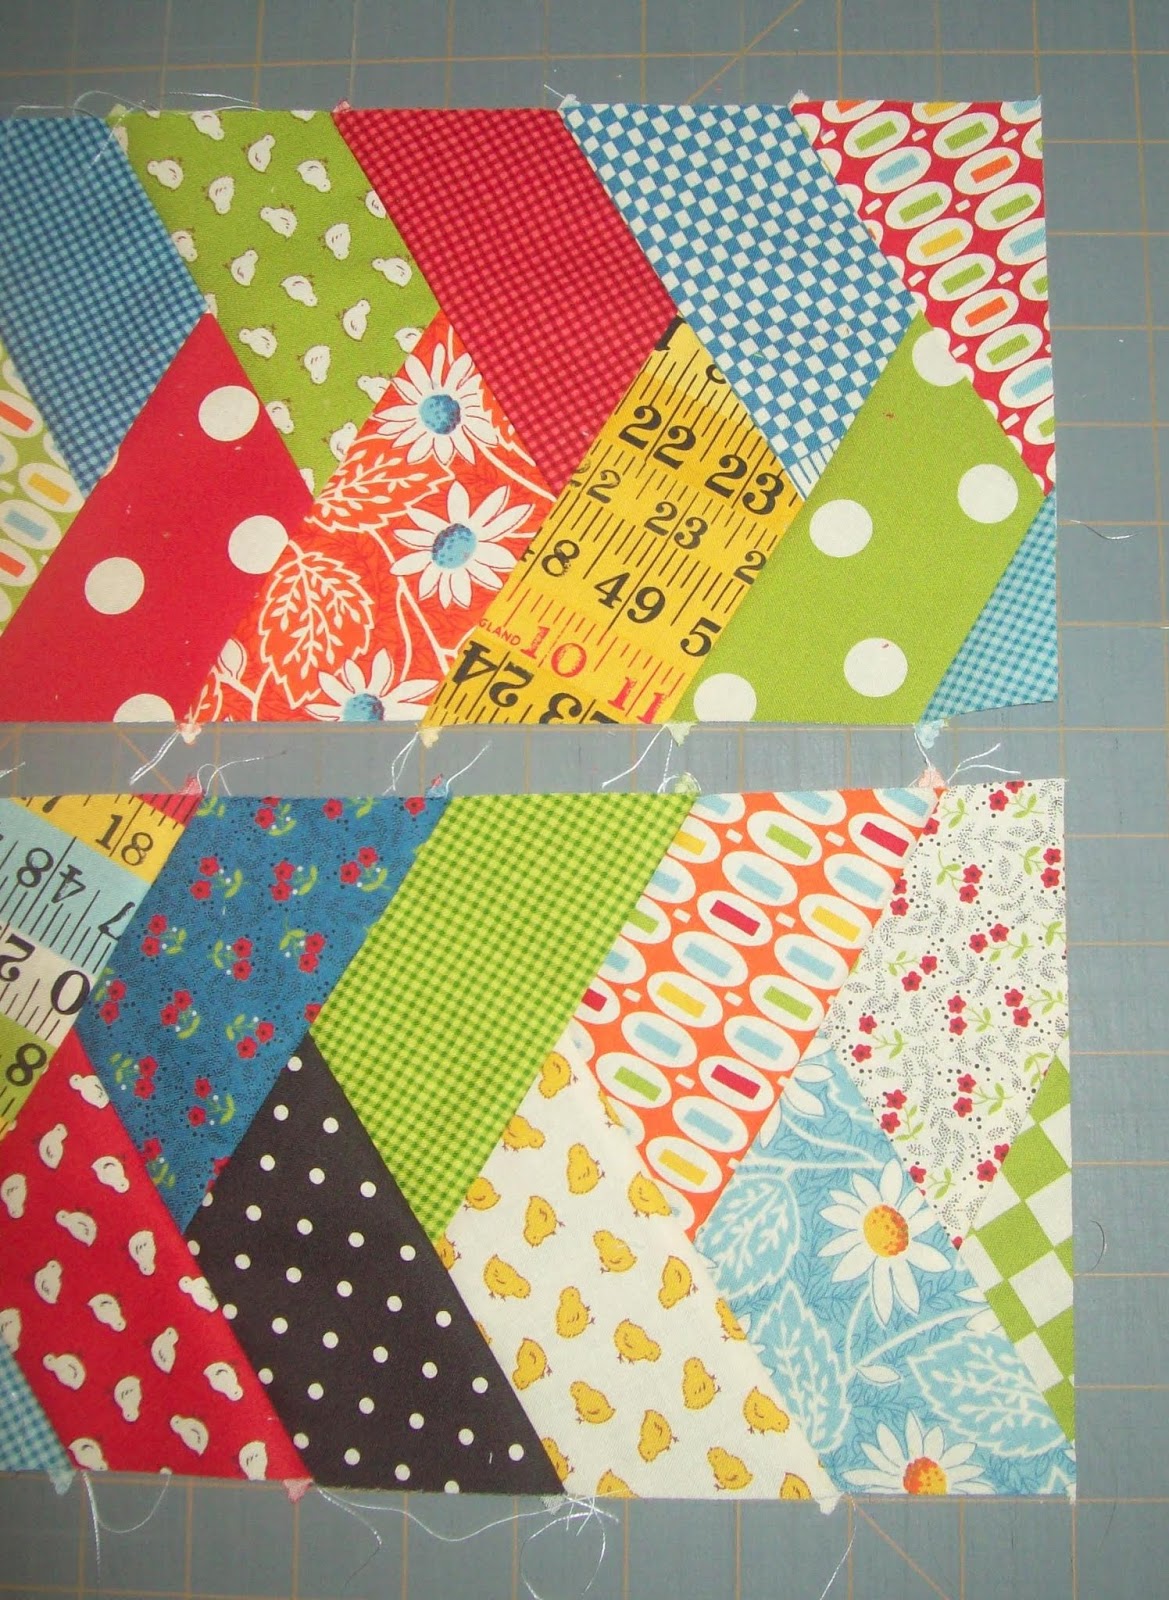
Now for the sort of tricky, but not too bad part 🙂 Take your LONG herringbone and fold it into even thirds, like below, except that you kinda cant tell that it is folded in thirds 🙂
…but it is, see?
…and from the other side.
Get the thirds as equal as possible and bravely cut 🙂
Lay them side by side to see how they look next to each other. You may need to rearrange them a bit to get it right 🙂 Don’t worry too much about it, it will be GREAT!
Ready to sew your rows? (I recommend pinning for this process. The edges of the rows are a bit biased and will stretch a titch.)
Sew the rows, then press.
Now, you have a choice to make, do you want your bag quilted or not? If you want it quilted, here is your chance. I decided to quilt mine. I spray basted my pieced panel to some batting and straight line quilted it.
I quilted it only with the top panel and batting, no backing, using a walking foot for the “straight” lines. (I am a very “organic” straight line quilter… that means my lines are NOT very straight and even 🙂
….but I like them 🙂
****If you would prefer not to quilt it, you will need to use a heavy fusible interfacing on the back of your panel. When I use fusible interfacing on pieced fabric, I cut my interfacing larger than the panel, fuse it to the panel and then square the panel. (You will need a 1/2 yard more pellon)
Are you ready for the interior?
Fuse the interfacing to the back of the interior lining fabric.
At this point you need to make sure that your interior lining fabric and your exterior quilted piece are the same size. Trim as needed to make sure they are the same size.
Lay your interior lining piece, right side up on your work surface.
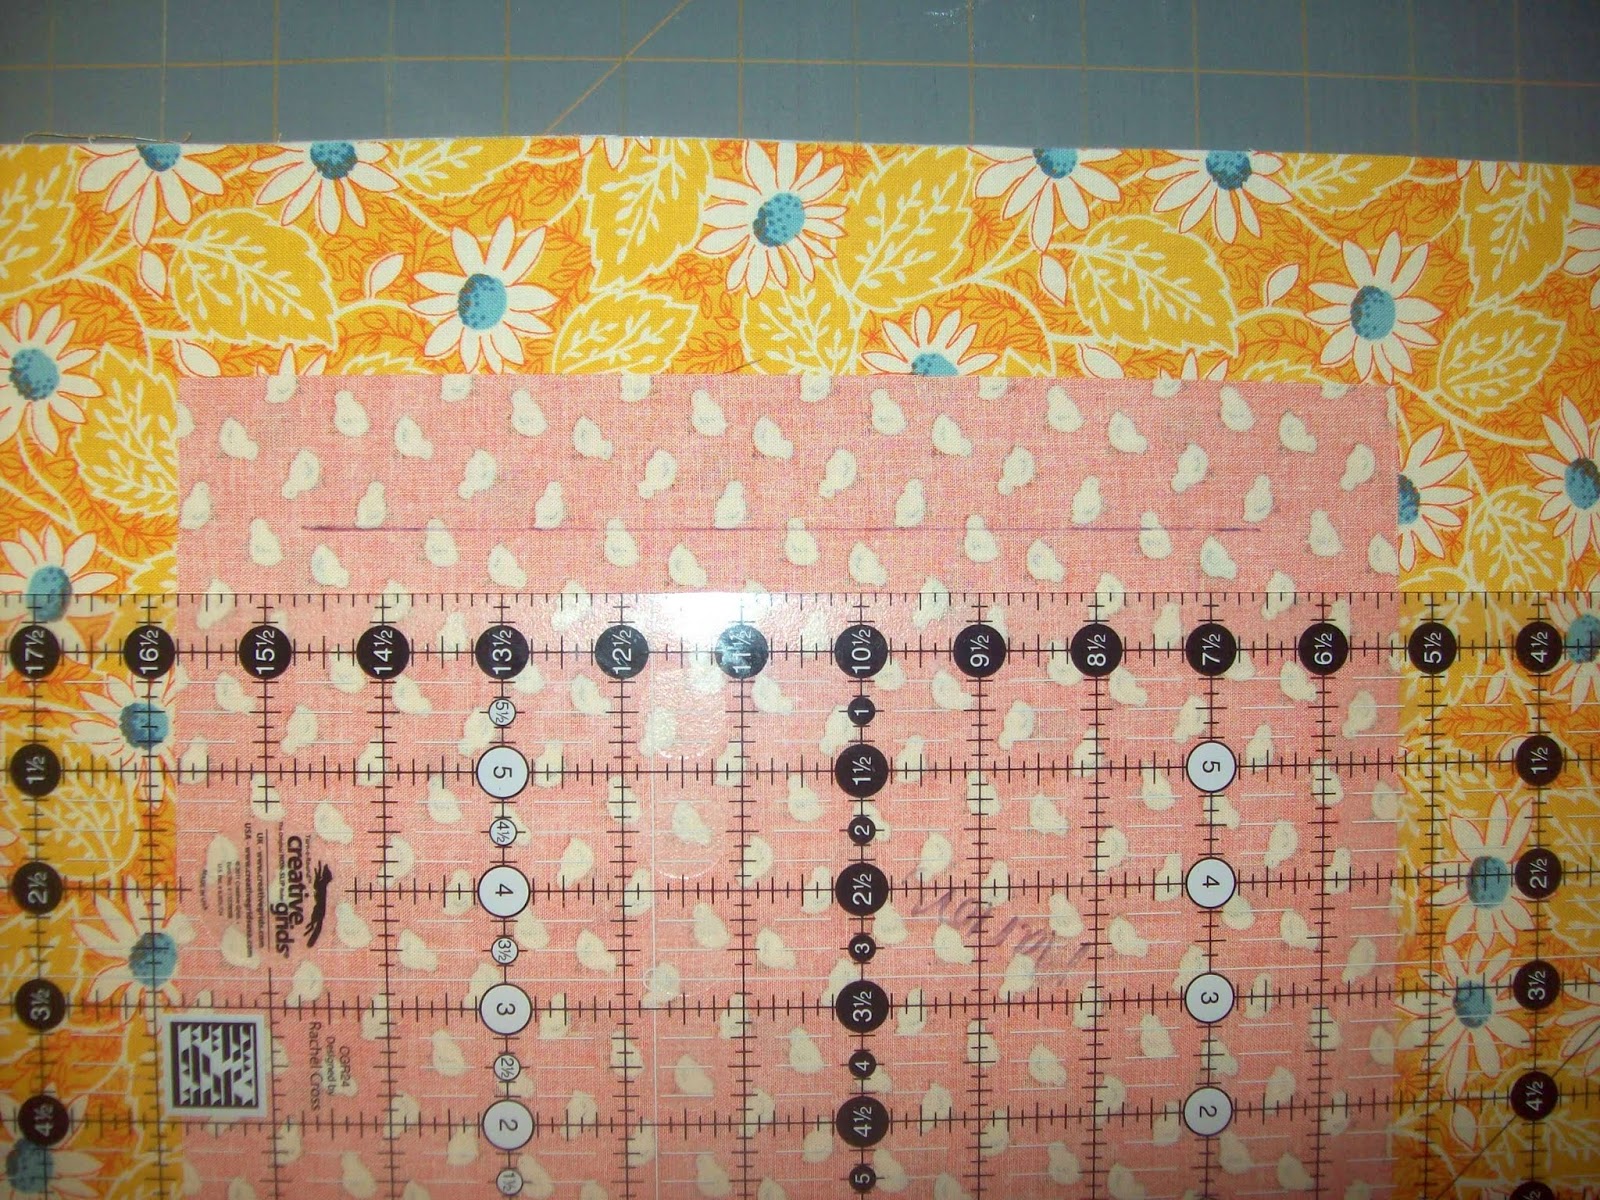
Take your fabric for the zippered pocket and lay it right sides together on your interior lining fabric as shown. Place the pocket fabric about 2″ below the top edge.
Next you will need to draw a 1/2″ wide rectangle on the pocket fabric.
It should be about an inch to an inch and a half away from the top and sides of the pocket fabric edge as shown below.
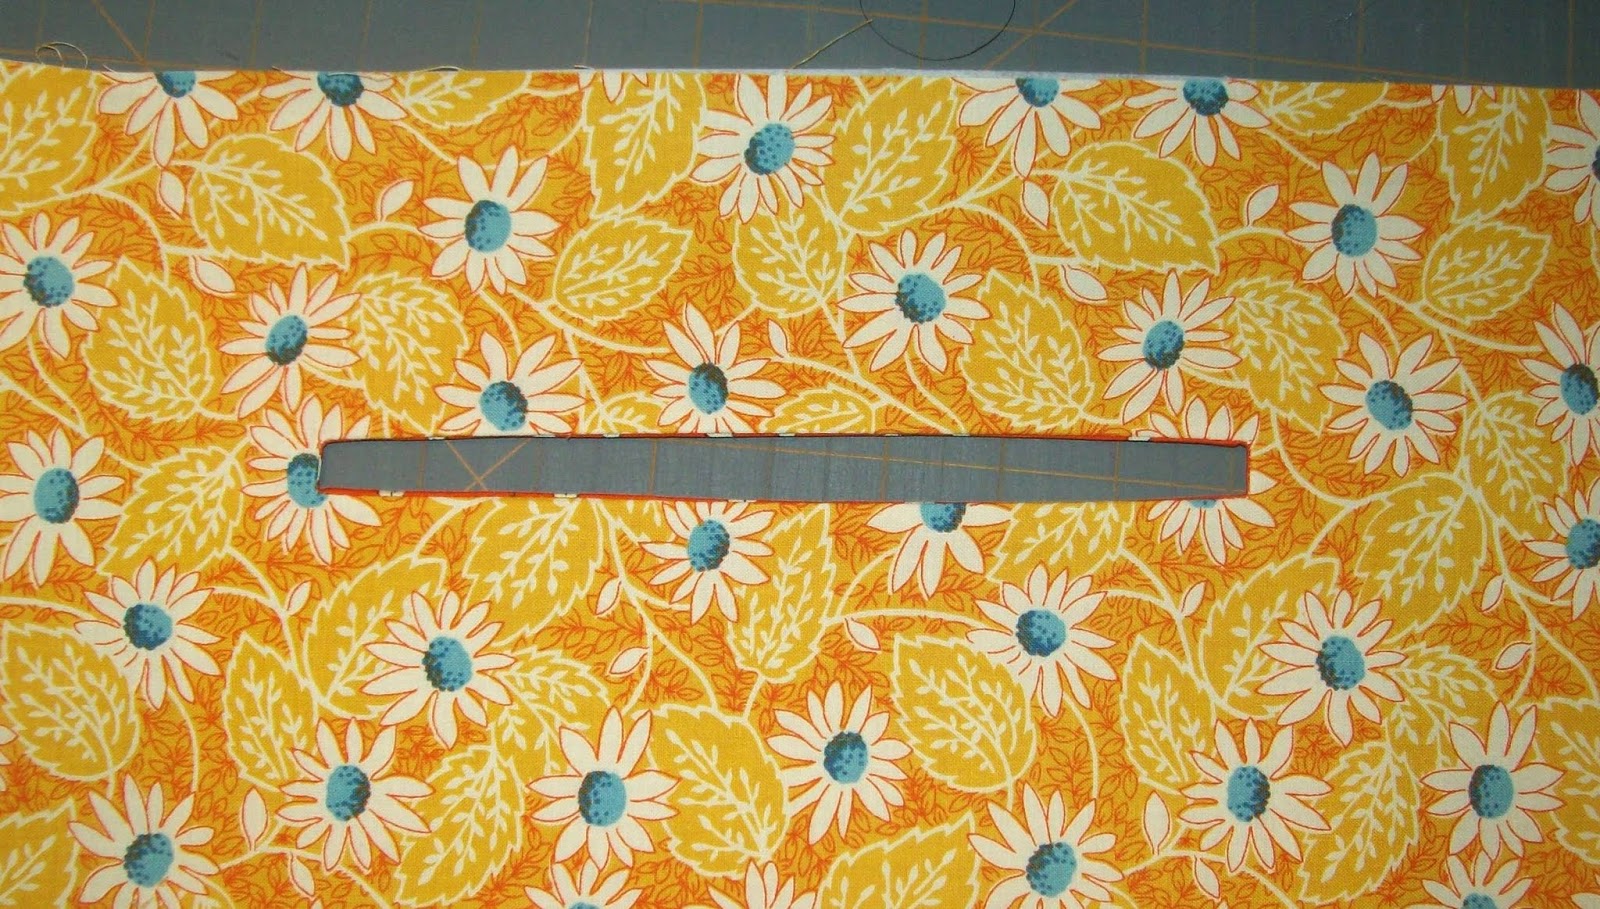
Pin and sew on the drawn skinny rectangle.
Now for a bit of snip snip.
Please cut carefully, with sharp scissor,s down the center of the long rectangle, through both layers of fabric, stopping a 1/2″ before the end.
At the end, you will want to cut a “v” shaped cut up to, but not through, the corner stitching of the rectangle.
Now, shove your pocket fabric through the new cut opening to the back side of the interior lining fabric.
Get it all though 🙂
…and press 🙂
At this point, you may have to “make” the pocket lining behave.
Tug and press and don’t burn your fingers! 🙂
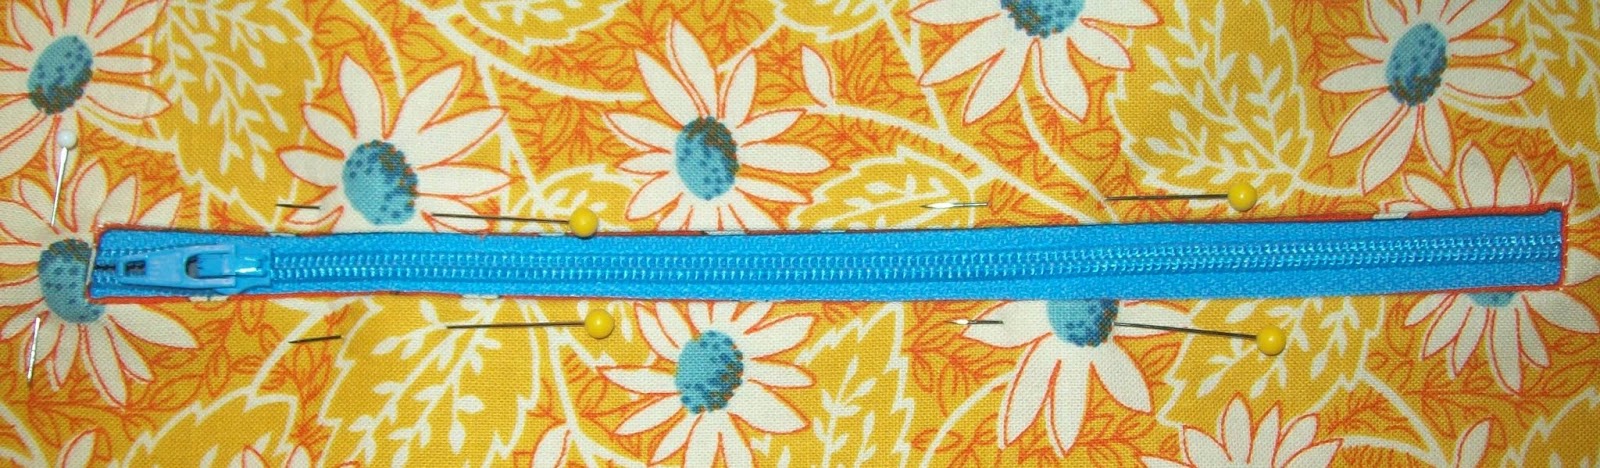
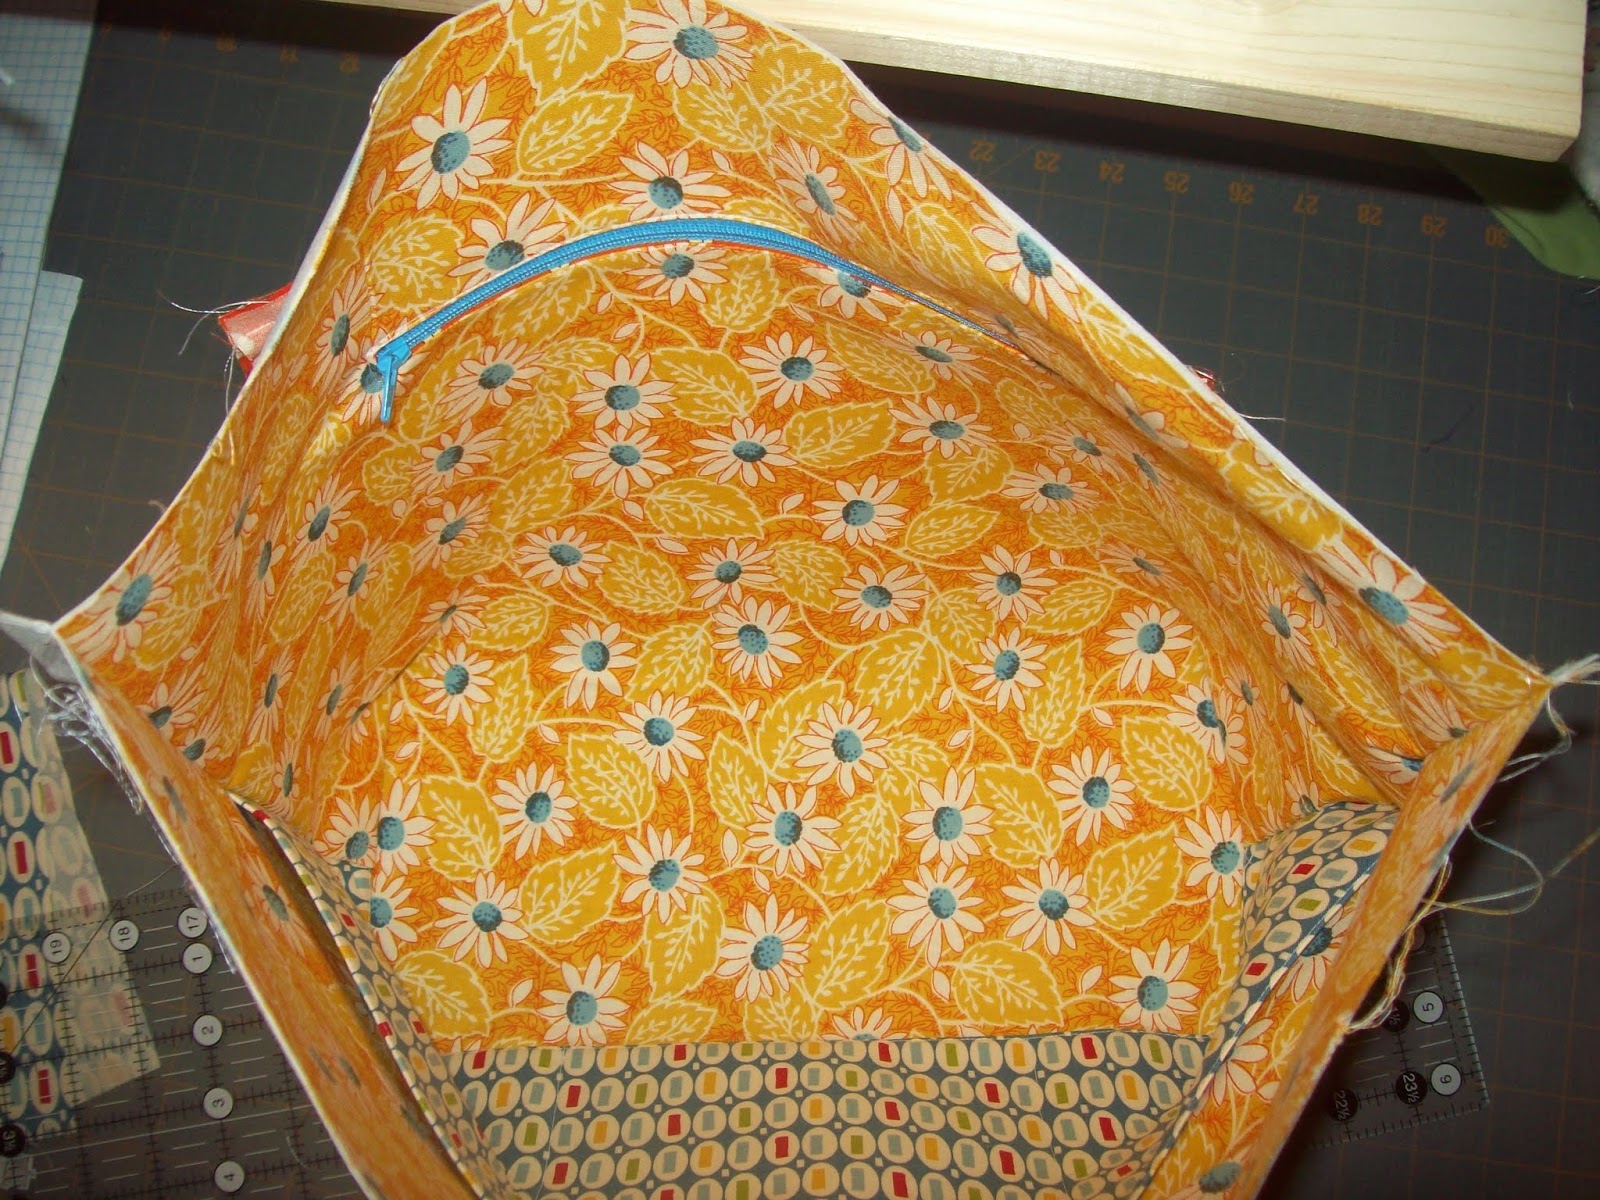
Take your zipper and lay it behind your interior lining so you can see it.
Carefully pin the zipper into place. This can take a bit of patience, as the zipper sometimes likes to wiggle ;D
Carefully top stitch around the edge of the opening to attach the zipper.
Yippee! It’s in!
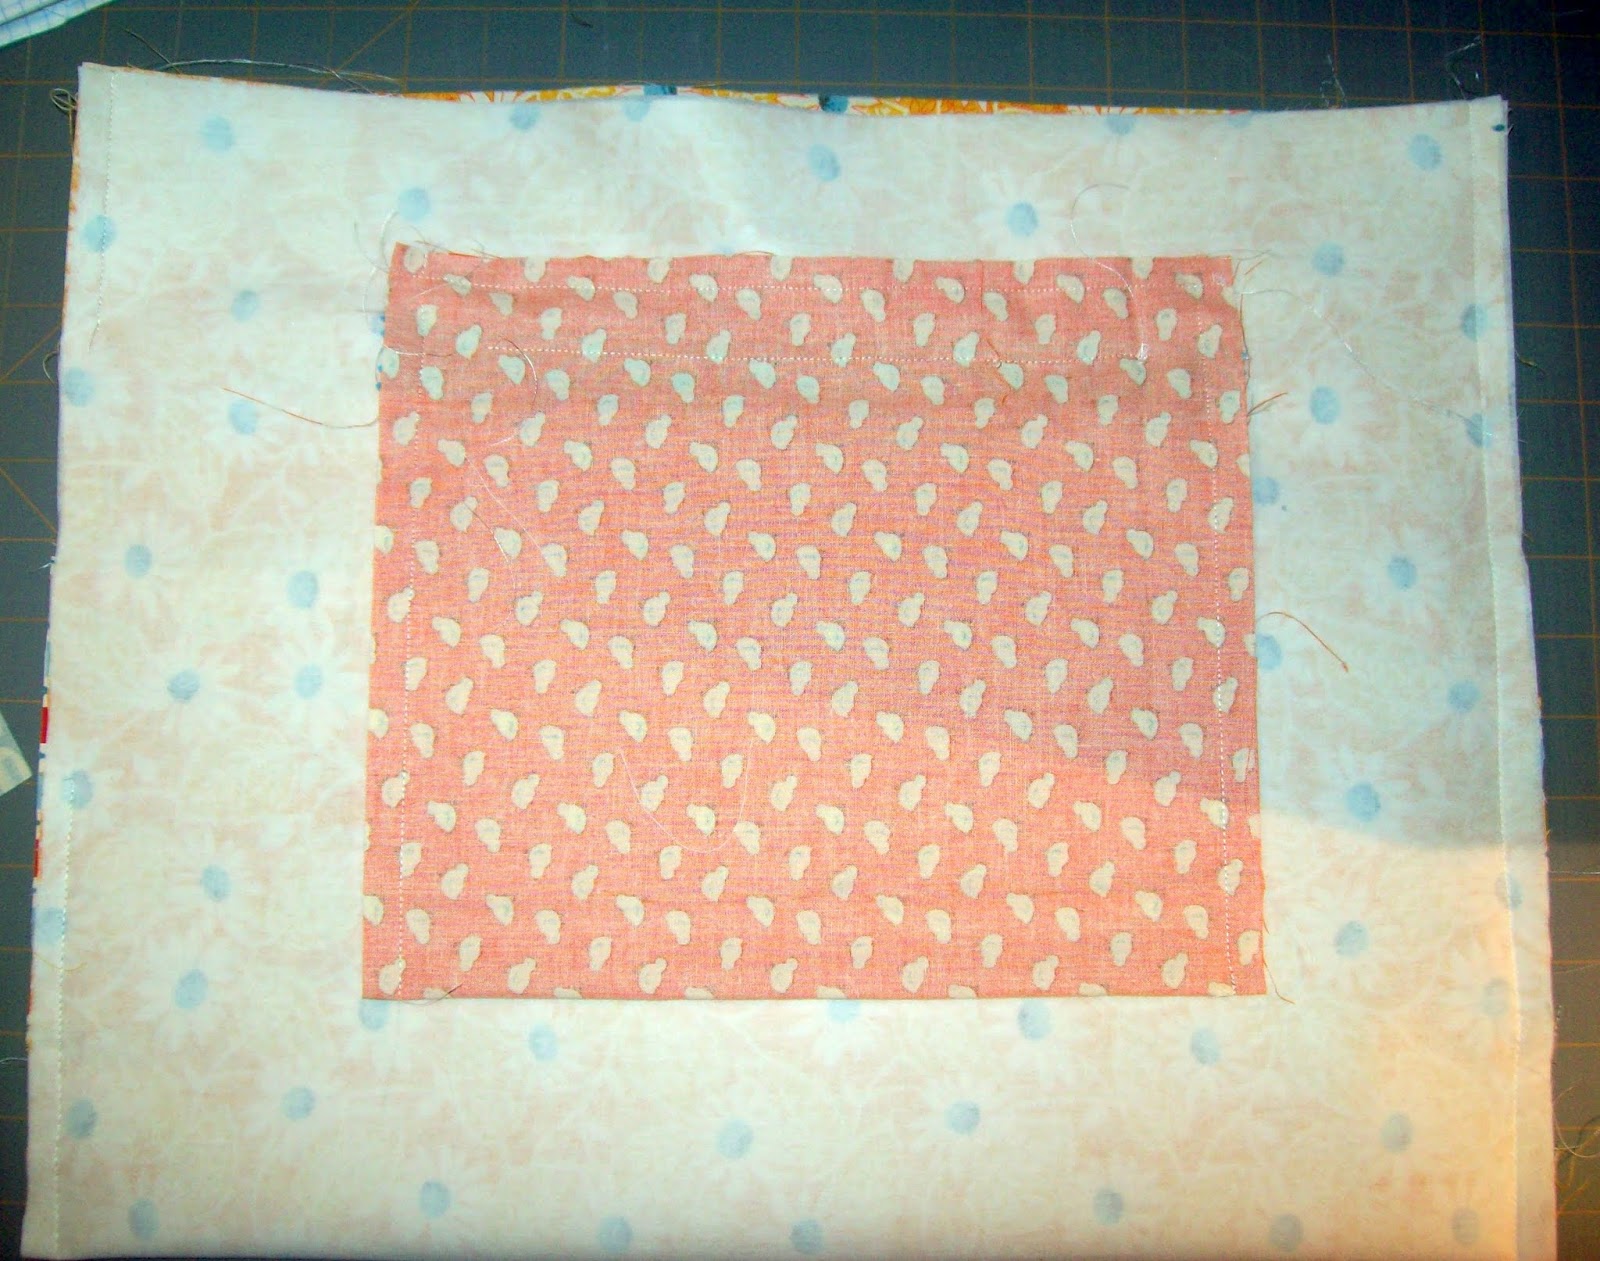
A view from the back side.
Now to sew up the zipper pocket. Fold up the zippered pocket fabric so the bottom meets up with the top.
Another shot.
Pin only the pocket fabric together. Do not pin the pocket fabric to the bag’s interior lining fabric.
Fold back the interior lining fabric to expose the zippered pocket fabric.
Sew shut using a 1/4″ seam allowance.
Repeat for the other two sides of the zippered pocket. (The bottom of the zippered pocket is a fold, so it won’t need to be sewn 🙂 BONUS!!!)
Once your zippered pocket is all sewn shut, sew right along the top, top stitch seam above the zipper.
This keeps the pocket from sagging inside the bag lining.
Can I get a WHOOP WHOOP??? You just made a zippered pocket!!!
Now for the long, interior pocket. Fuse the fusible interfacing to the backside of the long interior pocket.
Fold in half and press well.
Put right sides together and sew the bottom seam.
Flip right side out and press well, especially that thick bottom seam 🙂
Take your interior lining fabric (yellow daisy’s) fold in half and press a crease in the bottom fold (you can see it in the picture below on the left).
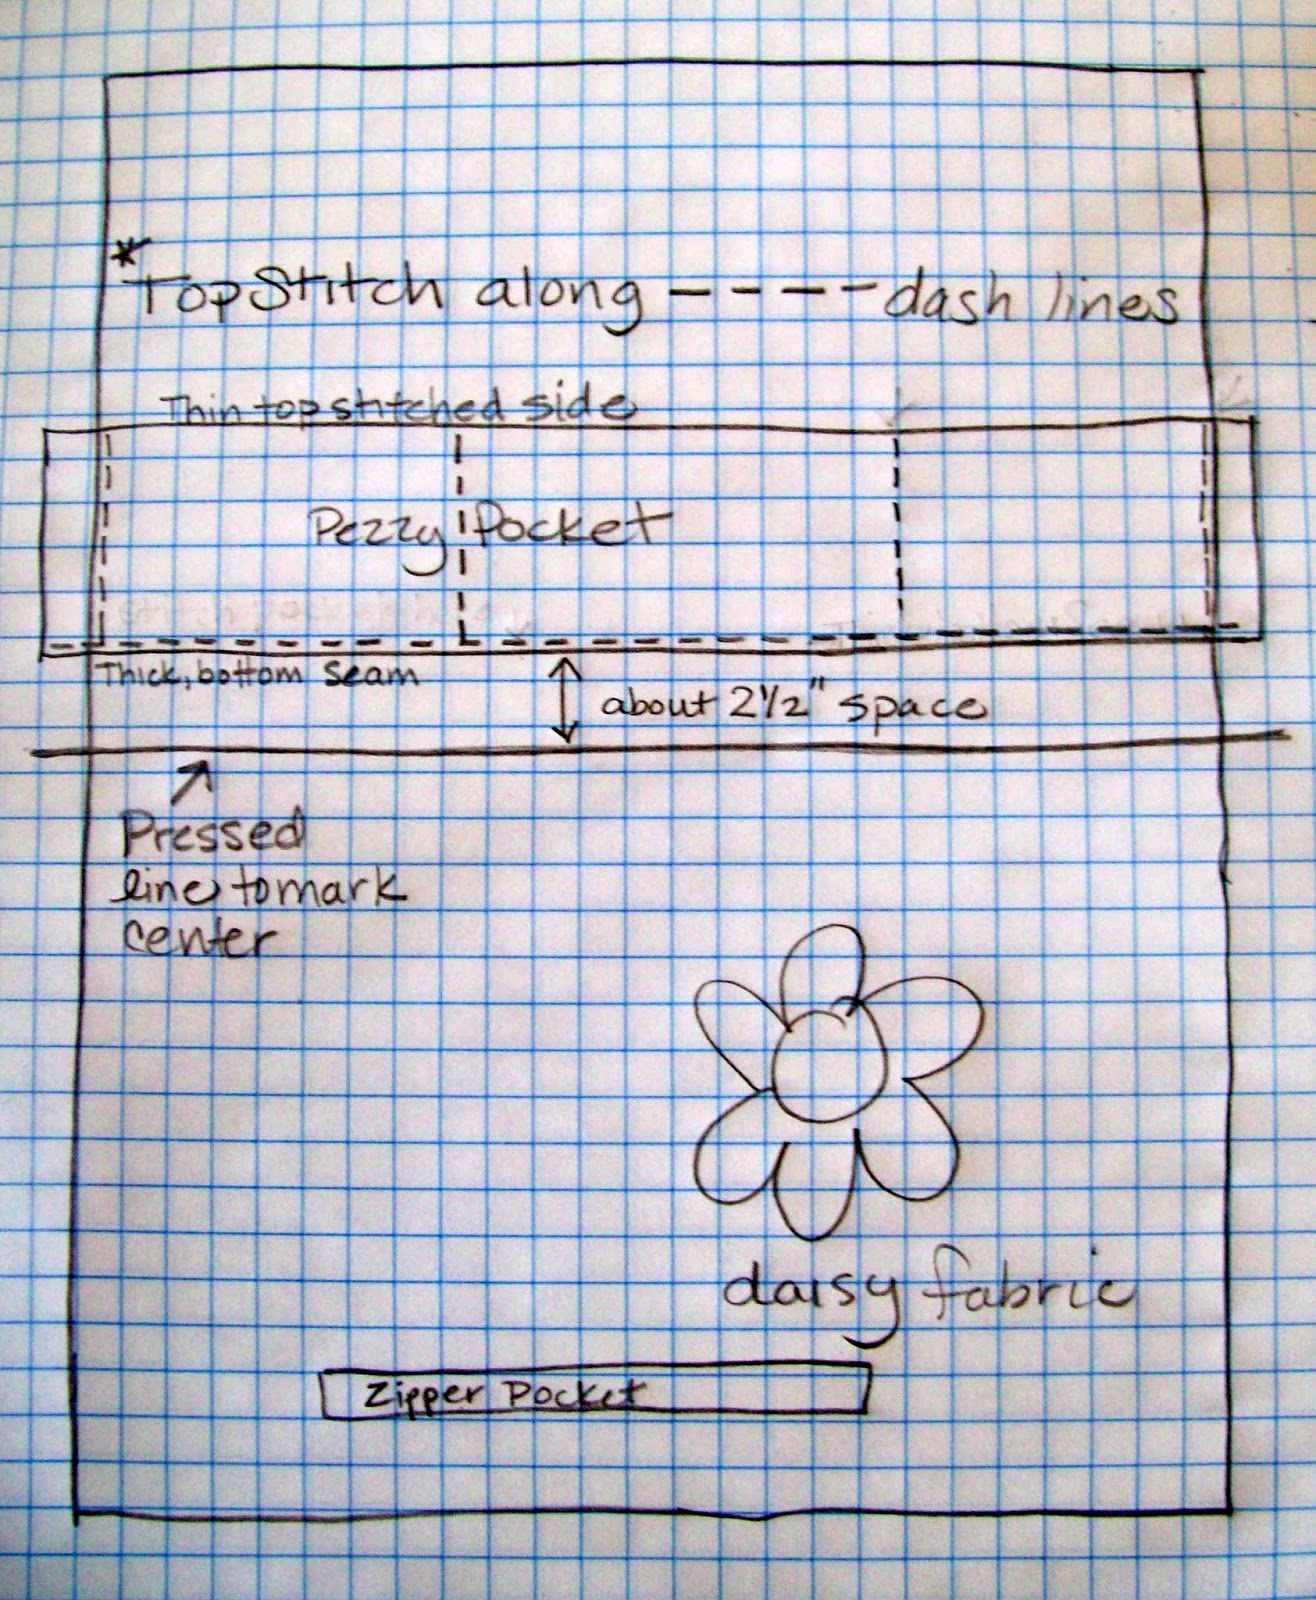
***for some reason I don’t have a picture of this next step, so I drew a diagram 🙂 …sorry, I’m not an artist
***
Take your interior pocket fabric (blue multi pezzy) and top stitch right along the top edge of the fold (opposite to the thick bottom seam you just pressed).
Now, lay you interior lining fabric (yellow daisy) on your work surface. Place the long pocket (blue multi pezzy) across it with the thick seam at the bottom and the thin, folded, top stitched seam at the top. The bottom [thick seam] should be about 2.5″ up from the fold you pressed into the center of the yellow daisy fabric.
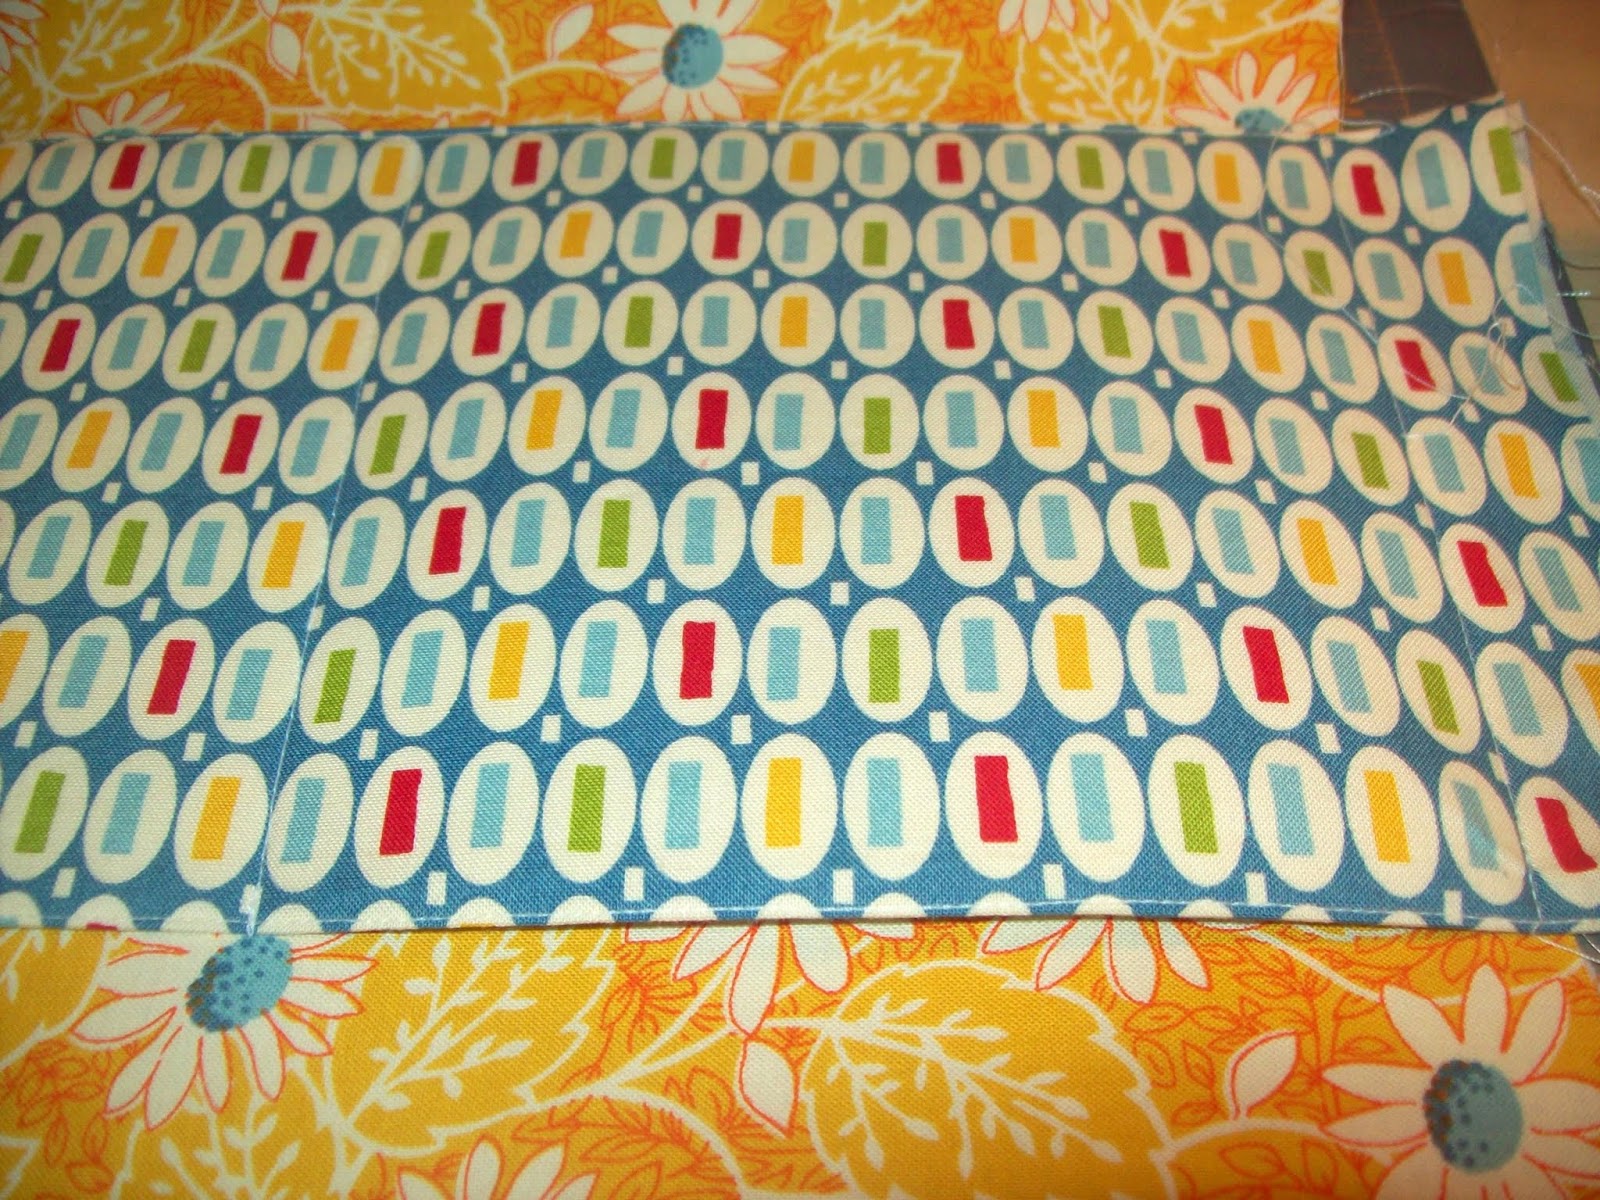
Pin in place. Now, top stitch the pocket into place along the bottom, on the thick bottom seam. Then top stitch on either edge, right along the edge (this will help when you are putting the bag together). Next, top stitch two lines to form 3 pockets. See diagram & picture below.
Top stitching the bottom of the pocket onto the interior lining fabric.
 |
| See the pressed fold on the left? |
If you look closely, you can see the top stitching that forms the pockets.
See? A pocket 🙂
…and another 🙂
Now to form the bag. Ready?
Fold your interior lining, right sides together, like so. Stitch up one of the sides (using a half inch seam allowance).
Stitch up the other side (also using a 1/2″ seam allowance), but leave a 4″ opening. This opening needs to be at least 3-4″ from the top edge, and about 5″ from the bottom fold.
Trim off your long pocket overages.
For the exterior of the bag, place right sides together and sew up the sides as well using a 1/2″ seam allowance, but do not leave an opening in either of the sides 🙂
At this point, I like to hold up my interior and exterior right next to each other to see if the side seams line up at the top with each other. If they are within a scant 1/8″ inch of each other, no worries. If the difference is bigger, hold tight, there is an easy fix on the way… just take in one of the side seams in the larger of the two 🙂 ….so lets say the interior lining is a 1/4″ bigger than the exterior, just take the side that doesn’t have the opening in it, and stitch a seam a 1/4″ in from the original seam. Don’t worry about unstitching the first seam, it will be hidden inside the bag 🙂
Now to set the corners. Do this for the interior and the exterior of the bag. With the wrong side out, put your hand inside the bag and form this triangle in the bottom of the bag on one side. Be sure the side seam is straight up and down as shown below. Using a ruler, put the 2.5″ line at the point of the triangle.
Draw a line. Stitch along that line.
Do this for both corners, in both the lining and the exterior.
***Some people prefer to cut off the little triangles after making the corners, I prefer to leave them for extra stability.***
 |
| Say, “Aaaahhh!” |
Strap Construction
Select four jelly roll strips to form the straps. [After cutting off two half hexies from a jelly roll strip in the beginning, the left over strip is perfect for a strap.] Each strap will have two sides, one that I will call the outside (blue) and the other, the inside (red and green chick fabric).
Fuse interfacing to each of the outside/blue strap pieces. Place one outside/blue and one inside/chick strip right sides together, stitch together using a 1/4″ seam. Do this for both straps.
Stitch a basting seam along one end for turning.
Turn the strap right side out.. (I use a chop stick or a knitting needle for this fun business.)
Press.
Top stitch as desired. I did three rows of stitching for mine.
Trim straps to the same length. …about 33″ long each.
Bag Assembly
Turn interior lining right side out.
Place the interior lining into the [inside out] exterior bag, like so.
Snuggle it down in there good 🙂
Pin straps in place. For this bag, I center the straps on the herringbone seams. Make sure the straps extend about a 1/2″ above the edge of the bag. [The fabric that is touching the exterior bag fabric will be the strap fabric you see primarily.]
Pin well.
Make sure that your side seams match up. Pin well. [I usually do not sew the side seams open, but when the exterior is quilted, it is sometimes easier to do it that way.]
Stitch around the top using a generous 1/2″ seam allowance.
After you have sewn the top seam, go back and do some wide zig-zag stitches on the straps for reinforcement.
Carefully reach inside the side seam that you left open and turn the bag right side out.
After tucking in the seam allowances and finger pressing, carefully pin and sew the side seam shut. I use a narrow zig-zag, but you may straight stitch or hand sew it shut if you like.
My narrow zig-zag.
Once your bag is all turned, top stitch a 1/4″ around the top edge of the bag.
Voila!!! Pretty tote for all of your needs 🙂

One SUPER cute medium-ish sized Haul-It-All Tote 🙂
Tote size- 11″ tall by 17″ wide. The bottom of the bag is 5.25″ wide.
One large zippered pocket and a large triple side pocket.
These chicks are TOO cute!!!
Be sure to come by in a few weeks to see another way to make this bag using other Moda pre-cuts! The second bag is even BIGGER and just as fabulous!!!!
When you make yours, be sure to post it to Instagram be sure to tag me @myquiltdiet and hash tag it #haulitalltote 🙂 I can’t wait to see your bags!
Marion McClellan