Sew Simple Star Pincushion

Hi everyone! I’m Kimber from Heirlooms by Ashton House blog here to share my first project for the Moda Bake Shop. While trying to jazz up the traditional LeMoyne Star pattern for a quilt project one day, I came up with this whimsical star pincushion design. I chose the bright and cheerful Summer House fabrics by Lily Ashbury, which remind me of my garden in the summertime. This would make a great addition to your sewing room or a fitting gift idea for your sewing friends. After all, who can’t use another colorful pincushion?


• 5 Layer Cake squares per pincushion (I used two each of two contrasting fabrics for mine, plus a third coordinating one for the button)
• 1/4 yard total of two different pom-pom trims
• One 7/8″-diameter cover button kit (you will need to make two buttons)
• Polyester fiberfill or filling of your choice
• Template plastic
• Diamond template (included in the Printer Friendly Version at the bottom of this post)
• Long doll needle
• Perle 5 cotton


1. Print the template (included in the Printer Friendly Version at the bottom of this post). Be sure to print it with “no scaling” or your template will be the wrong size (the template’s dimensions are approximately  x 6½”). Then trace the diamond template on to the template plastic and cut it out on the line. The template includes a 1/4″ seam allowance.

2. Place the template on the wrong side of a Layer Cake square and trace around it. For one pincushion, you will need eight diamonds from one fabric and eight diamonds from a contrasting fabric. You can fit six templates on one Layer Cake and you will need an additional Layer Cake square of the same fabric to trace an additional two templates. Repeat this step for the contrasting fabric.


3. Cut out each template. You will need a total of 16 for one pincushion.

4. Lay out the diamonds in a star design. You will need two stars—one for the front and one for the back.

5. With right sides together, sew two diamonds of contrasting fabrics. 

6. Continue sewing diamonds together until you have a total of four of them.
7. Repeat Steps 5 and 6 to create a second half star. Then piece the two halves together to create a star.
8. Repeat Steps 5-7 to create a second star, leaving an approximately 2 inch opening in the center for stuffing the pincushion later. Backstitch at the stopping and starting points to stabilize the stitches for stuffing. 
9. With right sides together, layer the two pieced stars so that like fabrics are on top of each other.
10. Pin the two pieced stars together. Using a ¼” seam allowance, sew around the entire perimeter of the star.
11. To create nice, sharp star points, clip the outer points. With all the points in this pincushion, it’s important to clip for a smooth finish!
12. Clip the inner points so they will lay nice and flat when you turn the pincushion right side out. 
13. Turn the pincushion right side out. Gently push the harder-to-reach outer star points out with a pointed yet blunt object.
14. Starting with the star points and working your way toward the center, stuff the pincushion firmly with polyester or your choice of filling. Then slipstitch the opened closed. It doesn’t matter if your center point matches perfectly because it will be covered with a button later!
15. Following the instructions on your cover button kit, cover two buttons with a coordinating fabric. 
16. Using a long doll needle and Perle 5 cotton, sew the two buttons to the center of the pincushion. Tufting puts a lot of tension on the thread and I find that Perle 5 cotton works better for this task than regular sewing thread because it’s stronger. 
17. Trim eight balls off the pom-pom trim of your choice. 
For my pincushion, I used two contrasting colors of trims.
18. Sew the pom-poms to the tips of the star points. 
19. Fill your pincushion with pins and enjoy! You can make a colorful galaxy of star pincushions with the cheerful palette of Summer House fabric. Here are just a few color combos.


2 Layer Cakes will make 21 pincushions with fabric scraps to spare for other projects. They’re so easy to make that you’ll want to create some for your sewing friends, too!

Thanks for joining me and I hope you enjoyed my first tutorial for the Moda Bake Shop. I love making pincushions and have designed several over the years. To see more of my designs and my creative adventures, stop by my blog. And if you decide to make some of these fun pincushions, I’d love to see them. Please feel free to contact me at the email link on my blog.

Happy stitching!

Kimber
{heirloomsbyashtonhouse.blogspot.com}

Log Cabin Baby Blocks


Hi! I’m Sarah and I’m so excited to bring you my second Moda Bake Shop recipe! This is a fun quilting project where you don’t just make a flat quilt block, you really make a block! You can create precious blocks for baby with the soft and sweet Lily & Will line by Bunny Hill make a super-sized pincushion with a bright and modern print.

Log cabin blocks are simple and fun! They are a great way to ease into quilting because the blocks are very forgiving. No worrying about points matching up and if your seam allowance isn’t perfect, no one will even notice! If you are an experienced quilter, the log cabin block is simple and quick, and makes an adorable gift!


1 or 2 Charm Packs, I used Bunny Hill Designs’ Lily & Will
(6) 4-1/2″ squares of muslin or scrap fabric (fabric is not visible when project is complete)
(6) 4-1/2″ squares of your choice of batting, I use Warm & Natural
polyester stuffing
coordinating thread
rotary cutter
ruler
cutting mat

1. Decide which fabrics you’d like to use for your block. Using 2 charm packs, I made 3 blocks: 1 pink, 1 green and 1 blue. Sort your charms into color families to make choosing prints easier.

2. Choose the fabrics for your log cabin blocks! You can make a mock-up arrangement with your charm squares as shown below. Typically a log cabin block has two adjacent sides in one color and the other two sides in a second color, but you can choose whatever arrangement you’d like! I choose creams and browns for two sides and pink/blue/green for the other two sides.

3. When you are happy with the arrangement, cut your center piece into a 1-1/2” square. Each “log” will be made from 1” strips cut from the charm squares. You won’t use up all the fabric, so I cut just as many strips as I needed. (If there’s a fun print you want to highlight, feel free to fussy cut and even omit one set of strips and cut your center square 2-1/2”. I fussy cut the bunny out of the larger-scale print for a center and also fussy cut “logs” from the border print.)

4. To create the log cabin block, you simply sew one strip on a time, going around the center square and building upon each previous strip. See the numbered diagram below. Use a 1/4” seam. Build your block one “log” at a time. You can use your fingers to gently press the seams open before adding each strip or press open with your iron. Trim excess at least once each time around the center square. You can use a single strip for two of the shorter “logs.” Depending on how accurate your 1/4″ seam is, the logs will all finish to 1/2″ wide.

6. Repeat steps 2 – 5 for each block, until you have six blocks that measure 4 1/2” square.

7. Cut (6) 4 1/2” squares of batting and (6) 4 1/2” squares of muslin or scrap fabric.

8. Make a quilt sandwich with muslin on the bottom, batting in the middle and your finished log cabin block on top. Quilt as desired. I like a to sew a square spiral starting in the center, but a diagonal grid or stippling would also work well! The purpose of the quilting is to make the sides of your completed block sturdier. But is decorative as well. Be sure to pull the ends of your threads to the backing by pulling the bobbin thread. Then tie the ends so your quilting won’t come undone, especially if this will be a toy. I used a bright thread so you could see the quilting pattern, but you’ll want to use a coordinating neutral just in case the bobbin thread pulls up to the top.

9. Arrange your six blocks into two rows of three. Sew together at side seams using a 1/4” seam allowance, right (pieced) sides together, so raw edges will be hidden.

10. This is where your flat miniature quilts turn into a three dimensional project! Keeping the pieced sides toward the inside, fold the block rows into a “C” shape.

Using a single seam, sew the two block rows together as shown below, again with a 1/4″ seam allowance.  If you stitch just about 3/4″ in from the corners on either side of the opening the turned and finished block will have cleaner points.

This may be a little awkward, but just remember to pivot 1/4″ from the corners with the needle in the down position. Before sewing each side, align the layer edges. It’s also helpful to reinforce your stitching at the corners so the stitches don’t come loose as you turn it right side out. You’ll find it’s easier than it looks!


11. Turn your cube inside out and stuff with polyester fiberfill.You can make a very soft or firm block.

12. Hand stitch the opening closed using a slipstitch or ladderstitch.

You’re all done!


1 Charm Pack has more than enough fabric to complete a single block. With 2 Charm Packs I made 3 coordinating blocks with fabric scraps to spare. Give a single block or a set as a special baby shower gift or 1st birthday gift!

Make a few plain (1 fabric per side) blocks with leftover charm squares to go along with Log Cabin Baby Blocks to quickly create a gift!

Sarah Meyer
{sew.sarahbdesigns.net}

Oopsie the Octopus

G’day all! So nice to be here with you, all the way from Australia, on the Moda Bake Shop! My name is Melanie Hurlston of Melly and Me and I would love you to all meet my newest friend, “Oopsie” the octopus. Oopsie is made from the stunning new “Spirit” range by Lila Tueller which is soon to be released. Don’t stop at just one – a jelly roll would make a whole family of these friendly sea creatures!

If you would like to see more of my fun pattern designs or locate an online seller in your part of the world, please visit my blog. For wholesale trade inquiries (we distribute to all countries) please email me at mellyandme@optusnet.com.au

1 Jelly Roll of “Spirit” by Lila Tueller.

A small scrap of wool felt in white and pink.
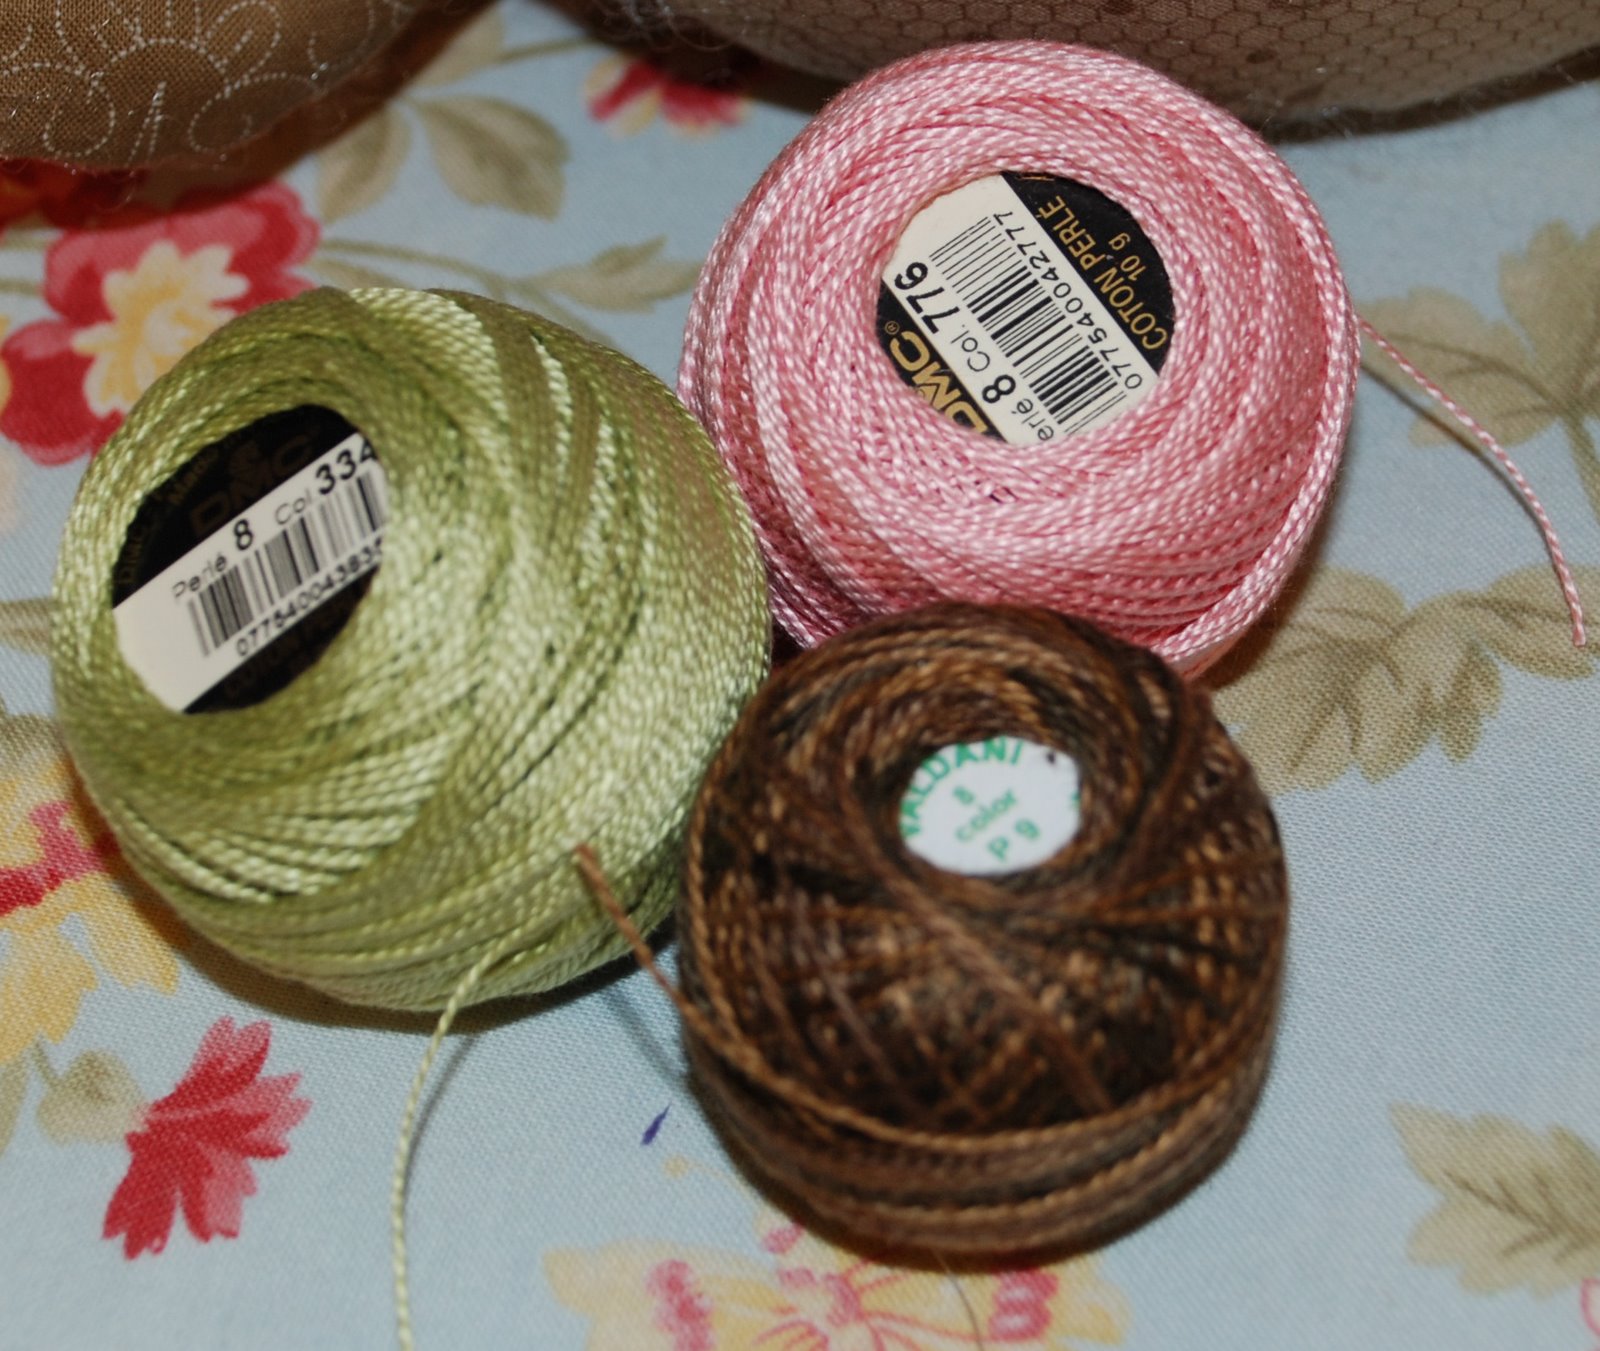
White, pink and dark brown 6 strand embroidery floss to match.
Good quality polyester toy fill.
A small piece of fusible web.
Strong polyester sewing thread.
Stuffing tools (I like to use a wooden skewer and paint brush).
Optional: Yo-Yo (Suffolk Puff) maker to make 3/4″ yo-yos.

Download the Printer Friendly PDF at the bottom of the post. Print your templates and cut out all pattern pieces on the line.
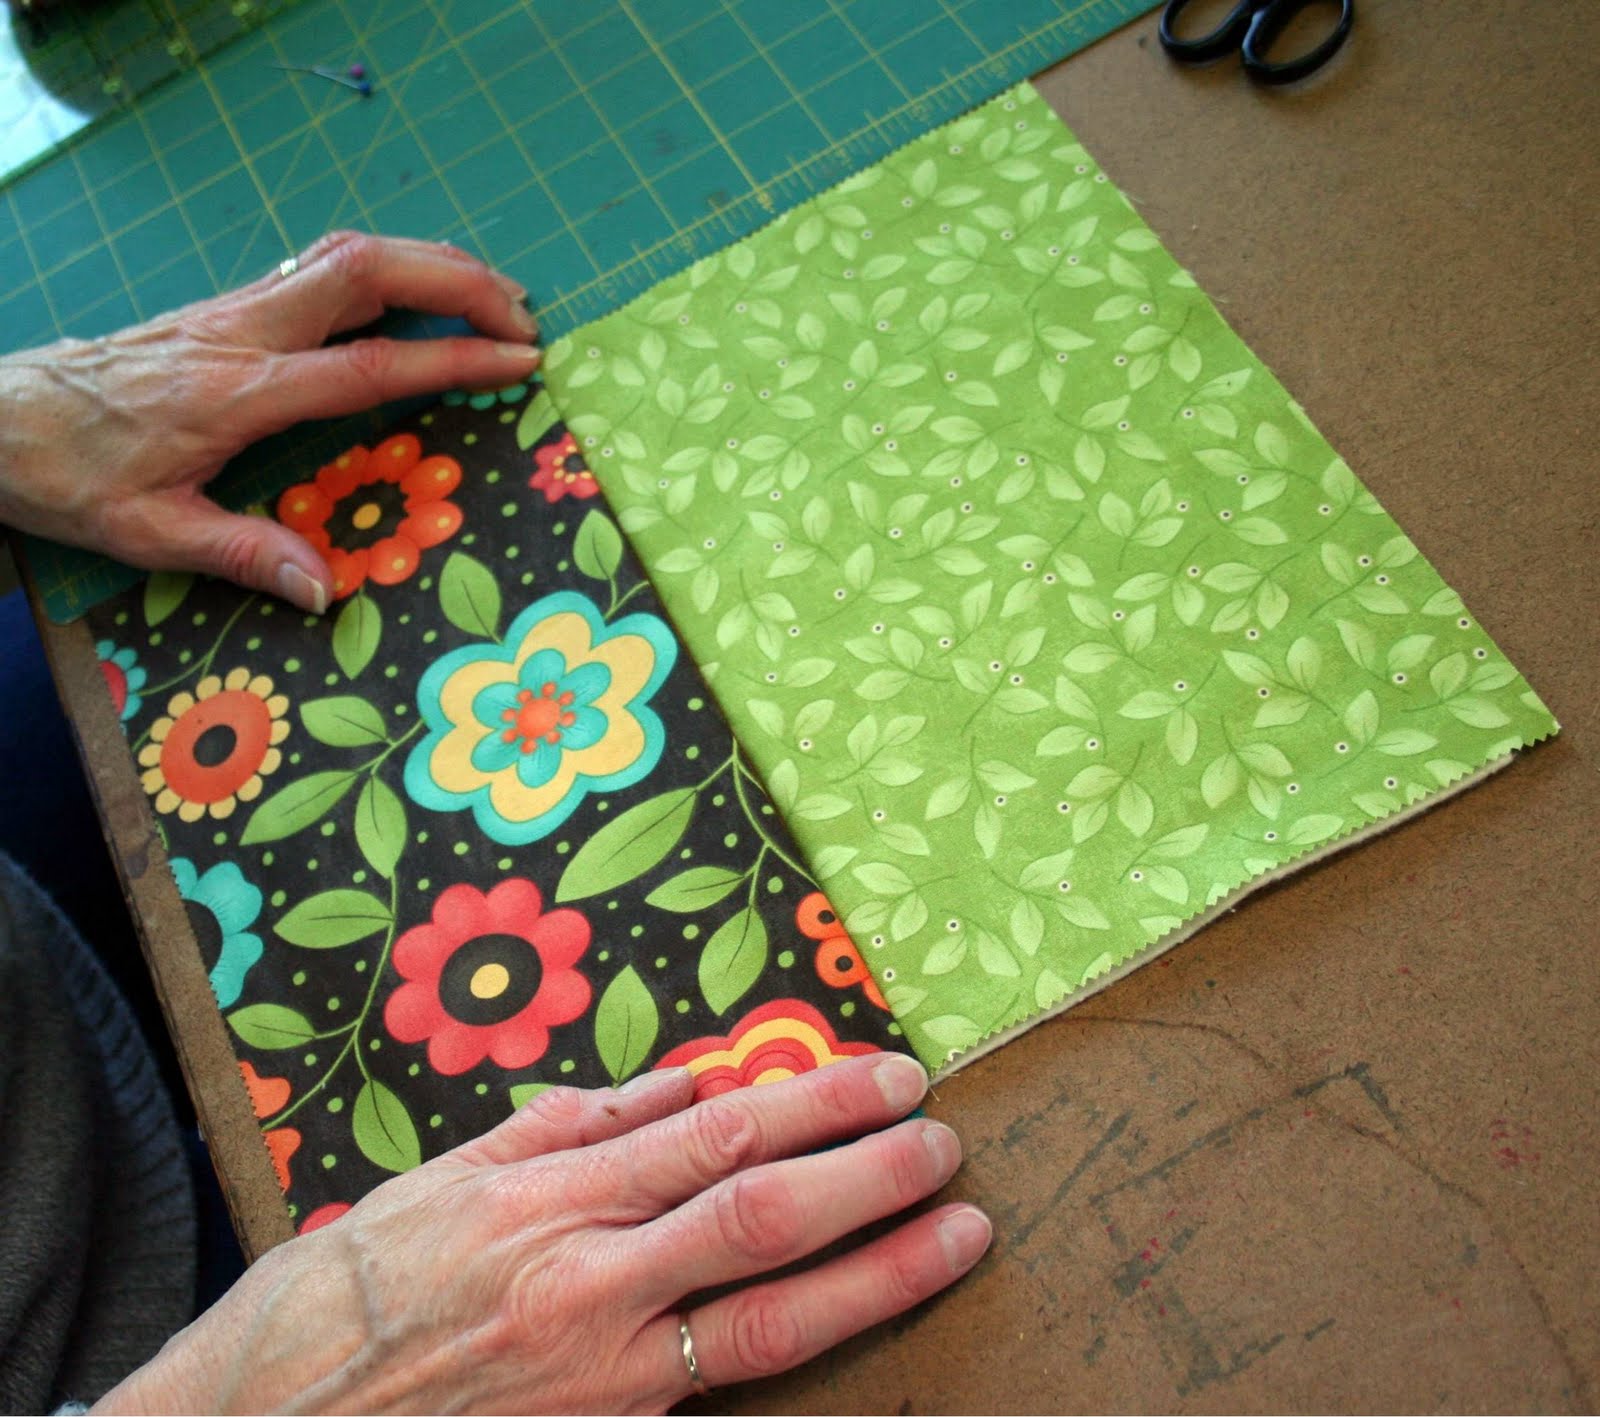
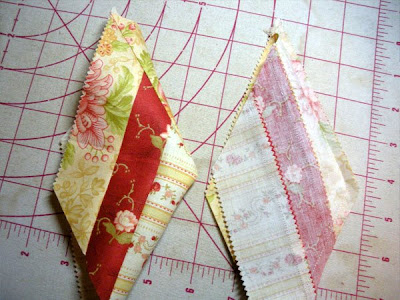
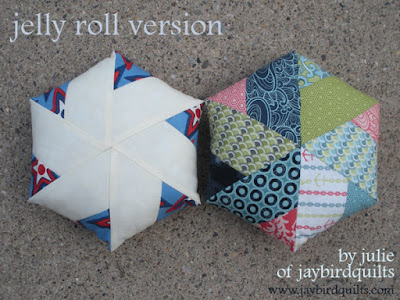
Select 9 of your fabric strips to create your “Oopsie.” The 9th fabric needs to have a lot of contrast with the other 8 to create suckers (yo-yo’s) that really stand out. I chose to use the white spot on top of solid color prints for this purpose. Four of your body strips will create the body and the other four will create the 8 legs.

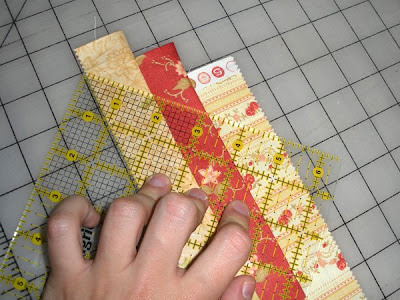
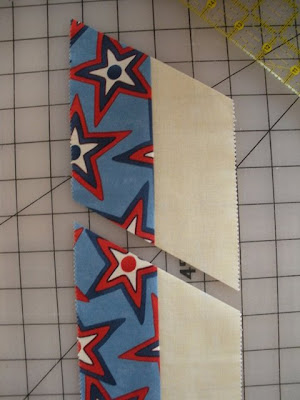
Once you are happy with your fabric selection, place the folded strips (other than your 9th strip) on your cutting board and trim off the selvage and fold. You only need 1/2 of each strip for this project.

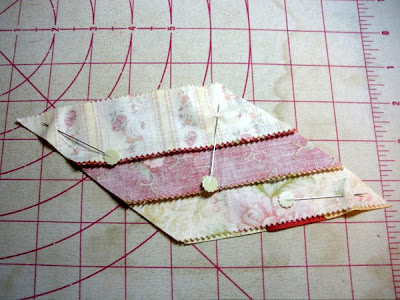
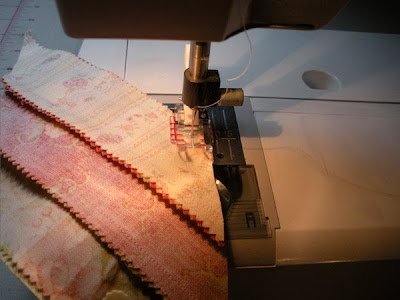
Take the four strips that are intended for the body, and using a 1/4″ seam allowance, sew the strips together in order.

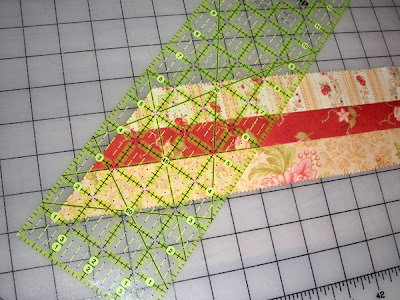
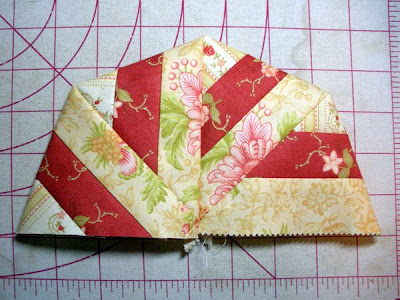
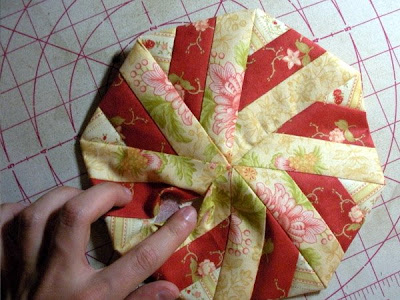
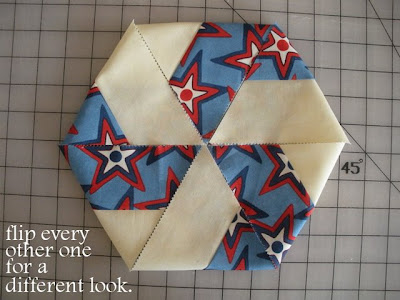
Until you have a pieced panel that looks like the following.


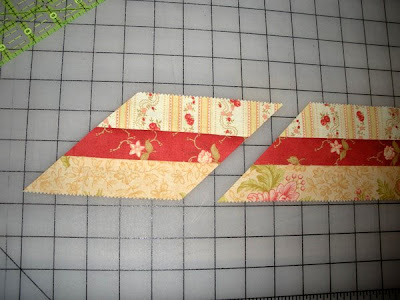
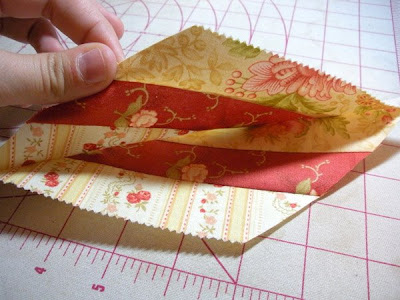
Fold your fabric panel in half, right sides together, so that all of the seams meet evenly. Now pin your body template to one half of the panel and cut the shape out.


Repeat with the second half of your folded panel so that you have four body pieces as per the following image.


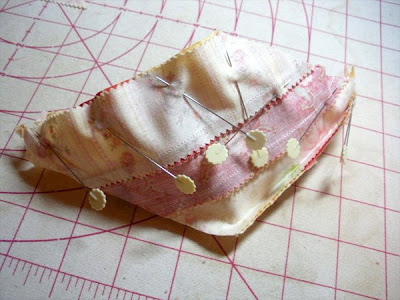
Take two of your body pieces and sew them together along one side edge only, right sides together. I recommend that you always use polyester thread and a small stitch (approx 1 – 1 1/2) on your sewing machine for extra strength of seams. Repeat with your remaining two body pieces.


Now open out your body front and body back pieces. Place them on top of each other, right sides together, ensuring that all seams meet. Pin in place.


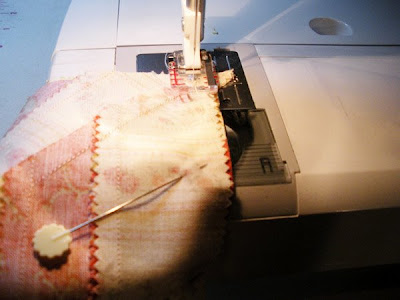
Sew the body front and body back together along both side edges, however this time please leave a 1 1/2″ gap in one side edge for turning and stuffing. Turn right side out and put aside for now.


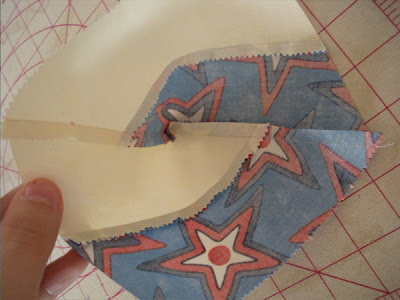
Take one of your leg fabric strips and fold it evenly in half, right sides together. Trace the leg template twice onto this folded strip. This will be a tight fit but make sure there is some seam allowance at both raw edges.


Please ensure that you transfer the gap markings and pin the fabric together to secure. Do not cut out as these legs will be sewn on the marked line.


Using a small stitch on your sewing machine sew the legs together along the marked lines, leaving the gaps as marked. Cut the legs out approx 1/8″ outside the sewn line. Clip curves.


Repeat with your remaining 3 leg strips. Turn all of your legs right side out.


Take one of your legs and position the end opening so that the seams are now on top of each other. If desired please tack these edges together.


Keeping the leg opening in this position, pin or tack the leg to the bottom raw edge of your body. Please ensure that the top seam of the leg (without turning gap) is facing the right side of the body.


Alternating the print, pin all of the legs to your body in the same manner. 2 legs should fit side by side within each of the 4 body panels.


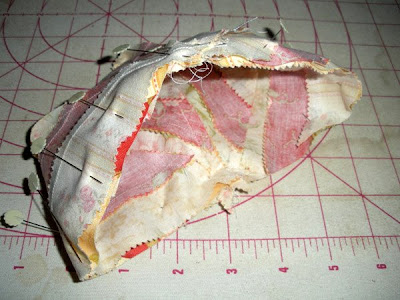
Using your sewing machine, tack all of the legs onto the body approx 1/8″ outside the raw edges. Now turn your body inside out. Position the leg inside the body evenly so that the top edges are flat.


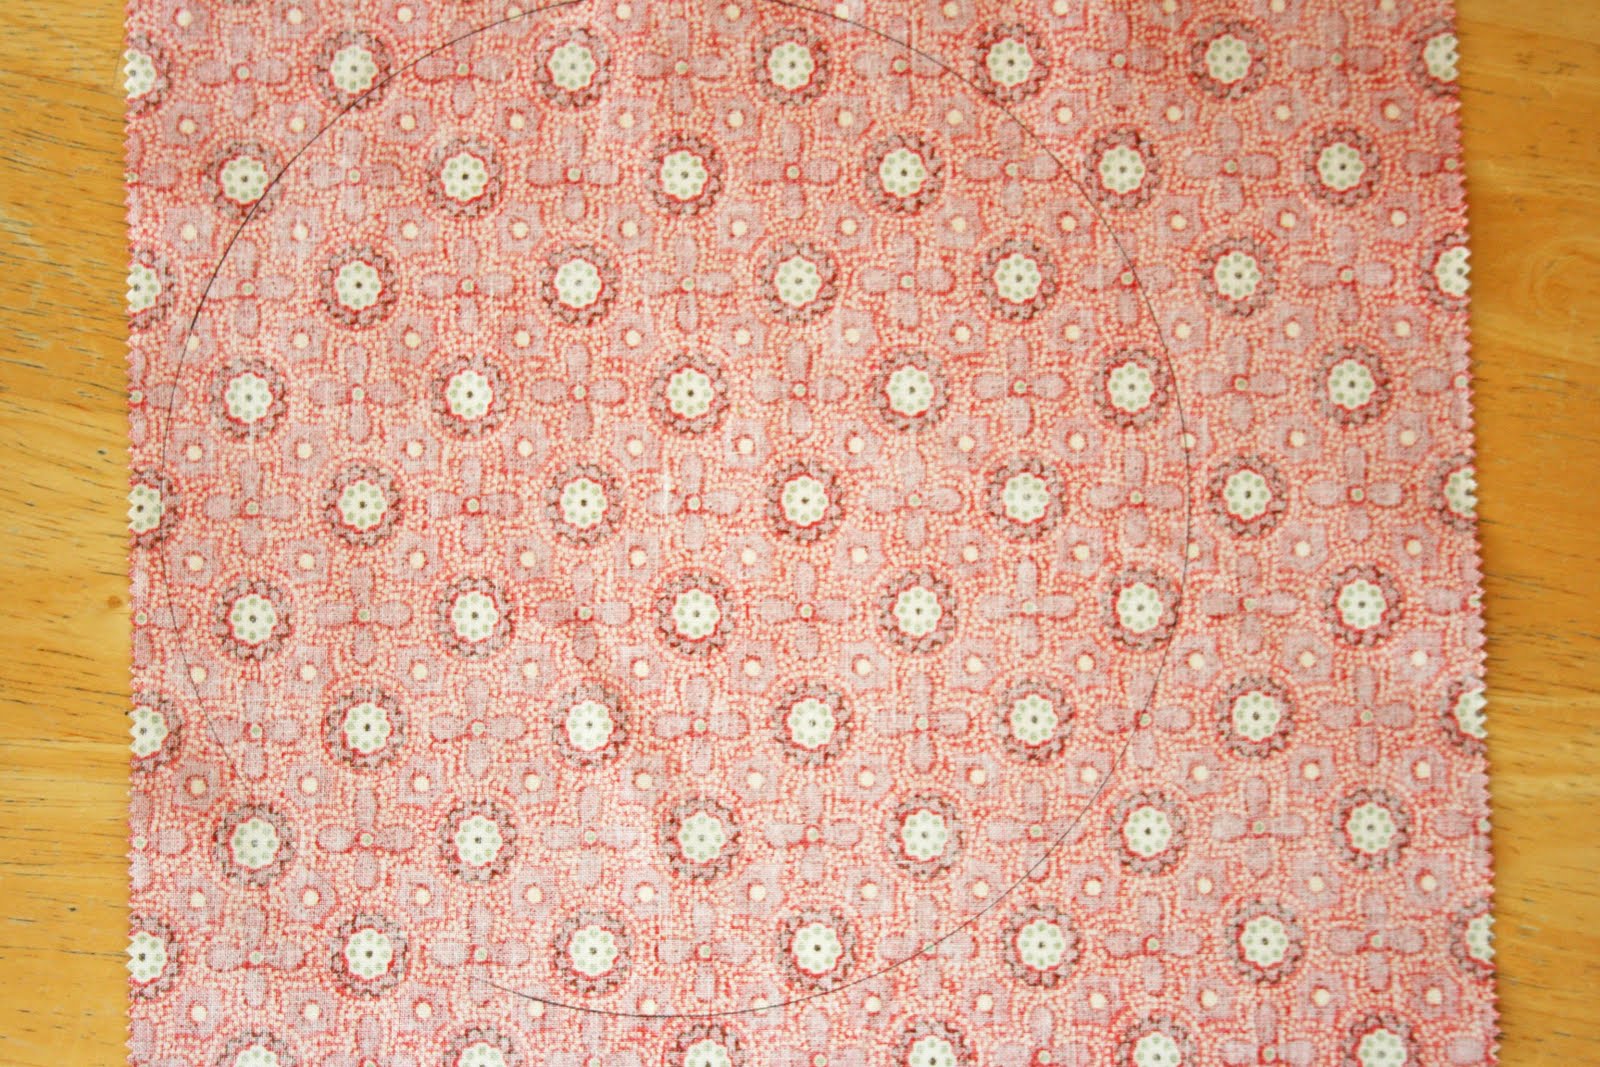
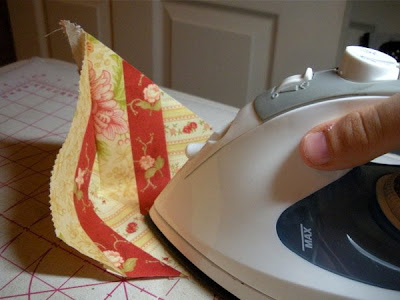
Take two lengths of one of your body strips (no need to cut accurately as long as they are minimum 4″ in length), sew together along the length and press. Pin your body base template onto this and cut out the circle.


Fold the circle in half (seams together) and finger press so that you can easily see the quarter points.


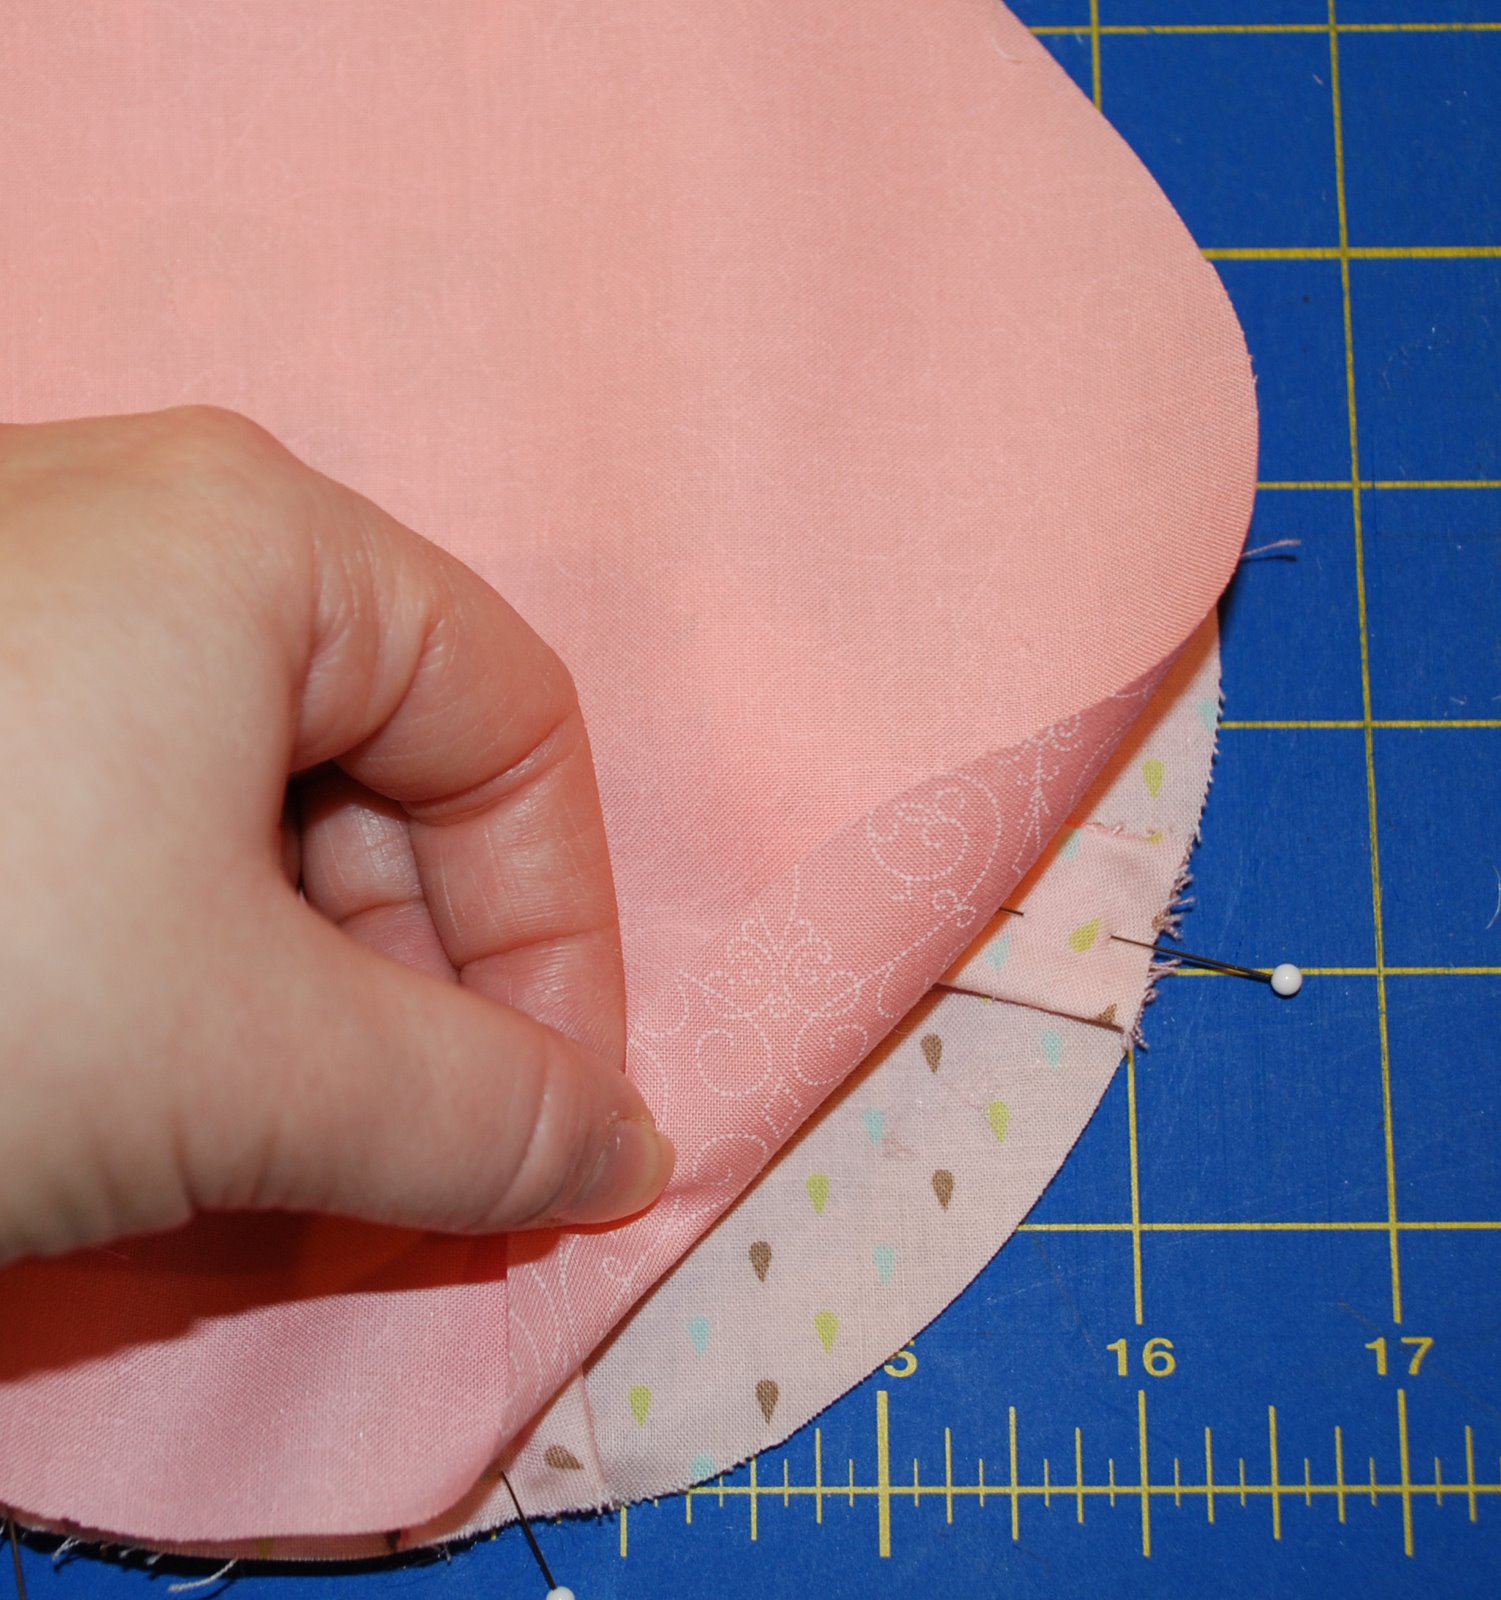
Place your base right side down over the body opening and match one quarter point up with one of your 4 body seams. Pin in place and than continue this with each quarter.


Now also pin in place between each quarter. At this point I recommend tacking but this is optional.


Using a small stitch on your sewing machine, sew the base into the body. This stitching will secure the legs between the body and base seams. It is a good idea to sew slowly and rotate the body as you go to avoid puckering.


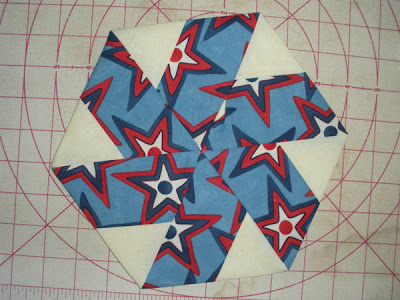
You will now have your completed body looking something like this.


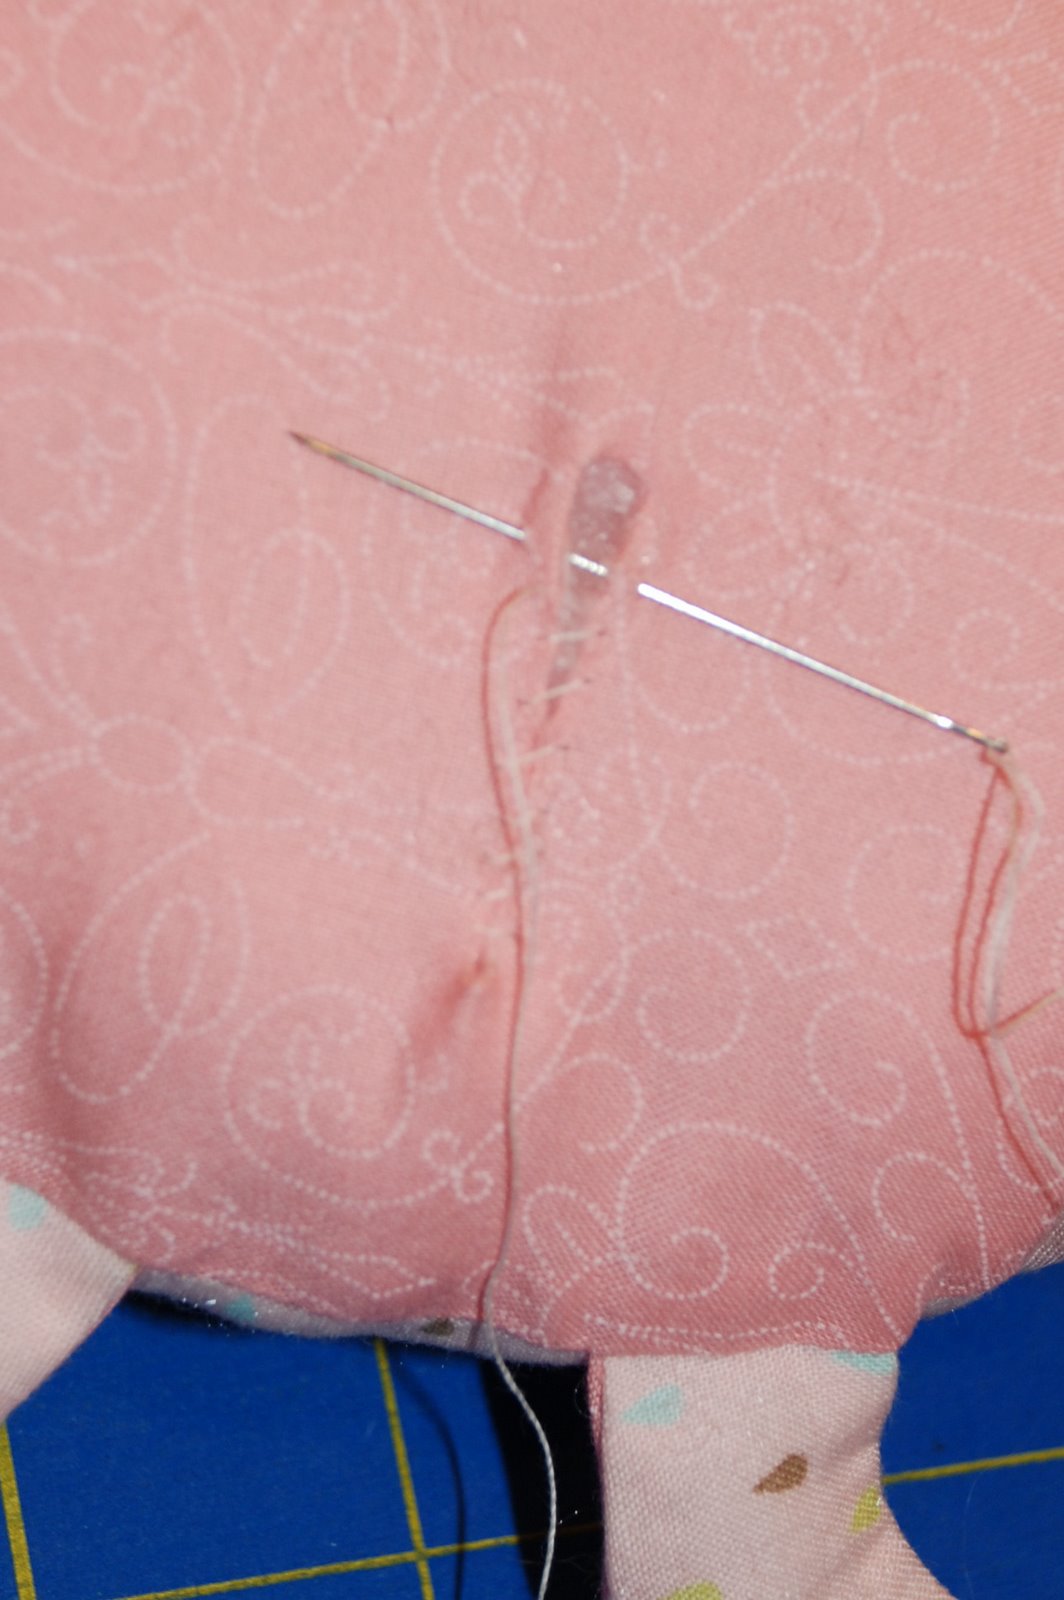
Using a turning tool, turn Oopsie right side out through the gap in the body.


Stuff Oopsie’s body firmly with good quality toy fill. If you want to create a great circular shape then it is a necessity to stuff very firmly. If you have used polyester thread and small machine stitches then do not be fearful to keep stuffing until it will take no more.


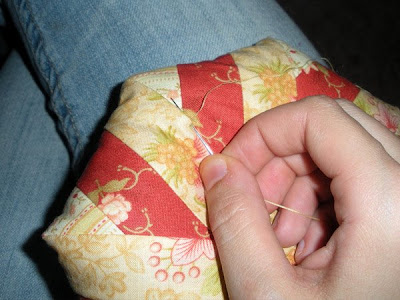
Sinking your knots, ladder stitch the opening closed with 2 strands of polyester thread (if you are unsure of how to ladder stitch and sink knots then please visit my blog and check out the “Tips & Tricks Tuesday Tutorials”). You may want to stuff a little more as you sew to avoid a dimple in Oopsie.


Turn Oopise upside down and then start to stuff the legs firmly, using the gap in the bottom of the leg.


Once all the legs are stuffed sufficiently, ladder stitch the openings closed.


Iron some fusible web to your scraps of white and pink wool felt. Trace the eye template twice to the paper side of your white wool felt and trace your cheek template twice to the paper side of your pink wool felt.


Cut the shapes out on the traced lines, peel the backing paper away from the fusible web, and position the eyes and cheeks onto Oopsie. Iron into place. I recommend that you use a medium iron or cover the shapes with fabric when ironing to avoid the felt melting.


Using 2 stands of white embroidery floss, blanket stitch the eyes into place.


Mark the mouth circle onto the face and then using the same white floss, satin stitch the mouth in place.


Mark the pupil positions and then create the pupil with a french/colonial knot using 6 strand brown embroidery floss.


Blanket stitch the cheeks in place with 2 stands of pink embroidery floss and then backstitch around your mouth with the same thread.


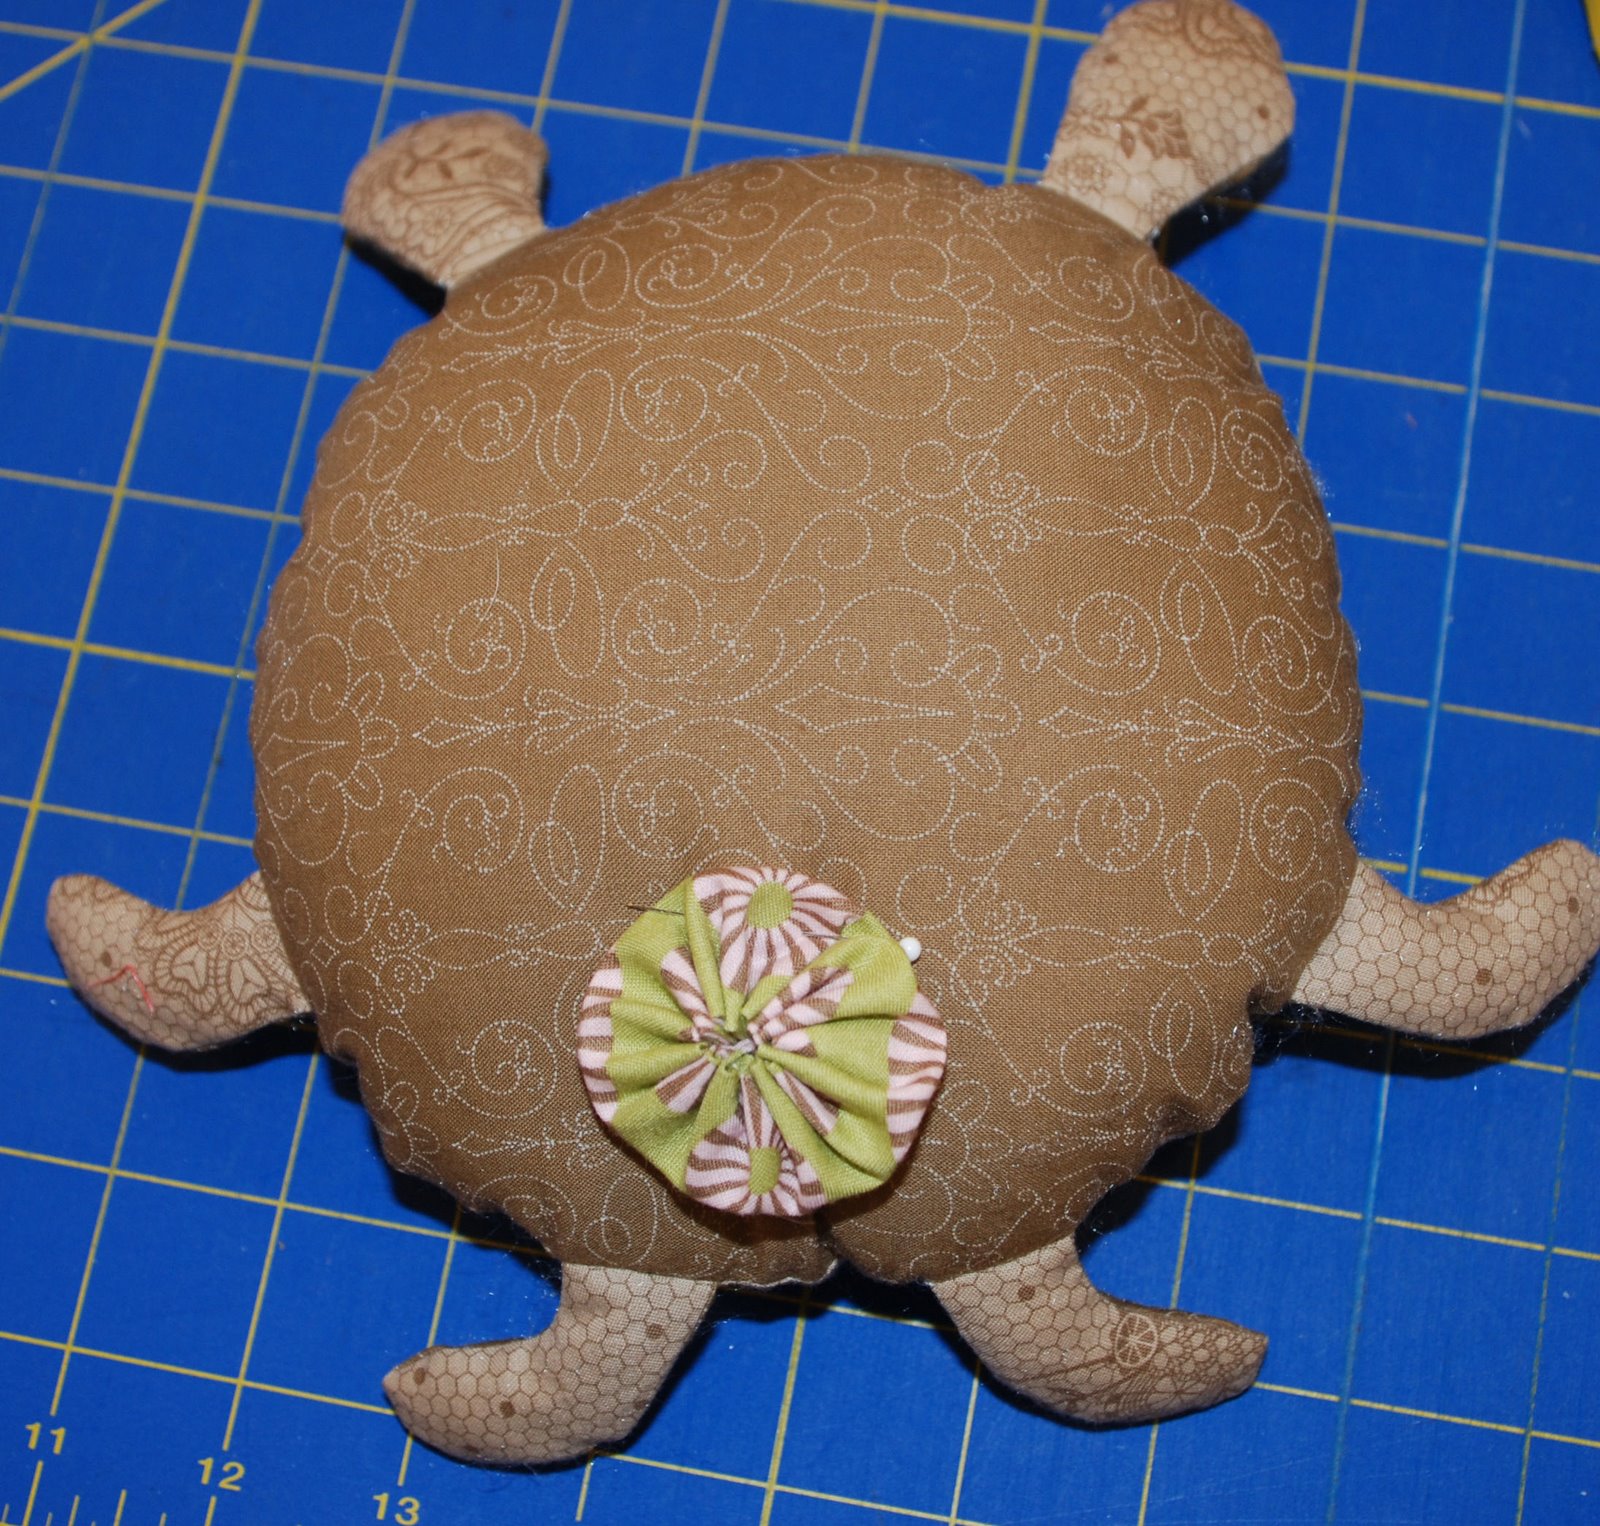
Using a yo-yo (Suffolk Puff) maker or by hand (please look up a tutorial if unsure), create 12 x 3/4″ yo-yos out of your 9th fabric strip.


Using sewing pins, try different arrangements with four of the yo-yo’s on Oopsie’s body until you are pleased.


Also pin a yo-yo onto each of Oopsie’s tentacles.


Using 2 stands of polyester thread, ladder stitch all of the yo-yos into place on Oopsie.


And voila! You have your very own Oopsie to love!

This pattern makes 1 “Oopsie” however a jelly roll will be sufficient to make a whole gang of these little cuties!

Melly
http://mellyandme.typepad.com/

Introducing Owlivia – A Sewing Companion


Hello Moda Bake Shop Followers,

I am Sandy Gervais, a fabric designer for none other than Moda Fabrics. (Yes, it is a dream job!) Lissa at Moda asked me to design a project that could be sold as a kit using my new spring line, Frolic. I thought it would be fun to have a “sewing companion” to set by your machine, or on a shelf nearby.

With that thought Owliva was born. The size of her eyes certainly enables her to “watch” over you. She could also be used as a pincushion – if you can bear to poke her with pins. The kit includes pattern, 6 fabrics, ric rac, cotton batting and two buttons for $12.50 (plus shipping). All you will need to add is your favorite stuffing – batting, play sand, walnut shells, etc.

Go here to order the kit.


6 Frolic Layer Cake squares
10″ of jumbo ric rac
10″ X 10 1/2″ piece of batting
2 pieces of cotton batting 2″ X 2″


Two 5/8″ buttons.
Poly-fil
Crushed walnut shells


One sweet sewing companion.

Go here to download and print the template. Note this prints on 11″ X 14″ paper.

1. From your Frolic Layer Cake™ select:
Green leaf print square – cut this to a size of 6 1/2″ X 10″
Solid orange square – cut this to a size of 2 1/4″ X 10″
Brown daisy print square – cut this to a size of 3 1/4″ X 10″
2. With right sides together, stitch these three pieces together along the 10″ sides. Press. (front of owl)


3. Cut a piece of ric rac 10″ long.
4. Center ric rac over middle orange piece.
5. Machine stitch down center of ric rac.


6. Cut a piece of cotton batting 10″ X 10 1/2″.
7. Lay the batting down and place the pieced owl front on top of batting with right side up.

8. Top with the large brown floral Layer Cake™ square, right sides together, matching lower edges.


9. Fold back large brown floral print to the spot where the green print meets the orange solid piece.

10. Insert pins to mark the fold.

11. Lay owl template onto backing fabric.

12. Lay a ruler across the pin markings.
13. Now move your owl template until the dotted line on the owl template is lined up with the ruler.

14. Pin template in place.
15. Using a small machine stitch, stitch ON the template line, leaving an opening at the bottom for turning and stuffing.
16. Tear away the paper.

17. Cut out owl a scant 1/4″ away from stitching line. (It is helpful to leave about a 1/2″ excess in the opening area.)

18. Turn right side out.

19. Stuff firmly with Poly-fil – just up to the middle section.

20. Fill remainder of owl with crushed walnut shells. This will make Owlivia stand straight. (You can purchase crushed walnut shells at a pet store.)

21. Whip stitch opening shut.

22. From your solid yellow Layer Cake™ square cut a 2″ X 2″ square.

23. Fold this in half diagonally, wrong sides together. Finger press.

24. Fold in half diagonally again. Finger press. (beak)

25. Pin beak in place. (see owl template for placement) Stitch beak in place with a running stitch.

26. From the medium brown flowered Layer Cake™ cut out two large flowers. (these are the eyes)

27. From cotton batting cut two 1 1/2″ circles. (eye backing)


28. Center eye over batting circle.
29. Using a running stitch, stitch eye to batting by stitching through all thicknesses around the center of the eye.

30. Thread a long needle with two strands of thread.
31. Sew button in place in center of eye. DO NOT cut thread.

32. Position eye onto owl. Poke needle through hole of button, go through the owl and come out the back of the owl, pulling thread tight so that eye pulls in somewhat.
33. Go back and forth a couple of times and knot thread in back of owl.
34. Repeat for other eye.

Viola!


Meet Owlivia –Isn’t she a Hoot?

Now go stitch.

From my heart,
Sandy

Moda Love Pincushion


It’s no secret that I love Moda fabric. So if you’re like me and over the past couple of years you have accumulated Jelly Rolls, Fat Quarters, Honey Buns, Layer Cakes and more, then you probably have lots of the ribbon that was used to wrap each one of Moda’s precuts. What to do with it? You’re going to love to make this sweet pincushion. If you have just discovered Moda and you don’t have enough ribbon, not to worry — you can start collecting now and in the meantime you could use an assortment of 3/4″ decorative ribbon.

Five Jelly Roll strips  – 2 1/2″ by 10″ strips and four 2 1/2″ by 13 1/2″ strips
One Layer Cake Square – 10″ square for the backing
Nine Moda ribbons 11″ long and two 14″ long collected from any Moda Layer Cakes, Jelly Rolls, Honey Buns etc.
Poly Fill and Plastic Pellets
This pattern makes two pincushions, so you can share the love!
Sew the five 2 1/2″ by 10″ strips together and press. Trim 1/4″ from each end strip as illustrated above to make a strip set that measure 10″ square.
Lay out the 9 Moda Ribbons 11″ in length and sew each one in place. Stitch approximately 1/8″ in from the edge on each side of the ribbon.
Trim the excess ribbon.
Cut the square on the diagonal coner to corner to make two triangles. Repeat this for the 10″ backing square.
Place a strip set triangle and a backing triangle right sides together and sew together with a ¼” seam allowance, leaving a 2 1/2″ wide opening along the long edge. Repeat for both sets.
Turn right sides out. Stuff firm using poly fill against the front and plastic pellets against the back of the pincushion. Sew up the 2 1/2″ opening, and pull the two corners in towards the centre to create a heart. Stitch these corners together, making sure that they overlap about 1/2″.
Sew each of the 14″ Moda ribbons to the middle of two of the 2 1/2″ by 13 1/2″ strips. Trim the ends of the ribbon. Sew these strips with the other remaining 2 1/2″ strips right sides together with a ¼” seam allowance. Sew the ends on a 45-degree angle and then straight down the sides, leaving a 2” opening along one of the long sides. Turn the strips right sides out through the 2” opening and press. Stitch closed the opening.
Put the finished ties through the opening of each Heart Pincushion and tie in a knot.
This pattern makes two pincushions!
Please come visit my blog and website to see all the new designs being created at The Pattern Basket!

ABC Book and Snail Softie


ABC Book:
Charm Pack – featured Love U by Deb Strain
Love U Panel
Coordinating Thread
Luna Batting – craft size
Fusible Web – featured Pellon Wonder-Under
2 1/8″ Binder Ring
13 Large Eyelets – 1/4″ (6mm) and tool – featured Dritz #659-65
hammer to fasten eyelets

Snail Softie:
Jelly Roll Strips – featured Love U by Deb Strain
Stuffing


Extra small buttons for eyes on snail.


ABC Book…

Select 26 Charm Squares to use as the backing or pages of your ABC book.
Cut out all the letters as close to the inside line as possible from the Love U Panel.
Determine what letters will go with the charm squares you selected. I chose two of the same charm squares to use as my front and back of the book.

Fuse your letter square to a piece of fusible webbing. Remove the paper backing, then fuse the other side to the center of your charm square. Do this for all the letters.

Using coordinating thread, applique your letter to your charm square.

Do this for all the letters.

I chose to change up my stitching for a fun look and to add a bit more texture.

Layer a piece of 5″ x 5″ batting then a charm square right side up, and finally another appliqued charm square right side down. PLEASE BE AWARE: You are working with letters that need to go in alphabetical order, so you need to make sure you are putting the correct letters together.

You should have a total of 13 pages (26 front and back).

Stitch a 1/4″ seam along all four sides leaving a 3-4″ opening so you can turn right side out. Clip the corners before turning for a nice point.

Following the directions on the Eyelet Kit, attach an eyelet to the corner of each page. PLEASE REMEMBER: You are working with letters so make sure your eyelets are in the correct corner for each page to keep your letters in alphabetical order.

Open your Binding Ring and slide through all the eyelets keeping your pages in alphabetical order.

You now have one adorable little ABC book to give as a gift or for your own little ones.

Snail Softie:
Select two Jelly Roll strips.
Hand draw a curved edge at one of the ends of the strip. Match the two strips RST and sew a 1/4″ seam allowance following the curve at one end and leaving the other end open for turning.

Trim off the excess fabric at the curved end. You should be able to cut on your drawn line.

Flip Right Side Out and stuff loosely with stuffing until you reach the end.

At your open end fold the ends in and stitch closed.

Now it’s time to roll him into a snail! Start with your stitched opening end, fold over and stitch it down.

Continue to roll and stitch as you go until you have just a little bit left for the head. I kept all my stitching in the center of the roll so you do not see it from either side.

You can now add little beady eyes if you wish or just leave him plain.

One adorable little Jelly Snail ready to play.

Two Charm Packs will make 3 ABC Books
One Jelly Roll will make 20 Snails.
Enjoy!
Angela Yosten

Garden Fresh Fabric Tomatoes


it all started when my friends were talking about making salsa. that’s when i decided to make my own harvest of tomatoes (since i didn’t plant any in my garden this year).

i’ve made a bigger version to make pumpkins check out my blog for instructions.


one layer cake of simple abundance
(and one charm pack of simple abundance optional)

buttons, hot glue gun


first you will need to make a circle. you can use the template (to be found at the end of the instructions) or you can use a bowl with the width of 8 inches.
draw a circle with a fabric marker or a pencil
cut out your circle.
i wanted red, yellow, and green tomatoes (um hello, fried green tomatoes?!) so i picked out a few of each color.
you are going to to a running stitch around your whole circle.
once you have done a running stitch around the whole circle gently pull on your string’s end.
and do so till your circle is almost closed up. make sure you leave enough of an opening so that you can do the next step.
stuff your tomato, i like “cluster stuff” (i got mine at walmart)
gently pull your thread to shut the tomato base. and tie a knot.
now this is optional.
if you want different tomato tops (the leaves) then get yourself a charm pack.

take out your four green squares.

if you do not have a charm pack make sure you pull aside one green layer cake block. and cut in four.
fold in half your charm square. and using the template (make sure it downloads to the right size. template can be found on the same page as the tomato circle at the end of these instructions.)
trace two tomato tops. side by side.
with your sewing machine (while your square is still folded in half) sew on top of your traced lines of the leaves.
cut out your leaf and turn around. the marking should be on the bottom so that you can not see your marker or pencil line.
now if you want the easy way out.
get your hot glue gun and glue the top on.
this is an option.
no one will think any less of you trust me, because it still looks cute.
or if you want the extra steps, get yourself a button and green thread to attach your top on the tomato.
start by pulling the needle through the top all the way through the tomato.
place your button on the bottom and sew up through your tomato.
and gently pull on your thread. this will kind of squish your tomato in the middle.
do this a few times to secure it nicely.
to finish your sewing the top, knot under the leaf so that you don’t see your knot.
to secure it even better, i put a few dabs of hot glue under the leaves.
and now you have a super cute tomato.
one layer cake will make a few tomatoes, but make sure you leave out one green square at least to make 8 leaves.

pdf file download for tomato and top
(make sure you enlarge it to 100%)

instructions and pictures by Vanessa of V and Co.
hope you liked em!

Peppermint Swirl Pincushion

peppermint

(featured in the Simple Abundance Moda ad in the Better Homes and Gardens Christmas Publication)

1 Layer Cake square- red
1 Layer Cake square (or 8″ square)- cream
1 Layer Cake square- aqua
1 Layer Cake square- green
2-3 small red buttons
1 large button
Warm and Natural batting scraps
2 cups crushed walnut shells or other filling

1. Cut two pieces of batting, one 5″ x 10″, and one 5″ x 5″.
2. Fold the red Layer Cake square in half. Place the 5″ x 10″ piece of batting inside. Cut the green layer cake in half to make a 5″ x 10″ rectangle. Fold it in half. Place the 5″ x 5″ piece of batting inside.

3. Print out pattern pieces from this pdf file. Trace 5 swirls onto the red fabric, and 1 of each leaf onto the green fabric with a water soluble fabric marking pen. (Having some problems with the pdf file- it will be up a little later.)


4. With matching thread, sew around each shape on the lines you marked with the pen.


5. Do the same with the leaves. Sew around the whole shape, then add a small line down the center of the leaf, about 2/3 of the length.
6. Remove all the pen lines with a damp cloth. Cut out the shapes 1/8″ from the stitching. (Yes, there will be raw edges!)
7. Using the circle from the pdf, cut one cream circle, one aqua circle, and one circle from your batting.
8. On the cream circle, Fold it in half, then in half again to find the center. Pinch it to make small creases. This will mark your center.
9. Place the swirls around the center, evenly (or not!) and pin them to the cream fabric.

10. Stitch them to the cream fabric, following the stitching on each shape, up one side and down the other. You don’t need to stitch along the outer edge. The swirls will hang over the edges a little bit.


11. If you’d like, you can jazz it up a little bit with your darning foot and a few squiggles.

(here’s a close up of mine)
12. Layer the 3 circle pieces in the following order: Batting, Aqua back (right side up), Cream with swirls (right side down). Pin around the edges. Sew a slightly bigger than 1/4″ seam around the circle through all three layers (making sure to catch the edges of the swirls), leaving a 1″ opening so you can turn it.


13. Trim the swirls so they are flush with the circles. Clip around the shape, every 1/4″, up to the seam, making sure you don’t clip into the seam!!

14. Turn right side out, trim any fraying threads. Fill with crushed walnut shells about 3/4 of the way full. (Use a funnel to do this part, unless you want a big mess!)

15. Stitch the opening closed.

16. Stitch the leaves on in the center, going all the way through to the back of the pincushion.
17. When you get to the back, add the large button, and bring the needle back through to the front. Repeat each time you add a button to the center. When you finish, tie the thread off on the bottom, hiding the extra thread behind the bottom button.
18. Enjoy your sweet little peppermint pincushion. Or give it away and make another. And then another, and one more after that. 🙂

One sweet little Christmassy sewing treat.
And there you have it! Enjoy!
Camille
Simplify (blog)

Puppy and Kitty Softies


Made from the ♥ by Vickie E aka mid-ohio quilter
Read all directions carefully before beginning this project.

• Hushabye Layer Cake Moda sku# 23040LC
• DMC pearl cotton size 8 DMC #776, #3348, Valdani #8
• Clover yo-yo makers Jumbo, Large, Small & X-small
• scrap brown wool felt
• poly stuffing
• pencil, needle, thread, pins
• Pinking Shears
• purple thang
• embroidery hoop
• stabilizer for embroidery
• water soluble pen or brown pigma pen
• a small scrap light weight heat n bond


•Begin by choosing 3 of your 10 inch squares, preferably at least one that has a circle print.


• Cut out 2 ‘eyes’ with out 1/8 of an inch around the edge as shown.


• Using the JUMBO clover yo-yo maker or other 7-inch circle template. Trace with a pencil or water erasable pen on the wrong side (WS) of one of your “body” fabrics.
• *Tip* trace the ‘bumps’ on the yo-yo maker and use to align your circles when you sew them together.

• Print the templates for the ears, arms, legs and faces. Make a paper template by cutting out on the line. This is your sewing line.
• *Note* click on picture to enlarge and print

• Place the 2 “body” fabrics right sides together (RST) and pin to prevent shifting.
• Using the templates trace around the ears, legs/arms.


• This is the way the fabric will look. Sew around the solid lines of the ears, arms and legs…leaving the bottom open for turning. Set aside.


• Cut out the body pieces AFTER you sew the arms, legs and ears. Set pieces aside.
• Trace the face onto the circle with a water soluble pen or brown pigma pen.
• Using pinking shears…trim the ‘eye’ fabrics as shown.

• Using Size 8 pearl cotton to match the fabrics sew fabric eyes onto face.
• Pink DMC #3348
• Green DMC #776
• Brown Valdani #8
• Use a running stitch to outline and attach the eyes.

• Trace the nose template onto fusible light weight heat n bond. Adhere to wool felt.
• Cut out on the line and peel paper backing and iron to kitty “front” fabric. *note* if you use a blue water soluble pen…heat will set the pen and it will not rinse away.

• Using an embroidery hoop, use a running stitch to make the whiskers and mouth.
• Stitch a buttonhole around the brown nose.
• IF you used a water erasable pen…rinse out BEFORE you turn your piece or iron!


• Cut out arms, legs and ears with a scant 1/8 inch seam allowance.
• Clip inner curve of arms and legs before turning.


•Turn out all pieces shown. *note* 2 legs face right, 2 face left!
•Lightly stuff with polyfil and a purple thang


• With softies face up; pin arms, legs and ears.
• *note* the appendage fabric you want to face the front of the softie needs to be pinned “DOWN” and the fabric to the back fabric needs to be “UP”.

• Lay the ‘back’ fabric RST with the front fabric.

• Pin, Pin, Pin….all the way around easing excess If there is any.

• Pinch back fabric and snip a 1.5 inch slit in the fabric.

• Turn right side out.

• Iron and stuff firmly with polyfil.

• Slip stitch opening closed.

• Using the 3 sizes of yo-yo maker and scraps make:
• 5 x-small yo-yo’s
• 1 small yo-yo
• 1 large yo-yo

• Take completed yo-yo and quilting thread and string 5 yo-yo’s together.

• Knot the thread but do NOT cut it.


• Add the small yo-yo and knot thread, do not cut the thread.


• Finally the large one can be sewed on the small and appliqued to cover the opening.


•Back view of the puppy…made with just 1 large yo-yo for a more baby friendly toy.


• Back side of both softies.

One layer cake could make several softies. I hope you enjoy the designs as they were made from my ♥ for my little girls.

Giant Pincushions


These are super simple to make and adorable! They come in handy around your sewing room and work as great gifts for sewing friends.

honeybun or jelly roll strips
hand sewing needle & matching thread
pincushion filler of your choice

Patisserie by Fig Tree – Neptune by Tula Pink

1. Pick 3 honeybun strips that look good together and have some contrast.
2. Sew them together into a strip set. Offset the start of your strips like this.

3. Press seams. This can be in any direction.
4. Measure your strip to make sure it is 3 ½” wide. If it is not it is ok if it is smaller (your ¼ is bigger) but not larger (you are sewing too scant) Correct if needed and write down what the width of your strip is.
5. Cut a 45 degree angle at the one end of your strip.

6. Turn your ruler so you can cut a diamond. Cut it to be 3 ½” or the width of your strip set.
Repeat for a total of 8 diamonds.


7. Place diamonds RST into 4 sets making sure that the top points are the same fabrics.


8. Pin & Sew along 2 sides from top to bottom pivoting in the center. (repeat 3 times for 4 sets)


9. Open and press towards solid strip. (not the part with 2 seams) (repeat 3 times.)


10. Similar to step # 7 place diamond sets RST and pin. The ironing from step #9 should help you interlock the seams at the top and bottom. Sew 2 sides from top to bottom, repeat for 2nd set, and iron again.


11. Now you have 2 halves of your pincushion.


12. Put one half inside the other RST. Pin all the way around and sew leaving a 1 ½” opening.


13. Turn right side out. Fill with stuffing or filling of choice.


14. Hand sew opening closed and you are done!

See how easy that was!

Red White & Bold by Sandy Gervais – Neptune by Tula Pink

1. Pick 2 jelly roll strips that look good together and have some contrast.
2. Sew them together into a strip set. Offset the start of your strips.
3. Press seams. This can be in any direction. (since i had a light color solid here i pressed toward the blue print)
4. Measure your strip to make sure it is 4 ½” wide. If it is not it is ok, just write down what the width of your strip is.
5. Cut a 60 degree angle at the one end of your strip.
6. Turn your ruler so you can cut a diamond. Cut it to be 4 ½” or the width of your strip set.
Repeat for a total of 6 diamonds.

7. Place diamonds RST into 2 sets making sure that the top points are the same fabrics. You will have 2 leftover at this point.
8. Pin & Sew along 2 sides from top to bottom pivoting in the center. (repeat 1 time.)
9. Open and press towards solid strip. (not the part with 1 seam) (repeat 1 time.)

10. Similar to step # 7 place a diamond set RST with a loose diamond and pin. Sew 2 sides from top to bottom, repeat for 2nd set, and iron again.


11. Now you have 2 halves of your pincushion.


12. Put one half inside the other RST. Pin all the way around and sew leaving a 1 ½” opening.

13. Turn right side out. Fill with stuffing or filling of choice.
14. Hand sew opening closed and you are done!


see just as easy!!

you probably noticed that one of my pincushions has a lot of fabrics… this is achieved by cutting your diamonds from different strip sets… it makes a nice scrappy look and can help you use up leftover strip sets so you can go buy more fabric!

another option is to flip every other diamond… instead of a star you’ll end up with more of a pinwheel…

the possibilities are endless!!

Super cute pincushions.. you won’t be able to make just one!
3 Honeybun strips = 6 1/2″ x 6 1/2″ x 3″
2 Jelly Roll strips = 8″ x 7″ x 3″

Enjoy!
by Julie of jaybirdquilts!