
by Roslyn Mirrington of Bloom
Just in time for Christmas giving, cook up a journal cover (or ten!) from a single honey bun. The two covers in this tutorial are made from Minick & Simpson’s elegant new line, Wiscasset.


1 x fat quarter of coordinating fabric for lining
lightweight fusible fleece (I used Vilene H 630 made by Freudenberg)
For Journal #1:
12″ coordinating ribbon
DMC six strand embroidery floss in the following colours:
- #347 very dark salmon
- #611 drab brown
- #760 salmon
- #3750 very dark antique blue
For Journal #2:
1 x fat eighth linen fabric
1.25 yard coordinating ribbon
I have made these journal covers to fit an A5 art diary which is 6.25″ wide, and 8.25″ long. If your journal is a different size, the method of construction will remain the same, but you will need to alter the measurements to fit.


Journal Cover #1
Step 1: The pieced panel
From the fusible fleece, cut a rectangle 9″ x 21″.

From the honey bun, choose 8 strips. (If you would like the option of an embroidered strip, choose one tone-on-tone strip for your embroidery). From each of these strips, cut a 21″ length.

Using a sharp, lead pencil and a light box (or the nearest window), transfer the embroidery design onto the tone-on-tone strip. You can find a pdf version of the embroidery design here. The fabric itself inspired this simple design, but feel free to make up your own design at this point! Of course, this embroidered strip is entirely optional. If the embroidery doesn’t appeal to you, simply leave this strip unadorned.

Lay the rectangle of fusible fleece on ironing board, with fusible side up. Lay the first fabric strip along the top edge of the fleece, with top edges aligned and fuse.

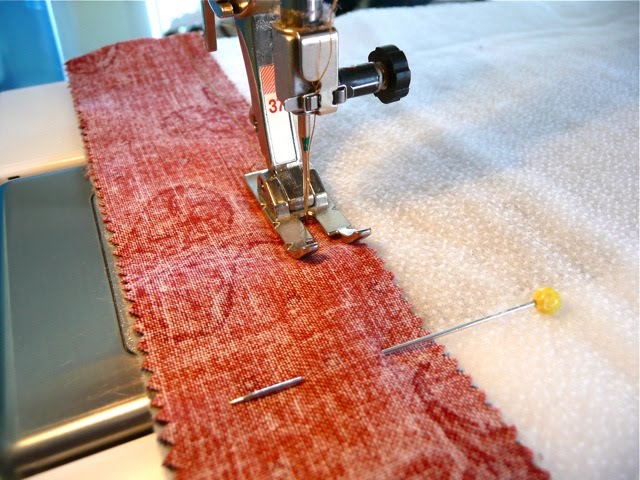
Lay the second strip, right sides together, on top of the first strip. Pin in place.

Using a 0.25″ seam, stitch the strips together to the fusible fleece.
Edit: Your seams actually need to be slightly less than 0.25″ or a ‘very scant’ 0.25″. (The finished width of each strip should be a little more than an inch).
Open the strips, & flip the second strip down onto the fusible fleece and press.

Continue adding strips in this way, pinning, stitching, flipping & pressing until you have added all eight strips.

You may find at this point that the fabric strips have stretched a little as you have sewn, and you have messy bits at either end of your pieced panel (see below). Simply trim these ends back to square with the fusible fleece.
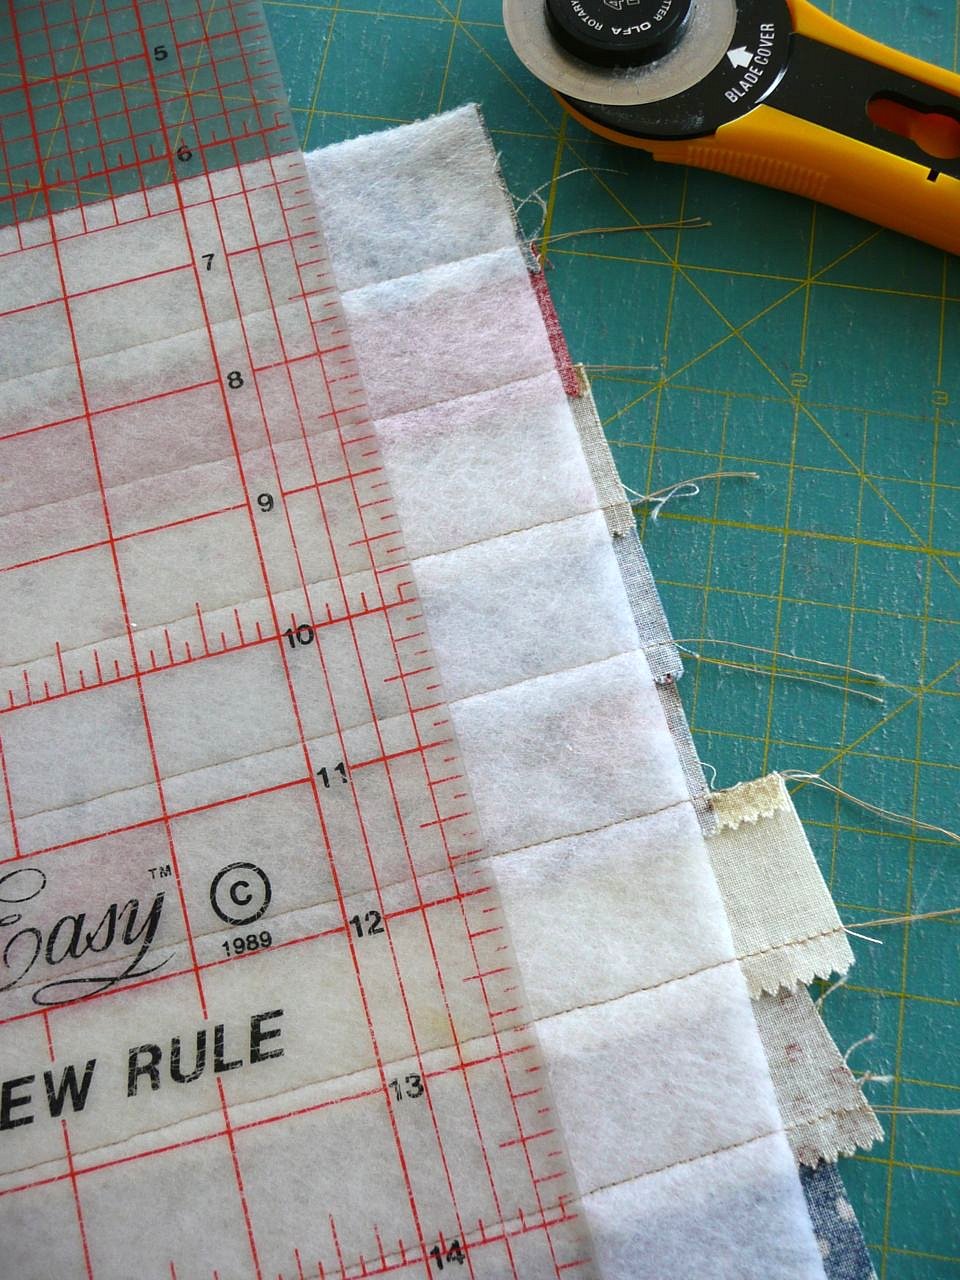
Similarly, you may have some excess fleece at the bottom of your pieced panel. Again, trim the excess fleece back to the fabric strip.

You should have something that looks like the photo below. At this point, the pieced panel should measure 8.5″ x 21″.
Correction: The pieced panel should be 9″ long (not 8.5″) by approximately 21″ wide.

Step 2: The embroidered strip
If you are choosing to embroider your journal cover, it is time to stitch! Using a simple backstitch and 2 strands of thread, stitch the flowers. I have used DMC #347 very dark salmon for the flowers, #760 salmon for the flower centres and #611 drab brown for the leaves and stems. The spots are colonial knots using 2 strands of #3750 very dark antique blue.

Step 3: The ribbon marker
Mark the centre top of your cover. Pin a 12″ piece of coordinating ribbon to the top edge of the cover, 1.5″ from the centre, towards what will be the back of the cover.

Machine stitch this ribbon to the cover, 1/8″ in from the edge.

Step 4: Finishing the cover
Overlock or zig zag the short sides of the rectangle to neaten. Turn these sides under by 0.25″ and stitch.

With the right side of your journal cover facing upwards, put pins at the centre top and centre bottom. Measure 6.75″ either side of each centre, and mark with pins.

Turn in each of the short ends such that the fold lies at the point you have pinned 6.75″ from centre.

Measure your journal cover at this point. From the fat quarter of coordinating fabric, cut a lining rectangle with the same measurements. (The lining should be somewhere near 13.5″ x 8.5″; you can overlock the short ends of this rectangle, but it is optional).

Pin the lining rectangle in place over the journal cover. Make sure your ribbon marker is tucked in out of the way.

Stitch the top and bottom seam using a 0.25″ seam allowance. (I also overlocked these seams, just for strength & neatness).

Now for the exciting bit! You should now be able to turn the entire journal cover in the right way & press. Hopefully, the outside should look something like this:

And the inside should look something like this:

Insert journal and enjoy!


Journal #2
Step 1: The pieced panel
From the fusible fleece, cut one rectangle 9″ x 21″.
From 21 honey bun strips, cut 4.5″ lengths.
From linen fabric, cut two rectangles 2.75″ x 21″
The coordinating lining fabric will be cut to size later.

Using a 0.25″ seam, sew the 4.5″ honey bun strips together to form one long piece.

With the fusible side of your fleece up, mark lines with a pencil 2.25″ from each long edge.

Place your pieced honey bun strip between these lines and pin. Fuse the strip to the fleece, with the point of your iron. Take care not to press beyond the fabric strip or you will end up with a sticky mess on your iron!

You may find at this point that the fabric strips have stretched a little as you have sewn, and you have excess fabric at end of your pieced panel (see below). Simply trim these ends back to square with the fusible fleece.

Pin one of the linen rectangles, right sides together, to the top of the honey bun strip.

Stitch this seam using 0.25″ seam allowance.

Flip the linen back across the fusible fleece and press. Repeat with the second linen rectangle.

Using a matching thread, topstitch three rows of straight stitching, 0.25″ apart to the top and bottom side of the honey bun strip.

Pin your length of coordinating ribbon at the centre of your journal cover.
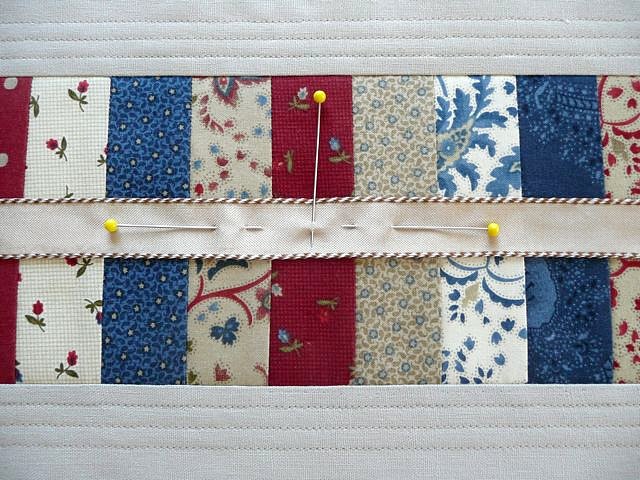
Stitch the ribbon in place.

Finish your journal cover by following from Step 4 of Journal Cover #1. Insert journal and tie the ribbon in a bow to close. Trim ribbon ends to desired length.
Have fun with these journal covers & be sure to send me a photo if you make one! There are more variations of these covers over at my blog, here and here. Best wishes, Bloom.

One Honey Bun (40 strips) will yield 10 of Journal Cover #1 OR 15 of Journal Cover #2.
![]()
