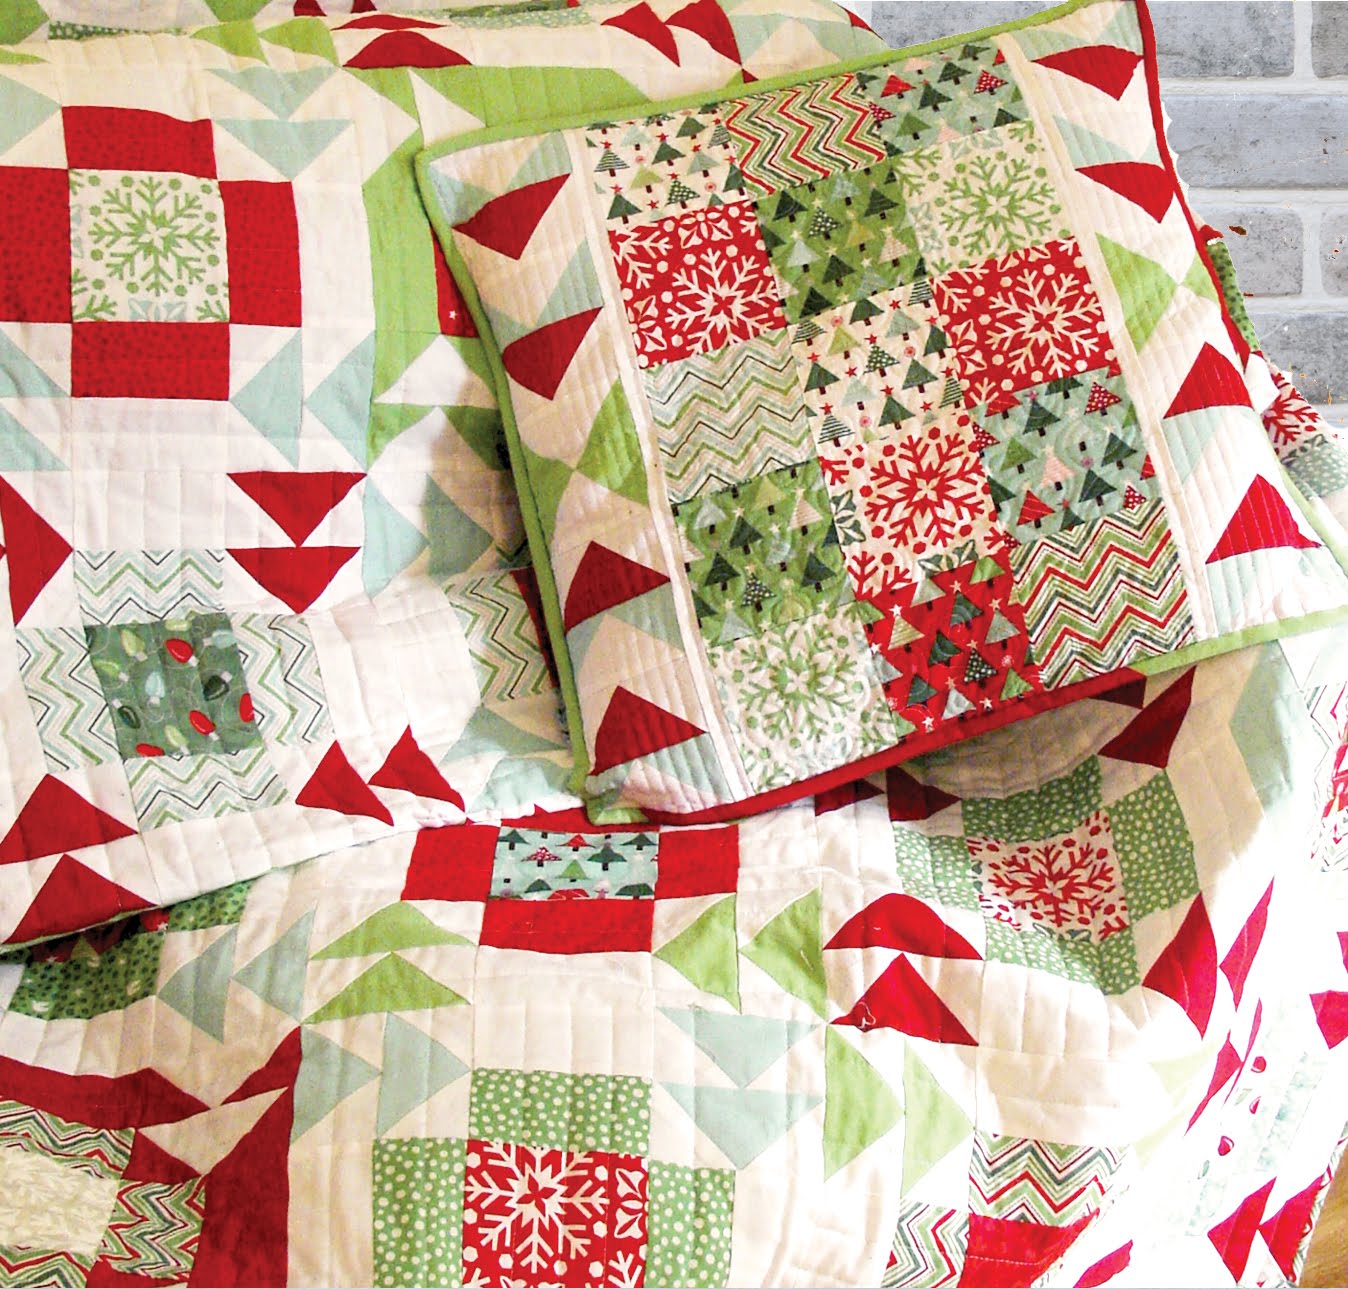
Hi, Kristy back again from HandmadeRetro. I don’t have many Christmas decorations up in my house usually. Both of our families live interstate (thankfully in the same one) and we are most often away for the Christmas season so it seems a little silly to decorate an empty house. But when I made this cushion last year and it got such a great response I decided to make a quilt sized version for a little Christmas cheer. I modified the construction a little from the cushion to eliminate some of the unnecessary seams but it is still based on a Kaleidoscope block with careful fabric placement. I used a layer cake but it would also be great from scraps of different Christmas lines, as the cushion was.
Note: My templates are provided in the Printer Friendly Version below. They are sized for A4 paper but will print on US Letter paper if you select “no scaling.”

1 x Layer Cake of Joy by Kate Spain
3 yards solid or tone on tone print for background/negative space (I used 27124 23)
2 yards of print for border (I also used 27124 23)
3/4 yard for binding (I used 27127 12)
5.5 yards of chosen print for backing (I used 27123 13)
template plastic

Perle cotton
Kaleido ruler or other 45 degree ruler

Make your templates
From the printable version print the templates (your will need to join Template C) and trace onto template plastic with a ruler (to help keep your lines straight) and a sharp pencil.
Cut out using scissors (or and old rotary cutter) along the lines.
Cutting
From the Layer cake
Sort each of your layer cake squares into four colour groups – using this line I had green, red, white background and aqua.
For each ring you will need 12 large triangles and 16 small corner triangles. The templates are provided in the printable version. If you have a Kaleido ruler/45 degree ruler you will be able to use this for the large triangle (12” block mark) but you will need to use the template to cut the smaller triangles.
From each layer cake sheet you can cut 2 large triangles and 2/3 small triangles. Cut the required number of triangles from a mix of colours and patterns. A minimum of four designs per scrappy ring is recommended (you will have four different prints in each corner). As I was cutting I lay out each ring to make sure I had a good mix as I was cutting.
To make maximum use of a 10” square cut a strip 6.5” wide along one side. From this strip you can cut 2 large triangles by top and tailing Template A (or your 45 degree ruler)
Top and tailing the second template as shown you can cut 2-3 small triangles. The shorter edges will be the bias ones so handle carefully.
A reconstructed layer cake square will look like this with the scraps.
From the background solid
Cut 2 strips 6.5” wide and cut a further 16 large triangles with Template A (or your 45 degree ruler).
Cut 5 x 12.5” strips and cross cut to yield 13 12.5” squares
Cut 2 x 12.5” strips and crosscut into 8 template C – rotating but not flipping for each subsequent shape.
 |
| A tip: when cutting using template plastic place this on the fabric as a guide, line up a ruler at the edge and then use this to cut along with your rotary cutter – it will save your fingers and stop you from shaving off little bits of the template. |
From the border fabric
Cut 4 x 9.5” strips down the length of the fabric to yield 4 x 9.5” 60″+ length of fabric strips.
From the binding fabric
Cut 9 x 2.5” strips
Sewing
The centre panel of the quilt is make from 25 blocks in a 5×5 layout as shown above. The mostly solid blocks (in the corner, middle of the sides, the centre block and the centre of the wreaths) are the 12.5″ squares you cut with the corner triangles added. The Template A triangles are the larger coloured triangles (and the white ones where the wreaths join and around the edge) and Template C makes the second half a block on the outer edges. Clear as mud?
Sewing the Wreath Centres
I worked a colour/wreath at a time because it helped me lay out the prints in the pleasing mix.
Lay your A triangles out on a table/floor/design wall with the larger base to the middle of the ‘circle’ – you will have 3 on each ‘side’. Add the white triangle to one side of the set of three. Found it helpful to also lay out the Template C half so I placed the Background A triangle on the correct side.

Sew these sets together in two pairs, press seams to one side, and then to a set of four with the background triangle on one edge.
Tip: When sewing – start from the wider base, it will help you fabric not to get chewed up by the feed dogs at the start of the seam.
Tip:If you always put the wide triangle base to your left when pressing the seams after the first pair are sewn they will nest nicely when you sew them together.

Now you will have four halves. The ones destined for the outside of the quilt will match with the template C piece like this. To finish the pieced half on all the four sections sew on a corner triangle in the positions as pictured. You will have ‘ears’ on the B triangles so to position correctly find the centres by folding and finger pressing and then matching the marks. Sew, press seams to outer triangle.
Sew the background halves to two of the pieced halves. The other two will be joined to a pieced half of a different colour later.
To finish the ring we need to add the coloured triangles to the 12.5″ squares – the centre of the wreath will need one at each corner, and four more will need 1 in one corner (2 of these will later get a second colour on a second corner and one will have 4 corners coloured with the colour of the four rings. Confused? The diagram at the beginning of this section should help)
To trim the corners to assist placement of the coloured triangle lay one of the triangles in the corner to be trimmed, matching the point and edges. Mark the background square at the base of the triangle (this will be the seam line so use something erasable).

Place the 1/2″ mark of your ruler on the line you just drew and cut, trimming off the corner.
You’ll end up with this.
Finger press to find the centres of side of each piece again and sew the corners on.
You’ve now got all the blocks/units needed for one ring. Repeat the steps with the other colours – joining the pieced halves of two colours where they meet.

Piece the Centre Section
Lay out all the blocks, using the diagram at the top of this post to assist, and sew together in rows, then sew the blocks together. I press my seams to the side and nest them together when sewing the rows.
Adding the borders
You will have four borders longer than the side seam of the quilt. To measure the size needed to trim them to fold the quilt though the centre and measure. Repeat on the other axis. It should be the same, and about 60.5″ if your seams were accurate. Trim all four of the side measurements to the length of your measurements.
Tip: Measuring in this way helps to minimise the calculation of any stretched out sides and prevents a wavy border when sewn on.
Sew two long strips to opposite side of the centre panel. Press seams towards the border.
Tip: I find pinning at this stage very helpful. find the centre of the border and the centre panel by folding and finger pressing. Match these marks and pin. Pin at either and and then in at least 3 additional places in each half. This should help stop unwanted stretching as you sew.
Before sewing on the two additional borders you’ll need to construct four 9.5″ cornerstone blocks to add to each end of the remaining two borders to bring them up the the size of the centre panel plus the two borders. I made wonky 9 patch stars in keeping with the Christmas theme. There are a heap of tutorials for this block around so I won’t include another other than to say that each unit should be cut at 3.5″. You could use any block you like or a print. I got all the fabric I needed from the scraps of the squares and a few unused ones.
Once you have made them sew the blocks onto each end of the two remaining strips and press seams towards the border strip.
Nest seams at the border, pin at the centre and each end and sew. Press seam towards the border.
You have a Christmas quilt top!
Finishing
Basting
I pin baste my quilts. First I tape the backing to the floor pulling tight (but not stretching the fabric) and taping the edges flat.
Tip: If you have joins or designs you want to match up the floorboards joints or tile grout lines can be helpful here!
Quilting
For this quilt I hand quilted with Perle cotton No. 5 (see garnishes for Finca colours I used) ¼” inside some of the triangles to mimic ribbon wrapping around a wreath.
I free motion quilted a 4 point star in each of the large background squares (alternating the orientation inside and outside the wreaths.
In the border I hand quilted inside the white stars and outside the coloured stars and free motion quilted around the print on the long borders.
Binding
I use straight of grain binding, machine sew to the front, mitering corners and hand stitched to the back.

A 78″ x 78″ full sized quilt!
Kristy Ward
{handmaderetro.blogspot.com}