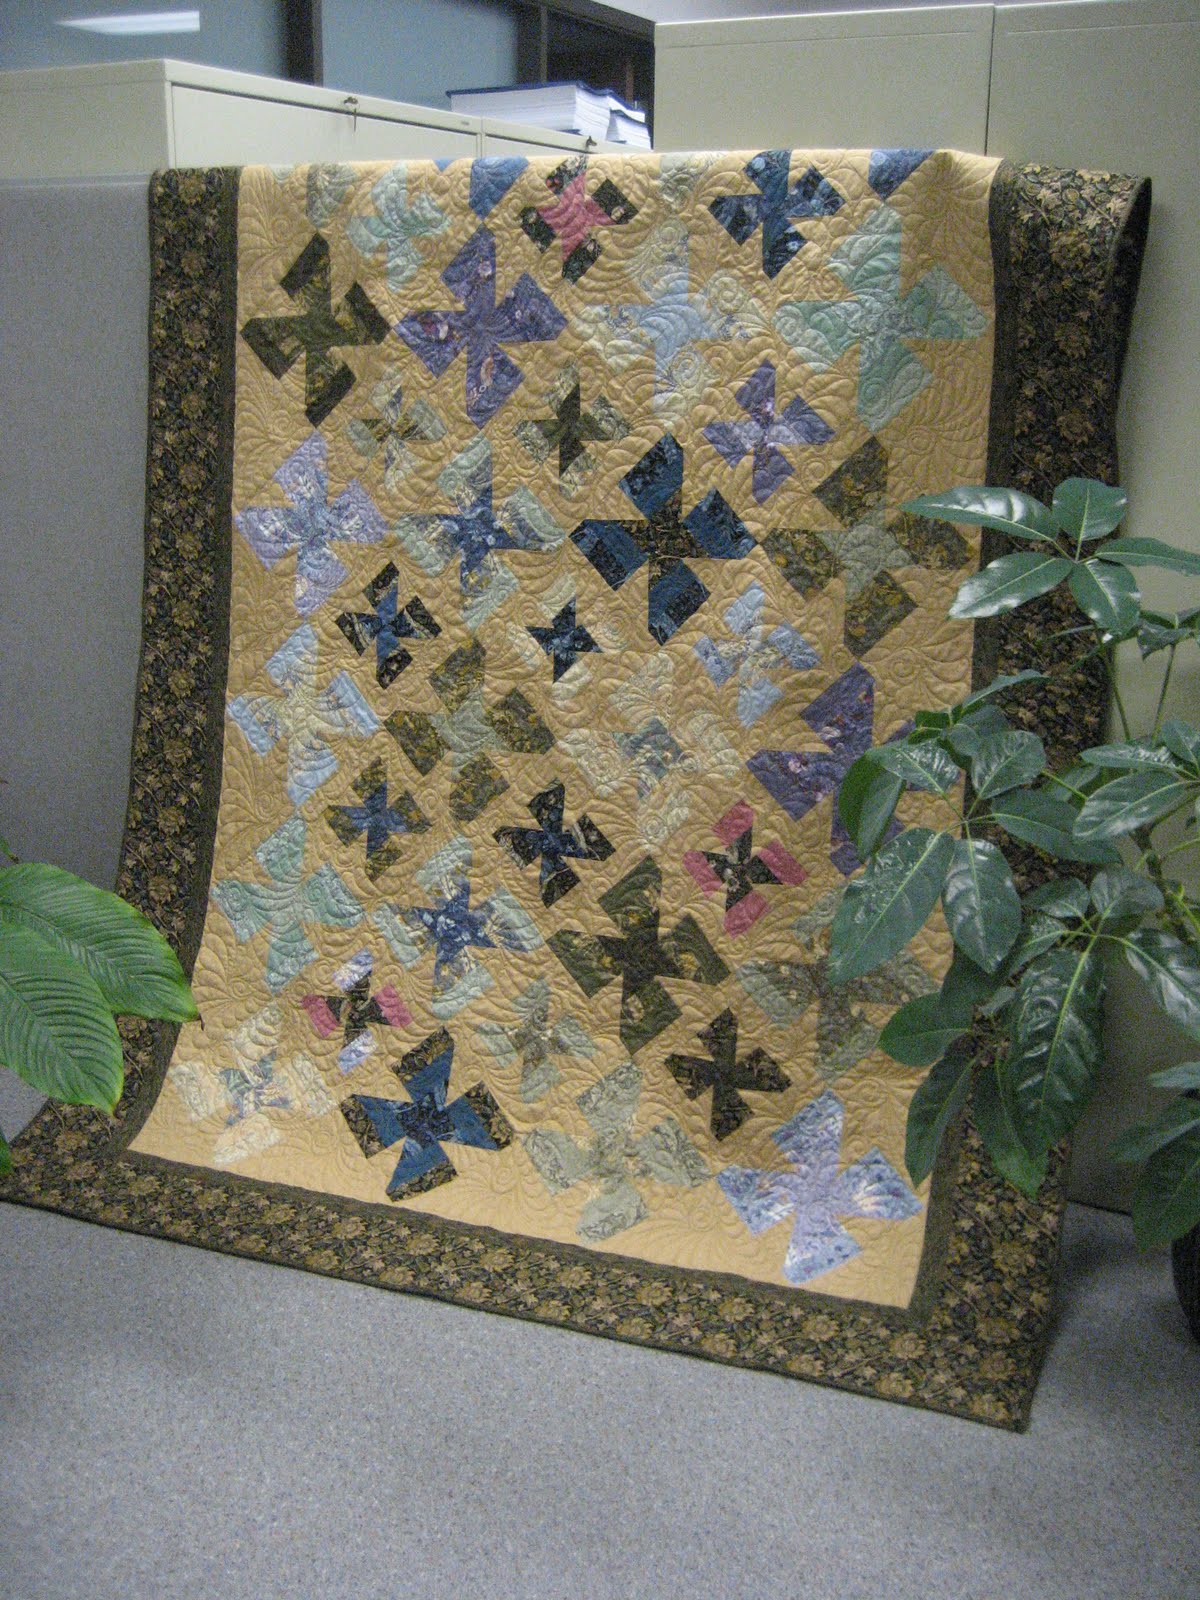
Hello all! I am so excited about this project. It happens to be the largest quilt I have made, as well as the largest quilt I have quilted. This project is a “twist” on a classic. The Irish Chain is one of the most traditional quilting patterns, so I took that wonderful tradition and then kicked it up a few notches. And please don’t be scared by the size, whether you are a beginner or an expert, this quilt is a wonderful project.
So are you excited?? If you have any questions feel free to contact me at happyquiltingmelissa (at) gmail (dot) com. And you can always find me at
happyquiltingmelissa.blogspot.com. And as always, Happy Quilting!
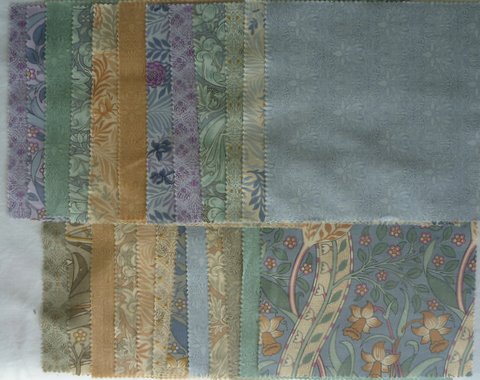
1 – A Morris Tapestry Jelly Roll (I used this collection as I wanted a more traditional collection to match my twisted traditional pattern. If you want a different collection so that it matches your room or what not, feel free. You’ll just need 40 Jelly Roll Strips.)
2 – Moda Bella Solids Natural Jelly Rolls (If you are using a different collection make sure your solid coordinates )
2 3/4 Yard – Bella Solid Natural. (You need exactly 2 3/4 yard so if they don’t cut straight at the store, give yourself a bit extra to square things up.)
6 3/4 Yard – Coordinating Print for the Backing. (You will cut this into three 2 1/4 pieces and sew them together to make the back.)
A quick side note before we start. I tried to make this tutorial very beginner friendly. If you are not a beginner, feel fee to simply skim the instructions for what you need. If you are a beginner and you happen to have questions, please don’t hesitate to ask. You can email me at happyquiltingmelissa@gmail.com. I will try to answer all of your questions asap. All sewing is done with 1/4 inch seams.
STEP 1 – CUTTING
Layout the strips of your jelly roll, lining them up with the 0 line at the base of the board. I did mine 8 at a time and didn’t double them up since you will be making several cuts and don’t want things shifting.

Cut across at the horizontal 16 1/2 inch line on your mat. Now if your mat is like mine, you don’t have a 16 1/2 inch line. So how do you do this you ask? Simple, just line your ruler up so that the first 1/2″ mark is aligned with the 16 inch line on your mat. You can check to make sure it is aligned along that 1/2″ ruler mark between each of your strips. So now, your ruler should be placed at exactly 16 1/2″ up from the 0 line on your mat. And just cut across all 8 pieces of your jelly strips. Now without moving your fabric cut at the 19 inch horizontal line on your mat and the 21 1/2 inch line using the same method you did for the first cut. This gives you a 33″ long piece and 4 pieces that are 2 1/2″ square in each print. (and a tiny bit of scrap selvage) Repeat this process with all 40 of your print jelly roll strips. Remember to take your time, precise cutting saves time in sewing 🙂

When you are finished, you should have a stack of (40) 33″ long strips and (120) 2 1/2″ squares. This project only requires 54 of those squares. I picked out 1 of each print and then 14 more squares of my favorite prints. Set the remaining 66 squares in your stash to make up something fun in the future. (These are perfect for HSTs, as they are already cut and ready to go.)
Now grab your first Bella Solid Jelly Roll. Isn’t it so hard to open them up? They look so cute rolled in a roll. Go ahead and open it up. Layout the jelly roll strips in the same fashion, 8 at a time, lining up along the base of the board on the 0 line.
You are now going to make the same first cut at 16 1/2 inch line (using your ruler to create the line) . Then without moving any of your fabric, cut again along the 21 inch line on your mat. This gives you a 33″ strip and two 4 1/2″ pieces out of each strip. Repeat this process for all 40 strips in your Jelly Roll.
Now we need to cut a few remaining pieces. So break open your second solid Jelly Roll. Lay out 6 strips from your jelly roll however, this time lay them slightly over the 0 line. Only like 1/4″.
Start by aligning your ruler along the horizontal 0 line on your mat and cut off the tiny overhang. So now you won’t have any pieces that are folded. Without moving any fabrics, slide your ruler up to the 8 1/2 inch line and cut horizontal. (Now I know there is no 8 1/2″ line but you are a pro at the ruler trick by now). Continue to slide your ruler up and cut along the horizontal 17 inch line on your mat. Once more, slide your ruler up and cut along the 21 1/2″ line. You should have four 8 1/2″ strips and two 4 1/2″ pieces out of each of the 6 strips. So (24) 8 1/2″ long pieces and 12 more 4 1/2″ long pieces.
And now, we only need 4 more 4 1/2″ pieces from our jelly roll. So get one more strip out, line it up and cut 4 more 4 1/2″ pieces. I choose to take it from the top doubled up. You can do that or whatever works best for your and your scrap needs.
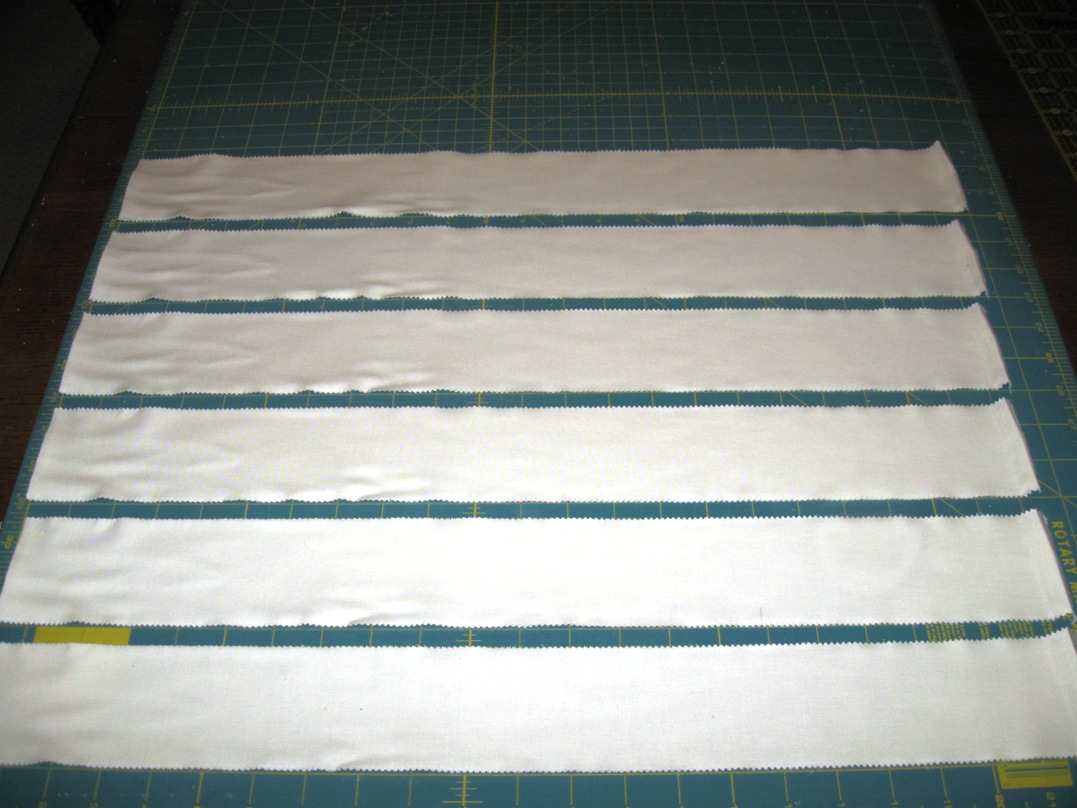
We are done with the pre-cut cutting. Go ahead and pull out your solid yardage of neutral fabric. (And iron it first; don’t follow my poor example. I cut this one strip and then ironed because I already had my camera out and didn’t want to forget where I was). You are going to cut (22) 4 1/2″ strips out of your yardage.
Simply line your fabric along any vertical line on the far right of your mat making sure that the fold runs evenly across the 0 line on the bottom of your mat. If the edge of your fabric is not straight, line up your ruler on a vertical mat line closest to the edge of your fabric and cut along the mat line, giving you a nice straight edge to work with. Now, count over 4 1/2″ on your mat, align your ruler along the top and bottom of that measurement and cut. Keep doing this until you run out of mat and then start over repeating until you have 22 strips.

You are going to take those strips and cut them up some more. First, you are going to take 6 strips and cut them into four 10 1/2″ pieces for a total of (24) 10 1/2″ x 4 1/2″ pieces. You can do this the same way we cut the jelly roll strips before. Line 3 strips along the bottom of your mat slightly hanging over the 0 line. Cut along the 0 horizontal line. Then measure up 10 1/2″ and using your ruler trick, cut at 10 1/2 inches. Then measure up another 10 1/2 inches which will put you at the 21 inch horizontal mat line and cut again. Repeat this process with the other 3 strips.

Your almost there, just one more set of cuts. Now you are going to cut the remaining 16 strips and cut them into six 6 1/2″ pieces for a total of (96) 6 1/2″ x 4 1/2″ pieces. Once again, we are going to use the same method as above. Line 3 strips along the bottom of your mat slightly hanging over the 0 line. Cut along the 0 horizontal line. Then measure up 6 1/2″ and using your ruler trick, cut at 6 1/2 inches. Then measure up another 6 1/2 inches which will put you at the 13 inch horizontal mat line and cut again. Now measure up 6 1/2″ more to 19 1/2″ and using your ruler, cut horizontal again. There is some extra scrap along the top. Repeat this process for all 22 strips.
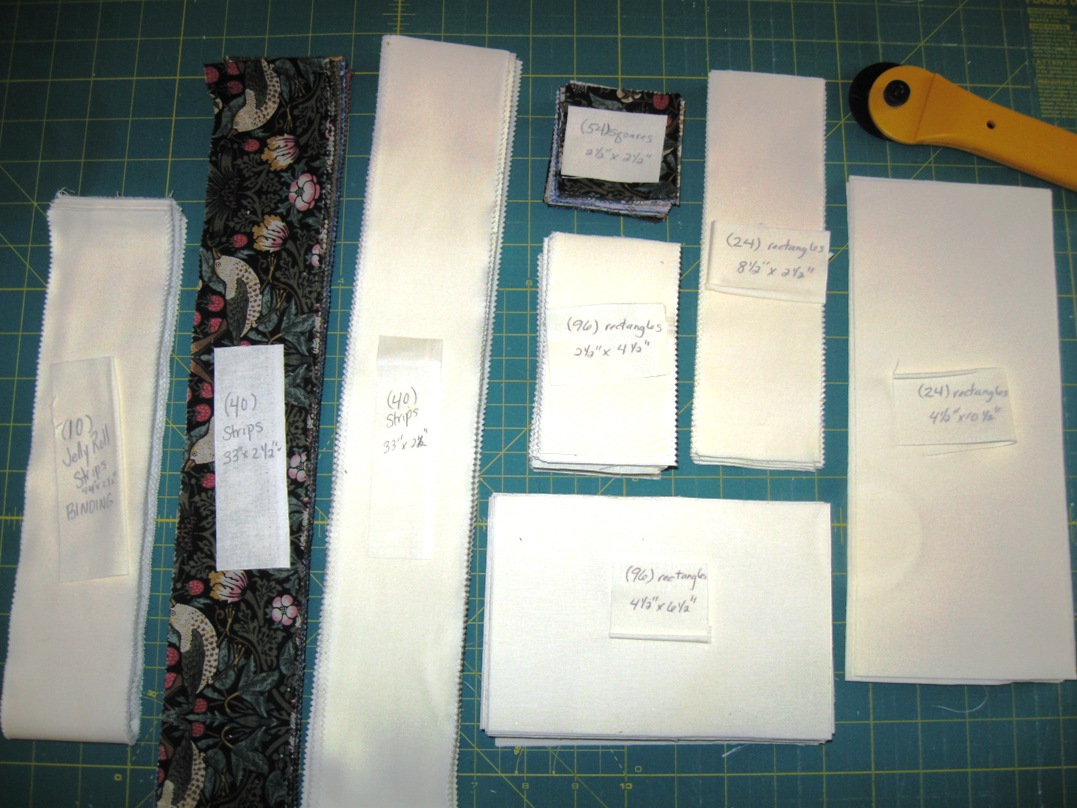
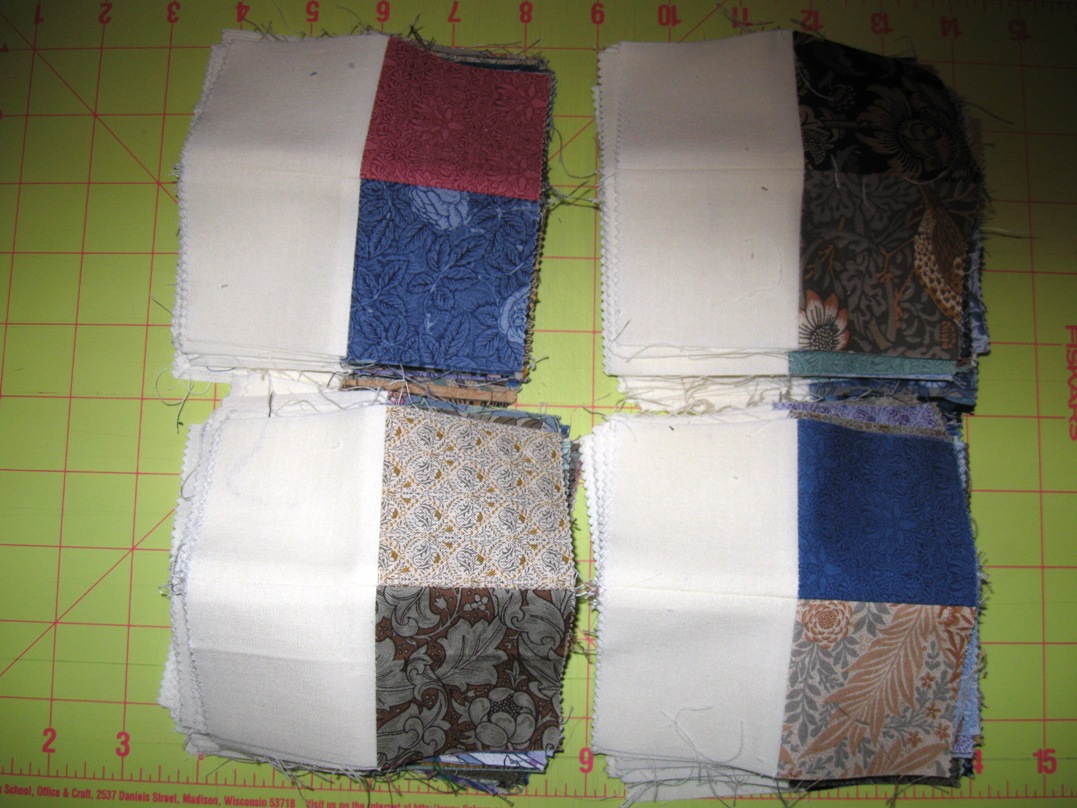
Wow, you did it!! Remember, this is a large quilt, so it is a large cutting job! Just as a checklist, this is what you should have. I made this picture a little larger so that you could see my little handwritten notes 🙂
STEP 2 – STRIP PIECING
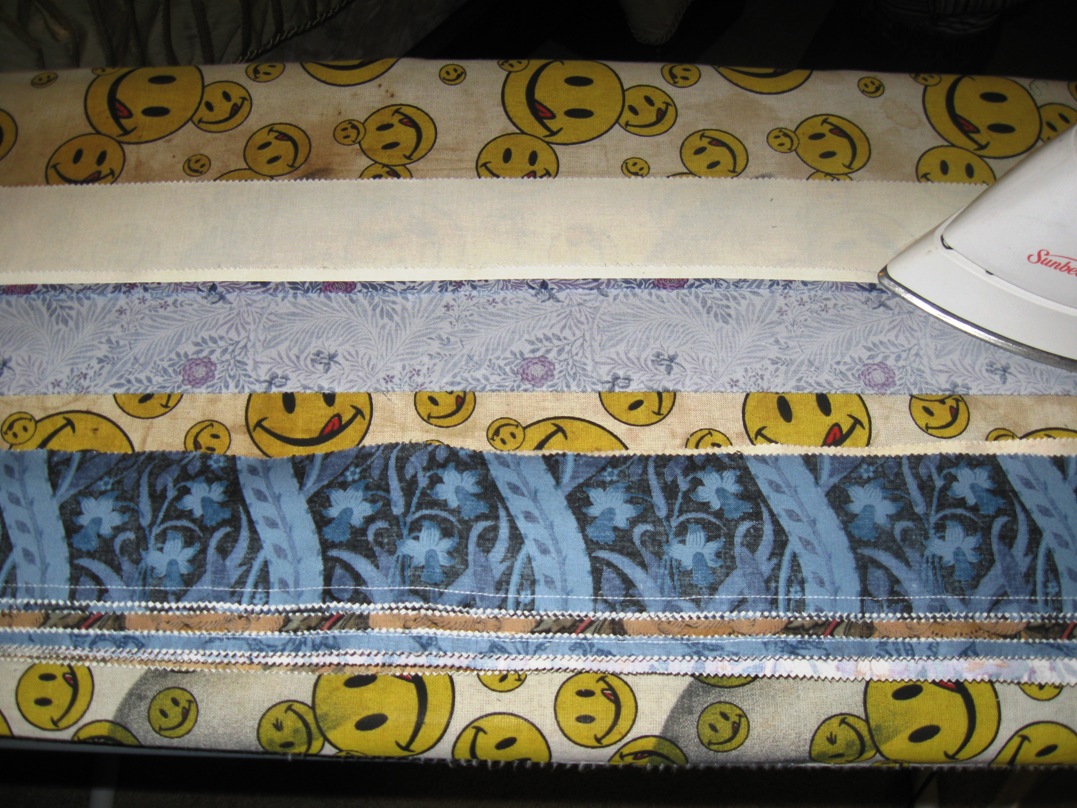
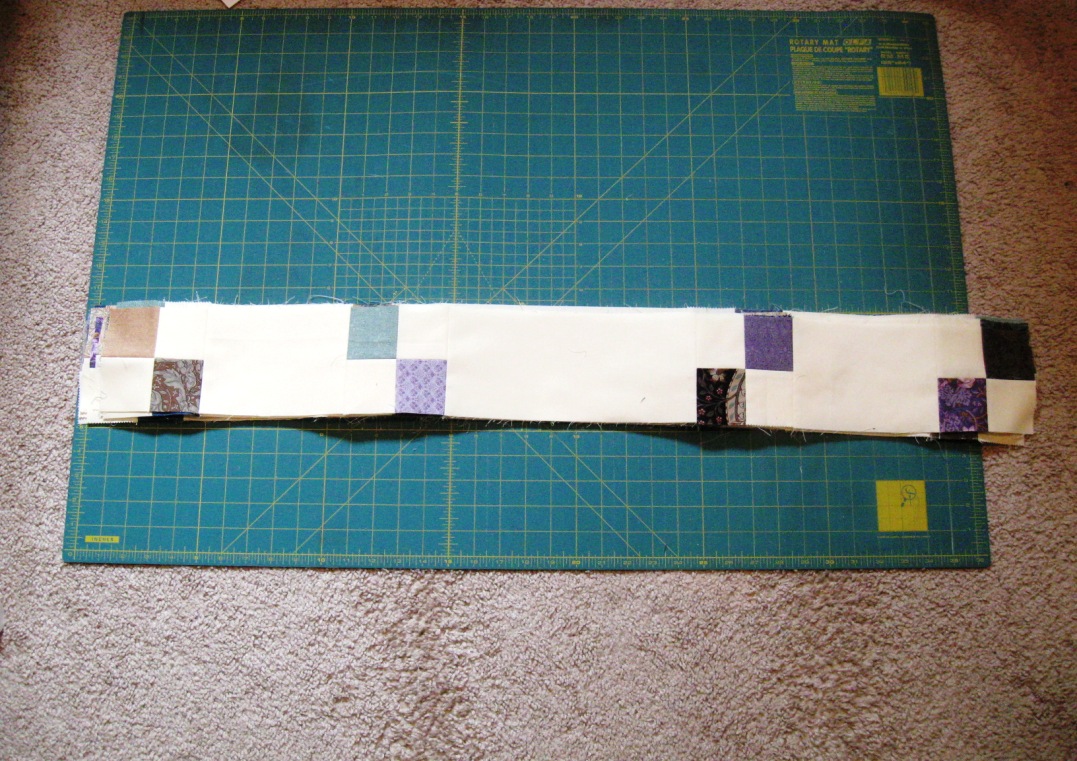
Okay, so no one wants to stitch all of those squares together individually. To save a huge amount of time, we are going to sew our strips together first, and then cut. I call this Strip Piecing, I don’t know if that is the technical name for this method but it works for me. In this method, we are going to take a 33 inch strip of solid and a 33 inch strip of your print and sew them together. So this is the idea of what it will look like. As a side note, I like to turn my stitch length down a bit for strip piecing. Since I will be going back and cutting these all up I find it helps to keep edges from coming undone. This is a personal preference, you do what you feel comfortable with.
With right sides together, lay your 33″ strip on top of your solid strip. Now remember, the picture only shows three but you will be doing this with all 40 of your sets of strips. Where the pen indicates, you will sew a 1/4″ seam down the full length of your strip. Don’t worry about pinning, just line them up by hand and feed them through, focusing on keeping the pieces matching where you are sewing your seam. If you get to the bottom of the piece and the one piece overhangs a little no worries, I made allowance for that in the cutting.
Once you get to the bottom of the strip, simply feed the next set of strips in. This is called Chain Stitching and it saves so much time and it is a lot of fun as well. We also will be using it a ton in this tutorial so enjoy the practice. Just keep feeding those sets of strips through your machine until you have sewn together all 40 sets.
Okay, so you have finished sewing the 40 strips. Now you will go ahead and cut the threads between them.
Now to pressing. This project has a lot of little squares put together and for that reason, I choose to press my seams open. I found it really helped reduce bulk. With that said, I know pressing is a very personal thing, so if you are not a fan of pressing seams open, press them whichever way you like.
And back to cutting. I know, but I promise, this is the last of cutting. You now have 40 beautiful 33″ long sets of strips. We are going to cut them down into 2 1/2″ pieces. You got this right. Just like we did before. Line up 4 to 5 strips along the bottom. (I know it is tempting here to stack up several pieces on top of each other but fight the urge). Cut a nice straight edge using your 0 line. Then keep measuring up 2 1/2 inches slicing as you go. In the end, you have (13) 2 1/2 x 4 1/2 sets of 2 patches with a little bit of leftover for wiggle room from each print.
Continue this process with all 40 of your sets. You should have 520 little 2 patch rectangles. Aren’t they adorable. I left mine in stacks like this and choose randomly. I would suggest not playing with them much as they are cut after being sewn and if they are mixed up in a bag or thrown around to much the seams can start to come undone.

STEP 3 – CREATING BUILDING BLOCKS
Each of the blocks in this quilt are made up of smaller “building blocks”. We are going to start with what I call the opposite 4 patch block. Now I have tried to really detail this process because not only does it create “building blocks,” it goes over the basic building steps of piecing quilts that will be used over and over in this tutorial. So here we go. Start by grabbing 2 sets of your 2 patch rectangles. Align them so that the prints and solids are opposite.

Now lay your first piece over on to the other piece. When I say lay, I don’t mean pick up and possibly spin around and then lay. I like to think that whatever two pieces I am going to be sewing have a hinge between them. When it is laid out, you simply lift the top piece and “fold” it over onto the bottom piece without changing anything where the seam or “hinge” would be. I know this sounds silly with this little piece but the rest of the tutorial is based on understanding this and it is really easy to mix up where your seams are being sewn if you don’t keep an eye on it. So with that being said, I tried to slightly alter the alignment on this picture to illustrate this point.
Whenever you are aligning two pieces that have seams in the same spot, you always want to make sure those seams align perfectly. Don’t worry about how the edges line up as much. The seam is the most important.
So go ahead and pin your piece where you will be sewing your 1/4 inch seam ie where your “hinge” would be. (Sorry, I just realized that after I picked this piece up to take a picture of it I turned it over when I pinned it, I hope that doesn’t cause confusion.)
We are going to be making 144 of these opposite 4 patch squares. So go ahead and pin up a bunch (I did mine in groups of 50, 50, and 44 as that is how many pins I had.) Now that you have a huge stack of pinned sets, you are going to stitch them. Sew a 1/4″ seam, making sure to pull out pins as you come to them. Just keep feeding your pieces through, chain stitching a long line of opposite 4 patches.
After you’re done with a group of four patches, go ahead and clip your threads between pieces.
Once again, press your seams open (or your preference) for your set of 4 patches.
Keep repeating this process until you have 144 Four Patch Opposite Squares. Aren’t they cute?
Now we are going to be making the Same Four Patch Squares. I know, not a great name, but it is all I could come up with. You will be making 96 of these 4 patches. Align your first two pieces so that your prints are next to one another and your solids are also next to one another.
Just like before, you are going to make sure your seam lines up. Also, notice the difference on how your squares line up. You know you are right if your prints are together and your solids are together. Go ahead and pin at the seam first, and then along the edges. Do this for your first batch of 50 or so till you run out of pins. (I know, tons of pinning, but it doesn’t take much brain power, feel free to multi-task while pinning. I found it was a great thing to do while helping my son with his homework.)
Now start sewing your 1/4 inch seam, chain stitching your batch of 4 patches. Remember to pull pins as you go along.
Clip your threads between pieces and then press. Repeat this process with your whole batch.
When you are finished, you should have 96 Same Four Patch Squares. Way to go!!
You only need a few more building blocks and they are already made. Pull out 24 of your 2 patch rectangles. This is a great opportunity to set aside any duplicates you might still have.
So now you have 16 extra 2 patch squares. Set these aside for a future project.
Now that the building blocks are made, you are ready to start making the blocks for the quilt. The next steps will walk you through making block A, B, C, and sashing.
STEP 4 – BLOCK A
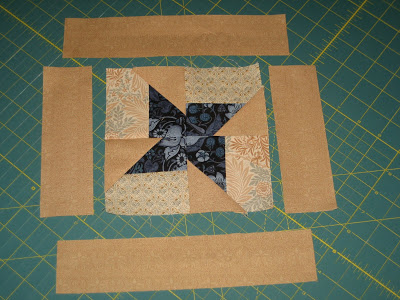
You will be making 24 Block A’s. For each instruction, make sure you are doing it 24 times (unless otherwise noted). It always saves time to do things in an assembly line. Get 48 Opposite Four Patch Squares, (48) 2 1/2″ x 4 1/2″ solid rectangles, (48) 4 1/2″ x 6 1/2″ solid rectangles, and 24 printed 2 1/2″ squares.
This is the layout for the block. Go ahead and sew your columns together and then your rows 24 times.
STEP 5 – BLOCK B
You will be making 24 Block B’s. For each instruction make sure you are doing it 24 times (unless otherwise noted). You know the drill about saving time. Get all 96 of your Same Four Patch Squares, 48 2 1/2″ x 4 1/2″ solid rectangles, 24 2 1/2″ x 8 1/2″ solid rectangles, and 24 printed 2 1/2″ squares.
This is the layout for Block B. (Sorry, I forgot to spread out the pieces to make it easier to tell the pieces). Sew your columns together and then your rows 24 times.
STEP 6 – BLOCK C
You will be making 6 Block C’s. Yes that’s right , you only have to make 6 of something! Here is what you need to make your 6 Block C’s. 24 of your Opposite Four Patch squares, 24 of your 2 patch rectangles, and 6 of the 2 1/2″ squares.
Here is the layout for Block C. Sew your columns together and then your rows 6 times.
STEP 7 – SASHING
Okay, so now you’re asking, why are we putting the sashing together before we put together what we are going to sash? And the answer is, because when we get those big huge blocks together and you are so close to seeing your quilt complete, the last thing you are going to want to do is fiddle with sashing. So I like to do them early so they are ready when you are. Grab the remaining 72 Opposite Four Patch Squares, 24 of the solid 4 1//2″ x 10 1/2″ rectangles, and 48 of the 4 1/2″ x 6 1/2″ solid rectangles.
So this is the layout of your sashing. You will be making 24 sets of each layout. Make sure that you have 24 sets where the top left hand corner of your four patch is a colored print and 24 sets where the top left hand corner of the four patch is your solid. This is really easy to flip so pay close attention. Sew your sashing.
Split your sashing’s into 2 piles of 12. Go ahead and set one pile aside, they are done. The other pile of 12 we will be adding corner squares onto. Here is the layout for the corner squares. Grab the last of your opposite four patch squares. This is where we finish up using your “building blocks”.
Make sure that your Corner Squares layout match these. Once again, it is really easy to spin and block and then your chain will not quite link up. Sew your corner blocks on.
And there you have it, 12 Sashing’s with corner blocks added. Pat yourself on the back!
STEP 8 – THE BIG BLOCKS
This is where you really get to see the quilt come together. You will be making 6 “Big Blocks”. For each “Big Block” you will need 4 Block A, 4 Block B, and 1 Block C. here is how they will be laid out.
Sew the rows together. This is what your Row 1 looks like. You should have 6 of them.
Now onto Row 2. This is what it should look like when finished. You should have 6 of them.
And you guessed it, same concept for row 3. This is what it should look like when finished. Remember – 6 🙂
Now that your Rows are all made lay them out and sew them together – 6 times :).
For each Big Block you need 2 regular sashing’s and 2 sashing’s with corner blocks. Here is the layout. The regular sashing’s are layed on the left and right hand side of your block and the sashing’s with corners are added to the top and bottom of your block.
We’ll add the left and right hand regular sashing first.
Here is what it should look like. Super nice!!
Now you are ready to add the sashings with the corner blocks to the top and bottom of your block. Make sure to pin lining up seams and sew 6 times.
And there you have it! 6 Big Blocks that have been sashed and are ready to be put into your quilt top.
STEP 9 – FINISHING THE QUILT
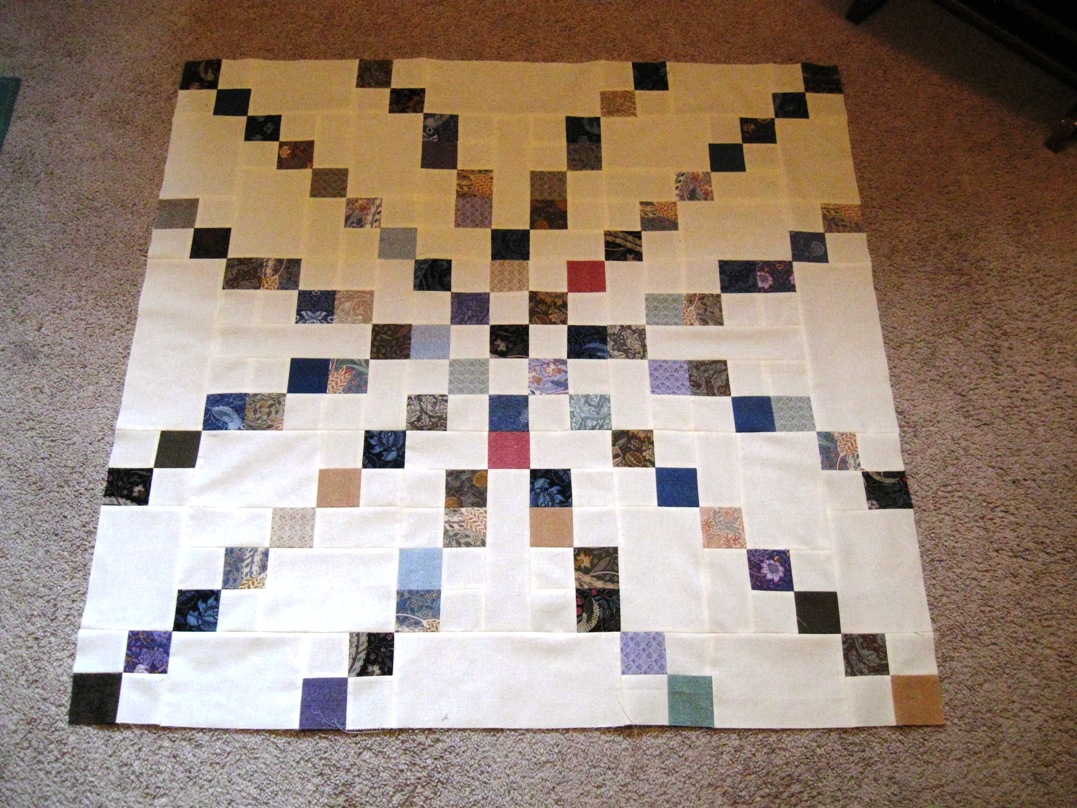
I totally had to rearrange my living room in order to lay out the six blocks for a picture. You can see all the furniture on the side, tee hee hee. Go ahead and lay out your 6 blocks in three rows of 2 blocks each. You can spin your blocks as much as you like to get the look that is pleasing to your eye. Sew blocks into rows and then rows together.
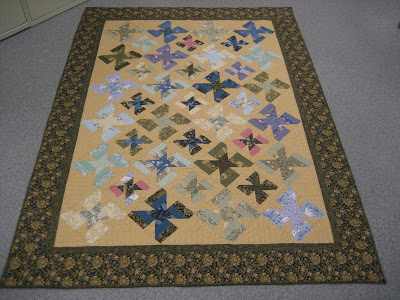
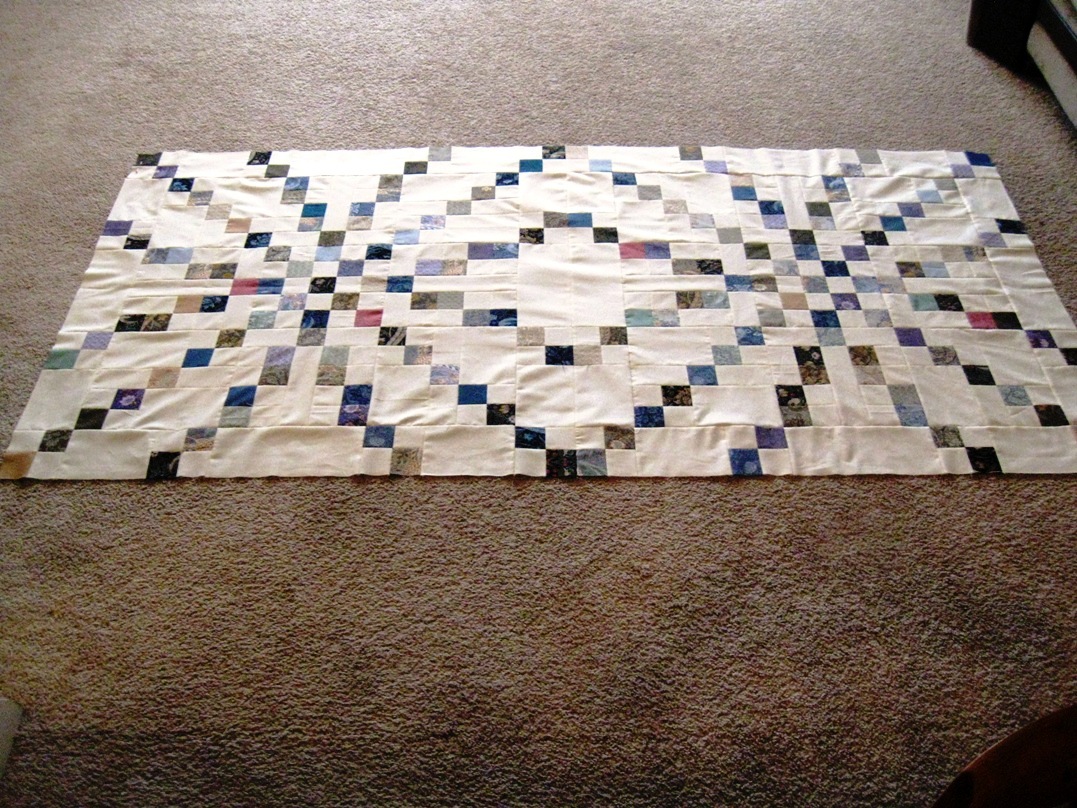
And there you have it, your completed top! Isn’t it amazing. Ya, I did a little dance in my living room at this point in time. Go ahead, do your own dance, you deserve it!!
Now to finish you just quilt and bind. I know, it sounds so easy. There are tons and tons of tutorials out there on free motion quilting. Just Google it and practice 🙂 . I quilted this quilt on my little “Bernadette” the Bernette Bernina so don’t be afraid. It is possible to quilt this without a long arm! (If you missed that, yes, I named my sewing machine Bernadette). Use 10 of your extra solid jelly roll strips to do the binding. There is a great tutorial here on how to bind:
http://www.modabakeshop.com/2010/08/binding-with-jelly-roll.html And you are done!!! Way to go!! This is a big project and you should be so proud of yourself. Yup, It’s back to the victory dance! Now, if you would like to, head over to my
Happy Quilting Tutorial’s Flick page to upload your quilt. I would love to see your work!
One Beautiful Braided Irish Chain quilt measuring 76 x 114. Enjoy!!!
ADDITION – I have since created a pattern for this quilt in 6 alternate sizes, including a Queen 90 x 90 and King 107 x 107. You can find it here 🙂
Melissa Corry


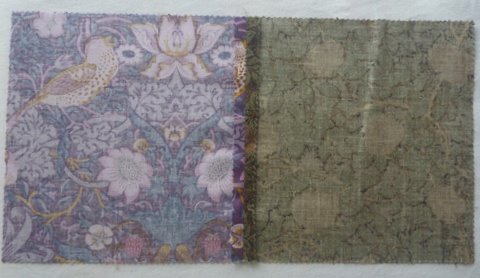


 4. Place a plain square on top of a patterned square, right sides together.
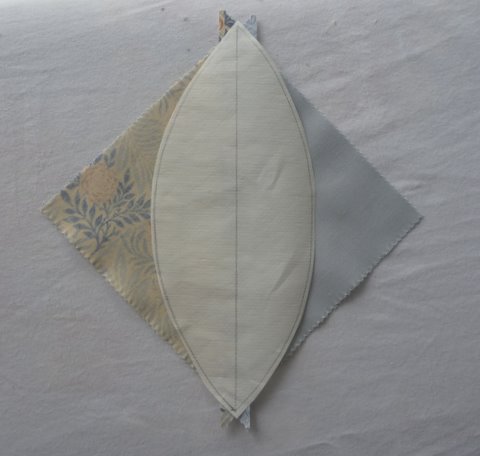
 5. Sew a 1/4″ seam on both sides of the diagonal line that is marked on the fabric.
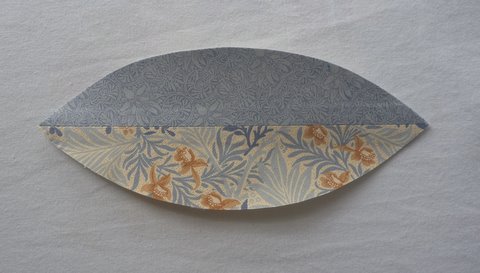
 6. Cut along the pen line marked on the square.
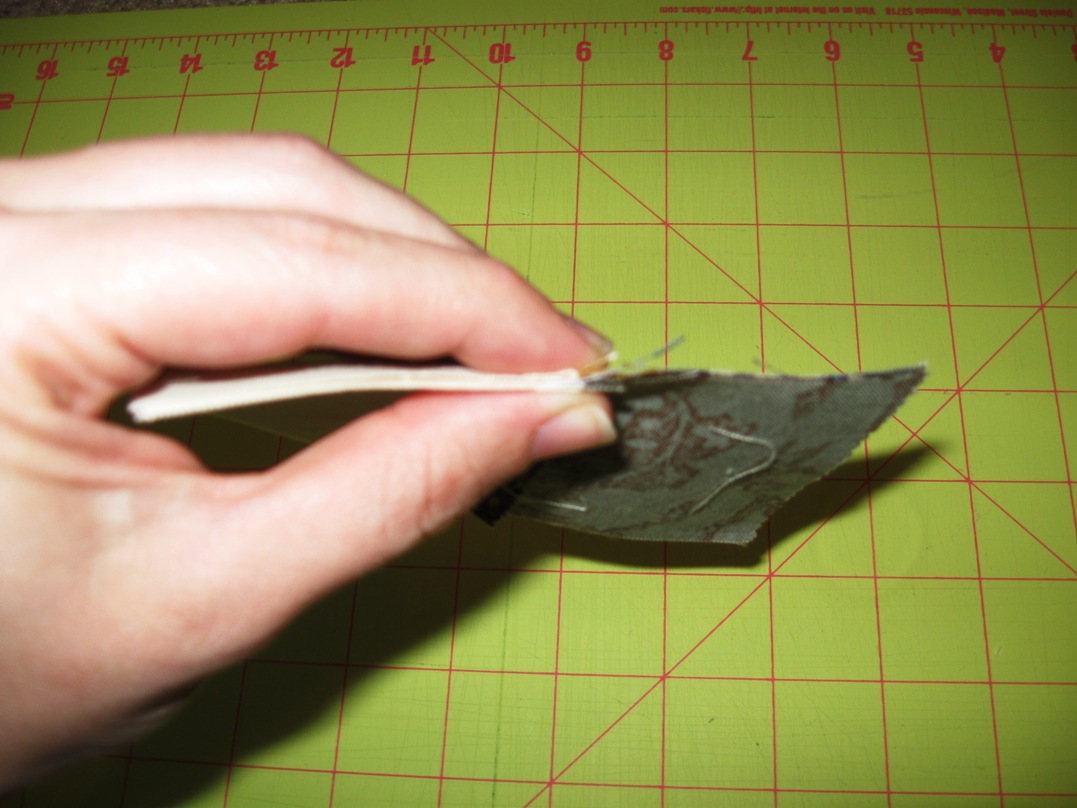
 7.Press the triangles open to give two squares. Trim off any the ‘ears’ at both edges of the square. You should have 16 matching pairs Half Square Triangles (32 in total!).
 8. Take one of each fabric pattern and arrange Half Square Triangles in a 4×4 grid. Keep swapping them about until you are happy with the arrangement. Remember, the centre four will be the ones which will be seen on the on the seat. Sew the Half Square Triangles together.
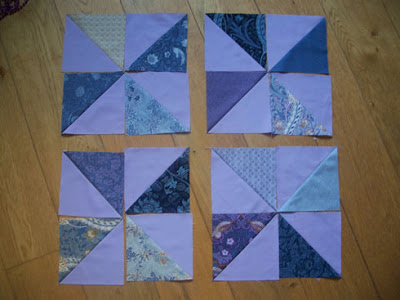 9. Make another 4×4 grid for the chair back, again swap them until you are happy with the arrangement!
 OR Place some heavy weight paper on top of the chair seat and using a felt tip pen, trace around the edge of the chair. Repeat for the back of the chair.
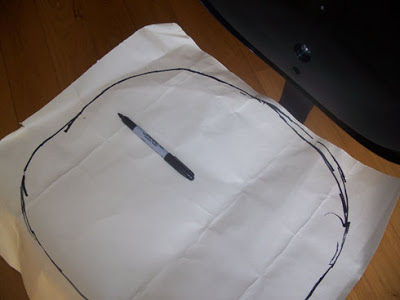 Cut out template. Place template on top of the seat to make it is the correct shape. Repeat for the back template.
 Add on approx. 2″ around the edge of the templates for both the seat cover and the back cover.
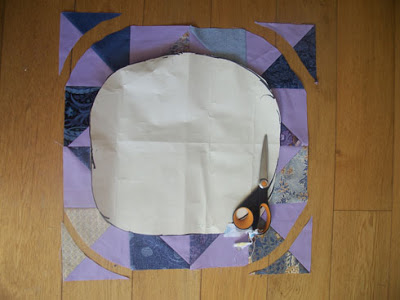 11. To make the casing for the elastic, fold in 1/2″ of the end of the bias binding, place on top of the seat cover, right sides together.
 12. Using a scant 1/4″ seam, stitch in place around the entire seat cover, stopping 2″ from where the stitching was started. On the bias binding mark with a pin where the bias binding overlaps, cut off the binding 1/2″ from this pin.
 14. Fold the bias over onto the wrong side of the cover and pin in place.
 15. Sew around the inside edge of the bias binding to complete the elastic casing.
 16. For the chair seat, cut a piece of elastic 22″ long and for the chair back, cut a piece 17″ long. Place a safety pin on the end of the elastic and thread it through the casing.
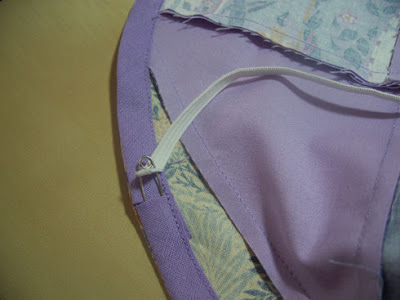


