Hi, I’m Kristy and I blog over at HandmadeRetro. This is my first Moda Bake Shop recipe and I couldn’t be more excited to share this little quilt I came up with.
When I was designing this quilt I was jointly inspired by the wind farms outside of Canberra in the Australian Capital Territory and the back of a wedding quilt I made for my brother and his wife which was in turn inspired by the aisle markers at their outdoor wedding.
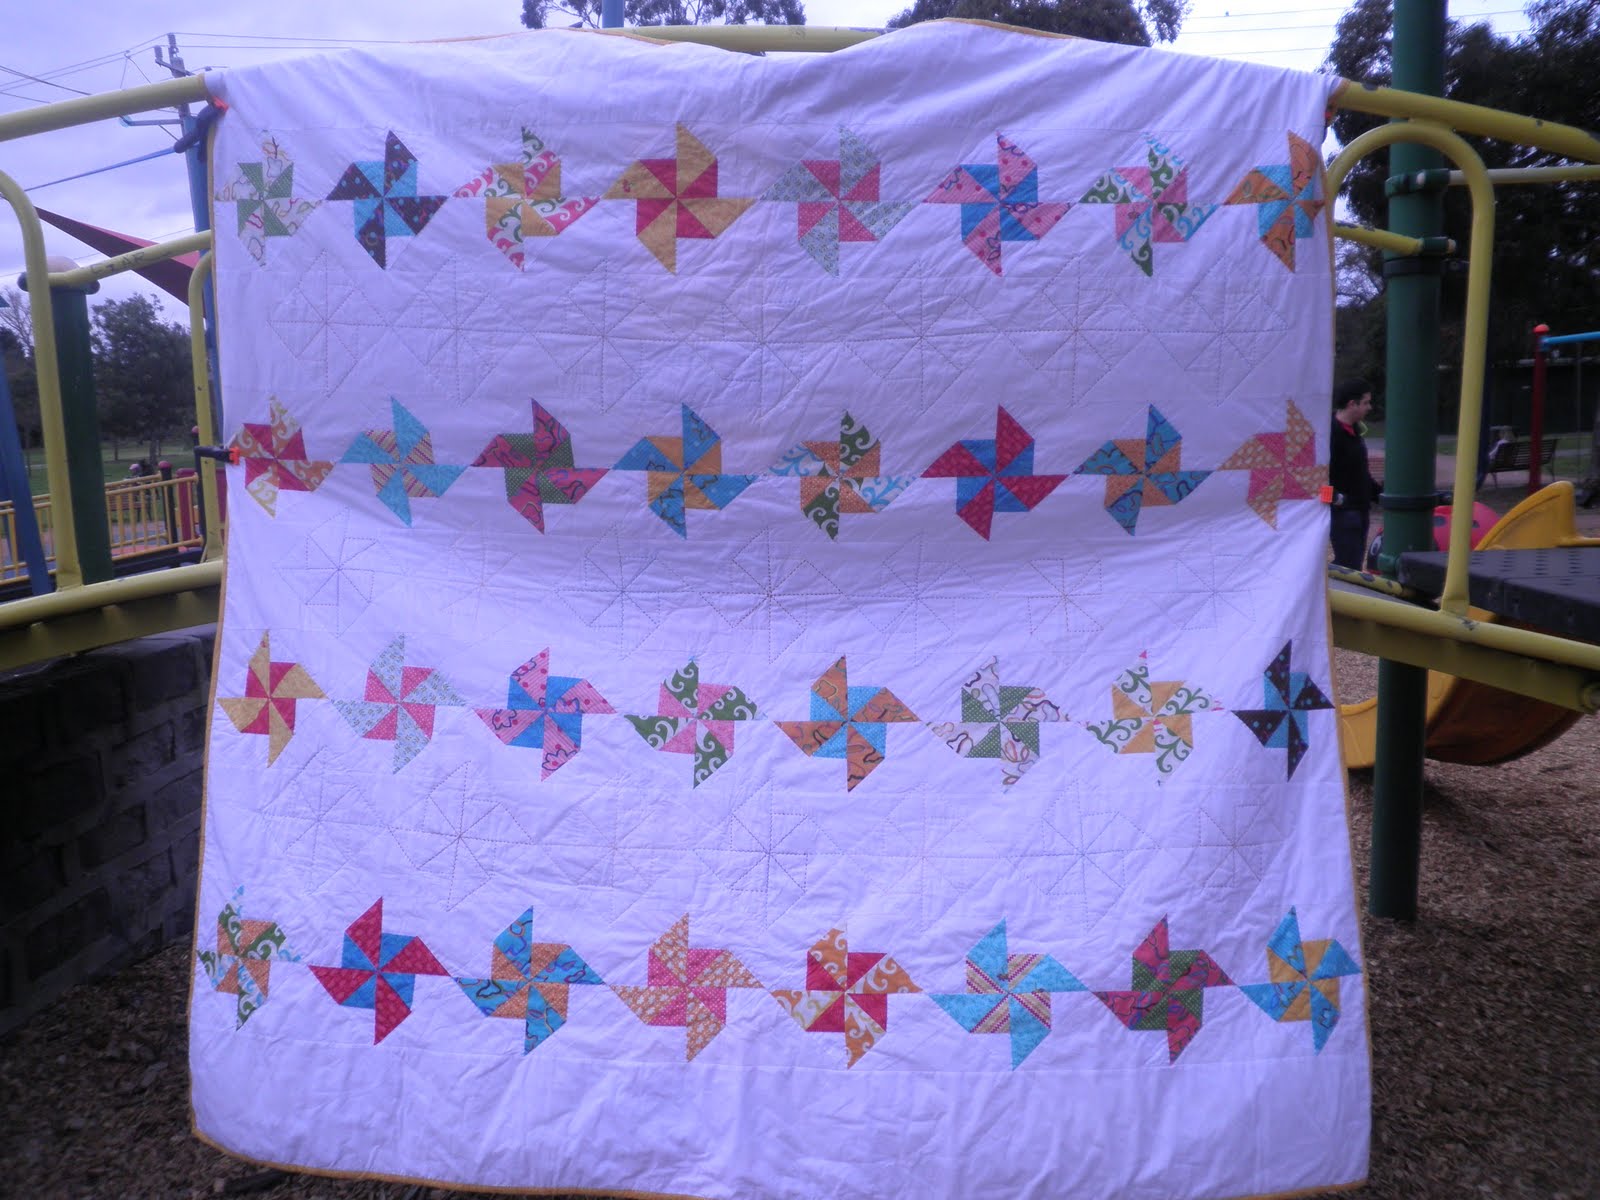
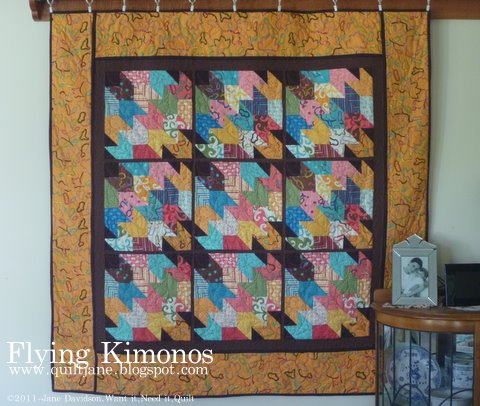
I was so please when I came up with the technique (that may or may not be original) that I thought it deserved a quilt of it’s own. So here it is, Pinwheels on the Plain.

1x Layer Cake Modern Workshop by Oliver + S
1x Charm Pack in Bella Solids White (9900-98)
4.5 Yards Bella Solid for Background (9900-98)
5.5 yards of green spot for backing (11175 14)
3/4 yard of yellow texture for binding (11174 20)

Perle No. 8 Hand quilting thread in various colours to compliment your pinwheels
Quilting hoop
Olfa stencil cutter
Template Plastic

Sorting and Cutting Fabric
Sort the layer cake into two piles: one for the larger triangles and one for the smaller inner triangles. Because paper pinwheels created by cutting and folding scrapbooking paper inspire the quilt, I chose a small design for the smaller triangle, and a large design for the bigger triangle. I also tried to make the pairs different designs and colours.

You will need 16 layer cake sheets for the larger triangles and 8 for the smaller triangles.
From the 16 layer cake sheets for the larger triangles, cut 4×4.5″ squares.
From the 8 layer cake sheets for the smaller triangles, cut 2x 5″ squares (reserve the 10″x5″ off cut for piecing into the back)
From the background solid cut
(5) 83″x9″ strips (I cut mine lengthways).
(28) 7.5″ in squares and then diagonally into 56 triangles
4 more 7.5″ squares and crosscut into 16 quarter square triangles.
From the binding fabric cut
(9) 2.5″ strips
Sewing the Pinwheel Blocks:
Start by sewing the solid charm squares to the 5″ print squares into HST units.
– Draw a line diagonally across the back of the solid corner to corner
– Sew .25″ either side of the line.
– Press to set seam
– Cut along the drawn line.
– Press HST units open, pressing seam to print.
– Trim to 4.5″, making sure your diagonal seam remains in the centre of your pinned unit.
You will have 8 HST units in each print.
Sew HST units with the units you just made and the 4.5″ print squares.
– Draw a line diagonally across the back of 4.5″ print square corner to corner
– Place the HST units and the print squares right sides together with the seam line and drawn line forming an ‘X’
– Sew .25″ either side of the line.
– Press to set seam
– Cut along the drawn line.
– Press HST units open, pressing seam to larger triangle.
– Trim to 4″, making sure your diagonal seam remains in the centre of your pinned unit.
You will have 8 HST units in each print combination – four in one direction and 4 in the other.
Construct the Pinwheel Blocks:
– Layout your 8 units in each colour combination into two pinwheel units – one will ‘turn’ in a clockwise direction and the other counterclockwise direction.
– Sew the vertical seams and press to the larger triangle.
– Sew the horizontal seam.
Make 32 pinwheel blocks, you will have 16 unique combinations.
Sewing the Rows:
Lay your pinwheel blocks out on your design wall or floor in four rows of 8 on point, making sure you have a good spread of colours. Have alternate rows spinning clockwise and counterclockwise.
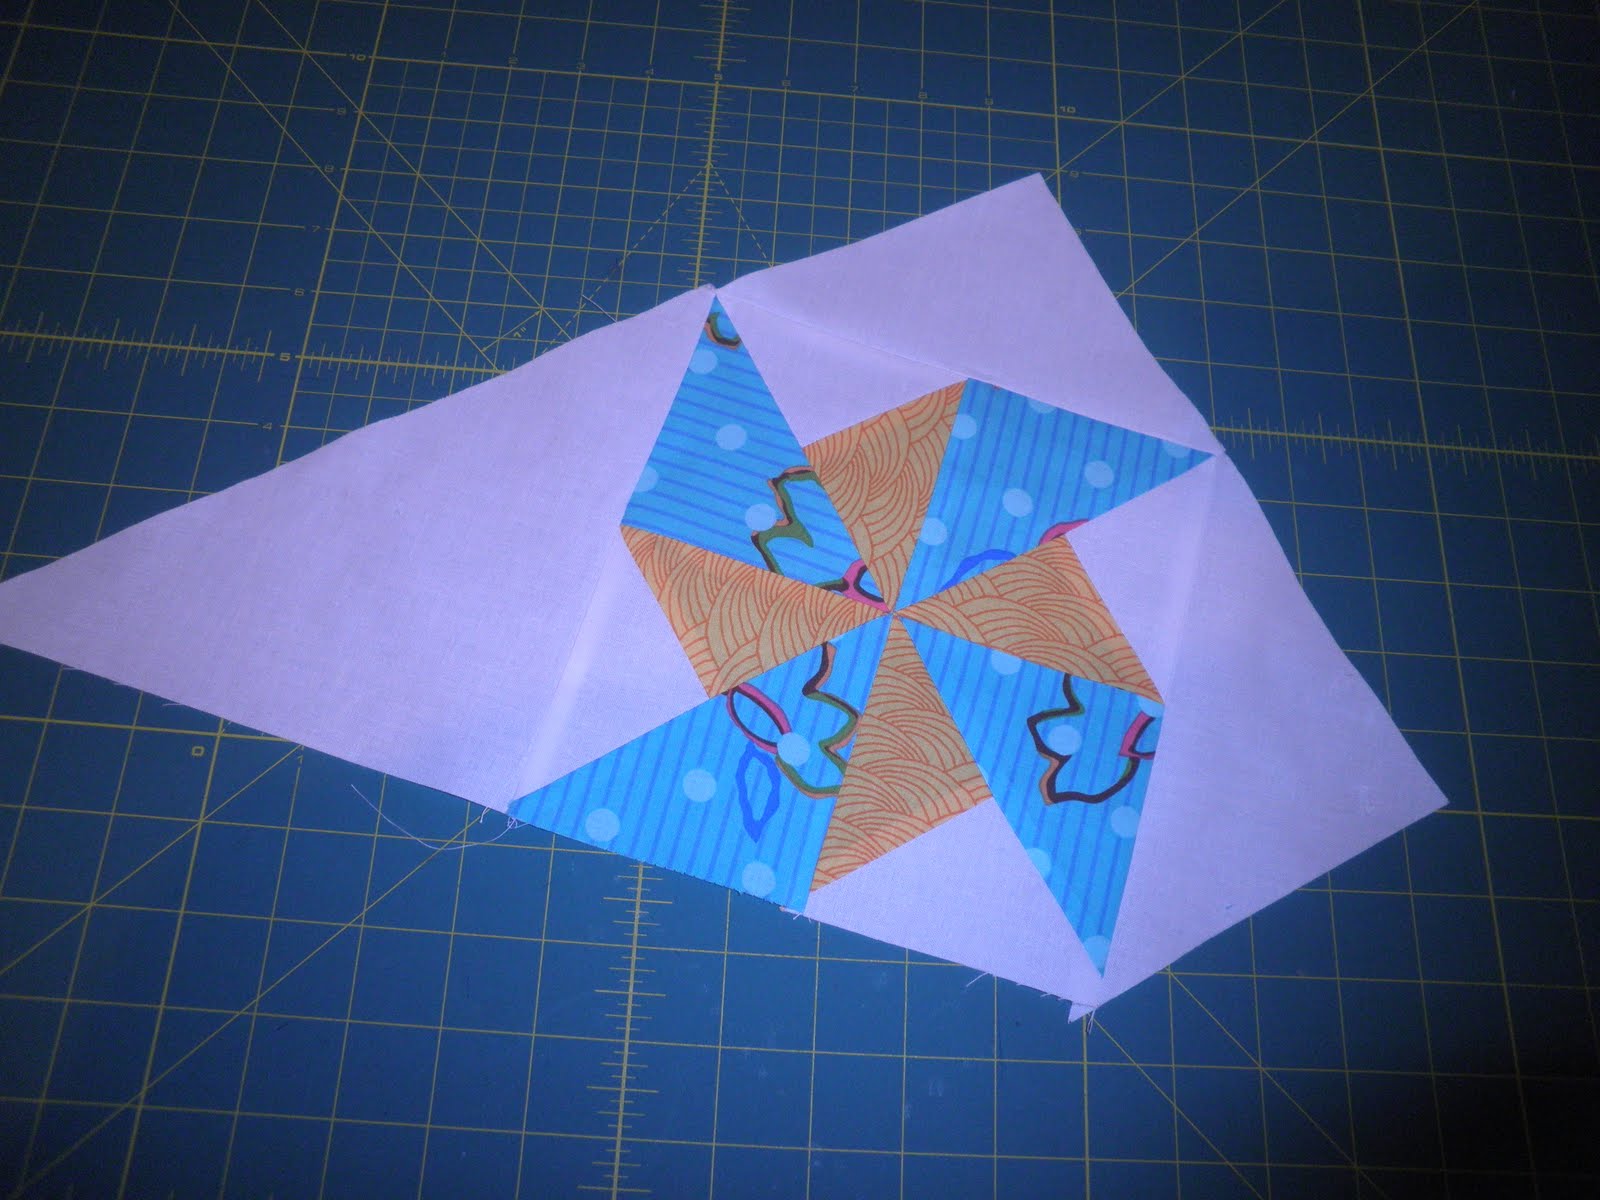
Sew the Setting Triangles:
– Working one row at a time, sew a setting triangle to the bottom right of each block. It may overhang a little at the bottom edge, don’t worry. You won’t need to do this for the last block in each row. Press seams to the solid.
– Working one row at a time, sew a setting triangle to the top left of each block. Again it may overhang a little, this time at the top but don’t worry. This time you won’t need to do it for the first block in the row. Press seams to the solid.
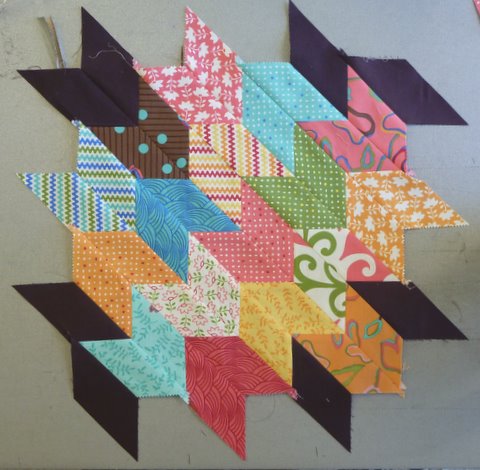
– You will end up with blocks that look a little like this.
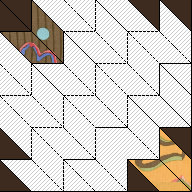
– Sew the quarter square triangle to both sides of the end blocks left exposed.
– Trim any dog ears at the edges, ensure you leave .25″ seam allowance at the pinwheel points.
– You have a row!
– Complete 4 rows.
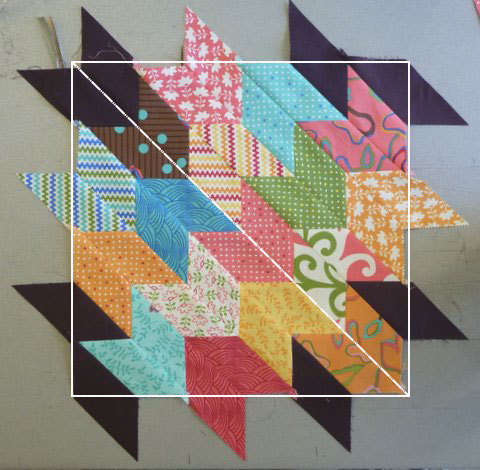
Sewing the Quilt Top:
Join a solid strip between each of the rows and one at the top and the bottom. Because the bias edges of the setting triangle are exposed and we cut the strips a little longer than necessary, this needs the be measured and pinned carefully. The points of the pinwheel blocks should be 10″ apart.
– Find the centre of each of your solid strips and mark, mark 10″ along in both directions until you reach the edge. Use this as a guide when pinning the solid to the pinwheel rows.
– Pin, matching the pinwheel points and the marks you made.
– Sew, press seam to the solid strip.

Cut off the excess strips at the side matching pinwheel points and leaving .25″ seam allowance.
Make the back:
Either cut your backing into two and sew together to create a single fabric backing or piece the leftover layer cake sheets into the backing.
Baste using your preferred method.
Quilting:
I hand quilted my Pinwheels on the Plain in No. 8 perle cotton from DMC.
I initially outline quilted the coloured pinwheel blocks about 1/8th inch in Blanc beginning in the middle and working my way to the edges, top and bottom simultaneously.
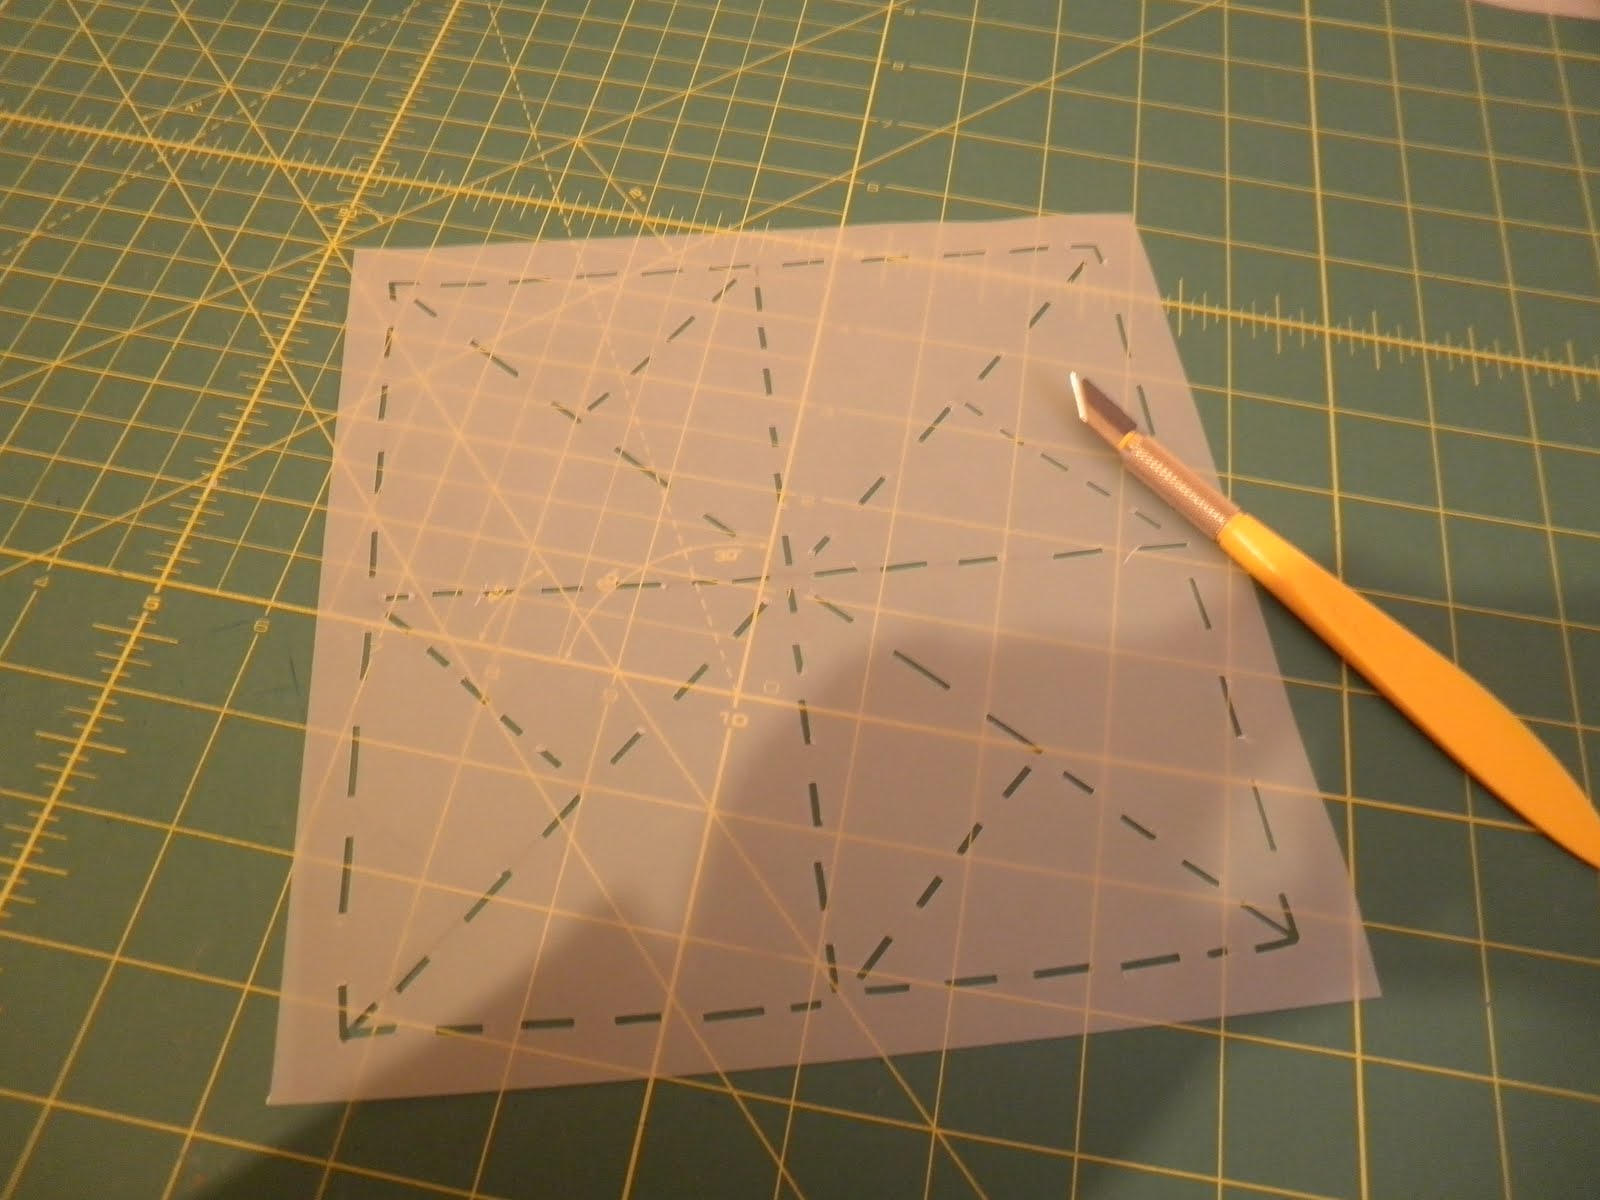
I then made a stencil and quilted pinwheels in the empty areas between the pinwheel in the middle three solid rows.
To make the stencil, I drew a 7.5″ square on template plastic and then the pinwheel shape in the centre. I cut along each of these lines using and Olfa double blade cutter in dashes.
I traced this onto my quilt top using a water-soluble marker and quilted around the outside square in Blanc and the inner pinwheel triangles in two colours.
Bind:
Bind using your preferred method.
I cut 2.5″ strips and machine sewed to the front and hand sewed to the back.