Windmill Quilt


Hello, it’s Amanda from Material Girl Quilts and I am so happy to be back on the Moda Bake Shop today sharing my latest tutorial.  I am a huge fan of Fig Tree & Co. fabrics.  Joanna Figueroa has an amazing talent of putting together the most beautiful designs and colors.  I chose to use Tapestry for this quilt, but the latest Fig Tree & Co. line in shops is Avalon and it is just as gorgeous.

Now that it is summer, it seems to be the season for weddings.  This quilt was designed for a beautiful new couple in our family that will soon be tying the knot.  I hope this quilt helps warm their new home together.

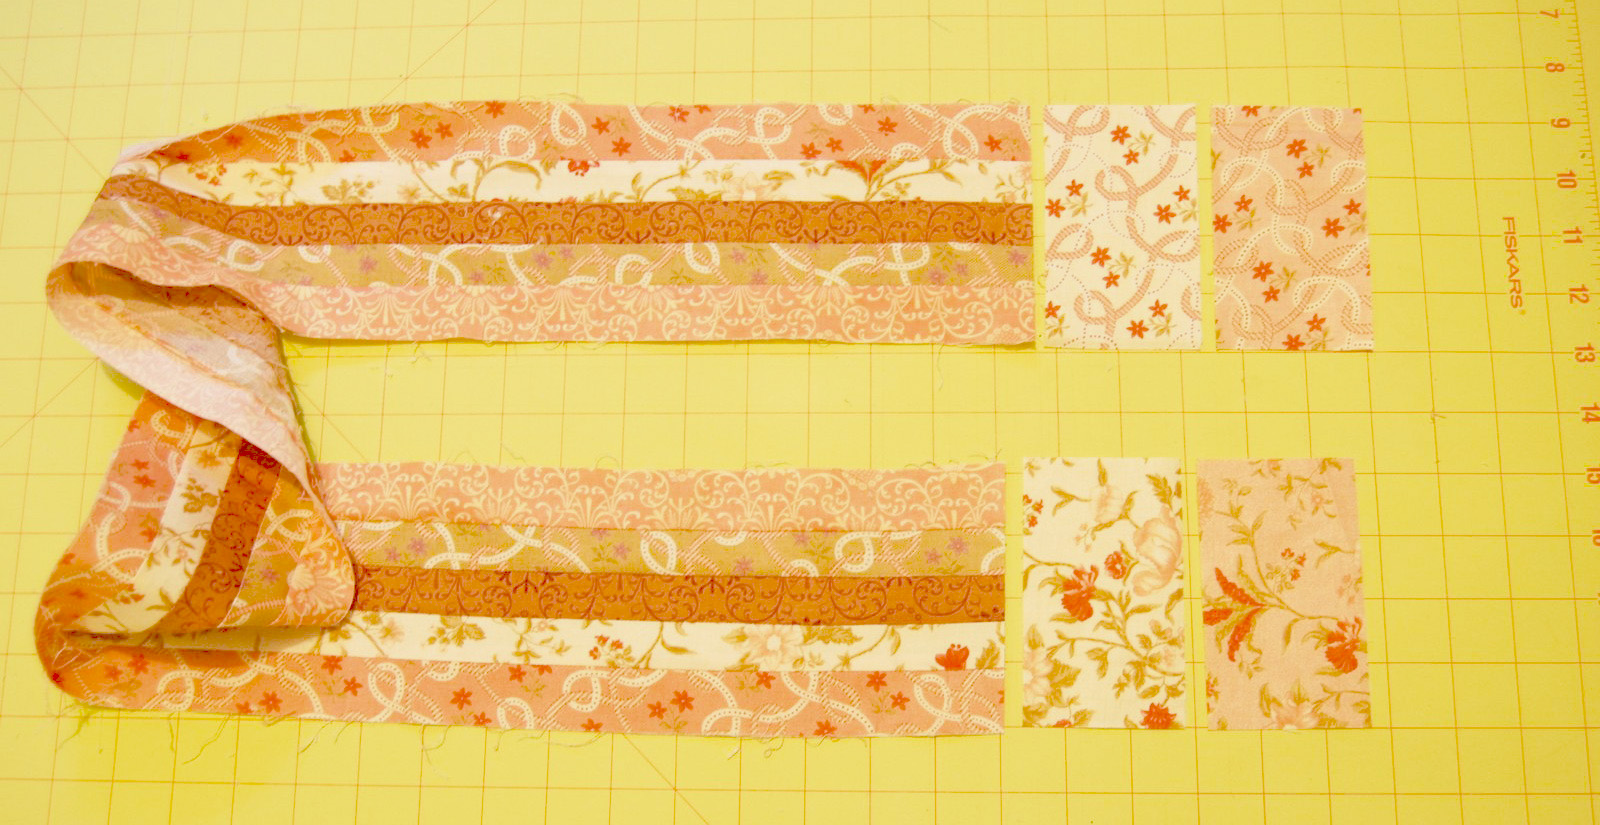
1 layer cake Tapestry by Fig Tree & Co.
1 layer cake Moda Bella Snow (or 2 1/2 yards cut into 32 10″ squares)
4 yards backing fabric (Tapestry Marskesh in Cobblestone)
1/2 yard binding (Tapestry Yasmin in Cobblestone)

Select 32 print 10″ squares and pair with 32 background 10″ squares.

With right sides together and the background square on top, mark diagonal lines connecting the corners with a pencil as shown below.

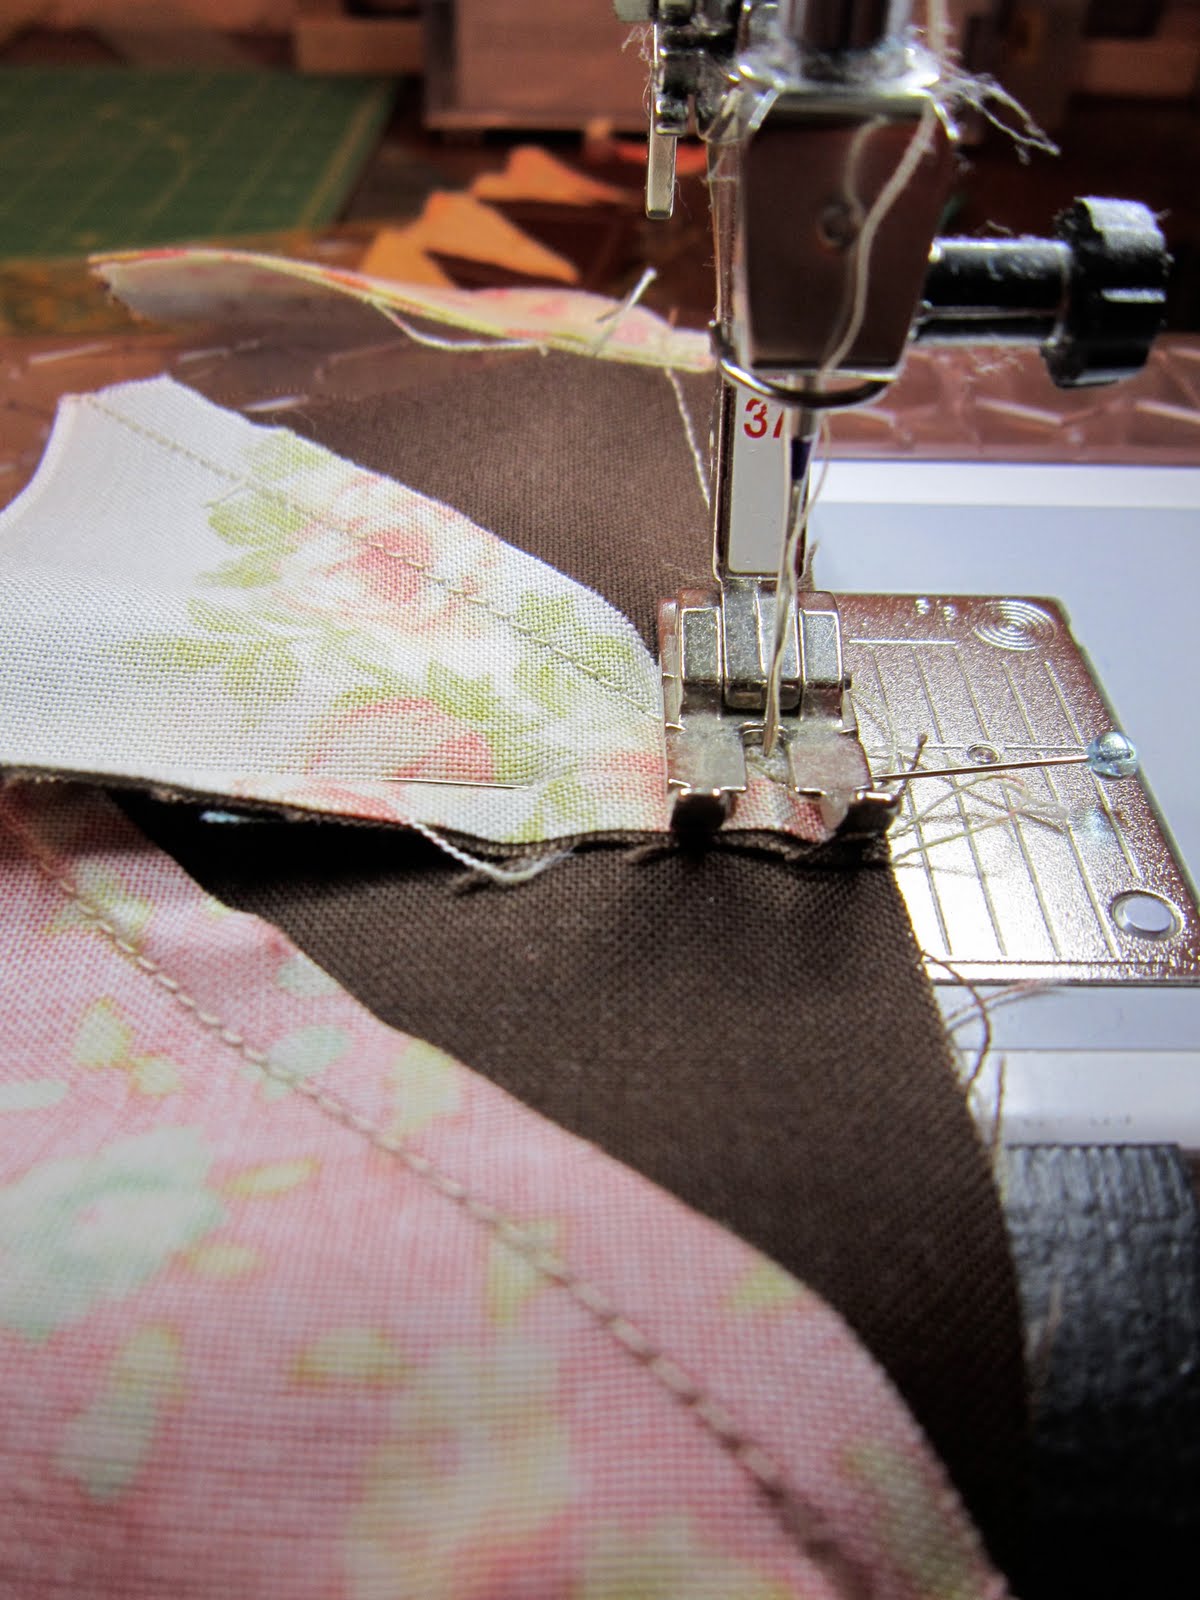
After your lines are marked, pin the blocks together in several spots and then sew 1/4″ on each side of the diagonal lines.

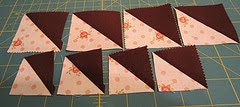
Now it is time to cut these 10″ squares into a total of 8 half square triangles (HSTs)!  For the first cut, line your ruler up horizontally through the center of the squares and cut.

Without moving any pieces, rotate your ruler and line it up vertically through the center of the squares for the second cut.

Again, without moving any pieces, now it is time to cut directly on the two diagonal lines between the seams as shown below.

When you open up all of the cut pieces, you will end up with 8 matching HSTs.

Press each HST away from the background fabric and trim to measure 4 1/2″ square.

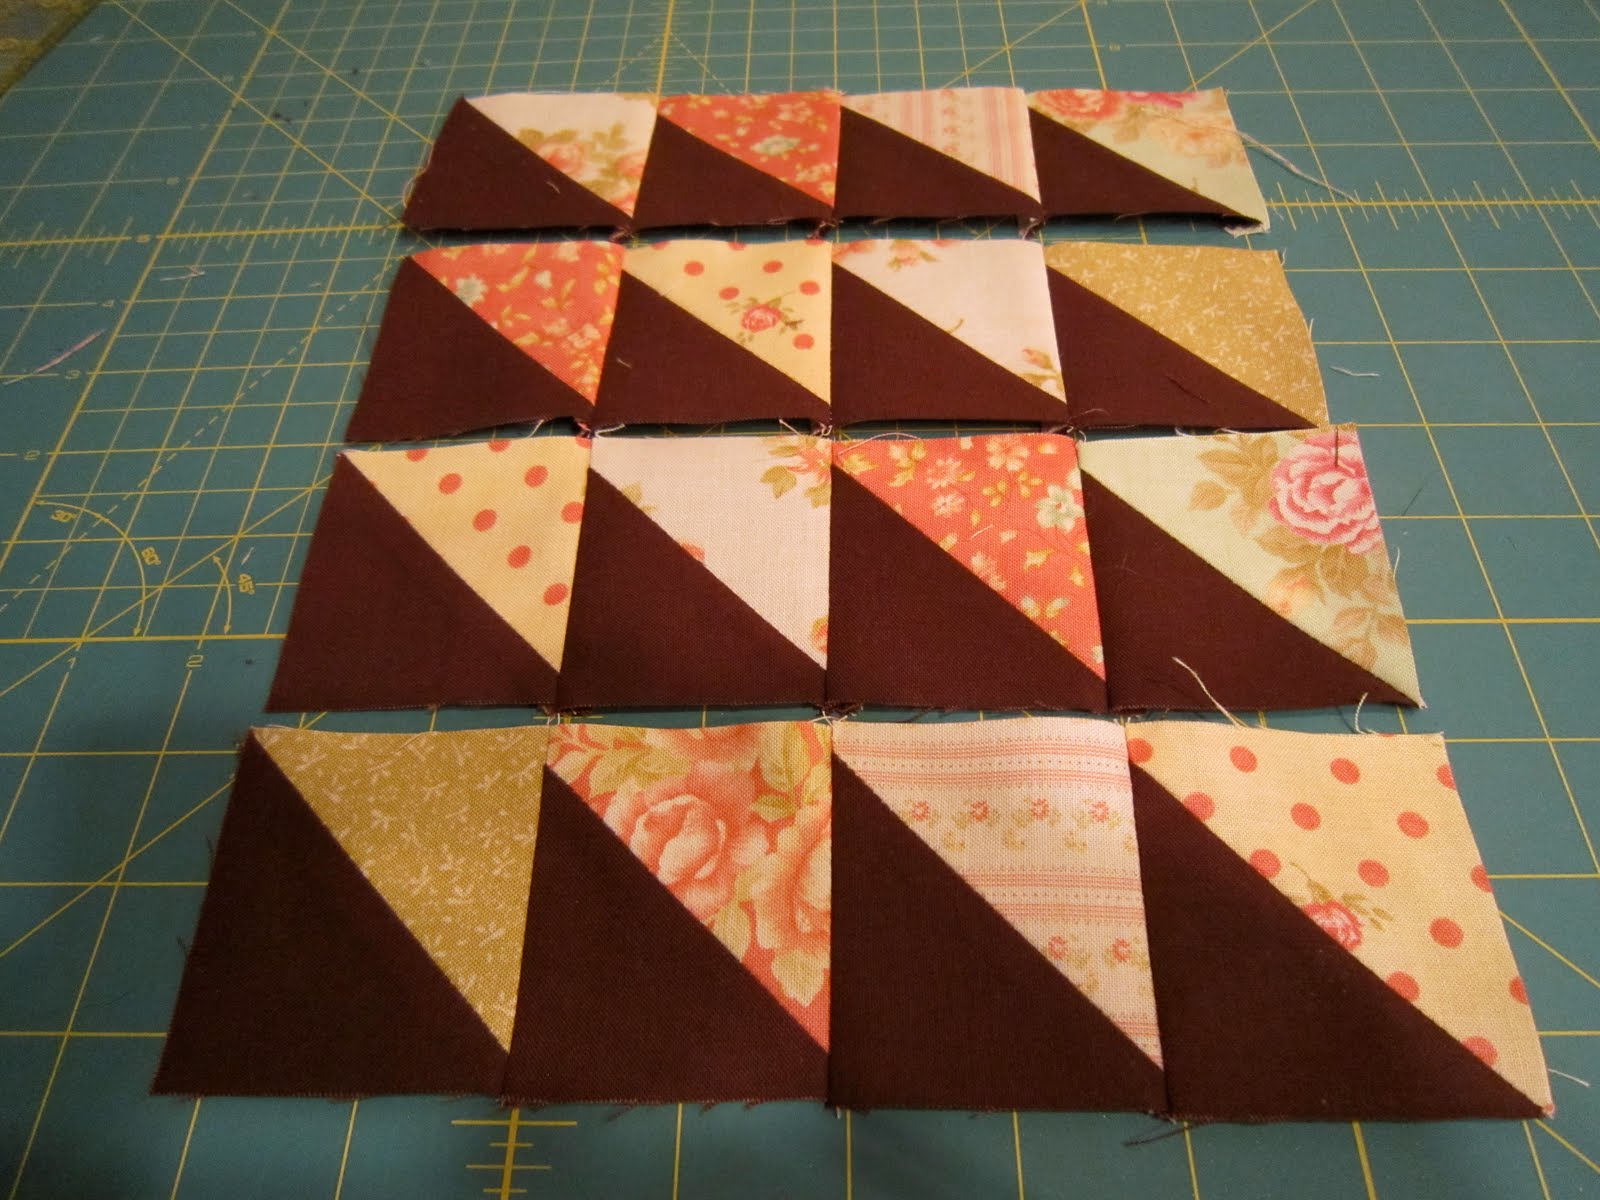
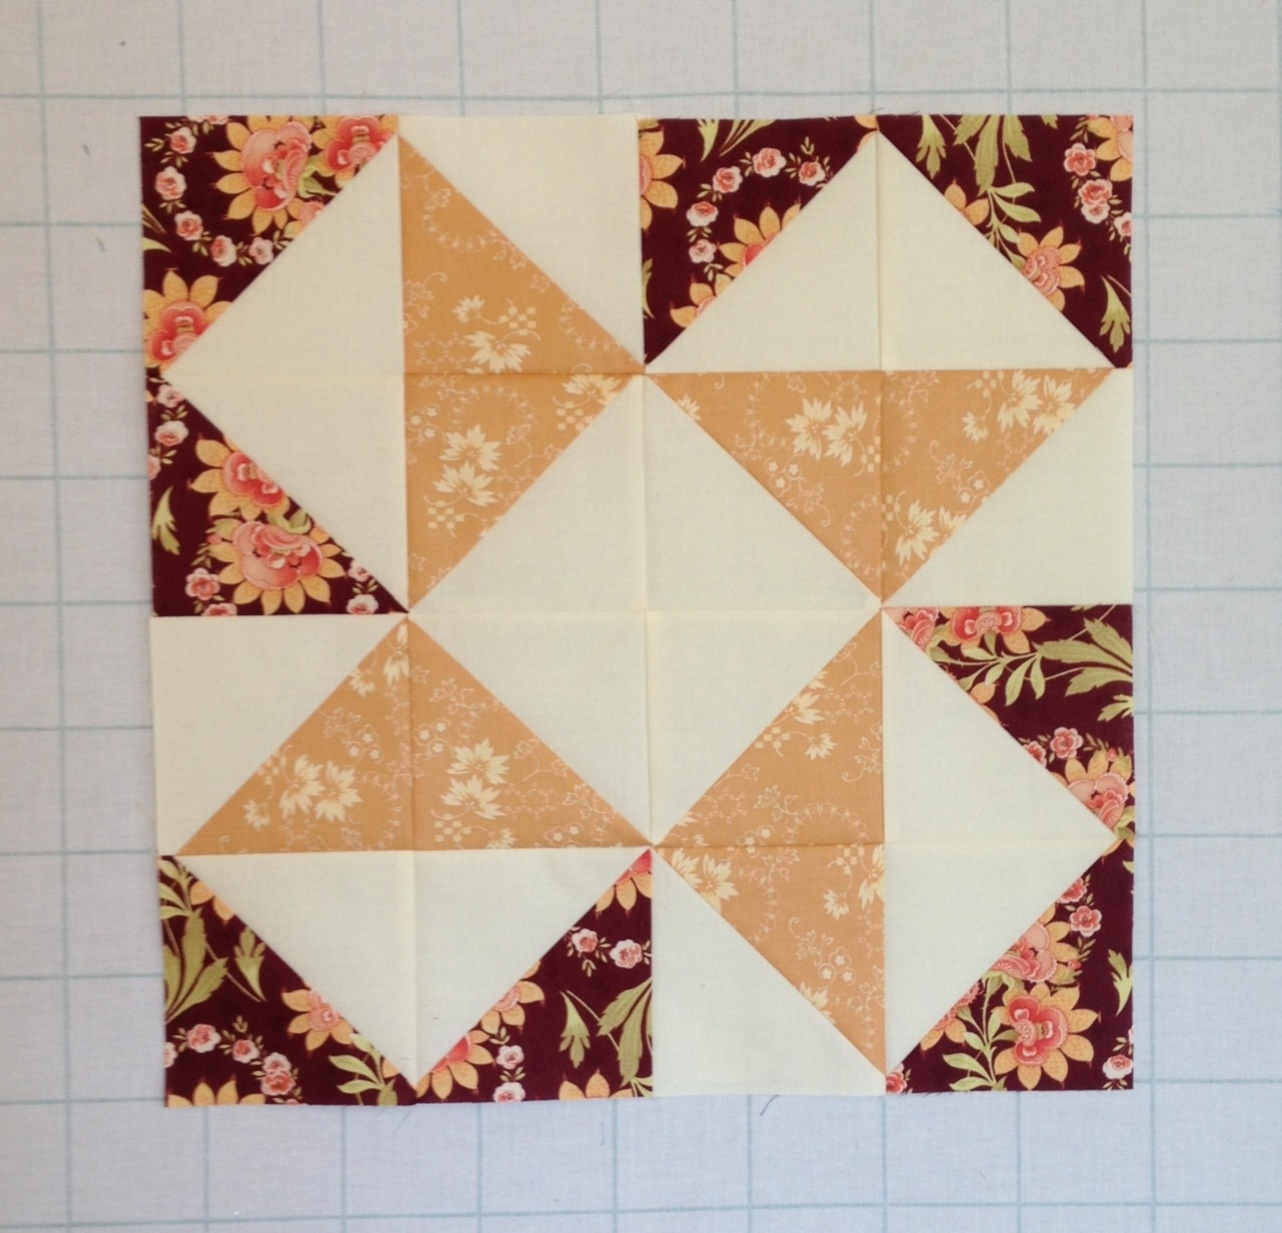
Now select two contrasting sets of half square triangles and lay out as shown below to create one block.  Press the seams for rows 1 and 3 of the block to the right and rows 2 and 4 to the left.  Each block will finish at 16″.

Lay out your 16 finished blocks in four rows of four blocks in a way that suits you and piece together.  Layer with batting and backing and quilt as desired.


One 64″ x 64″ quilt perfect for a newlywed snuggle 🙂

Amanda Castor
{Material Girl Quilts}

Sunday Best Quilt

50″ x 50″

SUNDAY BEST

Hello! Back with another Moda Bake Shop project, and I hope you love it! Just in case you are getting a little scared by all of those triangles, don’t be…I’ve come up with the best fabric trick ever to make this quick and fun.

The words ‘Sunday Best’ brings back so many memories of growing up in my mother’s home. Sunday Best referred to how we dressed for church, how we behaved, the meal we ate, how we spoke, and how we treated one another. Extra care was given, a little more time was taken to prepare. Sundays were special, and this was reflected in all that we did. Sunday Best is the perfect name for this little quilt in my mind…beautiful, delicate fabric, lots of little triangles, and a little extra effort make this quilt something to treasure.

Please be sure and visit me at http://www.cherryhousequilts.com/

Cherri


3 Charm Packs of Moda Bella Solid – Brown *

3 Charm Packs of Fresh Cottons*

1/4 yard Moda Bella Solid Brown – BINDING

Cut (6) 2 1/4″ x width of fabric strips, join

1 yard Fresh Cottons Chantilly Cream Pinafore Skirt 20133-14 BORDER
Cut (5) 5″ x width of fabric strips, join

3 yards Fresh Cottons Chantilly Cream Medallion Fleur 20132-14 QUILT BACK
Divide the fabric evenly, join lengthwise, and press
58″ x 58″ batting

*For a larger quilt use Layer Cakes, cut into 5″ squares
Create 8 HST (half square triangles) from 2 Charm Squares: 1 Solid, and 1 Print

Use 1/4″ seam allowance throughout
The numbered instructions are listed from left to right:


1. Evenly layer 1 solid charm square, and 1 printed square (right side down)

2. Fold in half, press firmly on the fold for a solid crease

3. Open the folded square, refold in the opposite direction, press firmly on the left side fold, but do not press out the original crease.

4. Press again on the right side fold. The creases will become your sewing guide, so you don’t want to press it out.

5. Open the pressed unit, and pin the center to keep the fabric from shifting.

6. Sew on the diagonal, around the entire charm square unit on all four sides. Marking the lines isn’t necessary – but you can if you would feel more comfortable.

7. Once you have sewn around all four sides, lay unit on a cutting mat (a rotating mat is helpful if you have one), using your ruler, cut the unit into 4 even squares (2 1/2″ each)

8. Using a ruler and marking tool (thin pencil works well), draw a line 1/4″ from either side of the seam line, on all four units.

9. Sew a 1/4″ from the drawn line on all four units

10. Cut units apart on the drawn line


11. Open units, press…all these blocks from 2 5″ squares! 4 2 1/2″ HST, and 4 1 3/4″ HST


12. Set aside the 1 3/4″ HST (these are a bonus, not part of this quilt)

13. Make 100…this will yield 400 HST 2 1/2″ units 


14. Sew a row of four HST


15. Sew together four rows for a block

16. Arrange the blocks in a 5 x 5 grid

17. Sew by rows, join rows, press

18. Adding the border strips: Cut two strips to 41″ each, and two strips to 50″ each (in case of seam allowance variables, it is recommended that you measure the quilt top, before cutting the strips)

19. Add the 41″ border strips to the top, and bottom of the quilt top, press to the borders

20. Add the 50″ left & right side border strip to the l/r sides, press to the borders

21. Layer quilt top, batting, and backing. Quilting with a walking foot is a good solution with all of those seams


Bind and label
Enjoy!


    2 Charm Squares (one solid/one print) yield 4 2″ HST finished units, and 4 1 1/4″ HST finished units.

    1 Charm pack yields 168 2″ HST finished units

    1 Layer Cake yields 672 2″ HST finished units
    This quilt is made with 400 2″ HST finished units


    What to do with all of the 1 1/4″ HST units? Pinwheels…lots of pinwheels!

    BONUS PATTERN:

    Take four tiny HST, sew together to form a pinwheel, make two

    Place two pinwheels together, right sides facing

    Sew around the entire unit, leaving a small opening

    Carefully turn inside out, poke out the corners

    Fill with your favorite filling

    Stitch closed

    Add a small button to the center, stitching through the entire pincushion.

    I hope you enjoy this quilt, and this new HST trick! I haven’t tried it on a 10″ Layer Cake, but I’m certain the same method would apply to those as well.

    Cherri
    http://www.cherryhousequilts.com/

    Gypsy Scarf


    Hello MODA friends-

    Even here in California we are still deep in scarf weather so I thought I would share with you the favorite project around our house lately. These particular ones are made from our latest fabric collection, Gypsy Rose which is available in stores right now. You can see the whole collection here. But any style of group could be used for both boys and girls, adults and kids!

    These little scarves can be whipped up in under an hour and make wonderful projects to make with your own kids or as easy, personal presents. If you like the idea, check here for our Scarfletts pattern in more varieties & styles. Or come by for a visit here to see what we are up to lately…

    Happy Sewing,

    Joanna

    1 Gypsy Rose Jelly Roll™ by Fig Tree & Co.
    1/8 to 3/8 yd. [depending on which size you are making] of fleece, velour, cotton velveteen, minky or any other soft fabric
    piecing thread

    Decorative button or brooch to tie off the scarf.

    CHILD GYPSY SCARF

    Take (5) Jelly Roll strips and cut them in half lengthwise to make (10) 1 1/4″ wide x 45″ strips. You will only need (5) of these skinny strips.

    If you are making multiple scarves then perhaps you might want to cut up more strips to give yourself a variety of color combinations. That way each scarf can be different and unique!


    Sew 5 of the strips together. Press to the same side after you add each strip. Trim off the uneven edges on each end.


    Use 2-4 more Jelly Roll strips and cut them crosswise into 2 1/2″ x 4 1/4″ sections. You will need 4 of these pieces total. I used 4 different fabrics for variety but you can definitely use just 2 if you are saving strips for another project.

    Sew 2 of those pieces to each end of your scarf. Press in one direction.


    Cut a piece for the backing the same size as the scarf front. It should measure 4 1/4″ wide by the length of your scarf. Place the 2 pieces together, right sides together, and sew them together all the way around. Leave a 6″ opening on one of the long sides. Finish the edges by zigzagging or serging the seam allowance all the way around to prevent fraying later when you are washing your scarf.


    Turn the scarf right sides out through the 6″ opening you left open on the side.


    When you have turned the entire scarf, turn the edges of the opening down and trim the opening shut to finish the scarf. Press the scarf and topstitch 1/2″ all the way around or all the way down 2 of the strips just to stabilize it a tiny bit. No need to quilt more than that because you want the scarf to be soft and pliable around your neck and not stiff.


    This is what the finished child scarf will look like.


    MOM’S GYPSY SCARF

    For the mom version, follow the same general directions except the following:
    Cut (5) Jelly Roll strips into 2 1/2″ x 5 1/4″ sections crosswise. You will need a total of 30 pieces for the length shown here below.

    [NOTE: I used 10 different jelly roll strips so that I would have the variety of fabrics that I wanted and only cut 3 from each fabric. You can use any amount of fabrics but 5 is the minimum you will need to get enough pieces.]

    Keep sewing on pieces until the length of the scarf fits the person who will be wearing it. Some people like their scarves short and some long so the length is really your preference here.

    This one used (30) sections and is approximately 60″ long.

    Cut (2) 5 1/4″ x the width of your backing fabric. Sew them together to create one long piece and trim it down to the size you need to match your scarf front.

    Follow the same instructions as for the child scarf.


    Here are some fun directions for a unique way to wear your scarf that is apparently traditional in Korea and has become very popular in Japan [or so say my Japanese quilting friends]… Fold the scarf in half as shown above and place it around your neck like shown below- loop on one side and ends on the other side.


    Take the ends and pull them through the looped side.


    Pull all the way through and arrange around your neck as you like.


    Hope these keep you warm!
    1 Jelly Roll will make 14 child sized scarves
    1 Jelly Roll will make 8 adult sized scarves