This swingy summer skirt is made with a one-size fits most design, but can easily be adapted to plus sized by adding a square or made smaller by removing a square from the top layer of the skirt. It’s just that easy! Look for easy size changes in italics.


1 Santorini layer cake
1 Santorini Jelly Roll
1/2 yard of any Santorini fabric
1 package of 1 inch no roll elastic

This skirt is made in three layers. The first layer is 5 pieces of your layer cake. Seam allowance is 1/4 inch through out this project.
Pam: Just grab any five!
 Elizabeth: Uh, no. Of course you don’t grab “any five”. You need to stare at all of them for awhile…stripes are slimming, but you can’t have nothing but stripes…hey this one with the green I think is my favorite so it has to be on the front…gotta get the combination of colors just right…so keep agonizing until Pam shoots you a dirty look and tells you she could have the skirt halfway finished by now.
Stitch your five layer cake pieces together forming a tube. This is the top tier of your skirt.


 Unroll your jelly roll strips and gaze at them a bit. Doesn’t Moda do a nice job with these fabrics?
At this point you should try it on and make sure it’s not too big or too small. Add on a square to make it a plus sized skirt. Subtract a square or a portion of a square to make it smaller.

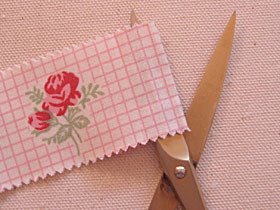
Ruthlessly cut them in half at the fold.

Pam: Randomly pull strips from the pile and stitch them together.
Elizabeth: OK, this time you try to be totally random…so you get into the spirit of just grabbing prints, until Pam tells you that you’re about to have a big blob of green in the middle of your skirt. So I guess you sort of randomly pull strips. They all go together quite well, and it’s fun to see combinations of prints you might not have thought of trying, but avoid blobs of one color. At all costs.
You will need 50 strips for this tier.
For every 1 inch you added to the top tier, add 1 strip. (one layer cake square equals 10 strips) For every inch you removed, remove 1 strip.
Press seams in one direction.
 Once your strips are all stitched together, stitch into a tube.
 Trim to length. For our ‘maxi’ skirt we trimmed to 19 inches. Total length of the skirt is 38 inches. This is the perfect time to measure a skirt you love pick your own perfect length. Most purchased tiered skirts are between 34 and 36 inches long, as a guideline. For an average length skirt cut at 18 inches.
 Gather your tier using your ruffler attachment, or your favorite method of gathering.

Ours was gathered using the ruffler foot set at 6 and stitch length set at 4.3. Yours may vary.
 Pin your ruffled strip to your top tier. Stitch together.
 Woo hoo , it looks like a skirt now doesn’t it!
 Randomly select 20 layer cake pieces from your remaining pile for your last tier. For every 5 strips you added to your second tier, add 2 layer cakes pieces. For every 5 strips you removed subtract 2 layer cake pieces. Its not critical that you add or remove at this point. Its going to be ruffly regardless.
 Gather at the same settings used before. Attach gathered layer cake tier to strip tier.
 How cute is this?


Hem your skirt by turning up bottom tier 1/4 inch, then again 1/4 inch, for a nice small hem. For a more casual look, stitch 1/4 inch from the pinked edge and let it get that frayed look. Its summer fun, go for it!
From your 1/2 yard of waistband fabric cut (2) 2 3/4 inch strips. Stitch short ends together for one long strip and trim to 48 inches OR the measurement of the top of your skirt, if you made any alterations.
Elizabeth: Pam’s measurements and instructions are exactly right–but be sure to use a very accurate seam allowance when you stitch the waistband to the skirt and when you top stitch the top of the waistband make sure you stitch very close to the edge…because it might be a tiny bit difficult to thread the elastic through the casing. And if you tell Pam that the waistband should be cut maybe a little wider she’ll tell you “no”. If you don’t think you want to be that precise, you could cut your waistband pieces maybe 1/8″ wider, and Pam probably won’t find out.
Stitch into a tube leaving a 1 inch opening in the seam as shown. This will be the opening to insert your elastic. Fold right sides together and press.


Pin your waistband to the right side of your skirt with the opening facing away from the skirt.

Top stitch at the fold very close to the edge. This gives a nice professional look to your garment.
 Insert elastic into your waistband and adjust to fit comfortably.

Stitch elastic ends securly everlapping for a flat finish.

Whip stitch the casing closed.
 Pam: I used contrasting thread so you could see the stitching!
Elizabeth: Psst! Just between you and me? She used green thread because that’s what was already in the needle.
Your swing skirt is done! Go on, celebrate!


One very swingy summer skirt!

Summer fun brought to you by Elizabeth and Pam!


 Select 6 charm squares for star bodies. Selecting coordinating star points and bodies lets your stars stand out in this runner. Select 18 charm squares for remainder of runner, setting aside 4 of those for corners.

 Press squares towards corners on all blocks. Cut away excess triangles if desired. I cut away the inner portion.
 Using the finished runner as a guideline, layout blocks. Stitch blocks into rows pressing in alternate directions. Layer and quilt as desired. Bind with 2 1/4 inch binding strips. Sit back and enjoy your fast and easy table runner.
 One quick and easy Happy Camper table runner. (14 x 36.5)
 With gathering foot set as 6, gather a variety of honey bun strips 1/4 inch from top of strip. The number of strips needed will depend on the size of your lampshade. This medium sized shade took 16 strips. Set aside your favorite strip for the very top. I used one color for each layer. Lay out your strips and decide how you’d like your lampshade to look.
 On a medium sized shade one strip will only cover about half the circumference of the lower half of the shade. I glued the end of the first strip to the edge, then folded over 1/4 inch of the incoming strip and glued it over the first strip for a nice transition.


