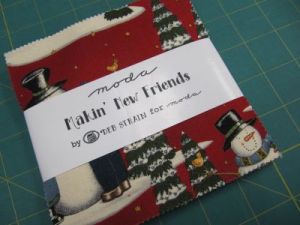
Makin’ New Friends Charm Pack
Small bag of toy filling
3″ squares of lightweight backing fabric (42 required)
4 lengths of 21.1/2″ by 2″ green fabric for border
21.1/2″ square of green fabric for wall hanging backing
2 strips of 2.1/2″ white fabric for binding
Embroidery thread for tying wall hanging

Gold embroidery thread or similar for embellishments on border
Hi, I am Rose from Ludlow Quilt and Sew and I am thrilled to be adding a biscuit recipe to the Moda Bakeshop.
Biscuit quilts are also known as puff quilts and they make delightful, unusual quilts. They are made of larger squares of fabric sewn to smaller squares of backing fabric and filled with the sort of stuffing that is used for stuffed toys and such like. They do not require wadding. Given all the cookery references, I was tempted to try and use a layer cake but that would have given me far more fabric than I needed.
For the backing for the biscuits, I used 3″ squares, about 1″ smaller all round than the 5″ charm pack squares. If you wanted flatter biscuits, you could use slightly larger squares of backing fabric.
Pin two corners of the backing square to the corners of the charm pack square. As the charm pack square is larger than the backing square, there is a loop of charm pack fabric between the two pins.
Holding the two corners, smooth the fabric from each side towards the middle and then squash the loop of charm pack fabric flat to make a pleat. Pin in place and repeat with a further two sides so that three sides are pinned and one side is open.
This is what it looks like on the back.
I think the video will make this much more clear:
Continue sewing the charm pack squares to the backing squares on three sides until you have used all 42 squares.
Take a small wadge of filling and push it into the fabric shape. The smount of filling that you use depends on how thick you want your biscuits to be. It’s best to try and use roughly the same amount in all the biscuits. I used two wadges similar to the one shown in the right hand photo but with hindsight I would have used only one wadge that size to make it easier to sew the biscuits together.
When you have added the filling, flatten the fourth edge, make a pleat as on the other sides of the square and sew the seam.
Join the biscuits together by squeezing flat the edge to be joined and then sewing two biscuits together with right sides together.
As there are 42 squares, I have sewn them together with seven biscuits to a row and six rows. This needs doing carefully because of the thickness to the left of the needle, so do check afterwards that both layers have been caught in your stitching.
I wanted to put a border on the biscuit quilt so that I could add some embellishment and also to make it easier to add the backing so I cut four lengths of green fabric 2″ by 21.1/2″. With right sides together sew two lengths to the longer (7biscuit) edges of the biscuit quilt and the remaining two lengths to the shorter (6 biscuit) edges.
Cut a 21.1/2″ square of backing fabric – I used the same green fabric as I had used for the border – and baste this to the biscuit quilt with wrong sides together. Bind the edges as for any quilt, but be careful when hand stitching as there are only two layers of fabric so your stitches may show through if you’re not careful.
It would obviously be impossible to quilt the two layers together so I secured the puff quilt by tying knots using embroidery thread in the corners of every other biscuit. There is a point just in from the corner where the fabric is quite flat and that is a good place to tie.
Bind the edges as for any quilt. I used white fabric to give a good contrast to the green border.
To embellish the border I made a dozen daisies using gold embroidery thread and sewed them round the biscuit quilt border.

The finished size is 21.1/2″ square. I intend to use my puff quilt as a quilted wall hanging for Christmas, but it makes such a lovely, unusual quilt that it could be made for a pram or crib covering, or to go on top of a Christmas hamper for a Christmas gift. It would also make a lovely and comfortable cushion cover.


