Hi, bakers! I’m
Amy Hooper and I’m thrilled to bring you my very first Bake Shop project! This magic skirt has got it all – it flatters a variety of shapes and sizes, it’s virtually seasonless, inexpensive, easy, and uses only 1 yard of fabric and a charm pack to do it! Wear with flip flops and a tank for summer, boots and a chunky sweater for fall. The sash would make a great headscarf, too!
1 yard Half Moon Black and White Swirls
1 Half Moon Charm Pack
1 ½” wide non-roll elastic

4 yds. 1” wide rick-rack, or other trim as desired
Make note of what you want the finished waist measurement to be. Generally speaking, a skirt circumference of twice your waist size will result in a nicely gathered, full skirt. So one yard of fabric should make a skirt for up to a 36” waist. I used ½” seam allowances unless otherwise noted. Be sure to zigzag or serge your raw edges.
1. Take your single yard of fabric, fold it selvage to selvage, and press. Cut along the fold line. Using a rotary cutter, cut the pieces to waist measurement plus 1 inch. (I cut mine to 33”, so now I have two pieces measuring 22” x 33”).
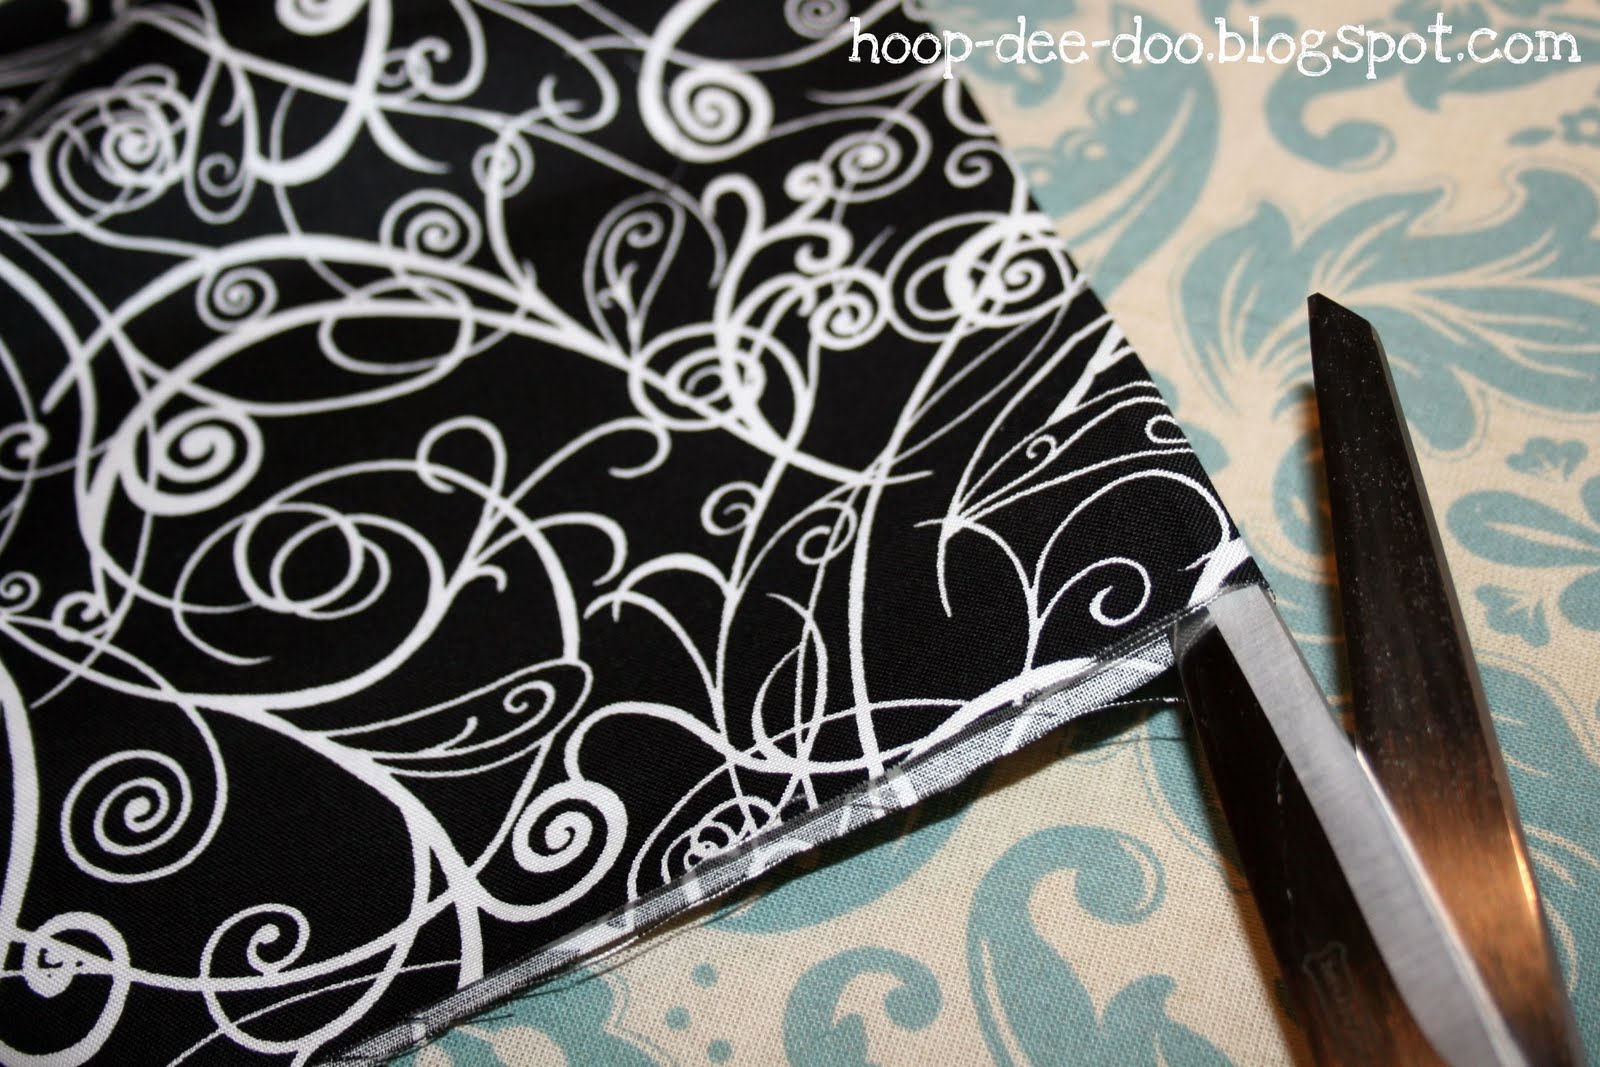
2. With RST, sew one short side together, so you have one long panel. Trim the selvage edge off, then cut another 5” strip off that same edge and set aside.
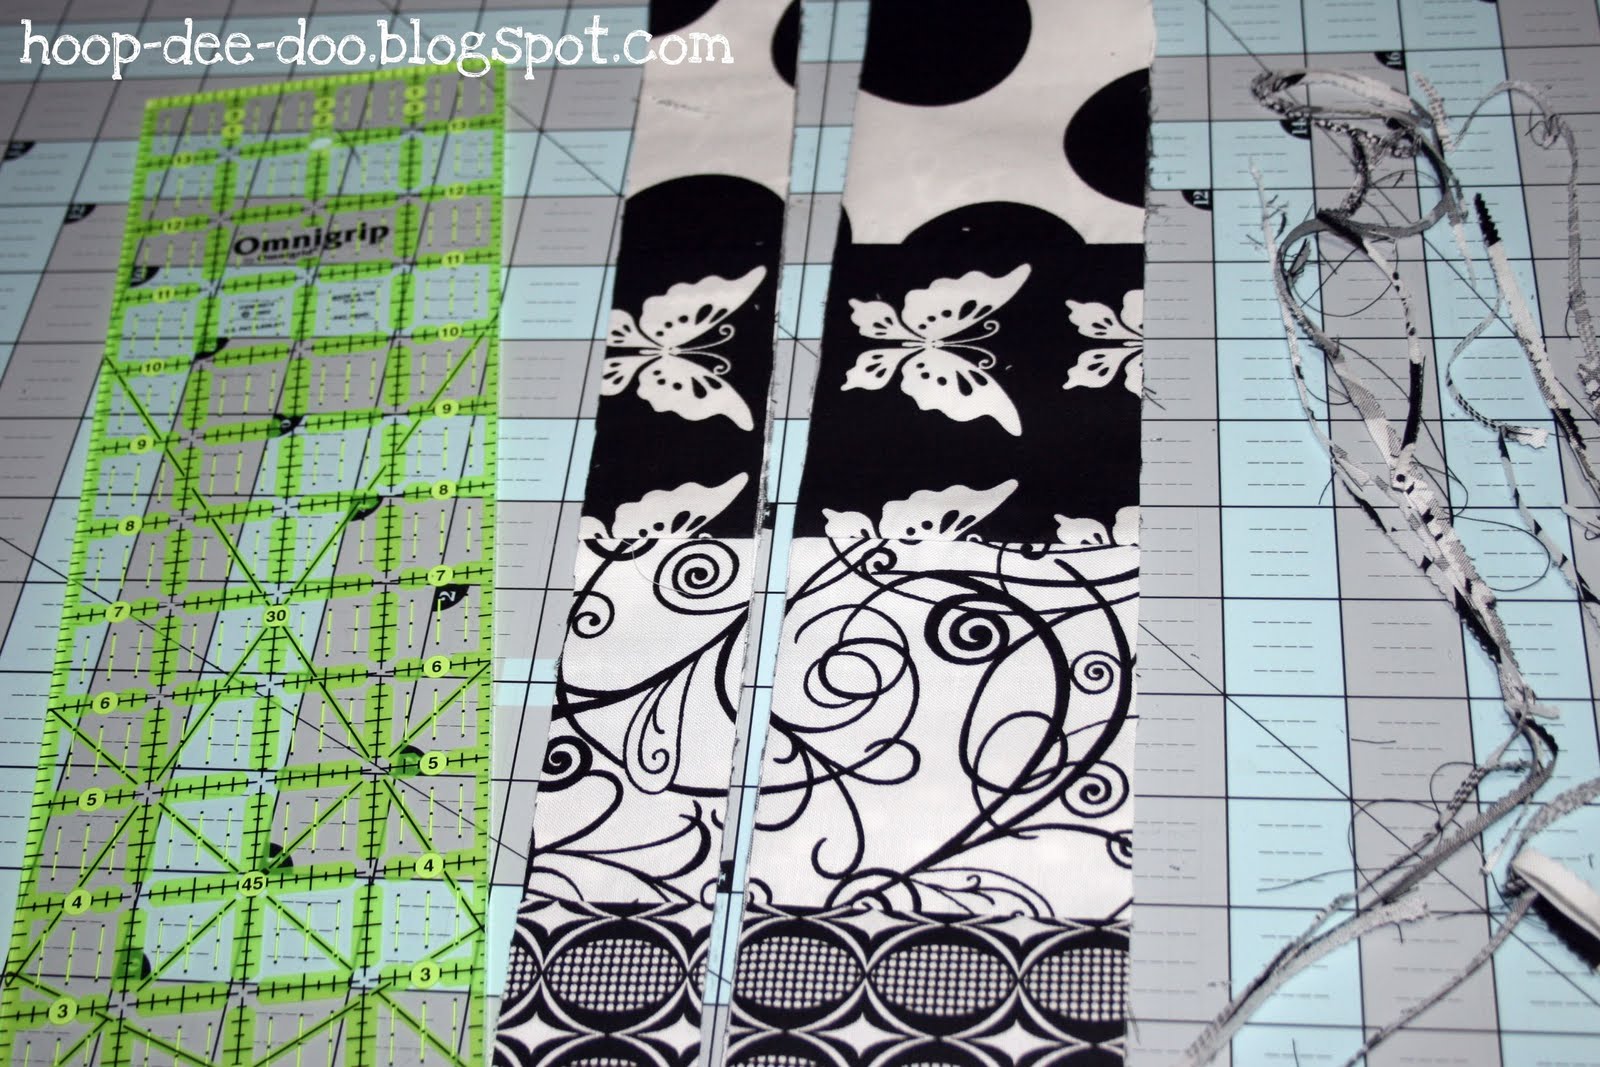
3. Now the fun part! Grab that charm pack and select some squares you like for the patchwork inset strip. Keep in mind that after seam allowances, your squares will be 4” long, so calculate how many you will need to cover the width of the main panel (I used 17). Sew them together into one long strip, making sure directional prints are oriented the same way.
4. Using your rotary cutter to cut your patchwork strip lengthwise, even up your edges. Then cut a 3” wide strip. The remaining strip will be somewhere around 1.75” wide. We’ll use it later for the binding, but set it aside for now.
5. Place your 3” wide patchwork strip RST against a long edge of your main skirt panel, paying attention to your directional prints. Pin and sew. Open seam and press. Stitch rick-rack directly over the long seams. If you aren’t using trim, just topstitch.
6. Now pin the 5” strip you cut in step 1 to the bottom of the patchwork strip. Sew and press. Add rick-rack and/or topstitch.
7. RST, sew remaining short sides of skirt together so you have a tube. Topstitch the side seams.
8. Now grab the 1.75” wide patchwork strip you cast aside earlier. Fold in half lengthwise, WST, and press. Tuck in one end 1”. Line up the raw long edge of the folded strip with the raw bottom edge of your skirt, WST, and pin. The edges of your patchwork strip should overlap. Tuck the raw end inside the folded end. Sew using a scant ¼” seam allowance (you do not need to serge or zigzag this edge).
9. Now for the binding. You have a couple of different options. Turn skirt right side out.
Version A: Keeping the raw edge flat, fold up the binding just to the stitch line. This will give you about a ¼” binding. You may want to trim the raw edge a bit to make this easier. Pin and press heavily. Stitch a scant 1/8” from edge, making sure you cover the seam underneath. A small amount of the binding will be visible on the underside of the skirt.
Version B: Fold the binding and the raw edge up so that you have about a ½” binding. Pin and press heavily. Stitch a scant 1/8” from edge. No binding should show on the underside of the skirt.
10. Now turn under ½” around the raw waistband and press. Turn under 1.75” and press again. Stitch on right side 1.5” from folded edge, leaving a 2” opening. Cut your elastic 3” smaller than your waist size and thread it through the casing, stitch the ends together and sew the opening closed.
Tada! The skirt is finished!
11. Optional sash: Take your remaining charm squares and sew them into one long strip, as long as you like. You don’t need to finish the edges. Fold one short end ½” to WS and press; fold strip in half lengthwise RST and press again.
12. Stitch the unfolded short end and the long raw edge using a ¼” seam allowance. Turn inside out and topstitch around all four edges. Voila! You now have a lovely sash or scarf to accompany your cute new skirt!
One very versatile skirt, about 19.5″ long.
Amy Hooper