Quilt As You Go Improv Pillows


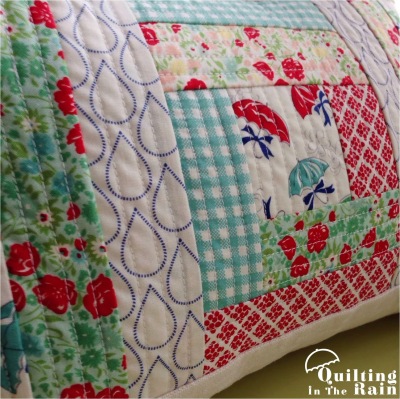
Hi All! This is Jera from www.QuiltingintheRain.com bringing you a creative weekend project. This pillow uses a modern Quilt as you Go technique which will be featured in my upcoming book, Quilt-As-You-Go Made Modern, to be released this Fall. I’m so excited to share this technique with you all!
 
The Quilt as you Go technique is very creative as it doesn’t follow a precise pattern. Rather, it takes on more of a improvisational style of piecing and quilting. For updates on my latest quilting endeavors, check out my Quilting in the Rain Facebook page and blog. You can also find me on Instagram. Thanks so much for stopping by and enjoy the tutorial!


Please Note – For this pillow I used leftover Layer Cake squares from the April Showers Collection by Bonnie and Camille. Leftover fat quarter scraps will work too. For the solid borders, I used Moda Solids Prairie Cloth in Buff (this material is home decor weight but has a linen/canvas feel to it). For the back of the pillow, I used Moda’s Twill (home decor weight), Nautical Ticking Stripes in Red.

For Pillow No.1 (14″ x 14″ pillow cover):

  • 1 layer cake square (or a 10″ square cut from a fat quarter) 
  • 1/4 yard border fabric
  • 3/8 yard Backing
  • 15.5″ x 15.5″ batting square (needle-punched batting)
  • pillow insert

 For Pillow No.2 (16″ x 12″ pillow cover):

  • 6 layer cake squares for variety (or six different fat quarter prints)
  • 1/4 yard border fabric
  • 3/8 yard backing  
  • 17.5″ x 13.5″ batting square (needle-punched batting)
  • pillow insert 


    For Pillow No. 1 (14″ x 14″ pillow cover):

    1.  Take a 10″ square and place it in the center of the batting. Place a few pins to help keep it down. Then, quilt it directly to the batting. As shown below, make sure your stitch starts and ends on the batting.

    I did free-motion quilting with some simple loopy-loops. If you’ve never free-motion quilted before, now is a good time to try it out as it’s easier to do it on a smaller, more manageable block.

     2. From your border fabric, cut two 3.5″ strips along the length. Take a strip and trim it with fabric scissors so it’s the same length as the side of the square. With right sides facing together, sew a 1/4″ seam allowance.

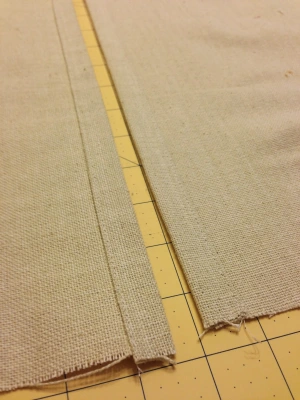
    3. Press open, and then quilt lines that run parallel to the seam. There will be some extra fabric hanging over the batting. As shown below, make sure your stitch starts and ends on the batting.

    4. Take the strip and trim it with fabric scissors so that it measures the length of the square and strip that you just pieced together, as shown below. With right sides facing together, sew a 1/4″ seam allowance.

    5. Press open, and then quilt lines that run parallel to the seam. There will be some extra fabric hanging over the batting. 

    6. Repeat the previous steps until there is border fabric surrounding all four sides of the square. You are essentially piecing fabric in a log-cabin style method, but quilting it directly onto the batting as you go.
    When you are finished, the entire batting will be covered and will look similar to this.
    The back will look similar to this:
    Flip the block over so the batting side is facing you. Trim the excess fabric sticking out side of the batting. Then, flip it over so the patchwork is facing you and trim approximately 1/4″- 1/2″ from all four sides so that your block measures 14.5″x14.5″.
    7. Next, create an envelope closure for the backing. From your backing fabric, cut two 11″x14.5″ rectangles. Along the length,  turn the edge 1/4″ under, press, then turn under 1″, then press again. Stitch along the fold to keep in place to create a pretty seam. Repeat on the other rectangle as well. 
    With right sides facing together, take one rectangle and align it along the left side of the pillow cover. The finished seam you created from the previous step should be facing toward the right. Pin to keep in place, then sew a 1/4″ seam allowance along the perimeter as illustrated by the dashed line below. Start and end your stitch with a back-stitch.
    Repeat with the other rectangle, but align it on the right side of the pillow. Lastly, trim the corners to get rid of bulk fabric, and then turn right side out.
    Insert the pillow and there you have it! 🙂

     
    For Pillow No.2 (16″ x 12″ pillow cover):
    Please note: For this pillow, the same exact technique that was described above (for pillow No.1) was used, except with smaller pieces of fabric. The technique I explained from the first pillow will give you the basic understanding you need to complete this next pillow. That being said, I will not list step-by-step instructions.  Rather, I have listed the order in which the strips should be pieced. Enjoy!
    1. From your fabric, cut one 3″ square and a couple 2″ strips from each print (you will trim these strips as needed).
    2. Start by placing the 3″ square in the center of the batting, and then quilt it. Next, add strips making sure to trim them with fabric scissors to the correct size. Add the strips in the following order, using the quilt as you go method previously described. For this pillow, I quilted straight lines that ran parallel to all of the seams. 
    Tip! Fabric can shift while stitching on the batting. Correct for this by keeping the strips aligned and ‘square’ them as necessary. The seams of each successive piece should be at a 90° angle to the previous quilted piece. 
    Also, please note that your pieces will shift around slightly and the batting will stretch a little – this is completely normal. So don’t expect yours to look as straight as the illustration above. =)
    3. From your border fabric, cut one 5-6″ wide strip along the length. With right sides facing together, place the strip along the length of the patchwork as shown below. Overlap the strip with the patchwork as needed to straighten it out, and as mentioned in the “Tip!” above. Sew.
    4. Press the strip down, and then quilt lines that run parallel to the seam. Repeat for the top so that the entire batting is covered.
    5. Flip the block over so the batting side is facing you. Trim the excess fabric sticking out side of the batting. Then, flip it over so the patchwork is facing you and trim approximately 1/4″- 1/2″ from all four sides so that your block measures 16.5″x12.5″.
    6. Next, create an envelope closure for the backing. From your backing fabric, cut two 11″x12.5″ rectangles. Repeat step 7 from Pillow No.1 to create the envelope closure and to finish your pillow. 
    And that’s it! Quilt as you Go is a fun and different way to quilt. I hope you enjoyed learning this new improvisational technique! Now that you know the concept, you can get really creative with all the other fun Quilt as you Go pillow designs you can think up! 
    (Above: Paige modeling a Quilt as you Go strip quilt using the Scrumptious collection by Bonnie and Camille).
    Come visit me at www.QuiltingintheRain.com for more Quilt as you Go projects. You can also find me on Facebook and Instagram.
    Let your creativity rain!
    xoxo
    -jera brandvig

    Applique Hearts Pillow


    Hi All! This is Jera from www.QuiltingintheRain.com bringing you this simple Applique Hearts Pillow tutorial just in time for Valentine’s day. Depending on what fabrics you use, the pillow can be used year round. This pillow has an easy envelope enclosure, making this a quick and fun weekend project that you can complete in a few hours.

    Also, I wanted to share that I have a quilting book coming out this year, so come check out my blog for details (or for some great tutorials!), or follow me (and my corgi, Paige) at Quilting in the Rain’s Facebook to see my latest quilts and projects. Thank you so much for stopping by! Let your creativity rain!

    • 1 yard Moda Solids Prairie Cloth in Buff (this material is home decor weight but has a linen/canvas feel to it) 
    • 1 Bella Solids charm pack in Porcela, plus one scrap for the colored heart
    • Clear glue that works on fabric
    • Coordinating thread
    • 20″ square pillow insert


    1. From the prairie cloth, cut one 21″ square. For the back of the pillow, cut two 15″ x 21″ rectangles (these will be made into the envelope closure).

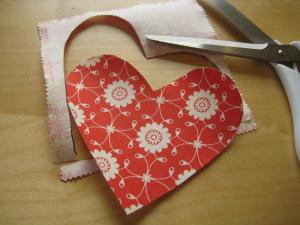
    From the charm squares, cut hearts of varying shapes and sizes. I think the variety and imperfection of the heart shapes adds character to the pillow. To cut a big heart, simply fold a charm square in half and crease it with your finger so it stays folded. Then, use fabric scissors to cut the arch of ‘half of a heart’ along the folded edge. When you unfold it, you will have a heart shape.

    To make smaller hearts,  repeat but cut two hearts from one charm square. 

    I started by cutting approximately 8 big hearts, and then filled up the pillow with smaller and medium sized hearts. Also, from your scrap fabric cut one medium-size colored heart.
    2. Next, arrange the hearts on the 21″ square.
    3.Use clear glue that works on fabric to temporarily hold the hearts in place. Use very little glue as this is just an alternative to using pins and is meant to be temporary. For each heart I put the tiniest drop of glue and then spread it with my finger to make a very thin layer.
    This is the glue I ended up using but i’m sure Elmers would work just as well. I just recommend getting a clear adhesive.
    4. Sew the hearts in place using a regular presser foot. I simply guided the edge of my presser foot along the heart to sew a 1/4″ seam allowance, using a straight stitch setting.
    If you’ve never done this before, to get around the curves of the heart you will need to stop and pivot the fabric quite often. To do this, simply stop sewing with the needle in down position, lift the presser foot and pivot the fabric underneath to follow the curve. You’ll get the hang of it. 🙂 
    5. Along the length of a 15″ x 21″ rectangles,  turn the edge 1/4″ under, press, then turn under 1″, then press again. Stitch along the fold to keep in place as shown below. Repeat on the other rectangle as well.

    6. With right sides facing together, take one rectangle and align it along the left side of the pillow cover. The finished seam you created from the previous step should be facing toward the right. Pin to keep in place, then sew a 1/2″ seam allowance along the perimeter as illustrated by the dashed line below. Start and end your stitch with a back-stitch.

    Repeat with the other rectangle, but align it on the right side of the pillow.

    Clip the corners to rid of bulk and then turn right side out through the envelope opening.

    7. Lastly, rub your hands up and down the pillow to help ruffle-up the edges of the hearts. The semi-freyed and ruffled hearts adds texture to the pillow. The freying will not go beyond the stitch. 

    And there you have it! A beautiful, applique heart pillow!


    One fabulous 20″ x 20″ pillow

    Thanks again for checking out my tutorial! Come visit me at www.QuiltingintheRain.com or follow me on Facebook at QuiltingintheRain. You can also find me on Instagram.

    Let your creativity rain! 🙂

    Jera Brandvig
    {www.QuiltingintheRain.com}

    4-Step Flagstone Quilt


    Hey everyone! It’s Jera from Quilting In The Rain bringing you this fun quilt top that you can finish in a weekend.

    And here’s a sweet treat for all you pre-cut lovers…The West Seattle Fabric Company‘s online shop is offering Boho Quilt Kits, plus 10% off all pre-cuts and kits by typing in the code bakeshop at checkout.

     Grab a Layer Cake or a Boho kit and get this quilt top done within a few hours. Have fun!


    For one big quilt measuring 54.5″x63.5″

    • One  Layer Cake (you will need all 42 squares)
    • coordinating thread
    • 1/2 yard binding
    • 3 1/4 yards backing 

    OR

    For two smaller quilts measuring 36.5″x45.5″ each

    • One  Layer Cake (each quilt uses 20 squares)
    • coordinating thread
    • 3/4 yard binding (will bind both)
    • 3 yards backing (will back both)


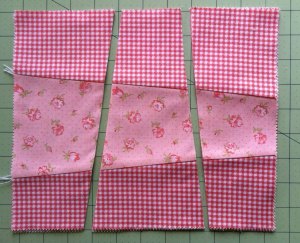
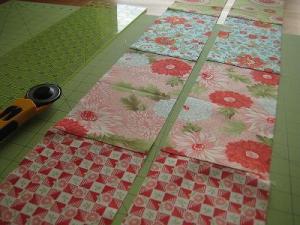
      Step 1 – Choose ten pre-cut 10 inch squares and lay them directly on top of one another making sure they are aligned. Using a ruler and rotary cutter, make a diagonal cut through all ten layers. Make sure the cut is similar to the one shown below (i.e. don’t make the cut too slanted).

      After you make the diagonal cut, you will have two stacks of fabric: Stack A and stack B.

      Step 2 –  From stack A, take the bottom piece and from stack B take the top piece. Place them together as shown below. Piece these two pieces together (with right sides facing together, sew a 1/4″ seam allowance). Repeat until stack A and B are all pieced together.

      Tip: For faster piecing, you can chain piece:

      Step 3 –  After you’ve completed Step 2, press open all of the blocks using an iron. Next, stack all of your blocks on top of one another, same as you did in Step 1. Make sure all the blocks are facing the same direction and are aligned. Rotate the stack and then make a diagonal cut again, as shown below.  Once again, you will have stacks A and B.

      Repeat Step 2 with stacks A and B:

      After sewing together, press open with an iron. A finished block will look like this:

      Repeat steps one through three with ten more pre-cut ten inch squares so that you will yield a total of 20 finished blocks. If you want to make the bigger quilt, repeat the steps until you yield a total of 42 finished blocks.
      Step 4 –  To make the smaller quilt, lay all 20 finished blocks in a 4×5 formation as shown below. To make the bigger quilt, lay all 42 finished blocks in a 6×7 formation. 
      To piece the quilt top together, first sew all four blocks together in each row, and then sew each row together. (Using a 1/4″ seam allowance, sew with the right sides facing each other, and then press open with an iron).

      Lastly, baste and bind your quilt. That’s all there is to it!


      Two smaller quilts measuring 36.5″x45.5″ each, or one big quilt measuring 54.5″x63.5″

      The fabric I used in the above images are from Moda’s Marmalade collection. Below I used a combination of Moda’s Sew Stitchy and Noteworthy collection. This pattern is so much fun I’ve used several different collections, so grab a Layer Cake and have fun!

      Happy Quilting 🙂

      Jera Brandvig
      {www.QuiltingintheRain.com}

      Summer Love


      Hi Everyone! It’s Jera from www.QuiltingInTheRain.blogspot.com bringing you another MBS tutorial! This is a simple and beautiful quilt that will make your favorite fabrics pop! Check out my 3-step tutorial below that uses jelly roll strips to make the entire quilt top.

      I used the Summer House collection by Lily Ashbury. Make one yourself and checkout my blog at www.QuiltingInTheRain.blogspot.com for a chance to win a Terrain jelly roll by Kate Spain!

      • 1 jelly roll (you will have plenty of leftover strips!)
      • 1 solid white jelly roll
      • 3 yards backing


      Step 1 – Trim the strips from both the colored and solid white jelly roll to the exact measurements represented in the cutting diagram below. (Note: the measurements below are the exact cutting measurements of the unfinished pieces). Since a jelly roll strip is 2.5″x44″ long, in some cases you will need to sew a couple strips together and then trim it to get the measurements shown below.

      Step 2 – Using a 1/4″ seam allowance, sew all the pieces in each row together, and then sew all rows together.


      Step 3 – Add the borders. Sew enough strips together until you have these measurements:

      1. Left and right borders – 46.5″ long. Sew these on first.
      2. Top and bottom borders – 57″ long.


      Layer and quilt.

      Sew together six leftover strips to create the binding. A binding tutorial can be found here.

      That’s it! Simple and absolutely beautiful! Let me know if you have any questions. 🙂

      Happy Quilting!


      57″ x 50.5″

      Jera Brandvig

      Strawberry Fields Forever Quilt


      Hi! This is Jera from Quilting In The Rain bringing you this Strawberry Fields Forever pattern (thanks again Lalobe from Austria for the name idea)! I love this pattern because each block will be unique to your own making…there are no precise measurements; simply cut, stack, whack and sew!

      This quilt top requires a single layer cake pack. I used the Strawberry Fields collection by Fig Tree & Co. Make one yourself and visit my blog {QuiltingInTheRain.blogspot.com} for an easy chance to win a Layer Cake!

      Note: this pattern assumes a 1/4″ seam allowance.


      1 layer cake pack (Forty-two 10″ squares)
      3 yards for backing
      3/8 yard for binding

      Step 1 – Choose four squares from your layer cake pack.

      Step 2 – Layer all four squares so they are stacked evenly on top of one another. Then, using a rotary cutter and ruler, make 2 diagonal cuts as shown below.

      Step 3 – After making the above cuts through all four layers of the squares, you will yield the following. All four pieces of the letter ‘a’ should be the same shape and size, as with the letter ‘b’ and ‘c’.

      As shown below, switch around the letter ‘b’ pieces so that the colors are alternating. In this photo, I simply switched the top ‘b’ with the bottom ‘b’.

      Sew the newly arranged a, b and c pieces together as shown below to yield four blocks.

      Step 4 – Layer all four pieced-together blocks so they are stacked evenly on top of one another. Rotate the stacked blocks 90 degrees, as shown below. Similar to step 2, make 2 diagonal cuts.

      Step 5 – After making the above cuts through all four layers of the pieced-together blocks, you will yield the following. Same as before, all four pieces of the letter ‘a’ should be the same shape and size, as with the letter ‘b’ and ‘c’.

      Here’s the fun part! Switch around the a, b or c pieces, so long as they are switched with their same letter (e.g. only switch a ‘b’ piece with another ‘b’). For this quilt, I stuck with only switching around the ‘b’ pieces. I like the way it looks, and it’s simpler. Here are two different ways you can switch around the ‘b’ pieces:

      or

      Step 6 – Then, sew the newly arranged a, b and c pieces to form 4 finished blocks (9″ squares finished).

      Step 7 – Repeat until you have a total of 42 finished blocks. Then, arrange each block in 7 rows of 6 blocks each.

      Sew each block together in each row, and then sew the rows together. Quilt and bind!


      One fabulous 52″x 60″ quilt!

      That’s it (I told you it was easy). It might seem a little confusing at first, but once you get started you’ll quickly get the hang of it. Thanks for checking out my tutorial!

      Come visit me at www.QuiltingInTheRain.blogspot.com whether it’s to check out my latest crafting, or for a chance to win a Layer Cake (or both!).

      Happy Quilting!

      Jera Brandvig
      {QuiltingInTheRain.blogspot.com}

      Woven Jelly Roll Rug


      Hello! This is Jera {quiltingintherain.com} bringing you this fun weekend rug project that requires just 1 jelly roll. Make a free rug for yourself by checking out my blog for a jelly roll giveaway! I used the collection ‘Wild Rose’ by Blackbird Designs. It makes a beautiful rug to display in your sewing room or to put by the fireplace. Seven simple steps below! Oh, and there’s a surprise bonus picture at the bottom of the tutorial ;-p

      • 1 Jelly Roll
      • *Non-slip liner for drawers, enough to cover 20”x30”
      • Scrap backing fabric, measuring 20”x30”

      *Originally I tried using non-slip rug padding but it was too thick to sew through. The non-slip drawer lining is much thinner and works better.


      Step 1 – From your jelly roll, choose 28 strips and do the following:

    • Take 12 jelly roll strips (44″ long). Cut each in half so you have a total of 24 strips that are 22″ long each. Trim each so they measure 20” long. You will have a total of (24) 20” long strips.
    • Take 16 jelly roll strips. Trim each so they measure 30” long. You will have a total of (16) 30” long strips. Press all of the above strips in half lengthwise, and then stitch a ¼” seam as shown below.
    • Step 2 – Cut the backing fabric.

      From your scrap fabric, cut a 20”x30” rectangle. I used a semi-thick fabric.

      Step 3 – Place the 30” long strips along the length of the backing fabric and pin at the ends. Sew a ¼” seam to keep in place. Continue until you’ve attached all 16 strips.


      Step 4 – Take your 20” long strips and weave along the width, over and under the 30” long strips you attached in the previous step. Pin as you weave them to keep them in place.

      For each strip, sew a zig-zag stitch to secure the weave. I pinned and sewed 3 strips at a time.


      Step 5 – After you’ve finished weaving in all of the 20” strips and sewing zig-zag stitches along the width of the rug, go back and sew zig-zag stitch along the length as well. Trim off excess strips that hang over the 20”x30” backing.

      Step 6 – From your non-slip liner, cut a 20”x30” rectangle and pin to the back of your rug to keep in place.


      Step 7 – Lastly, bind the rug using leftover jelly roll strips as described in Oda May’s Binding with a Jelly Roll tutorial.


      One fabulous 20″x30″ rug!

      Bonus picture!


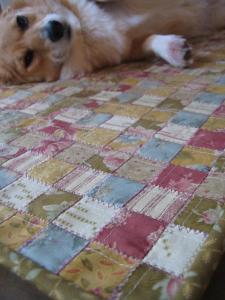
      My dog Paige has grown very fond of the woven jelly roll rug. 🙂

      Don’t forget to check out my blog for a chance to win a jelly roll!

      Thanks for stopping by!

      Jera Brandvig,
      {QuiltingInTheRain.com}

      Fabric Ornaments


      Hi! This is Jera in Seattle from http://quiltingintherain.blogspot.com sharing a quick weekend project that doesn’t involve sewing for a change, though it does involve getting your hands a bit messy! I used the “Halloween Night” charm pack by Minick & Simpson; I’d love to see someone do a Christmas version. To make roughly 7 ornaments, you will need approximately 15 five inch squares (aka charm squares). You can use the leftover charm squares to make a matching table runner. All of the ingredients below (other than the charm pack) can be found at a crafts store.

      • Foam balls (2″ in diameter and/or 3″ in diameter)
      • 1 charm pack, Halloween Night
      • ModPodge
      • Clear brush-on glaze finish
      • Paint brush
      • Wire (I used fabric-coated wire from the floral section)

      • Ribbon
      • Halloween tree (from JoAnn’s); or make your own similar to the one below using branches:


      Step 1 – From your charm pack, choose about 10-15 charm squares. Cut these into strips no wider than 1”. If you’re using smaller foam balls, I wouldn’t cut them any wider than ½ ”.

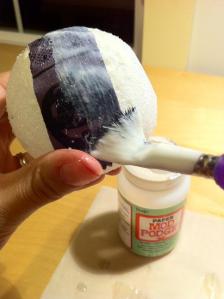
      Step 2 – Get your hands messy! (Tip: I covered my table with parchment paper). With a paint brush, apply a single coat of Mod Podge where you plan to place a fabric strip:

      Place the fabric strip over the Mod Podge and smooth down with your fingers. Then, secure the strip by brushing it down with more Mod Podge. Don’t brush it on too thick:

      Repeat the above steps but with another strip. Simply layer the fabric strips as needed until the entire foam ball is covered:

      Let the fabric/Mod-Podged ball(s) dry on parchment paper overnight.

      Step 3 – After the fabric balls have dried, apply a thin coat of clear brush-on glaze coating and then let it dry again overnight.

      Step 4 – Create the ornament hanger. As shown below, cut approximately 4” of stem wire. Bend 2” of one end over to create a ½”-1” loop, and using the remaining wire secure the loop by wrapping the wire around the main stem to create a little knot.

      Step 5 – Using a thin blade (e.g. the tip of an old pair of appliqué scissors), make a small incision on the fabric ball so that the blade cuts through the fabric. Insert the end of the wire hanger (the end that doesn’t have the loop) into the incision until it stops at the knot. The foam secures the wire better than I thought, but you can also apply clear glue around the base of the knot to reinforce it. If desired, add a bow using ribbon at the base of the loop.

      That’s it! You can use the leftover charm squares to make a matching table runner. The tutorial can be found here 🙂


      Approximately 7 ornaments

      Jera
      Quilting in the Rain
      {quiltingintherain.blogspot.com}

      Charming Hearts Quilt


      Hi all! : ) This is Jera from http://www.quiltingintherain.com/ and I’m excited to be posting my 2nd MBS tutorial! I just LOVE the simplicity of this quilt.

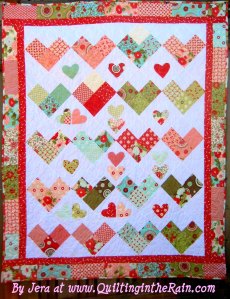
      The main heart blocks are made up of 4 charm squares. Easy peasy! For the other blocks, I cut out hearts from leftover charm squares and appliquéd them onto a solid white layer cake. To appliqué, I simply used fusible interfacing (e.g. steam-a-seam) and then stitched a ¼ inch seam around the perimeter of the heart. After a few washes, a cute little fringe will develop around the heart. It’s my favorite and fastest way to appliqué. Check out my 7-step tutorial below. =)


      2 charm packs, Bliss
      1 layer cake, Bliss
      1 layer cake, solid white
      ½ yard inner border
      4 yards backing


      (Note for newbie’s: when I refer to “sewing,” always sew with right sides of fabric facing together, align the corners, pin the fabric so it stays in place, sew a ¼” seam, and then press open.)

      Step 1 – Prep fabrics for the main heart blocks
      Sort the charm squares by color and create 20 piles with 3 matching charm squares in each pile. Next, take 5 white layer cakes and cut (4) 5” squares from each. This will give you 20 white 5” squares. Distribute one white 5” square to each of the 20 piles you previously sorted.

      Step 2 – Sew the main heart blocks
      To make one main heart block, take one pile of charm squares (sorted from Step 1), and arrange them like the following picture. As shown below, sew the squares together to create 2 units.

      Then, sew both units together to create one block. Repeat until you have all 20 blocks sewn.

      Step 3 – Prep the white background for the appliqué blocks
      Take 12 white layer cakes. Trim each one so they measure 9.5”x9.5”. Layer the fabric for faster cutting.

      Step 4 –Follow steps A-G below to appliqué the hearts using steam-a-seam. Use leftover charm squares for the hearts. Repeat until you have a total of 12 appliquéd blocks.

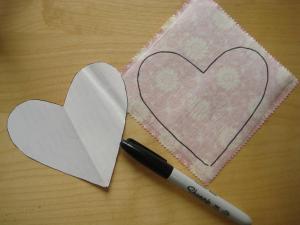
      A. From a 5”x5” piece of scrap paper, draw and cutout a heart as shown below. You will use this paper heart as a stencil for all the fabric hearts.

      B. Next, cut out steam-a-seam to ~ 4.5” squares. As shown below, iron the steam-a-seam to the wrong side of a charm square.

      C. Use a marker to trace the paper heart (cut from step A) on the wrong side of the charm square (onto the steam-a-seam layer).

      D. Using fabric scissors, cut out the heart.

      E. Peel off the steam-a-seam layer from the fabric heart.

      F. Place the heart on the white 9.5” square (from step 3) and press in place.

      You can arrange the hearts any way you like. Below is another fun idea…

      G. Stitch a ¼” seam around the perimeter of the heart.

      Step 5 – From your white layer cakes, cut the following (for faster cutting, stack your fabrics):
      – Take 7 layer cakes and trim each one to measure a 9 7/8” square. As shown below, cut each 9 7/8” square in half diagonally to form 2 half square triangles. These will be the sides of your main quilt top.

      -Take 2 layer cake squares and trim each one to measure a 7 5/8” square. As shown below, cut each 7 5/8” square in half diagonally to form 2 half square triangles each. These will be the corners of your main quilt top.

      Step 6 – Arrange all your main blocks and half square triangles cut from the previous step as shown below. Sew the blocks/half square triangles together in diagonal rows, as designated in red. Start by sewing all the blocks/half square triangles in each row together, and then sew all the rows together.

      Step 7 – Sew the inner borders and outer borders to the main quilt top:

      -Inner border: From the ½ yard of fabric, cut (7) 2.5” strips. These will be for your inner border. First sew the left and right inner borders to the main quilt top. Trim excess fabric.

      -Outer borders: From your non-white layer cakes, choose 14 squares. Sew 2 rows of 7 squares together. Cut each row in half lengthwise to form 2 border strips, as shown below.

      Start by sewing the left and right inner borders onto the main quilt top, and then the left and right outer borders. Trim excess fabric so the borders are flush with the quilt top and bottom. Repeat, but for the top and bottom inner and outer borders.

      Quilt and bind! Click HERE for easy, Quick Quilt Binding.


      77″ x 62″ quilt

      Jera
      {http://www.quiltingintherain.com/}

      Cuttin’ Corners Quilt


      Hi! I’m Jera from Seattle and I’m excited to be quilting for Moda! Come visit me in the rain at http://www.quiltingintherain.com/. =) 

      Cuttin’ Corners quilt has an abstract look to it – I took a really simple idea of sewing five rows of 10” squares together and then added a twist by cutting out shapes on the quilt top and rearranging them. This is a great quilt top you can finish over a weekend. Grab a layer cake pack and you’re good to go!

      • 1 layer cake pack, Bar Harbor
      • ½ yard white fabric, Moda solids (for inner border)
      • 3 yards backing fabric
      • 55”x65” batting
      • Coordinating thread

      (Note for newbie’s: when I refer to “sewing,” always sew with right sides facing together, align the corners, pin the fabric so it stays in place, sew a ¼” seam, and then press open.)

      Step 1 – From your layer cake stack, choose 20 squares. Arrange them in 5 rows of 4 squares each.


      Step 2 – In each row sew all 4 blocks together (first picture below). After the blocks in each row have been sewn together, sew each row together as shown (2nd picture below).


      Step 3 – Mark the following lines as designated in red, below. I used thin masking tape to mark these lines (also helps give you a straight line). Then, mark each section with a number 1 through 7 as designated below. I used scrap paper and pinned a number to each section.

      Step 4 – Using fabric scissors, cut along the lines you marked with tape. After cutting along the lines, your quilt top should now be divided into 7 individual pieces (each marked with a number) as shown in the 2nd picture below.


      Step 5 – Rearrange these 7 pieces as shown in the picture below.


      Step 6 – Sew the 7 rearranged pieces together to create 3 units. Then, sew each unit together to create the main quilt top.


      Step 7 – From your white fabric, cut the following for the inner border:

      • 2 – 2.25”x48” strips
      • 2 – 225”x42” strips

      Step 8 – Create the outer border using leftover layer cakes. For the left and right side borders, sew 6 layer cakes together, and then cut in half lengthwise. For the top and bottom side borders, sew 5 layer cakes together, then cut in half lengthwise.

      Step 9 – Sew the left and right inner borders onto the main quilt top, then sew the top and bottom inner border pieces on. Trim off excess fabric. Repeat, but using the outer borders you created from step 8. Use the excess border fabric to compensate for any short ends. Quilt and Bind.  


      Finished quilt measures about 60”x50”.


      That’s all there is to it!

      Jera at http://www.quiltingintherain.com/