Follow the Pezzy Brick Road


Follow the Pezzy Brick Road

46″ X 55″
Hi Ya’ll! It’s Jamie Mueller and Jill Rimes of SunFlower Quilts again with our newest Moda Bake Shop project!  We had so much fun designing this quilt and it was even more fun to make!  It’s made with the very popular Pezzy Prints fabric from American Jane and let us tell ya, the fabric is so fun you’ll definitely want to get your hands on some!  We used one Charm Pack and 1/8 yard cuts of yummy Bella Solids to make this adorable baby quilt! 
If you make one please add a photo to our Flickr Group, we would love to see it! Also make sure you check out BOTH of our blogs for a GIVEAWAY! 
Jamie’s blog: {jamiemueller.blogspot.com} 


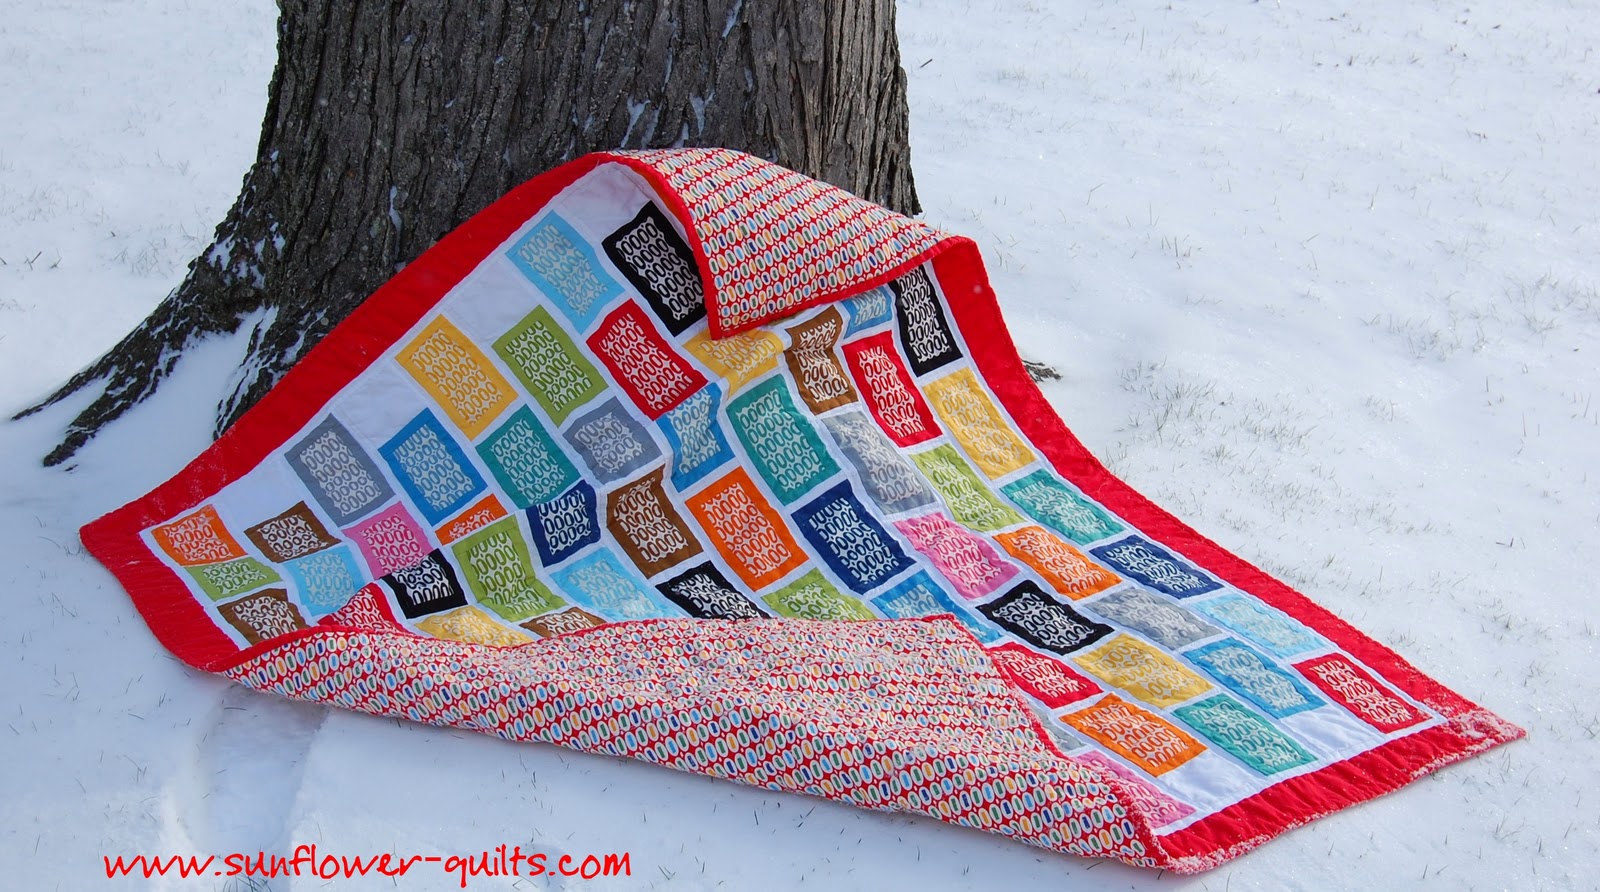
1 – Pezzy Print charm pack

1/8 yard each of 12 coordinated Bella Solid fabrics

(99001 23G, 990080G, 99002 4G, 99001 43G, 99001 92G, 99001 84G, 99001 37G, 990048G, 99001 26G, 990099, 99001 94G, 99001 93)

1 yard white Bella Solid for sashing

1 ½ yards Bella Solid for outer border and binding

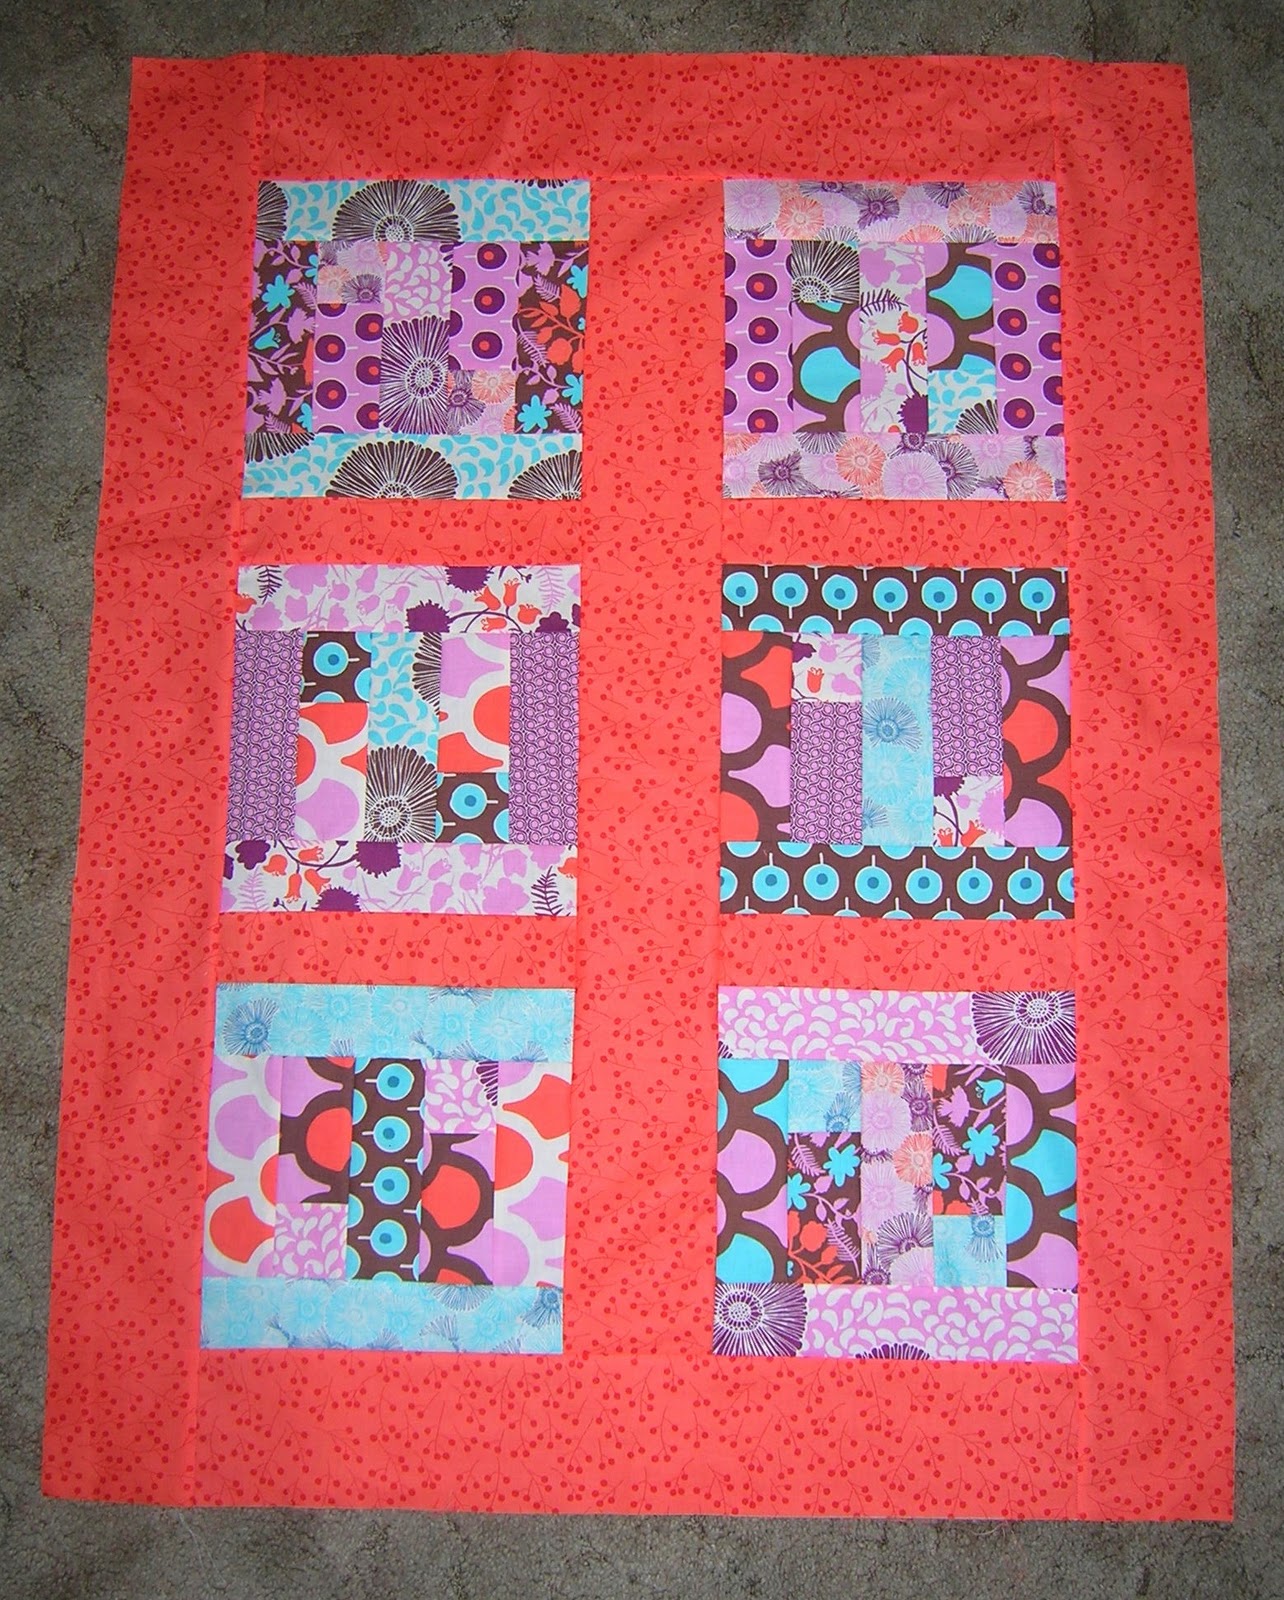
3 ½ yards backing fabric (we used the red multi pez print)


Making the Blocks

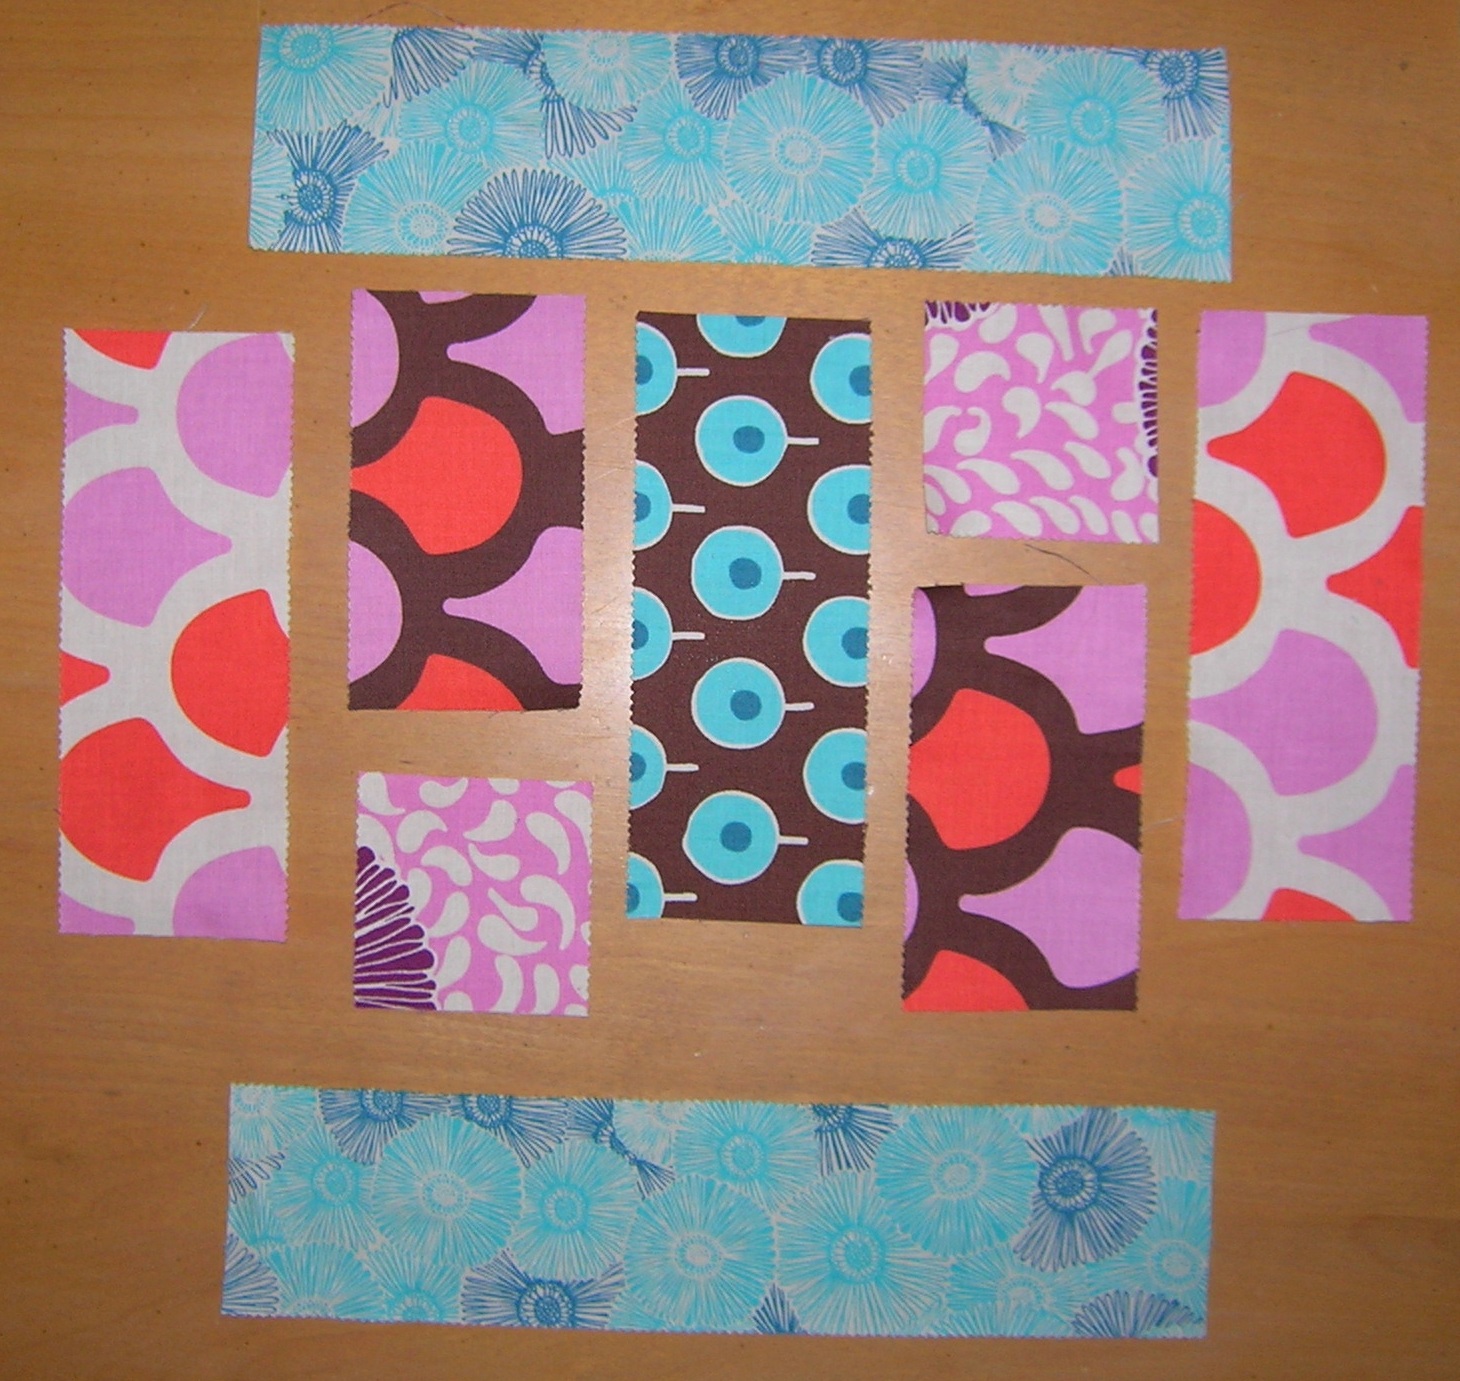
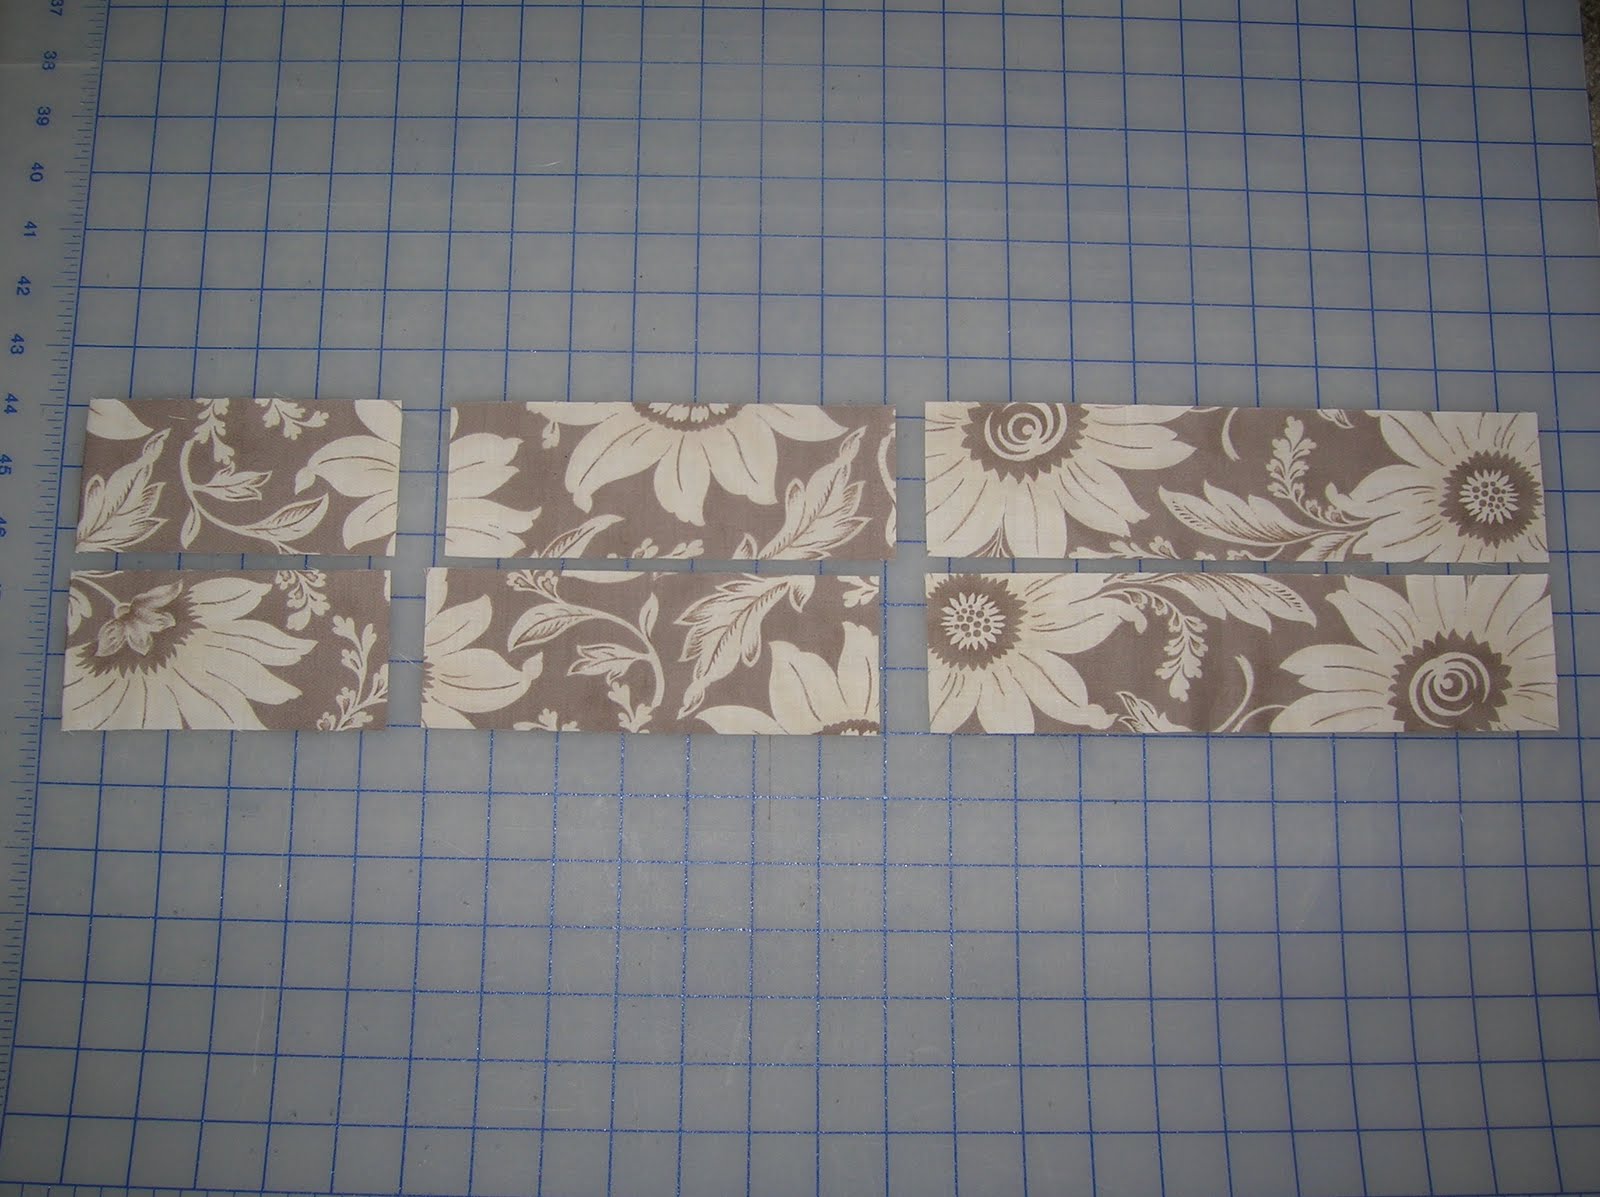
1. Separate the 5” charm squares by color. There will be 12 color groups.

2. Place the 12 different 5” charm color groups with a coordinating Bella Solid fabric. There will now be 12 charm/solid fabric groups.

3. Take one group and cut the 5” charm squares in half yielding 2 – 2 ½” x 5” rectangles. Cut the coordinating Bella Solid fabric into 1 – 4” x WOF (width of fabric) strip. From the strip cut into 4 – 1” x WOF strips; then from the 1” x WOF strips cut into 16 – 1” x 5” rectangles and 16 – 1”x 3 ½” rectangles. Repeat for remaining 11 charm/solid fabric groups. (Note: Be sure to keep the 12 coordinated groups separate from one another.)


Sewing the Blocks

1. Take 1 charm/ solid fabric group and sew a 1” x 5” coordinated Bella Solid rectangle to each side of the 2 ½” x 5” charm rectangle. Press to solid fabric.

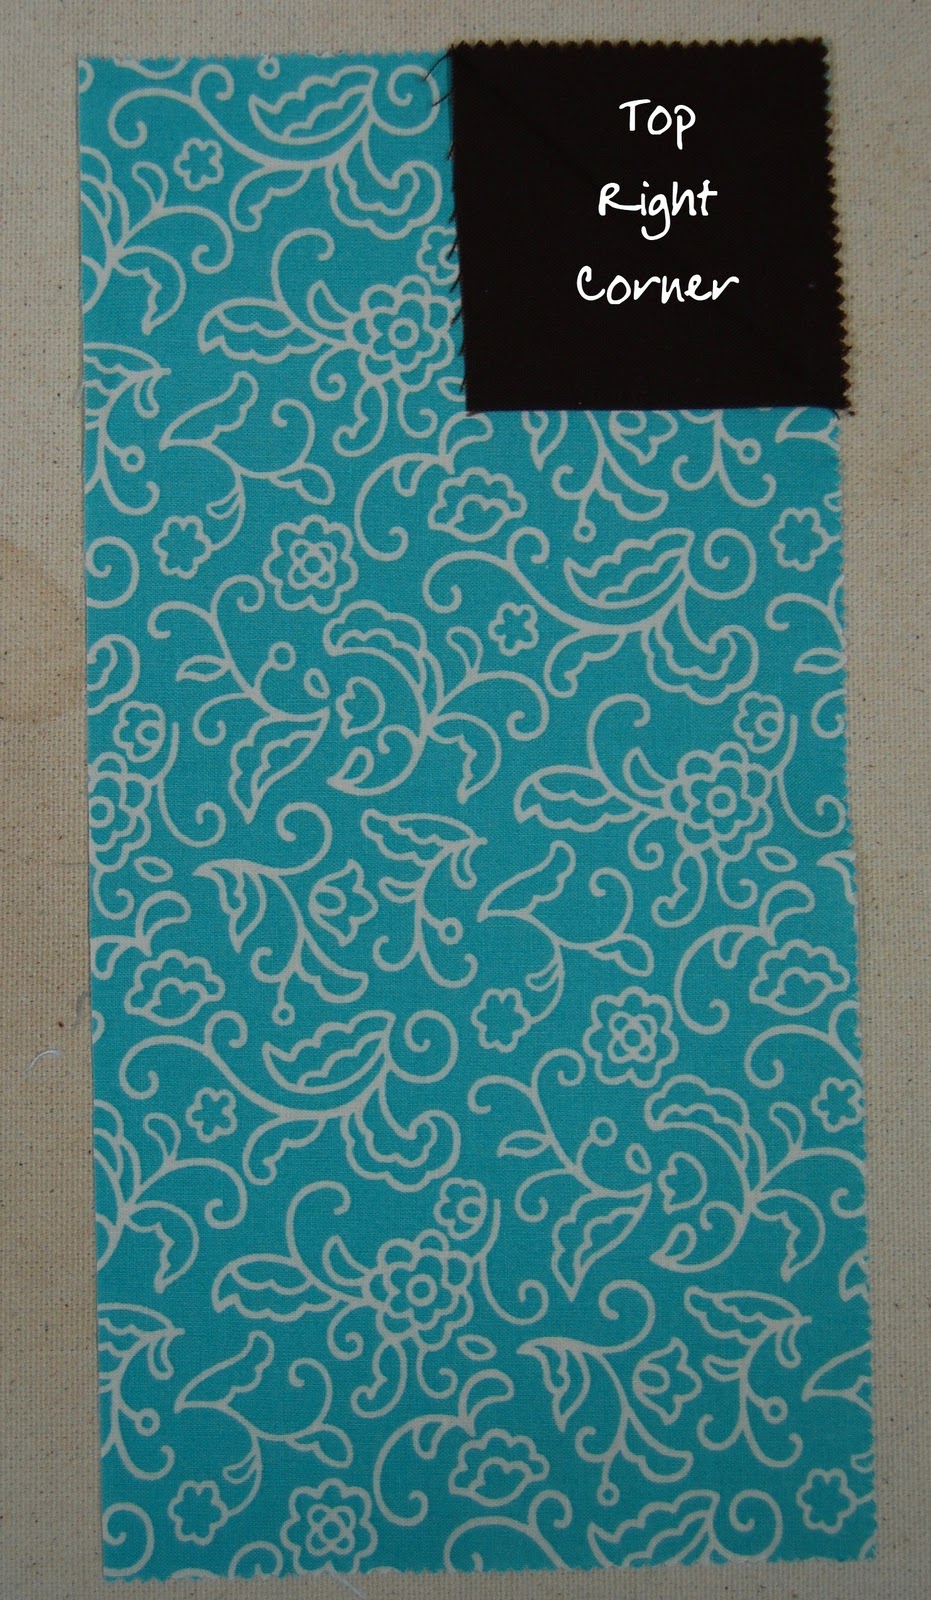
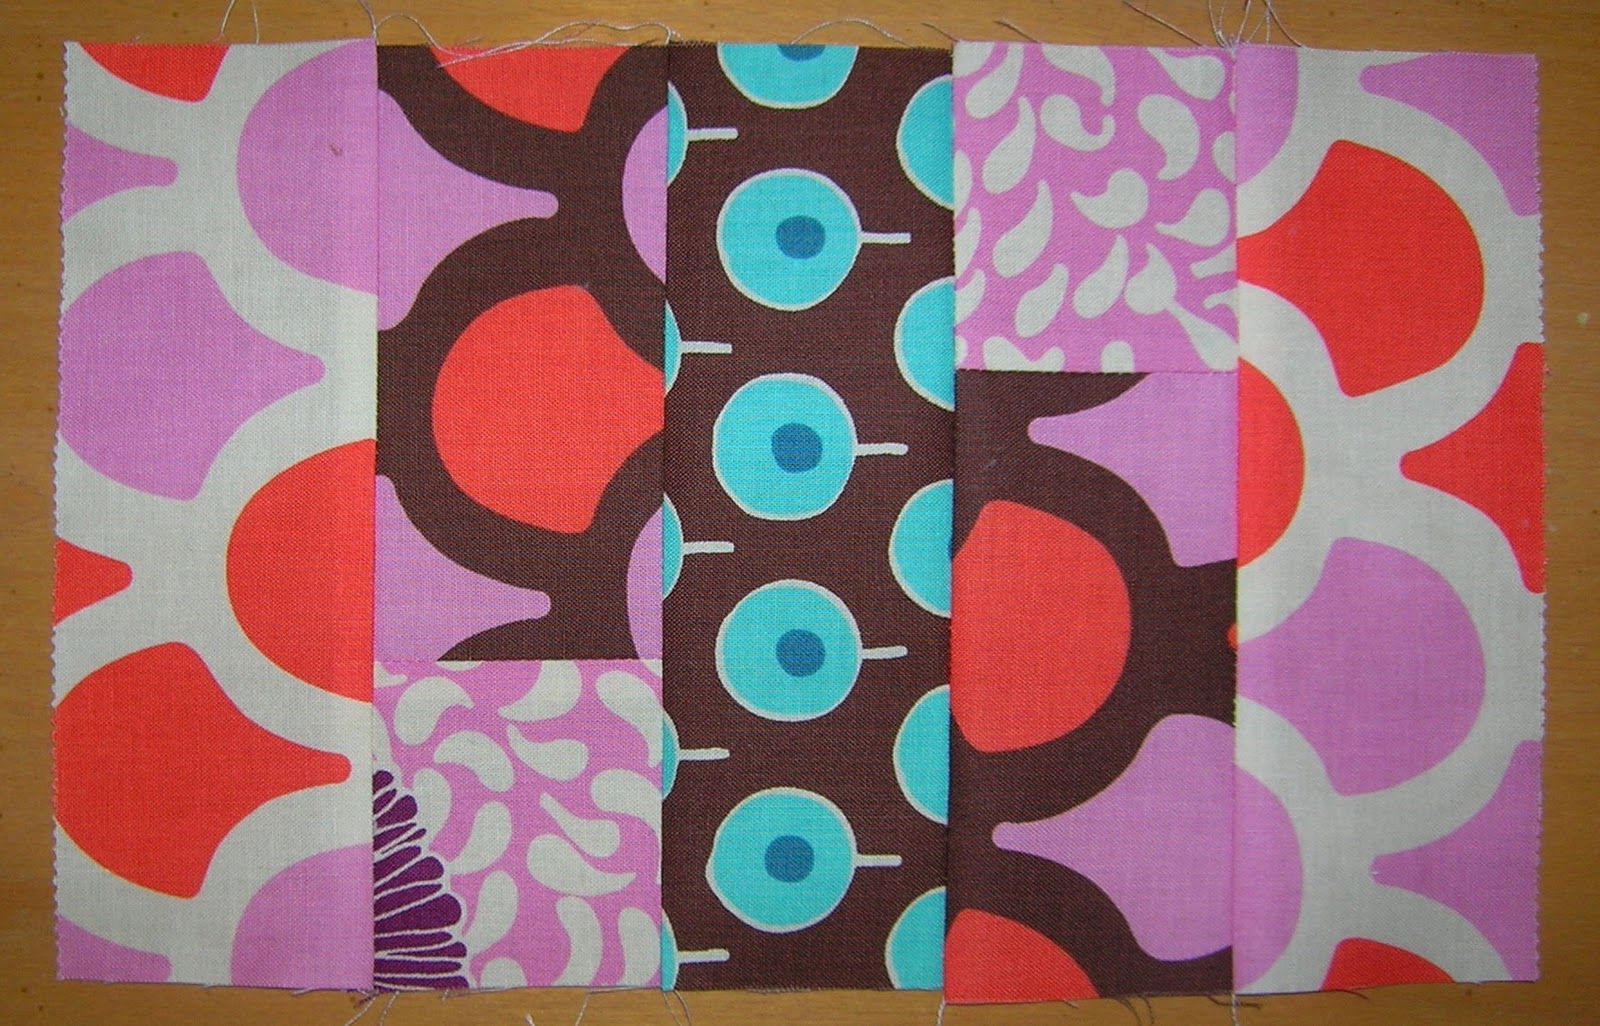
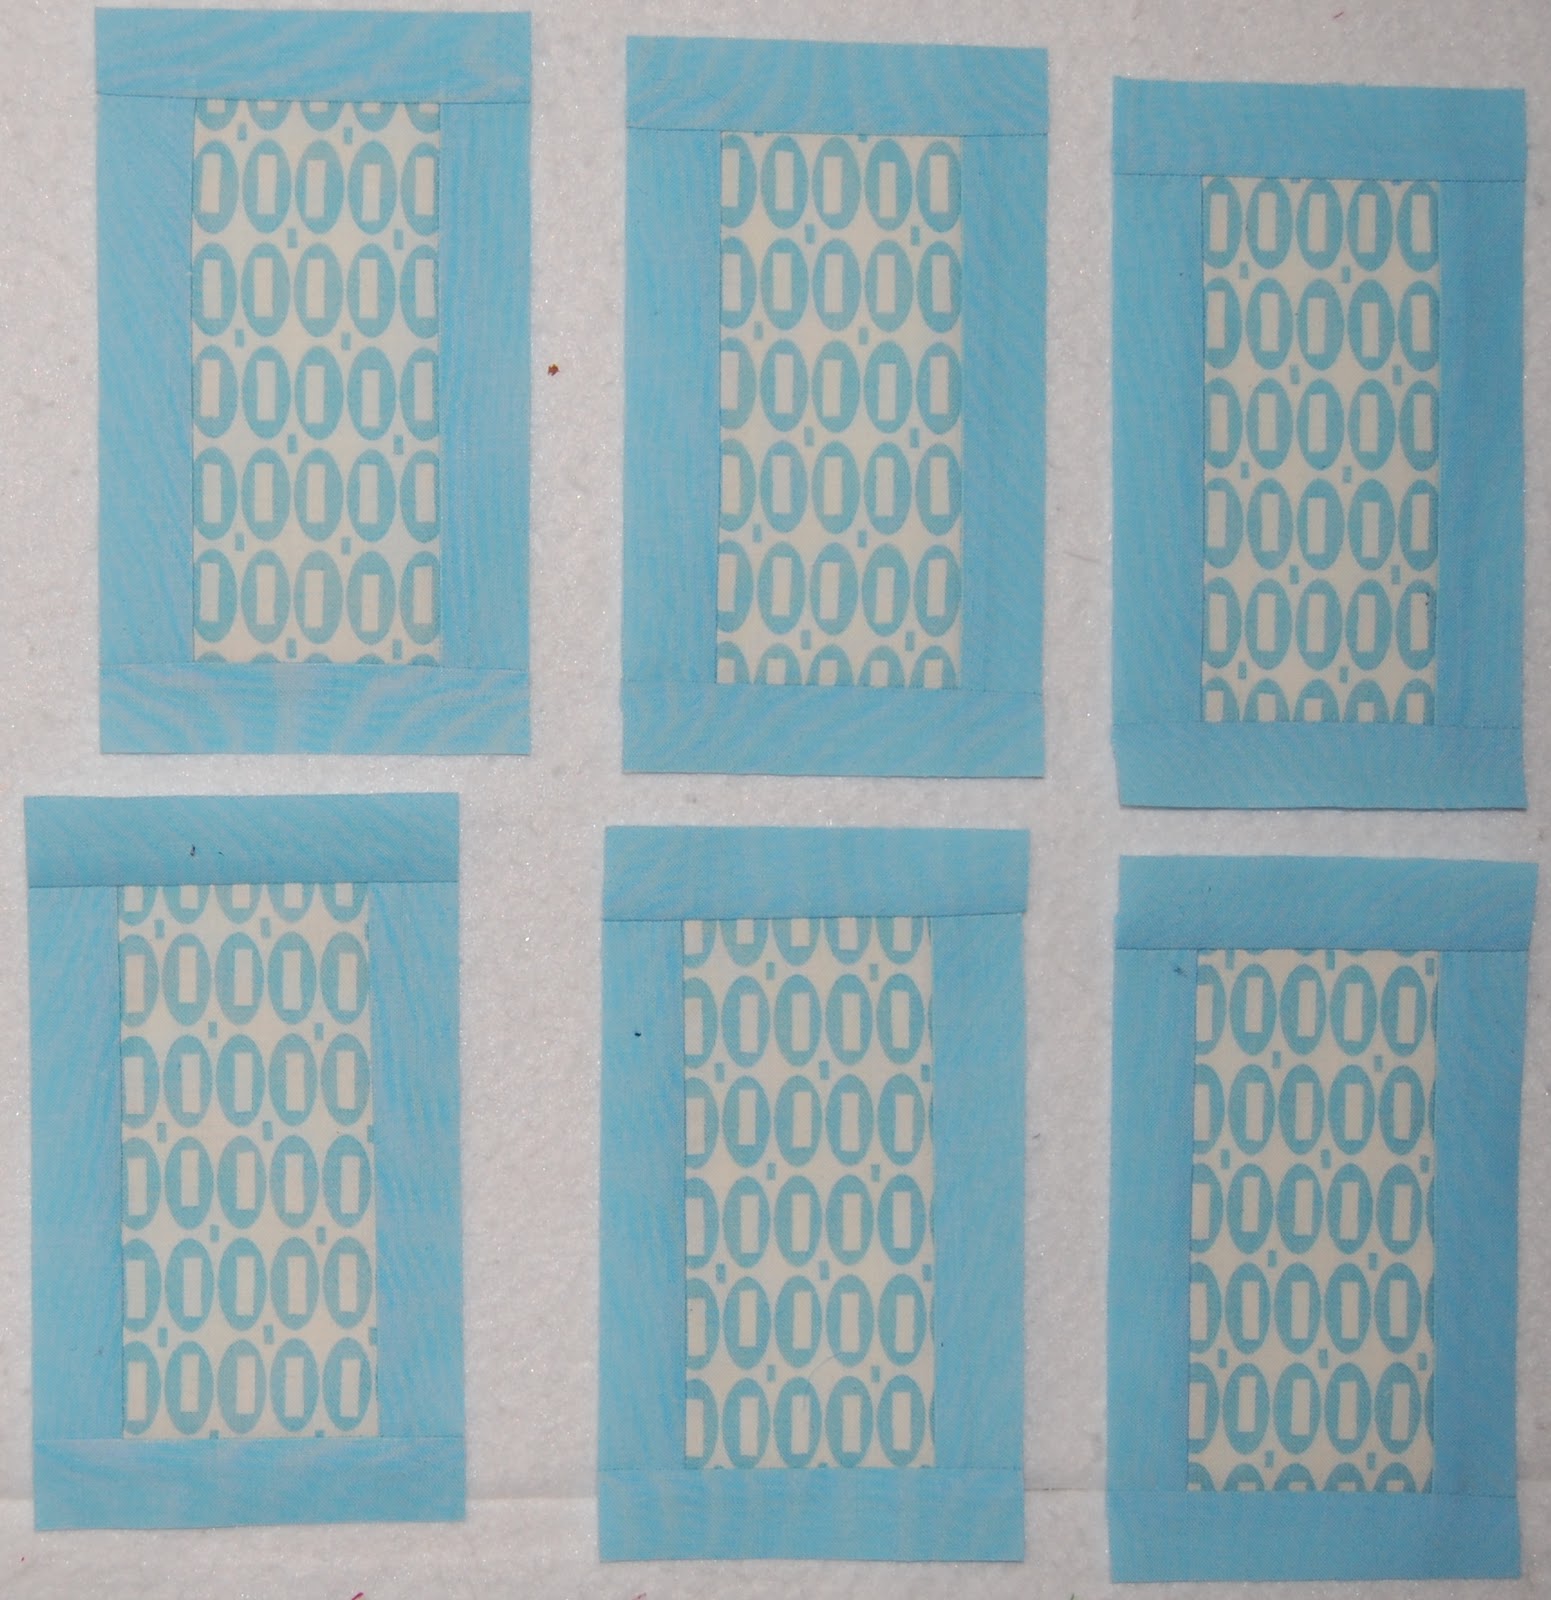
2. Sew a 1” x 3 ½” coordinated Bella Solid rectangle to the top and bottom of the block. Press to solid fabric. Square to 3 ½” x 6”. Repeat Steps 1 and 2 for all 80 blocks.

(Note: Depending on the charm square color groups, you will have 6 or 8 blocks)

Cutting the Sashing

From the Bella solid white sashing fabric cut:

22 – 1” x WOF strips. Set aside 16 of the strips for the inner border and sashing strips. From the remaining 6 strips subcut into 72 – 1” x 3 ½” rectangles.

Cut 1 – 3 ½” x WOF strip. From the strip subcut 10 – 3 ½” squares units.

Sewing the Sashing

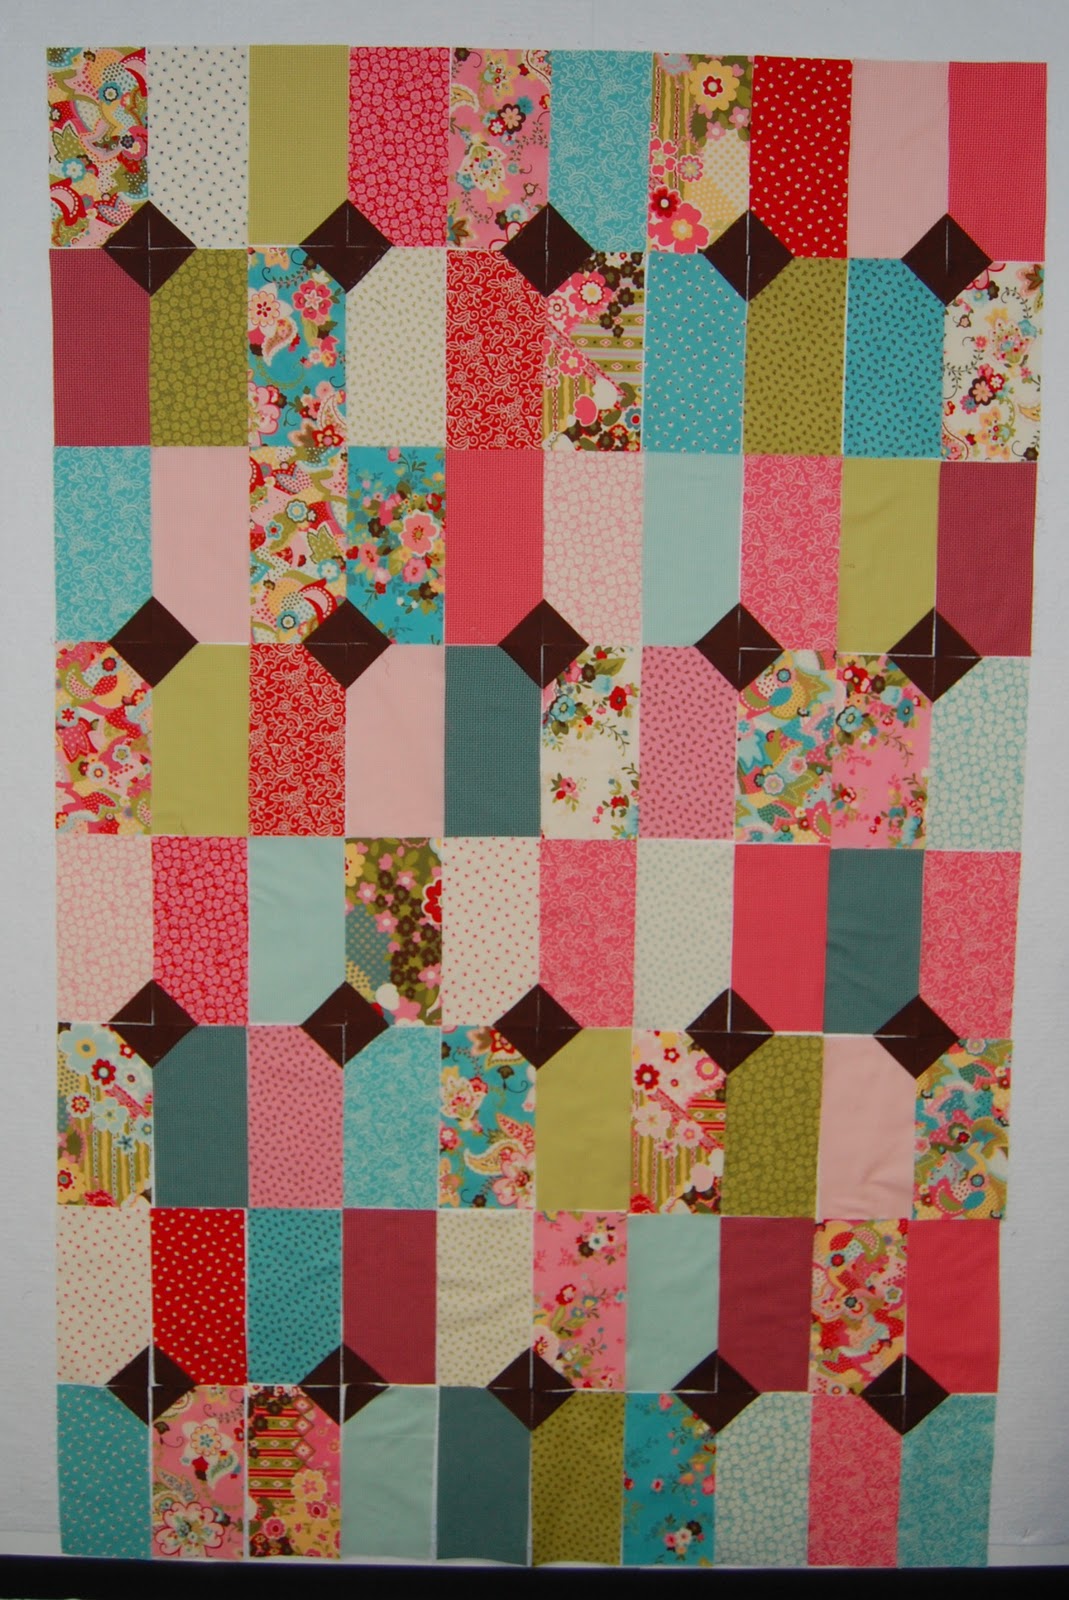
1. Choose 8 Pezzy Print blocks and lay them out vertically. Sew a 1” x 3 ½” sashing strip to the bottom of the first block. Press sashing to block. Continue sewing a 1” x 3 ½” sashing strip to the bottom of the next 6 blocks.

2. Sew all 8 blocks together in a vertical row. Press sashings to blocks. Repeat Steps 1 and 2 to make a total of 6 vertical rows that measure 3 ½” x 48 ½”.

3. Choose 7 Pezzy Print blocks and lay them out vertically. Sew a 1” x 3 ½” sashing strip to the bottom of the first block. Press sashing to block. Continue sewing a 1” x 3 ½” sashing strip to the bottom of the next 5 blocks.

4. Sew a 3 ½” white sashing squares to the top and bottom of each of the 5 rows. Press to pezzy blocks.

5. Sew the short end of 14 – 1” x WOF strips together to make 1 continuous strip.

6. Measure all rows and cut 12 – 1” white sashing strips to that measurement.

7. Layout the rows as shown.
Sew a 1” white sashing strip to each side of rows 1 and 11. Sew a 1” white sashing strip to the right side only of rows 2-9. Press to sashing strip.

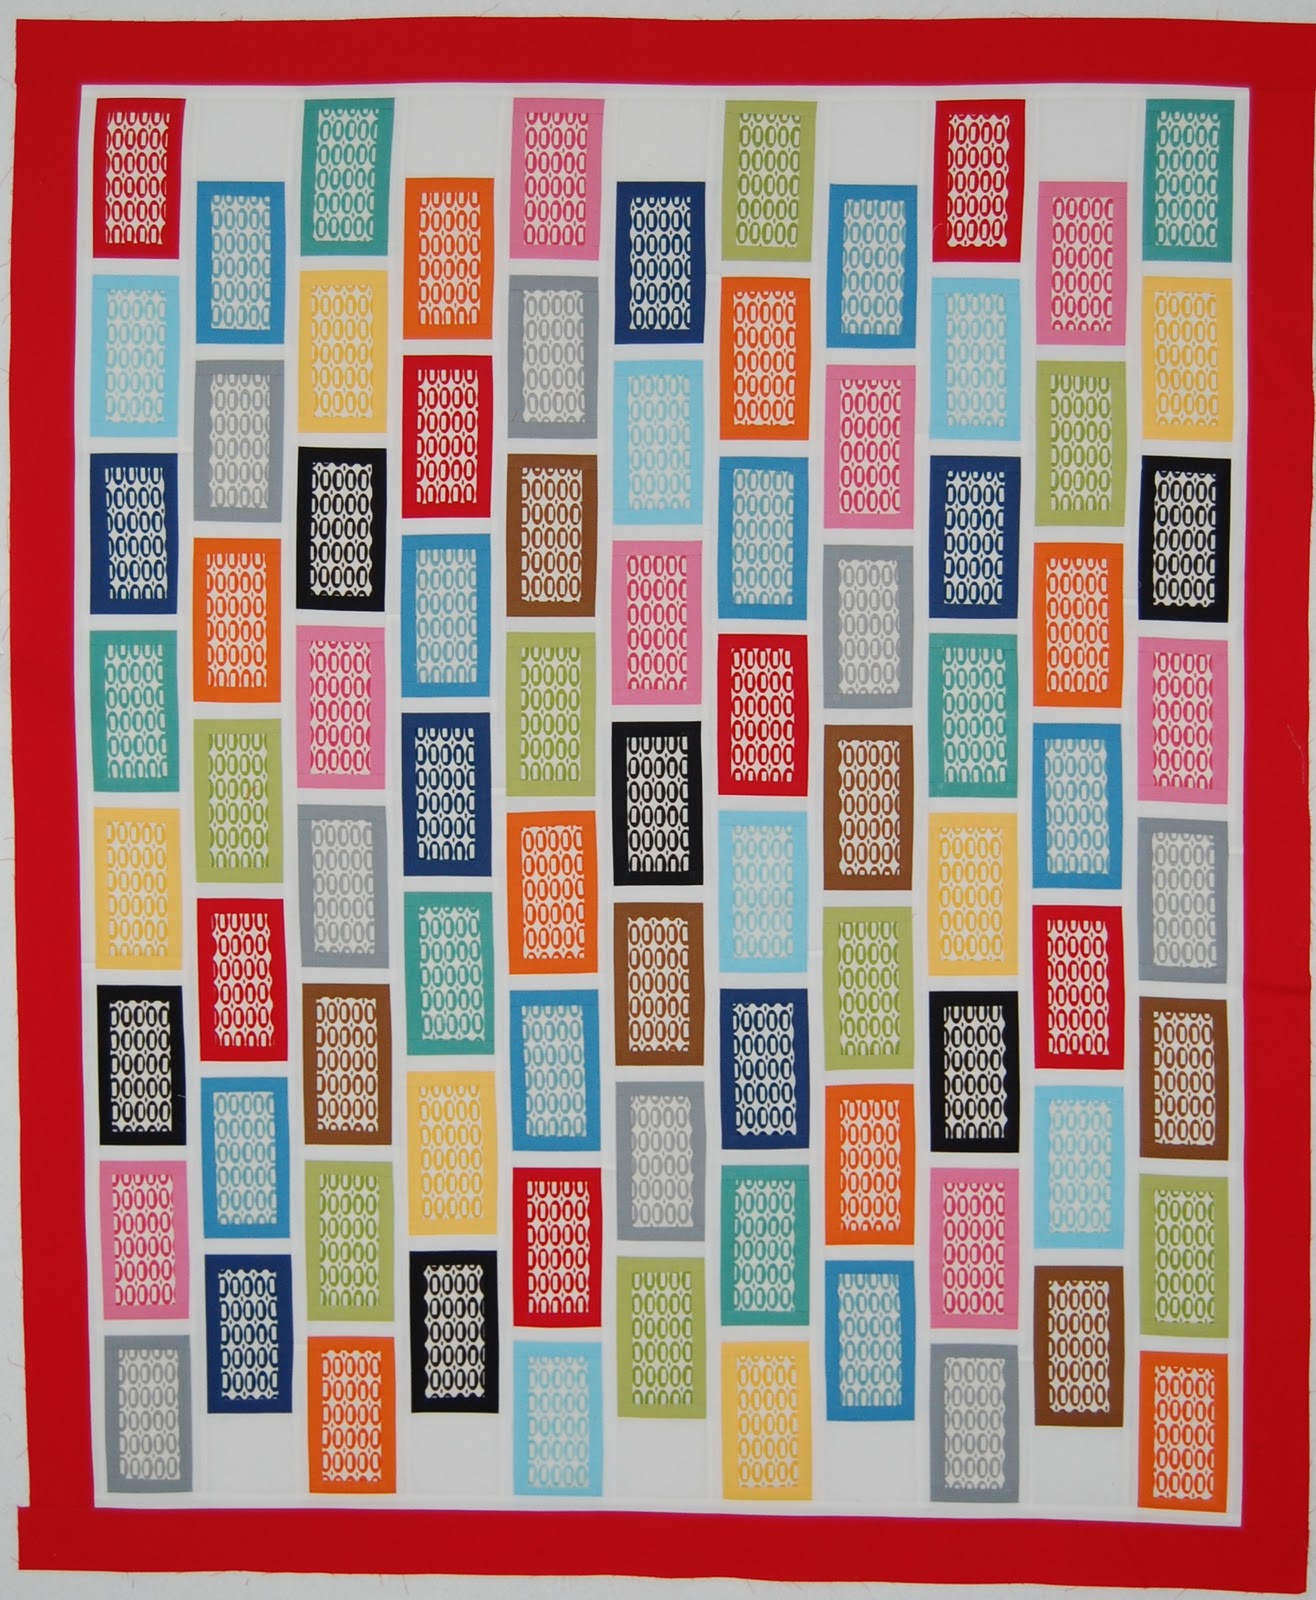
8. Sew vertical rows 1-6 together as shown. Press to white sashing.

9. Sew vertical rows 7-11 as shown.

10. Sew all rows together from Step 9 & 10 as shown.

11. Measure the center of quilt horizontally with the 2 remaining 1” x WOF white sashing strips. Cut each strip to that measurement. Sew to top and bottom of quilt top. Press to sashing strip.

Outer Border

1. Cutting on the lengthwise grain (parallel to selvage) from the Bella solid red border fabric, cut 4 – 2 ½” x length of fabric.

2. Measure center length of quilt top and cut 2 strips to that measurement. Sew to each side of quilt. Press to border.

3. Measure center width of quilt top and cut 2 strips to that measurement. Sew top and bottom strips on. Press to border.
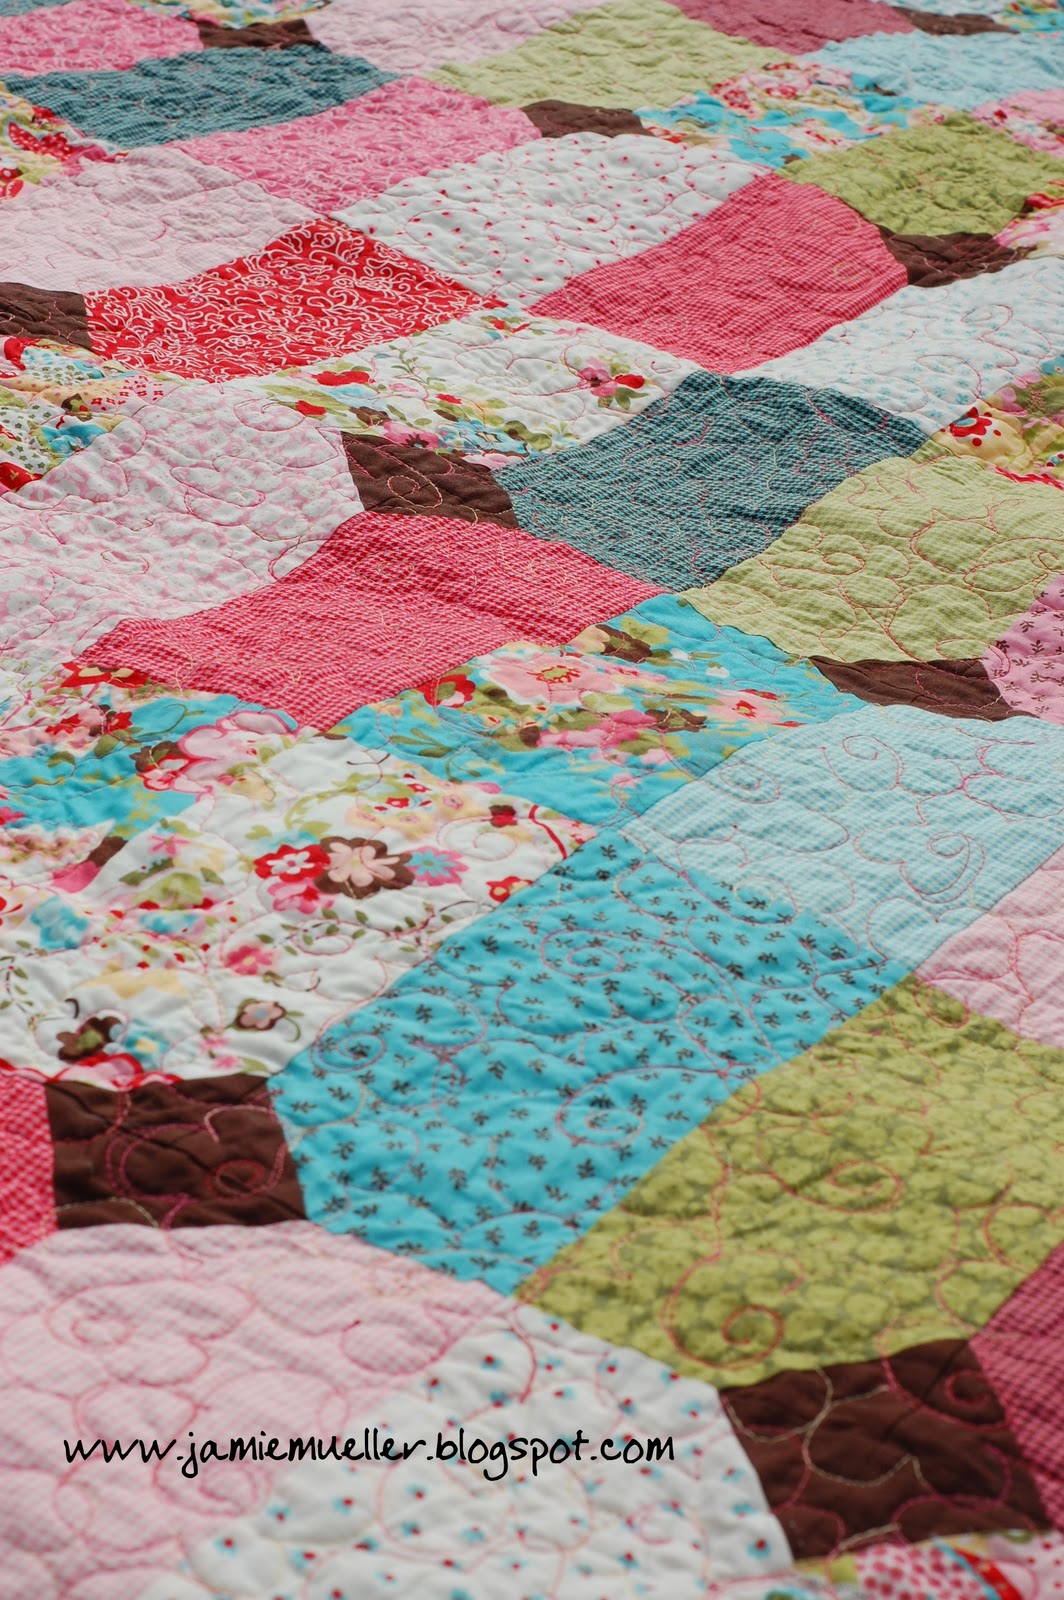
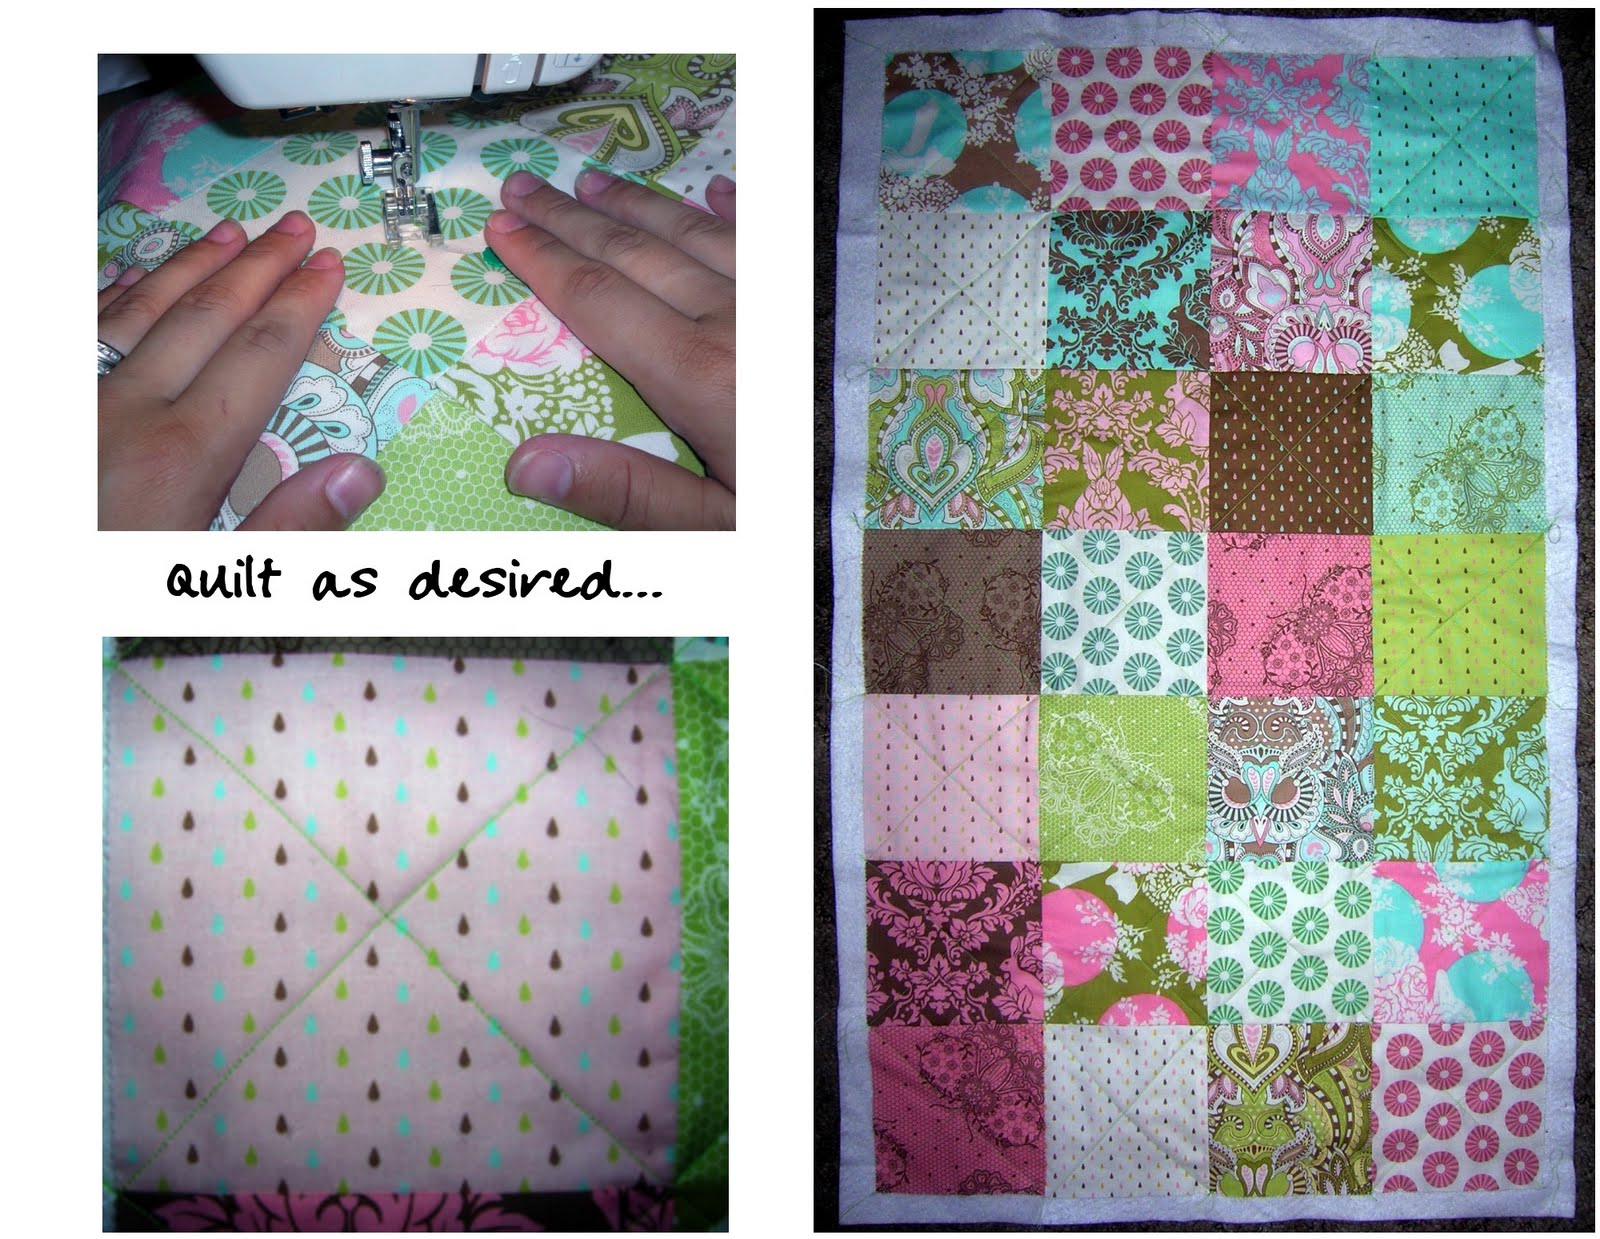
Quilt as desired.

Binding

From the Bella solid red binding fabric on the lengthwise grain cut 4 – 2 ½” x LOF (length of fabric) strips.

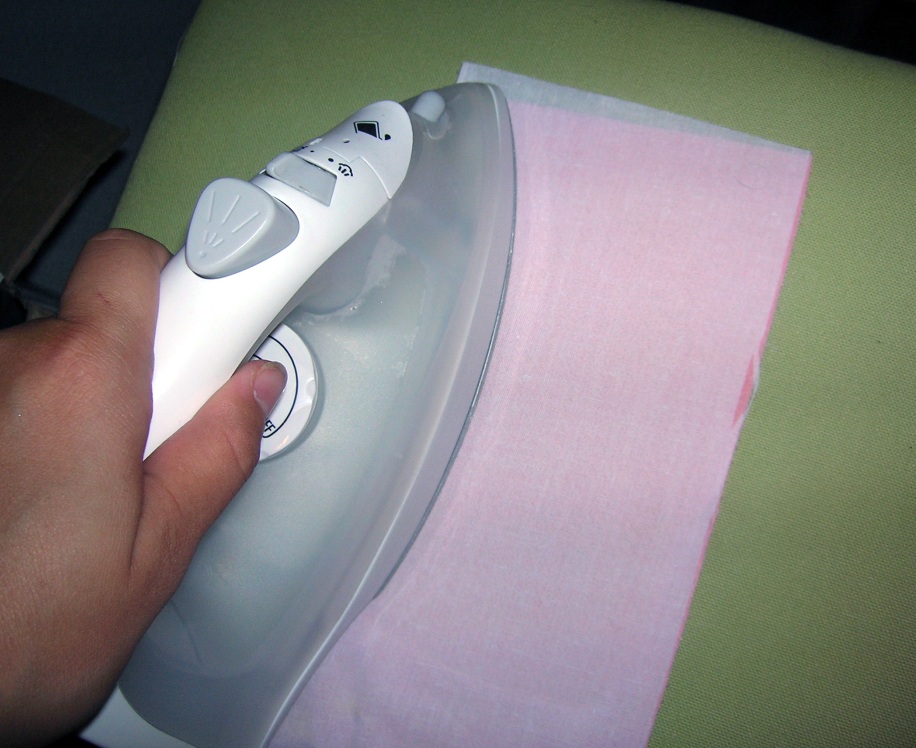
1. Sew all the strips together (short ends) to make 1 continuous strip. Fold binding in half wrong sides together and press. Attach binding to right side of quilt (raw edges even) and machine stitch all the way around. Turn binding to back and hand stitch down.

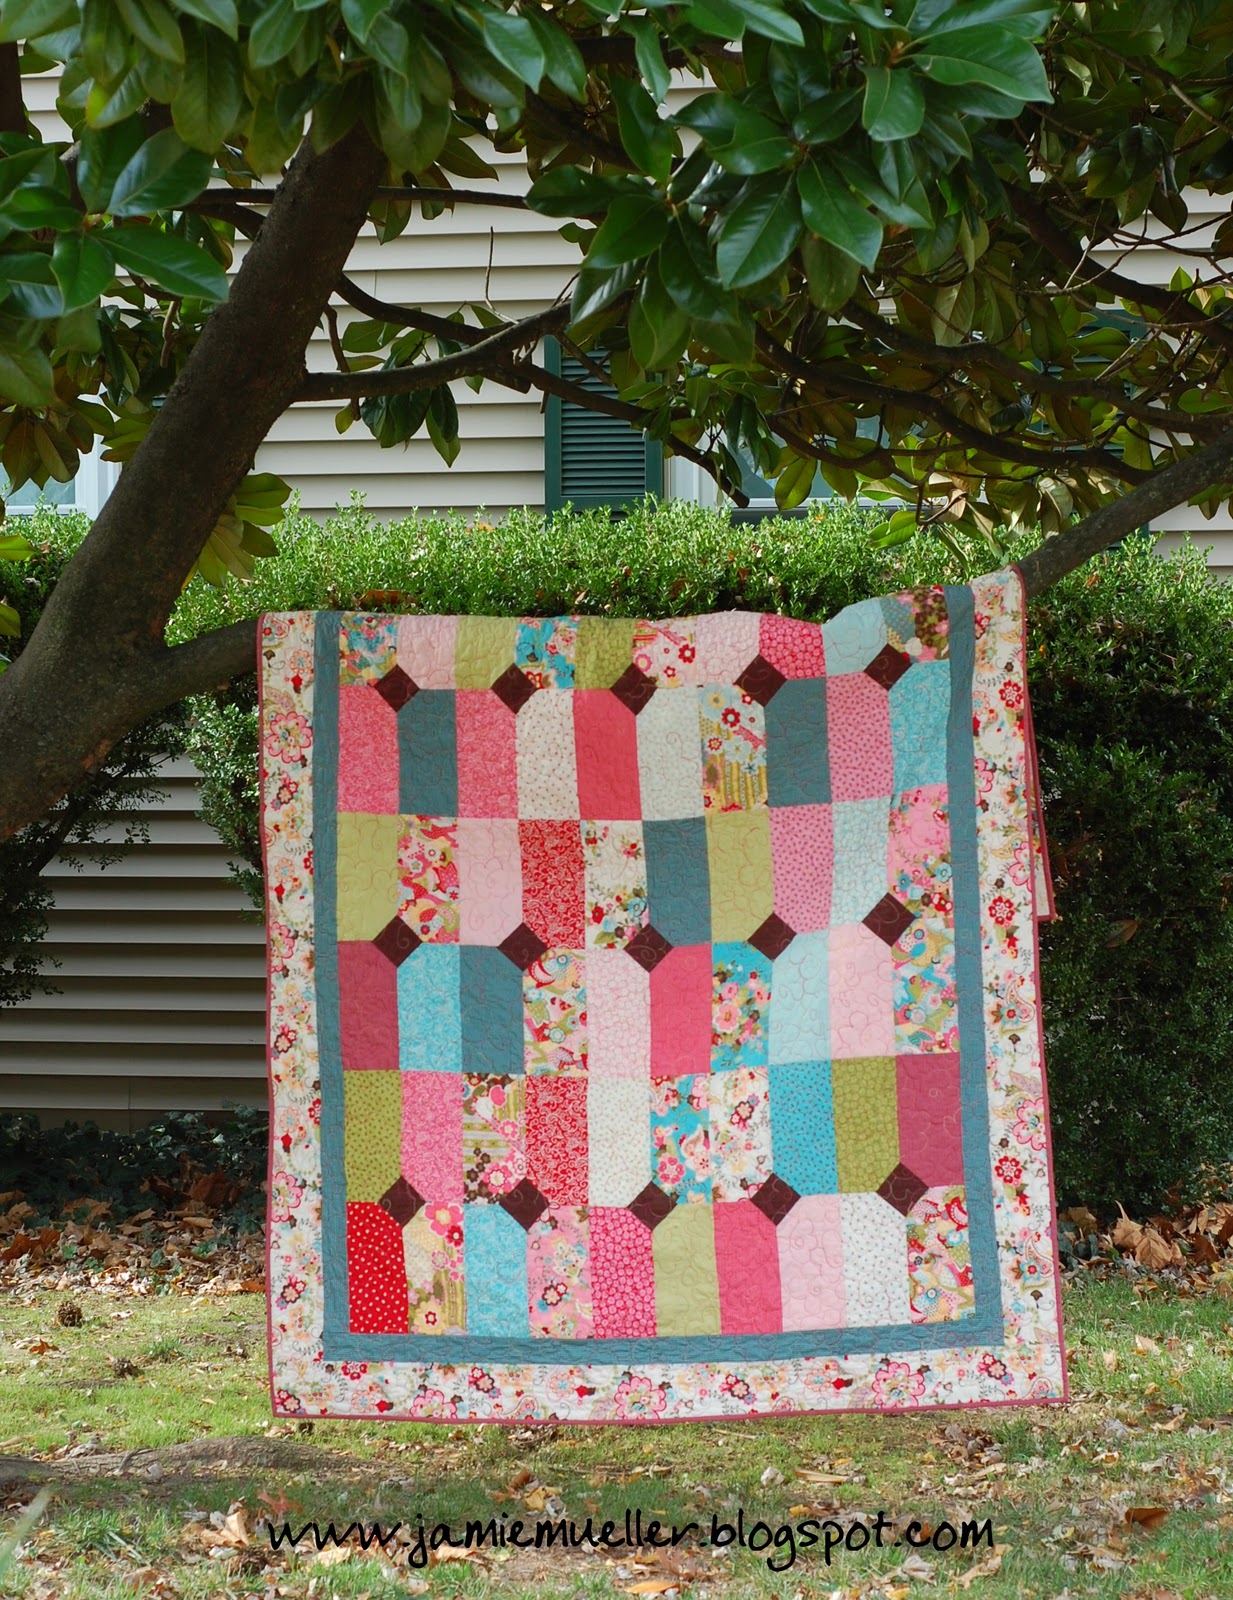
Your quilt is finished!! Enjoy!  Please email us photos or add them to our Flickr Group, we’d love to see them!

Jamie Mueller


Auntie’s Diamonds


Finished Size: 57″ X 88″
Hello again!!  It’s Jamie from SunFlower Seeds with my new Moda Bake Shop project! Auntie’s Diamonds is a quilt made from a Layer Cake and a Bella Solids Charm Pack!  I hope you like it and if you make one please add it to my Flickr Group!!  As always, be sure to check out my blog {jamiemueller.blogspot.com} for a giveaway!


1 Layer Cake “LC” (Sophie by Chez Moi)
1 Moda Bella Charm Pack “CP” (brown)
½ yard inner border fabric (blue houndstooth)
1 ¼ yard outer border fabric (paisley floral)
5 ½ yards backing fabric
¾ yard binding fabric (pink houndstooth)


Cutting Blocks:

1. Choose 40 LC squares (there are 42 in each pack) and cut each one in half. You will have 80- 5” X 10” rectangles.

2. Take 20 Charm Squares (1/2 of the pack) and cut each one in half horizontally and vertically. You will have 80- 2.5” squares.

Block Assembly:

1. Take one 2.5” square, fold in half diagonally and press. The pressed line will be your stitching line. Repeat with all 80- 2.5” squares.

2. Place one 2.5” square RST (right sides together) on the top right corner of one 5” X 10” rectangle. Pin in place and stitch on pressed line of 2.5” square. Repeat until you have 40 total on the top right corner. See photo:

3. Place one 2.5” square RST on the top left corner of one 5” X 10” rectangle. Pin in place and stitch on pressed line of 2.5” square. Repeat until you have 40 total on the top left corner. See photo:

4. Trim off excess fabric ¼” from sewn line. See photo:

5. Press all 40 RIGHT corner blocks towards the solid corner.

6. Press all 40 LEFT corner blocks towards the printed fabric (larger piece).

7. Square (trim) all blocks to 5” X 10”.

Top Assembly:

1. Layout blocks 8 rows of 10 blocks each as desired, making sure to match the small triangle corners to make the diamond in the center. See photo:

2. Sew blocks together in 4 patches to have 20 larger blocks, making sure to match seams of small triangles. See photo:

3. Sew the 20 larger blocks of four together until the center of the top is complete.

Inner Border:

1. From inner border fabric cut 7- 2 ½” X WOF (width of fabric) strips.

2. Measure center length of quilt top and cut 2 strips to that measurement. (You will have to sew 2 of the 7 strips short ends together to have enough length).

3. Sew side strips on each side of the quilt. Press towards border.

4. Measure center width of quilt top and cut 2 strips to that measurement. (You will have to cut 1 of the left over strips in half and sew each half strip to the short end of each top and bottom strips).

5. Sew top and bottom strips on the quilt. Press towards border.

Outer Border:

1. From outer border fabric cut 9- 4 ½” X WOF strips.

2. Measure center length of quilt top and cut 2 strips to that measurement. (You will have to sew 2 of the 9 strips short ends together to have enough length).

3. Sew side strips on each side of the quilt. Press towards border.

4. Measure center width of quilt top and cut 2 strips to that measurement. (You will have to cut 1 of the left over strips in half and sew each half strip to the short end of each top and bottom strips).

5. Sew top and bottom strips on the quilt. Press towards border.

Quilt as desired.

Binding:

1. From binding fabric cut 8- 2 ½” strips

2.Sew all 8 strips together (short ends) to make 1 continuous strip. Fold binding strip in half wrong sides together and press. Attach binding to right side of quilt (raw edges even) and machine stitch all the way around. Turn binding to back and hand stitch down.

Finished Size: 57″ X 88″

Your new quilt is done!! ENJOY!

Jamie Mueller
{jamiemueller.blogspot.com}

Sugar Baby Quilt

Finished Size: 32″ X 42″

Hello again!!  It’s Jamie from SunFlower Seeds with my new Moda Bake Shop project! It’s called “Sugar Baby” and is a quilt made from a Jelly Roll!  I hope you like it and if you make one please add it to my Flickr Group!!  And as always be sure to check out my blog {jamiemueller.blogspot.com} and my mom’s blog {sunflower-quilts.blogspot.com} for a giveaway!!


1 Jelly Roll (JR)
1 yd sashing/border fabric
1 yd backing fabric
½ yd binding fabric OR left over JR strips (you’ll have plenty)


 ¼” seam allowance for entire quilt.

Blocks:

1. Choose 12 strips from JR.

2. Take 6 strips and cut each strip as follows:

Two- 10 ½” pieces
Two-2 ½” pieces
One- 6 ½” pieces

*You will have fabric leftover from each of the 6 strips (you do not need these pieces – set them aside).

3. Take the remaining 6 strips and cut each strip as follows:

Two- 4 ½” pieces
Two- 6 ½” pieces

*You will have fabric leftover from each of the 6 strips (you do not need these pieces – set them aside).

4. What I like to do next is layout all 6 blocks as randomly as possible- this helps keep everything together while I’m sewing all the blocks together. Layout blocks with two-10 ½” pieces that are the same fabric, two- 4 ½” pieces of the same fabric, two 2 ½” pieces of the same fabric, two- 6 ½” pieces of the same fabric and one- 6 ½” piece of another fabric. See photo:

5. Sew one 2½” piece and one 4 ½” piece together and press; repeat with the other 2 ½” and 4 ½” pieces.

6. Sew the one different 6 ½” strip in the middle of both 2 ½”/4 ½” pieces, making sure to alternate the two 2 ½”/4 ½” pieces and press.

7. Take the two 6 ½” pieces and sew one on both sides of 2 ½”/4 ½” pieces and press.

8. Sew one 10 ½” piece on top and one 10 ½” piece on the bottom of the block. Press.

9. Repeat steps 4-8 until you have 6 blocks total. Trim up your blocks (they should be around 10 ½” square).

Sashing:

1. Take your sashing/border fabric and cut one strip 2 ½” X WOF (width of fabric) OR you can use a JR strip of the same fabric if you still have it.

2. Cut the 2 ½” strip into four- 10 ½” pieces.

3. Sewing along the 10 ½” side of your blocks, sew one 2 ½” X 10 ½” piece on the bottom of four blocks. Press.

4. Sew two rows of thee blocks each. Each row will be approximately 34” X 10 ½”. Press.

5. Cut one- 4 ½” X WOF strip from sashing fabric for middle sashing. Trim to length of rows. Your piece should be approximately 34”. You should have a 4 ½” X 34” piece for middle sashing.

6. Sew the 4 ½” X 34” strip between the two rows. Press.

Border:

1. Take the border fabric (the fabric left over from sashing) and cut four- 4 ½” X WOF strips.

2. Cut the four strips as follows:

Two- 4 ½” x 24”
Two- 4 ½” x 42”

3. Sew one- 4 ½” x 24” strip on top of your quilt top (the 24” side) and press. Repeat on bottom of quilt top and press.

4. Sew one- 4 ½” X 42” strip on each side of your quilt top and press.

Your quilt top is now finished!

Quilt as desired.

Binding:

1. From binding fabric cut 4- 2 ½” strips OR just use four Jelly Roll strips.

2. Sew all these strips together (short ends) to make 1 continuous strip. Fold binding in half wrong sides together and press. Attach binding to right side of quilt (raw edges even) and machine stitch all the way around. Turn binding to back and hand stitch down. See finished quilt photo.

Finished Size: 32″ X 42″


1 Jelly Roll can make up to three sets of blocks.  Just get extra sashing/border fabric to make more quilts!
 

Jamie Mueller

"Awesome" Lap Quilt


Hi, I’m Jamie from SunFlower Seeds and this is my third Moda Bake Shop project. I hope you like it!  It comes together rather quickly and will add that touch of fall to your house!  I really think this quilt would be cute in any holiday color and can’t wait to see what ya’ll come up with!  Stop by our blog for a giveaway honoring our new MBS project!  Enjoy!  If you’re going to Quilt Market or Festival stop by our shop located 15 minutes north of downtown Houston!

-1 Jelly Roll (JR)                                                                                                                                                     
-3 yds yards of backing fabric


NOTES:

* We pulled out 5 solid JR strips to be used later for the binding. 
*1/4″ seam allowance for entire quilt
*Press all seams open.

FOR BLOCKS:


1. Choose 16 JR strips (we used dots and stripes)

2. Take 13 JR strips and cut each as follows:
four- 7 1/2” pieces
four- 3” pieces

3. Take the 14th JR strip and cut as follows:
two- 7 1/2” pieces
two-3” pieces

4. Cut the 15th JR strip as follows:
14- 2 ½” pieces

5. Cut the 16th JR strip as follows:
13- 2 1/2″ pieces

6. Mix & Match the 2 ½” middle squares with two each of the larger pieces (same fabric).

7. Sew one 2 ½” square in the middle of two matching 3” pieces along the 2 ½” side. Press.

8. Next, sew two matching 7 1/2” pieces on both long sides to make a block.

9. Repeat steps 6-8 until you have 27 completed blocks. Press all blocks.  Square up/trim all blocks to 6.5″ X 7 1/4″.

10. Sew three completed blockstogether. Make sure the long 7 1/4” sides on top and bottom. See photo:

11. Repeat until you have nine complete rows.  Press.

FOR STRIPES:

1. Choose 18 JR strips and set aside the remaining JR strips for binding. (We chose all the strips that had patterns and set aside the solid strips for binding).

2. Cut the following from each of the 18 JR strips:
one- 14.5” piece
one- 28” piece

-You should have 18- 14.5” pieces and 18- 28” pieces.

3. Mix and Match your pieces and sew together as follows:

Sew three 14.5” pieces together six times. Sew three 28” pieces together six times.

-You should have 6- 14.5” stripe rows and 6- 28” stripe rows.

TOP ASSEMBLY:

1. Sew three rows as follows:
one-14.5” stripe row THEN one square row THEN one-14.5” row.

-You should have three rows total like this. Press.

2. Sew six rows as follows:
one- 28” stripe row THEN one square row.

-You should have six rows total like this. Press.

3. Lay out rows as shown in photo:

4. Sew rows together matching up squares, and pin in place. You will be matching up one square on each row. See photo:

-Your rows will be a little off on the ends and will need to be trimmed after all sewn together. Press all rows.

*TIP: Sew every three rows to help match up squares then sew the three sections together to complete the top.

5. Quilt as desired.

BINDING:

1. Take the 5 solid JR strips for the binding. Sew all these strips together (short ends) to make 1 continuous strip. Fold binding in half wrong sides together and press. Attach binding to right side of quilt (raw edges even) and machine stitch all the way around. Turn binding to back and hand stitch down. 

You’re finished! Enjoy your “Awesome” lap quilt! I hope you enjoyed making this quilt!


48″ x 55″

Jamie Mueller

{www.jamiemueller.blogspot.com}

Back To School Grommet Bag


  • (28) 5” charm squares  (we used Fresh Cottons: Hushabye was used for instruction photos)
  • ⅝ yd lining fabric
  • ⅓ yd straps fabric
  • (1) 20” x 33” piece of batting
  • 1 yd woven interfacing
  • (8) 1” grommets (we used Dritz curtain grommets, no tools needed)


Sewing the outer bag:

1. Sew 7 rows of 4 charm squares. Press rows in opposite directions. Sew rows together as desired to create outer bag unit.

2. Place batting down and put pieced outer bag unit (wrong side down) on batting.

3. Quilt as desired. Trim to 18” x 31 1/2”.

4. From lining fabric, cut (1) 18” x 31 1/2″ rectangle.
5. With right sides together match one of the 31 1/2” sides of the lining and quilted rectangles. Sew using a ½” seam allowance. Press seam toward lining.
6. Fold lengthwise in half as shown. Pin all 3 sides. Using a ½” seam allowance, sew all 3 sides leaving about 4” of the lining section unsewn for turning.
7. Trim corners being careful not to cut through stitching. Turn right side out through 4” opening in lining and poke out corners.
8. Stitch the lining opening closed. Push the lining into the quilted section of bag.
9. Press the top edge of bag and topstitch ⅛”and ¼” from the top edge of bag.
Attaching the grommets:
1. On left side of bag, mark 2” down from top edge of bag and 1 ¼” from side of bag. Then mark 3 ½” from 1 ¼” mark. Repeat marks for right side of bag.
2. Repeat step 1 for other side of bag. You will now have 8 grommet placement marks.

3. Position the template provided with the grommets over the center marks and trace in the slots. Cut out the holes for each grommet on the traced lines.

4. Place the raised center of a grommet in each hole from the right side.
5. Position the pronged side of each grommet over each raised grommet and press down to secure.

Making the Straps:

From the straps fabric and woven interfacing cut:

(2) 5” x 36” strips

1. Fuse the woven interfacing to each strap strip.

2. Fold strap long side in half RST. Stitch using a ¼” seam allowance starting at short end, leaving about 4” opening for turning (along long side) and ending at shut end. Clip short end corners and turn right side out.

3. Top stitch all the way around strap being sure to close opening.

4. Thread one strap through the 4 grommet holes on one side of the bag. Repeat for the other side.

5. Tie ends of the two straps together.

Enjoy your grommet bag!!!
Hey ya’ll I hope you like our Grommet Bag….they are addicting and super easy to make! 

* 2 Charm Packs will make 3 bags!
* You can always add pockets to the insde with left over charm squares!!
* These make great gifts!

Jamie Mueller
{www.jamiemueller.blogspot.com}

Ruffle Quilt


1 jelly roll: choose 12 strips OR if you don’t have a Jelly Roll, you’ll need (12) 2 ½” strips by WOF
1 ¼ yard of fabric for solid strips and ruffles
⅓ yard binding fabric (or use 4 jelly roll strips)
1 ½ yard backing fabric

1. Take your 12 strips and cut each strip into:
    (2) 5” pieces
    (2) 7” pieces
    (2) 10” pieces

See photo below:

2. Start piecing together new strips. For each new strip you will need two different 5” pieces, two different 7” pieces, and two different 10” pieces. Mix fabrics and lengths however you want. The more random, the better. Your new mixed strips will be approximately 2 ½ X 42″. Make 12 mixed strips.

3. Take your 1 ¼ yard of fabric and cut (15) 2 ½ X WOF strips. Set aside 10 strips; they will be used later for the ruffles.

4. Layout the design, starting with two mixed strips then one solid strip. Continue until you use all five solid strips. You will use 12 mixed strips and 5 solid strips. Sew all strips together until quilt top is finished. See below.

5. Square the top to 34” x 42”. NOTE: Depending on your cutting and sewing this measurement should be close.

Making the Ruffles:

1. Take the (10) 2 ½” x 42” ruffle fabric strips cut previously. Sew (2) 2 ½” x 42” strips together, making one long continuous strip. Repeat 5 times. Finish long side raw edges of strip with a small hem or zigzag stitch.

2. You can either gather the strips by sewing basting stitches down the center of the strip and pulling stitches to gather the ruffle to 40”, or you can use a ruffle foot. We used a ruffle foot; it made making the ruffles so fast and easy. Make (5) 40” ruffle strips.

3. Before you add the ruffles to each of the five solid strips, quilt the top as desired.

4. Place one 40” ruffle on one of the solid strips of the quilt, determine where to hem the 2 short ends of the ruffle and do so. Using a walking foot, machine stitch down the center of the ruffle. Continue until you have sewn all 5 ruffles to the 5 solid strips.

Binding:

From binding fabric cut (4) 2 ½” strips, or use jelly roll strips.

Sew all 4 strips together (short ends) to make 1 continuous strip. Fold binding strip in half wrong sides together and press. Attach binding to right side of quilt (raw edges even) and machine stitch all the way around. Turn binding to back and hand stitch down.

 Copyright 2010 Jamie Mueller and SunFlower Quilts
*I hope ya’ll enjoy this ruffle quilt! If you make one too please feel free to email me with photos, I’d LOVE to see them!mailto:jamiemueller0522@yahoo.com