Jelly Turnover Quilt


Hello! I’m Shannon from Modern Tradition Quilts.  It’s an honor for me to be with you today on Moda Bake Shop.  I love working with pre-cut fabrics.  When it comes to creating quilts, the possibilities are endless!  When designing this quilt, I thought it would be fun to use a jelly-roll for the sashing and candy squares for the gem-stone corners–after all, they are already pre-cut to the same width.  All that was left was to decide what type of blocks to use.  Since charm squares create half-square triangles so readily, this quilt came together like “Peanut-butter & Jelly”–hence its name, the Jelly Turnover Quilt.

To create this project you will need:
  • One packages of 5″ charm squares.  (I used Grant Park)  This quilt uses 40 print squares.
  • One packages of 5″ bella solids charm squares.  This quilt uses 40 white squares.
  • Three packages of 2 1/2″ candy squares for the gem stone corners on the sashing. (I also used Grant Park).  This quilt uses 99 squares.
  • One 2 1/2″ jelly roll for the sashing (I also used bella solid white).  This quilt uses 23 strips.
  • One yard navy blue fabric for the binding. 

    To create the half-square triangles (HSTs):

    • Draw a diagonal line on the wrong side of each white Bella solid charm square.
    • Layer one white charm square on top of one print charm square with right sides facing.
    • Sew down both sides of the drawn line.

    • Cut down the drawn line and press seams towards the darker print fabric.
    • Square all HSTs to measure exactly 4 1/2 inches. 
    Use your favorite method of choice for this.  I like using a small square ruler.  Basically, you are trimming off the factory-created pinked/serrated edges.
    • Yield: 80 HSTs.

      To create the sashing:

      • Select twenty-three 2 1/2 inch jelly roll strips.
      • Cut the 2 1/2 inch white strips from the jelly roll into 4 1/2 inch sections.  Yield: 16 sashing rectangles measuring 2 1/2 inches by 4 1/2 inches per jelly roll length.
      Quick tip:  It is easy to cut several jelly-roll strips at once by laying 5 or 6 strips on your cutting board at a time.  Then, simply make the same rotary cuts that you would doing just one strip at a time.
      • This quilt requires 178 of these rectangles.

        To sew the vertical sashing units:

        • Select five 2 1/2 inch by 4 1/2 inch strips and five 2 1/2″ candy squares.  Sew these end to end to create a vertical sashing strip.  Press all seams towards the sashing to reduce bulk.  Create 18 of these strips.

        • Sew one horizontal sashing row for the bottom of the quilt.  It is comprised of nine 2 1/2 inch candy squares and eight 2 1/2 inch by 4 1/2 inch sashing strips.

        Note: This quilt is sewn in four quadrants–one quadrant at a time to ensure the proper placement of the HST unit to make the echo effect.  Each quadrant uses 20 HSTs.

        General directions for sewing all four quadrants:

        • Take twenty HSTs and  twenty 2 1/2 inch by 4 1/2 inch rectangles.
        • Chain-sew the 2 1/2 inch by 4 1/2 inch rectangle to the top of the HST.  Check the orientation of the HST you are working on as they differ in all four quadrants.  Press all seams towards the sashing to create less bulk.

        Note, the HST rotates depending on which quadrant of the quilt you are working on.
        • Sew this units into four columns of 5 units down.  Press all seams towards the sashing to create less bulk.
        • Add four vertical sashing strips to the side of each of the four 5-unit columns.  Refer to the quadrant diagram to check if it is the right or left-hand side.  If pressed correctly, these seams should nest.  Pin-match the intersections and sew with the HSTs on top to avoid blunting the points.  Also press these seams towards the sashing.  This will enable the quilt top to lie flat.
        Sew the columns together with HSTs on top so their points do not get blunted.
        • Sew these four columns together to create one quadrant.

          The upper left-hand quadrant HST orientation is: 

          The upper right-hand quadrant HST orientation is:

          The lower left-hand quadrant HST orientation is

          The lower right-hand quadrant HST orientation is:

          Use this assembly diagram to add the four quadrant panels together.

          • First, add the top left-hand quadrant to a center vertical sashing strip, then add the right-hand upper quadrant.
          • Second, add the bottom left-hand quadrant to a center vertical sashing strip, then add the right-hand lower quadrant.
          • Third, sew the top and bottom halves together.
          • Fourth and final, add the long horizontal sashing strip to the bottom to finish your quilt top.
          Assembly Diagram

          The finished quilt top diagram:


          The finished quilt top measures 50 inches by 62 inches.

          I quilted this using a lasso edge-to-edge style.

          Shannon Mower
          {moderntraditionquilts.blogspot.com}

          Quilting Bee Sampler Quilt


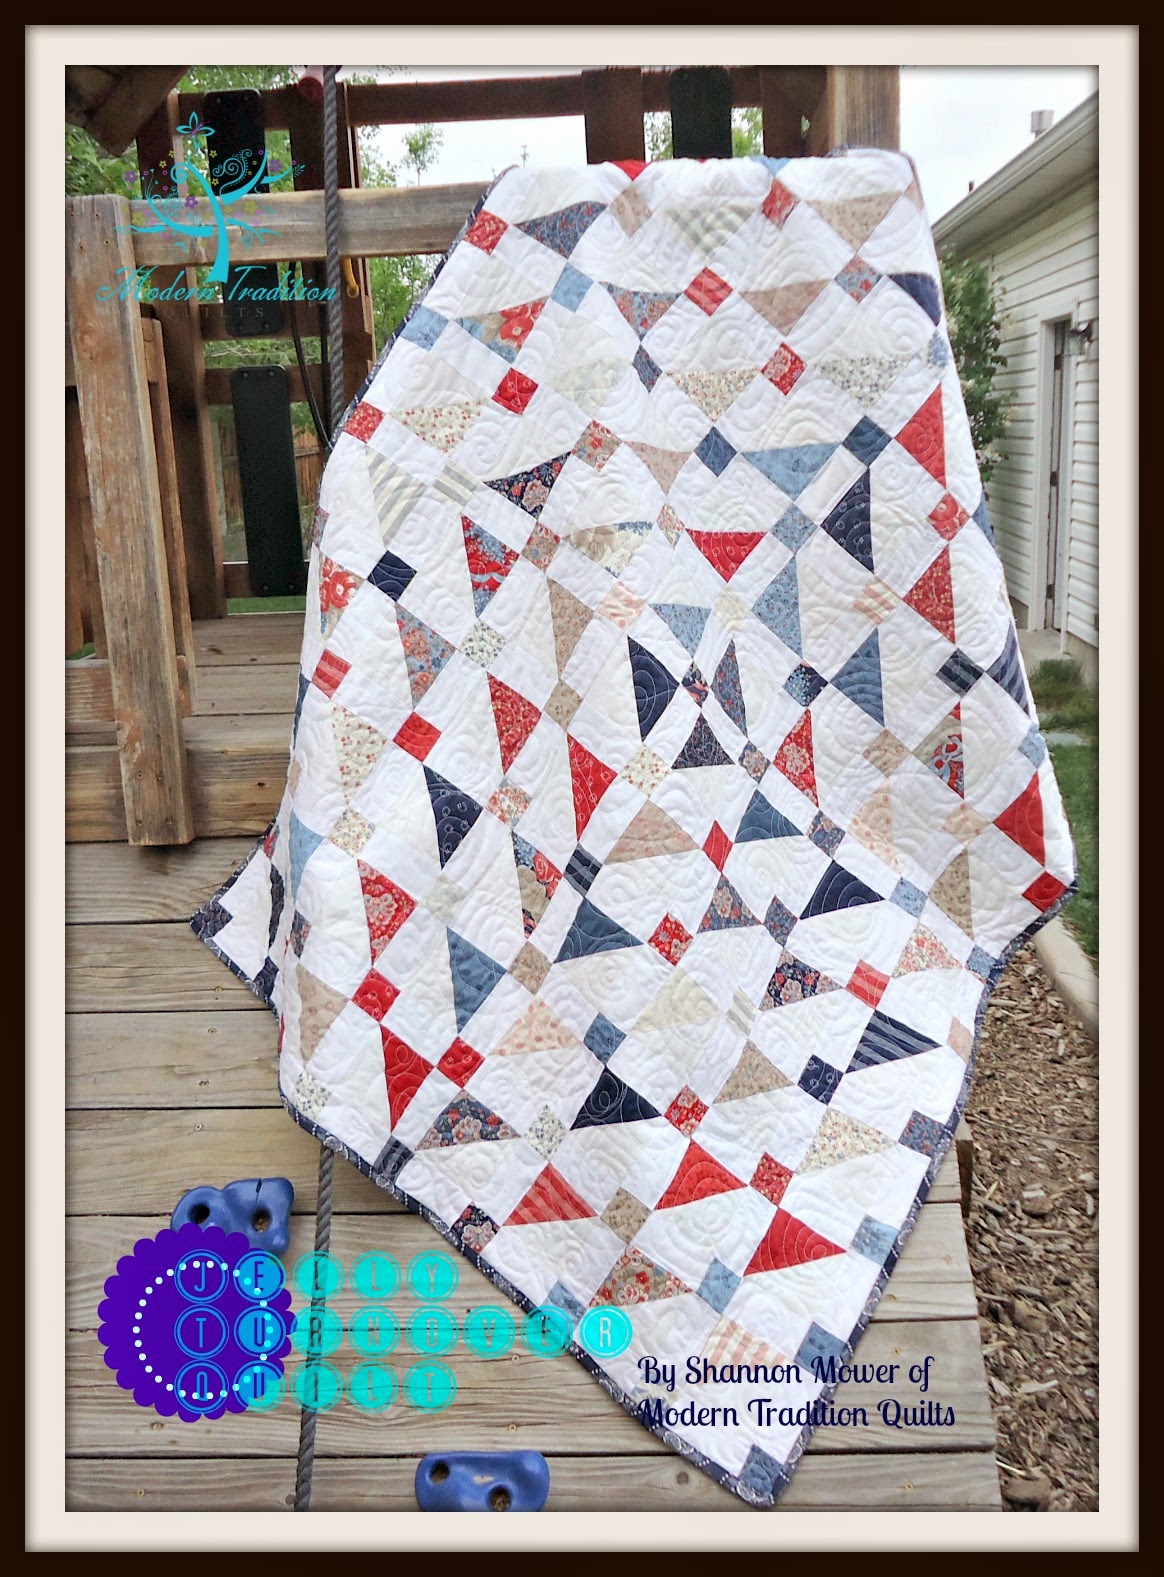
          Hello again, I’m Shannon from Modern Tradition Quilts and it is an honor for me to be with you today at Moda Bake Shop.  As a quilter, I love big modern prints and Kate Spain’s newest fabric line, Daydreams.  It is full of awesome fabrics.  These prints are so beautiful, they are inspiring.  These fabrics are so bright and fun that they leave me daydreaming about the beach–which is great since there is a foot of snow outside!  I also enjoy using traditional quilt blocks made from newer techniques, such as those utilized when sewing with pre-cut fabrics.  I hope you enjoy this quilting bee sampler as it is a traditional style quilt in modern fabrics.  

          For this sampler, we will need:

          • 1 Layer Cake (or two charm square packages) of your favorite print (I’m using Daydreams by Kate Spain)
          • 2 white Bella solids charm square packages
          • 1 1/4 yards for the setting triangles (I’m using Daydreams Cadence Stream)
          • 2  yards for the sashing strips and inner ease border (I’m using Daydreams Full Circle Rose)
          • 2 1/2  yards for the outer border (I’m using Daydreams Reflection Rose)
          • 1 yard for the binding (I’m using Daydreams Arcadia Ink)

          GENERAL INSTRUCTIONS:  As always, please read through all the instructions prior to beginning any project.   Unless otherwise indicated, all seam allowances are 1/4 inch.  I recommend testing that your quilting foot and pressing is actually creating a 1/4 inch seam allowance prior to beginning this project and making any necessary adjustments.  This will help the pieced border fit the patchwork more readily.   Press all seams in the direction of least bulk unless otherwise indicated.  Also, trim all dog-ears on your half-square triangles (HSTs) as this will help intersecting points lie flat.   And last, but not least, to ensure that your points do not get blunted when they are attached to sashing and borders, always sew with the HSTs on top. face-down with right sides of fabrics together and away from the feed dogs.  This way you can see the top point of your piecing.

          CUTTING INSTRUCTIONS:

          • Cut your layer cake in half to yield a 5 inch strip.  Reserve one half for another project and cut the other half into two sets of 5-inch squares.
          • Cut border fabrics along the lengthwise grain:
            • White outside border: cut four, 2 1/2 inches wide by 60 inches long
            • Pink outside border: cut four, 7 1/2 inches wide by 84 inches long.
          • Cut teal setting triangles to ensure the bias edge goes against the piecing and not the outer pieced edge:
            •  Cut one large square measuring 24 inches.  Cut these in half diagonally, and then again to yield 4 triangles measuring 16 1/2 inches tall by 24 inches long.  These are the setting triangles.
            • Cut two triangles measuring 12 1/2 inches square.  Cut these in half diagonally, each square yielding two triangles.  Yield: 4 total squares for the outside corners of the setting.
          • Cut sashing strips along lengthwise grain:
            • Cut eight strips measuring 2 1/2 inches wide by 16 1/2 inches long.
            • Cut four strips measuring 2 1/2 inches wide by 20 1/2 inches long.
            • Cut two strips measuring 2 1/2 inches wide by 58 1/2 inches long.   Excess length will be trimmed away later.

          PIECING THE BLOCKS: The finished block size is 16 1/2 inches square.

          Note: All of the blocks use half-square triangle units (HSTs) in different orientations.  However, some of the blocks use a different number of them. I recommend sewing the HTSs for each individual block as you go, not chain piecing all the HSTs at once. This will help with the color coordination as well as keeping you from sewing HSTs that are not needed.

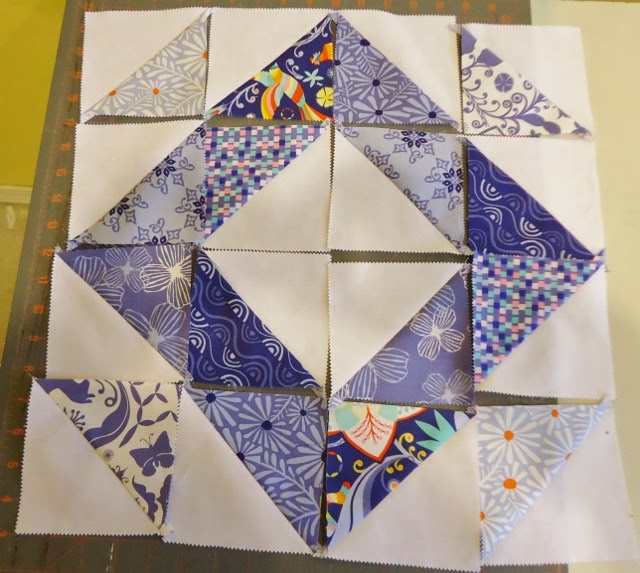
           Use this layout diagram to create the Mosaic Tile block.  Sort 8 blue charm squares and 8 white squares to create this block

          To create the half-square triangle units (this technique is used to create all HSTs throughout):

          • Draw a diagonal line down the center of all of the white Bella solids charm squares. 
          • Layer one 5-inch charm square on top of your 5-inch  charm square print.
          • Sew down both sides.

          • Cut these in half on the drawn line.

          • Press all squares open and toward the print fabric.

          • Layout all HST units and check them with the layout diagram prior to sewing the block together.  I like to have the stronger prints creating the center diamond, but you can play around and make it how you like it.

          Here’s the sewn block:

          Use this layout diagram to create the Whirlpool, also known as a Windblown block.  Sort 8 red and pink charm squares and 8 white charm squares.

          To create the half-square triangle units follow the same method of creating the HST units as shown in the Mosaic Tile block.

          • Layout all HST units and check them with the layout diagram prior to sewing the block together.  As the charm square is cut in half diagonally, it yields two identical HST units.  These paired end to end create a diamond.
          • When I layout my blocks with a diamond shape in them, I layout the paired HST units creating the diamond first.  This ensures my block “spins” correctly.  It also allows me to check the orientation of my pieces while sewing the block.
          • Now add the outside flying geese units with points going in.

          • And..the finished block:

          Use this layout diagram to create the Yankee Puzzle block.  Sort 8 yellow and orange charm squares and 8 white squares for this block.

          • To create the half-square triangle units follow the same method of creating the HST units as shown in the Mosaic Tile block.
          •  As in the previous block, when I layout my blocks with a diamond shape first.  This ensures my block “spins” correctly.  It also allows me to check the orientation of my pieces while sewing the block.
          •  Now add the rest of the pieces.

          • And…the finished block:

          Use this layout diagram to create the Clay’s Choice block.  Set aside 4 green charm squares and 4 white squares for the outer block edges.  Trim these to measure 4 1/2 inches.  Sort 4 more green squares and 4 more white charm squares and sew them into HST units as previously shown.

          • As in the previous block, when I layout my blocks with a diamond shape in them, I layout the paired HST units creating the diamond first.  This ensures my block “spins” correctly.  It also allows me to check the orientation of my pieces while sewing the block.  Then add the remaining pieces.

          • And the finished block:


           Use this layout diagram to create the Flying X block.  Set aside 4  print charm squares and 4 white squares for the outer block edges.  Trim these to measure 4 1/2 inches.  Sort 4 more multi-colored charm squares and 4 more white charm squares and sew them into HST units as previously shown.

          • In this block, I layout the pinwheel center first, then add the remaining pieces.

          For all blocks: Trim the blocks to a 16 1/2 inch square.

           PIECING THE CENTER:

          • Add the sashing lattice to the blocks.
            • Note: Sashing will over-hang the setting triangles to be put in later and this excess will be trimmed away and squared in the final squaring of the patchwork center. (This photo shows it being trimmed away at a later step.  I just thought I’d give you a “heads-up” now so you don’t worry when you see the over-hang.)
          Assembly diagram of adding the sashing to the end blocks.
          1. Sew a 2 1/2 inches by 16 1/2 inches strip to both sides of the Yankee Puzzle and Flying X and blocks.
          2.  Sew a 2 1/2 inch strip by 20 1/2 inch strip to one side of the Yankee Puzzle and Flying X blocks.
          Assembly diagram of adding the sashing to the center blocks.
              1. Sew a 2 1/2 inches by 16 1/2 inches strip to both sides of the Mosaic Tile block.
              2. Sew the Whirlpool block to one side of the Mosaic Tile block and the Clay’s Choice to the other side of the Mosaic Tile block.  Add the two 2 1/2 inch by 58 inch strips to this pieced unit.  Trim away excess to fit the length.
              3.  Finish the outside edges by adding a 2 1/2 inch strip by 20 1/2 inch strip to the remaining edge of the Whirlpool and Clay’s Choice blocks.

            ADD THE SETTING TRIANGLES

            1. Sew the 16 1/2 inch by 24 inch triangles to both sides of the Yankee Puzzle and Clay’s Choice block.
            2. When this strip is finished, sew these two units to the center patchwork blocks.  Do not worry that the sashing sticks out of the setting triangles.  It is part of the design and will be trimmed away later.
            3. Add the four outer 12 1/2 inch triangles to the remaining four corners.
            Piecing Diagram

            ADD BORDERS:

            • Sew the HST border using the method shown in the Mosaic Tile block section.
            • Sew left and right hand side borders, both consisting of 12 pieces.  Refer to the layout diagram for placement.
            • Sew the top and bottom borders, both consisting of 14 pieces.  Refer to the layout diagram for placement.
            Sawtooth border diagram.  This diagram shows 16 pieces, but you only need 14.

              TO EASE IN THE HST BORDER:

              • Measure the ironed finished length of the 12-piece HST border.  It should be 50 1/2 inches long.  
              • Measure your finished patchwork center, it too should be 50 1/2 inches long.  
                • Note: Often there are variations in piecing and pressing that could get these two to differ.  If your quilt top does not measure up, square the center patchwork section to measure the same as your 12-piece HST border.  (Ah-ha!  So this is where we trim off the sashing overhang!)
                  • Iron the quilt top folded in half twice to create creases showing the panel’s center.  Pin-match the center of the HST border with these creases and pin from the center out.  Sew on the HST units border.
                  • Sew on the outer borders starting with the 2 1/2 inch border, then add the 7 inch border.
                  • Quilt as desired!
                  Assembly diagram with borders.

                  Finished quilt top measures 81 inches square.

                  Note: If you choose to make this project omitting the saw-tooth border, you will only need one 42-piece print charm pack and one 42-piece Bella solids charm pack.

                  Here is an alternate colorway using the modern gray back-grounds instead of the white.  Also this has a saw-tooth border variation where all the HSTs face the same direction.  I like it too!

                  Here are some photos of how I quilted the top.  I just fell in love with this fabric and had to do some crazy free-motion quilting on it.  I hope you like the ideas.

                  Shannon Mower
                  {www.moderntraditionquilts.blogspot.com}

                  Candy Squares Table Runner


                  Hello, again! I’m Shannon from Modern Tradition Quilts and I am so excited to be a part of Moda Bake Shop today.  It’s great to share my Candy Squares Table runner made from those darling pre-cut Mini Charm packages–Moda Candy.  They are so cute that they’re sweet!  The 2 1/2 inch squares work-up into 2 inch squares–perfect for a postage-stamp style  quilt.  I love using pre-cuts, don’t you?  I also love the Little Black Dress fabric line by Basic Grey.  It works beautifully with modern home decor and will make a beautiful addition to any table at any time of the year.  This is one project that can be displayed all year round!  So, let’s get down to business!

                  2 Packages of Moda 2 1/2 inch pre-cut Mini-Charms (I used Little Black Dress)
                  1/2 yard white dot for setting squares (I used Little Black Dress Ivory Dot)
                  1/3 yard for outer borders (I used Little Black Dress Grey Dot)
                  1/3 yard for binding (I used Little Black Dress Cream Black)

                  LAYOUT YOUR MINI-CHARMS

                  This is the fun part!   Playing with all of those prints and trying to make it so that no two of the same print touch one another.  It is helpful to look at your candy pieces in gray-scale to see if there are any similarly valued pieces touching one another.  If you don’t want to use a yellow filter, you can always squint at it to get your eyes to notice the gray-scale.

                  CUTTING INSTRUCTIONS

                  For the setting squares, cut seven squares measuring 4 7/8 inches from the width of fabric (WOF), then cut them in half diagonally to yield 14 triangle units.

                  Also cut one square measuring 2 7/8 inches and cut it into quarters diagonally to get the setting triangles for the four outer corners.

                  For the outer border, cut four strips from the WOF measuring 3 1/2 inches wide.

                  PIECING INSTRUCTIONS

                  Due to the fact that this quilt has odd numbered rows, it would appear that the triangle units would need to be set-in.  This can be difficult for new quilters and I have found a way to get around it by simply doing the piecing in several sections.  Please refer to the number in the photo for final section placement.

                  • Section One and Five: Sew two rows consisting of 5 candy squares with a triangle unit added at the end.

                  Sections 1 and 5
                  • Section Two and Four:  Sew two rows consisting of 7 candy squares with a single triangle unit added at the end.

                  Sections 2 and 4
                  • Section Three:  This is the tricky section.  In this section we compensate for the odd-numbered setting by using three rows instead of two.  This way we can avoid setting-in the outer triangles.

                  • First, sew two rows of 7 candy squares then add a triangle section just as before for sections 2 and 4.  Then sew another unit comprised of two candy squares and one triangle as shown on the right-hand side of the photo.  Save this piece
                  • Sew a strip of 9 candy squares together, then add  it  to the unit comprised of two rows of 7 candy squares.  This row will span the full length of all 7 candy squares and the triangle.

                  • To complete this center unit, add the triangle with the two candy squares to this section.
                  • Sew the outside corner  units.  They are comprised of two candy squares, two triangle units and topped with the mini-triangle unit.  Sew four, one for each corner.

                  • Sew together the center patchwork sections.  I think it looks good without the corner pieces as well!
                  •  Add the four outer corners.

                  • Add the four outer 3 1/2 inch borders.  Trim away any excess fabric to square the quilt top.
                  • Quilt as desired!

                  And…just because it’s one week until Christmas, here is what it would look like if made from scraps of holiday fabric.

                  One table runner measuring 16 inches by 30 inches.


                  Shannon Mower
                  {www.moderntraditionquilts.blogspot.com}

                  Anasazi Medallion Quilt

                   
                  I am honored to be a part of Moda Bake Shop.  This is my first post and I can’t wait to show you my finished project!  As a child, our family took many vacations to southern Utah and the Four-Corners area of Utah, Colorado, New Mexico and Arizona.  One of my favorite places to visit was Mesa Verde National Park–a spectacular area of canyons where the native Anasazi Indians “Ancient Ones” built their homes in the cliffs.   In honor of this, I decided to name my quilt Anasazi Medallion as the layout takes me back to those fun camping trips.


                  1 Dessert Roll (For this quilt I used Moda Ombres Marble Dots collection)
                  1 Jelly Roll for the borders (I also used Moda Ombres Marble Dots)
                  2 1/2 yards white fabric for the medallion setting and inner border (I also used Moda Marble Dots)
                  4 Yards Backing
                  3/4 Yard Binding (I also used Moda Marble Dots)


                   Center Medallion:

                  Unroll your dessert roll and pair 10 fabrics strips according to your liking.   In the sample quilt, I aligned the fabric color with the color adjacent to it in the dessert roll.  To maintain the color placement value of the ombre fabric, align the white selvage edges together so that the dark hues align with similar color values.

                  Sew two coordinated strips together, pressing all seams toward the dark fabric.  Then cut these strips into squares measuring 9 1/2 inches.  Each strip will yield 4 squares.  You will need a total of 18 squares.

                  From the 2 1/2 yards of white fabric, cut the inner border first from the lengthwise grain.  Cut four strips measuring 2 1/2 inches wide by 60 inches long.  Reserve these strips to apply to the center patchwork medallion once it has been completed.

                  From the remaining white fabric, cut the medallion setting squares.  Rotary cut 6 strips measuring 9 1/2 inches wide, then cut these into 9 1/2 inch squares. You will need a total of 18 squares. Draw a diagonal line down the center of each of these.

                  Layer one pieced pieced square with a white square on top, right sides together.  Sew a 1/4 inch seam allowance down both sides of the diagonal line on the white square.

                  Cut these in half along the drawn line and press seams toward the colored fabric.  This will yield 36 blocks for the center medallion.  Refer to the placement diagram for the correct orientation of these blocks in the medallion.


                  Border:

                  Unroll your jelly roll and pair fabrics according to your liking.  In the sample quilt, I aligned the fabric strip with the color adjacent to it in the dessert roll.  To maintain the color placement value of the ombre fabric, align the white selvage edges together so that the dark hues align with similar color values.  Sew all all 2 1/2 inch strips together in rainbow order.  Rotary cut these into 6 inch widths.  14 rainbow repeats are needed, 4 for the top border, 4 for the bottom border, 3 for the right border and 3 for the left border.

                  Quilt Top Assembly Diagram:

                  Add the borders to your quilt top starting with the inner white strips first, then your completed rainbow repeat borders.

                  70 inches square quilt top.

                  I just love the vibrant colors in these Moda Marble basics dessert and jelly rolls .  Their colors are as vivid as my Zinnias in my garden!  Wow!  These fabrics are sure to make any project pop with awesome color.

                  Note: 1 Dessert Roll contains enough 5 inch strips to create enough squares for two center medallions.

                  Happy Quilting!

                  Shannon Mower
                  {moderntraditionquilts.blogspot.com