Hello, again! I’m Polly from Aunt Polly’s Porch blog. I am thrilled to be posting my latest project on the Moda Bake Shop today! I hope you like it and find that it will be the perfect set to take with you to the park for a day of relaxation and fun!
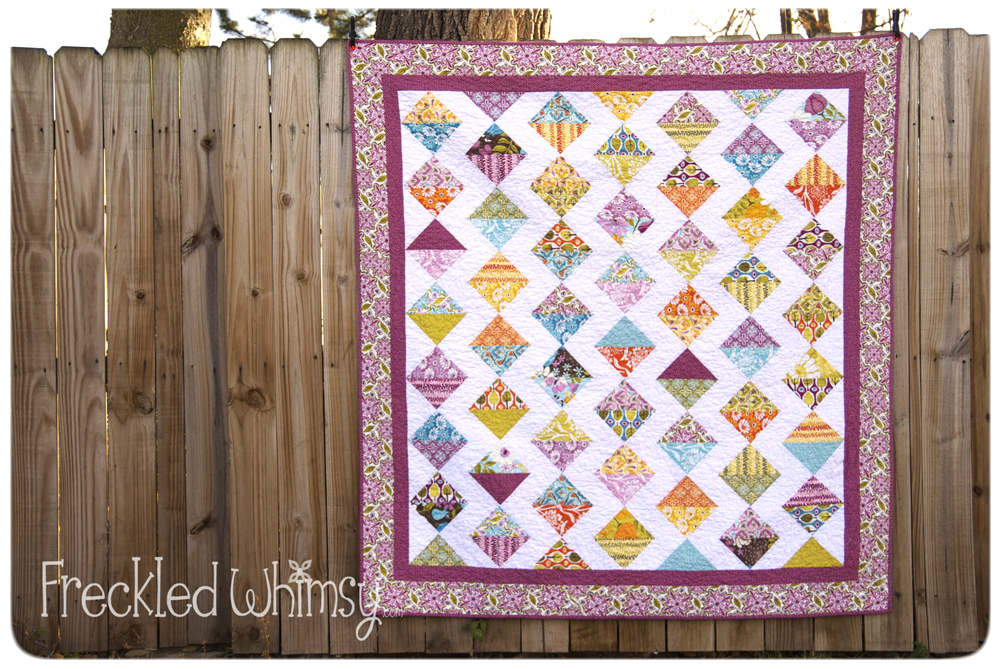
“A Day in Central Park” consists of five easy pieces- a shaggy quilt, a camera bag, an iPad sleeve, a journal cover and a big tote bag to carry them all in!

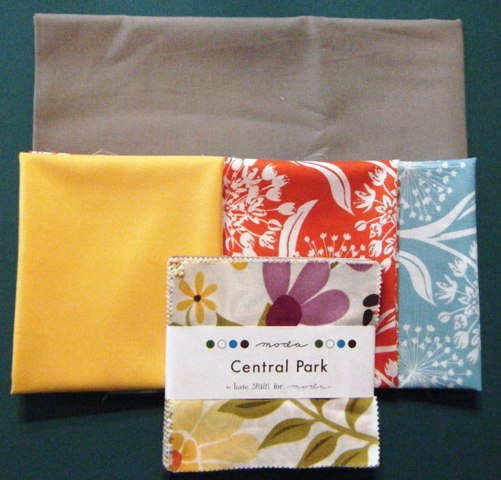
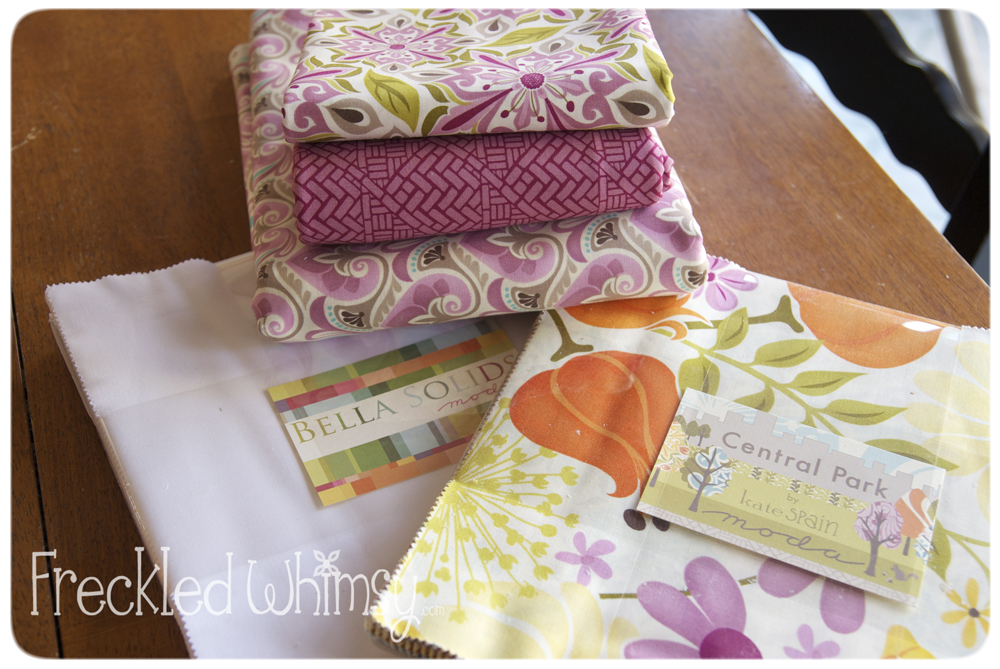
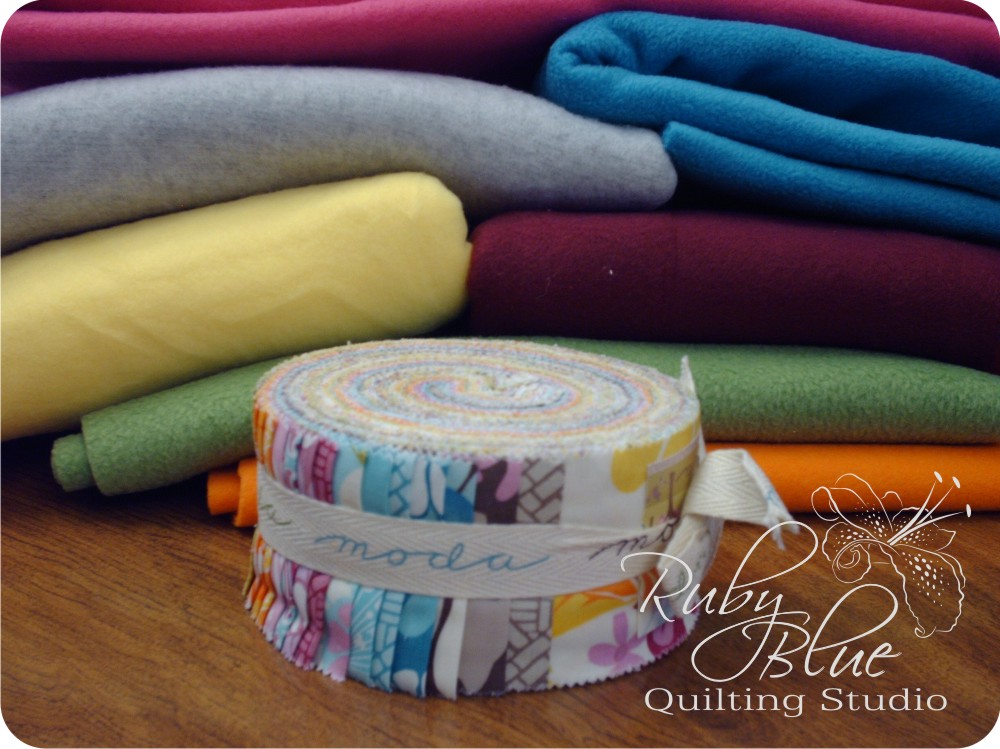
1 fat eighth bundle of Moda’s Central Park by Kate Spain
1 yard fabric of your choice from this collection for bag linings and straps
1 yard white Bella Solid
4 yards coordinating flannel for shaggy quilt backing
batting of your choice for the shaggy quilt
fusible fleece for camera bag, tote bag, sleeve and journal
4 rectangular 1″ wide gold “rings” for tote bag
buttons for camera bag and journal cover embellishments

Camera Bag-
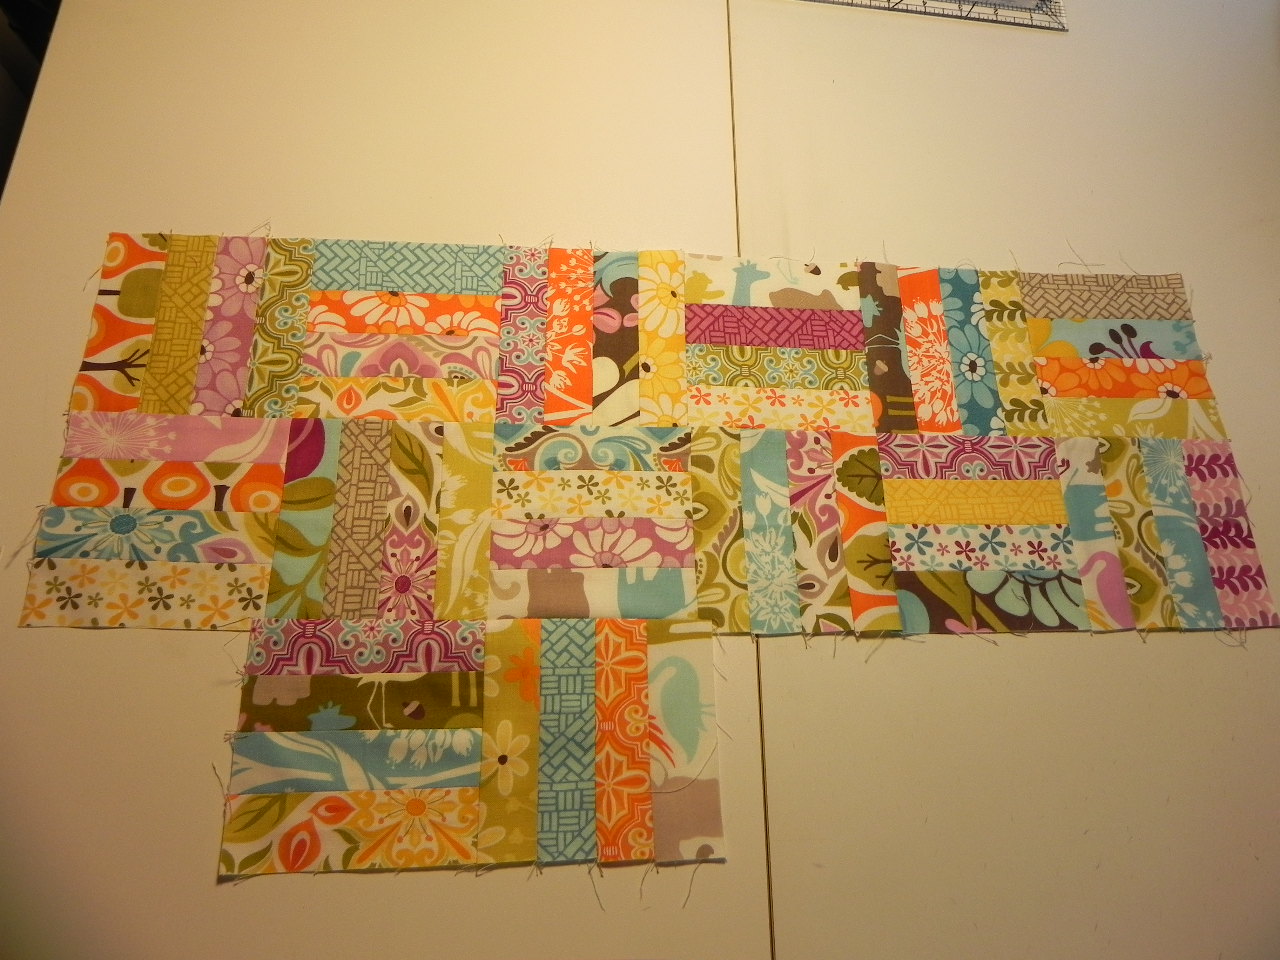
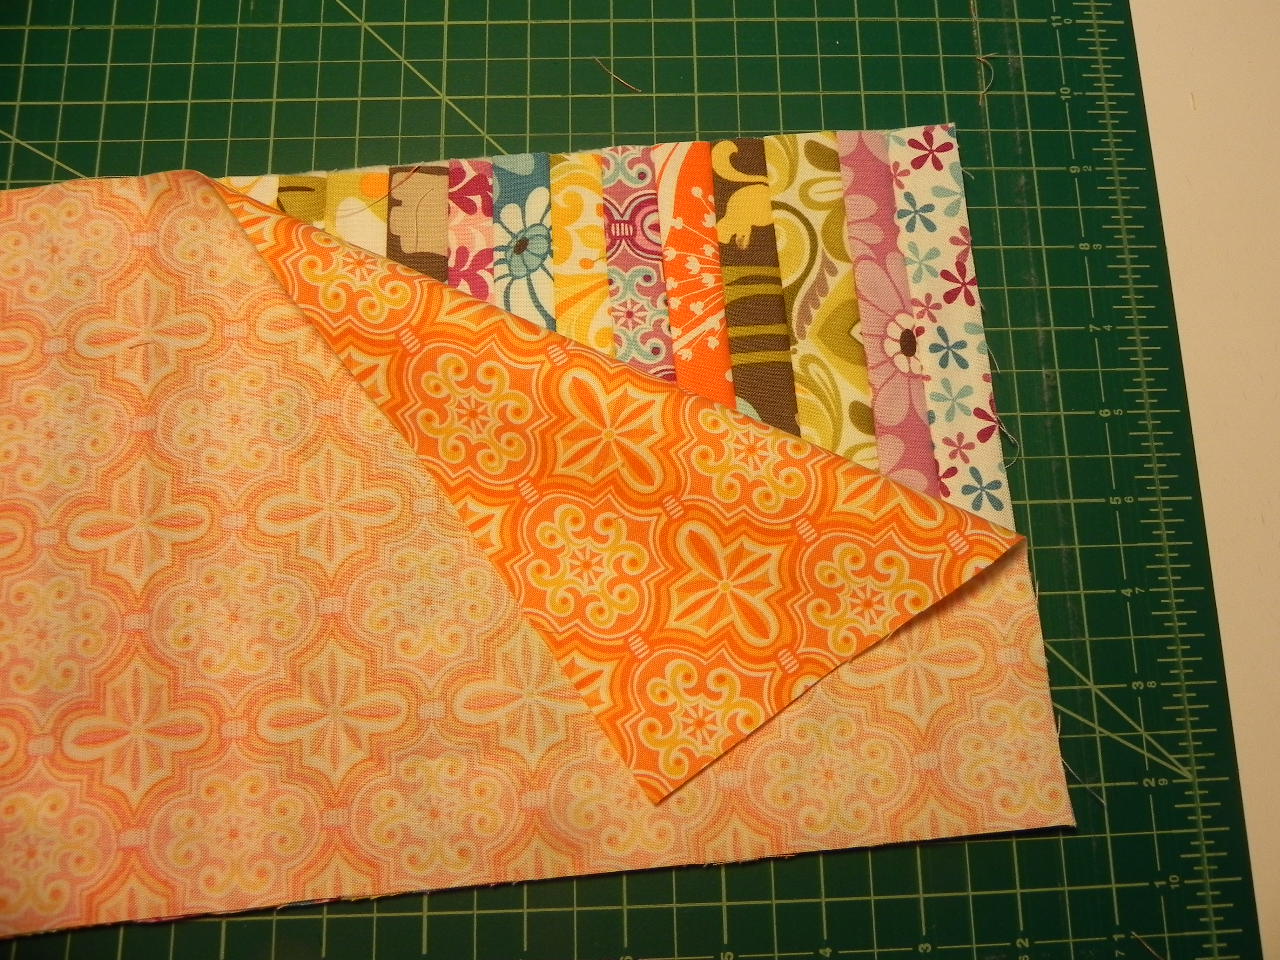
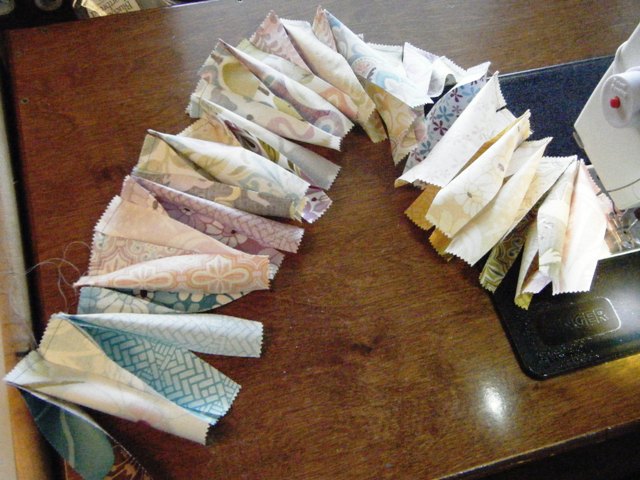
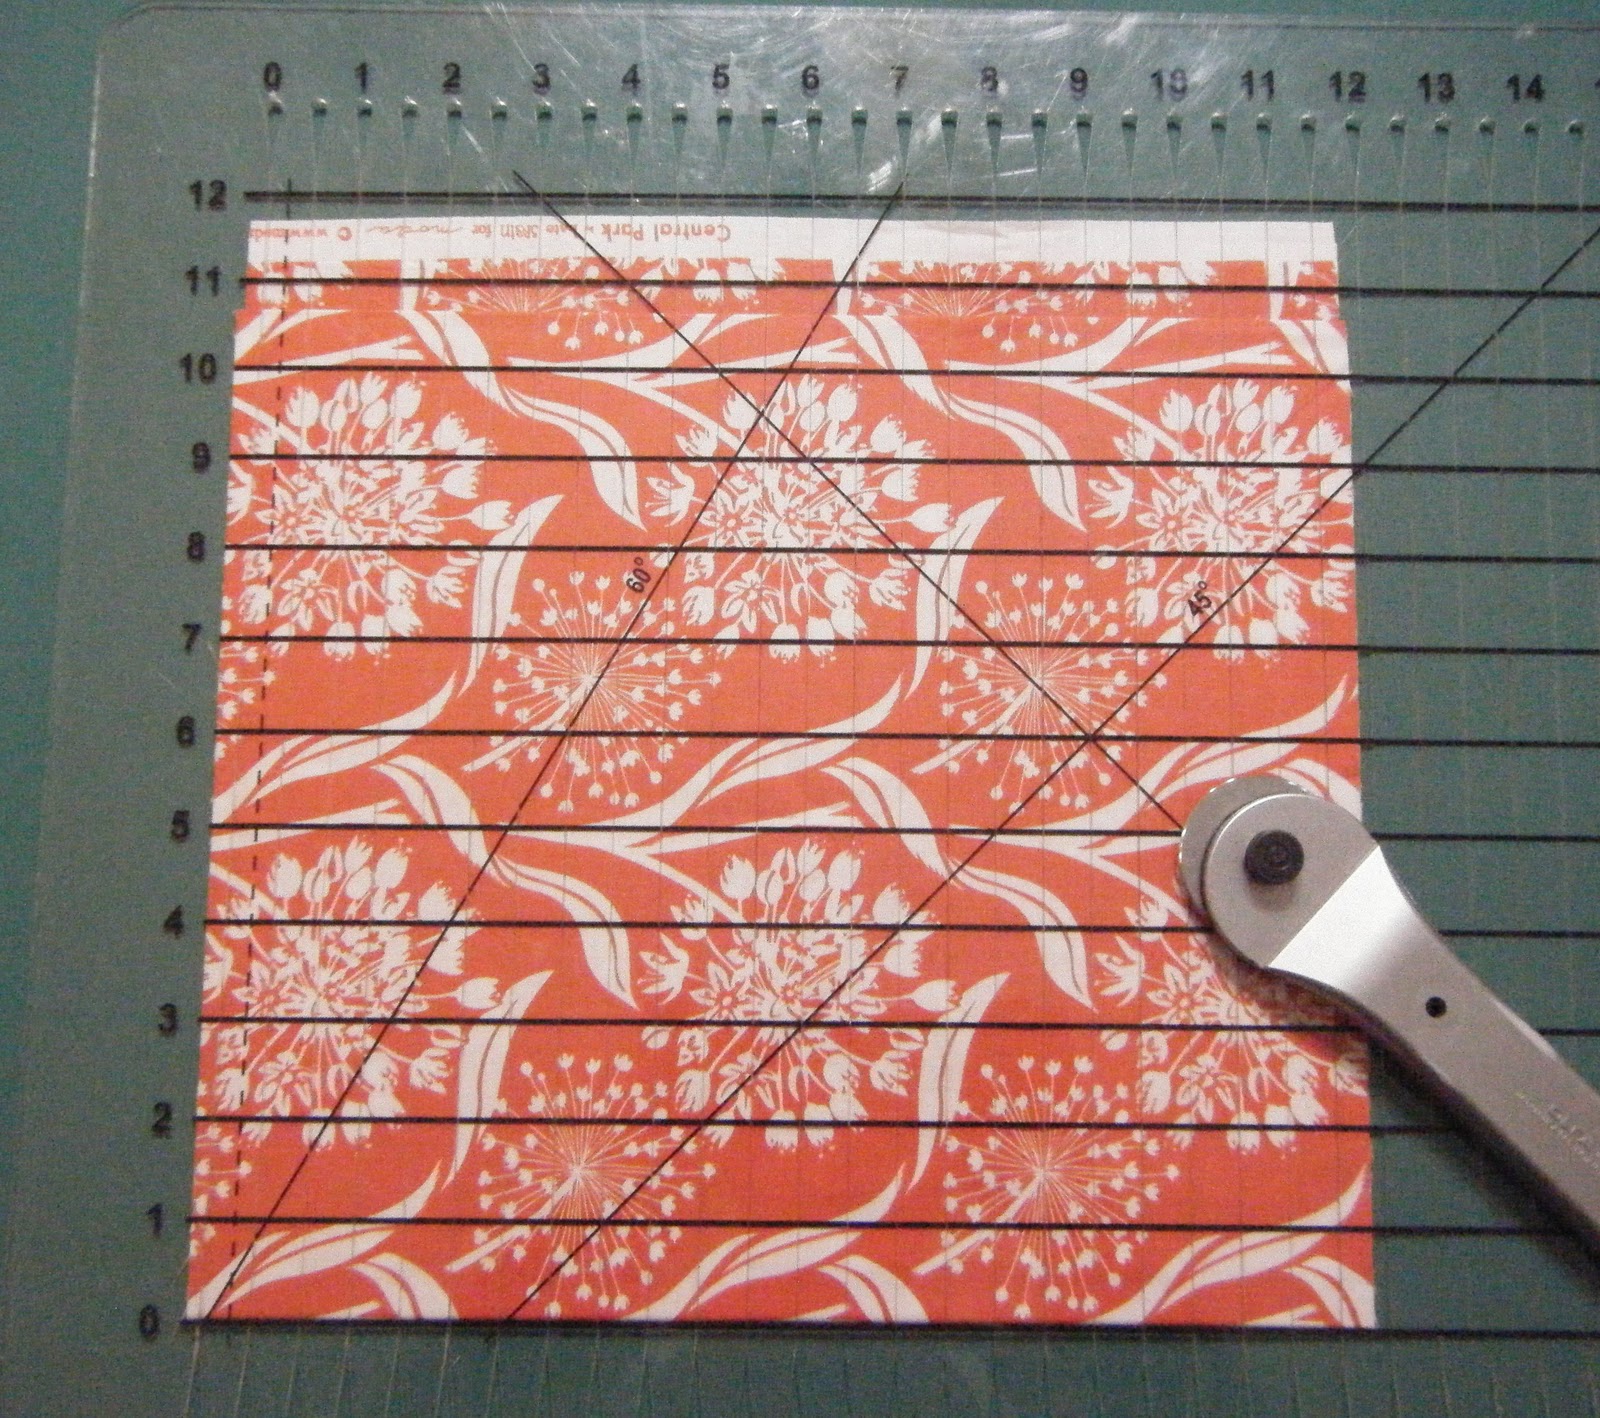
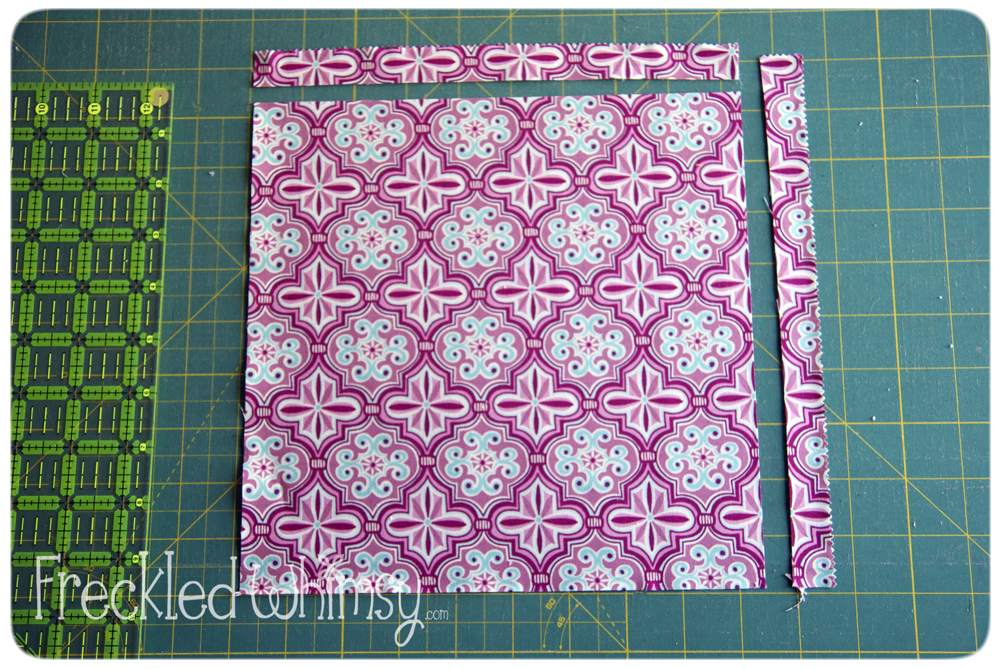
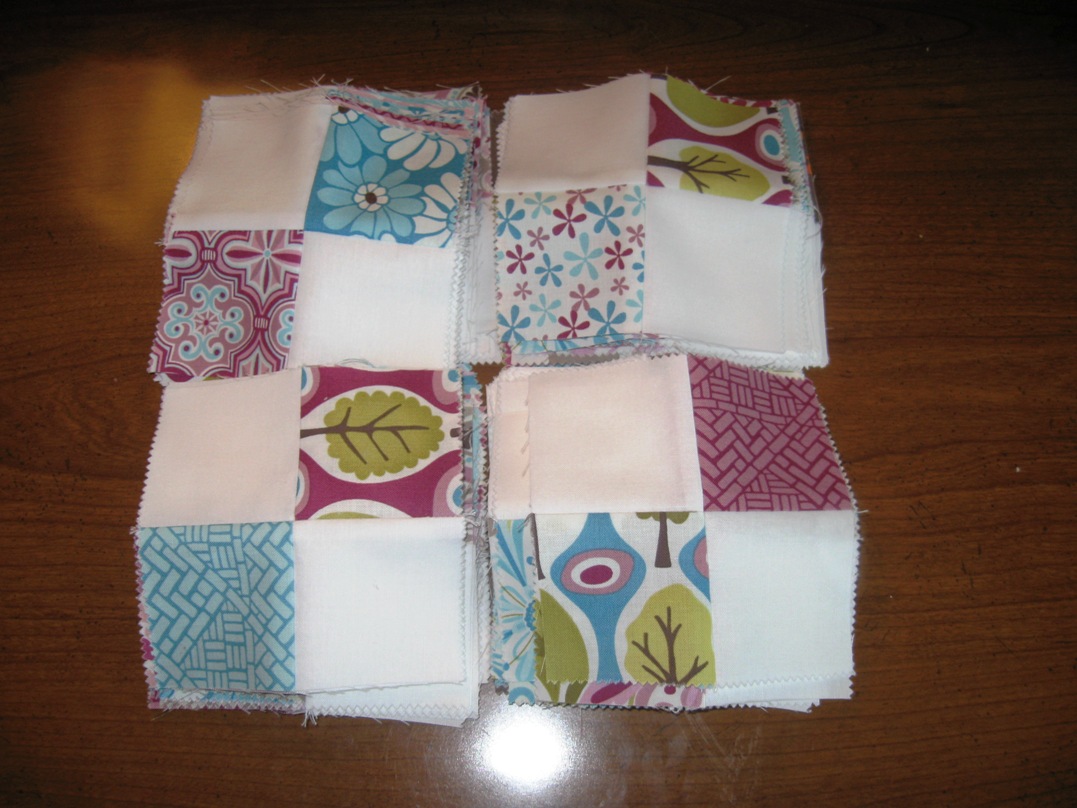
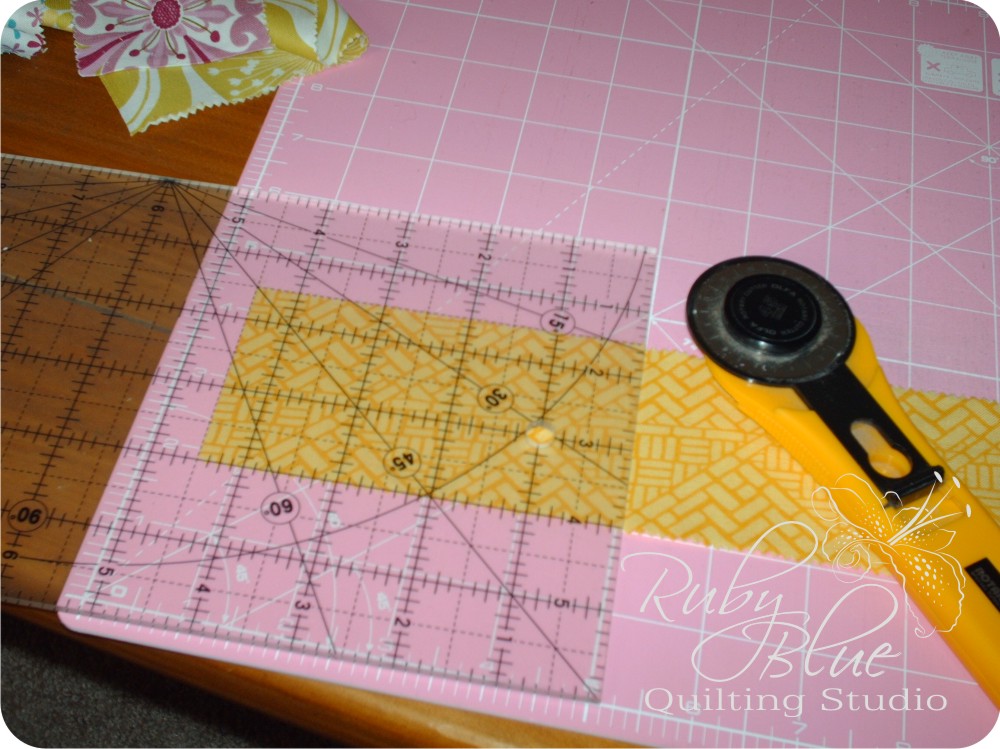
Press open all the fat eighth pieces. I carefully stack/align 4 fat eighth pieces on top of each other on the cutting mat, straighten the edge and then cut a strip 4 1/2″ by the height (9″) of the fabric.
Then sub cut that strip into two 4 1/2″ squares.
Put one set of squares aside to be used for the tote bag later.
Take the other set of squares and subcut them into three 1 1/2″ strips.
Sort your pile of strips into sets of 4. Sew these four strips
together to make a block. I pressed the seams open.
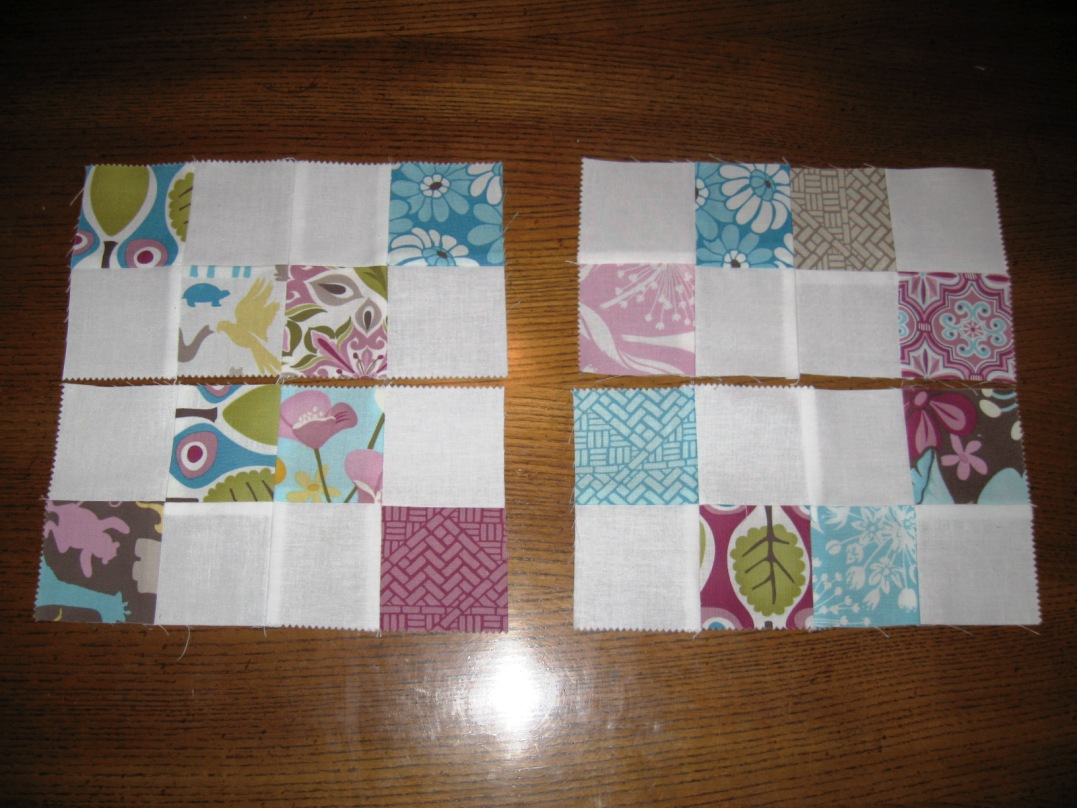
Choose 14 blocks to layout for the bag body,
alternating the direction of the block strips as shown in the photo.
Sew together, press as desired.
Select 6 more blocks to layout as shown for the bag top flap.
Sew them together and press as desired.
Cut and fuse fleece onto the back of both pieces then quilt as desired. Trim off the corners as shown on the top flap. Lay these two quilted pieces right sides against the right side of the lining fabric and cut around them to create the linings.
(I also fused fleece onto the back of the camera bag lining.)
With right sides together, sew around the top flap and lining.
Turn it right sides out, press and topstitch around the seamed edges.
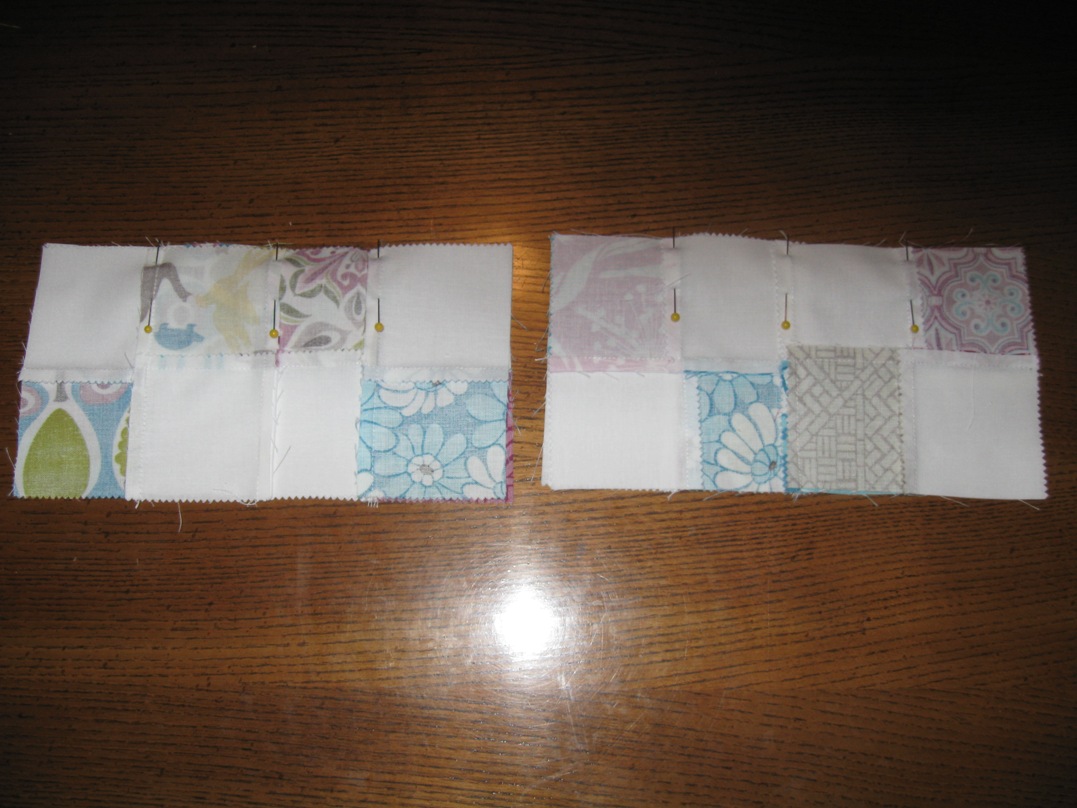
Select 4 more blocks for the back pocket, sew them together
and two more blocks for inside small pockets.
Lay them right sides together on top of the lining fabric and cut out their linings.
Leaving them right sides together, sew around the sides leaving a section open
for turning. Turn them right sides out, press and topstitch
across one edge to be used for the pocket top.
Place the two small pockets next to each other on the bag body
lining as shown in the photo and stitch around the three sides.
Lay the large back pocket on the back of the quilted outside bag body piece
as shown in the photo and stitch down on three sides.
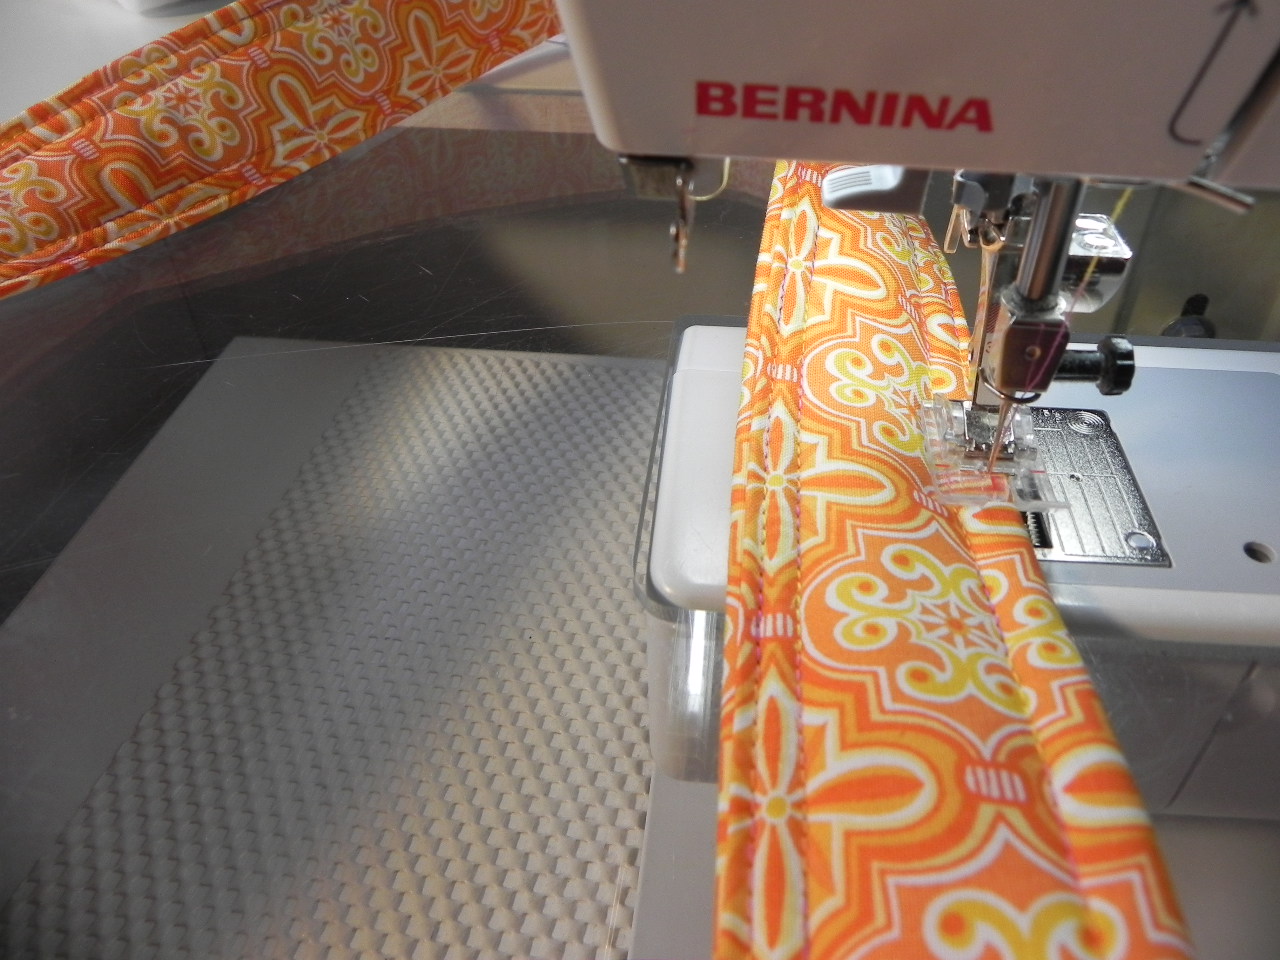
Cut a 6″ by 32″ strip of lining fabric for the strap.
Fuse fleece onto the wrong side of the strip.
Press under 3/4″ on one long edge and 1 1/2″ on other long edge.
Now fold in thirds as shown in the photo and press, pin
and topstitch down both long sides of the strap.
I like to topstitch twice… it just looks more finished!
Next, pin the side seam together on the outer bag and stitch.
Then pin the bottom seam and stitch it too.
Do the same with the lining, but leave
a 4″ opening in the side seam to turn the bag through.
Pin the ends of the strap on each side of the outer bag and the top flap
on the back of the outer bag with right sides together and
stitch all around with a 1/4″ seam allowance.
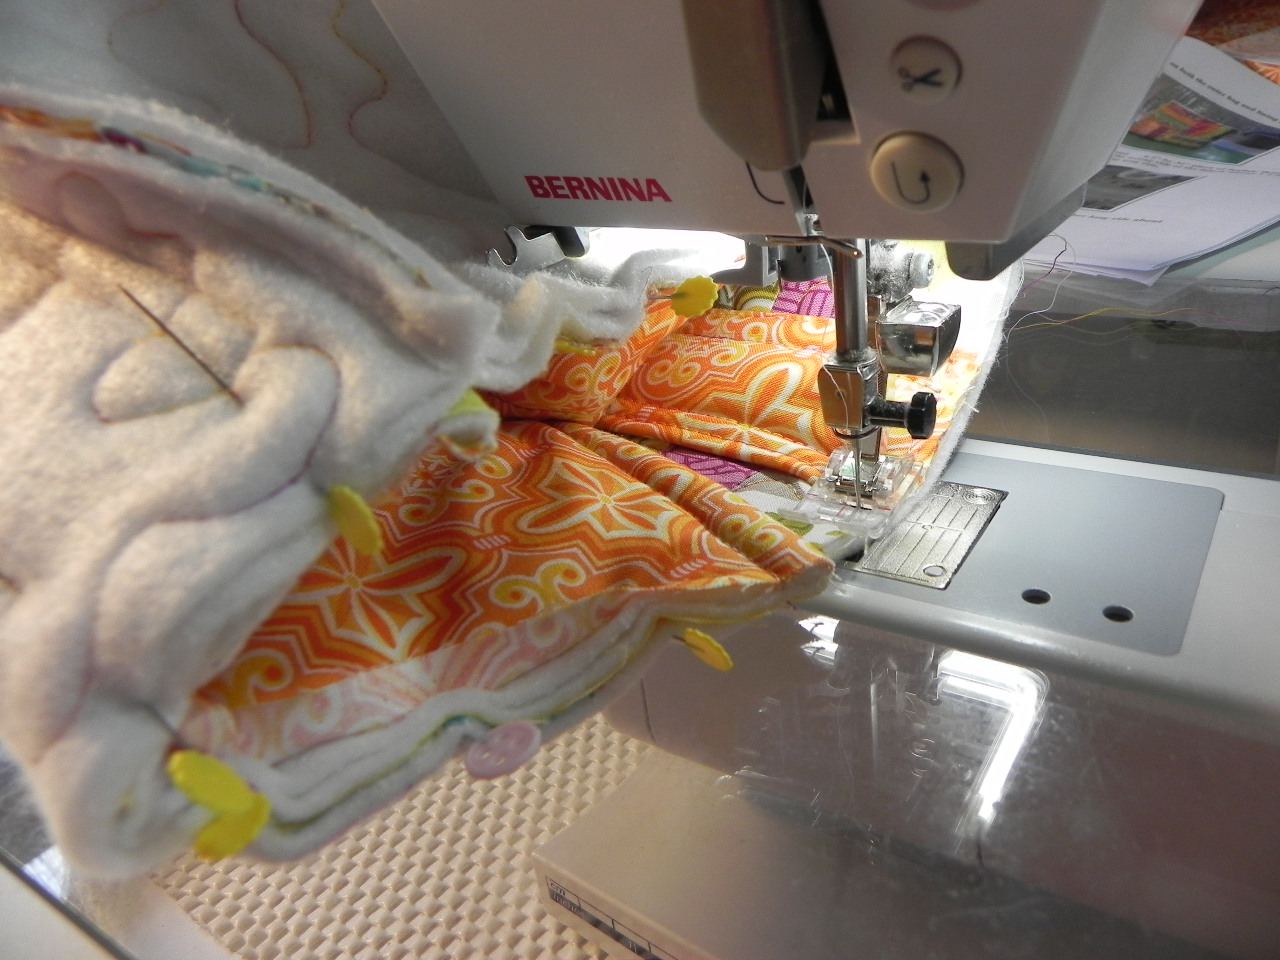
Now, with right sides together, place the outside bag inside
the lining and pin all around the top . Stitch this seam with a 3/8″
seam allowance. This is a thick seam, so go slowly!
Reach inside the opening and slowly pull the bag
right sides out, then stitch the opening closed.
Push the lining down inside the bag and pin all around the top edge.
Another thick bulky seam to topstitch, so go slowly!!
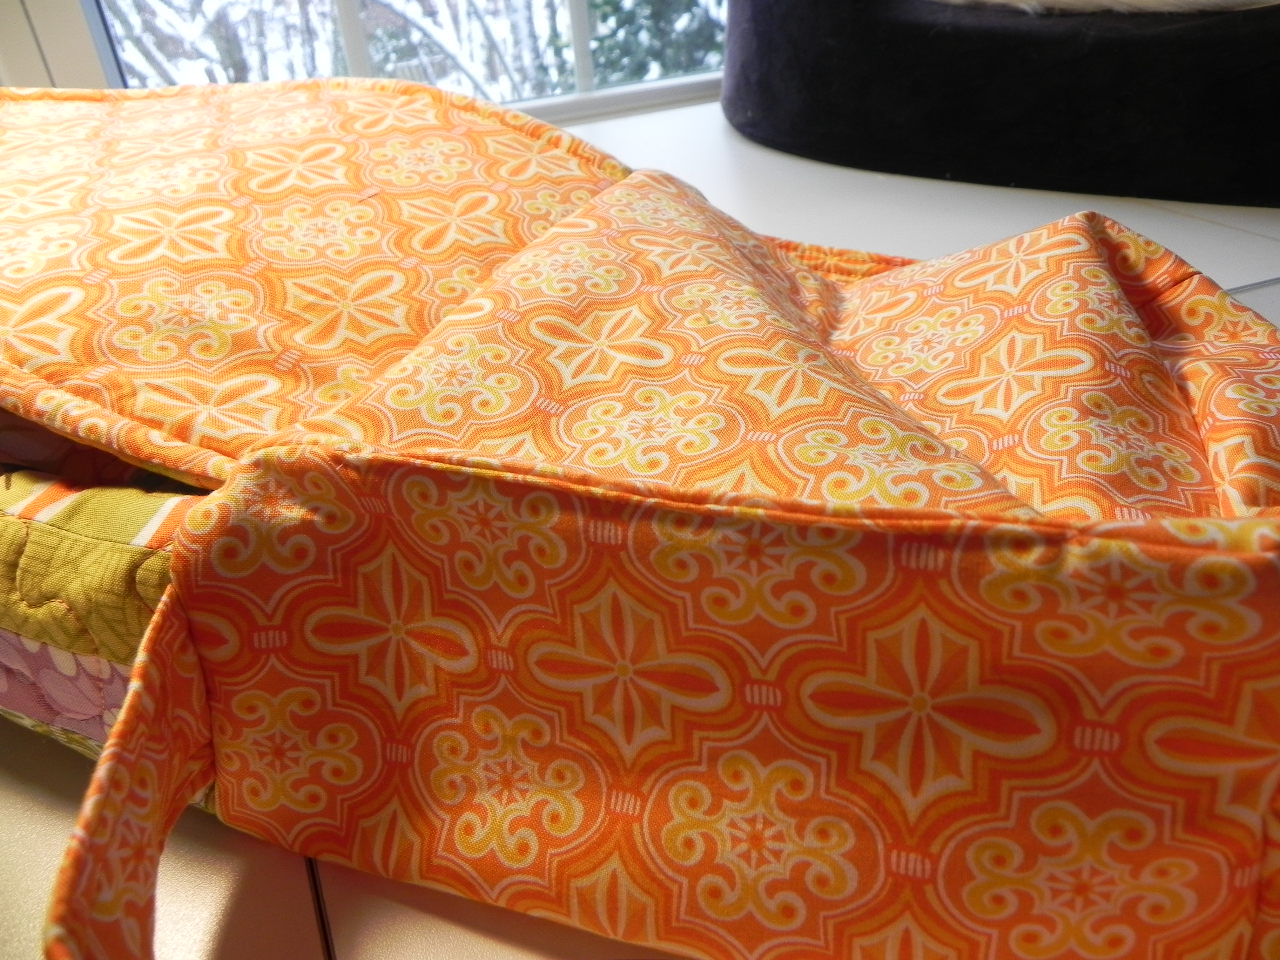
Lookin’ good!! Almost done! Hand-stitch velcro to the bag
front and top flap to close the bag.
I love to stack different color and sized buttons
to embellish the top flap as shown!
And Voila! It’s done!!
Put your camera, cords, cards
and manuals inside it and you’re ready to go!!
Tote Bag-
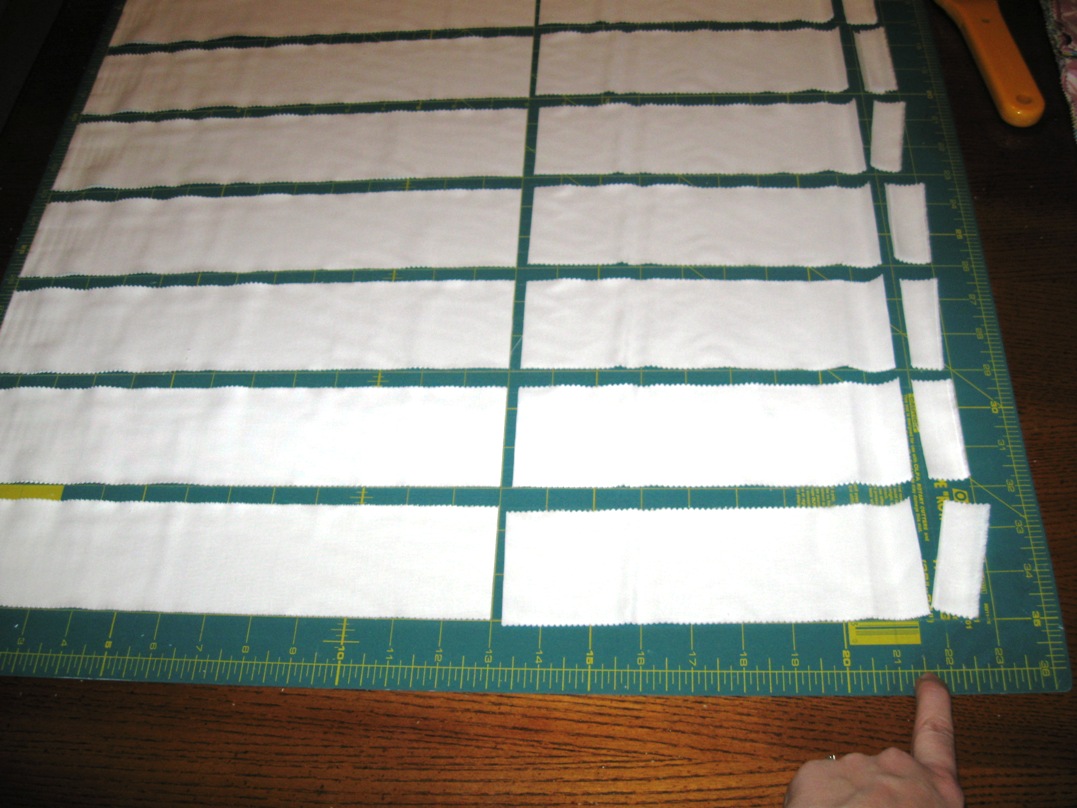
You will use the second stack of forty 4 1/2″ squares you cut already above and you will need to cut 40 white 4 1/2″ squares from the solid white fabric by cutting five 4 1/2″ strips from selvage to selvage and then subcut them into 4 1/2″ squares.
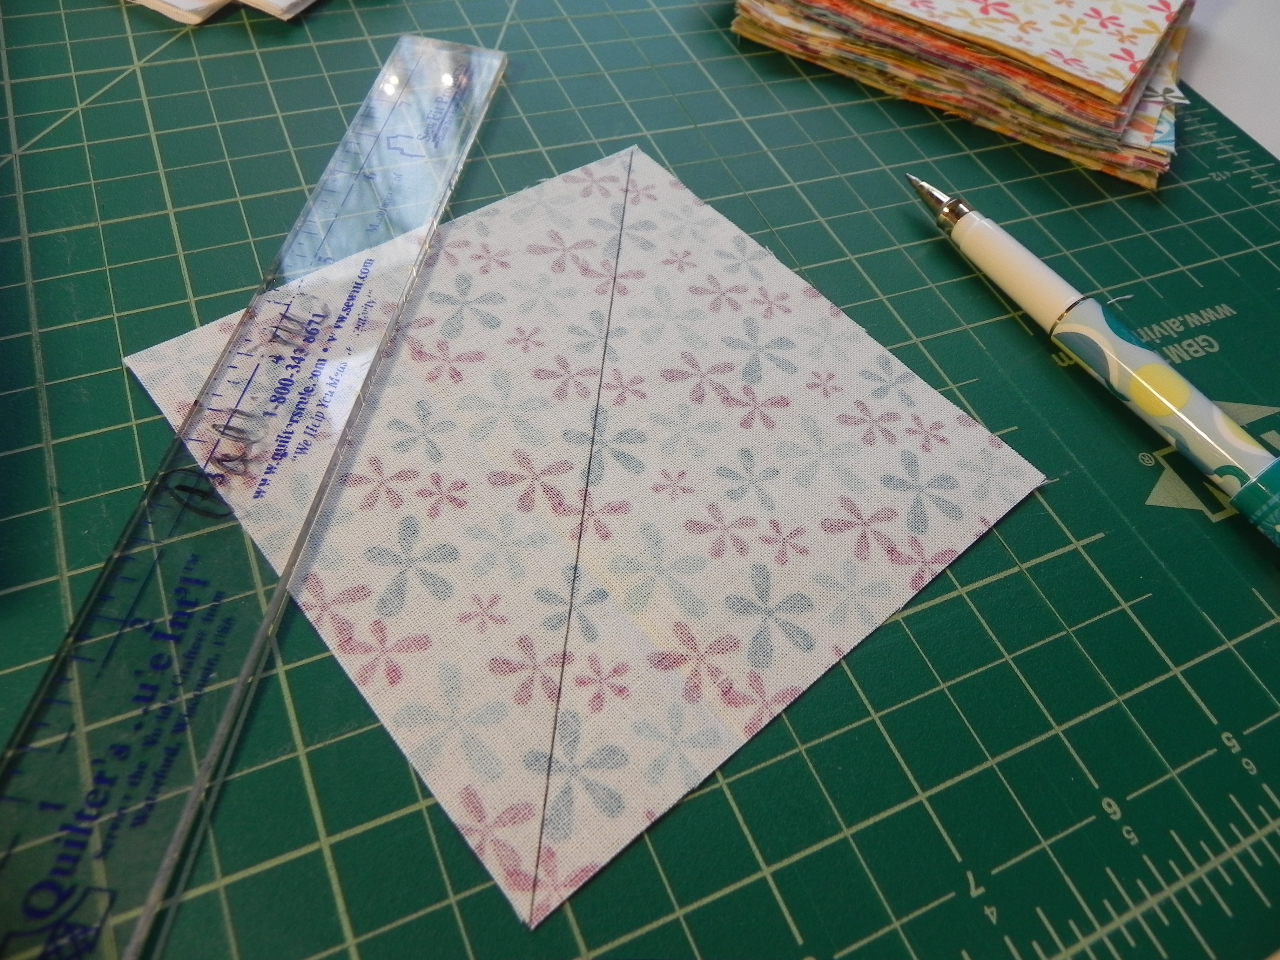
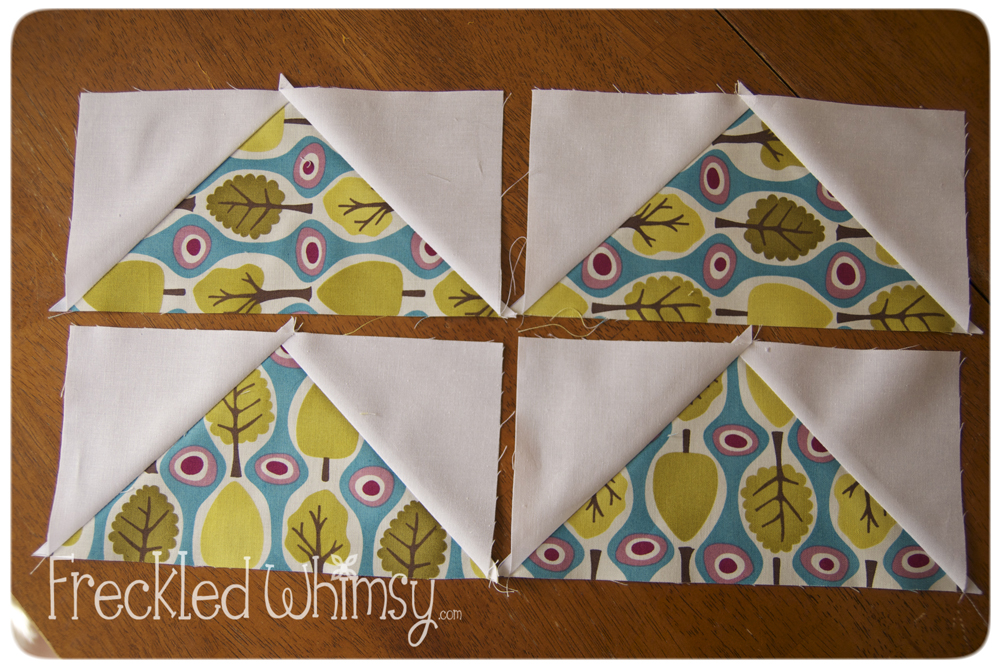
Draw a line diagonally across each print square on the wrong side.
Layer one print and one white square right sides together
and stitch 1/4″ away on each side of drawn line. Then cut
on the line itself and you will then have 2 squares each made
with one half white and one half print triangles.
Lay them out as shown in the photo- two separate bag sides
made with 6 rows down and 6 rows across each.
Sew the blocks together. Fuse fleece onto the
wrong side of each and quilt as desired.
Cut 2 lining pieces 22″ X 22″, and
cut three 4″ strips from width of lining fabric.
Cut one of these strips in half both lengthwise and
widthwise resulting in four 2″ X 22″ strips.
Press 1/2″ under on the long sides and
pin onto the bag sides as shown.
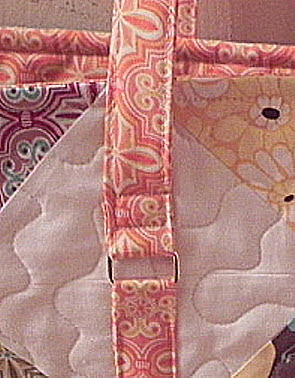
Slide one rectangle ring onto the strip at the top and pin in place.
Start at the bottom and topstitch close to one long folded edge-
up one side across the top securing the ring and
back down the other side, thus enclosing all the raw edges.
Do this on both sides of bag.
Take the other two strips and press under 1″
on both long sides of both strips. Then press in half, enclosing
raw edges and resulting in a strip about 1″ wide.
Topstitch all four edges of each strip to enclose all raw edges.
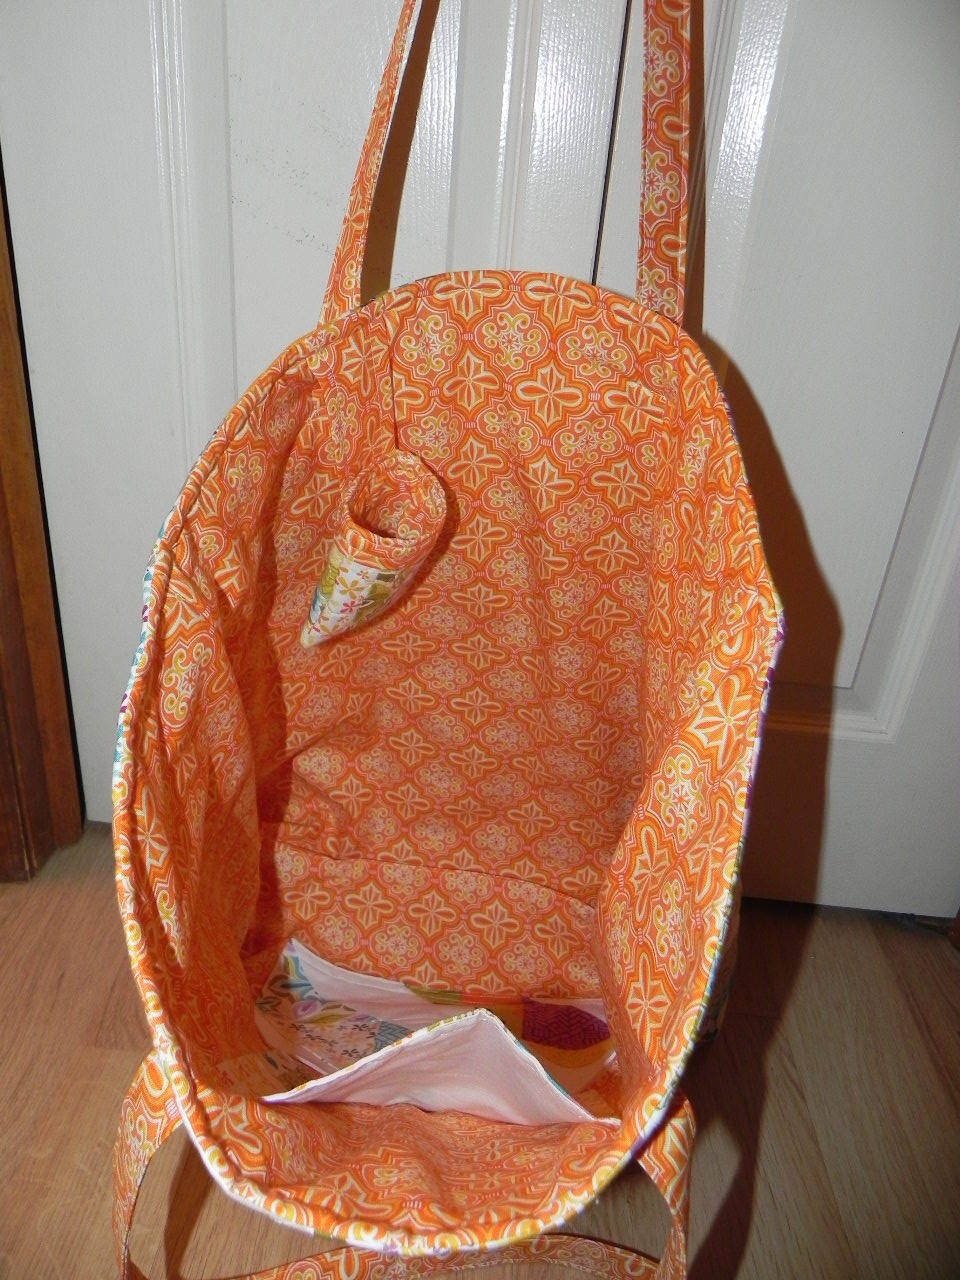
Set aside for now. Time to work on the lining and pockets.
You will have 8 leftover triangle blocks from the tote construction
and 4 leftover rail fence blocks from the camera bag construction.
Select 2 rail fence blocks to use for the cell phone holder.
Sew them together as shown above.
Fuse fleece to the back and quilt as desired.
Cut out a piece of lining 1″ WIDER than this quilted piece.
Fold each in half and stitch around across the bottom and
up the non-folded side as shown on both quilted outside and lining.
Turn the quilted outside piece right side out. For hanging strap,
cut a piece of lining fabric 5 1/2″ X 5″. Fold in half with right
side together, sew down that one side with a 1/4″ seam allowance.
Turn right side out, topstitch down both long sides.
Pin one raw edged short end at top center of quilted side,
stitch across to secure it with a 1/4″ seam allowance.
With WRONG SIDES together, push lining down inside the quilted outside.
The lining is longer than the quilted outside,
so you will fold the raw edge under twice and pin it down
enclosing the top raw edge of the quilted outside.
Topstitch around the edge of the lining fold on the outside
of the cell phone holder. See the photos for clarity.
Pin the top raw edge of the cell phone strap to the raw edge
top of the tote bag, about 5″ off center.
Stitch together the remaining blocks to make two pockets.
Use these pieces to cut out matching pocket linings.
With right sides together, stitch around all sides of both pockets
but leave an opening to turn them through.
Turn them right sides out, press and topstitch
across one edge to be used as the pocket top.
Pin them on one side of the bag lining, then stitch around three sides.
Time to sew up the bag sides and bottom! 🙂
Pin and sew around all three sides on the bag outside and bag lining.
Make sure to leave a 6″ opening in one lining side to turn the bag through.
Box the corners of both bag outside and lining as shown above.
Place the lining and quilted bags right sides together
and pin all around the top seam. Sew this seam with a 3/8″ seam allowance.
Turn the bag right side out through the opening you left in
one side of the lining, then sew that opening closed.
Pin around the top seam and
topstitch 3/8″ from the edge, making sure the hanging cell phone
holder is hanging straight.
Now, we add the straps!
Take the finished ends of the straps and slide each through
the rectangle ring already attached to the bag.
Pin through the strap, enclosing the end onto the bag,
then stitch a small rectangle through this strap right onto the bag.
Guess what?
You are DONE! YAY!!
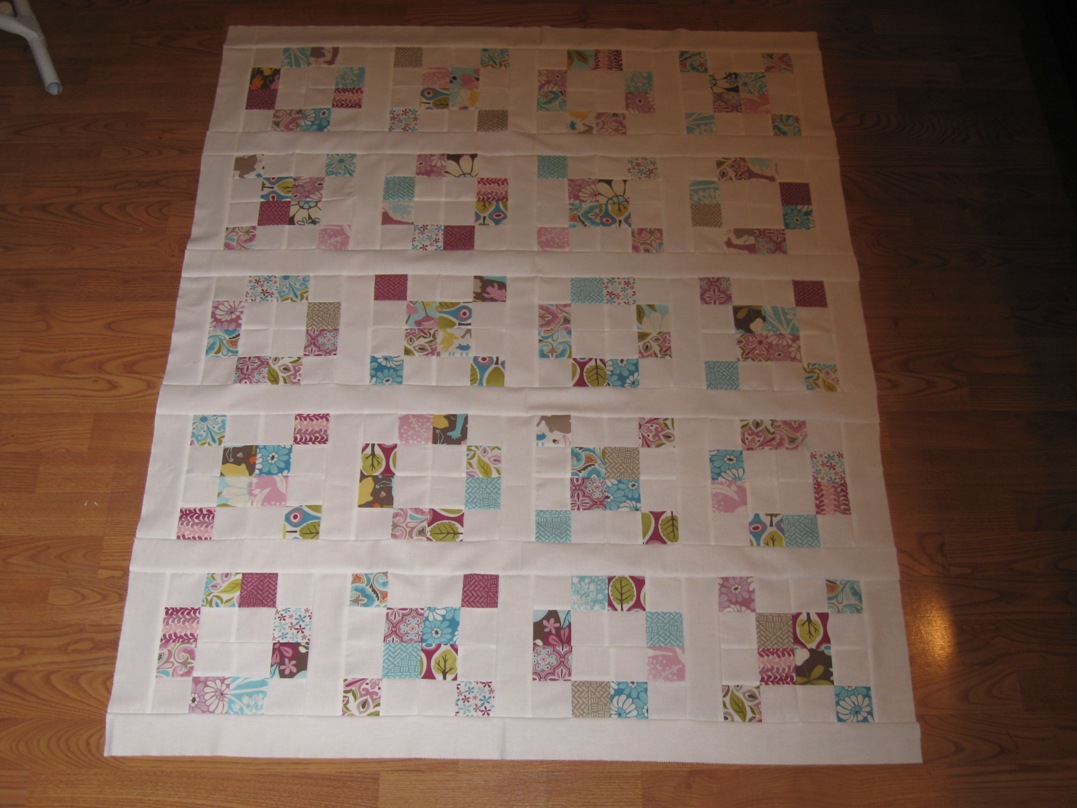
Shaggy Quilt-
This is the easiest item in this project!!
You will be able to cut two 8″ squares from each
piece of the leftover fat eighth.
(Make sure you save all the little strips you trim off!)
You will need to cut one more 8″ square from the leftover lining fabric
because you will need 81 squares and you can only get 80
from the leftover fat eighths.
Next, cut eighty-one 8″ squares from the coordinating flannel backing fabric.
And, finally, cut eighty-one 7″ squares from your batting.
Shaggy quilts are quick to make because you quilt them as you construct
the blocks! Lay an 8″ backing square right side down on the table,
then center a 7″ batting square on top of that.
Finally, lay an 8″ print square right side up,
on top of the batting and backing squares.
Some people use a walking foot for this next part. You will stitch through
the little block “sandwich” diagonally from corner to corner, both ways.
You can just use a straight stitch or a decorative stitch. I like to use a wavy stitch.
You will do this process for all 81 blocks!
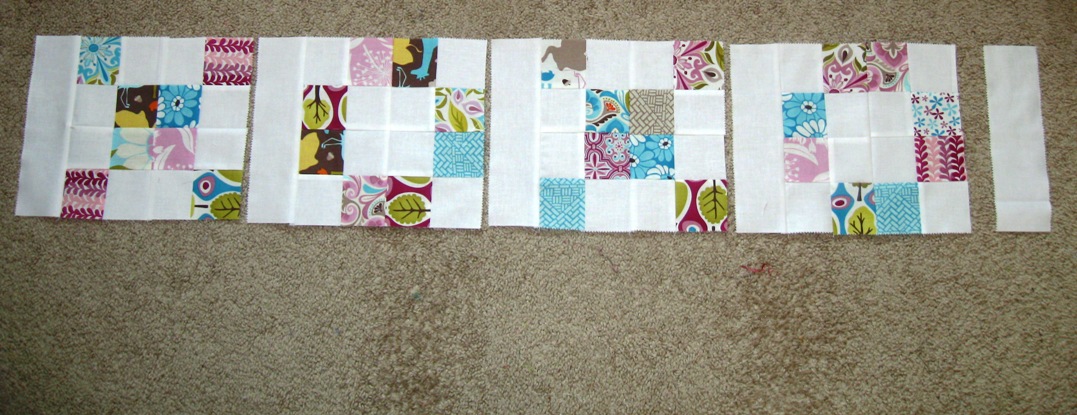
The quilt will be 9 rows by 9 rows. Layout your blocks however you like!
You will sew the blocks together by placing 2 blocks
backing side together with a 1/2″ seam allowance.
Then you will sew the rows together-
opening flat the seams as you sew over them.
Assemble all the rows this way.
This is what the back view will look like!
Next, you will sew 1/2″ in from the outside edge all around the quilt.
Again, you can use a straight stitch or a decorative stitch.
Now, the quilt is all assembled and you are ready
to clip all those raw seam allowance edges.
I use spring-loaded Fiskar clippers and clip every 1/4″ on all
seam allowances between blocks and rows and finally all around the outside
edge of the quilt. Make sure you do NOT clip through the seam itself!
Finally, machine wash and dry the quilt!
Make sure you check the lint trap in your dryer
a couple of times because it will fill up!!
The clipped seam allowance really fluff up in the
washer and dryer and look like ruffles between
the blocks! So pretty, quick and easy!
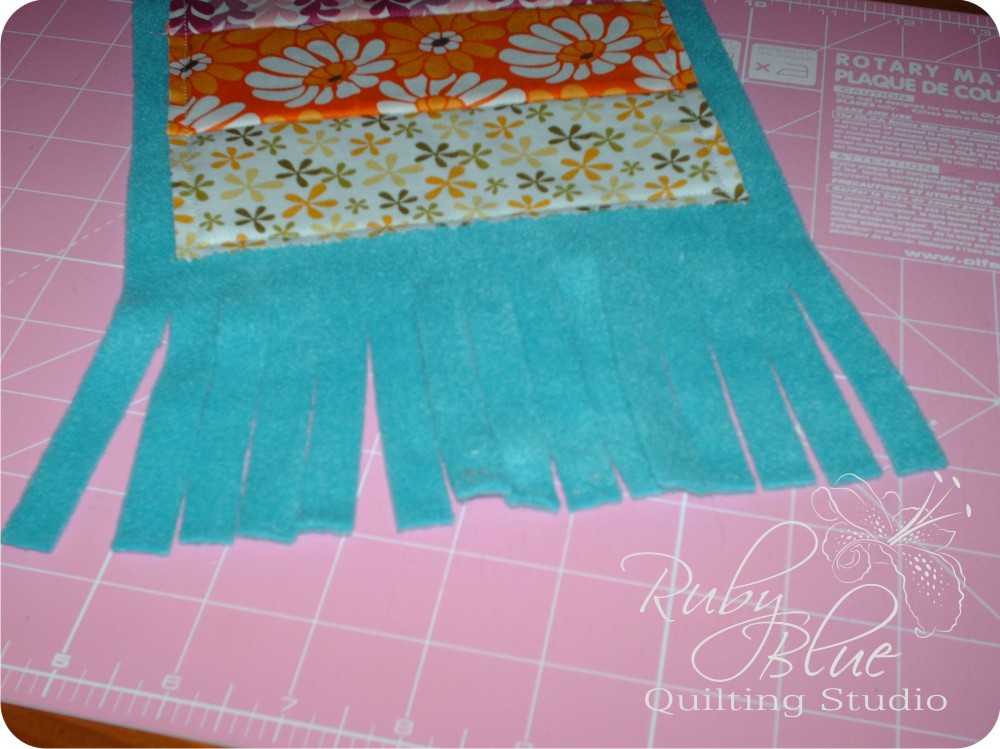
iPad Sleeve-
Remember those little strips you had leftover after cutting out
those 8″ squares from the leftover part of the fat eighths?
Use the pile on the right- the ones that are wider!!
Now you get to sew them together on the long sides!
Make one piece about 21 ” long, and 2 small sections 4″ wide.
Press the seams to one side or open- your choice!
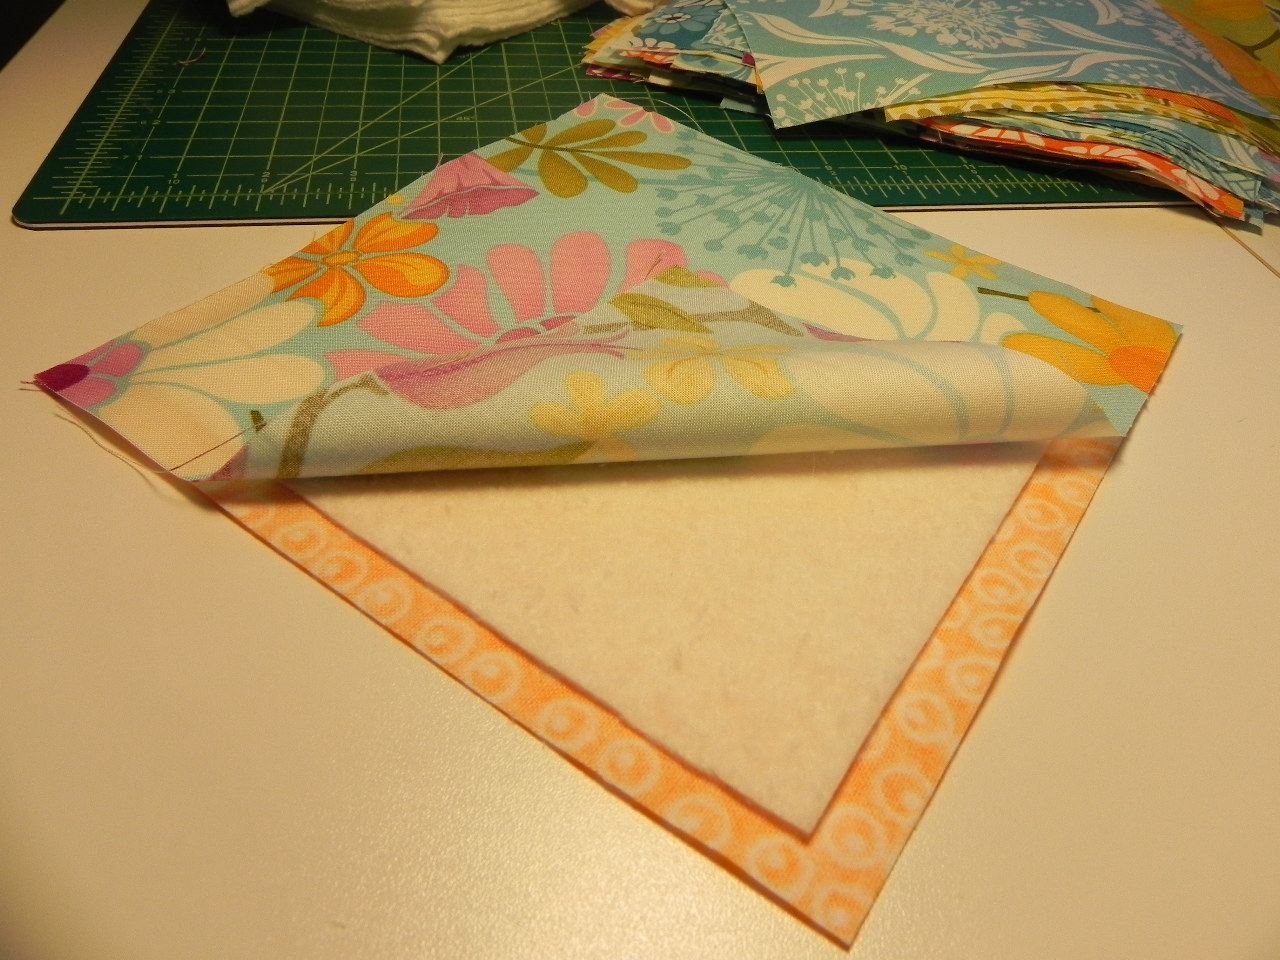
Trim the large piece to 9 1/4″ X 21″.
Fuse fleece onto the back of the larger piece and quilt as desired.
Cut a piece of leftover flannel the same size for lining!
Fold both pieces in half and cut on the folds to give
you two sleeve outer sides and two sleeve lining sides.
The two 4″ wide pieces will be the top flap to close the sleeve.
Trim the edges as shown.
Fuse fleece onto one side.
Add a strip of velcro to one side as shown.
Pin around the flap pieces with right sides together,
then sew the three sides with a 1/4″ seam allowance.
Turn right side out and topstitch around the three sides and quilt as desired.
If you’d like a small pocket on the sleeve front to hold your earbuds,
cut a piece of scrap lining fabric about 5 1/2″ X 4 1/2″,
then sew enough scrap strips together to cut out a pocket that same size.
Sew around all four sides of the pocket,
but leave an opening to turn it through.
Turn it right sides out, press, and topstitch across the top edge.
Pin in place on the front and stitch it down on three sides.
Next, sew the corresponding velcro on the outside front of the sleeve
about 2″ down from the top edge. Pin the raw edge of the top flap, right sides
together on the top of the quilted sleeve outside back.
If you want a little loop to insert in the top seam to use to pick up the sleeve,
it must be inserted now between the top flap and the back of the sleeve.
I made mine from a lining scrap 8″ X 2″. I pressed the scrap
lengthwsie in half, then opened the fold and pressed the two long
raw edges in touching the fold line then repressed
and topstitiched on both long sides.
Place the two outside quilted pieces right sides together and pin then sew the two sides and bottom seams with a 1/4″ seam allowance. Repeat with the flannel lining, but leave an opening in one side to turn the sleeve through.
Turn the outside sleeve right sides out and slide it into the lining
that is wrong side out. Pin around the top seam,
then sew it with a 3/8″ seam allowance.
Turn the sleeve right sides out through the lining side opening
then sew that opening closed.
Push the lining down into the sleeve and topstitch
around the top seam, and you are DONE!
I really LOVE my Central Park sleeve!!
And so does my iPad!! 🙂
Four down and one to go!
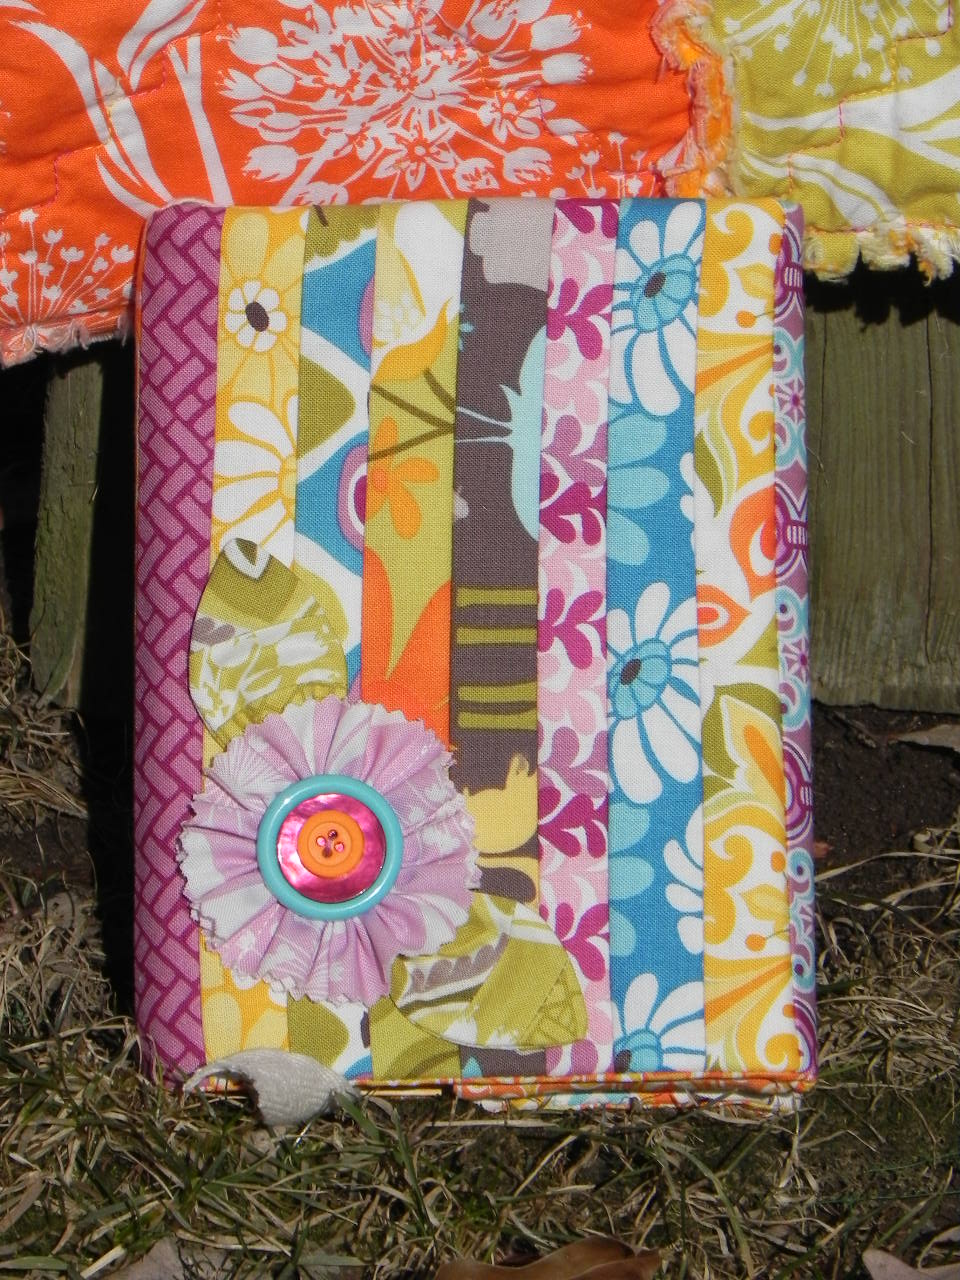
Journal Cover-
You still have some leftover scrap strips!!
This time, you have scrap strips about 1″ wide by 8″ long.
The journal book I used for this project I bought at Michael’s
in their $1.00 bins, made by Mary Engelbreit.
I laid the book on top of a scrap of batting to judge what size to cut,
then decided on 18″ wide by 8 1/2″ tall.
I drew a straight vertical line down the middle and placed
the edges of 2 strips on that line and sewed a 1/4″ seam.
Opened up the strips and pressed them flat. Then continued to add strips
one at a time, right sides together with edges matching,
sew the seam, flip open and press until I reached the end of the batting.
Then do the same in the opposite direction until you reach the other end.
Trim the edges and cut a piece of lining fabric the same size.
I cut a 10″ piece of the woven cotton ribbon with Moda printed on it,
that was wrapped around the fat eighth bundle, for a bookmark.
I placed one end at the middle of the strip-pieced cover,
placed the lining right sides together then pinned and sewed
the two long sides with a 1/4″ seam allowance.
Turn the raw edges at each end under, pin and topstitch.
Press well and slide one end at a time onto the book hard cover.
I liked how it looked, but felt it needed something more…
So, I selected 2 scrap strips, sewed the short ends together
forming a big circle.
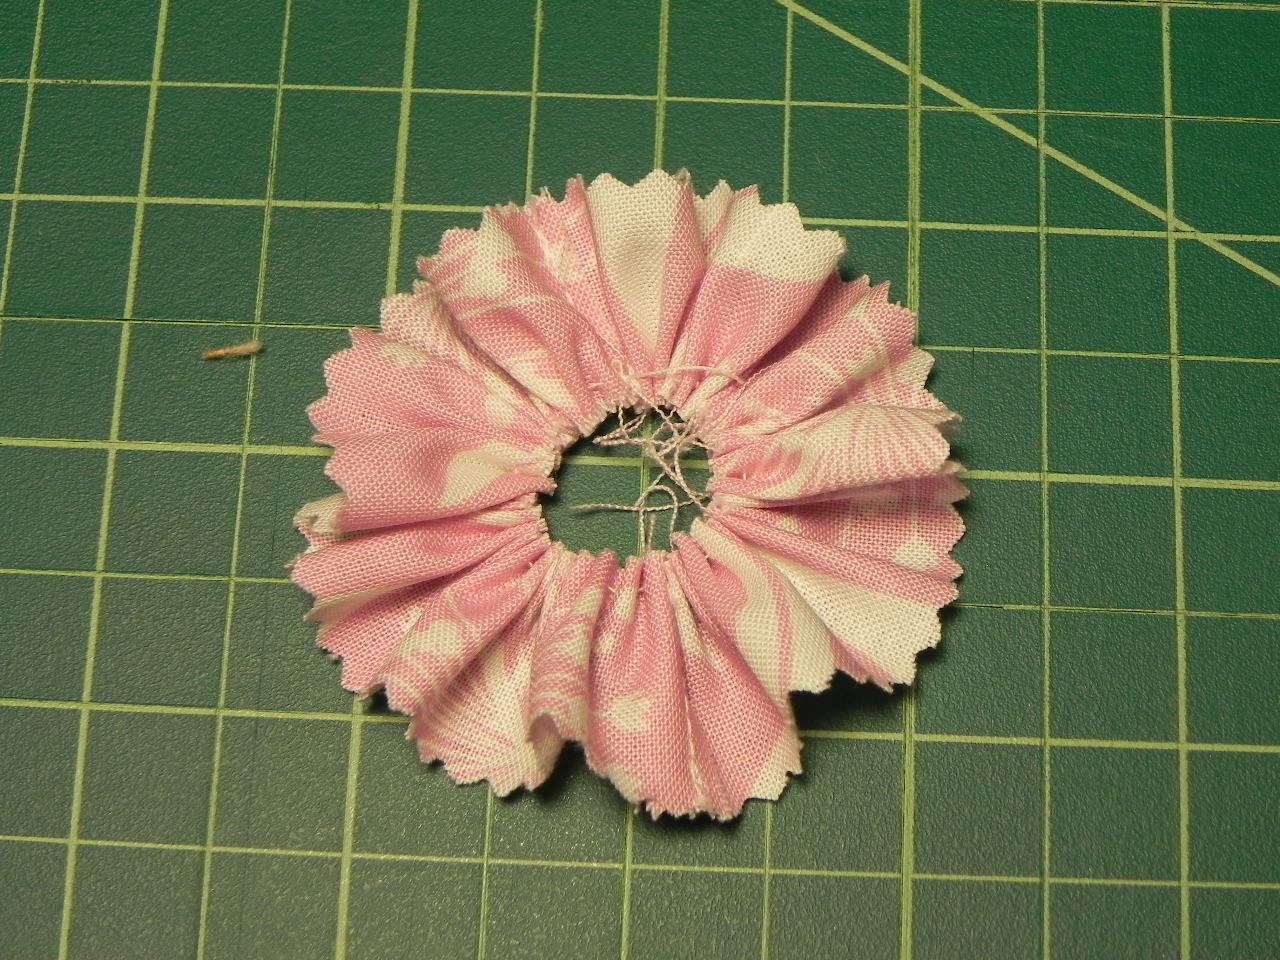
I hand gathered one raw edge and pulled the
thread up to make a cute ruffled circle.
I then selected three green scrap strips, sewed them together
on the long sides, pressed the seams open and cut the piece in half.
Then folded each in half again with right sides together.
I rounded the corners and made 2 leaf shapes.
I sewed the edges and turned the leaf shaped right sides out and
hand gathered the bottom straight edge of each.
I used a hot glue gun to secure the 2 leaves and the round flower onto
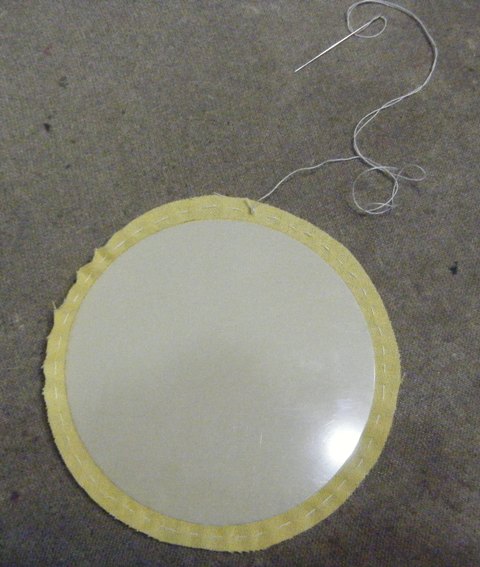
the journal cover and completed it with three stacked buttons.
Yippee skippee!! All done!
You could use the book for a quilt journal, or a daily thoughts journal,
or a photography journal or ????? Whatever you want!!
WHEW, huh?? Five fun projects you can take with you
to the park for a day of fun and relaxation!

one 63″ X 63″ shaggy quilt
one camera bag
one large tote bag
one iPad sleeve
one journal cover
I hope you like these designs and will
come visit Yogi and me real soon at my blog
Take care and
Polly Monica