
![]()
One of the things that makes the biggest impact in how cozy your house feels are your window treatments. I love quilting but my windows were so neglected. I decided to come up with a way to make EASY curtains that will cozy up any room. You can use charm packs to tie in your bed quilts or couch quilts or do like I did and try something completely different. I’ve never used French General fabrics before but I am in love. Petite Odile is perfect for people who love sewing.

- Exterior fabric ( Width of window + 5″ x WOF) *if using a wraparound type curtain rod, you need to add 10″ or so instead, depending on how far the rod protrudes on each side)
- Lining fabric (same amount as exterior fabric)
- Charm squares (Each charm pack gives you about 160″ of casing. Each window needs about 80″ of casing. You can use any extras to make a small pillow or runner to coordinate.

2″ ribbon (about 5 yards per window)

First remove both selvages from exterior fabric and lining fabric. Cut a 5″ strip the entire length of both pieces (parallel to where the selvage runs. These will be your rod pockets. We will be using 2 layers to add a nice drape and better light blocking since these are quilting cottons and not home dec fabrics. The bonus is that you can arrange your backing fabric so that it peeks out on the bottom if you like.

Take the remaining large sections of fabric for the interior and exterior. Sew right sides facing {RSF} on 3 sides. Leave your top edge unsewn. Clip corners. Now flip out like a pillowcase for the main body of your curtain. Press well and top stitch the sides and bottom edge. I like to top stitch 2 lines because it looks more professional.

You will need about a 1/2 charm pack per window for your ribbon casing. Cut charms in half.

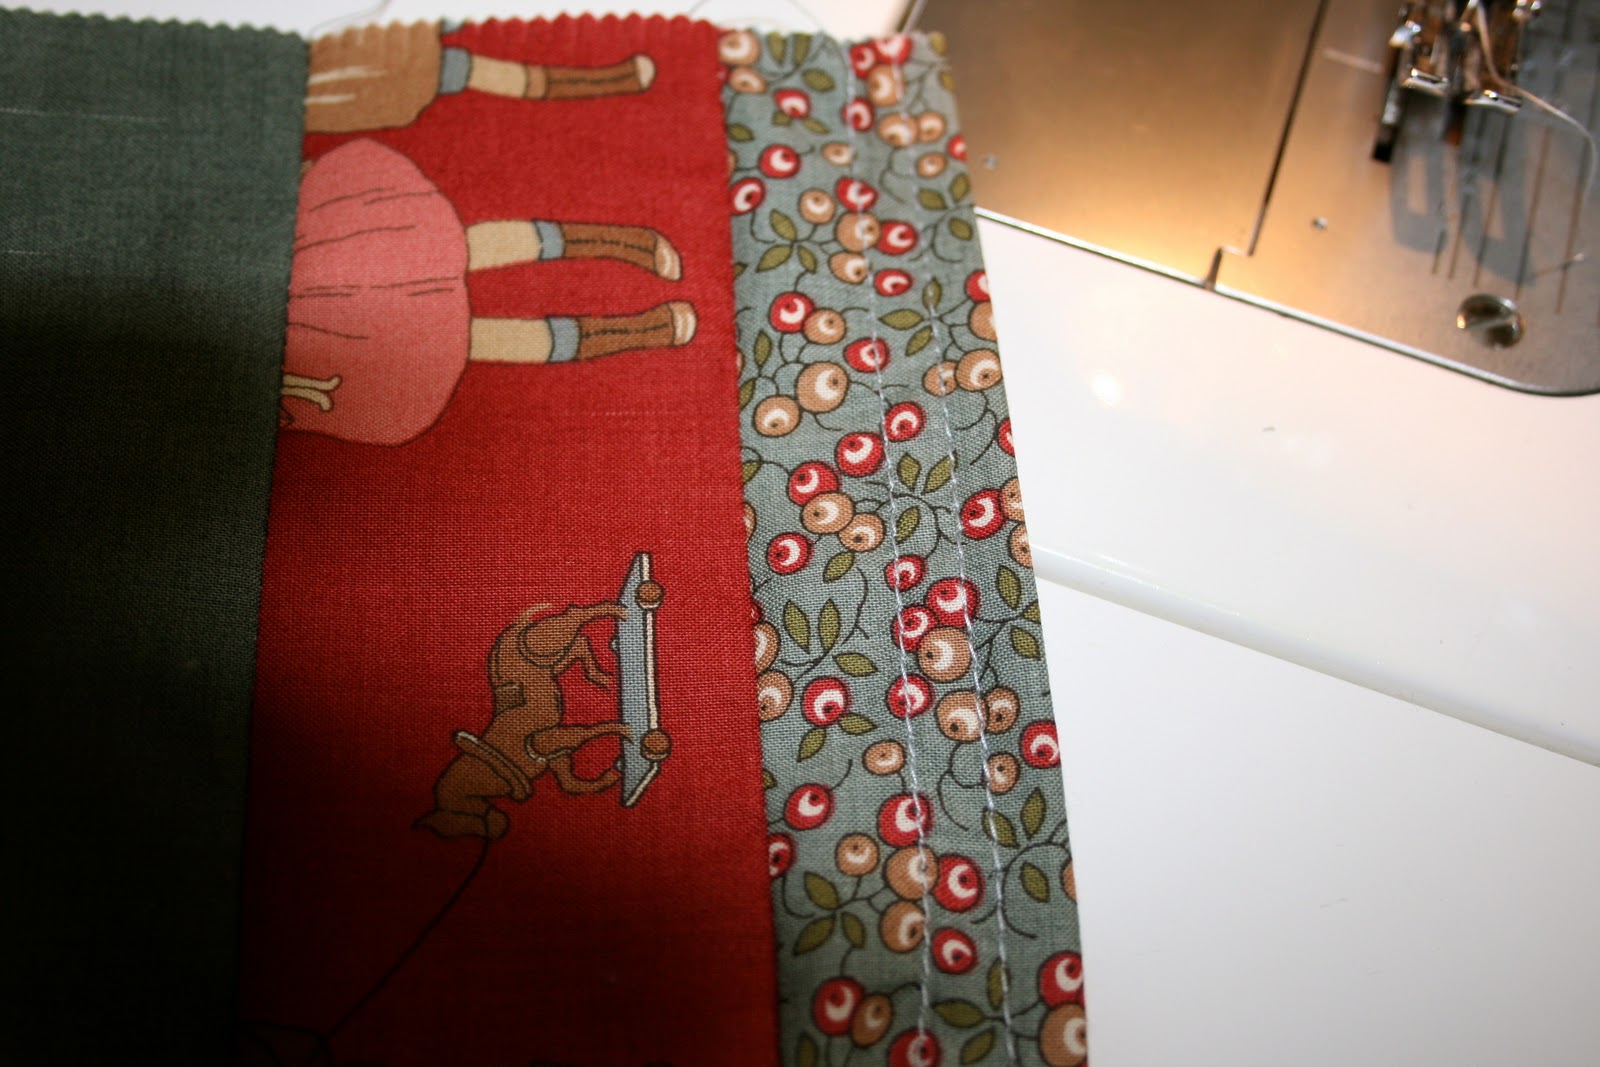
Sew 2 rows of 20 2.5″ coins four your 2 window casings. Press your seams in one direction (preferably toward the bottom)
Take your bottom edge and fold up 1/2″. Turn the raw edge toward the fold and top stitch to secure. Once again, I top stitched twice just because I like that look.

Fold your casings RSF and sew into a tube.

Pull your tube right side out. Press your tube so that the seam line centered on the underside of the casing.

Match your bottom edges up with the bottom of your curtain. I like to arrange my 2 casings so that there is half the curtain between the casings and 1/4″ of the curtains on each side of the casings. Affix your casings on the window by sewing up the sides. Don’t sew your casing opening shut and do not sew across the top of the curtain- we will have to run a ribbon through it. In the photo it appears that I have sewn over the casing that but is just the double stitching matching up.
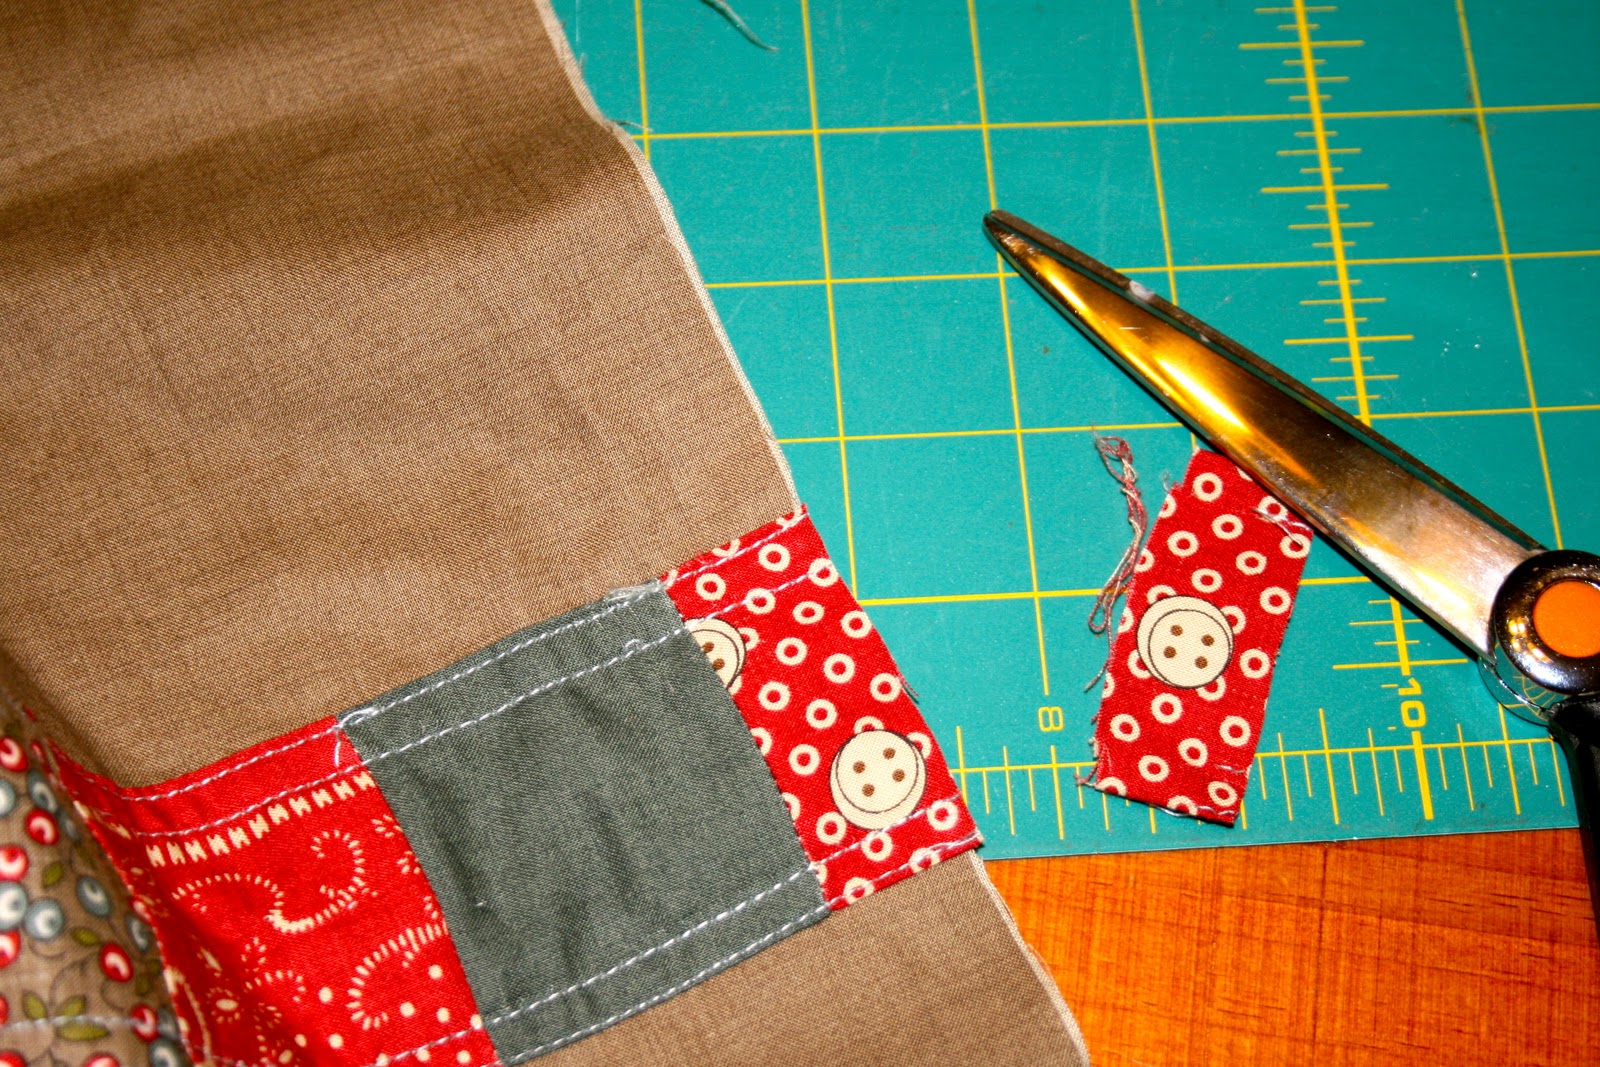
Cut off any excess casing at the top (raw edge) of your curtain.

Take a length of ribbon (I used about 2.5 yards per side and trimmed up later…you can use the extras in the room to tie things together). Put a safety pin on one edge to act as a guide. I also used a safety pin to act as a “stopper” at the halfway mark.

Once you’ve threaded your ribbon to the halfway point, stop. Take the ribbon that is still outside and safety pin it between the casing stitch lines on the back. This is to keep it out of our way as we are finishing up.

Now take your 5″x length of fabric sections. Sew 2 the short edges RSF. Turn out, press, and top stitch. Fold in half lengthwise hiding your lining fabric. This is your rod pocket.

Sew the rod pocket along the top edge of the curtain. Make sure you catch your ribbon in the seam. Make sure you DON’T catch the safety pin in your seam.

I serged the raw edge of the rod pocket. You could also zigzag. If you don’t want to do the rod pocket, you can just fold over the curtain at the top. I just did not want my casings to be on the rod pocket – personal preference. Hang your curtain and adjust your ribbons. I tied one knot before I tied my bow. then cut off the excess. You can also treat with fray check if you anticipate handling these much. Make sure you remove the safety pins before you hang your valances.

A really cute window treatment- so easy I could do it!

On a smaller window…
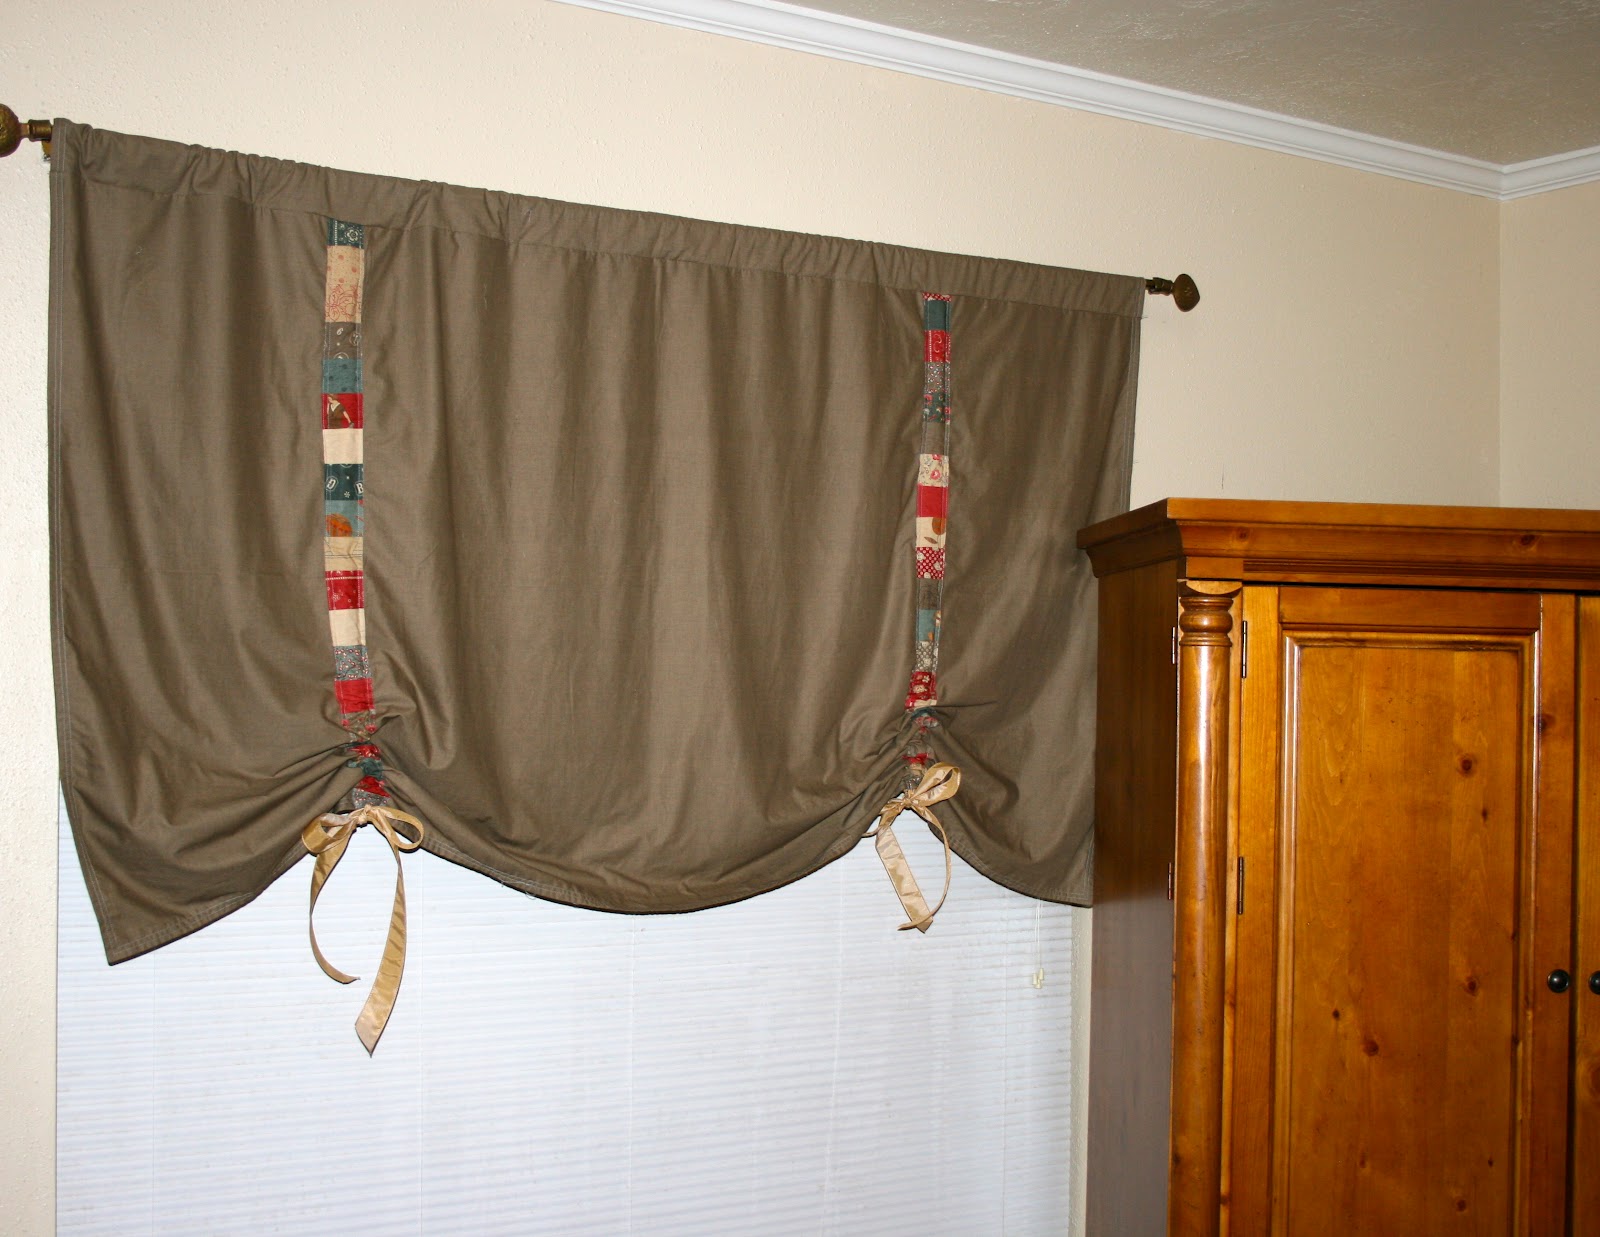
or a bigger one…
Now go cozy up those windows!
Mary Lane Brown
{tulip-patch.blogspot.com}
![]()
