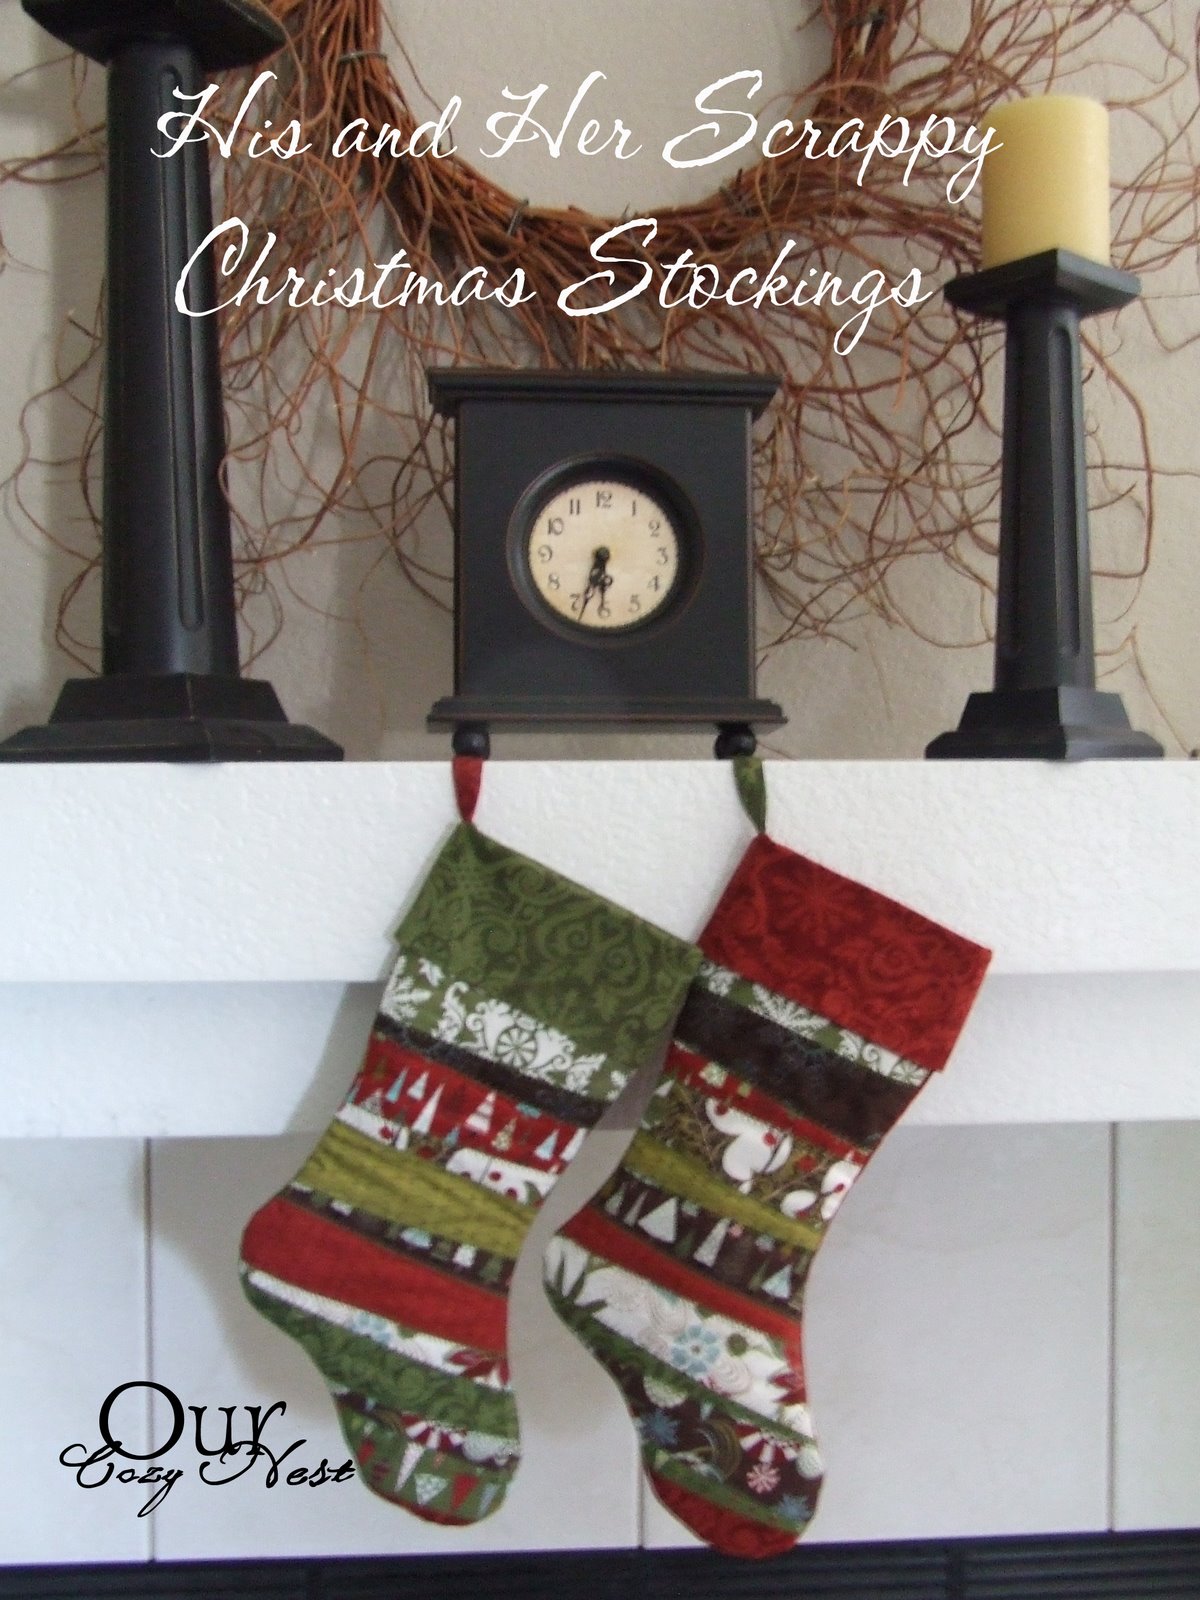
Hi there! It’s Melissa Mortenson from the Polkadot Chair, today I am going to share with you a tutorial for a Christmas Tree Skirt & Runner. I think this is my favorite project for Moda Bake Shop yet.
Stop by my blog and say hi, ask me questions or let me know what you think!
Do you have a cute little table top Christmas tree? Why not make a quick and easy tree skirt for it? Plus you will have enough fabric left in your honey bun to make this cute table runner to match!

1 Figgy Pudding Honey Bun
1 Figgy Pudding Turnover or Charm Pack
1 Moda White Jelly Roll
2 yds white fabric for backing
1/4″ yd. or 1 fat quarter, blue fabric for binding on tree skirt
Embroidery floss
Buttons
Heat n Bond Lite
Ribbon
Batting (I used quilters dream cotton)


Very IMPORTANT! Before you begin to sew, if you want to make both the runner and the tree skirt make sure that you pick out all of your fabrics first! Otherwise you might run out of a color that you want.
To begin, you need 11 honey bun strips. You need to set them up in a color pattern that starts in the center and mirrors out to the edges. You want to match rows 1 & 11, 2 & 10, 3 & 9, 4 & 8, 5 & 7 and row 6 will be your center row.
You need them to match because your are going to cut them into triangles, and flip the template after each cut. (if you are confused now, don’t worry just keep reading it will make sense with the photos).
Sew all rows together with 1/4″ seam. Press all seams to one side.
You need to make a template. To do this you need 1, 12×12 piece of scrapbook paper. Cut it to 9×12, find the center of the 9″ side, measure from the center down to the opposidte corners, cut. Repeat for other side. For photo instructions to make the triangle click here (NOTE: your triangle will be 9×12, NOT 6×9 like in the photos)
After you have made your template, lay it out on your sewn rows of fabric. Using your ruler & rotary tool, cut out the triangle, making sure that it is all the way over to the edge, you will need every centimeter of fabric, so double check it.
Cut off selvage edges.
You will get a piece that looks like this.
Next, flip the template 180 degrees. Line up the edge of the template with the cut edge of the fabric strip. Cut out your next piece.
Flip template again and repeat, until you get 9 triangles… (note your last triangle you may be a little short, don’t worry still cut it, that will be the edge piece of your tree skirt).
Arrange your cut pieces into a circle, alternating patterns. (you will have 2 next to each other that are the same pattern, use this as the “seam” or opening of your tree skirt).
Sew pieces together with 1/4″ seam. Leave one seam open, this will be the openeing of your tree skirt.
Cut out center of the skirt, leaving 1″ of the red strip still showing. (if your tabletop tree has a wider trunk, cut a larger hole).
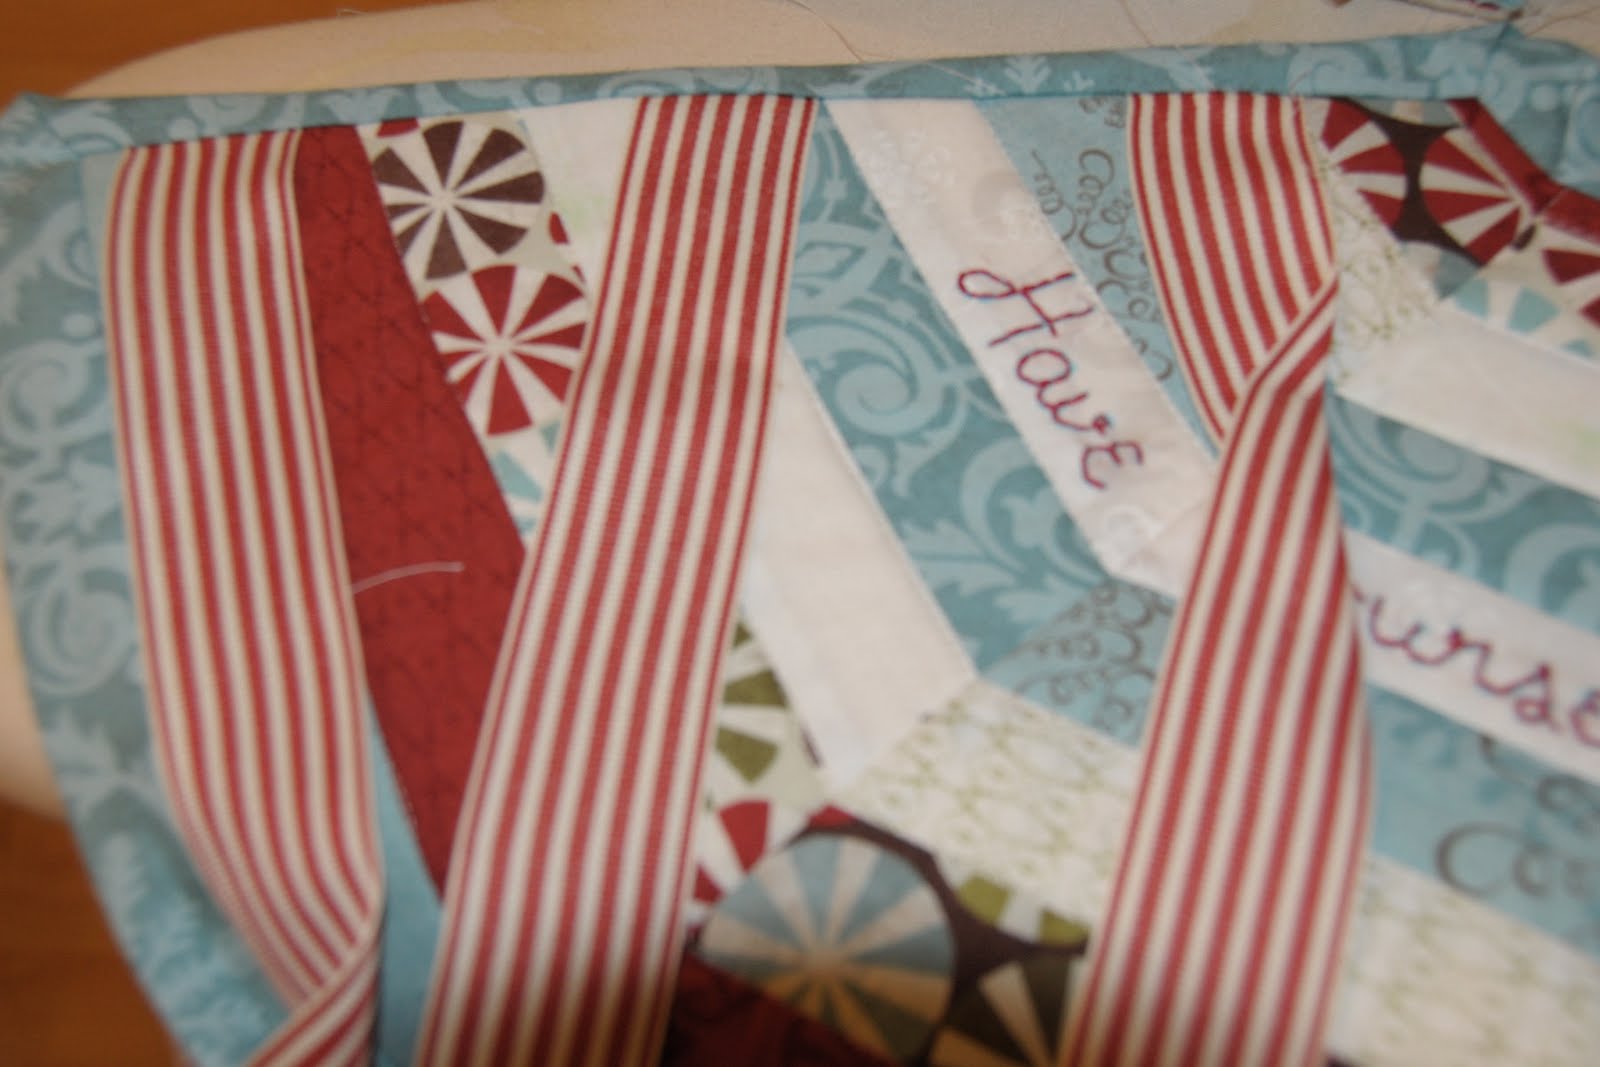
If you wish to hand embroider a phrase on your tree skirt do it now. Print off your words, (the font I used is called Noodle). Then using a light box and a water soluble pen, trace the letters onto the tree skirt.
Hand embroider, using a simple backstitch.
When finished with the embroidery, layer with batting and backing and quilt as desired. I just did a stitch in the ditch.
Cut 6 pieces of ribbon about 10″ long. Pin to opening of tree skirt. Sew in place before you bind it.
Sew on binding, making sure not to catch ribbon in binding.
Now onto the table runner. This runner is LONG. It is 14″x 105″. I wanted a long runner to fit my big table. If you want it shorter just elimante some of the blocks.
To begin:
From your honeybun, collect 5 strips each of 4 different color ways. I used the blues, greens, reds & browns.
Arrange how you like, and sew togther with 1/4″ seam. Press seam to one side.
Cut strip into 3, 14″ pieces, cutting off selvage edges.
Repeat with the other 3 colors.
You will have 3 blocks each of 4 different colors (for a total of 12 blocks).
Sew 2 white jelly roll strips togteher. Cut into 14″ pieces (same as you did for the honeybun pieces, remember jelly roll strips are wider, 2 1/2″ wide).
Repeat this 4 times so that you have a total of 10 white blocks each 2 strips tall x 14″ wide.
Cut 2 14″ pieces from 1 jelly roll strip.
Note: I quilt on an embroidery machine so I don’t have much control over where the stitches go, if you are free motion quilting this, BEFORE you sew your blocks together, skip to the applique steps. It will be easier to applique the white blocks before they are sewn with the colored blocks. I think it would look nice to do echo quilting around the shapes on the white blocks.
Sew blocks together. This is the color arrangement that I used, but you can change yours to your taste (it would also look nice going dark-light)
Row 1: 1 single- 14″ white jelly roll strip
Row 2: Brown, honey bun block
Row 3: White, jelly roll block
Row 4: Red, honey bun block
Row 5: White, jelly roll block
Row 6: Green, honey bun block
Row 7: White, jelly roll block
Row 8: Blue, honey bun block
Row 9: White
Row 10: Red
Row 11: White
Row 12: Green
Row 13: White
Row 14: Blue
Row 15: White
Row 16: Red
Row 17: White
Row 18: Green
Row 19: White
Row 20: Blue
Row 21: White
Row 22: Brown
Row 23: 1 – 14″ Jelly roll strip.
You will have 1 brown block left over, you can use it if you need to make your runner longer.
Layer runner with batting and backing and quilt as desired, I quilted mine with a interlocking circle pattern.
Next applique…
To cut the words out you can use the computer font method
here.
Or, if you ahve an electronic cutting machine (like a cricut), you can use this method. You can also buy a chipboard alphabet at a scrapbook store that you like and trace those letters.
Cut the words out with your machine 3 3/4″ tall. (you will need the words, cheer, merry, bright, joy, jingle), then flip the page over so the letters are backwards. Trace onto a piece of Heat n Bond light.
Roughly cut the letters out, and adhere (with your iron) to the back of your turnover pieces. (you could also use a charm pack, I just had a turnover on hand).
Cut out, and iron onto your runner.
This is how I laid out the applique on my runner: The color in parentheses is the color I cut the applique out of the turnover pieces. (the applique is only on the white blocks)
Order of the white blocks: (refer to photos above).
1: trees (green)
2: “merry” (red)
3: ornaments (blue)
4: “bright” (blue)
5: peppermints (red/white)
6: “cheer” (blue)
7: holly leaves (green)
8: “joy” (red)
9: trees (green)
10: “jingle” (brown)
For the applique shapes, I used various clipart, for the holly leaves I used
Camille’s pattern that she posted on moda bake shop last month. The peppermint swirls are also from that pattern, reduced 50%.
Iron the appliques onto the runner. Stitch around each with a straight stitch. I just used raw edge applique with a straight stitch. I am okay if it frays (I actually prefer that look for this project).
Bind using leftover honey bun strips. (you will need 5 strips)
Sew buttons for the holly berries.

1 runner and 1 tree skirt


 From the background fabric, cut 2 pieces 4″ x 63″. Sew to the sides of your center panels, press your seams.
 Cut 2 pieces of 4″ x 50″. Sew to the top and the bottom of your center panel. Trim any excess. (there should be about 1/2″ extra, depending on how exact your seam allowance is.) Press well.
 The first border is complete.
 Take 7 squares from the layer cake and cut each piece into 4 strips—each 2.5″ wide, for a total of 28 strips. These will be for the next border. Mix up the fabrics so they will be placed randomly around the quilt.
 Join 6 strips of fabric end to end. Make 2.
 Attach these borders to the sides of the quilt first, centering them along the edge, cutting off the excess after sewing the border on.
 Then attach the top and bottom borders, again centering them and then cutting off the excess.
 Now, to finish off the quilt, cut 6″ strips for the final border. I cut two pieces 53″ x 6″ for my quilt, but you will want to measure your own quilt top at this point.
 When you measure, measure in the center or your quilt, not at the outside edge. This will help prevent wavy borders. Each person’s seam allowances will cause these lengths to vary, that is why I’m recommending this method. My final two borders measured 6″ x 88″. Again, you will want to measure your own quilt at this point for the exact measurement that you will need. After attaching borders, press all seams and the top of your quilt is done! Easy enough, right?
 I like to make a pieced backing for my quilts, so I added a little checkerboard to the top and the bottom of the quilt using more of the layer cake pieces. Of course you can skip this step and back the quilt with one fabric if you would like.
 Attach to the checkerboard strips to the top and the bottom of the center panel.
 Cut two more pieces of background fabric 11″ x 68″. Attach to the top and the bottom of the checkerboard strips.
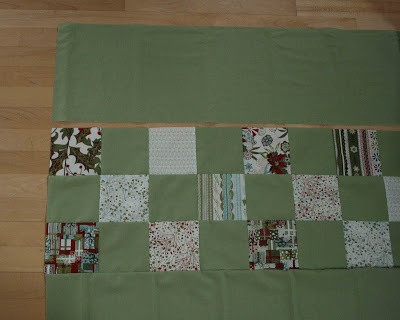 Press well and you are ready to baste your quilt.
 I baste my quilts on a tile floor which has a built in grid. It makes it easier to center the front and back of the quilt while keeping everything fairly square. It’s especially helpful in cases like this where both the front and the back are pieced.


 by amandajean of crazymomquilts


 Step 9 – Explained in picture.


