Hi there, this is Cheryl from Meadow Mist Designs and I am so excited to share my first project for Moda Bake Shop! I love the cute Moda candy packs and all of Fig Tree & Co.’s fabric lines so I was thrilled to combine them to make the Candy Circle baby quilt. With just four mini charm packs (or just one charm pack), a focal print fabric, and some background fabric, you can have a cute baby quilt ready to gift.

4 mini charm packs (also called candy packs) or 1 charm pack: Mirabelle by Fig Tree & Co.
3/4 yard of a focal print: Mirabelle Breeze 20225
5/8 yard of a background fabric (3/4 yard if you include the optional pieced backing): Bella Solids White Bleached
3/8 yard for binding: Mirabelle Bark 20227
1 and 1/4 yards for backing: Bella Solids Green Olive (for a 2″ overhang)

Step One – Cutting the Fabrics
*Note: if you cut each strip in each step you may have a few extra pieces cut.
Candy Squares
1) If starting with a charm pack, cut each (5” x 5”) charm square into 4 (2.5” x 2.5”) patchwork squares for a total of 168 squares (2.5” x 2.5”) (if starting with candy packs, skip to step 2)
2) Select 132 of the 168 squares (2.5” x 2.5”) to use in the front of your quilt. Pick squares with good contrast with the background. You can use the leftover squares for a pieced backing.
Focal Fabric
1) Cut 3 strips 4.5” x WOF strips
a) Cut each strip into 4.5” x 4.5” squares (9 per strip) for 24 squares (4.5” x 4.5”)
These 4.5” x 4.5” squares are the “full focal blocks”.
2) Cut 4 strips 2.5” x WOF
a) Cut 2 strips into 2.5” x 4.5” rectangles (9 per strip) for 12 rectangles (2.5” x 4.5”)
b) Cut 2 strips into 2.5” x 2.5” squares (16 per strip) for 28 squares (2.5” x 2.5”)
Background Fabric (abbreviated bg in this pattern)
1) Cut 8 strips 2.5” x WOF
a) Cut 4 strips into 2.5” x 4.5” rectangles (9 per strip) for 28 rectangles (2.5” x 4.5”)
b) Cut 4 strips into 2.5” x 2.5” squares (16 per strip) for 64 squares (2.5” x 2.5”)
Step Two: Assembling the Blocks
The Candy Circle quilt contains 6 types of blocks. Using the following amounts of fabric pieces and following the sewing pictures, sew pieces into rows and then rows together into blocks. Press all seams open.
Full Focal Blocks:
24 focal print squares (4.5″ x 4.5″)
1/4 Focal Blocks
Using 16 bg squares (2.5″ x 2.5″), 16 bg rectangles (2.5″ x 4.5″), and 16 focal print squares (2.5″ x 2.5″), make 16 1/4 Focal Blocks
3/4 Focal Blocks
Using 12 bg squares (2.5″ x 2.5″), 12 focal print squares (2.5″ x 2.5″), and 12 focal print rectangles (2.5″ x 4.5″), make 12 3/4 Focal Blocks

Full Patchwork Blocks:
Using 48 focal print squares (2.5″ x 2.5″), make 12 Full Patchwork Blocks
3/4 Patchwork Blocks
Using 72 patchwork print squares (2.5″ x 2.5″) and 24 bg squares (2.5″ x 2.5″), make 24 3/4 Focal Blocks
1/4 Patchwork Blocks
Using 12 bg squares (2.5″ x 2.5″), 12 bg rectangles (2.5″ x 4.5″), and 12 patchwork squares (2.5″ x 2.5″), make 12 1/4 Patchwork Blocks
Step Three: Assembling the Quilt Sections
The quilt contains 4 quilt sections, each section containing 25 blocks in a 5 rows x 5 columns arrangement. Each section contains the following number of blocks:
Arrange the 25 blocks in a 5 by 5 block arrangement as shown below:
Sew blocks together into rows (pressing seams open) and then sew rows together pining at each intersecting seam (pressing seams open).
Repeat 3 more times for a total of 4 quilt sections. (Alternatively, you may layout the full 10 x 10 block arrangement for the whole quilt, sew the blocks into rows, then sew the rows together).
Sew the 4 quilt sections together (pressing seams open).
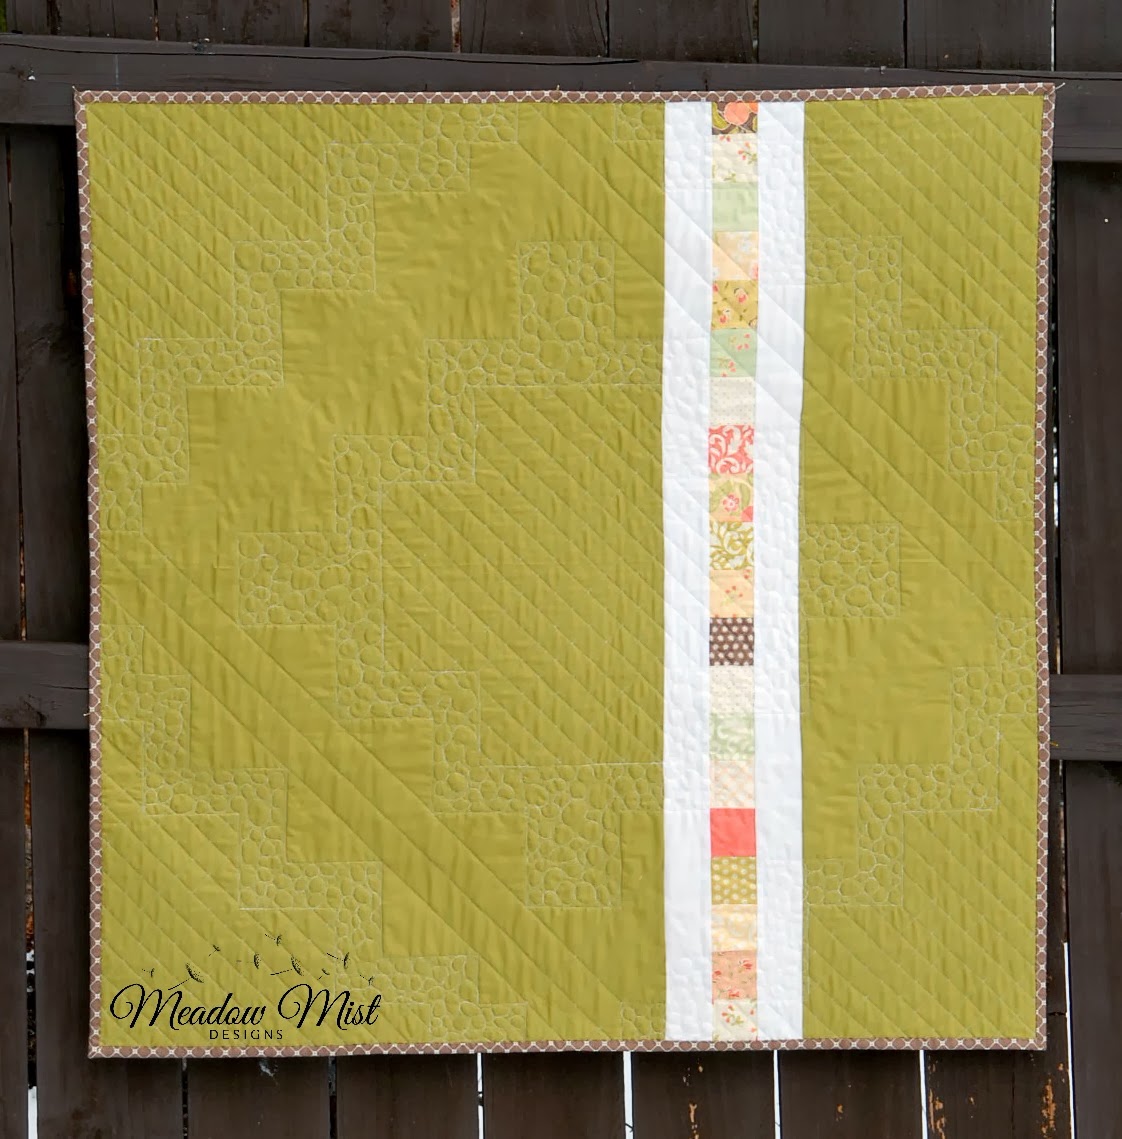
Optional Pieced Backing
Select 22 patchwork squares
Cut 2 additional strips 2.5″ x WOF of the background fabric
Sew the 22 patchwork squares into a row, then sew the 2.5″ x WOF background strips onto either side of the patchwork row.
Slice the backing yardage (I made my cut about 2/3 of the way across the fabric) and sew the patchwork section into the background yardage.
Step 4: Finishing the Quilt
1) Layer the quilt top, batting, and backing and baste the quilt.
2) Quilt as desired. I quilted the focal fabric areas in a straight line lattice, quilted the background areas using a small pebble design, and quilted the patchwork squares with straight line quilting.
3) Bind the quilt using 5 strips 2.5” x WOF (for straight, not bias binding). More information on binding can be found here.