2012 in Review

Happy New Year quilters and sewers! 2012 was a busy year at the Moda Bake Shop. 199 posts published! Click through to see the top ten projects from 2012.


The Moda Bake Shop’s Top Ten Projects of 2012:

1. Sunbathing Companion by Stella Rutherford | {The Golden Adventures of a Very Dark Horse}


2. Sophie Car Seat Quilt by Jennie Pickett | {Clover & Violet}

3. Cathedral Window Pincushion by Kim Niedzwiecki | {gogokim.blogspot.com}

4. Patchwork Chevron Quilt by Jeni Baker | {In Color Order}

5. Renaissance Waves Quilt by Karin Vail | {cascadequilts.com}

6. Owl Tag Along Toddler Backpack by Angela Pingel |{cuttopieces.blogspot.com}


7. Lucky Layers Tiered Dress by Anshu Jain | {Blooms And Bugs}

8. So Soft Washcloths by AnneMarie Chany |{Gen X Quilters}

9. Isosceles Picnic Quilt by Penny Layman | {sewtakeahike}

10. Four Squared Quilt by Polly Monica | {auntpollysporch.blogspot.com}

Wishing you a happy, safe, and sew-ful New Year,

Chic Mama Stroller Organizer

Hello again, it’s Jennie from Clover & Violet and I’m here today with a fun project for those with little ones!  As a busy mom, I am always looking for ways to incorporate quilting with fun and function, so today I’m sharing my quilted stroller organizer.

1 {Coquette} Charm Pack
1/2 yard Small {Flowers} Print
1/2 yard Large {Paisley} Print
1 yard Fusible Woven Interfacing
1 – 10″ zipper
1 – 16″ zipper
10″ Stem-a-Seam {optional}
20″ – 5/8″ Velcro
6 Mini Anorak Snaps & Snap Tools

Begin by selecting 27 charms, cut 6 in half  for 12 – 2 1/2″ x 5″ pieces, from one 2 1/2″ x 5″ rectangle, cut a 2 1/2″ square.

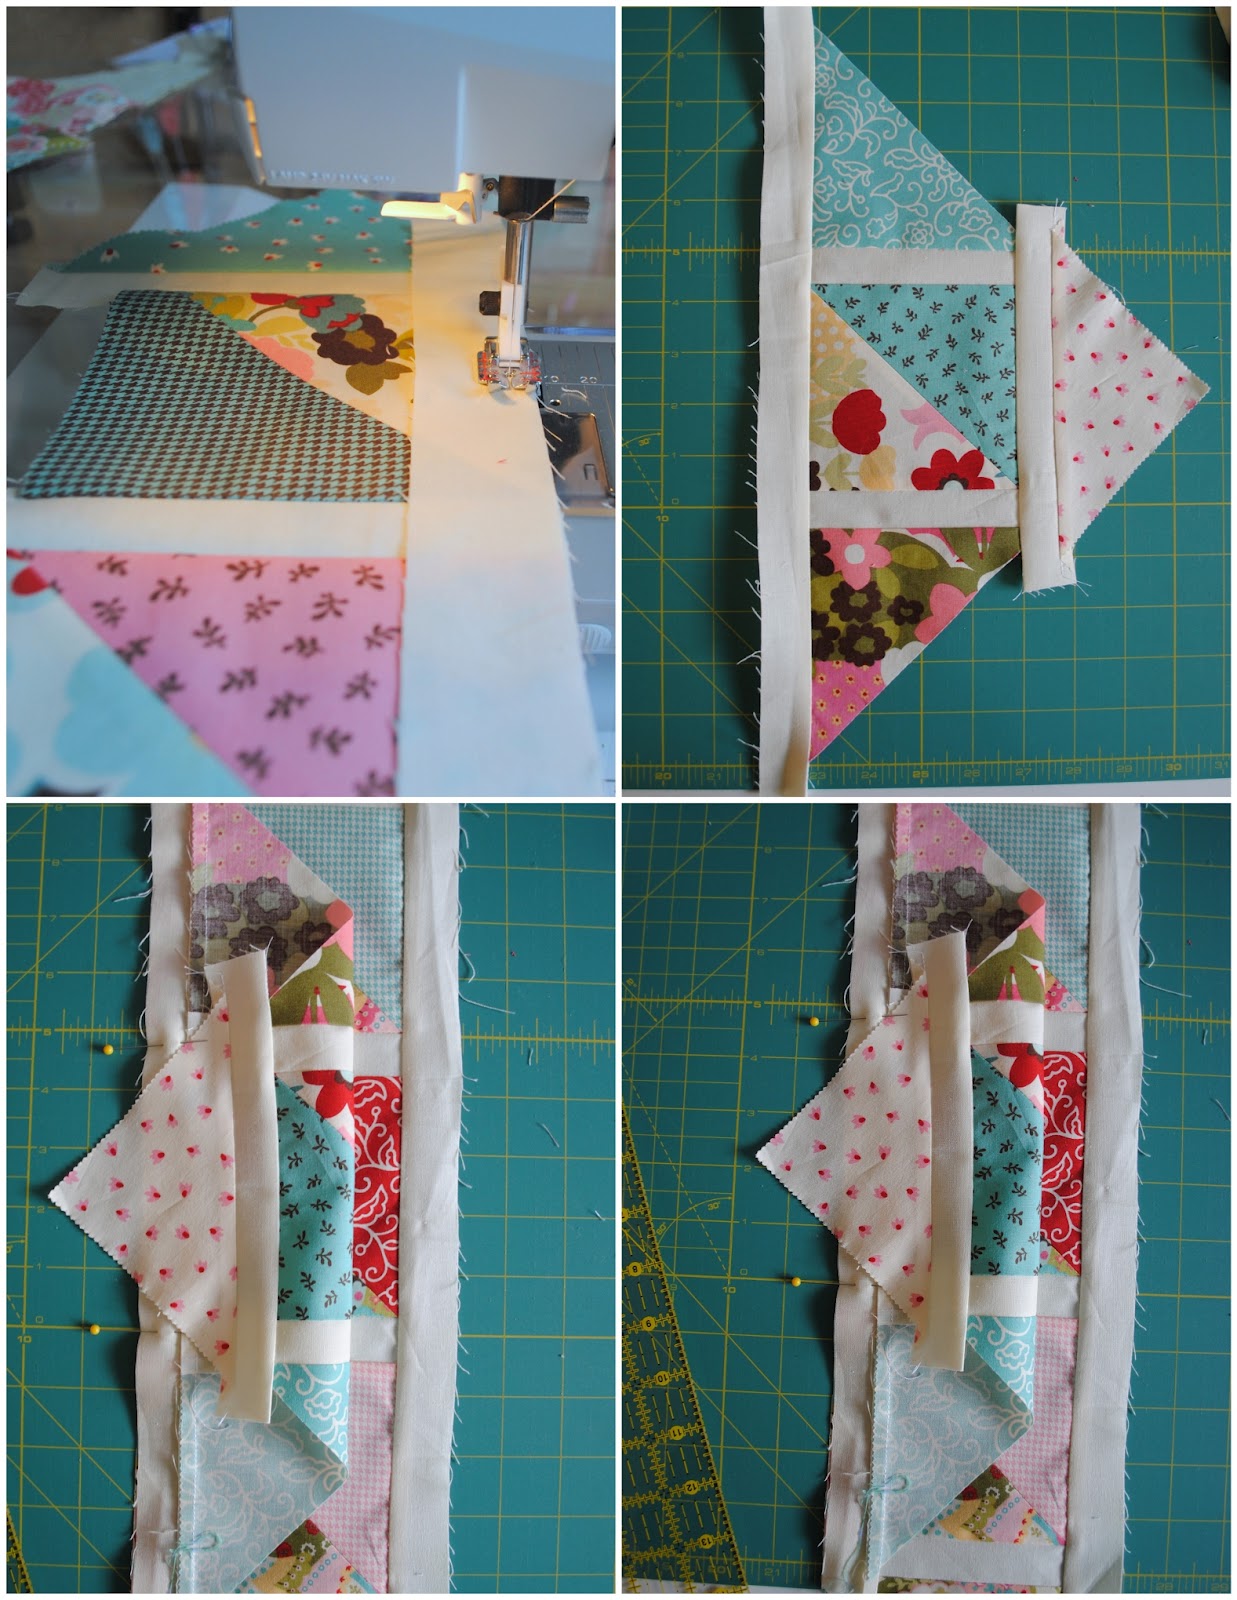
Sew the charms into seven rows of three whole squares and one half as shown.  Sew one additional row out of three 2 1/2″ x 5″ rectangle and one 2 1/2″ square.  Cut the rows of whole charm squares in half lengthwise.  Arrange the rows as shown into 12 rows for the body of the organizer and 3 rows for the pocket.

Optional:  The stroller I made this for is a convertible with a lower, second seat.  So, I’ve added these three toy loops so my little one can have toys.

Cut an additional charm square in half and use the leftover piece from the 2 1/2″ x 5″ rectangles for the loops.  Fold the pieces in half longways, right sides together, stitch long seam, turn right side out, and fold in half.  Sew the loops to one of the center rows of the organizer.  Continue sewing all the rows together to form the main panel.  Sew the three pocket rows together and set aside.

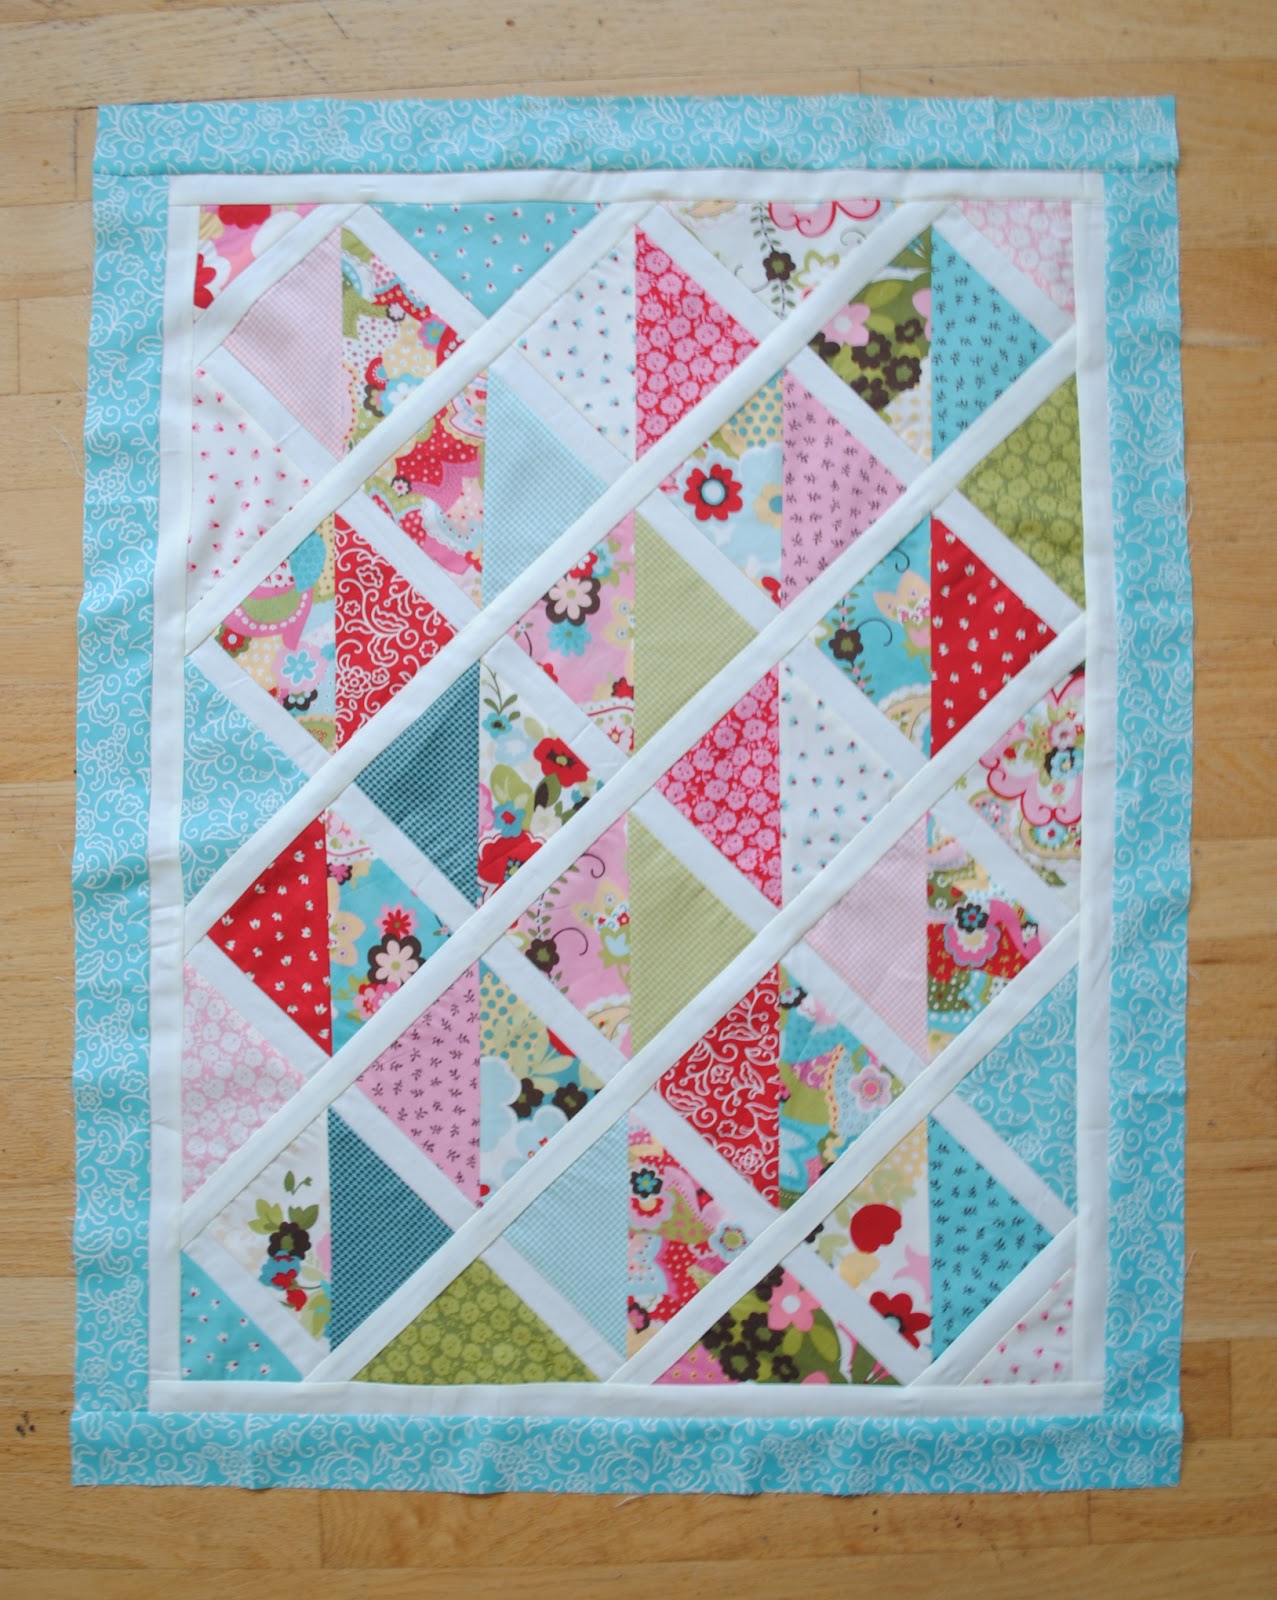
Fuse one 16″ x 25 1/2″ piece of woven interfacing to the wrong side of the patchwork panel and quilt as desired {I used random horizontal and vertical lines}.  Note: for a more quilted look, use fusible fleece or batting.  I chose the woven interfacing because I wanted my organizer to be lightweight.

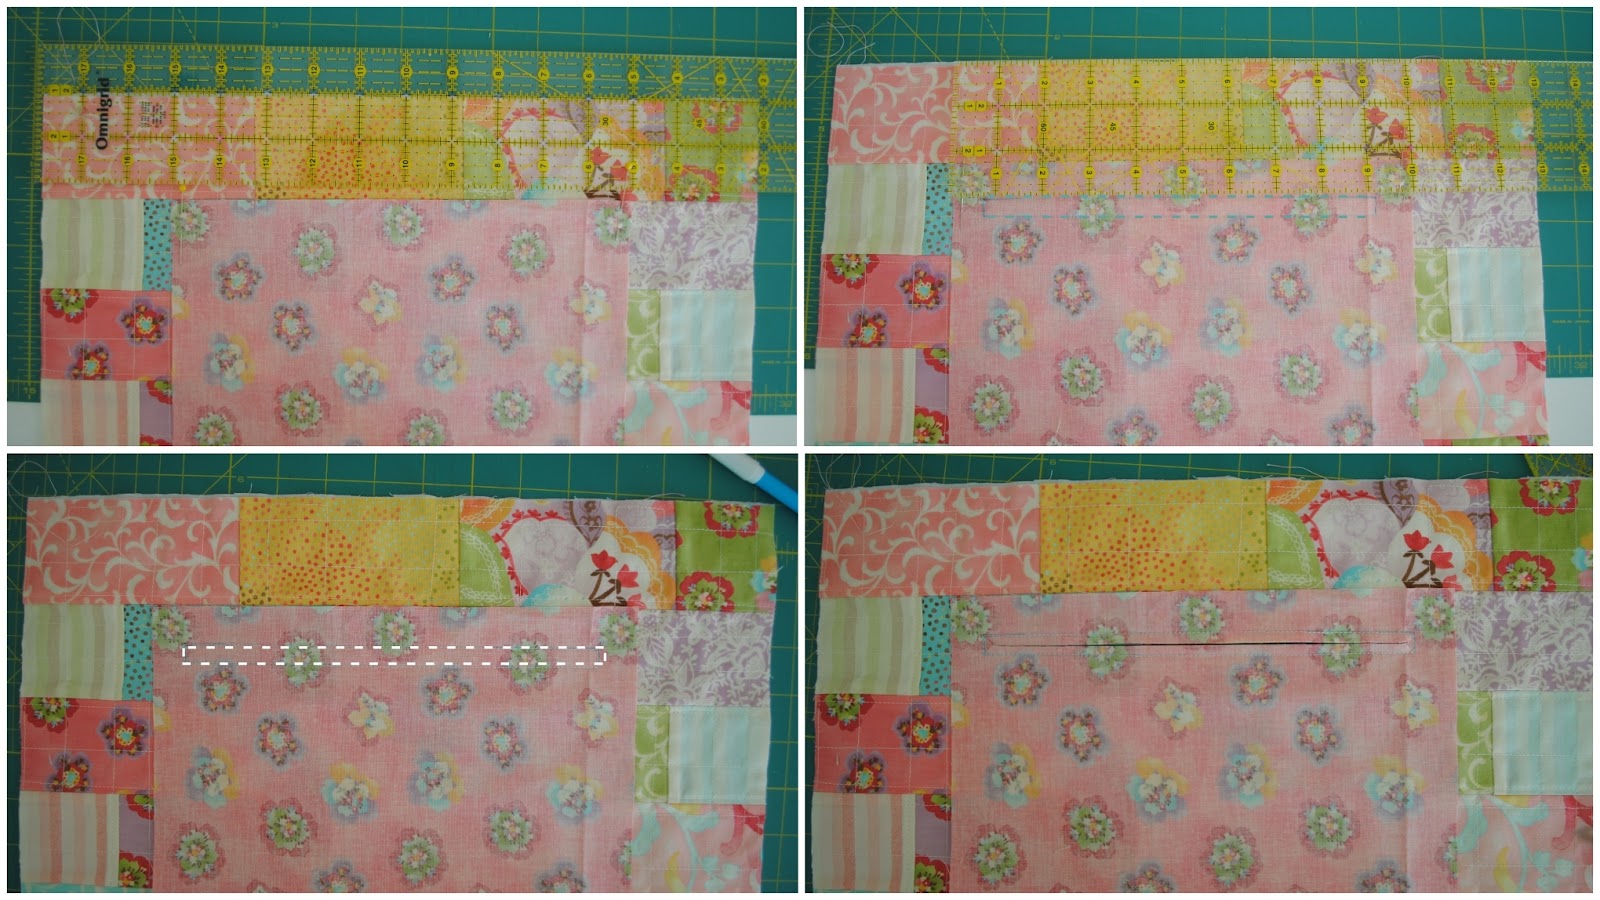
From the small print half yard, cut one 10″ x 19″ rectangle for the zipper pocket.  Line one 10″ edge up with the first row of strips on the main organizer, right sides together, pin in place.  One inch below the edge of the pocket piece, draw an 8 1/2″ x 5/8″ rectangle.  Stitch around the rectangle.  Then, carefully cut a slit down the middle of the stitched box, clipping toward the corners.  Push the pocket piece through the opening and iron.

Cut the strip of Steam-a-Seam in half and fuse to the right side of the zipper.  Remove paper and fuse zipper to the inside of the pocket.  Using the zipper foot, stitch in place.  Fold the pocket piece in half and stitch around three sides as shown.  I stitched through the bag front as well, to give the pocket the largest amount of room.

Next, take the pieced pocket panel that was set aside, fuse a 16″ x 6 1/2″ rectangle of interfacing to the back.  From the small flower piece, cut one 16″ x 6 1/2″ rectangle, this is the pocket lining.  Layer the pocket piece and lining right sides together.  Sew along the top and bottom edges, leaving the sides open.  Turn right side out, press.  Then quilt in the same manner as for main organizer.

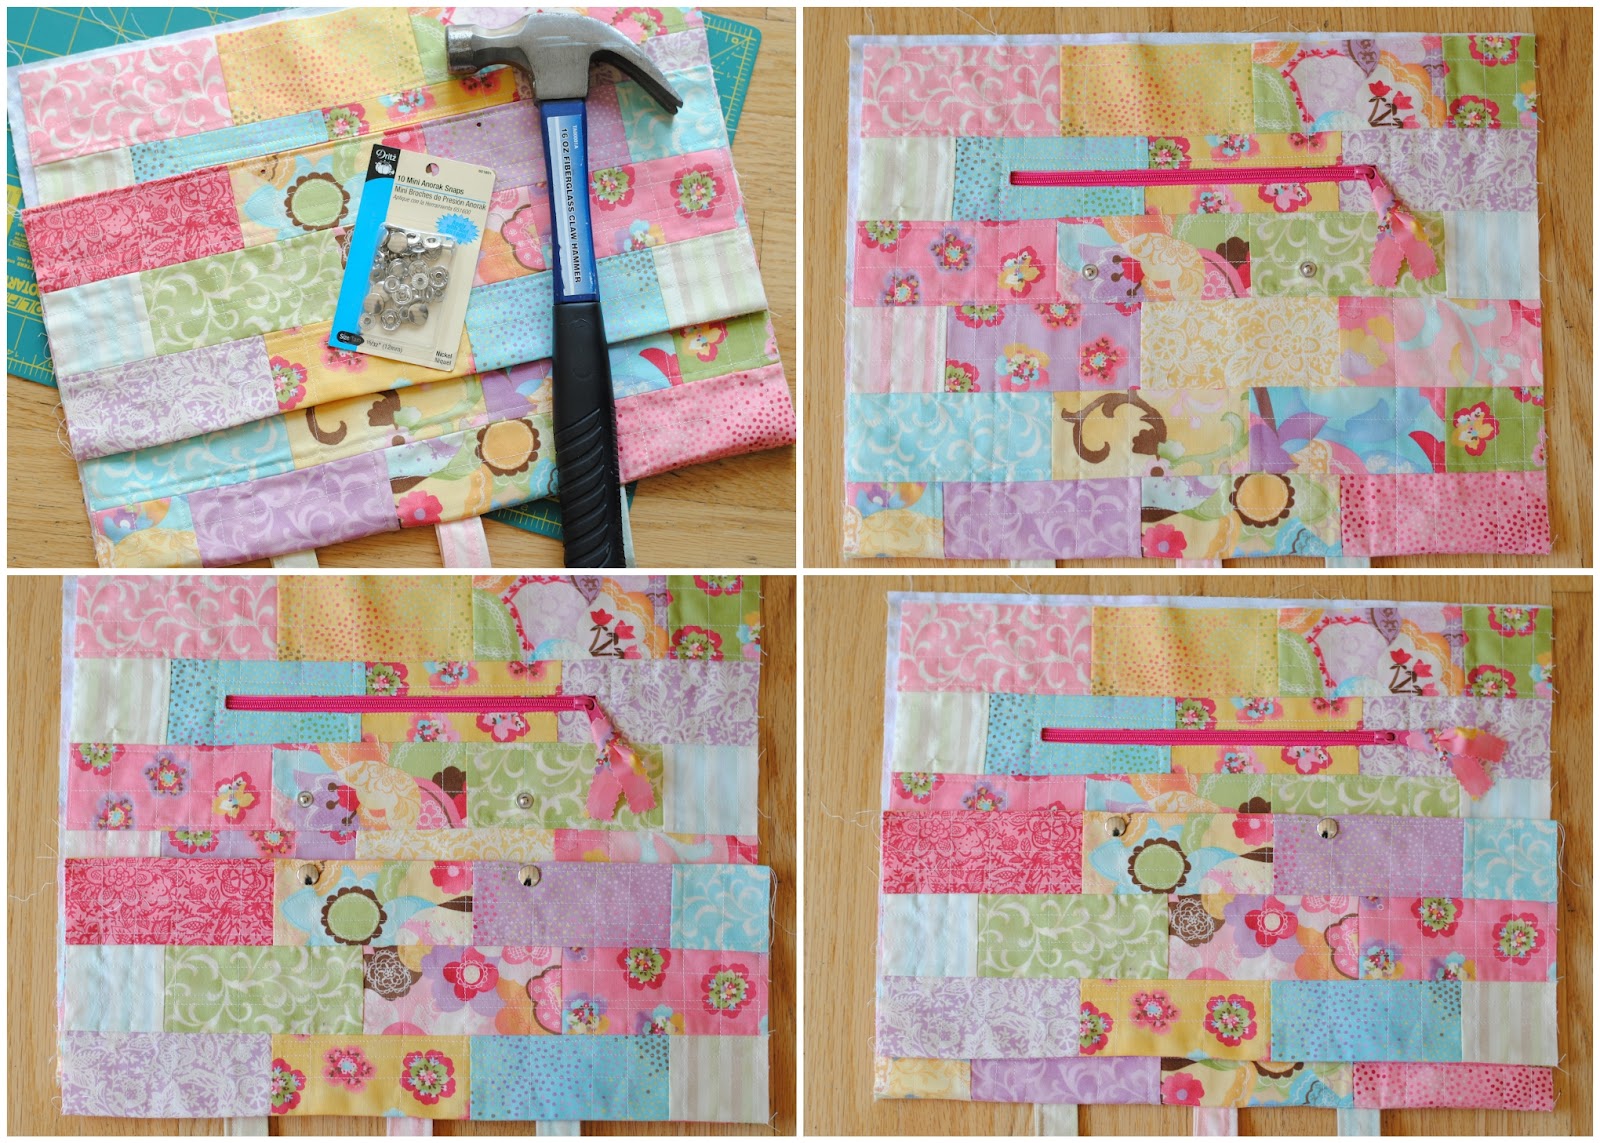
Following the manufacturer’s directions punch holes for the snaps on the pocket panel and the main organizer.  I positioned mine at 1/4″ from the bottom of the third row of tiles on the main organizer, 6″ from each edge.  When punching the holes on the main organizer, be sure not to punch through the zipper pocket piece.  Punch matching holes on the pocket.  I use Fray Check around my punched holes to keep them in place.  Apply snaps.

Snap the pocket piece to the main organizer.  Then stitch 1/8″ and 1/4″ from the bottom edge of the pocket to secure in place.

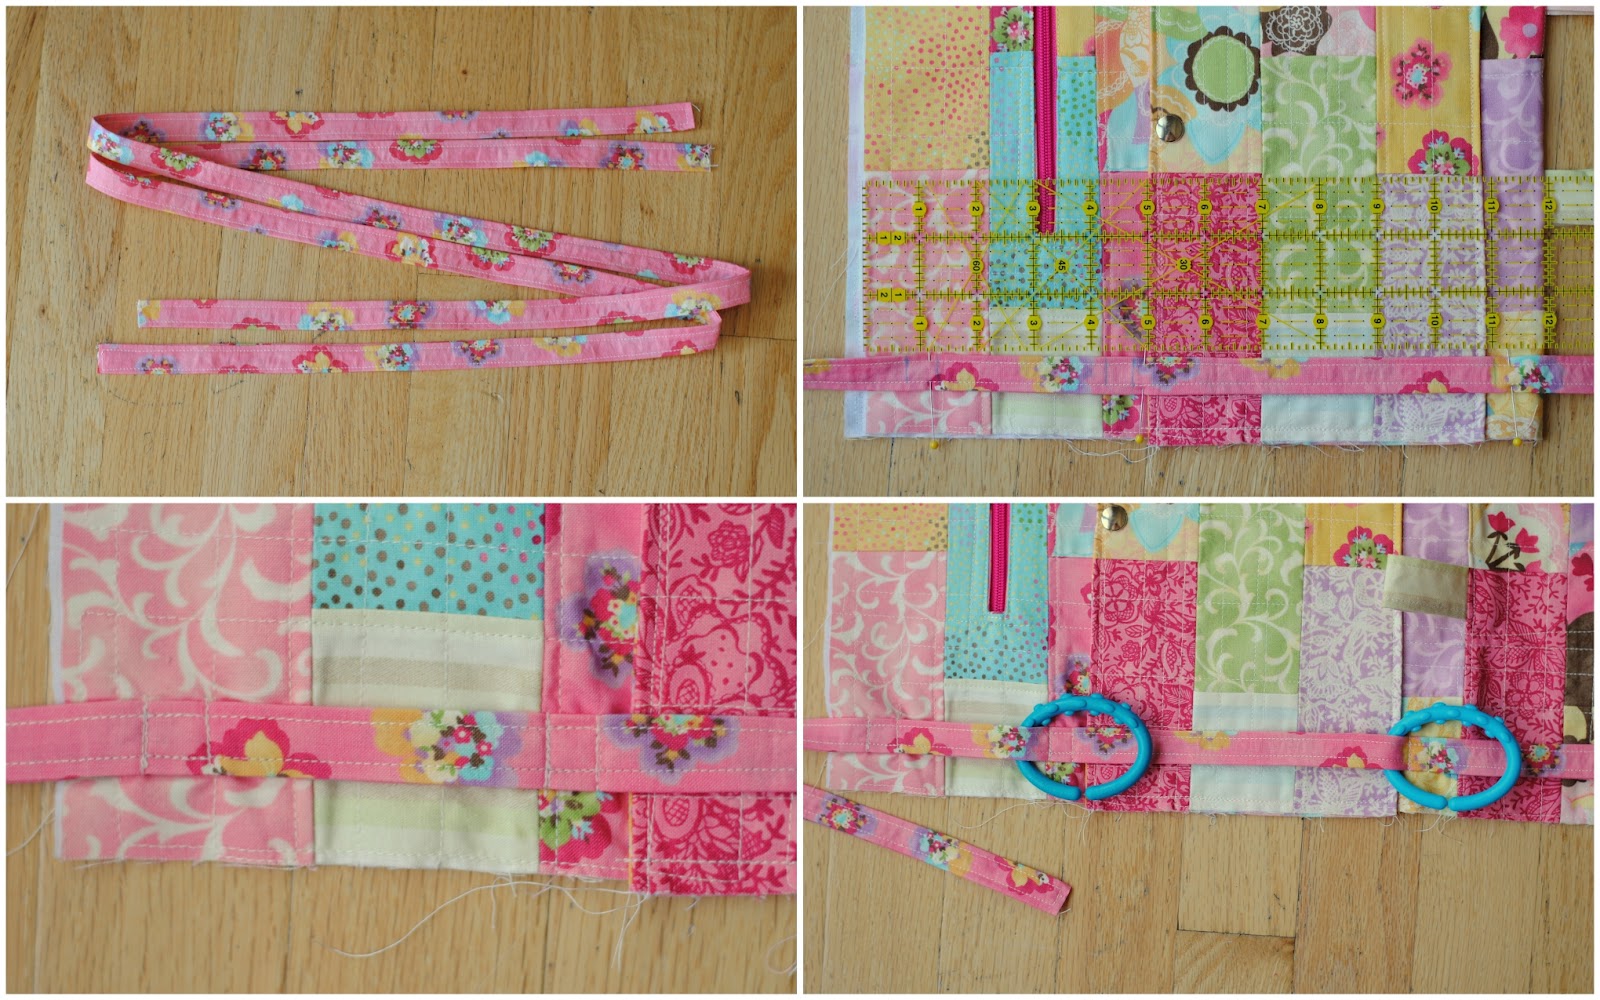
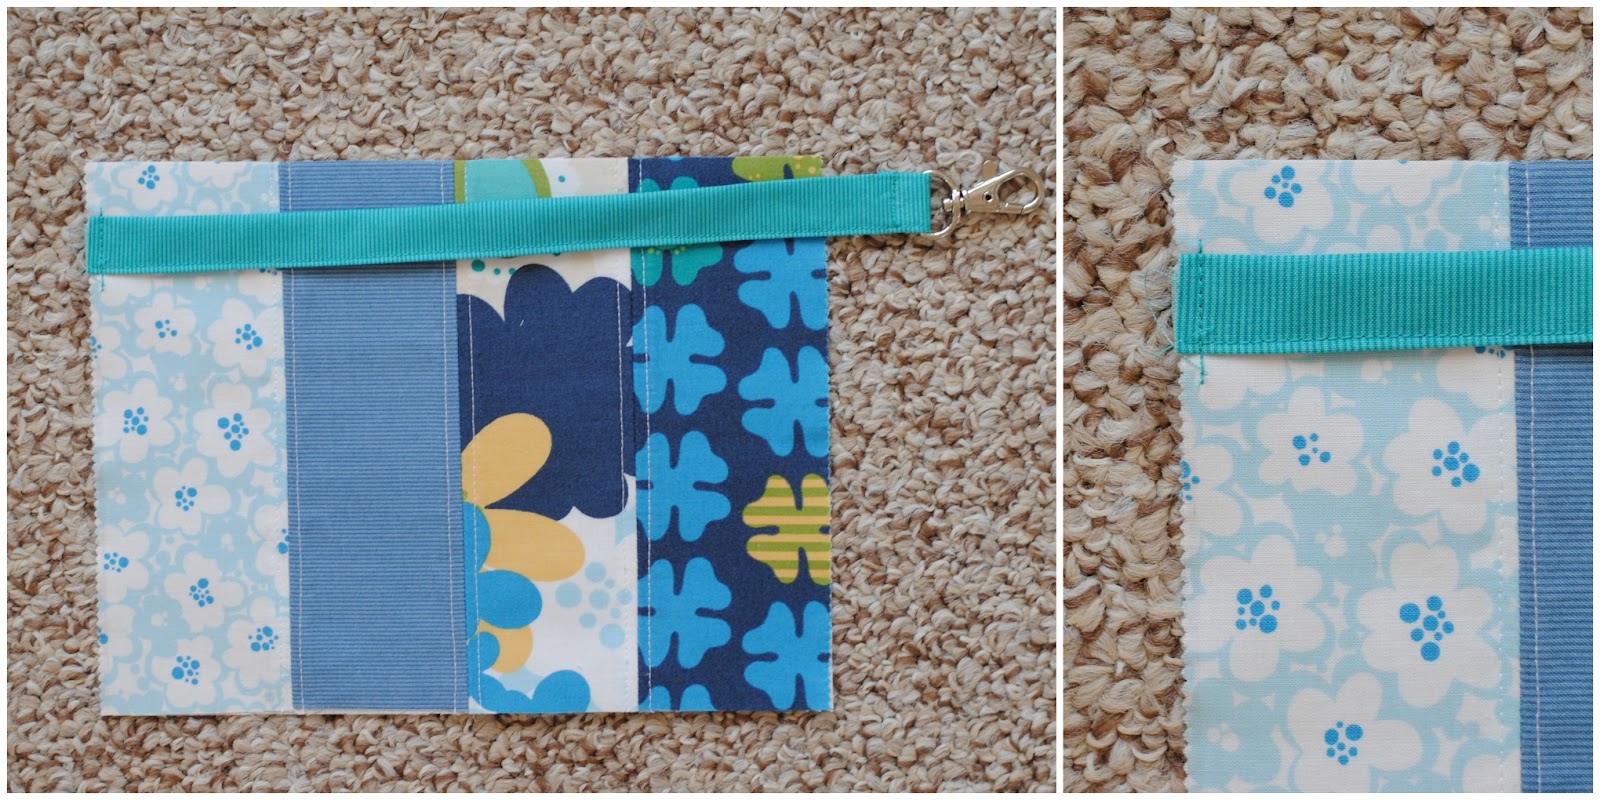
From the small flower cut two 2″ x WOF strips for the ties.  Sew, right sides together, along the long seam, back stitching at beginning and end.  Turn right side out.  Position the ties 3/4″ from edge, with an equal length of fabric on the top and bottom of organizer. 

Stitch the tie down.  I stitched mine in three boxes, 1/2″ from top, right above the pocket, and right below the pocket, that way I could hang a clip for my keys, shopping bags, or sunglasses from the loops.

Cut the Velcro into two 10″ lengths.  Sew the hook side to the back of the organizer, 3/4″ from the edge.  Cut the loop portion of the Velcro into four 5″ pieces.  For my stroller I measured 7″ for the ties to hook around the handles.  Pin Velcro in place and trim tie to 1/2″ longer than Velcro.  Fold the 1/2″ under the Velcro for a finished edge.  Stitch in place.  Note: I added snaps to my organizer ties for sturdiness, since my baby will be sitting under it.  However, the Velcro allows me to move it to different strollers and adjust the ties.

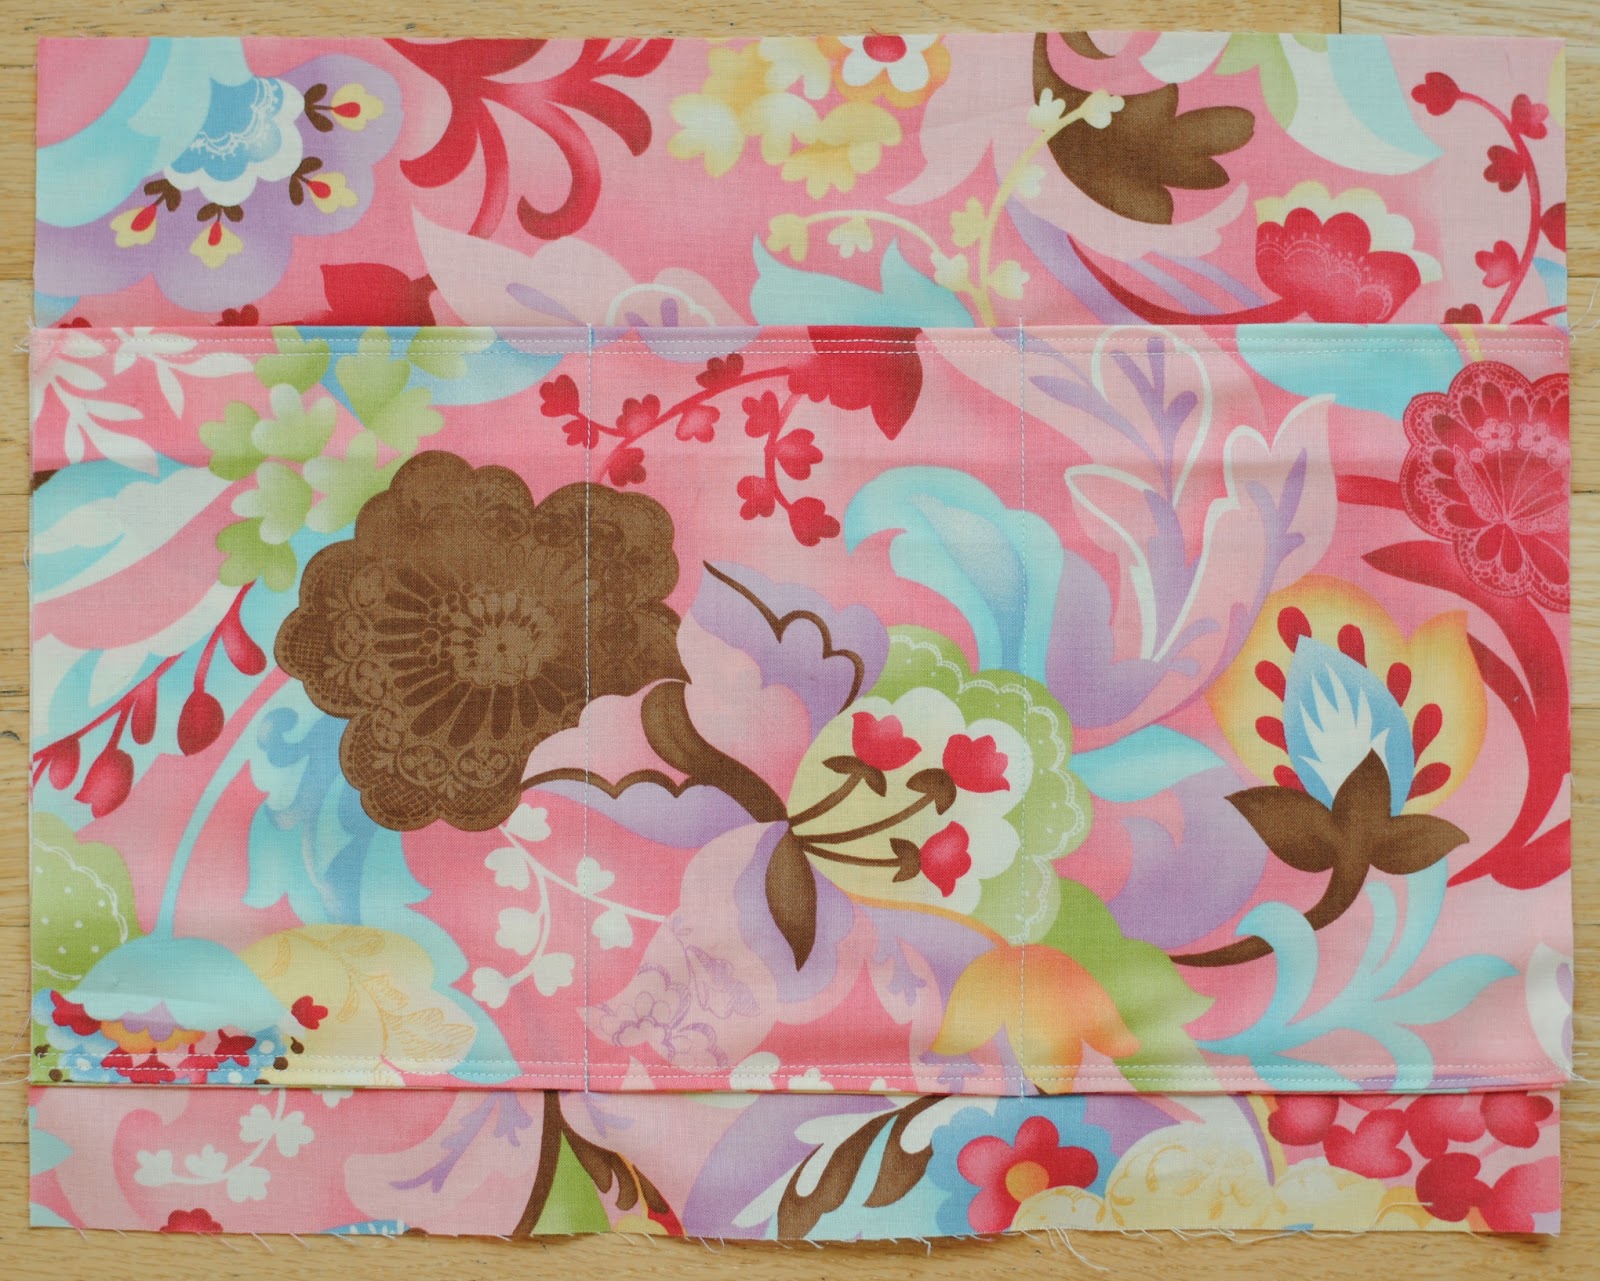
From the large flowers cut two 16″ x 12 1/2″ for the lining and two 16″ x 7″ for the inside pocket.  Construct the pocket as for outside pocket, omitting interfacing and quilting.  Place the pocket on one inside lining piece.

Divide pocket in thirds and sew along lines to create three pockets.  Note, if you use specific cups or bottles, adjust your pocket widths accordingly.

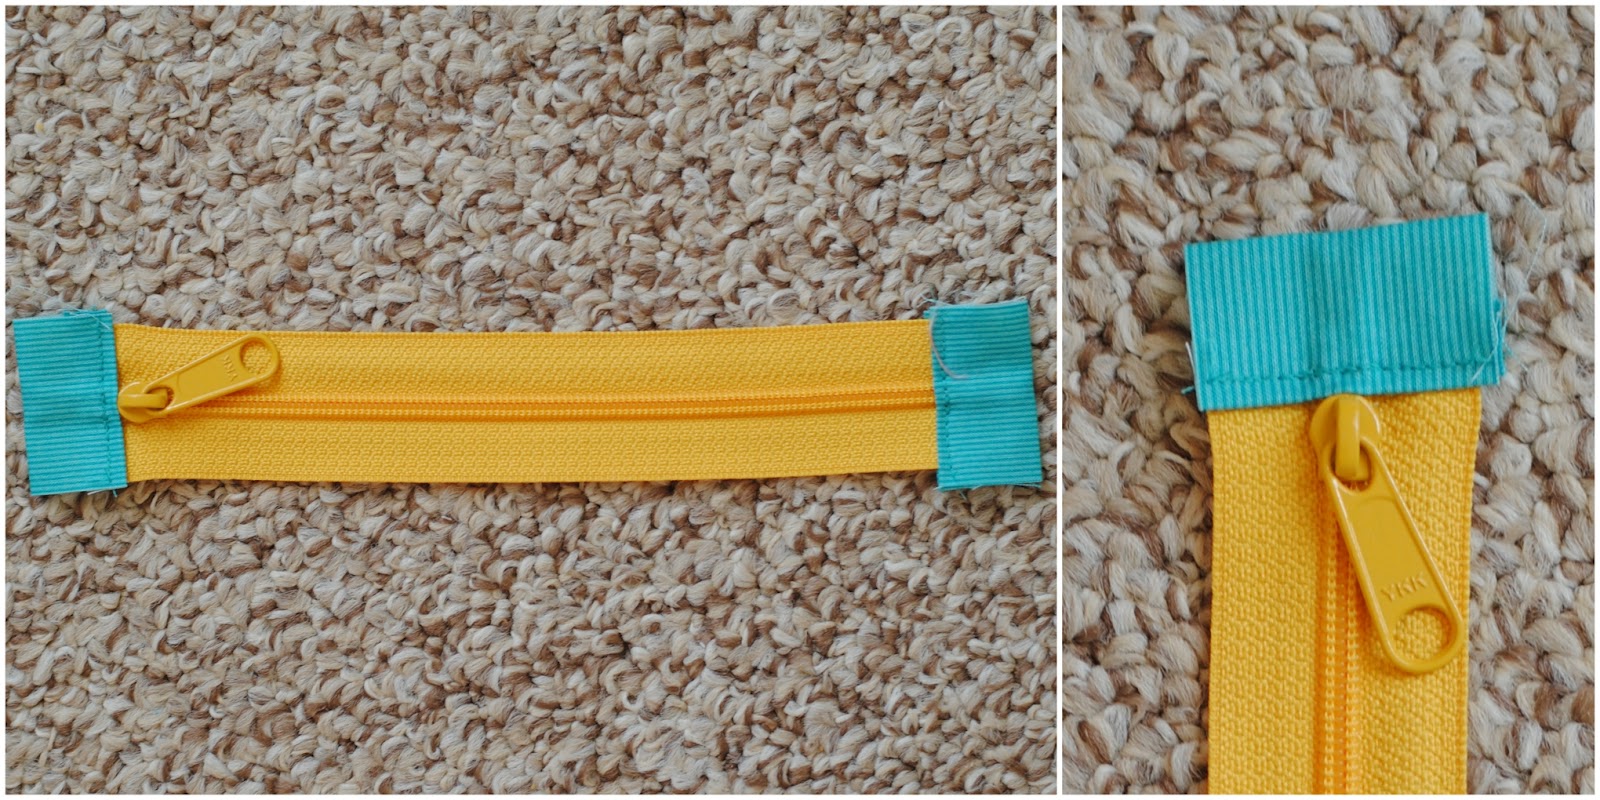
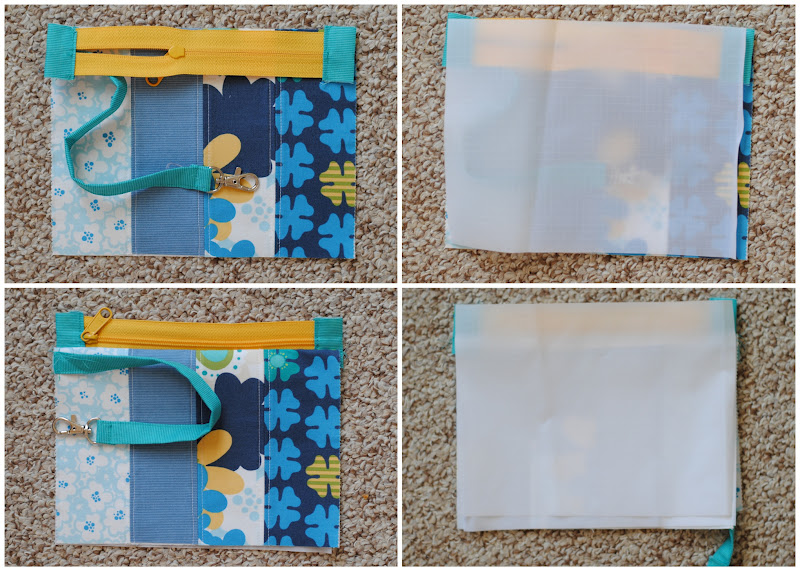
To install the top zipper, place the zipper face down on the outer piece.  Note:  Make sure the zipper pull is on the same side of the organizer as the smaller zipper’s.  Place one lining piece, right sides together, on top of the main organizer.  Use the zipper foot to sew near the zipper.  Turn right sides out, then place zipper, face down, on other side of main organizer.  Layer lining as before, sew.

Place the lining right sides together and the main organizer right sides together, pin zipper tape toward lining.  Stitch along the sides of organizer and lining with a 1/2″ seam allowance.  Stitch along the bottom of the lining, leaving a 4″ opening.  Turn right sides out through the opening.  Stitch the opening closed near the edge of the lining.  Then, just tuck the lining inside the organizer and zip!

Optional:  As I mentioned before, I chose to add snaps to secure my organizer when using my double stroller.  I added the snaps after sewing the organizer together, to help keep the lining in place on the inside.  I placed the snaps right above and below the Velcro, as shown.

One fun organizer sure to spice up any stroller and carry everything you need on hand!

{Clover & Violet}

Goodie Pouch


The perfect addition to any bag, this little pouch is lined with Rip Stop Nylon so toys or snacks won’t get lint on them {or get your fabric wet or greasy!}, and the handle has a swivel clip so it can be fastened to a stroller, purse strap, or somewhere else convenient!  Made with a few leftover Jelly Roll strips, it’s a quick project that will be great for kids.

  • 4 Jelly Roll Strips cut to 13″ outside
  • 2 – 2 1/2″ x 1 1/2″ rectangles for zipper tabs
  • 1 Jelly Roll Strip cut to 11″ for handle
  • 8 1/2″ x 13″ Pellon SF101 Shape-Flex woven interfacing
  • 2 – 8 1/2″ x 6 1/2″ rectangles Rip Stop Nylon Fabric {similar to what a kite or windbreaker would be made from,it has little grid squares on it that you cannot see in the photographs}
  • 9″ Long Pull Zipper {my favorite type of zipper!}
  • 1 1/2″ Swivel Clip

Start by piecing four jelly roll strips together lengthwise with a 1/4″ seam allowance, then fuse the interfacing to the wrong side.  Quilt as desired {I quilted 1/8″ from each seam}:

Cut in half to make 2 – 8 1/2″ x 6 1/2″ rectangles, set aside.  Fold the handle piece in half lengthwise, wrong sides together, press. 

Then open and fold the raw edges toward the center, wrong sides together, press.  Open handle and fold 1/4″ of one short edge down.  Refold the handle piece along pressed lines.  Stitch along the open edge.  Feed the short folded edge through the swivel clip, stitch in place.

Stitch the handle 1/2″ from one top edge of one of the outside pieces.

Fold the two 2 1/2″ x 1 1/2″ rectangles in half {1 1/4″ x 1 1/2″}, then turn 1/4″ toward center on each side, press.  Trim zipper to length of bag and sew the rectangles onto the zipper.

Place the zipper face down on the pouch piece, the closed zipper pull should be on the same side as the handle.  Then place the nylon lining piece on top of the zipper, use a zipper foot and stitch in place.  Fold the pieces wrong side together.  Then place the zipper face down on the other outer piece {the two outer pieces will be right sides together}, and then put the remaining lining piece on top, stitch along zipper.

Fold the pieces so that the right sides of the pouch are together and the lining is together {as shown above} and stitch 3/8″ around the bag, leaving a 3″ opening along the bottom of the lining {note: make sure the zipper is partially unzipped}.  Turn the bag right sides out.  Stitch the opening closed on the outside of the lining.  Then, stuff the lining inside the bag and it is finished!

One cute little pouch that won’t sink to the bottom of your bag, perfect for any outing!

 If you make one of these, I’d love for you to share it in the Moda Bake Shop Flickr Group and the Clover & Violet Flickr Group!

{Clover & Violet}

Sophie Car Seat Quilt


Hello!  I’m Jennie and I blog {along with my mom} over at Clover and Violet.  I have two little kids, both born in the winter.  With my little boy I quickly discovered how easily blankets are kicked off, so I designed a little quilt that tied to the infant car seat handle.  When I found out my second was a girl, I knew she needed a girly version for the car seat too!  This little quilt also works great for a stroller and can be a little play mat in a pinch too!

If you’re interested in making one of these too, my friends at Sew Lux Fabric and Gifts have put together a a few special kits at a special price just for this quilt {the kits feature a few different fabrics as they’re already sold out of Sophie charm squares…I think I might need to make another one!}.  Click here for details.

1 Charm Pack
1 yard large print for backing and binding
1/4 yard small print for borders
1/2 yard Bella Solids Snow for sashing
1 yard cotton flannel or batting

First, select 18 charm squares and pair them up {for 9 pairs}.  Then, chose 7 more charms for the setting triangles, cut them in half diagonally {from point to point}, set aside.

Place the pairs right sides together, then draw a line a line on the wrong side of one of the charms from point to point.  Stitch through both charms 1/4 inch from the centerline on both sides of the line.

Cut the pair of charms in half along the drawn line.  Press the halves open to make two half-square-triangle pairs.  Trim each new square to 4 1/2″.

Once you have sewn all 18 pairs and have 18 new squares, arrange the squares and setting triangles into rows, as shown:

From the Bella Snow, cut ten {10} 1 1/2″ strips.  Leave behind the very last triangle of each row and sew the remaining pieces onto about four {4} of the sashing strips.  Cut the blocks from the strips and begin forming quilt rows as shown:

I like to leave a little bit of the sashing hanging past the blocks so that I can trim it after I’ve sewn the rows, this gives a nice straight finish.  Then sew the remaining triangle onto the end of the row.

After completing the rows, begin sewing the rows onto about three {3} remaining sashing pieces.  In order to line up the short sashing rows, I fold the top half-square-triangle row in half, line up the short sashings and pin at the intersections.  This creates a nice grid.

Once you’ve completed sewing all your rows together, trim the quilt.  To get nice, accurate points, trim 1/4″ past each of the points, always lining up at least two points while you’re trimming.

Use the remaining sashing pieces to create a border around the quilt.  Then, from the small border print, cut four {4} 2″ strips.  Sew the border on in the same manner as the sashing.

Layer using your favorite batting.  I used prewashed cotton flannel in my little quilt because where we live a heavy quilt isn’t necessary.  This is a great option for a warm climate or a spring or fall baby, when a little warmth is needed, but not as much as a full quilt.  I quilted with an allover meander.  Because my quilt was lightweight, I also used a single fold binding method.

Instead of using a 2 1/2″ piece of binding folded in half {as for a standard double fold binding}, use a 1 1/2″ piece not folded.  Then pull it flat, tuck the raw edge in, and wrap it around to the back.  I always pin or clip my binding down when using a single fold to avoid excess fraying.

Now, the final touch to this little quilt is adding the ties.  Cut two 1 1/2″ x 28″ strips {I cut mine from the remaining backing piece}.  Fold in half, press, then fold both raw edges toward the center seam as for bias binding.

Pin one ties ten inches {10″} from the top of the quilt on each side.  Stitch in place and your quilt is ready for outings!

One 25″ x 30″ quilt, ready to be tied on to any car seat or stroller!

Oh, and hopefully one cozy warm {and stylish} baby too!

I hope you enjoy this design, and if you make it I’d love for you to share it to the Clover & Violet and the Moda Bake Shop Flickr groups.

{Clover & Violet}