Wishes String Quilt


Hello again! This is Karin from Cascade Quilts, and I am happy to bring you another quick quilt project!  I have wanted to do a string quilt for years, but I just don’t care for foundation piecing – and all the tutorials I have seen to use strip quilting have not had the solid strip that goes down the *center* of the block.  They always seem to have a seam down the center instead, which gives an entirely different look to the overall quilt.  It came to me one night how to make the blocks with a strip pieced method with the solid down the center of the block (when trying to get to sleep, but can only think of current/future quilting projects!).  I am *thrilled* how this quilt top came together!  I have already started to make another one with this pattern I love it so much!   My mom even started one after she saw my completed top.  I hope you love this pattern as much as I do – and if you make a quilt from the pattern, I’d love for you to share it (or any of my other project patterns) on my flickr group 🙂

2 print jelly rolls (I used ‘Wishes’ by Sweetwater)
1 solid jelly roll (or 2 3/4 yards – I used Moda Bella ‘Porcelain’)
3/4 yard matching solid cut into 2.5” strips (‘Porcelain’- not shown)
3 yards wide backing (Bella solids in red)


All your seams will be 1/4” or scant 1/4”.  Whichever you use, just be as consistent as possible.

Unroll you jelly rolls and remove 1 strip from each of the print jelly rolls (you will use 39 strips from each roll for a total of 78 print strips).  Unroll your solid jelly roll – you will be using 26 strips at this point from the solid.  Pair up the 26 solid strips with 26 of your print strips.  Pair up the remaining 52 print strips into another 26 pairs.  Sew each pair together along one long side.  26 print/solid pairs and 26 print/print pairs.

Now, pair up each print/solid pair with a print/print pair keeping the prints together and the solid along the edge.  Press these groupings with the seams all going in the same direction (direction doesn’t matter, just as long as it’s consistent through all of them).  You will have 26 strip sets now, with a solid on the outside and 3 prints.

At this point, I suggest squaring up one end of each strip set.  Again, doesn’t matter which end, just be consistent for all of them.  *I hope I don’t confuse everyone too much with pics of different print strip sets – I seem to have missed/misplaced pics of some steps the first time around, so I started with a second quilt to capture those missed steps.  The fabrics in this second quilt is a collection from about a year ago called ”Seascapes” by Deb Strain*

Then pair each 4-strip-set with another strip set – making sure that you don’t sew the two solid strips together.  Since the seams are all pressed in the same direction, your seams will ‘nest’ and help you align the strip sets.  Sew along one long edge and press that seam in the same direction as the others.

You will now have 13 strip sets that are 8 strips wide.  All seams should be going in the *same* direction.  Solid, 3 prints, solid, 3 prints.

You are going to sew these into a tube.   Sew the final seam to form the tube, then carefully press the final seam in the same direction as the other seams.

Once you have the 8-strip tube made, you will be pressing the tube so you are pressing the solids in half.  Hopefully this picture explains what I mean.  You will be able to ‘nest’ the seams of the prints as you press so that you can be sure that you are pressing the solids directly in half.

I’m guessing you just had an A-HA moment like I did?! 🙂

Now, you will begin cutting your blocks!  You will get 5 blocks from each strip set ‘tube’, with a bit of leftovers.

Starting at the left side of the strip set with a 9.5” square-up ruler align the diagonal center of the ruler along one edge (the solid that is folded in half).  Don’t do like I did in this pic – use the diagonal line on the ruler to your advantage (I did use the diagonal line in the next 12 sets, LOL).

Cut the side on the RIGHT side of the ruler *first*.  Go ahead and cut all the way across the strip set.  Move the rest of the strip set aside far enough so you can cut the second side of the triangle without cutting the remaining strip set.

Make the second cut along the left side of the triangle.

Open up that triangle, and you have your first block with the solid going down the center of the block!  Yay!

Align the ruler along the edge that faces away from you, and cut your second block.  It will only take a cut along one side for the second block.

Now, for the third block, you will have to move again to the folded edge closest to you – but you will need to move it to the right a little, so you get the full triangle.  Again, cut as you did with the first block.

This will give you approx 1 3/4”-2” x 9 1/2” strip ”scraps”.  But, don’t throw away those scraps, those will be used in our pieced border!

Keep cutting all of your 13 strip set tubes until you have a total of 64 blocks (you can get 65 blocks, but you will only need 64 for this pattern).

At this point, I highly recommend starching and re-checking square of each of your blocks.  These are all on-bias, so will have quite a bit of ‘give’ to them.

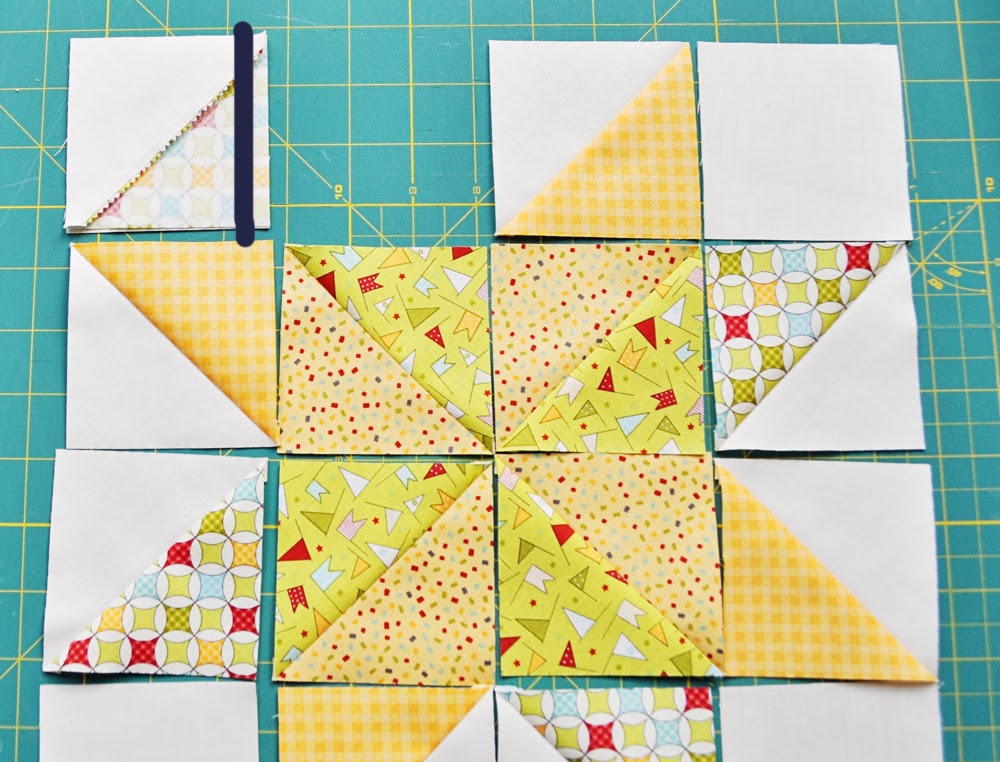
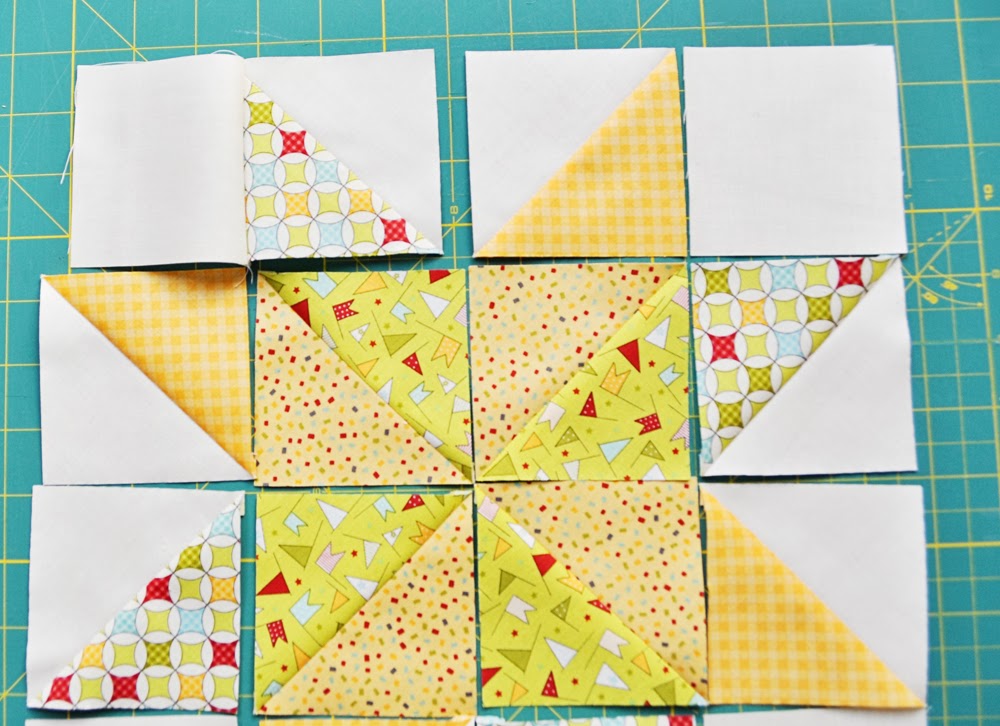
Arrange your 64 blocks into an 8 x 8 arrangement and sew them together for the center of the quilt.  If you arrange them right, you will be able to ‘nest’ all the seams so the seams line up easily!

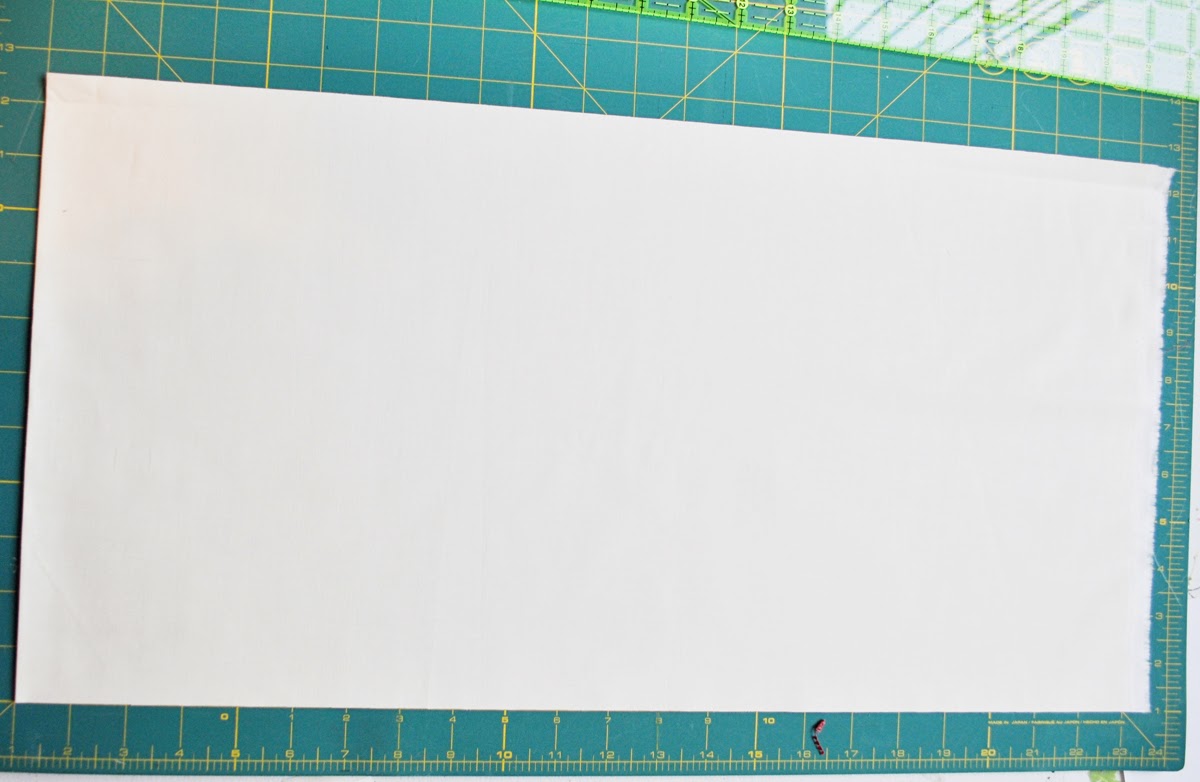
Now, for the first row of the border, take 7 of your solid strips and sew them together into one long strip.  Cut this strip into two pieces 72.5” long and two pieces 77” long (recheck the measurements of YOUR quilt center to make sure these are correct for yours).  Sew the 72.5” pieces along the left and right sides, then the 77” pieces along the top and bottom sides.  Press.

Now for the scrap pieced border!  (again, had to use pics from the second set of blocks for the second quilt I’m making for this one)
You will need 36 pairs of these tiny blocks to make 36 ‘chevron’ blocks (9 for each side of the quilt).
You can keep them as they are already paired up, or mix/match them as you please.  From the cut-offs that you already have, there will be 26 pairs (2 pairs from each strip set).  So, from the tail end of each strip set, you will need to cut one more pair.
So, first measure your little ‘scrap’ pieces.  Mine were 2”x9.5”

You will be cutting one more set from each end of the strip set tube.  Go ahead and cut it as wide as your scrap pieces are.  I cut mine 2” wide.

These ones will have to be opened up to cut them to length, so go ahead and cut them along the fold line.

Then, center the 9.5” ruler and cut off the ends – you are trying to make these the same as the first scraps, so make sure you center these so that the seams will line up when you pair them up with the other scrap strips.

I recommend starching these little cuties now too.  Pair these up and sew them together into 36 cute little chevron blocks!

If you pair them up properly, the seams will again ‘nest’ and you will be able to match up the seams easily!
When you press these blocks, press half in one direction and half in the other direction so that when you sew them into a long strip, those middle seams will also nest.

Sew your 36 little chevron blocks into 4 long strips with 9 blocks in each strip.  These will measure approx. 3.5”x81.5”.  Depending on your final measurements, you might need to add one more partial chevron block to all 4 strips if you intend to do a miter corner like I did, or just to two of the strips if you don’t do a mitered corner.  You should have plenty of scraps left to cut more if necessary.

This is what the seam will look like between the blocks:

Sew these long strips along the first solid border.  I chose to miter my corners, but you could chose the easier route and sew left and right, trimming them to fit the length, then sew top and bottom, trimming them to fit.

Finally, sew 8 of your solid strips into pairs of 2 – and sew on for your final border.

You have completed your beautiful approx 85” square quilt top!

Now, baste, quilt as desired, and add binding (from your remaining 9 solid strips).


A beautiful 85”x85” quilt!

Ooooh, and how cool does it look with the sun shining through it from the back?!!!

 Like stained glass! 🙂

Karin Vail
Cascade Quilts

Wish Upon a Star Quilt

Hi there! I’m Lindsey and I am really excited to be here on the Moda Bake Shop today! I blog over at Inspiring Creations where I share tutorials, patterns, recipes, and everything in between.  Today I am going to share with you how to bake up this fun quilt using Sweetwater’s newest line-Wishes. I had a completely different design in mind before I got the fabric, but when I got this fabric and saw it in person I was so excited that I had to change up my design.  There are a few prints in this line with flags on it–which soon became one of my favorite prints in the collection.  I took that idea and made a quilt with some fun flags! 
You can make this your own by changing the saying in the flags, or if the flag design isn’t your cup of tea, you can make the entire quilt using just the stars. 
So let’s get started!
2 Charm Packs- Wishes by Sweetwater
 2.5 yards background color (5538 16)
3/4 yard binding fabric 5535 -24
3 yards backing fabric Essential Dots Aqua 8654 22
3 yards of batting
Cutting:
Out of your background fabric cut the following:
4 strips of 3 1/2″ x 45″ 
3 strips 23 1/2″ x 11 1/2″ (for flag rows)
1- 11 1/2″ x 11 /12″ square (for flag row)
10- 5″ x 5″ squares (for stars)
24- 3 1/4″ x 3 1/4″ squares (for stars)
Out of the binding fabric you will cut:
3 strips 11/2″ x 23 1/2″ (for flag rows)
1 strip 1 1/2″ x 11 1/2″ (for flag row)
7 strips – 2 1/2″ x Width of fabric – (for the binding)
Separate your charm packs into different colors:
For each star you will choose two coordinating colors.  For this one I chose a yellow and green combination.  You will also  need two 5″ x 5″ squares our of your background fabric.  
You will need to make three sets of two that comprise of the following squares.
1. one background square and one green square
2. one yellow square and one green square
3. one background square and one yellow square
Place one set right sides together:
Sew a 1/4″ seam all the way around the squares.
You will do this to each set.
Now you will take a ruler and place it diagonally from corner to corner on the block and cut:
You will then place the ruler in the opposite corners diagonally and cut again:
You will now have four half square triangles (HST):
You will cut each of your sets the same way so you will have the following:
4-yellow/cream HST’s
4-green/cream HST’s
4-yellow/green HST’s
Now press them all open.  I like to press mine to the dark side.  You can also trim them up and make sure they are all 3 1/4″ square.  (since these are all cut on the bias they will have a bit of a stretch to them)
Now you will need four 3 1/4″ x 3 1/4″ squares:
Layout your HST’s and squares like this:
You will sew the blocks in rows of four first by placing the first two right sides together and sewing a 1/4″ seam:
Now you will take the second two and do the same:
I like to chain piece mine at two at a time and then join the sets of two together.  This helps the process go much quicker.
Sew the two sets together to form one row of four squares.  Will will do this to each row:
To get your points to match up nicely, nest your seams! This will really help!
Now you will sew your rows together. Start with the first two and place right sides together and sew a 1/4″ seam across:
Now do this to the next two:
You will now join the two sets and then give it a good pressing.
You need to make 5 stars using the same method shown above. Trim your blocks 11 1/2″ x 11 1/2″ 
We are now going to work on the flags for the quilt.First you need to print off your favorite block font with the following letters:
You will need a strip of background fabric that has heat and bond ironed on to it.  You will iron the wrong side of the fabric to the rough side of the heat and bond:
Now place one of your letters onto the heat and bond and trace.  **You will want to place your letters facing down so that when you cut them out they are facing the right way.
Cut out your letter:
Do the same process to each of the letters that you need:
Now to create your flags you will need 13 charm squares in different colors
Find the half way point of the charm which is 2.5″ inches and place your ruler on that point and then place it diagonally to the top left corner and cut:
Now do the same to the opposite side:
You now have your little flag:
Iron your letters onto the flags:
You will now add heat and bond onto the back of your flags.  Making sure you iron the wrong side of the flags to the rough side of the heat and bond.  You will do this to each flag.
Now to create the banners.  
3 – 23 1/2″ x 11 1/2″ rectangles
1 – 11 1/2″ x 11 1/2″ square
You will cut on a diagonal all the way across.  Try not to do it from point to point, rather offset the diagonal so that you have room for your flags later. You will cut the diagonal different for each row–so be sure to look a the quilt diagram to know which way to cut your diagonal. 
You will need a strip of red fabric that measures 1 1/2″  x 23 1/2″ you will place it right sides together and sew it to one side of the rectangle and then press, and sew the other half of the rectangle on so that you have a piece that looks like this:
 You will trim your rectangle to be 23 1/2″ x 11 1/2″.  Make sure you trim it up.  When you add in the strip, it makes it a tad bit bigger so you will need to trim it down a little. 
You will do this to all of your background pieces, but changing the diagonal.  Here is a diagram to help you see which ways you need to make your diagonals for the different words:
 You will now iron your words onto your strips–making sure you iron the right word on the right strip.  Just look at the diagram above to help you with that.   You can now sew around your letters and  flags if you’d like to make sure they are secured to your fabric.  Or you can do this later when you are ready to quilt the entire quilt.
Now it’s time to piece everything together.  You are going to piece it in rows and then sew the rows together.  
You will need four strips of 3 1/2″ x 45″ as well as all of your stars and banners.
You are going to start with piecing your banners and stars together:
Place the star and banner right sides together and sew a 1/4″ seam and then place your other star on the opposite side of the banner right sides together and sew a 1/4″ seam.  Press your row.  You will do this with all three rows:
Now you are going to add the rows of background fabric between the rows and on the top and bottom.  Start by placing the first row and the first strip right sides together and sew a 1/4″ seam. You will continue to add your rows in the same way so that it looks like this:
Your top is almost done!! You now have to add your charm borders.  You will sew the following sets
 2 sets of ten charms
2 sets of twelve charms
 You will sew your side borders on first.  Place the border right sides together with your quilt top and sew a 1/4″ seam and press.  **To make them line up evenly, pin your borders to your quilt top to ensure they lay flat and also line up nicely. Do this to the left and right side.
Now you will add your top and bottom borders.  Place border right sides together with quilt and sew a 1/4″ seam across. 
You are done with your quilt top! Now you can baste, quilt, and bind your quilt using your preferred methods.  
One Wish Upon a Star Quilt Measuring 53″ x 53″
For other fun quilts and tutorials you can visit my blog Inspiring Creations

Lindsay Weight
{www.inspiringcreationsblog.com}

Candy Wishes Quilt

Hello and Happy New Year to all you Moda Bake Shop fans from all of us over at Jo’s Country Junction! The gals from Moda are always challenging us Chefs to come up with projects relating to a theme. We were challenged to work with Moda Candy packs. I am not a gal that does many small projects so I extended the challenge to come up with a quilt. This projects, Candy Wishes, is the result. The quilt is VERY quick and great for beginners or those who are teaching someone to quilt. We have a giveaway going on over at our blog, Jo’s Country Junction, for two Moda Candy packs to get you started on your own quilt.


2 Moda Candy packs
4 yards background fabric
1 yard inner border and binding fabric
5 yards backing fabric

 
CUTTING
From the background/outer border fabric:
Cut two 54 1/2″ long pieces from the length of the fabric. Subcut 9 pieces measuring 6½” x 54½”
Cut 9 strips measuring 2½”  x WOF. Subcut into 56 pieces measuring 2½” x 6½”
Cut 7 strips measuring 3½” x WOF for the outer border

From the inner border fabric: 
Cut 7 strips measuring 1½” x WOF

From the binding fabric:
Cut 7 strips measuring 2½” x WOF

CONSTRUCTION
Select 48 of the bright squares from the candy packs. I opted to not use the ones with a light background. Combine 6 candy squares with 7 pieces of 2½” x 6½” background fabric shown. Make 8 of these strips.

Sew the 8 candy strip sets to 9 strips of 6½” x 54½” background fabric as shown.

Sew the inner border strips together end-to-end. Measure the sides of your quilt top and cut 2 strips. Pin carefully and sew to left and right sides of the quilt top. Press. Measure the top/bottom of the quilt top and cut 2 strips. Pin carefully and sew a strip each to the top and bottom.

Repeat the above process with the 7 strips measuring 3½” x WOF for the outer border.

Piece the backing together. Sandwich the top, batting, and backing. Quilt as desired.

If you want to see what I did for a quilting motif, come of over to my blog and check it out. Bind with the 2½” red binding strips.


63″ x 77″ Quilt

Remember to stop over to our blog, Jo’s Country Junction, for you chance to win 2 Candy Packs to get you started on making your own quilt.

Jo Kramer
{www.joscountryjunction.com}

Little Lady Ragged Bags


Today we are making a ragged tote bag that is the perfect size for little girls. It’s easy to make and fun to use.  I often give them for gifts filled with little toys or coloring books.

*2 packs of Moda Candy
*1/2 yard of white fabric (or coordinating fabric of your choice) for the lining
*1/2 yard of natural colored felt 

#1.  From your white fabric cut 66 squares that are 2 and 1/2 inches.
#2.  From your felt cut 66 squares that are 2 and 1/2 inches.
#3.  Open your Moda Candy packs!
#4.  Layer your squares for your bag.  Put 1 white square on the bottom, a piece of felt in the middle, and your printed fabric on the top.  (With the right sides facing out on both the white and the printed fabric.)
#5.  Choose two squares that you would like to place next to each other.  Place them (still stacked with the felt and white fabric) with the white fabric together in the middle.  Now your stack is 6 pieces deep!  (But don’t worry…your machine can handle it! 🙂
#6.  Once you are all stacked up sew down one side of your stack.  Then open it up!  (Your seams will be on the OUTSIDE and it will look crazy but that is ok…that is how you want it to look for this project!)
*Note:  For this project use a generous quarter inch seam.

#7.  Repeat the process for the 2 squares that you would like to attach underneath the pair you just made.  Once you are done place your two pairs of squares together with the white in the middle (your prints facing outward) and sew them together.

#8. Unfold and see the cute little 4 patch you just created!  Now repeat this process 13 more times.  (So that you have a total of 14 little 4 patches!)

#9.  Now select the 4 four patch squares that you would like to use for the front of your bag.

#10.  Sew the 4 squares together in the same manner you’ve been sewing thus far.  (With the white fabric in the middle and the printed sides out).  Once you are finished repeat this process for the back side of your bag.

#11.  Now we just need to sew up the two side pieces and the bottom piece for the bag.  Both the sides and the bottom are made up of 2 four patch squares sewn together.  The only difference between the sides and the bottom is just making sure any directional prints are going the right way on the pieces you choose for the sides.  So put together 2 side panels and one bottom panel. 

#12.  We have all of our pieces ready so now it’s time to construct our bag.  Put your front panel and your side panel WHITE sides together and sew it up!

 #13.  Next put that same side panel and your back panel WHITE sides together and sew it up as well!
 #14.  Now, I know what your thinking…it’s time add the other side panel.  But it’s not.  I mean I guess you could but I wouldn’t and don’t.  I add the bottom panel next.  So you will be sewing the bottom WHITE sides together in one long line across the front, pivot, down the side, pivot, and along the back side. 
#15.   Now add you last side panel…white sides together…sew down the front, pivot, across the bottom, pivot, and up the back.  Now your bag is completely formed.

#16.  We need to make the strap/handle now.  Sew together 10 fabric and felt sandwiches (exactly how we did in steps 4 and 5 only now we are sewing 10 together in a long strip instead of just 2).

#17.  Now sew a 1/4 inch seam down each side of your strap like shown in the photo below.
#18.  We are ready to attach the strap now!  Position it on the side panels right between the 2 small squares making up the top of the 4 patch squares as shown in the picture below.  I place the strap right behind the side panel and down inside the bag about 1 inch.  Then I sew the first strap on and continue stitching around the entire circumference keeping the 1/4 inch seam until I get to the next strap, which I sew on, and continue around the bag until I come back to the place where I began.

#19.  The only thing we have left to do is clip our seams.  Snip along all seam lines about every 1/4 inch like shown in the photo below.  Clip to the stitching but NOT through the stitching!!

#20.  When I finish my bags I always throw them in the washing machine on the rinse cycle and then into the dryer.  This will fluff up all those clipped and snipped seams and make them soft and cute.  This last step isn’t necessary but I always do it.

***NOTE***
There are other ways that these bags can be assembled.  However, I’ve made over 500 of these little guys and this is the way that I’ve found to have them best hold their shape and be the easiest to sew.


*1 little girls tote bag
(And 1 big disagreement if you happen to have more than 1 little girl!)

 Simple Simon & Co.
{www.simplesimonandco.com}

Scrappy Scrunchies


Hello again! This is Karin from Cascade Quilts with a cute quick project for the girls on your Christmas list! These would make great stocking stuffers! I have to admit, I have a lot of hair scrunchies and I wear them often! They are easy and fun to make to coordinate with different outfits/holidays 🙂 Stop by my website where I will be having a giveaway for some of these adorable scrunchies AND a mini charm pack so someone can make a couple of their own!


For EACH scrunchie, you will need: 

  • 20 Moda Candy pieces (2½” squares) – I used ‘Wishes’ by Sweetwater, ‘From Outside In’ by Malka Dubrawski, and ‘Grant Park’ by Minick and Simpson
  • 7″ to 8” of ⅜” wide elastic 


This project works with other precuts, as well. Substitute the 20 Moda Candy pieces with:

  • 5 charm squares 
  • 1 jelly roll strip
  • Half of a dessert roll strip 

  • 2/3 yard lace or ric-rac for each scrunchie

 If you are using mini charms, sew your 20 mini charms into two rows of 10 mini charms and press.

If you are going to use lace or ric-rack, cut to length of your pieced strips and lay on one edge of the pieced strip with the edge you want showing facing IN and far enough from the edge that your 1/4” seam will not hide it all in the seam.

The large ric-rac works well as you can line it up JUST inside of the edge and 1/4” seam is pretty much right down the center of the ric-rac then.

Sew your 1/4” seam to encase the lace or ric-rac.  Press with right sides out.

 Optional: top stitch with a scant 1/8” seam

Now, you are going to make a tube with your strips.

Using a 1/4” seam, stitch your strips to form a tube.

Here is where it might get a little confusing.  Trust me, this works if you follow closely.  with the tube laying flat, take the center of the top of the tube and fold it in thirds.  You are just folding this to get it out of the way to stitch the bottom portion together without getting the top portion in the seam.

Now take the bottom section and fold it right sides together (you will be encasing the part you folded in thirds)

Now, start stitching your 1/4” seam, making SURE not to catch the inside material, you are only stitching the outside 2 edges together.

Once you get a few inches, you will need to start pulling the center out from the tube.

Keeping your needle down, just start pulling the center out and forward.  You might have to help it along near the rear of the needle too.  Line up the new edges you pulled through and continue sewing.

Sew a few inches, pull out a few inches…..

Continue sewing until you have a small opening 2-3” left.  Backstitch.  I know this seems confusing…. I, too, was unsure this was going to work when I sewed my first one.  But, believe me, it works!  And, the next one will be much easier after you ‘get’ it 🙂

Pull the whole fabric tube right side out.  The opening will be to feed the elastic through.

Totally optional – press your fabric tube.

Feed your elastic through the tube and tie the ends, then stitch the opening closed with as narrow seam as you can.

Viola!  One super cute scrappy scrunchie!  I have tried several different ways to sew scrunchies over the years, but this is by far my favorite way.

Or maybe two?

Or threeeeee????  I can’t stop!  This one was made with a jelly roll strip (cut in half at the fold, selvedges removed, then sewn in the same manner as the scrappy one).


One (or fifteen!) super cute hair scrunchie!

Head over to my website at Cascade Quilts to enter my giveaway for some of these scrunchies and a mini charm pack so you can make your own.

cascadequilts.com

BOO! Table Runner

Em here from Em’s Scrapbag cookin’ up a little Halloween treat with the Boo Crew. A quick and easy table runner sure to scare up a little fun in your lair.

 
1 Boo Crew layer cake
¾ yard backing
Fat quarter for binding

Choose 24 of your layer cake squares. Arrange in sets of two.  (4 set for the Bs and 8 sets for the Os)
Choose one other 10″ square for spiders in Bs. Make a template from lightweight cardboard of a 6¼” circle.

For each O
Choose one of your 10″ squares and place the cardboard template on top and cut a generous ½” seam allowance around it. From the other 10″ cut a 8½” square.

For each B
Choose one of your 10″ squares and cut:
2 – 3½” squares
1 – 1½” x 6½” rectangles
From the other 10″ square cut
6 – 1½” squares
4 – 1½” x 6½” rectangles

To make the Os run a gathering stitch ⅛” around the edge of each circle.
Next pull the gathering stitch until the circle begins to pop up.

Place the template inside the popped circle and pull the gathering stitches until it encases the template.

Using Best Press and/or steam press your circle to set edge around template.

Pop out your template and center on your 8½” square background.  Top stitch in place.

For your Bs
Using your 10″ spider square cut 8- 1½” circles.  A spool of thread works good for this.
With a needle and thread start on the wrong side of the fabric and begin a gather stitch.

Folding the fabric over as you go.
Pull tight to create your spider and tie off.  Repeat with remaining circles

Sew a 1½” x 6½” B rectangle to a 1½” x 6½” background rectangle.

Take the 3½” square and sew the 1½” squares on the diagonal on three of the corners. Trim seam allowance.

 Sew a yo yo spider in the center of this block.  Repeat with the other 3½” square, remaining 1½” squares and yo yo spider.

Sew these two blocks together.

Sew the two 1½” x 6½” rectangle unit to the side of this.

 Sew another 1½” x 6½” rectangle to the other side of your B.

Sew the remaining 1½” x 6½” rectangles to the top and bottom of your B.
Sew a B to two Os to create your Boo units.  Make 4.

From your scraps or remaining 10″ squares cut 4- 5″ x 6 1/2″ rectangles and 1- 4 1/2″ x 6 1/2″ rectangle. Sew these together with the smaller rectangle in the center. Sew this piece between two of the Boo units.

You can stop here to make a table mat or add the remaining Boo units on either end for a runner.

 Sandwich top with batting and backing and quilt as desired.  I quilted spiderwebs in mine.

22″ x 38″ runner

Emily Bailey
{www.emsscrapbag.blogspot.com}

Spider Web Little Quilt


Hi. My name is Karen O’Connor and my husband, Kevin, and I own Red Rooster Quilts. Our quilt shop is locate in beautiful Dublin, Ohio home of the Memorial Golf Tournament and now playing the President’s Cup Golf Tournament. We have over 3500 bolts of fabric and 100+ samples on display. Please visit us when you are in town or shop on line at www.redroosterquilts.com. This is my first recipe on Moda Bake Shop and I am so excited! I love fall and Halloween and I think I have more quilts and decorations for those seasons than any other season. I hope you enjoy this little spider web quilt.

 
4 – The Boo Crew Mini Charm Packs by Sweetwater + 1 extra purple spider print 2″ square
1/4 yard of Moda Solid black #9900 99
1/4 yard of Boo Crew Tricky Orange #5512 21 for binding
3/4 yards of Boo Crew The Bash Green # 5510 13 for backing
1 craft size batting


1 – 2 1/2″ square Olfa ruler #QR2S
1 – Sewline Fabric Mechanical Pencil green
Best Press
Quilt Basting Spray by Sullivans
Aurifil thread

 
Open one mini charm pack at a time. You will need 36 of the charms. Cut each 2 1/2″ square in half on the diagonal. I like to carefully open the pack and leave them stacked neatly. I choose about 6 charms at a time to cut. You can choose however many you are comfortable with.

Sometimes the corners are not very well defined.  Just do your best to center the ruler and slice.  We will be trimming them up later so it’s not that critical that you get the exact center.

Layout your triangles like this.  It’s not critical that you put the same prints in the exact same spot as I did.  What does matter are the purples.  If you want your purples to be all the same in the center then you need to place the purple spiders in the same spots as I did.

Sew each pair of triangles together with a scant 1/4″ seam allowance.

I sewed mine just over 1/8″ of an inch. 

Press the seams towards the dark.  Lightly spray with Best Press.  I use this product because it helps keep the fabric from stretching.  And, I like the way my fabric feels while sewing with it.   
Square up each block to 2″  Using your 2 1/2″ square ruler, line the diagonal line up along the seam.  Trim two sides. 
 Flip the block around and line up the diagonal line on the seam and the cut edges on the 2″ lines.  Trim the other two sides.   

A perfect 2″ block!  Love it when that happens.

Continue to sew the triangles together and square them up to 2″.  Sew the blocks together into rows then sew the rows together to make this block:  Make 4 blocks total.

 Cutting the black:
      Cut 3 – 2″ strips. 
          Sub cut into 4 – 2″ x 9 1/2″ strips
                              2 – 2″ x 20″
                              2 – 2″ x 23″
Sew the 2″ x 9 1/2″ strip between two blocks.  Repeat for the other two blocks.

Sew one 2″ x 9 1/2″ strip to the 2″ purple block.  Then sew the other 2″ x 9 1/2″ to the other side.  Sew this strip to the blocks in the center.

Sew the 2″ x 20″ strip to each side.

Sew the 2″ x 23″ to the top and bottom. Spray the entire quilt top with Best Press and press.

Layer with your batting and backing.  I like to use the Sullivans quilt basting spay.  I lay my backing down, wrong side up and spray.  Then I fold my batting in half and lay the fold down in the center.  I smooth the half down that is on the backing.  Then I fold the other half over and smooth it down. Repeat with the top. 

I drew a diagonal line with the Sewline fabric mechanical pencil down the center of each color to make squares.  I sewed on the line with black thread.  You can see the quilting better on the back:

Binding:  I cut 3 strips 2 1/4″ x wof.  I prefer a little bit thinner binding.  Attach binding in method preferred. 

A kit is available on our web site that includes all the fabrics for the top, binding and backing for $34.99.  Backing may vary from the one used but it will be from the Boo Crew line.


Makes one little quilt ~23″ square.  It would be great as a center piece on your table with a basket of candy or a vase of flowers or with a candle.   Makes a great addition to your Halloween décor!

Karen O’Connor | Red Rooster Quilts

Bitty Bunting Quilt


Everyone loves a bunting quilt! I was inspired to make this quilt from the trimmings of another quilt. I was using a pattern that calls for dog ear corners from 2½” squares. The resulting triangles looked like pretty bunting flags to me (considering that the fabric was Bonnie and Camille’s Marmalade, any excuse to not throw out even tiny scraps, right?) I kept them in a bin on my cutting table for a few days and the idea of using Moda Candy for tiny bunting flags popped into my head.

Moda Candy are perfect for this quilt since folding them in half allows you to create two-sided flags that look very cute waving about. There are lots of ways to attach the flags – use bias tape like I have or sew them all down first and add ric rac trim. I’ve also made bunting quilts with Perle cotton stitches standing in for the bias tape. Use what you have on hand. There is really no wrong way.

If you want to use a solid background instead of piecing the ombré background, simply start with a 1½ yard cut. I’ve also included a girly color option below.

Bunting:
43 Moda Candy pieces* (equivalent to 1 packages plus 1 more.  I used a mix of Lucy’s Crab Shack, PB&J, and Oh Deer!)
4 yd of ¼” double-fold bias tape in coordinating color
Background: 
¼ yd dark blue (Royal | Bella Solid 9900-19)
¼ yd cobalt blue (Bright Sky | Bella Solid 9900-115)
¼ yd bright blue (Capri | Bella Solid 9900-225)
¼ yd gray blue (Glacier | Bella Solid 9900-207)
¼ yd light blue (Blue Raspberry | Bella Solid 9900-84)
¼ yd white (White Bleached | Bella Solid 9900-98)

Binding: 3/8 yd preferred print (I used Silver | 9900-183)

Backing: 3¼ yd (I used bits of leftover blues and Lush Uptown | 26047-22)

*NOTE: You may use more or fewer pieces of Moda Candy, depending on how you swag your bunting across the quilt.

Alternative Fabric Choices:
For a girl version of this quilt, try using Shocking Pink | 9900-223, Popsicle | 9900-143,  30s Pink | 9900-27, Amelia Pink | 9900-166, and Parfait Pink | 9900-248 instead of the blues listed above.

 
1. Piece ¼ yd strips from light to dark to create ombré background. Trim the selvedges before you sew or leave them on and trim all of them at once like I did. Press each seam from light to dark.

2. Layer up with your backing fabric and batting and quilt.

3. Square up quilted background and set aside.

4. Time to sew the bitty bunting! Set your stack of Moda Candy next to your sewing machine. Fold the first Candy square diagonally from corner to corner to create a triangle. Press or pin to make it easier to sew.

Top stitch around the sides of the triangle. You can chain piece but be careful not to stitch your Candy pieces together.

5. Place one bunting triangle between your bias tape with the fold  facing away from the triangle point.  Top stitch along the opposite edge of the bias tape to close the seam.

6. Pin bitty bunting to quilted background so that it drapes from edge to edge.

7. You can attach your bunting by top stitching long fold of the bias tape OR use an invisible stitch to tack it down (that’s what I did).

8. Trim any loose threads and bind as desired.


A simple, sweet, and modern baby gift! Measures approximately  43″ x 51″.

Lisa Calle
{www.vintagemodernquilts.com}

Road Fifteen Sixteen Patch Quilt


My name is Erica and I blog over at Kitchen Table Quilting and I am so excited to share this quilt with you.  Road 15 is such an inspiring collection and this was such a fun and quick quilt to put together.  I hope you enjoy the tutorial!

2 Road 15 jelly rolls
2/3 yard Road 15 print for binding
2.5 yards Moda Bella in Gray
5 yards Road 15 print for the backing fabric

1.  Take 72 strips from your jelly rolls and put them into pairs.  You want each pair to have one lighter strip and one darker strip so that there is good contrast between them.
2.  Cut each jelly roll strip in half at the fold. 
3.  Take one half from each jelly roll strip and piece them together along the long edge.  I didn’t pin my strips, but it is important to try piece these as accurately as possible.

 4.  Piece the pairs together along the long sides so that thee colors alternate; here I have blue – black – blue- black.  This should create one piece that is 8.5″ by roughly 22″.  There is a little leeway in the second measurement so if yours is a little shorter that is okay.

5.  Trim one edge. Line up your ruler with the lines on your fabric to make sure that you are cutting perpendicular to the pieces that you have just sewn.

6.  Start cutting 2.5″ strips from the trimmed edge.  This is where you will be glad that you pieced accurately in the previous steps.  If you didn’t sew them perfectly straight, you might need to occasionally re-square the edge of the fabric.  I know that I did.

7.  You should now have 8 pieces that are 2.5″x8.5″.

8.  Flip over every other strip.

9.  Sew them into pairs.

10.  And then pairs again so that you create 2 blocks that are 8.5″ square.

11,  Cut your sashing fabric into 12 strips that are 2.5″xWOF.
12.  Subcut these strips into pieces that are 2.5″x8.5″.  You should be able to get five 8.5″ pieces from each WOF strip.
13.  Sew a one 8.5″x2.5″ strip between each set of blocks and continue joining the blocks until you have diagonal columns.  There should be a single block in the top left corner, then 3 blocks, 5 blocks, 7 blocks, 9 blocks, 11 blocks, 11 blocks, 9 blocks, 7 blocks, 5 blocks, 3 blocks, until you get back to just 1 block in the bottom right corner.

14.  Cut twenty-three 2.5″xWOF pieces for the sashing that is going the opposite diagonal direction.  Cut off the selvage if you haven’t already and sew these strips together along the short side so that you have strips measuring:

  • 2 strips 20″ long
  • 2 strips 35″ long
  • 2 strips 55″ long
  • 2 strips 75″ long
  • 2 strips 95″ long
  • 1 strip 115″ long

15.  Since we are going to trim the blocks along the outer edge, these strips don’t need to reach from edge to edge on the quilt.  Just try your best to center them over each diagonal row and piece together.  The measurements give you more than 5″ extra so you have a little wiggle room.
16.  Once you have added the sashing, piece together the diagonal rows.
17.  Trim the edges to make the quilt square.
18.  Baste, quilt, and bind as desired.

An almost-twin sized quilt that is about 72″x85″. 

I think he likes it, what do you think? 

Erica Jackman
{kitchentablequilting.blogspot.com}

The Valencia Street Bike Basket

The Valencia Street Bike Basket-- Make a bike basket from a pair of fat quarters. Tutorial by Make It Handmade


Hi! It’s me, Palak– owner of Make It Handmade and a very proud mom. My biggest little one just ‘graduated’ from his tricycle to a 2 wheeler with training wheels. So far, his bike rides have been limited to riding from the backyard to the front yard; but I know this is just a sign of more independence to come.

To send him on his way in style; I decided to make him (and his sister) bike baskets to take with them where ever they go.

These bike baskets are made with just 2 fat quarters and a bit of interfacing or batting and are deep enough to accommodate all the summer essentials– a teddy bear, a princess cup, and those pebbles that were too shiny to leave at the park.

The Valencia Street Bike Basket-- Make a bike basket from a pair of fat quarters. Tutorial by Make It Handmade

  The very best part? At the end of the summer; you can toss them in the wash, and they’ll look brand new for the first day of school. 

The Valencia Street Bike Basket-- Make a bike basket from a pair of fat quarters. Tutorial by Make It Handmade

And even though Valencia Street Bike Basket was designed for the preschool set, it’s large enough that you can ‘borrow’ it for your own adult bike.
 

2 Fat quarters (I chose prints from Road 15 by Sweetwater)
4 12 inch lengths of ribbon
18″ x 22″ piece of quilt batting, or sturdy fusible or sew in interfacing

These bike baskets come together very quickly! I was able to finish the red and black bike basket (my second one) in about half an hour; from cutting to loading it up with stuffed animals.  When deciding whether to make a velcro or ribbon closure, consider the the bike– ribbon closures will work on any bike or trike.  To use the velcro closure you must have a bike with a bar between the handle bars.

Let’s get started! 

If you are using fusible fleece or interfacing fuse the lining and interfacing together before starting. If you are using quilt batting or a sew in interfacing, pin the batting/interfacing to the wrong side of the lining, and treat them as one piece of fabric from this point on. I used a heavy canvas lining which you will see in the pictures.

Trim the two fat quarters to get rid of the selvage and ensure they are the same size. Fat quarter sizes vary slightly from brand to brand; but this tutorial will work as long as your pieces are the same size. 

The Valencia Street Bike Basket-- Make a bike basket from a pair of fat quarters. Tutorial by Make It Handmade

Fold your outer fabric fat quarter into fourths. Cut a 6 inch square from the corner without any folds. Do this for the lining as well. Set those squares aside- we might be using them later!

The Valencia Street Bike Basket-- Make a bike basket from a pair of fat quarters. Tutorial by Make It Handmade

When you unfold the fat quarters, you should see something like a chubby plus sign. The middle is the base of the basket, while the ‘arms’ of the plus sign are the sides.  

The Valencia Street Bike Basket-- Make a bike basket from a pair of fat quarters. Tutorial by Make It Handmade

 Using the outer fabric, fold the corners together as shown and sew with a 3/8 seam allowance. In the picture below, I’m sewing the bottom left corner.

The Valencia Street Bike Basket-- Make a bike basket from a pair of fat quarters. Tutorial by Make It Handmade

 To insert the ribbon ties, pin the 12 inch strips of ribbon 1 inch from the top of seam before sewing the last two corners together. Do this on opposite corners of one of the long sides.

The Valencia Street Bike Basket-- Make a bike basket from a pair of fat quarters. Tutorial by Make It Handmade

 Do this for the same thing (without the ribbons) for the lining. When you are finished you should have two ‘baskets’– one much floppier than the other.

Press the outer fabric seam allowances toward the short sides of the basket; and press the lining seams towards the long sides of the basket.

The Valencia Street Bike Basket-- Make a bike basket from a pair of fat quarters. Tutorial by Make It Handmade

 With right sides touching, place the outer basket in the lining basket.

The Valencia Street Bike Basket-- Make a bike basket from a pair of fat quarters. Tutorial by Make It Handmade

 Pin all the way around, making sure to nest the seams as you go. Sew all around using a 3/8 seam allowance leaving a small opening for turning.

The Valencia Street Bike Basket-- Make a bike basket from a pair of fat quarters. Tutorial by Make It Handmade

Turn your project through that small opening and press! Top stitch a 1/4 inch from the top of the basket making sure to close the opening you left for turning.

The Valencia Street Bike Basket-- Make a bike basket from a pair of fat quarters. Tutorial by Make It Handmade

 You are finished and ready to ride!

The Valencia Street Bike Basket-- Make a bike basket from a pair of fat quarters. Tutorial by Make It Handmade

Velcro Closure

I knew my son wouldn’t appreciate those oh-so-girly ribbon ties; so his basket has a velcro closure. The velcro closure will only work on bikes with a bar between the handle bars.  To add velcro, first make up a basket just as before; leaving out the ribbon.

The Valencia Street Bike Basket-- Make a bike basket from a pair of fat quarters. Tutorial by Make It Handmade

 Take 2 of the 6 inch squares set aside earlier and place them right sides together (layer the batting on the outiside. Stitch around all sides of the square leaving a small hole for turning. Turn the square out and press well.

The Valencia Street Bike Basket-- Make a bike basket from a pair of fat quarters. Tutorial by Make It Handmade

 Sew the velcro to the square as shown.

The Valencia Street Bike Basket-- Make a bike basket from a pair of fat quarters. Tutorial by Make It Handmade

Position and pin the velcro patch so it is centered horizontally and overhangs the basket on top by about an inch.  Attach the square to the basket with two lines of stitching– one  across the middle of the square and one above the bottom piece of velcro.

The Valencia Street Bike Basket-- Make a bike basket from a pair of fat quarters. Tutorial by Make It Handmade

Although you will see the stitching on the inside of the basket, stitching through the outer fabric, lining and interfacing will give the velcro band more strength.

Tips and Tricks:

  • If you can’t find matching ribbon for the ribbon ties; you can use a leftover square to piece together 4 12 inch ‘ribbons’. 
  • For the velcro strap, if you have access to the bike, consider making the strap the exact length of the bar. This will make the strap even sturdier and the basket better able to handle heavy loads.
  • Consider using one of your scrap squares to applique a name or initial to personalize the basket for your little one.

One stylish bike basket– so your preschooler can take a little bit of home where ever he may roam.

The Valencia Street Bike Basket-- Make a bike basket from a pair of fat quarters. Tutorial by Make It Handmade

Palak Shah
{www.makeithandmade.com}