30-Minute Gift: Charm Square Scarf


Hi, my name is Trish and I blog over at notes of sincerity.  Today I am going to teach you how to create a fun and cozy scarf for those cooler days that lie ahead.


1 charm pack of Patisserie by Fig Tree Quilts for Moda
 20” x WOF* of flannel in desired choice

This is actually a very easily adjustable pattern that you could increase or decrease the length of your scarf depending on what you prefer.  You could also use your favorite scraps of fabric.

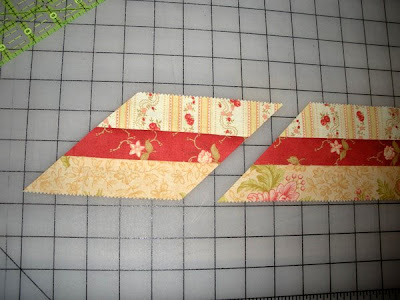
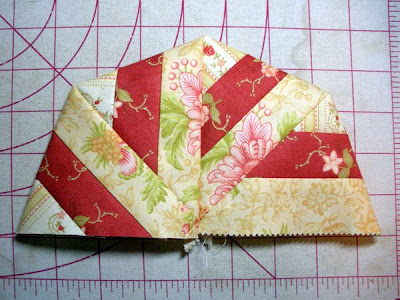
First, you will need 34 of the 5” charm squares.  So pick out your favorites and place side by side in sets of two.  When the desired pairs are matched, stack together.

Sew each pair using a ¼” seam (I prefer using a chain stitch method.).

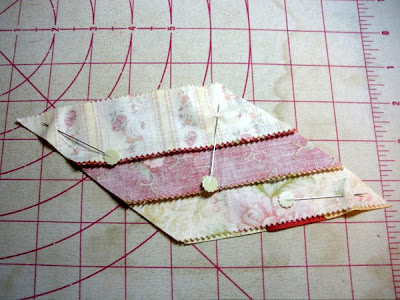
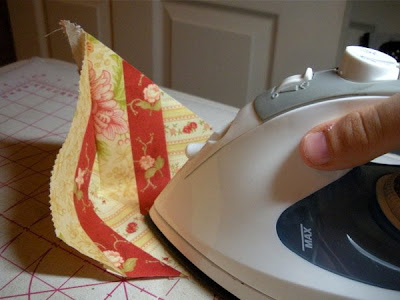
You now have 17 pairs, give seams a good little press with a hot iron.

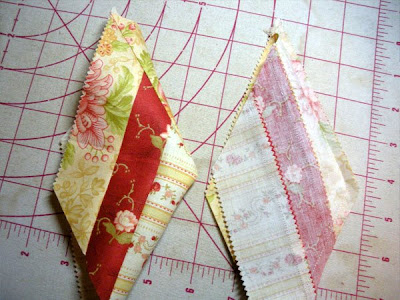
Open pairs and press to one side.

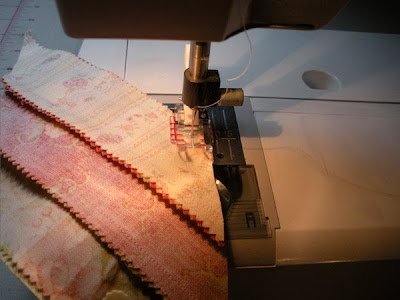
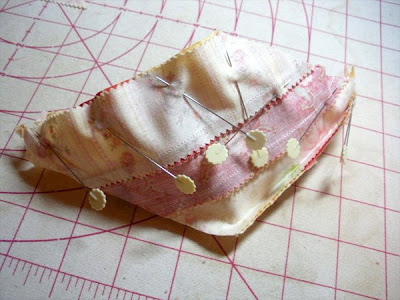
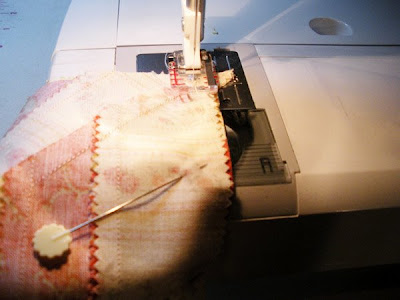
Sew pairs together, locking center seams that are ironed in opposite directions …

… until you have the full length of the scarf.


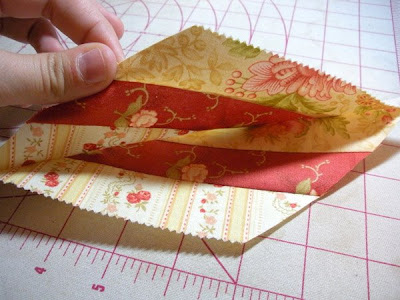
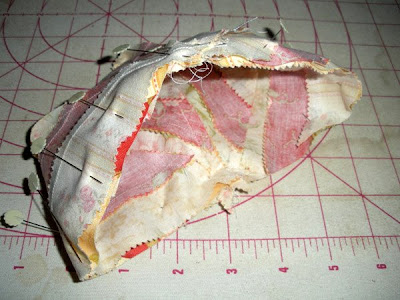
Again, press those newly sewn seams with a hot iron.  Then press in one direction. Cut flannel in two strips measuring 9 ½” x WOF*.  Sew both pieces together, end to end with RST*, press seam with a hot iron, open and iron to one side, then cut to 76½”.

Pin scarf front to scarf back, RST*.

Begin sewing around perimeter with a ¼” seam.  Secure beginning and ending stitches, leaving a gap you will be able to put your hand in to, enabling you to turn it right side out. Once scarf is sewn, clip the corners below seams, in order to bring corners to a nice point once turned right side out.  Give seams a press with a hot iron.


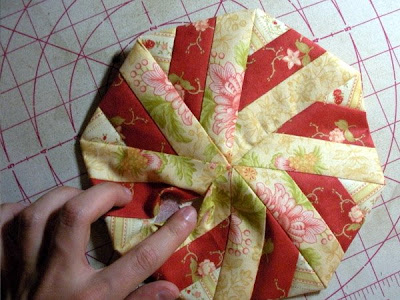
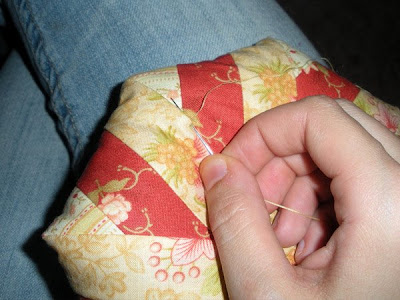
Turn right side out, pushing out corners to a point.  Press perimeter carefully, making sure it lies flat.

Sew around the perimeter using a “scant” ¼” seam.  Secure seams at beginning and ending of stitches.


One 9″ x 76″ cute and snuggly scarf that looks cute with a denim jacket and makes a fun Christmas gift for those special ones in your life.

 *RST = right side together
*WOF = width of fabric

Trish Poolson
{notesofsincerity.blogspot.com}

Giant Pincushions


These are super simple to make and adorable! They come in handy around your sewing room and work as great gifts for sewing friends.

honeybun or jelly roll strips
hand sewing needle & matching thread
pincushion filler of your choice

Patisserie by Fig Tree – Neptune by Tula Pink

1. Pick 3 honeybun strips that look good together and have some contrast.
2. Sew them together into a strip set. Offset the start of your strips like this.

3. Press seams. This can be in any direction.
4. Measure your strip to make sure it is 3 ½” wide. If it is not it is ok if it is smaller (your ¼ is bigger) but not larger (you are sewing too scant) Correct if needed and write down what the width of your strip is.
5. Cut a 45 degree angle at the one end of your strip.

6. Turn your ruler so you can cut a diamond. Cut it to be 3 ½” or the width of your strip set.
Repeat for a total of 8 diamonds.


7. Place diamonds RST into 4 sets making sure that the top points are the same fabrics.


8. Pin & Sew along 2 sides from top to bottom pivoting in the center. (repeat 3 times for 4 sets)


9. Open and press towards solid strip. (not the part with 2 seams) (repeat 3 times.)


10. Similar to step # 7 place diamond sets RST and pin. The ironing from step #9 should help you interlock the seams at the top and bottom. Sew 2 sides from top to bottom, repeat for 2nd set, and iron again.


11. Now you have 2 halves of your pincushion.


12. Put one half inside the other RST. Pin all the way around and sew leaving a 1 ½” opening.


13. Turn right side out. Fill with stuffing or filling of choice.


14. Hand sew opening closed and you are done!

See how easy that was!

Red White & Bold by Sandy Gervais – Neptune by Tula Pink

1. Pick 2 jelly roll strips that look good together and have some contrast.
2. Sew them together into a strip set. Offset the start of your strips.
3. Press seams. This can be in any direction. (since i had a light color solid here i pressed toward the blue print)
4. Measure your strip to make sure it is 4 ½” wide. If it is not it is ok, just write down what the width of your strip is.
5. Cut a 60 degree angle at the one end of your strip.
6. Turn your ruler so you can cut a diamond. Cut it to be 4 ½” or the width of your strip set.
Repeat for a total of 6 diamonds.

7. Place diamonds RST into 2 sets making sure that the top points are the same fabrics. You will have 2 leftover at this point.
8. Pin & Sew along 2 sides from top to bottom pivoting in the center. (repeat 1 time.)
9. Open and press towards solid strip. (not the part with 1 seam) (repeat 1 time.)

10. Similar to step # 7 place a diamond set RST with a loose diamond and pin. Sew 2 sides from top to bottom, repeat for 2nd set, and iron again.


11. Now you have 2 halves of your pincushion.


12. Put one half inside the other RST. Pin all the way around and sew leaving a 1 ½” opening.

13. Turn right side out. Fill with stuffing or filling of choice.
14. Hand sew opening closed and you are done!


see just as easy!!

you probably noticed that one of my pincushions has a lot of fabrics… this is achieved by cutting your diamonds from different strip sets… it makes a nice scrappy look and can help you use up leftover strip sets so you can go buy more fabric!

another option is to flip every other diamond… instead of a star you’ll end up with more of a pinwheel…

the possibilities are endless!!

Super cute pincushions.. you won’t be able to make just one!
3 Honeybun strips = 6 1/2″ x 6 1/2″ x 3″
2 Jelly Roll strips = 8″ x 7″ x 3″

Enjoy!
by Julie of jaybirdquilts!

Fabric Lamp Shade


1 patisserie honey bun
lamp shade
big sheets of paper
quilt basting spray
perle cotton thread size 8 in ecru

decorative trims, rick rack &/or buttons

remove lamp shade from lamp stand.
tape a few big pieces of paper together.
{i used three 18×34 pieces of drawing paper and taped them together.}
you’ll want to make sure that you have a nice, big work area of paper.
place the lamp shade on it’s side, lining up the seam with the paper.

trace the bottom & top edge of the shade with your pencil,

slowly rolling the shade as you go, until you get back at the seam.
{as shown by my hubby.}
hint: this part is MUCH easier with 2 people.
your paper will look something like this.
{click the pic to enlarge.}
extend the lines by an inch, as shown.

draw a straight line between the outside lines.

cut out the pattern you’ve drawn.

just for good measure, fit your pattern around your lamp.
yours will overlap like mine, it’s supposed to.

pick out you fav honey bun strips.
i used 16.

cut those honey bun strips in half.

it’s audition time!!!
lay your strips out in a manor that’s pleasing to you.

fold your pattern in half.

take the middle strip from your layout audition,
spray a thin layer of quilt basting spray on it.

place that strip directly on the fold line of your pattern.
this will make a paper foundation for your strips.

lay your first strip right side down onto your foundation strip.

turn your stitch length down to about 1.5
{just trust me!!!}
and sew your first strip on.
after each strip, press with a dry iron.
it makes a difference to press after each strip, so don’t skip it.
keep adding strips until you cover the right side of the pattern.
now flip your pattern over.
go again until you cover this side of the pattern.
your covered pattern should look something like this.

trim off the stragglers using the pattern as your guide.

now here’s the fun part.
remember how i told yall to shorten your stitch length???
that was so the needle would perforate the paper for you.
just tear off the paper gently, like you would a check out of your checkbook.
you’ll be doing this in sections.

this is what the pattern will look it.
cute huh???
now this is important: spray this block with a lightweight starch.
{i prefer to use magic sizing.}
you wanna do this so that your seams lay flat.
{hint: make sure to change your needle before going back to fabric.
i use a completely separate needle for paper foundations.}
spray your lamp shade seam with your quilt basting spray.

start by placing the short side of the fabric on the lamp shade’s seam.
secure it with pins.
spray the inside of fabric generously with quilt basting spray.
slowly roll the fabric over the lamp shade, a little bit at a time, smoothing the fabric out towards the edges as you go.
i have found that it helps to pin as you go.
{just to make sure that it holds in place until your fabric dries.}
allow the end of your fabric to overlap the beginning seam at least 1/4″ in case the fabric shrinks as it dries.
feel free to spray it with extra quilt basting spray.
i wanted to secure my fabric in a cutesy way, like so.
all you have to do is thread a needle with your perle cotton thread {doubled} and stitch around the top, bottom & seam of your fabric.
when you are done with your cutesy stitching, trim the underneath fabric to about 1/4″ or so.
it doesn’t have to be exact, no one it going to see it.

when the adhesive has dried, return you lamp shade to the base, and let your light shine.

one SUPER awesome new lamp shade!!!

so the next time you pass up that ugly lamp at the flea market…envision it in your fav fabrics!!!
{mine coordinates with the quilt on our bed, and i am completely in LOVE with it.}
rachel of p.s. i quilt

Fabric Frame Tutorial


1 patisserie honey bun.
wooden 4×6 picture frame. {not plastic or metal.}
elmer’s glue-all multi purpose glue. {mod podge works just as well.}
foam craft brush.

decorative ribbons, selvages &/or buttons.

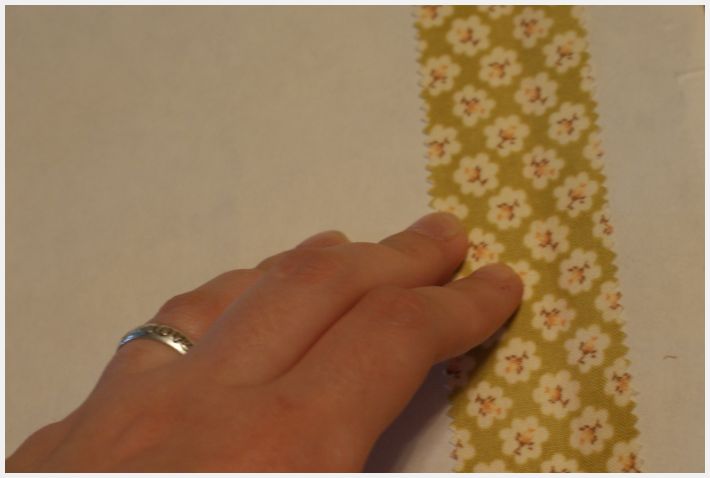
pick out 4 of your fav prints from your honey bun.
{this is a teacher’s gift, so i chose the 2 map-ish ones along with 2 that coordinated.}

cut your 4 honey bun strips in half.
{i cut mine right on the fold.}

now it’s time to prep your frame.
i cleaned mine with some lysol all purpose cleaner.
make sure you let it dry really well.

pour your glue {or mod podge} in a bowl.
trust me it’s much easier this way.
{and a wet wash cloth is very handy to have near by.}

start by brushing on some glue.
it’s okay to be liberal because you want the fabric to stick.
just don’t goop it like crazy and you’ll be fine.
promise.

place the end of your strip on the back side of the frame.

you’ll need to hold the end while you start to wrap the strip around.


and just keep wrapping.
make sure that you are wrapping the fabric tight up against the wood.
if you don’t the glass and frame backing won’t fit properly.

and don’t be intimidated by the corners.
just add some extra glue on the folds.


when you come to the end of your strip just overlap to the next one.
and make sure that the end of the 1st strip ends up on the back side.
{you might have to trim it like i did.}

at this point you might be thinking, “why am i doing this to my fabric???”
please trust me that once it’s dry you’ll ♥ it.
promise.

just continue wrapping until your whole frame is done.
take your wet wash cloth and rub it gently over the whole thing.
this is to make sure there isn’t a big dot of glue somewhere.

this is important:
before your glue/fabric dries, you need to fit the glass into the frame.
this will ensure that your glass & the frame backing will fit back in correctly.

set the frame aside for it to dry completely.
mine only took about 20 minutes because i set it out in the sun.

while your frame dries, go ahead and get your pic ready.
in this case i made up a little quote pic for jackson’s teacher.

and after your pic is ready if you’re still waiting for the frame to dry…
you can whip up one of these…

you can transform aluminum cans into cute holders by doing the same thing!!!
it’s SUPER quick to do. and easy peasy.

and don’t stop at those honey bun strips!!!
{i knew i was keeping all those moda decorative ribbons for a reason.}

and now…the moment you’ve been waiting for…
once your frame is completely dry, assemble it all together…

and voila…you have just made your very own fabric frame!!!
pure cuteness huh???

these little quote frames & pencil holders make the perfect gifts for teachers.
{and quilty pals.}

but don’t forget to make some for your family pics!!!
cute, cute, cute!!!


p.s. i quilt

Sugar Cookies Table Runner


Featured Fabric Collection – Patisserie by Joanna Figueroa, Fig Tree Quilts for Moda

One Moda Charm Pack — forty 5″ charm squares

3/4 yard background and binding
1/4 yard inner border
3/4 yard outer border
Marti Michell Perfect Patchwork Templates Set G – Small Hexagons Plus.


Using the large hexagon template #42 included in the Marti Michell template set and the 5″ charm squares, cut out a total of 39 hexagons.
Cut four strips 2 1/4″ by 42″ from the background fabric. Using the large triangle template #45 from the Marti Michell template set, cut a total of 76 triangles. Sew the hexagons and the triangles together as shown below. Make four of Block A, two of Block B and thirty-three of Block C. Sew the blocks into rows as illustrated below.Sew the five hexagon rows together to create the center of the Sugar Cookies table runner.From the inner border fabric cut two strips 1 1/2″ by 28″, two strips 1 1/2″ by 13″ and two strips 1 1/2″ by 14″.

Sew one of the 1 1/2″ by 28″ strips to each side of the table runner center. Following the shape of the table runner center, trim the inner border.Sew one 1 1/2″ by 13″ inner border strip to one end of the table runner center and trim, following the table runner shape. Repeat this step with the opposite end of the table runner.Sew one 1 1/2″ by 14″ inner border strip to one end of the table runner center and trim following the table runner shape. Repeat this step with the opposite end of the table runner. From the outer border fabric cut two strips 4″ by 31″, two strips 4″ by 19″ and two strips 4″ by 22″. Follow the steps above to sew on and trim the outer border.
Finishes 26″ by 46″
Quilt and bind!
Sugar Cookies designed by Margot, The Pattern Basket