Sitting and rocking, cozily wrapped up in a blanket while looking through photos, is a common occurrence in our household. Since both my family and my husband’s family live in other states, we like to take time to show our daughter pictures and review names of loved ones who live far away. I suppose this is a way for us to keep family members close to her heart and fresh in her mind –this was the inspiration behind the fabric photo album tutorial I’m going to share with you today.
Hi, I’m Angela Flicker and I specialize in machine applique, modern quilting, and sewn goods for children and the home. My fabric photo album idea originated in a quilt. I’m a predictable person by nature – a “rules girl” really, but with quilting, I find it’s important to do the unexpected, to push the traditional boundaries of what a quilt can mean.

This original quilt idea was a hit –to wrap up in a blanket, while looking through photos, who wouldn’t want to do that? I made a quilt like this for my daughter and she loved it. We sit at night, looking at photos of loved one, all wrapped up and snug. If you’re interested, the quilt pattern is available here, and the quilt is on sale here. I used Urban Chicks’ “Dream On” fabric line for this quilt.

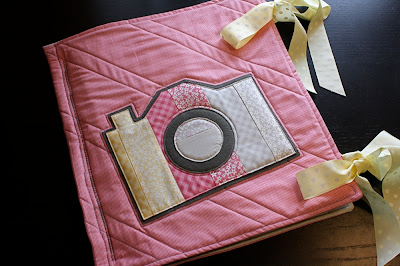
I wanted to make my daughter another photo album. I wanted it to have more pages and spots for photos. Like the quilt, I wanted it to be interactive and child friendly. I also wanted it to be made of fabric; I feel that fabric is more inviting than paper – it asks to be touched. And so today, I’m going to share my fabric photo album tutorial with you…


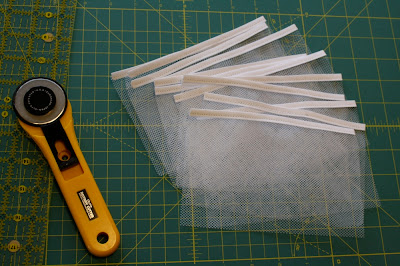
An Important Note: Concerning ingredients, there’s one thing I need to mention. When making photo albums, I still can’t decide if I like using clear vinyl or tulle better. When I first came up with this idea, the obvious material for the photo holders seemed to be vinyl. Yet, as I worked with this material, I realized that maybe it wasn’t and so I then tried tulle. After using both materials, the conclusion I’ve come to is that each material has its pros and cons. Tulle, while not as translucent as the clear vinyl, is much easier to work with, doesn’t glare, and can be ironed and dried after washing. Clear vinyl on the other hand, allows your pictures to be more visible and aesthetically, I like how the vinyl looks a little bit more. As you work through this tutorial, I’ll show you how to make both a photo page with vinyl, and a photo page with tulle — from there you can decide which material you prefer to work with.
For tulle photo pages, you will need:
- ¾ yard tulle –54” wide (The most translucent you can find–I literally brought a photo into the store with me when I was buying the tulle, and laid it under various types to see which tulle gave me the clearest picture. Along with that, you want your tulle to be iron, dryer, and washer friendly.)
- 8 ¾ yards of double fold bias tape (the thinner the better)
OR For clear vinyl photo pages, you will need:
- ¾ yard clear vinyl –54” wide (Washer friendly)
You will also need:
- 1 jelly roll –Sunkissed by Sweetwater
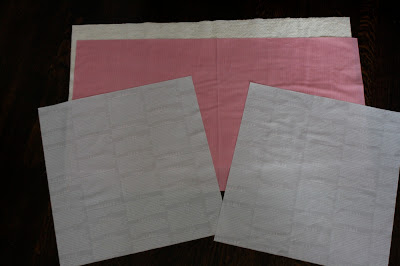
- 5/8 yard of fabric for the exterior of the photo album cover –Sunkissed Pink Sorbet Skinny Lines Yardage
- 5/8 yard of contrasting fabric for the lining of the photo album cover –Sunkissed Misty Grey Life Defined
- Batting –32 ½ ” x 18 ½ ”
- Ribbon –4 pieces of ribbon, each 10-20” long, depending on the thickness of the ribbon (thicker ribbon requires a longer amount to tie a nice bow)
- Washable friendly wool felt –fat quarter
- Thread
- Safety pins and sewing pins
- Rotary and straight edge
- Sewing machine with a walking foot
- Masking tape
- Freezer paper
- Ironing starch
- Ironing board & Iron
- Small paint brush or Q-Tip
- Tiny cup or dish
- Scissors

- Piping –15 pieces 16″ long = 240″ or 6 3/4 yards
- Zipper foot for your sewing machine
- Water soluble basting glue

Making the photo album cover:
- Cut a 32 ½ x 18 ½ piece of fabric for the exterior of the photo album cover, and a 32 ½ x 18 ½ piece for the lining of the photo album cover. Also, cut a piece of batting 32 ½ ” x 18 ½ ” in size. Note: the fabric I chose to use for the lining of my photo album needed to run vertically. I only had ½ yard though, so I cut 2 pieces, 18 ½ x 16 ½ and had them overlap in the middle. This will be covered up when the photo album is bound, so it’s no big deal. If you run into the same problem, you could also sew the pieces together if you wanted.
- Cut 4 pieces of ribbon, each 10-20” long, depending on the thickness of the ribbon. I chose a pretty thick ribbon for my book, and in order to tie a bow I needed my ribbon to be about 20” long.

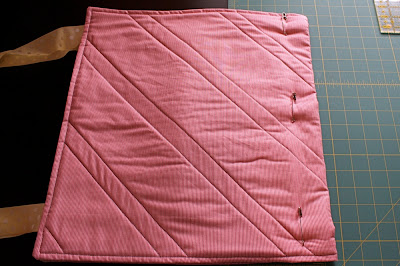
- Like basting a quilt, we are going to baste these pieces together. First, lay your exterior photo album cover piece down, right side up, and smooth out all wrinkles.
- Next, lay the liner piece down, wrong side up, on top of your backing, smoothing out the wrinkles and matching up the edges and the corners.
- Place the batting on top, matching up the edges and the corners.
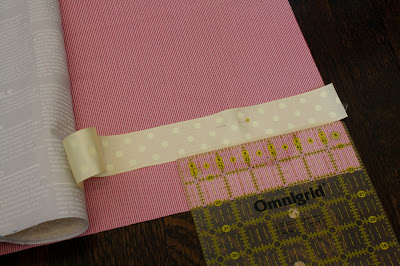
- Carefully fold the sides of the batting and the lining back, to reveal the cover. Using a ruler, measure and place a ribbon, right sides together, 2” from the top and the bottom of the side of the album cover, and pin in place. Carefully fold the batting and the lining back on top of the ribbon and the cover, being careful to keep the ribbons away from the edges so that they aren’t accidentally sewn down.
- Repeat the previous step for the other side of the book.

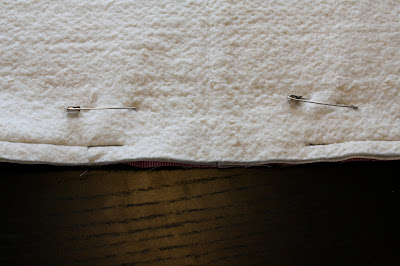
- Smooth everything out and use safety or quilter pins to baste the layers together around the perimeter of the album cover. It’s a good idea to peek between the layers to make sure the ribbons are basted down as well.
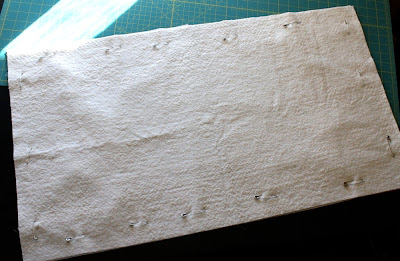
- Sew around the perimeter using a walking foot and making sure to go through all the layers, using a straight stitch and a 1/2” seam. Leave an 8” opening on one of the longer ends, so that you can turn everything right side out at the end.

- After you are finished sewing around the exterior, clip the corners, and sew a straight line along that clipped corner.
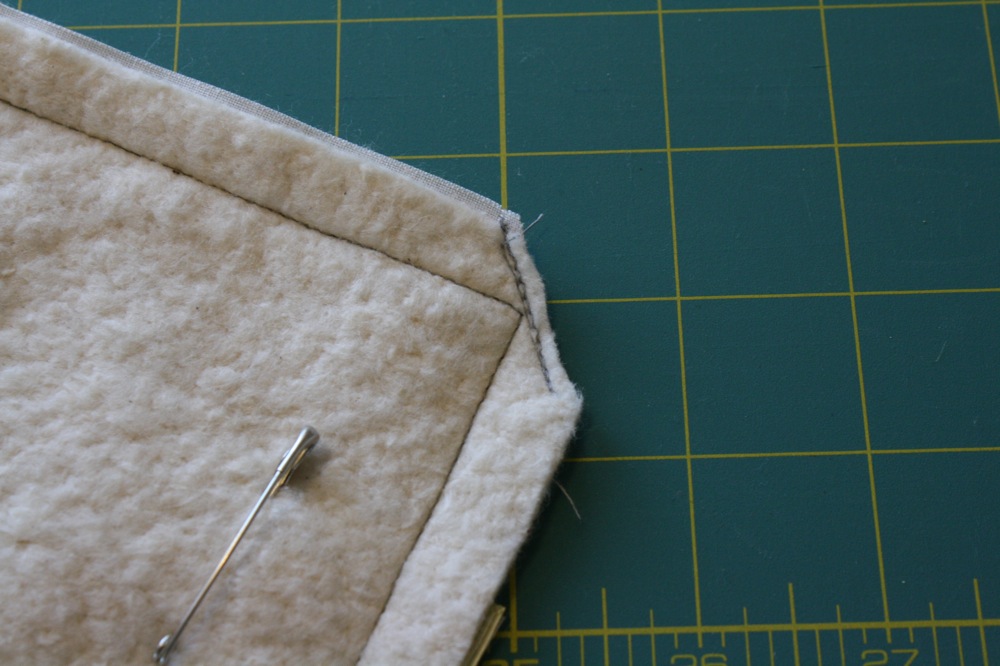
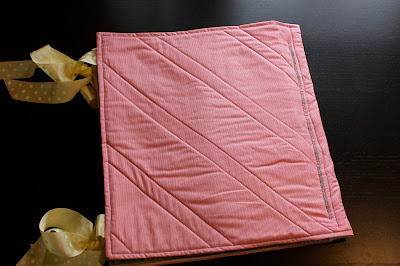
- Take out the pins and turn everything right sides out, through the 8” opening. Push the corners out from the inside, making a nice point, line everything up, and press, making sure to press the ½” seam allowance under along your opening. Pin your opening closed.
- Sew around the entire album using ¼” seam allowance. (Note: It’s important to use a walking foot anytime you are sewing with batting. My walking foot is built into my machine, so it might look different than yours.)

- Your photo album cover is now assembled. Set aside.
Making the photo album pages:
Note: The directions below yield 4 double-pages that hold a total of 48 – 4”x6” photos.
- For tulle photo pages: cut 6 rows of white washable/iron friendly tulle, width of fabric, 4 ¼” wide. Sew a strip of thin bias tape on the long side of each strip of tulle. Crosscut the rows into 48 pieces that are 4 ¼” x 6 ½”.

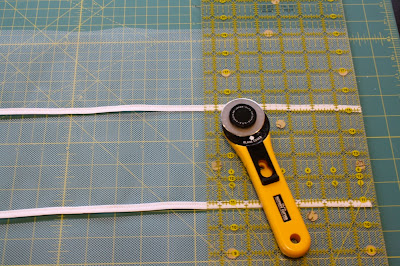
- OR For vinyl photo pages: cut 4 rows, width of fabric, 6 ½” wide. Crosscut into 48 pieces that are 4” x 6 ½”.


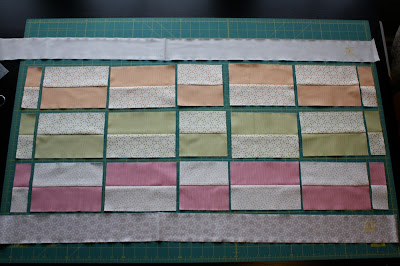
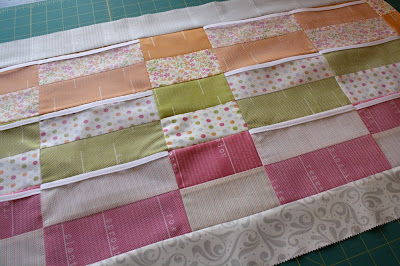
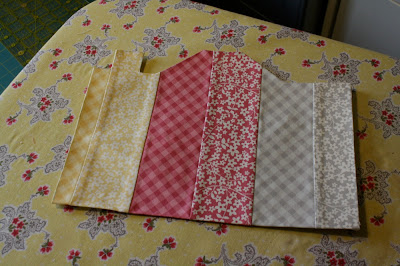
- Each double-page is 8 fabric strips tall. Layout four sets of 8 fabric strips from the jellyroll and label with masking tape.
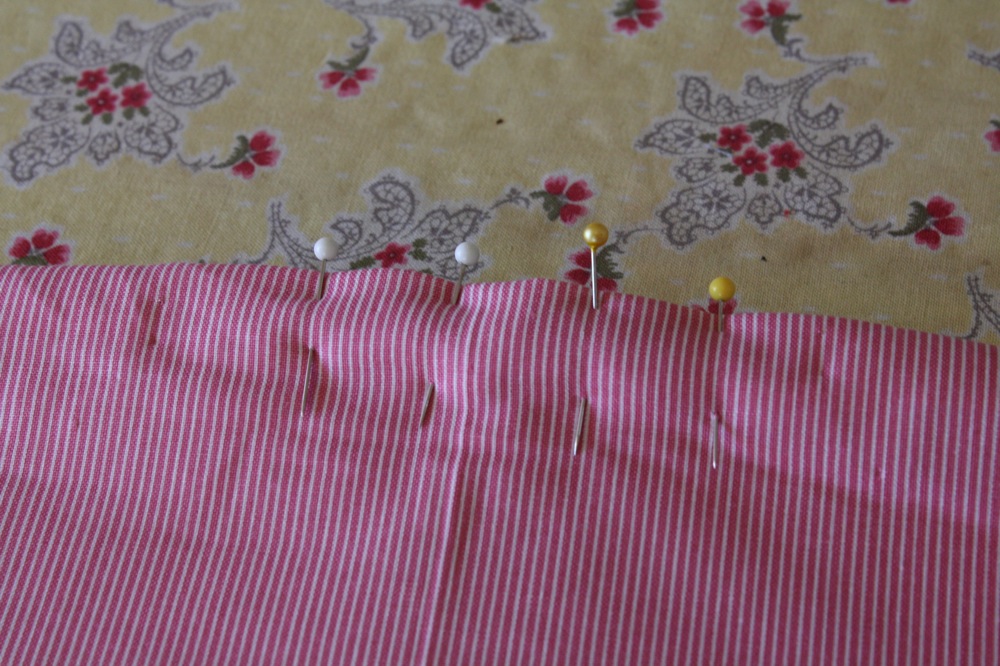
- Working with one of the sets, remove strip 1 and strip 8, and put them aside. Pin strip 2 to 3, 4 to 5, and 6 to 7 and sew, using a strict ¼” seam allowance. Press seam allowances flat.


- For each strip-pair (2-3, 4-5, and 6-7), crosscut the strip-pair into 4 pieces that are 6 ½” wide, 2 pieces that are 1 ½” wide, and 1 piece that is 4 ½” wide. Set the leftover fabric aside for later use.

- Move the pieces around and layout the double page to your preferences. You can even crosscut strips 1 and 8 if you like.
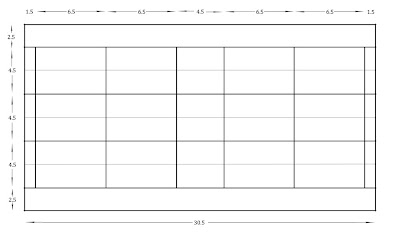
- Here’s a diagram showing how the double page lays out:
- Put a piece of tulle OR a piece of clear vinyl on top of each 4 ½” x 6 ½” piece of fabric.

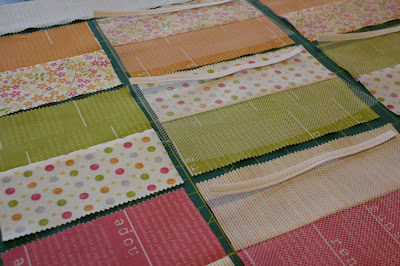
- Take pieces that are next to each other, put right sides together and pin, making sure to line up the bottom of the tulle OR the vinyl with the bottom of the other fabric pieces. Also, make sure to line up the center seams. Sew using a strict ¼” seam allowance otherwise your photos wont’ fit properly.

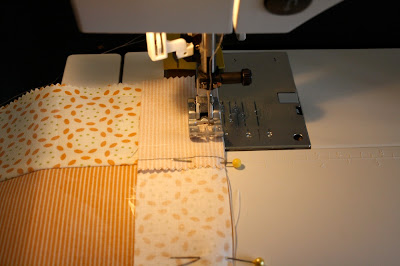
- If you are working with a heat tolerant tulle, press seam allowances flat and continue to assemble each row. If you are working with the vinyl, DO NOT IRON as the vinyl will melt; instead, use a bone folder or straight edge to try and create a crease.

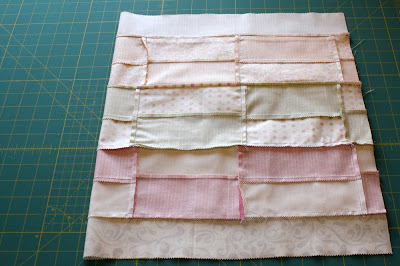
- When all three rows are assembled, sew them together, again using a strict ¼” seam allowance (otherwise you might sew the picture holders shut).

- Sew strips 1 and 8 onto the top and the bottom. Trim any access fabric.


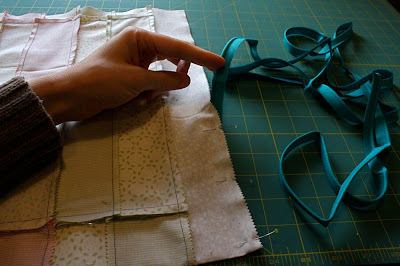
- Take your double page and fold it in half, putting right sides together. Iron down the center to create a seam. Line up your seams, adding the garnish piping between your layers as you pin. Pin and sew around the three sides using a straight stitch. I recommend using a zipper foot if you have one.


- Take out the pins, make a 5″ slit in the center seam, and turn everything right sides out, through the opening.

- Repeat the previous steps to make an additional 3 double-pages.
- Note: I made one of my pages plain, without any photo slots, and instead I sewed baby clothes onto it. Can you see the pretty piping? I used all different colors.

Adding applique, quilting, and binding your photo album:
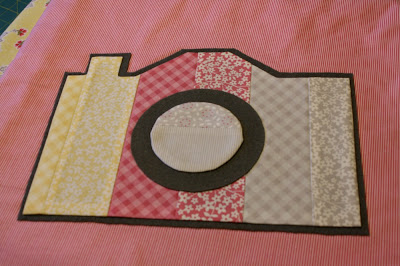
- Use your favorite method of applique, and leftover fabric scraps, to create an applique camera that will go on the cover of the photo album. I offer a few machine applique tutorials on my blog and I suggest using the wool applique tutorial or the machine applique freezer paper tutorial. I used a combination of the two, and I’ll show you my steps below.
- On a regular 8 ½” x 11”piece of paper, on horizontal setting, print 2 of the camera images included in the Printer Friendly Version.
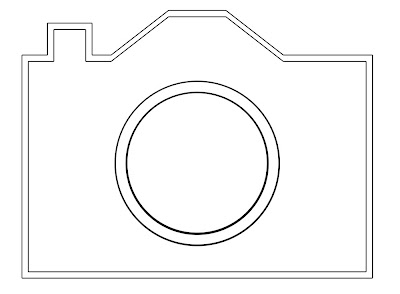
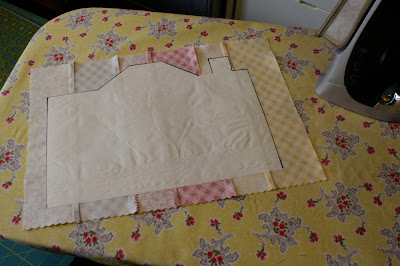
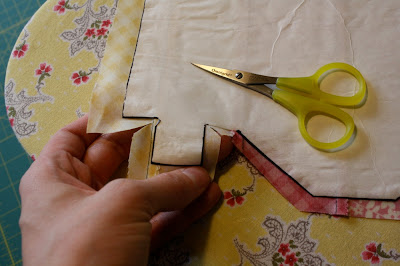
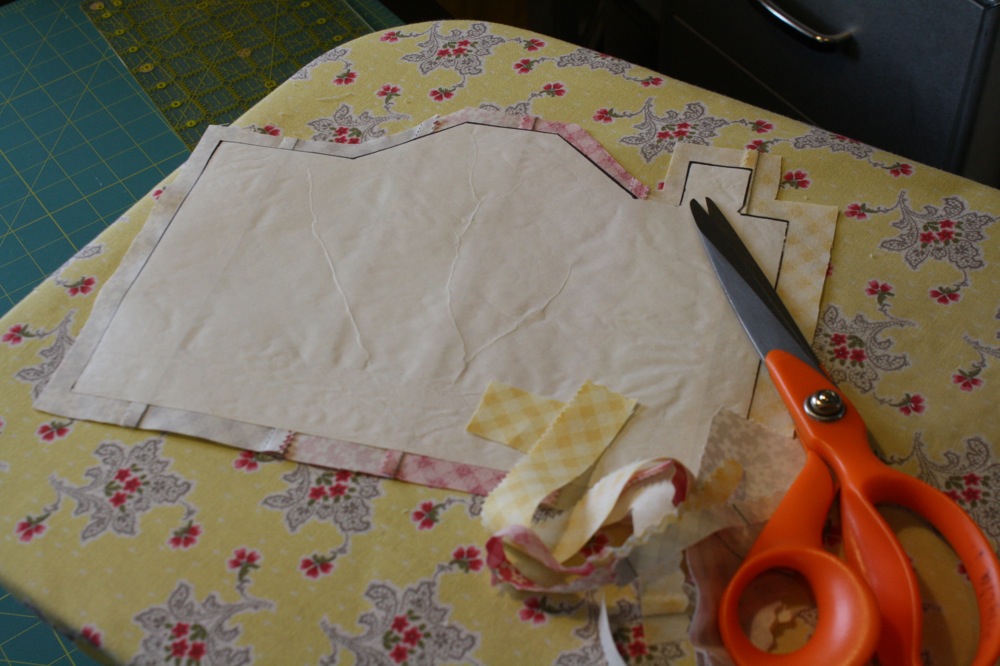
- From one of the copies, cut out the larger camera and the larger circle. From the other copy, cut out the smaller camera and the smaller circle. Trace these four images on freezer paper, mirrored from the original, on the non-waxy side of the freezer paper, and cut them out.
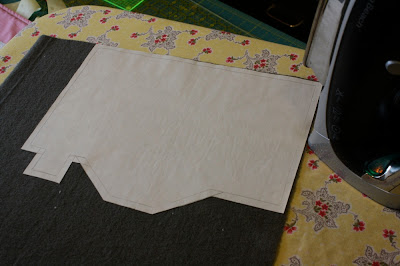
- Starting with the smaller camera, iron the camera image, waxy side down, to the back of some fabric scraps that have been sewn together.

- Cut around the camera, leaving a 1/3″ inch.
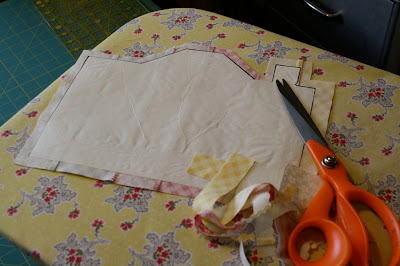
- Spray some starch into a little dish and with a paintbrush, or Q-tip, apply starch to the 1/3″ seam allowance.

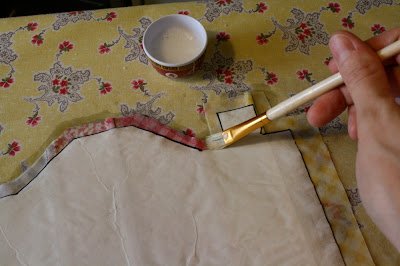
- Cut a snip into all the valleys.
- Give the item one quick iron, to absorb some of the moisture of the starch, and then use the edge of the iron to press the fabric over the freezer-paper. You might need to hold the iron still for about 3 seconds to allow the starch to do its job. Feel free to add more starch if the fabric is not creating a super stiff shape or if you mess up and want to try again for a better shape.

- Turn the shape over and observe. Continue to use your iron and starch to get everything folded over nicely, making a perfect and crisp shape. Pull out the freezer paper and press the applique item flat.
- Iron both the large camera image and the large circle, waxy side down, to the back of some washable-friendly wool felt. When dealing with wool, the edges do not fray, and so you don’t need to turn under the raw edges. As a result, these images can be cut out with no seam allowance around them.
- Using water soluble basting glue or sewing pins, baste your applique images to the cover of your book.

- Finally, iron your small circle, waxy side down, to the back of some fabric scraps that have been sewn together. Cut around the circle, leaving a 1/3″ inch seam allowance. Using a needle and a thread, carefully sew around the entire circle, about half way in between the raw edge and the freezer paper.
- As you work around the circle, pull the thread tight to get the fabric to cinch around the freezer paper. When you are finished, and you have a lovely circle, tie a knot, remove the freezer paper, and use an iron to define the edges and flatten the circle.

- Using either water soluble basting glue or sewing pins, baste your final applique image to the cover of your book.
- Baste your photo album cover again, using safety pins, and quilt your photo album cover like you would a quilt. Don’t forget to use a walking foot. Quilt the applique images, securing each of them down to the cover. Please realize that your sew line on the applique camera, needs to hold down both the applique image, as well as it’s seam allowance that is neatly pressed under. You can use a zigzag stitch or a straight stitch that runs close to the edge, no wider than 1/8″ in.

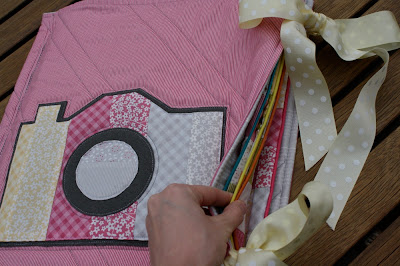
- When your photo album cover is quilted, and your applique camera is sewn down, it’s time for the final step of binding your photo album –by binding, I don’t mean the sewing term, rather the book binding term. Align all of your pages and carefully pin them down, using safety pins.
- Loosen the tension on your machine, install a heavy duty needle, and carefully sew through all the layers. You are sewing through quite a bit here, so make sure you prep your machine. If you’d rather sew the book closed by hand, that is an option as well. For strength, I sewed two lines, the first about 1″ in and the second about 1 1/4″ in from the edge of the book center.

One fabric photo album.


Well, that’s all folks. You can visit me over at my blog, The Artists’ House –The Art of Making a House a Home, or at my Etsy Shop. I’ve really enjoyed putting this tutorial together; I sincerely hope you enjoy making it.
Angela Flicker
{The Artists’ House}
![]()
