Avalon Scrappy Summer Quilt


Hi.  My name is Trish and I blog over at  notes of sincerity.  I am so happy to be back at the Moda Bake Shop sharing another tutorial.  Thank you so much for your kind comments left on my previous tutorials.

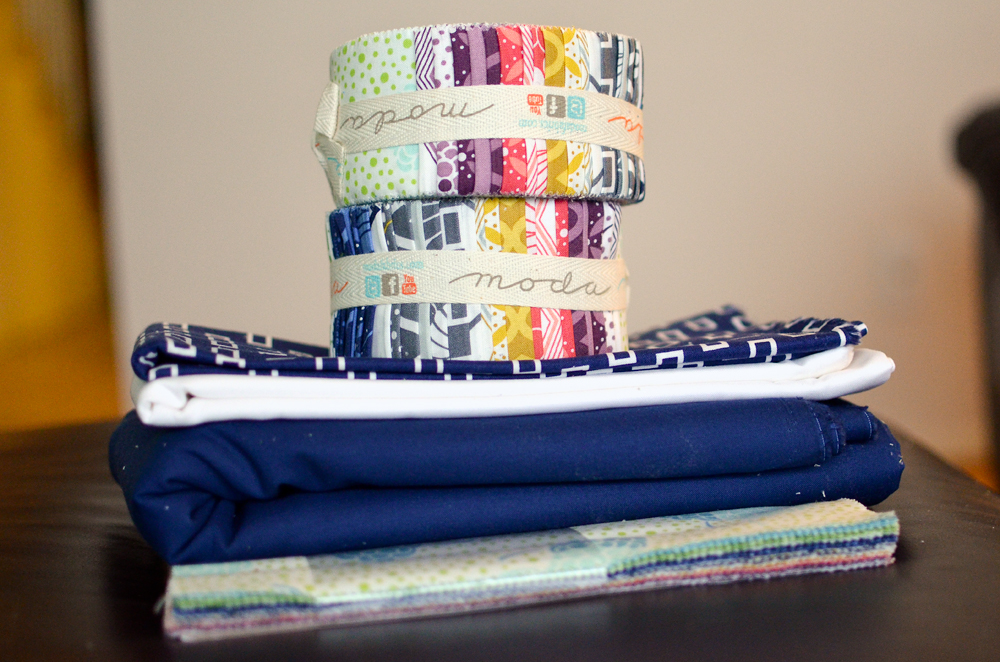
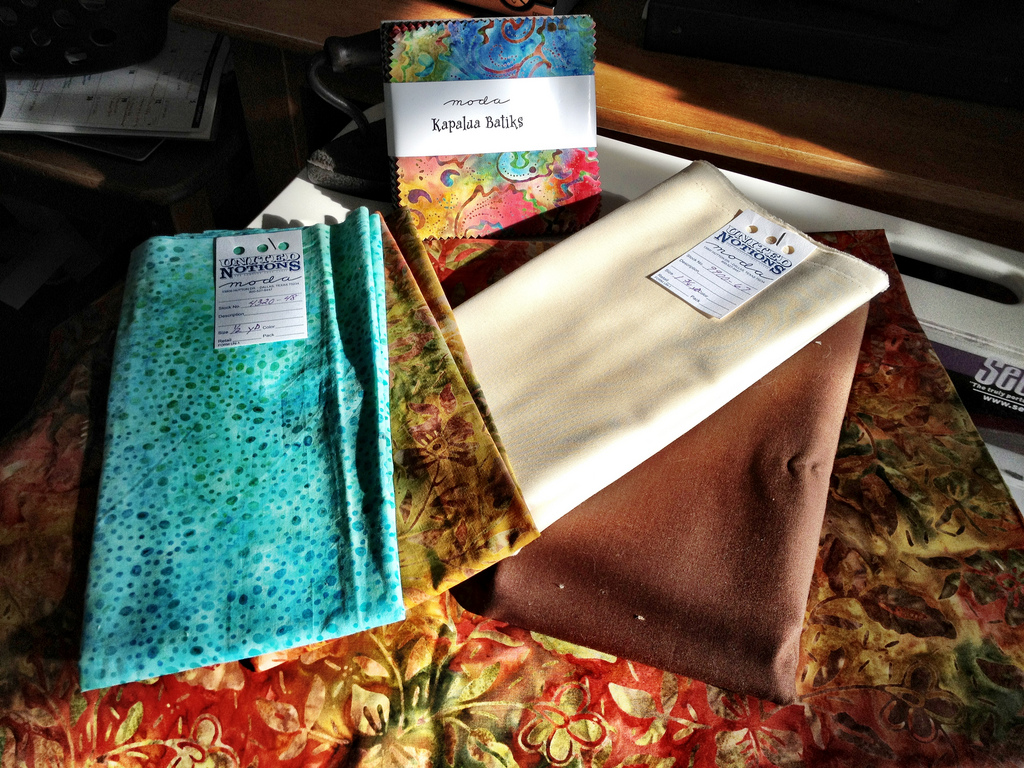
5 Avalon charm packs
1 1/9 yard Avalon Daisy Natural (blocks)
 1/2 yard Avalon Daisy Natural (binding)
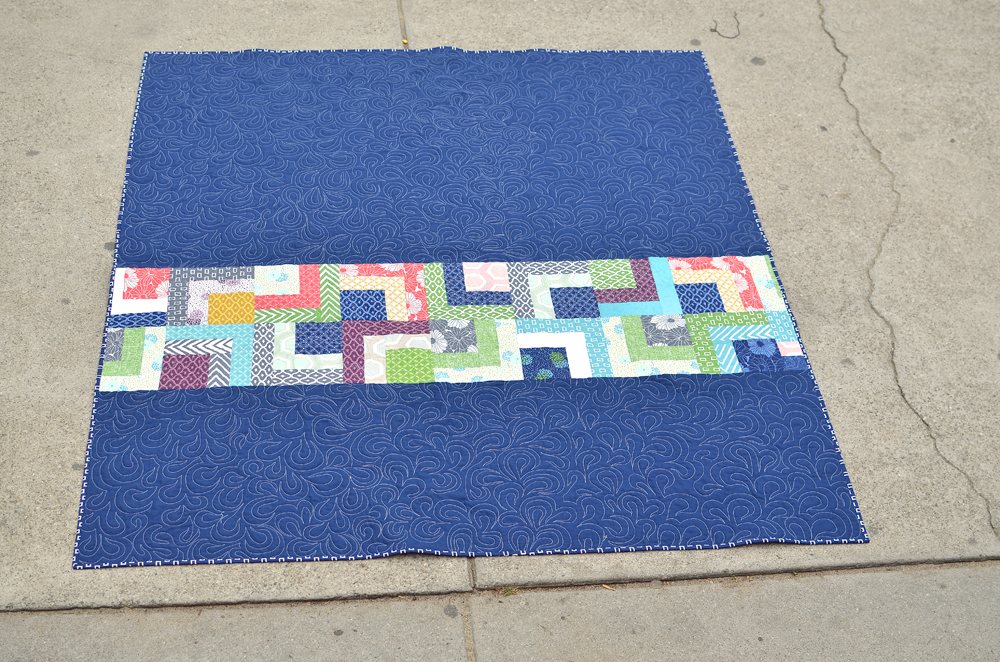
4 yards Avalon Cherry Candy for backing
*optional : starch


Our quilt today will consist of two blocks.  A four patch block and a diamond block made from half square triangles.
 
Open and divide charm packs into two piles.  You will need 128 squares for the 32 four patch blocks and 62 for the 31 diamond blocks.

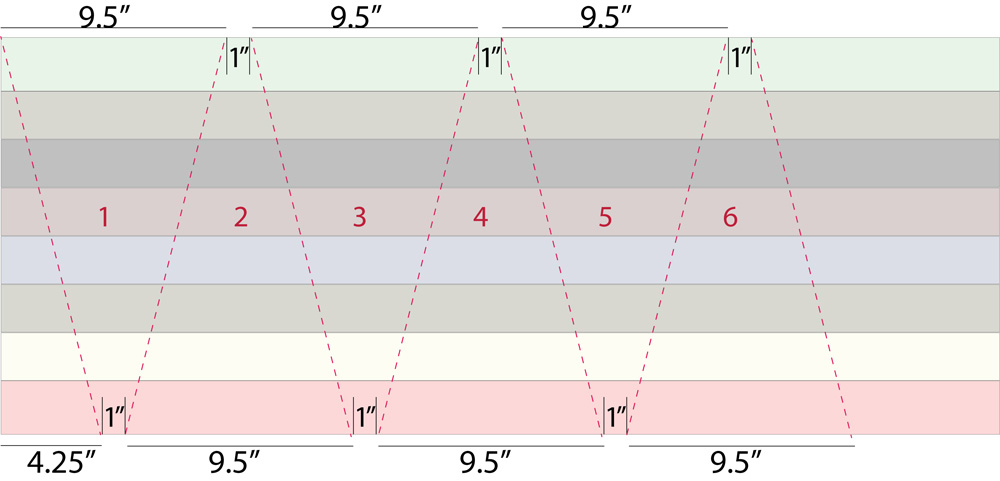
Iron and cut 8 – 5″ by width of fabric strips.  From these strips cut 8 – 5″ squares.  You will need 62 (having two left over).

For the four patch blocks, pair and sew two charm squares together.  Press with hot dry iron to set seam then press to one side = 64 pairs.  Sew those pairs into 32 four patch blocks, being sure to “lock” center seams.  

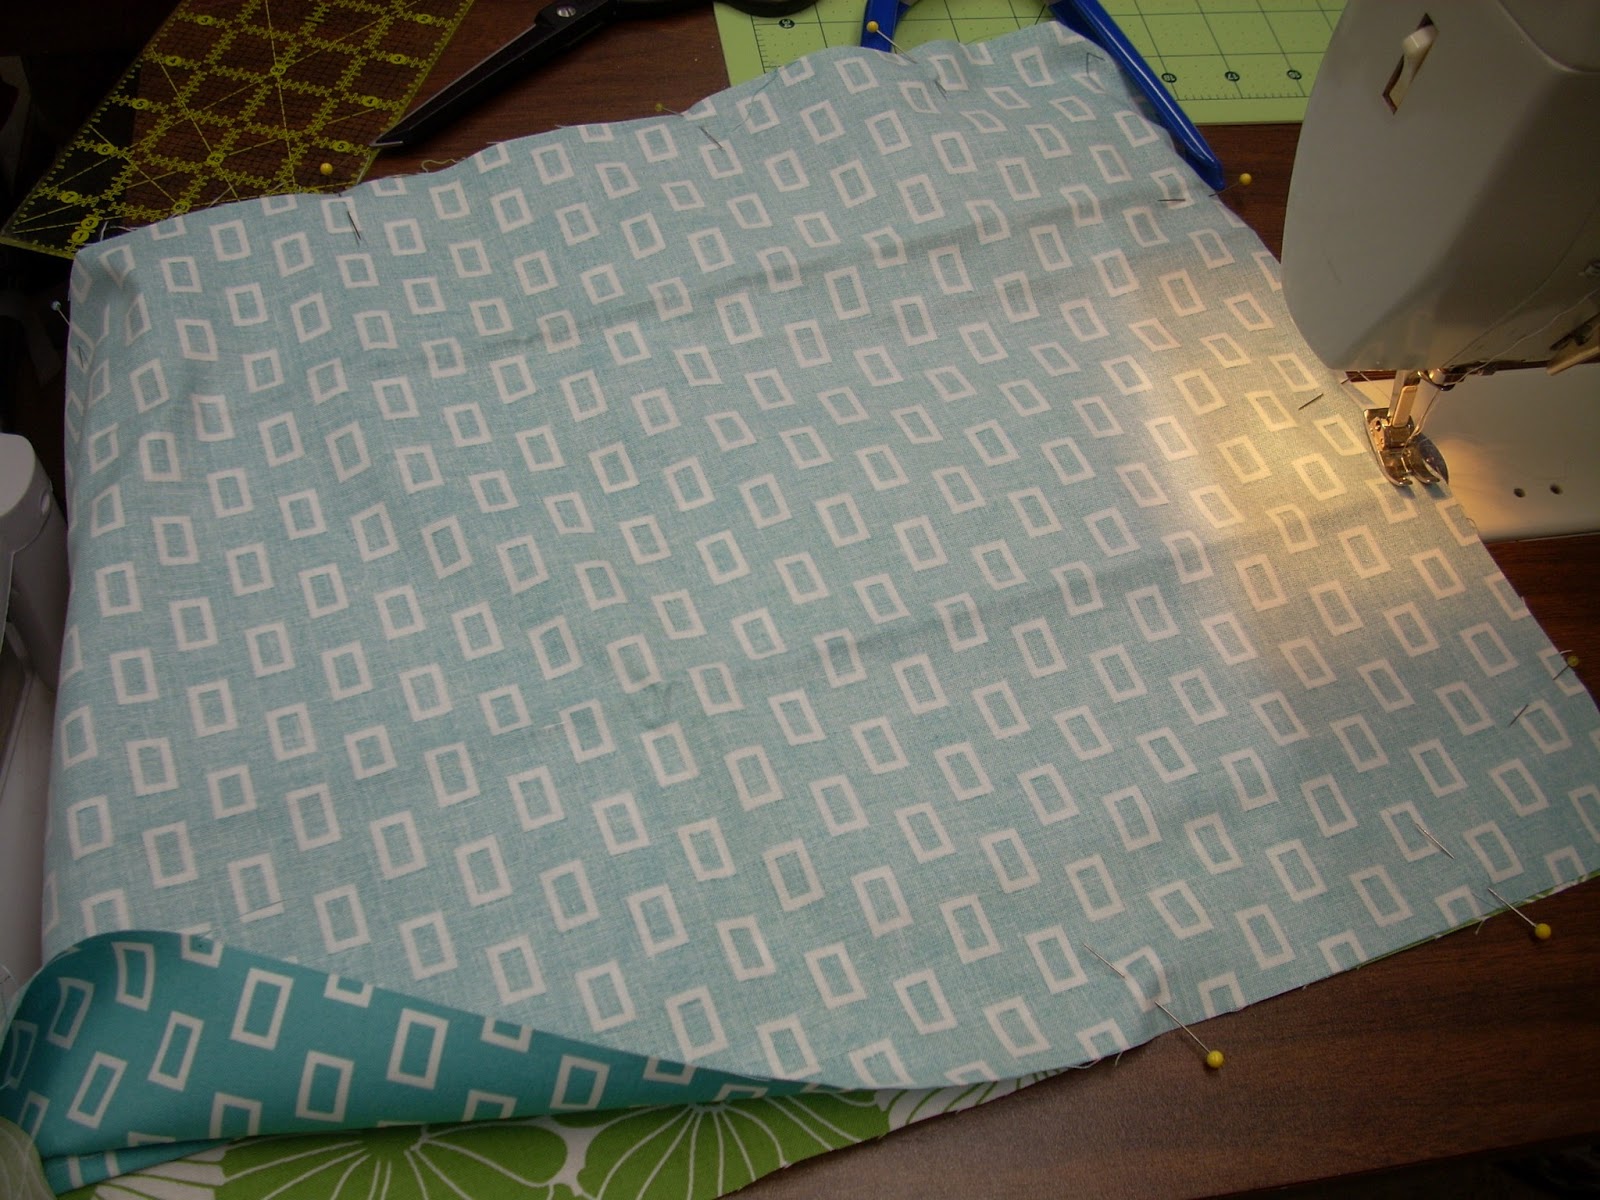
Press with hot dry iron to set seam, then (using a little starch – optional) press to one side.  Here is an example of the back to one of the blocks.
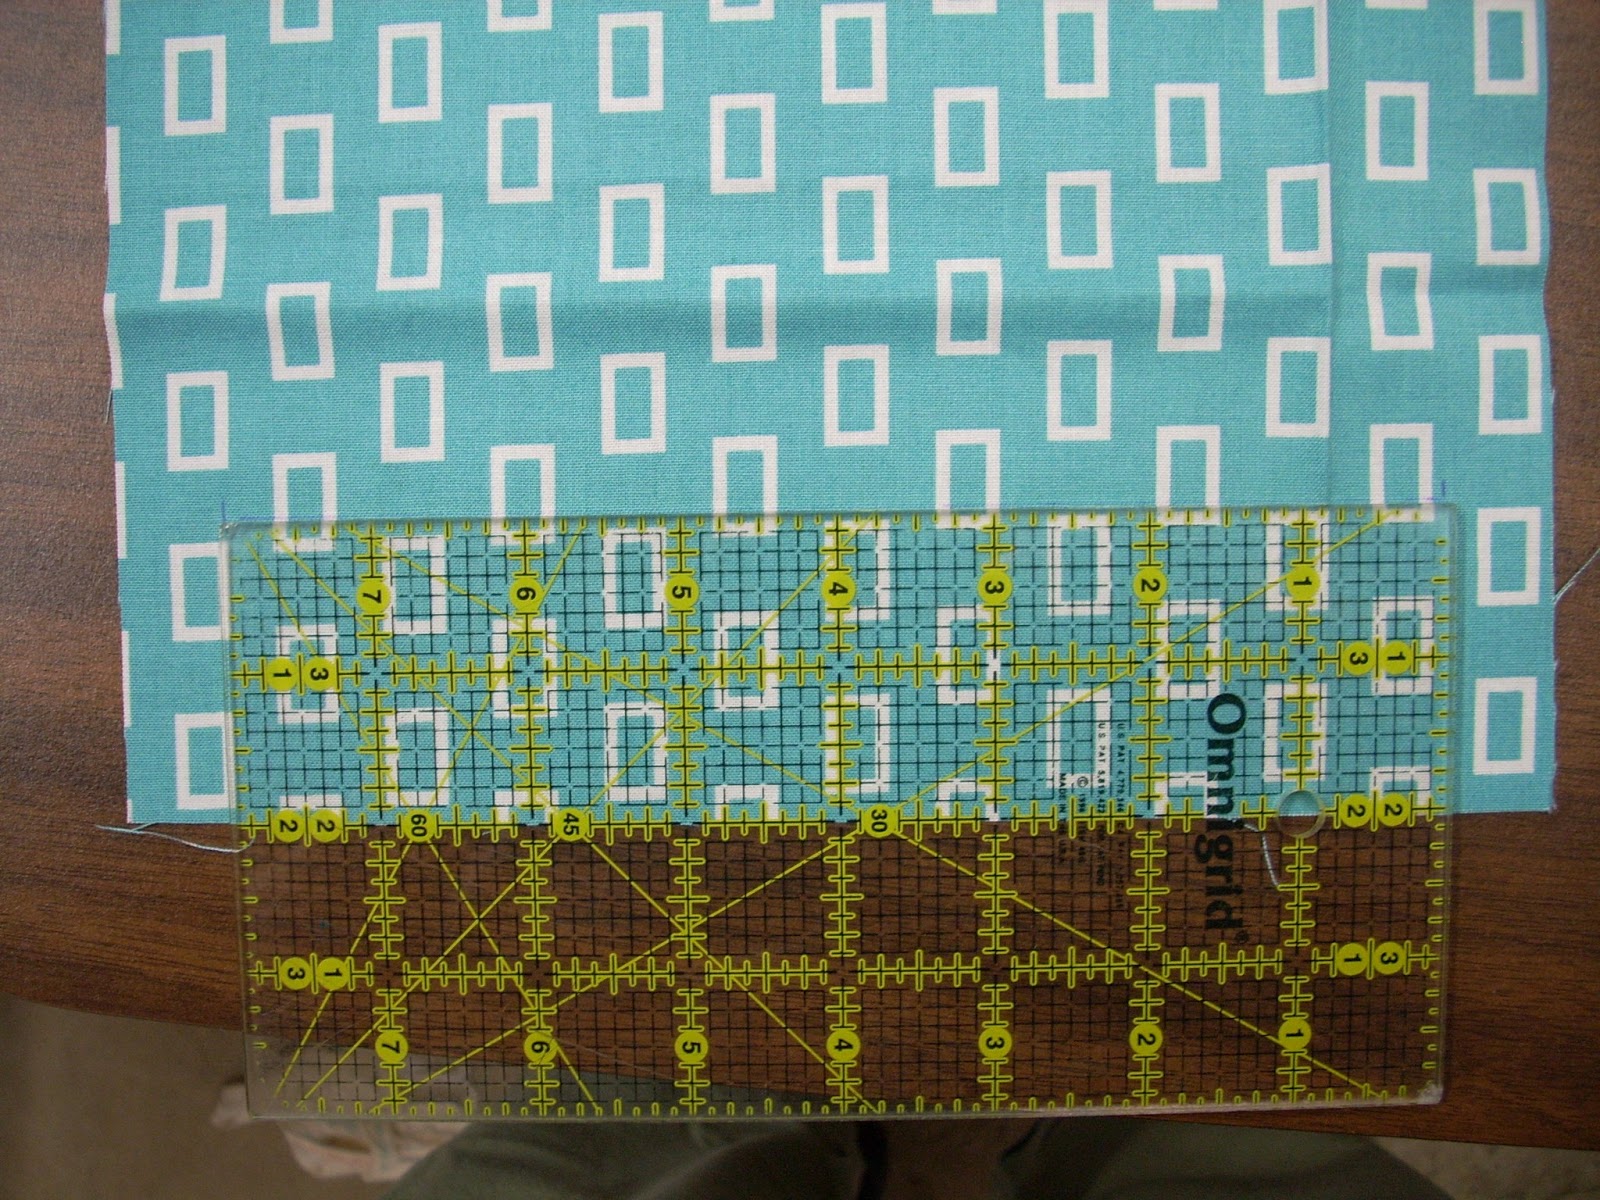
 Square to 8 1/2“.
Repeat until you have 32 blocks.
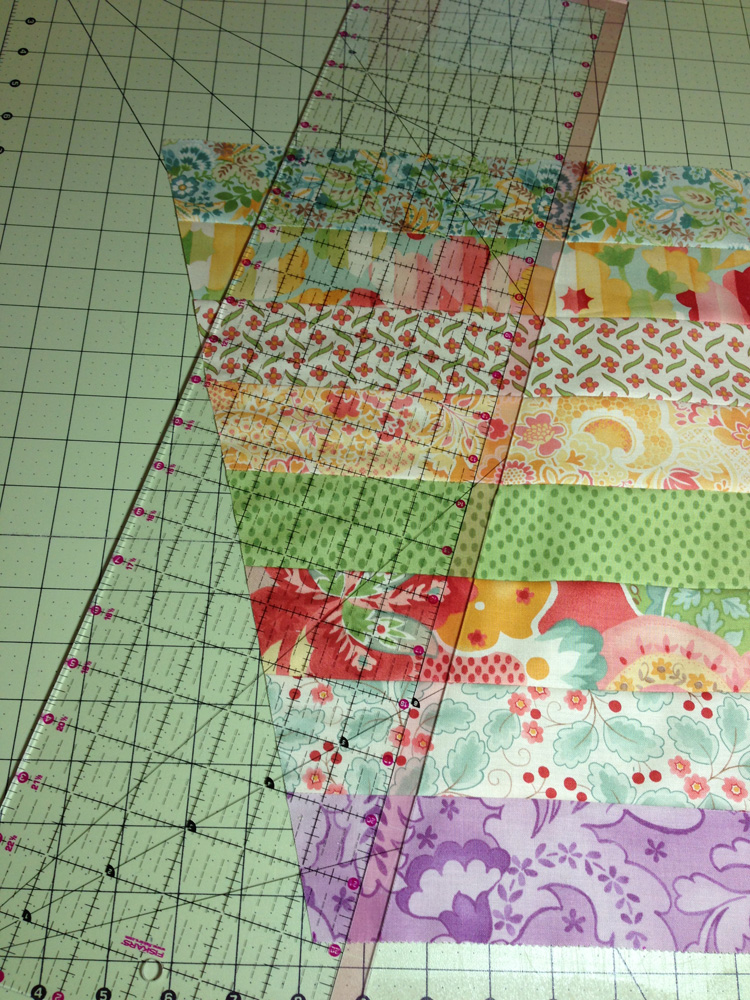
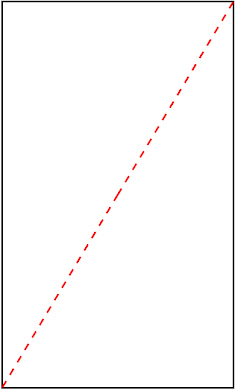
For the diamond blocks you will draw a diagonal line on one side of the neutral square.  Place flat, right sides together, and pin to patterned fabric.
Sew a 1/4″ seam on either side of the line.  Press with hot dry iron to set seam, carefully cut along drawn line.
Iron seams open (my personal preference).
 Square to 4 1/2″
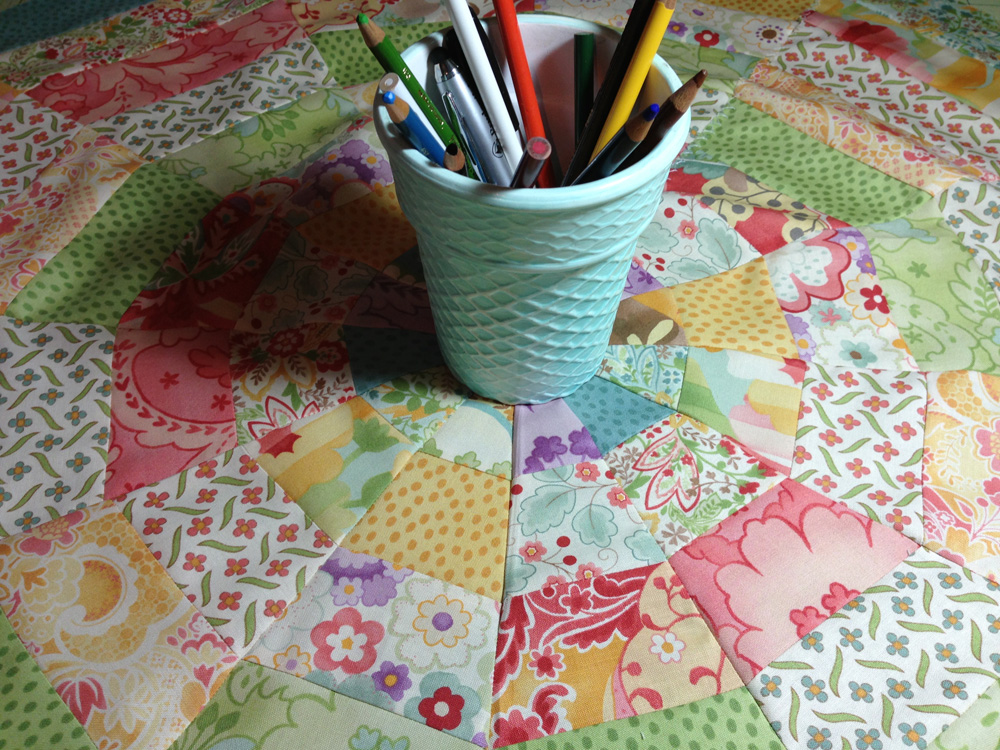
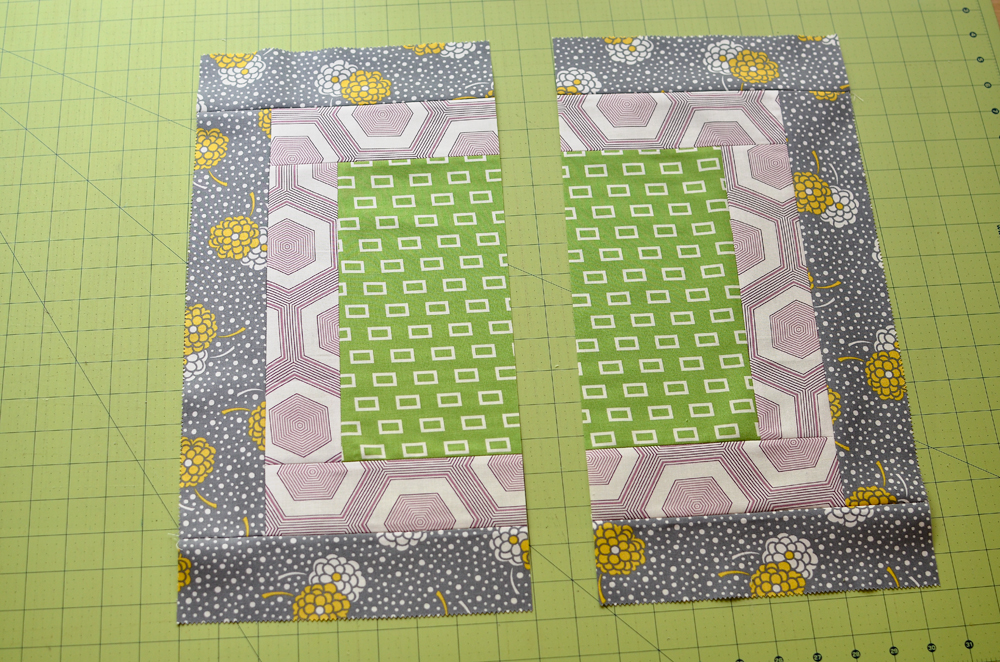
Form a square with four half square triangles in a diamond shape pattern.  Sew top two and bottom two together.  Press to set seam with hot dry iron, then press to one side.  
Sew top two blocks to the bottom two blocks.  Press to set seam (with what??) a hot dry iron (wink), then press to one side. Square to 8 1/2″.  Repeat until you have 32 blocks.
**little note : pressing both of your blocks to one side will allow those blocks to “lock” together while sewing into rows, then later when sewing rows together to form the quilt**

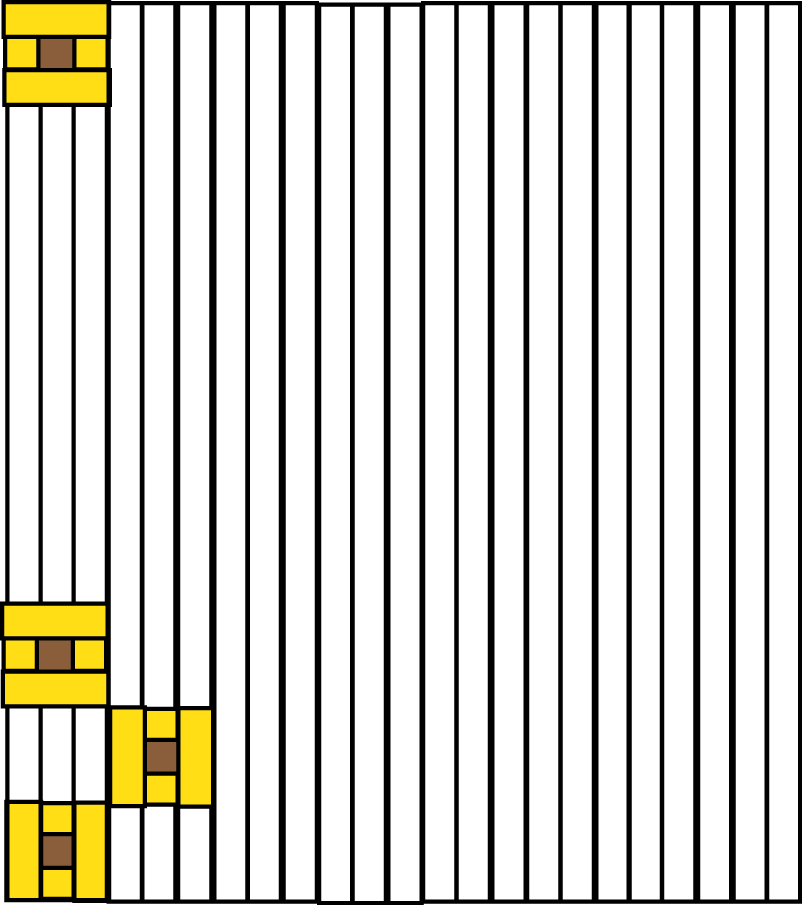
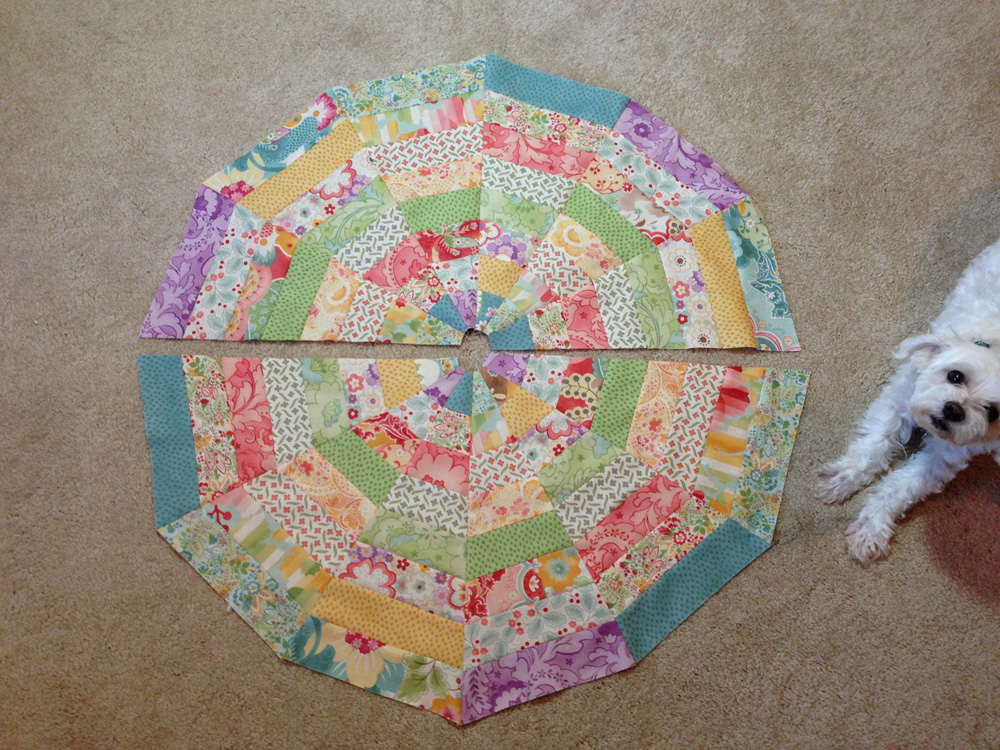
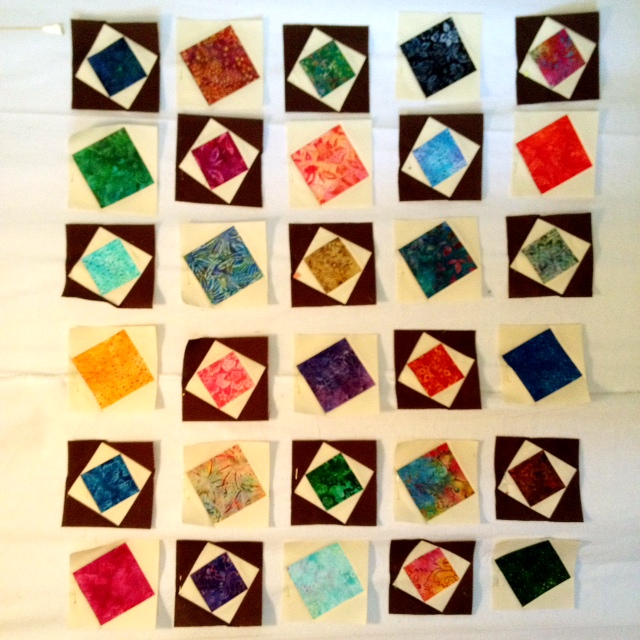
Lay your blocks out as you would have them – into rows.  Sew your rows together, locking seams as you go.  To insure that all my rows locked as desired, I made sure to place all diamond block seams facing up and all four patch block seams facing down before sewing.

Now that all your blocks are sewn into rows, it is time to press your rows so that they may be sewn to become your quilt top.  To reduce bulk and allow for the seams to lay flat after pressed, I pressed away from the diamond blocks.
 
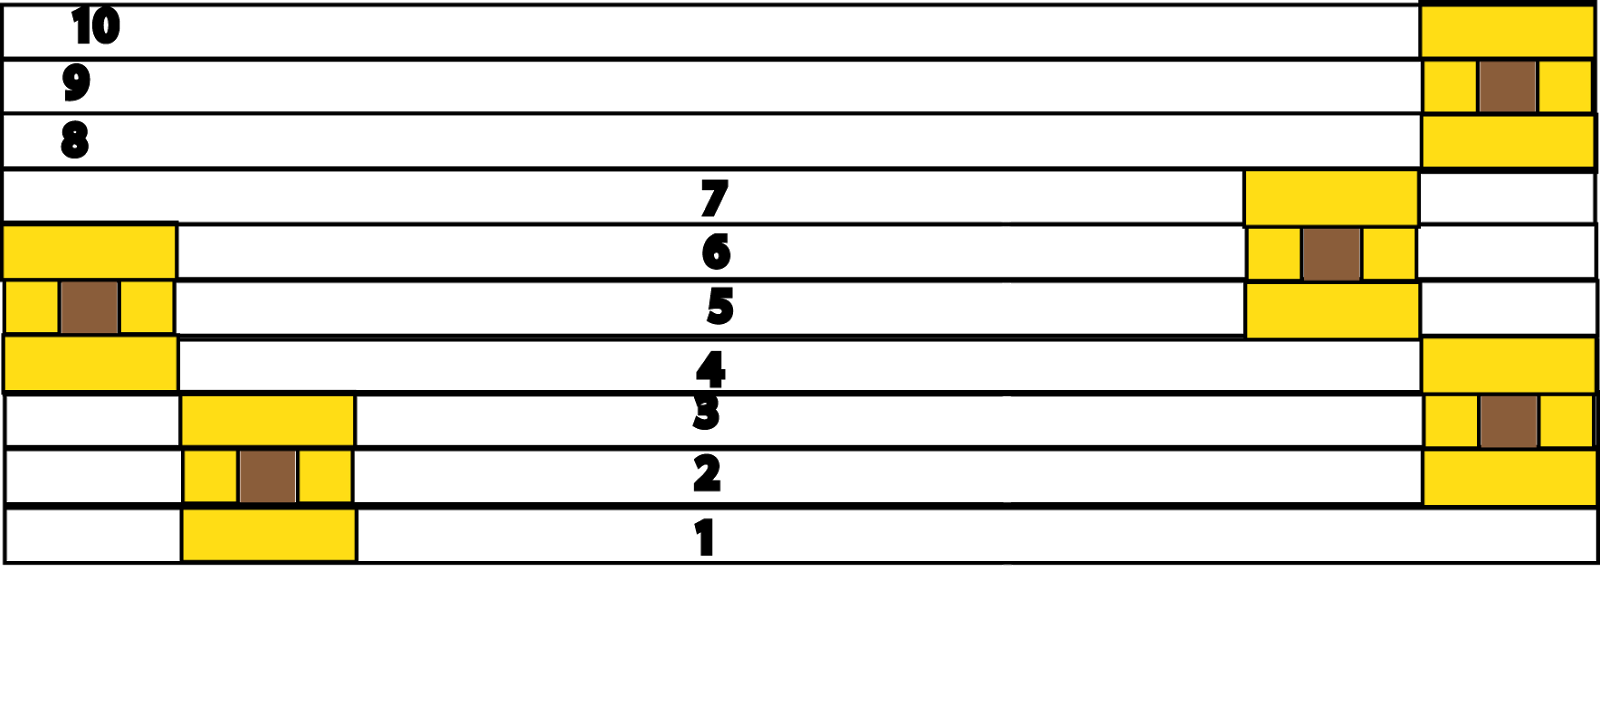
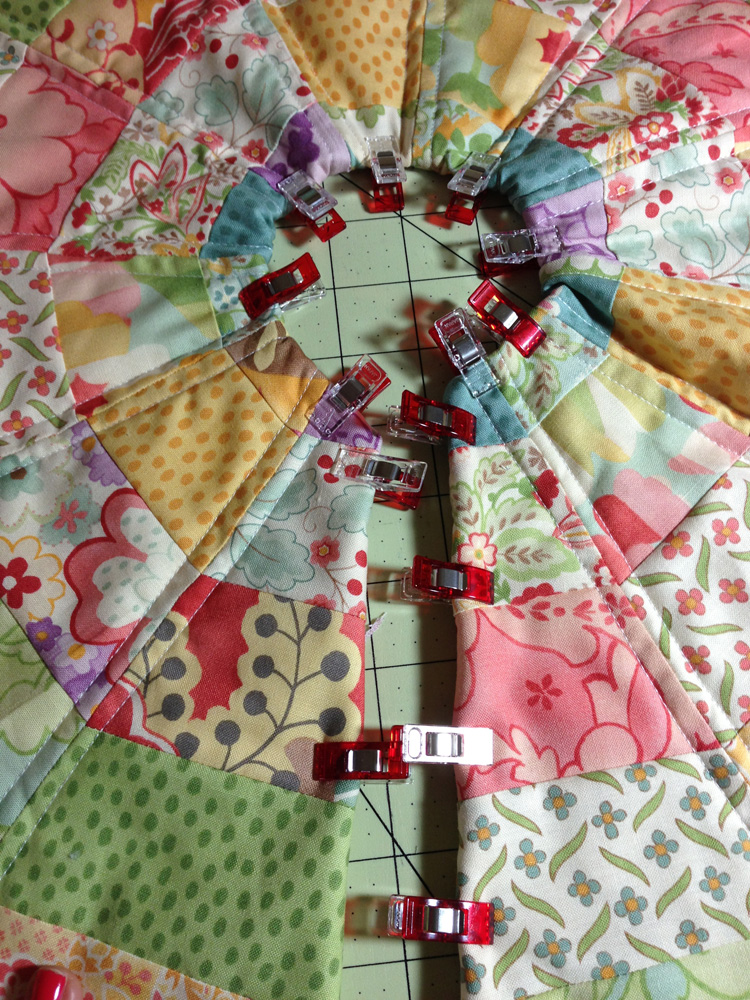
Pin each row together and sew rows together, one at a time.  I like to number each of my rows with a tiny sticky tab, that way they are sewn together in the pattern I intended, with no guess work.


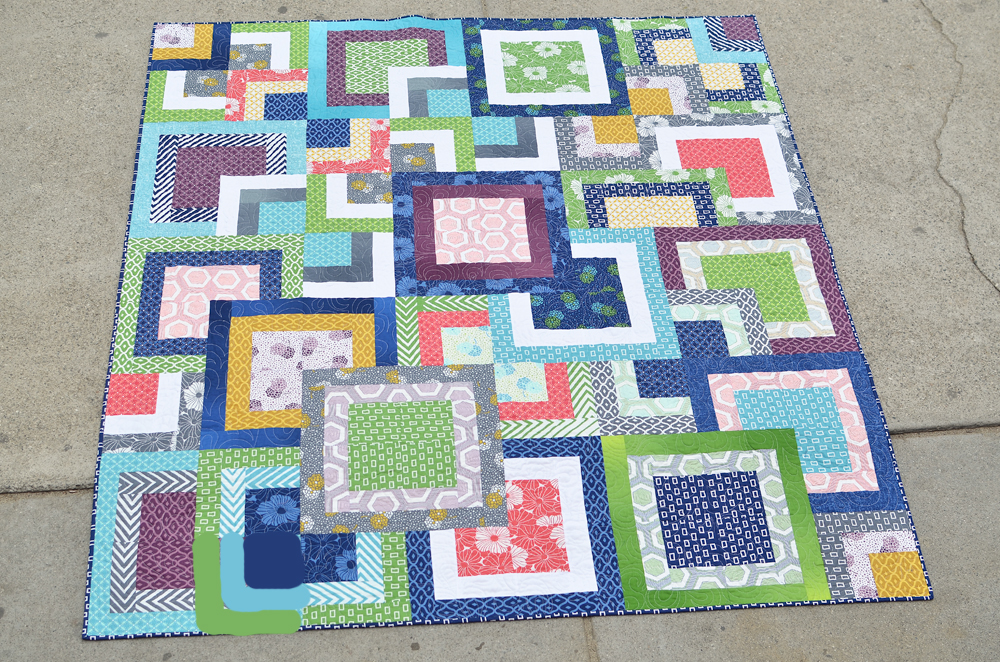
When rows are all sewn together, you will quilt as desired, bind using 2.5″ strips, and enjoy.
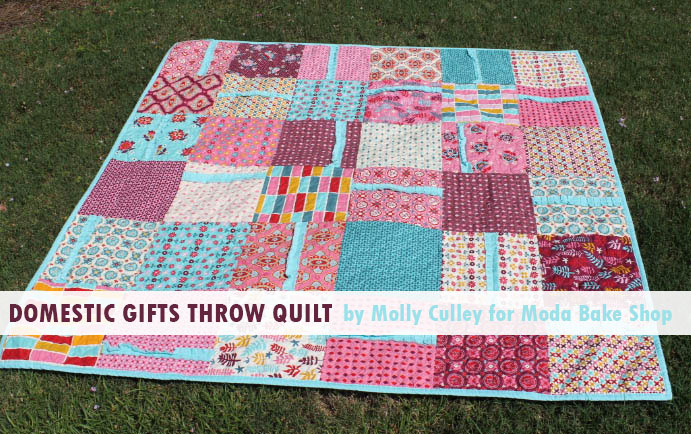
      Beautifully long arm quilted by Kathy Olkowski.


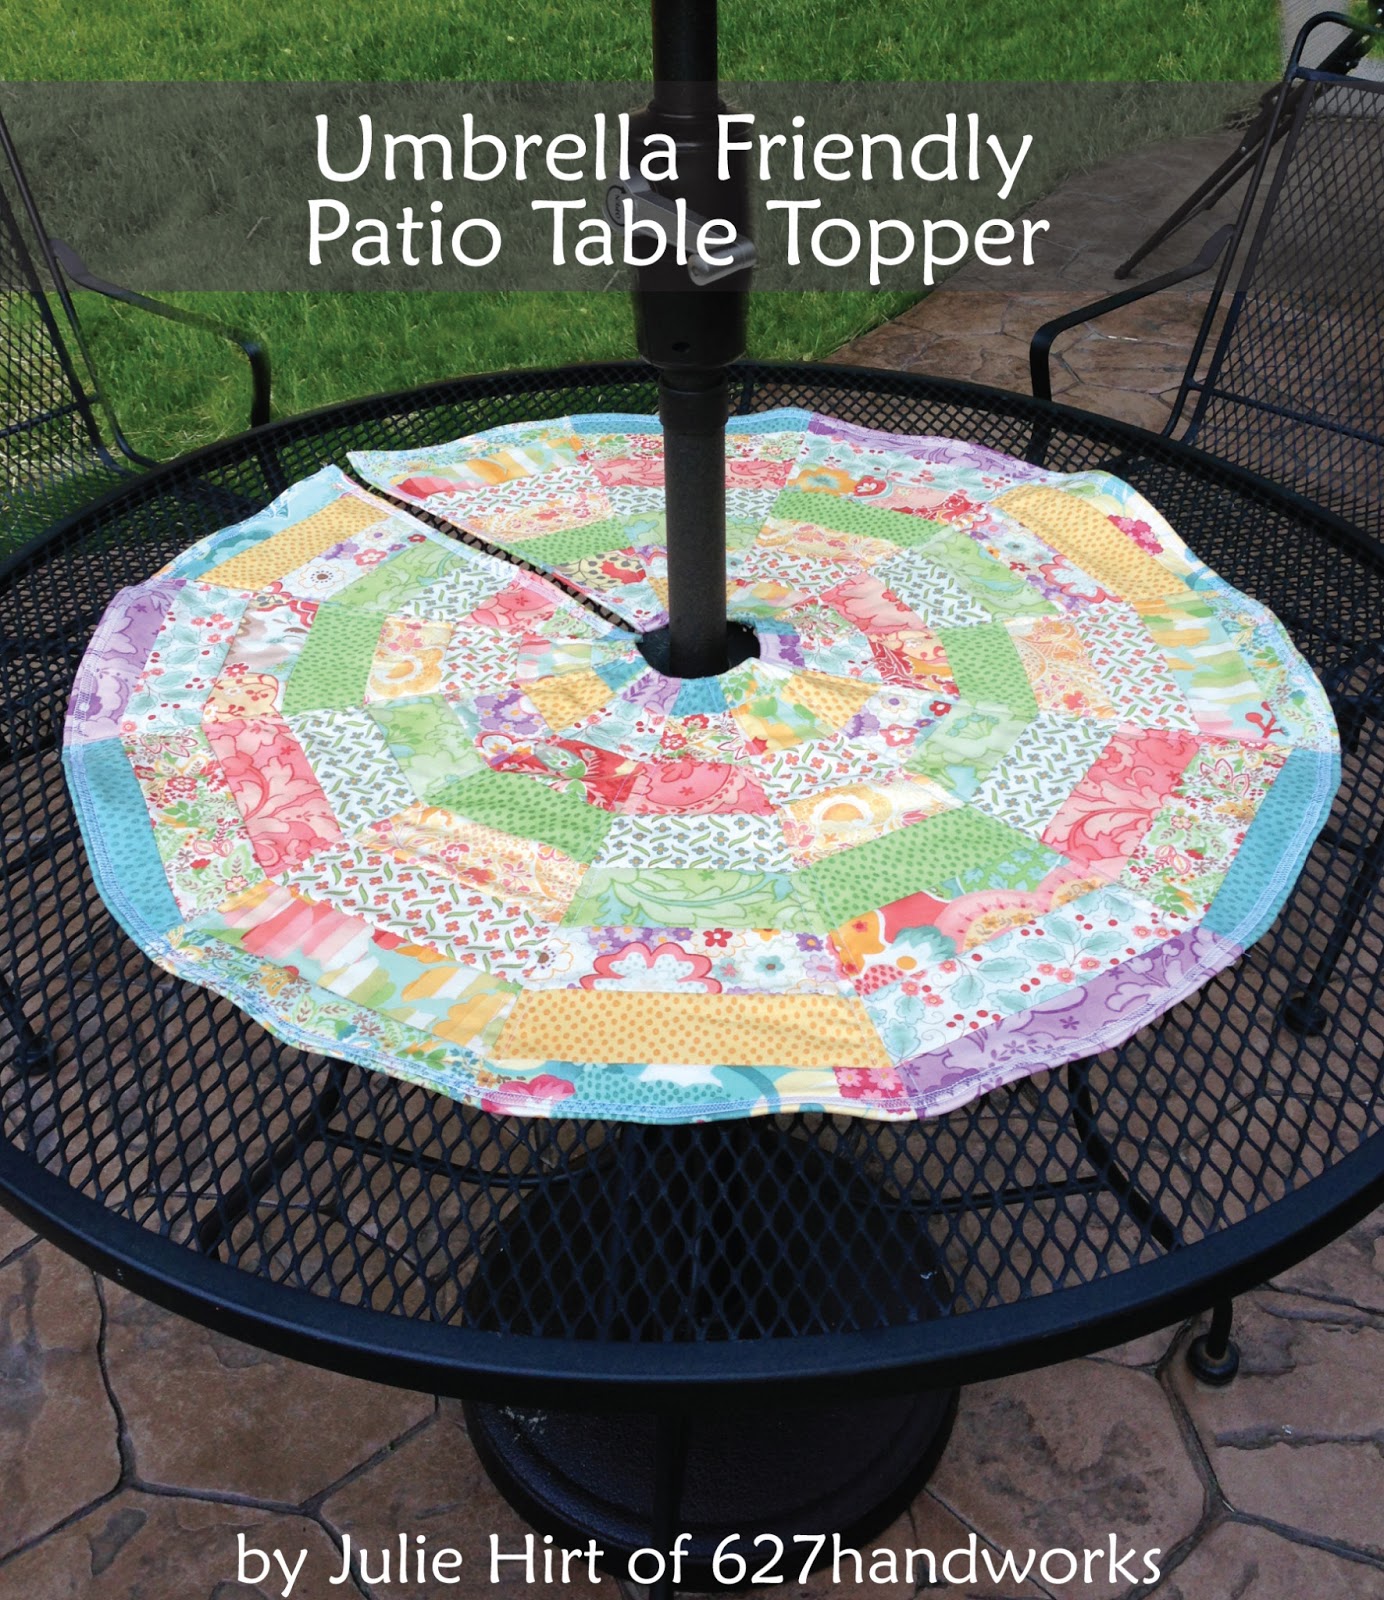
a fun and happy Avalon scrappy summer throw that measures 56.5″ x 72″

Trish Poolson

Domestic Gifts Throw Quilt


Hi again, it’s Molly Culley with another quick and easy throw quilt.  When I saw the Domestic Bliss line, it was love at first sight.  Pinks, aquas, plums…what’s not to like?  Another reason I was smitten with this line is how it looks so vintage, yet modern.  The quilt design is clean and simple, and really lets the fabrics shine, with a hint of texture and embellishment with the ruffled solids. 


One Layer Cake
One Jelly Roll
4 yards backing fabric

 
1.  Choose 36 layer cake squares for the front of your quilt, and set aside the remaining 6 for the pieced back.  Lay them out in a pleasing arrangement.

2.  Unroll your jelly roll and set aside 6 strips for your binding.  Next, we will need 5 strips for the ruffled/pleated solids, so go ahead and unroll those.  Take the first one, and fold it in half lengthwise so the selvedges are touching.  Cut the strip on the fold so you have 2- 2.5″x21″ pieces.  Now, cut each strip in half width-wise so you now have 4- 1.25″ by 21″ strips.  Do the same to the remaining 4 jelly roll strips. You will need 18 ruffle strips that measure 1.25″ by 21″.

3.  Using a coordinating thread color, stitch a 1/4″ seam on either side of each solid strip.  This will slow any fraying during daily use and laundry days.

4.  Your next step is to choose the squares you want your ruffles on.  I chose three alternating squares from each row, and also changed the direction of the ruffles for each row.

5.  Using the 18 solid strips, either ruffle or pleat them using your favorite method.  I chose to fold the strip as I sewed it onto the layer cake square to make pleats.  The photo above shows an example of my pleating method.  I just used my fingers to tuck the fabric under the presser foot, but you could also use a ruffler foot or a gathering stitch to make traditional ruffles.  I also didn’t put my ruffle exactly in the middle of the square each time…I didn’t want each block to be the same.

6.  Once the ruffles/pleats are sewn onto your layer cake squares, sew over the 1/4″ stitch lines on the edges of the solids so they lay nicer on your quilt once it’s washed.  I learned this the hard way…it’s much easier to do this with the individual squares, rather than wrestling the whole quilt into the machine again.

7.  Join your squares into rows, then sew the rows together into a 6×6 block layout.

8.  For your pieced back, sew together the 6 layer cake squares set aside earlier, and piece them into your backing fabric.

9.  Baste, quilt and bind.  I quilted mine in an all-over meander with a variegated thread.  Use the 6 solid jelly roll strips you set aside earlier to make your binding.  Enjoy your gorgeous new quilt!


A throw quilt that measures 57″ square.

I hope you enjoyed my project! If you’d like to see what I’m sewing up lately, stop by my Instagram feed (link below).

Molly Culley
{instagram.com/mollyculley/}

Artist On-the-Go Tote


Emily here today from Em’s Scrapbag for a perfect staycation project!


4 fat quarters (I used Simply Style by V and Co.)
4 grommets
Grommet tool

From on fat quarter cut a 15 1/2″ x 20″ rectangle for cover
From another fat quarter cut a 15 1/2″ x 20″ rectangle for lining
From third fat quarter cut 2- 12 1/2″ x 9″ for pockets
From fourth fat quarter cut 2- 3 1/2″ x 12″ rectangles for crayon holders and 2- 3″ x 15″ strips for handles

On each of the pockets fold the top edge down 1/4″ twice press and stitch in place.
On each of the crayon holders fold the short ends in 1/4″ and press.
Fold down the top edge of each of your crayon holders down twice making sure that the ends stay pressed in.
Run a gathering stitch along the top and bottom of your crayon holders.
Center an 8″ ruler 2″ from the bottom of one of your pockets.  Draw an 8″ line along the top of your ruler.
Gather the unfinished edge of your crayon holder so that it fits in the 8″ marked space.  Placing right sides together pin along the line you drew and stitch in place.
Use your 8″ ruler to make marks about 2 1/4″ up from where you sewed the crayon holder on.  Bring up the crayon holder up.  Gather the finished side so it fits between the marks you made and stitch the sides in place.
Divide your crayon holder into 12 equal spaces.  Just over 5/8″ and mark.  
Sew on each of these marks through the crayon holder.  Back stitching to reinforce.
Measure 2″ from the top of your first crayon holder.  Mark your 8″ line and repeat process with second crayon holder.
On your 15 1/2″ x 20″ lining make a 12 1/2″” long line 9″ from the left side.  Place the pocket with the crayon holders right side together along the line you drew so that the 9″ is not covered by the pocket and sew 1/4″ seam.  Flip and press so that the edges of your pocket line up with the edge of your lining.
Measure 9″ from the right side and repeat process with the remaining pocket.
Place the cover over your lining piece right sides together, pin.  Starting at the bottom sew around the edge leaving an opening to turn right side out.
Press to make crisp edge around where you have sewn and to finish edge on opening. 
 Top stitch in place.
Place a ruler 1/2″ down from top edge.  Measure 3 1/4″ and 6 1/4″ from side edge place grommets here.  Following the directions with your grommet tool apply grommets.  Repeat on other side.
Fold the short ends of each handle in 1/4″.
 
Fold in half along the long side.
Open up and fold bottom edge into the center fold.  Press
Fold the top edge into the center fold.  Press.

insert photo

Fold in half and top stitch in place.
Place handles through grommets so ends show on cover.  
Tie a knot in each end.
Place a 24 pack of crayons in the crayon holders and a sketch pad in the other pocket.  Place the cardboard from a old sketch pad in the pocket behind the crayons to give it stability.

 
One artist on-the-go tote

Bucket of Fish {Toss Game}

Hello everyone! Totally excited to be hanging out with you today.  I have been so lucky to work with some fantastic fabric for this project.  I don’t dip my toe into batiks often, but from now on, I would be happy to pick up a new line or two.  The colors and designs are so wonderful!  No cut square is the same, and I love that.  For some it can throw you off because you’re like what– why is this block yellow when it started off red? But for me, I love the little switches it makes and keeps you on your toes when you are designing.
For this project I used fabric from the Breezy Batiks Collection. I love this line and have a giveaway going on the blog to win 10 fat quarters from the same line!- ‘swim’ on over and sign up to win.


Printed Fish Template (see Printer Friendly Version at the end of this post)

Fish

12″ X 12″ square of fabric for each fish —you can mix and match the front and back if you’d like and use smaller pieces. If this is for a game toss, then you might want to make sure 3-4 of them are matching on one side so you can sort them out for each player easily.

Bucket

1 > 7″ X 30″  Blue for the ocean waves
2 > 7″ X 30″  Green for background and lining of basket
1 > 7″ X 30″ Fusible Fleece for stiffness
2 > 8″ X 8″  Bottom lining and outside
1 > 8″ X 8″ Fusible Fleece for stiffness

FISH
1)  Print out template of fish and cut out
2)  Lay fabric right sides facing out, pin template
3)  Cut out using pinking shears
4)  Sew all the way around the fish, leaving an opening for stuffing
5)  Fill tail with poly beads, crushed walnut shells, or sand- something to give it some weight
6)  Stuff firmly the rest of the fish body- the weighted fill will shift, that’s ok, just try to keep it inside the body and not leak out when you are stuffing the rest
7)  Pin closed and sew the opening closed
Repeat with additional fish as needed
HANDLES~
Cut: 2 > 2 1/2″ X 14″ handles
1)  Fold handles right sides together and sew
2)  Turn right sides out, iron. Set aside for later
BASKET~
Sewing Instructions:
1)  Place the fusible fleece on the wrong side of the outside fabric- right side facing out. Fuse it
2)  Cut the blue fabric wavy with your rotary cutter.  You can’t mess this up.  Just have fun 🙂
3)  Pin the blue fabric right sides facing out on top of the green background, lining up the bottom straight edge
4)  Zig-zag along the raw edge wave of the blue wave to secure
5)  Sew additional straight lines 1/4- 1/2″ from the last line sewn.  Repeat 3-4 times- you will be sewing through the wave, the background and the fusible fleece
6)  Fold in half and sew the ends together, making a tube
7)  Fuse the fusible fleece to the bottom outside fabric
8)  Pin right sides together the bucket tube to the bottom square. It will be tricky moving around those corners, but you can make it work
*When you get to the corner- keep the needle in the down position 1/4″ from the edge.  Lift the pressure foot and pivot the fabric to the next side.  Line up the edges and continue to sew.  Repeat at each corner
9)  Sew all the way around the square
LINING~
1)  Fold in half and sew the ends together- leaving a 3″ opening for turning later
2)  Repeat steps 7-8 with the lining
3)  Pin the handles to the ouside fabric- the end of the handles should be lined up with the top edge of the bucket
4)  Stuff the bucket lining -right sides facing – to the outside bucket. Pin- making sure the bottom squares are lining up
5)  Sew along the top edge of the bucket.  Make sure the handles don’t shift
6)  Turn right sides out through the hole in the lining
7)  Stuff the lining inside the bucket and close the opening
8)  Iron the top edge of the bucket.  Sew 1/4″ from the edge along the top
9)  Fold the handles in half length wise and sew along the edge- starting and stopping 2″ from the top edge of the bucket
10)  Fill bucket with fish and have some fun!

1 Bucket + Fish for tossing

Enjoy!  Remember to stop on by the blog for the giveaway.
Becky @ Patchwork Posse

Framed Square Throw Quilt


Here’s a bright throw using one jelly roll that will add color to any room. I used the Over the Rainbow batik line from Laundry Basket Quilts. All of Moda’s batik lines have rich saturated colors though, making it easy for us to create something vibrant. You could use any one of them. Hopefully you’ll have fun making or taking this on vacation.


1 Batik Jelly Roll – Laundry Basket Quilts “Over the Rainbow”
3-1/4 yd. Backing fabric
1/2 yd. Binding fabric
64″ x 72″ Batting

Step 1 
Remove selvedges from strip ends. Choose 4 strips that are close in color and in high contrast to most of the other jelly roll strips. These will be used for the frames. Choose one more strip that contrasts to the 4 for centers of framed squares. Set aside.

Step 2 – Quilt Sections
Using a design wall, the floor, or whatever you’ve got, lay out the remaining strips in two sections.

Use 23 strips for the lower section and 10 strips (+ scraps later) for the upper section. Line up lower section strips vertically in the color order you prefer. I used most of the darker strips at left in the bottom section shading and ending with lighter fabrics at right. Use 10 strips for the upper section and shade for best contrast with framed squares placement.

Step 3 – Make 9 Framed Squares
Sew one set of high contrasting strips (3 strips) together approx. 13″ in length with the darker strip in the middle. Turn the strip to horizontal and cut 5, 2-1/2″ strips. These are the centers of the framed squares. Do the same with the other two strips you set aside (10.5″ length this time) and cut 4 center strips for a total of 9 centers 

Sew strips to the sides of each of the framed square center strips. Press seams out and trim as needed.

Step 4
Beginning at the left side of the lower section, sew three strips together (lengthwise). Press. Sew the next three strips together in the same way (strip sets 1 and 2). Press.

Step 5
Sew one framed square to the top of strip set 1. Press seam toward dark. Trim strip set 1 to same length as strip set 2.

Step 6
Press top and bottom edges under (1/4″) on 2, framed squares. Press under top edge of square to be used at bottom of strip set 1. Place strip set 1 next to strip set 2. Pin squares in place as shown with one square matching up to bottom of strip sets 1 and 2. Offset and place the other two squares matching up corners.

Step 7 
Appliqué or topstitch top and bottom edges in place as pinned on each strip.

Step 8 
Carefully cut away the extra fabric beneath the appliquéd squares, leaving a 1/4″ seam allowance. Remove stitches and separate the scrap strips. Press. Scraps may come in to use to extend the width of the quilt upper section.

Step 9 – Complete Lower Section 
Sew all the remaining strips together lengthwise as you laid it out creating one piece with 4 framed squares. Press.

Step 10 – Upper Section
Number horizontal strips starting from bottom up 1-10. Sew strips 8, 9 and 10 together and sew a framed square to the end at top right. This is the top of upper section. Trim this strip set to match the width of lower section. Press.

Step 11
Sew strips 4, 5 and 6 together and sew a framed square to the left end. Press seam towards strips. Trim to same width as lower quilt section.

Step 12
Use strip scraps from beneath appliqués and ends of sets to extend width of remaining strips (1, 2, 3 in diagram) in upper section. Sew all the horizontal strips together to create one piece the same width as the lower section.

Step 13
Press edges under on remaining 3 squares for appliqué. Place as shown and appliqué edges except for the ones within seam allowance (bottom and far right edges).

Step 14
Sew the two sections together. Press seam towards upper section.

Step 15
But wait, there’s more… You’re sure to have more strip scraps available. Get more by trimming away any extra beneath appliqués. Sew scraps together end-to-end to yield two strips the length of the quilt. Sew one strip to each side which gets you an extra four inches in width.

Finish
Press the top again and make a quilt sandwich. Easy quilting suggestion: Start at top center and stitch vertical lines in varying widths out to the edges.

Trim excess batting and backing. Prepare and sew on binding.


One colorful, quilted throw approx. 53″ x 64″ finished.

You could easily make it a little bigger by adding a border. Have fun!

Robin Nelson
{www.craftsisters.com}

Umbrella-Friendly Patio Topper


Hello!  I’m so happy to be here as this is my first project for the Moda Bake Shop.   During the warmer months we spend a lot of time outdoors and tend to eat outside as well. I thought it would nice to pretty-up our outdoor space.  Using a jelly roll gives the topper a nice patchwork look and tons of color. 


1 Jelly Roll (I used Mimi by Chez Moi)
1 1/8 yard of coordinating fabric
40″ square cut of thin batting or heavy canvas
Fabric Pen or Chalk
Spray Baste or Basting Pins
Wonder Clips or Pins
5 yards of binding

Select 16 strips from your Jelly Roll

Arrange your strips into two groups of 8

Place 2 strips together.  Line up the selvedge end and sew down the length using a 1/4″ seam allowance.

Iron the seam open and grab your next strip. 

This time align your strip on the opposite end and sew.   Changing direction for each strip prevents the strip set from curving.

Keep adding strips until you have 8 pieced together.

Bring your strip set over to your cutting mat and trim off one end. Leave the other end uncut.


MARKING:
Using a ruler mark the TOP edge of your strip set at 9.5″ and 10.5″.

Move your ruler edge down to your 10.5″ mark.  Mark again at 9.5″ and 10.5″.  
Do this all the way down the top of the strip set.

Using your ruler mark the BOTTOM edge of your strip set at 4.25″ and 5.25″.

Move your ruler edge down to your 5.25″ mark.  Mark at 9.5″ and 10.5″.  
Continue marking at 9.5″ and 10.5″ down the length of the strip set.

CUTTING:
Line up the top left corner and the first mark (4.25″) at the bottom of your strip set.  
Double check.  Cut!

Line up your ruler with the first mark at the top (9.5″) and at the bottom with the next mark available (originally 5.25″) and cut.
This provides you with your first ‘wedge’.  It should be 9.5″ along the top and 1″ along the bottom.

Repeating the cuts (6 wedges) the length of the strip set.  Use the next mark available on the top and bottom as your cutting guide.

Each cut will be 1″ on one end, 9.5″ on the other end.   Your ruler will change angles each cut.

You will have enough fabric to cut 7 wedges but you only need 6.  I’m saving my extra for another project.

Repeat the above steps with your second fabric set.

SEW:

Arrange the wedges to your liking.  You will have 3 wedges of edge color variant for a total of 12.

Sew 2 wedges together a time. Pin each seam together – it really helps to keep everything lined up and looking nice.

Then complete 2 sides. (Bojangles wanted to say hello!)

Then sew one more side together – leaving seam open.

Find a circle approximately 3″ in diameter, trace over the center hole and cut.  This cleans things up a bit and makes it easier for quilting.

Prepare your topper for quilting by stacking:
Backing fabric (pretty side down), then your batting or canvas, then the topper (pretty side up).

You may use a light batting or a heavy canvas like duck cloth. I find the canvas is a little easier to work with and the finished result lays a bit flatter. The pictures below are using a thin cotton batting.

Baste using your preferred method.  Spray baste is a quick and easy option for this project.
 

I chose to sew 1/4″ down the length of each side of the wedges.  You can be as elaborate as you want!

After quilting, trim off the batting and backing. Be sure to trim the open seam and center hole.

Since we are going for a circle it makes it nice to trim a little off the points.
1/4″ or less – just enough to get the pointy part off.

It should be looking something like this.

OPTIONAL:
If you chose to use store bought binding or want to make your own binding, now is the time to add it.
Then you are done!

If you are going to use the folding method for finishing, keep going!

Baste 1/8″ all around the unfinished edges.  This just helps hold all of the layers together.

After basting:  Starting at a corner fold under 1/4″, then fold again.  Pin or clip in place.
This should create a nice, tight 1/4″ double fold.


Continue clipping all the way around.

Due to the curving and tight fold, you will need a lot of pins or clips.  
Be sure you are folding under, not to the top.
 

I find it easier to clip a section, sew, then clip another section.

Sew between 1/4″ and 1/8″ all the way around the top. This will be enough to catch the folds underneath.

For the final step I decided to stitch all the way around using one of those decorative stitches that I never get to use!  This is purely optional.

You are done!  Take it outside and enjoy.


1 Jelly Roll will make 2 table toppers.

If you are attending any outdoor barbeques or parties this summer these table toppers would make a nice gift for the host.

Julie Hirt
{www.627handworks.com}

Simply Style Stacked Squares Quilt


My name is Erica and I blog over at Kitchen Table Quilting. I am so excited to share this quilt with you. Working with the gorgeous colors of this collection was so much fun and I hope you enjoy this tutorial!

2 Simply Style Jelly Rolls
1 Simply Style Layer Cake
1 yard Moda Bella White
4.25 yards solid for backing
2/3 yard print or solid for binding
batting that is at least 74″x82″


Cut your white solid into 12 strips that are 2.5″xWOF.

Pair up the strips from each jelly roll so that there the matching strips are together.

You will be using 23 of the 10″ squares from the layer cake and all of the jelly roll strips.  Take the 23 squares and match them with 2 pair of jelly roll strips (and the white solid strips) just like in the photo below.

One pair of strips will be used for the inner square (the purple fabric here) and one for the outer (the gray fabric.  
Cut the inner square fabric into 2 strips that are 2.5″x10″ and 2 strips that are 2.5″x14″.  Cut the outer square fabric into 2 strips that are 2.5″x14″ and 2 strips that are 2.5″x18″.  There are 8 total strips in the photo below, the strips that are the same size and color are stacked.  
Sew the 2.5″x10″ strips onto opposite sides of the layer cake and press the seams open.
Sew the 2.5″x14″ strips onto the remaining sides and press.
Repeat this process with the fabric for the outer squares.  
Use your ruler to cut the square in half. 
And then in half again so that you have 4 identical 9″ squares.
Use your design wall (or living room floor) to lay out the blocks so that there are 8 columns and 9 rows.  Leave some blocks intact so that all 4 are placed together, and then arrange the other blocks around them to give the illusion that they are stacked. 
Be careful that the way you arranging your blocks makes sense.  I made a mistake in my quilt top that I didn’t notice until I had finished binding the quilt.  Here is how my layout should have looked.
There will be some orphan blocks leftover. Arrange them into two random rows and piece them into the backing fabric.
Baste, bind, and quilt as desired. 


This finishes up as a good sized lap quilt.  Finished size: 68″x76″.

Erica Jackman
{kitchentablequilting.blogspot.com}

Pink Ombre Patchwork Quilt


Hi Everyone!  I’m so pleased to be back here with a fun and easy project that is absolutely perfect for the beginner quilter (or for those who need to whip up a quick-yet-pretty gift).  The layout of this quilt is very simple and works with many pre-cuts – fat quarters, layer cakes, or charm packs. The trick is blending the fabrics from two different lines. I made this one with my daughter and it makes a great kids’ sewing project.

5 to 6 charm packs (choose lines that have lots of pink in different shades) – I used Posy by Aneela Hoey & 2wenty Thr3e by Eric and Julie Comstock.
3/8 yard Bella Solids for binding
3 2/3 yards Bella Solids for backing

From your charm packs, select fabrics with pink or white hues. Try mixing warms and cools too, as I did.  I even used a bit of orange. The results are actually very pretty.  Because you will be creating a quilt from dark to light, ensure that you have a nice even mix of both, along with a good amount of mid-range pink (or whichever colour you have chosen.  Say a mixture of five or six darker pinks/reds/oranges, five or six whites (with a touch of pink), and the rest in mid-range pinks.

Lay the charm squares on the floor and work out your desired design, ensuring that you gently blend the colours from dark to light.  Take a photo of this design to help ensure you get it right later on.

Starting in the bottom right hand corner, work backwards along the quilt, right to left, collecting your squares into a pile.  This will make it much easier when you come to sewing the quilt top.  Plus it looks pretty too…

Begin assembling your quilt in rows of eight, with a 1/4″ seam allowance for each seam.

Attach the strips together, either as you go or all at the end, your preference.

I gave my quilt top a good iron before sandwiching and quilting the top (very basic quilting – I am still very much a beginner quilter!).  Bind and quilt as desired. I used a white binding, but soft pink would look lovely too…  Didn’t I tell you it was easy?!

One small 40′ by 60′ single quilt for a pink-mad girl.  This would be a fun (and even easier) project using charm squares if you have enough pinks and whites – no cutting required!  Use fat quarters or layer cakes to make a larger version, and you can easily recreate this project using any colour you wish!

Stella Rutherford
{verydarkhorse.blogspot.co.nz}

Little Boy Blue {Toddler Bean Bag}

Toddler Bean Bag Pattern by Vanessa Goertzen 

Summer is finally here! I whipped up this cute little bean bag for my son  to complement the girly tuffets I made for my daughter {Tea Party Tuffets}.  I used the boy-ish colors in flannel from Bonnie and Camille’s Marmalade line. Since I was working with leftovers, mine are just basic panels in two different prints, but ideally you would piece charm packs together and use my templates (at the end of the Printer Friendly version) to create a patchwork version.

*If using two prints, you will need 1-1/4 yard of each bean bag material.

BEAN BAG PATTERN ASSEMBLY: 

Toddler Bean Bag Pattern by Vanessa Goertzen1. Open and print all pages of the “Little Boy Blue” Bean Bag Pattern on 8.5 x 11″ paper. Make sure that the printer settings are not set to “fit to scale.” The first page includes a 1″ tester square–measure to make sure everything has printed correctly.

2. Carefully cut out the pattern pieces labeled “Piece A,” Piece B,” and “Piece C.” Tape together as indicated in the adjacent diagram and set aside.

 3.  Carefully cut out the pattern pieces labeled “Piece D” and “Piece E.” Tape together as indicated.

Toddler Bean Bag Pattern by Vanessa Goertzen

NOTE: If you’d like to make a larger version of this bean bag (suitable for older kids), take these printed template pages to your local copy center and enlarge all pieces 150%.

CUTTING: 

You will need to cut a total of six bean bag panels from the bean bag material. (Since I am using two bean bag materials, I will be cutting three panels from each.) There are multiple ways to cut the panels from your fabric–here is my preferred method to get the most out of the yardage:

When you purchase fabric off the bolt, the manufacturer has already folded it in half widthwise, wrong sides together. Keeping it folded this way, make another fold by bringing the top of the fabric down about 9-10″ (or until the pattern fits along this new fold). Note: this new fold will run perpendicular to the manufacturer’s original fold.
Pin the pattern in place along the fold where indicated. Carefully cut around the pattern shape, remove the pins, and unfold the two resulting bean bag panels. Repeat the 9-10″ fold, realign the pattern, pin in place, and cut again. Repeat until you have six bean bag panels total.
Toddler Bean Bag Pattern by Vanessa Goertzen

*TIP: If using two different prints, this cutting method will yield 4 bean bag panels from each. You can refold the two extra panels (one from each print) and cut a top & bottom piece from each.

Speaking of the top & bottom pieces, go ahead and place that pattern on the fold of your leftover bean bag material and cut two. Designate one for the bean bag top and the other for the bean bag bottom.

Toddler Bean Bag Pattern by Vanessa Goertzen

LINING: Repeat the whole process to get six panels and a top and bottom from the lining material. 

SEWING THE BEAN BAG:

You will begin with two bean bag panels and the 22″ zipper. (If using two prints, retrieve one of each so we can alternate them).

Toddler Bean Bag Pattern by Vanessa Goertzen

Turn the zipper over so it is right sides together with one of the bean bag panels. Align the raw edges and pin in place down the entire zipper, moving the zipper head down as you go.

Toddler Bean Bag Pattern by Vanessa GoertzenToddler Bean Bag Pattern by Vanessa Goertzen

Once the zipper head reaches the bottom (or before then), move it back up a bit so you can pin the zipper tape beyond it. This may require removing some pins momentarily.

Toddler Bean Bag Pattern by Vanessa GoertzenToddler Bean Bag Pattern by Vanessa Goertzen

Install the zipper foot on the sewing machine (make sure you move the needle over to the left) and stitch the zipper in place, stitching as close to the teeth as possible.

Toddler Bean Bag Pattern by Vanessa Goertzen

Once you reach the zipper head, don’t be tempted to just stitch around it. Take a second to pause and pull the project out from the machine. Zip it up so the zipper head into the area where the zipper is already sewn down. Resume stitching all the way to the bottom.

Toddler Bean Bag Pattern by Vanessa GoertzenToddler Bean Bag Pattern by Vanessa GoertzenToddler Bean Bag Pattern by Vanessa Goertzen

Bring this “zippered” panel right sides together with the next panel. Referring to the picture below, fold the zippered-edge back slightly so the zipper is now right sides together with the other panel.

Toddler Bean Bag Pattern by Vanessa Goertzen

Line up the edge of the zipper tape with the edge of the panel. Begin pinning the zipper tape in place just as you did with the other panel, moving the zipper head down, and so on.

Toddler Bean Bag Pattern by Vanessa GoertzenToddler Bean Bag Pattern by Vanessa Goertzen

Move needle to right of the zipper foot and sew the zipper tape in place from the top.

Toddler Bean Bag Pattern by Vanessa Goertzen

When you’re done, you can take a little sneak peek of what the zipper will look like! Looks good, but we need to do one more thing.

Toddler Bean Bag Pattern by Vanessa Goertzen

Top-stitch the zipper in place on both sides. Keep using the zipper foot and make sure the needle is set on the side away from the zipper teeth to give a nice (approx. 3/8″) seam allowance.

Toddler Bean Bag Pattern by Vanessa Goertzen

Now that the zipper is in place, we can sew the rest of the panels together.

Toddler Bean Bag Pattern by Vanessa Goertzen

Add the next panel (right sides together), aligning the raw edges, and pinning in place like so.

Toddler Bean Bag Pattern by Vanessa Goertzen

Sew along the pinned side using 3/8″ seam allowance.

Toddler Bean Bag Pattern by Vanessa Goertzen

Repeat and add another panel until all six are all attached in a row. If using two prints, alternate them. Bring the first and last panel right sides together, pin in place, and sew together.

Toddler Bean Bag Pattern by Vanessa Goertzen

Keep the bean bag inside out and unzip the zipper before proceeding.

Pin the top right sides together with the bean bag, aligning the raw edges. Sew the top in place using 1/2″ seam allowance.

Toddler Bean Bag Pattern by Vanessa Goertzen

Repeat to add the bottom, but double check that the zipper is open before you do. 

Finally, turn the bean bag right-side out through the zipper opening.

Toddler Bean Bag Pattern by Vanessa Goertzen

Repeat this whole sewing process (minus the zipper) with the lining pieces. When adding the final bottom round piece, only stitch it 2/3 of the way. Turn the lining right-side out through that hole and fill it with the polystyrene beads before stitching it closed.

A word about the polystyrene beads: Be sure to read and follow all instructions. They will cause a big mess if you’re not careful.

Toddler Bean Bag Pattern by Vanessa Goertzen

Once the bean bag is filled about 2/3 full, pin it shut and hand-stitch it closed.

Toddler Bean Bag Pattern by Vanessa Goertzen

Now you are ready to slip it into your beautiful bean bag cover. Zip up and enjoy! When it gets dirty, just unzip, remove the bean bag, and wash the bean bag cover.

 Toddler Bean Bag Pattern by Vanessa Goertzen

A fun and happy pint-sized bean bag perfect for any toddler!

Toddler Bean Bag Pattern by Vanessa Goertzen

Toddler Bean Bag Pattern by Vanessa Goertzen

Vanessa Goertzen
{lellaboutique.blogspot.com}

Jiggity Quilt


Have you ever gotten an idea in your head and then had a hard time shaking it? It is like a song that inserts itself into your day and will not be abandoned. No matter what you do that silly song is right there with you.

This quilt is like that for me.

The idea grew from a comment I made in the instructions for my Twisted Charm quilt (posted on Moda Bake Shop on April 26, 2012) I had made the discovery, purely by accident, that if you cut your fabric while it was folded you could end up with half of your blocks turning at a different angle. I warned you that it would make your quilt look “jiggity” like an I-phone when you try to move the little icons around. Then I got a lovely bundle of Kapalua Batiks and wanted to make something beachy.

Jiggity is the blending of the blocks I warned you about and the summer time fun of Kapalua Batiks. It makes me think of bits of sea glass that are being tumbled in the ocean, broken bits caught in an undertow and polished until they delight us. I can smell salt mixed with a subtle hint of coconut oil drifting on a breeze….oh, that wasn’t the quilt….that was one of my boys walking by with a bowl of pop corn….different kind of summer time fun.


1 charm pack (40, 5″ squares) (Kapalua Batiks)
1 ½ yds cream solid (Bella Fig Tree Cream #9900-67)
1 3/4 yds chocolate brown solid (Bella Brown #9900-71)
½ yd inner border (Kapalua Batiks #4320-31)
½ yd binding (cut 2.5″ with wof) , and setting squares (Kapalua Batiks #4320-48)
3 yds backing (Kapalua Batiks #4320-31)


  • Open the charm pack
    • Remove the 10 charms that show the least amount of contrast with cream background fabric. The charms are set right against the cream fabric. Where there is no contrast there will be no gem sparkling on the sand.
    • Of the remaining 30 charms, put every other patch in a different pile. Go through the whole pack until you have 2 piles of 15 patches. This will put approximately half of each color way in each pile.
  • Cutting Directions:
    • Block A – Single Twist (15 blocks)
      • From cream
        • cut 3 5″ width of fabric (wof) strips
        • cut 2 wof strips into 14 3″ pieces each
        • cut 2 3″ pieces from the remaining wof strip
        • you should have 30, 3″x5″ rectangles
        • sub-cut each rectangle once on the diagonal for a total of 60 triangles.
        • If you are using a patterned fabric for the background DO NOT LAYER YOUR RECTANGLES WITH LIKE SIDES TOGETHER WHEN YOU CUT THEM. This will result in half of the triangles leaning the wrong direction. If both sides of your fabric are the same (like in a Bella solid) this isn’t an issue.
      • From charm pack
        • Please measure your charms.  Do not assume that just because they are labeled 5″ squares that they are.  Charms are pinked at the edges.  Find out if 5″ is 5″ at the inside or the outside of the zigzag.  It will make a difference.
        • 15 5″x5″ patches
    • Block B – Double Twist (15 blocks)
      • From brown
        • cut 3, 5″ wof strips
        • cut 2 wof strips into 14 3″ pieces each
        • cut 2 3″ pieces from remaining wof strip
        • you should have 30, 3″x5″ rectangles
        • THIS IS THE POINT OF THIS QUILT – PAY ATTENTION If you are using Bella or a similar solid you don’t have to worry about how you cut things; however if you are using a printed fabric you need to take note of which direction you cut the rectangles for Block A. Cut all rectangles for Block B in the opposite direction.
        • sub-cut each rectangle once on the opposite diagonal for a total of 60 triangles. *Mind the warning in Block A
      • From cream
        • cut 2, 4″ wof strips
        • from 2 wof strips cut 15, 2 3/8″ x 4″ rectangles
        • sub-cut each rectangle once on the diagonal, in the same direction you just did for the brown triangles in Block B, for a total of 60 triangles. *Mind the warning in block A
      • From charm squares
        • trim 15 charms to 3 3/4″ squares
    • Sashing
      • From brown
        • cut 3, 6 ½” x wof strips
        • cut 36, 1 ½” x 6 ½” rectangles (28 from one wof strip and 8 from a second.)
        • SAVE rest of second strip with the third strip.
      • From setting square fabric
        • Cut 2, 1 ½” x wof strips
        • Sew setting strips to remainder of brown strips from previous along the long edge.
        • Iron seams toward the brown
        • Cut 35, 1 ½” x 7 ½” rectangles from pieced strips. These will look like brown match sticks with colored heads.
        • From remainder of setting stip cut 7, 1 1/2″ squares
    • Inner Border
      • From setting fabric
        • cut 4, 1 ½” squares
      • From inner border fabric
        • cut 5, 1 ½” x wof strips
    • Outer Border
      • From cream
        • cut 5, 4 ½” x wof strips
      • From setting square fabric
        • cut 4, 4 1/2″ squares
    • Binding
      • Cut 6, 2 ½” wof strips


Time for a break. If you have completed all of this cutting and prepping, the rest of the quilt should go together easily.

Piecing Directions:
Sometimes a sewing machine can eat the points of a triangle as it is being fed through the feed dogs.  If you have trouble with this, try using a leader.  A leader is a small piece of fabric that leads the way for the rest of your sewing.  Take a scrap of fabric and feed it through the feed dogs ahead of your triangles – like you are chain piecing an extra little bit before your real pieces.  It seems to help.

Block A – Single Twist

    • The goal is to make 15 blocks like this one. They will each have a different center.
    • Align a cream triangle with the stubby angle 1/4″ over the edge of a 5″ charm and the pointy angle 1/2″ over the parallel edge
    • Sew 1/4″ seam along the long cream edge. If you are careful not to stretch the fabric, you don’t have to pin.
    • I’ve noticed that when using a machine with a 1/4″ foot, I can align my needle at the intersection of the two pieces and edge of the fabric right next to the flange of the foot and everything comes out where it should. The seam will start and stop at where the edges of the fabric intersect.
    • Iron the seam toward the cream.
    • Repeat on next side, 3 times until all four sides are added
    • Trim to 6 1/2″ square. Really. Do this. I sized the pieces so that they would be big – to make the piecing easier. If you don’t trim them it won’t work right.  Yes, it is tedious and boring.  I don’t like to do it either.  Do it anyway. 
    • If you have a 6 1/2″ trimming square center the center so that as close to 1/4″ of cream is between the points and the edge.
    • It is fine if it isn’t perfect. Even if you sew a corner into the seam allowance when you piece the blocks together it will still look square. The blocks are set in brown- your eyes will fill in any corners that are missing.
    • Make 15.

    • Block B – Backwards Double Twist
      • The goal, again, is 15 blocks.
      • These will each have a different center and two twists.
      • Add the cream triangles to the trimmed charms in the opposite direction from Block A.
      • Trim blocks to 5″ squares.
      • Add the brown triangles just like you did the cream ones a moment ago.
      • Iron towards the cream.
      • Trim to 6 1/2″ squares.
      • Make 15.

    • Center
      • Arrange blocks in a grid 5 blocks by 6 blocks alternating every other block.
      • NOTE: to my OCD friends this quilt does not come out even. If you are really OCD you have already noticed this, and probably chosen not to make it…or you have altered the pattern. If you aren’t, you are doing it right if  the corner blocks only match on one side.
      • Step away from your arrangement and see if you still like it. If you can’t get very far from it try taking a quick photograph of it with your cell phone. Look at the picture to see if the distribution of colors pleases you.
      • If you have a design wall this is a good time to use it. If you don’t there are other options. You can put them on the floor or lay them on a bed. You can close the drapes and pin your blocks to them. Or use the shower curtain. Use your imagination.
      • You can also just wing it. Random is good – but I haven’t met many people who are actually happy with random.
    • Vertical Sashing
      • Once you are happy with the layout sew a brown “stick” to the right side of each block in each row.
      • Sew the rows together:
        • (block, stick)(block, stick)(block, stick)(block, stick)(block, stick)
      • Sew a stick to the left side of the leading block
      • Iron seams toward the brown sashing.
    • Horizontal sashing.
      • You need to make 7 rows of horizontal sashing.
        • Sew 5 matchsticks together along the skinny side with the setting block (head) pointing toward the right.
        • Sew one head on the end of the last match stick.
        • Iron seams toward the brown sticks.
      • Place one matchstick row between each row of blocks.
      • Attach horizontal sashing.
        • Snuggle sashing seams and pin in place
        • Iron seams toward horizontal sashing.
      • Borders
        • Inner border
          • Measure your quilt’s length and width. Write it down.
          • It should be something like 36 1/2″ x 43 1/2.
          • Sew one 1 1/2″ border strip to each of the skinny ends.
          • Iron seams toward the border.
          • Trim excess.
          • Sew the remaining three skinny strips together, end for end.
          • Cut two strips from this that are the length of your quilt as it was when you wrote it down. (It should be 2″ shorter than the top is now.)
          • Sew a 1 1/2″ setting square to the ends of each of these strips. Iron seams toward the border strips.
          • Snuggle corner seams together. Pin in place.
          • Pin remaining length of borders in place.
          • Sew on long borders.
          • Iron seams toward border fabric.
        • Outer border
          • Measure your quilt’s length and width. Write it down.
          • It should be something like 38 1/2″ x 45 1/2″, give or take.
          • Sew 4 1/2″ border strips together end for end….making one very long and skinny strip.
          • Cut 4 lengths from this strip that are equal to the measurements you just wrote down. (2 that are the length of the top and 2 that equal the width.)
          • Sew short edges of the border on first.
          • Iron seams toward the border.
          • Sew a 4 1/2″ setting square to each end of each of the long strips. Iron seams toward the border strips.
          • Snuggle corner seams together. Pin in place.
          • Pin remaining length of borders in place.
          • Sew on long borders.
          • Iron seams toward border fabric.
      • Layer and Quilt as desired.

      1 crib or throw sized quilt, finished size: 46″ x 53″. A place to day dream away the long hot days of summer – a beach blanket for a tiny tot, a picnic spot for afternoon tea, a quilt to wrap up a water logged frozen child in.

      Enjoy!

      Cindy @ Tops to Treasures
      {topstotreasures.blogspot.com}