
![]()
Hello Friends! This is Alyssa from Pile O’ Fabric. My goal at Pile O’ Fabric is to connect with fellow quilters, and inspire them to continue learning, to step out of their comfort zone, try new techniques, join new events, try new products, and fall even more in love with quilting than they were. And Conquer that Pile O’ Fabric!
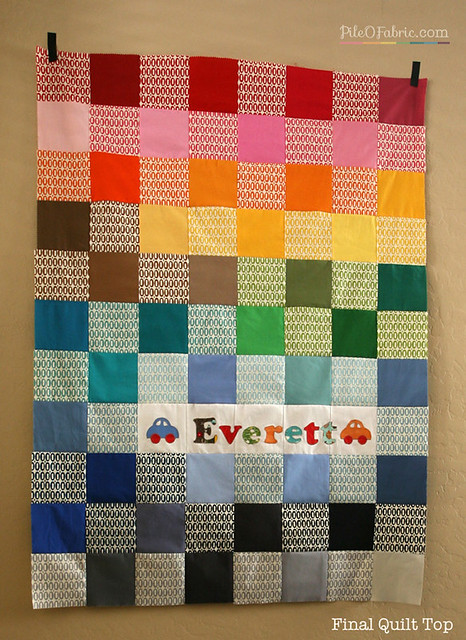
I am very excited to be sharing my very first Moda Bakeshop Recipe with you all today. The Easy Pezzy Crib Quilt. This quilt just like the name is very easy and can be made quickly. It would make a wonderful gift for a new baby!


for Quilt Top
- 1 Pezzy Print Charm Pack by American Jane for Moda
- 1 2012 Bella Solids Charm Pack for Moda
- 1 New Bella Solids Charm Pack for Moda
- 1 Dark Bella Solids Charm Pack for Moda
- 25″ x 5″ piece of white solid (cut into 5 charms for applique background)
for Appliqué
- fabric scraps 2 1/2” or larger
- 1/2 yard HeatnBond Light iron-on adhesive
- freezer paper
- appliqué templates (download here)
for Finishing
- 2 1/2 yards fabric of your choice for backing
- 1/3 yard Bella Solids in Christmas Red for binding
- Crib size batting (45” x 60”)

This quilt can be made with our without the Appliqué section, depending on the look you want to achieve.
First you will begin by laying out your charms alternating one Pezzy Charm with one coordinating Solid Charm.

If you plan to add the Appliqué section you will layout your charms 8 x 11, with 5 white charms for the background. Otherwise if not layout your charms 8 x 10.

Once you have your final layout label and seperate each row piles.


Starting with row #1 piece each charm together with a 1/4″ seam.


Now we will press our seams and trim the thread tails.

Press your seams to one direction for each row, alternating directions per row. For example Row #1 press seams to right, Row #2 press seams to left and so on. This will help assure your squares line up when sewing.

Pin your first two rows with seams together.

Sew the pinned rows together with a 1/4“seam allowance.

Continue to sew your rows together until you reach your Appliqué row.
Appliqué Section
If you plan to skip the appliqué section, then you can skip these instructions and continue to piece your rows together.
Print your templates on printer paper. Next trace the template onto the paper side of your freezer paper. (if you have printer friendly freezer paper than print the template directly onto the freezer paper) Cut all your templates out of the freezer paper and set aside.

Following the directions on the HeatnBond packaging, press your fabric scraps to the HeatnBond.

Layout your freezer paper templates onto the fabric scraps and press with a hot dry iron.

Cut each template out.

Remove the freezer paper from front of your template. The wonderful thing about freezer paper is you can reuse it multiple times. So I put all my templates into a Ziploc bag to save for future projects. Then remove the HeatnBond paper backing and throw away.

Position letters shiny side down on your white appliqué section, then press with a hot dry iron.

Sew along the edges of the appliqué with your choice stitch. I chose to use the zig-zag stitch in a beige thread.


You will have a lot of thread tails leftover. Don’t just cut them short. Thread a quilting needle with the thread tails, and pull thread to the back of the fabric.

Tie a knot, and then trim your thread tail.

Once you complete your appliqué section, finish piecing all your rows together until your quilt top is complete.
Continue on and baste your quilt, with your favorite basting technique. I myself like to spray baste my quilts.

Then quilt with your pattern of choice. I chose to quilt 1/4” on the left and right side of all my seams. And then for my appliqué section I quilted diagonal lines 1/2” apart using painters tape.

Continue on and bind the quilt with your preferred binding technique. For quilts I plan to wash often I machine stitch the binding.

And you are done!

One Easy Pezzy Crib Quilt
35″ x 48 1/2“
Gift it or Love it, Cuddle it and Enjoy it!


Are you a beginner quilter looking for more details on how to quilt, baste, and bind? Monday June 25 at Pile O’ Fabric a Beginners Quilting Series starts which will go through every step to creating today’s featured quilt. We will talk about tools/notions, fabric shopping, layout/design, piecing, basting, quilting, binding, tagging, and washing. And for more quilting and sewing tutorials, reviews, inspiration and encouragement, come visit me at Pile O’ Fabric!
If you use this tutorial to make a Easy Pezzy Crib Quilt, I’d love to see it! Be sure to add it to my Flickr group, and of course to the Moda Bake Shop Flickr group as well. Thanks for stitching along!

Alyssa Lichner
{Pile O’ Fabric}
![]()
