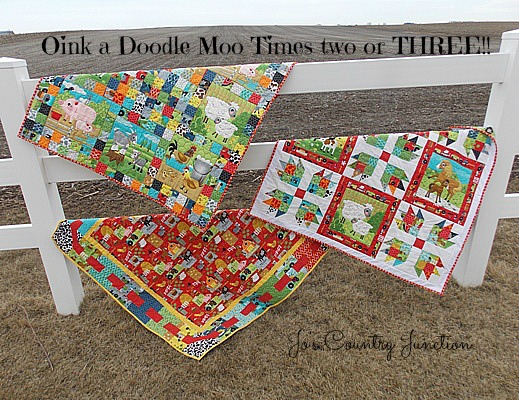
Hello from Jo and Kelli at Jo’s Country Junction. If you’ve read our blog, you know that we are farm gals and our guys are farmers. When we saw Moda’s new line “Oink a Doodle Moo”, we just knew we had to design something using it. We live, breathe, eat and sleep farming…we might as well sew it too! We ended up with not one, not two, but THREE baby quilts all from one jelly roll!! Isn’t that neat? After you read the tutorial, you’ll want to come over to our blog and sign up for a chance to win a free jelly roll to help you get started on your own set of quilts. Read on and we’ll show how to make them.

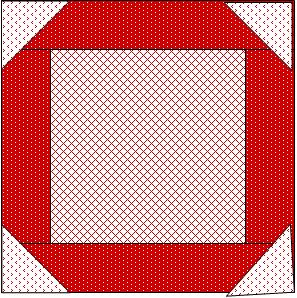
Oink-A-Doodle-Moo: #1 Woven Edge
Fabric Requirements:
-24 Jelly Roll Strips (Blocks)
-1/2 yard solid Red (Blocks)
-3/4 yard solid Yellow (Inner Border/Binding)
-1 yard Center Background (Center)
-1//4 yard cow print (Corner Blocks)
-2+ yards backing We used scraps and added a strip to the back making it wide enough.
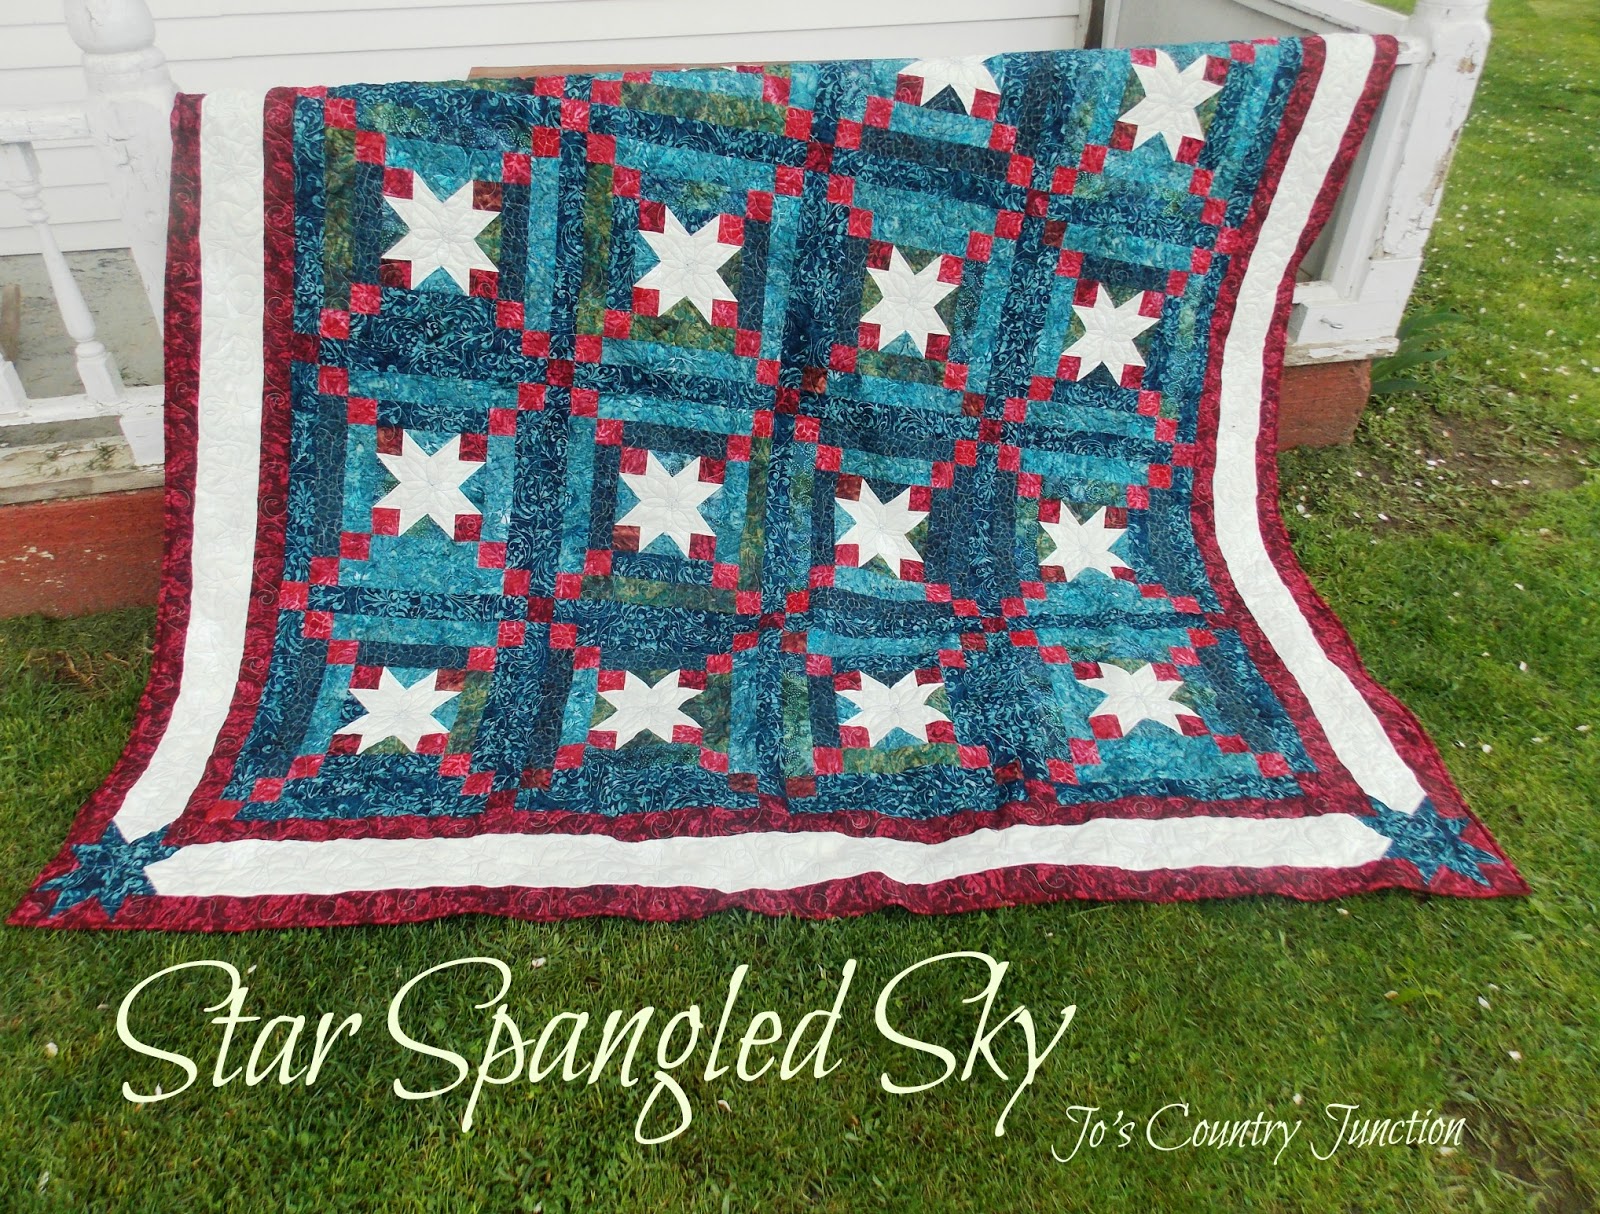
Oink-A-Doodle-Moo: #2 Scrappy Bear Paw Stars
Fabric Requirements:
-1 Panel Set
-5 Red Jelly Roll strips (12.5” total of each print)
-5 Blue Jelly Roll strips (10” total of each print)
-5 Green Jelly Roll strips (20” total of each print)
-20 assorted Jelly Roll strips (3.5” total of each print)
-1 1/4 yard white (blocks and outer border)
-¾ yards red print (panel borders)
-1/2 yard (binding)
-2+ yards Backing We used scraps and added a strip to the back making it wide enough.
Oink-A-Doodle-Moo: #3 Scrappy with PanelsFabric Requirements:
-Remaining Jelly Roll Strips
-1 Panel + 2 remaining Panels from previous quilt
–1/2 yard (binding)-2 yards Backing

Oink-A-Doodle-Moo: #1 Woven Edge Note: WOF=width of fabric All seams are 1/4″ unless noted.1. From each jelly roll strip, cut 2-6 1/2” rectangles and 1-2 1/2” square.
2. From the solid red, cut 3-2 1/2” strips
-Subcut into 48-2 1/2” red squares.
3. From the solid red, cut 1-4 1/2” strip.
-Subcut into 4-4 1/2” squares.
4. From the solid yellow, cut 4-1 1/2” strips.
-Subcut 2 strips to 34 1/2” long and 2 strips to 36 1/2” long.
5. From the solid yellow, cut 5-2 1/2” strips to be used for binding.
6. From printed center fabric, cut a square 34 1/2” square.
7. From cow print, cut 1-6 1/2” strip.
-Subcut into 4-6 1/2” squares.
8. From the remainder of the cow print 6 1/2” strip, cut 4-2 1/2” squares.
Sewing Blocks:
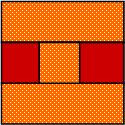
1. To make 1 woven block, you will need 2 matching 6 1/2” rectangles, the matching 2 1/2” square, and 2 red 2 1/2” squares.
2. Using the 2 1/2” squares, connect 1 printed square to 1 red square. Press to the red square.
3. Connect the second red square to the printed square. Press to the red square.
4. With right sides together, connect 1 pieced rectangle to a printed rectangle on the long side. Press to the printed rectangle. Repeat with the second printed rectangle.
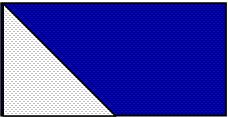
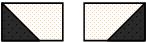
5. Repeat to make a total of 24 blocks.6. To make the cow print corner blocks, place a red 4 1/2” square in the corner of a 6 1/2” cow print square with right sides together.

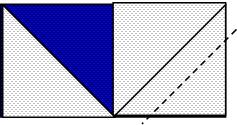
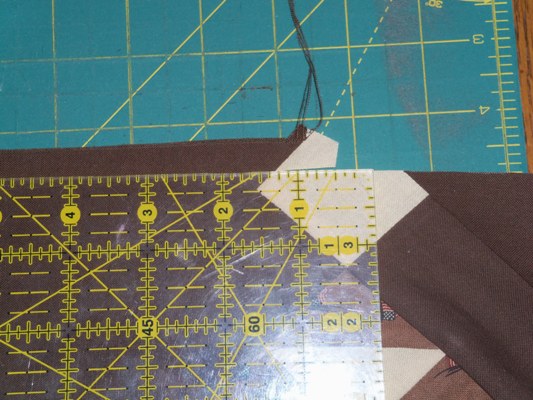
7. Sew diagonally from corner to corner of the red square. Trim seam to approximately ¼” on the outside of the block. Press to the red triangle. To create this.

8. Place a cow print 2 1/2” square in the same corner with right sides together.
9. Sew diagonally from corner to corner. Trim seam to 1/4″ on the outside of the block. Press to the cow print triangle. To create this.
10. With right sides together, sew the 34 1/2” yellow 1 1/2” strips to opposite sides of the 34 1/2” center square of fabric. Press to the yellow border.
11. Add the 36 1/2” yellow strips to the remaining opposite sides of the center fabric. Press to the yellow fabric.
12. Join the 24 woven blocks into 4 sets of 6 blocks.
13. Assemble the quilt as shown.
14. Quilt and bind using the 5-2 1/2” solid yellow strips.
Oink-A-Doodle-Moo: #2 Scrappy Stars
Cutting:
1. From the panel, trim 4 blocks to 10 1/2” square.
2. From each of the red jelly roll strips, cut 5-2 1/2” squares.
3. From each of the blue jelly roll strips, cut 4-2.5” squares.
4. From each of the green jelly roll strips, cut 8-2 1/2” squares.
5. From each of the assorted jelly roll strips, cut a 3.5” rectangles from each strip.
6. From the white fabric, cut 15-2 1/2” strips.
-Subcut 4 strips to yield a total of 20-6 1/2” x 2 1/2” rectangles.
-Subcut 2 strips to yield a total of 20-2 1/2” squares.
-Subcut 2 strips to yield a total of 20-2 1/2” x 3 1/2” rectangles.
-Save 5 strips for outer border7. From the white fabric, cut 5-2” x WOF strips.
8. From the printed red fabric, cut a total of 7-2 1/2” x WOF strips. I fussy cut the printed fabric so that it looked like the tractors and other farm vehicles were “driving” around each of the panel blocks.
-Subcut 3 strips to yield 8-2 1/2” x 10 1/2” strips.
-Subcut 4 strips to yield 8-2 1/2” x 14 1/2” strips.
9. From the binding fabric, cut 5-2 1/2” x WOF strips.
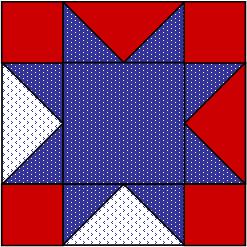
Sewing Blocks:
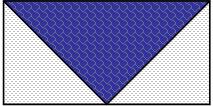
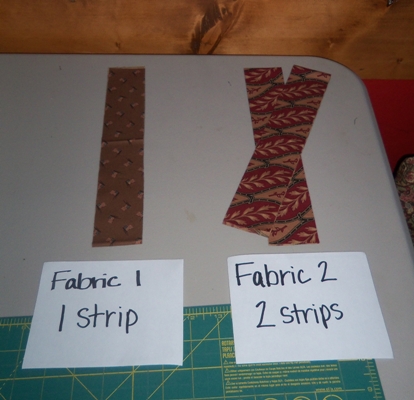
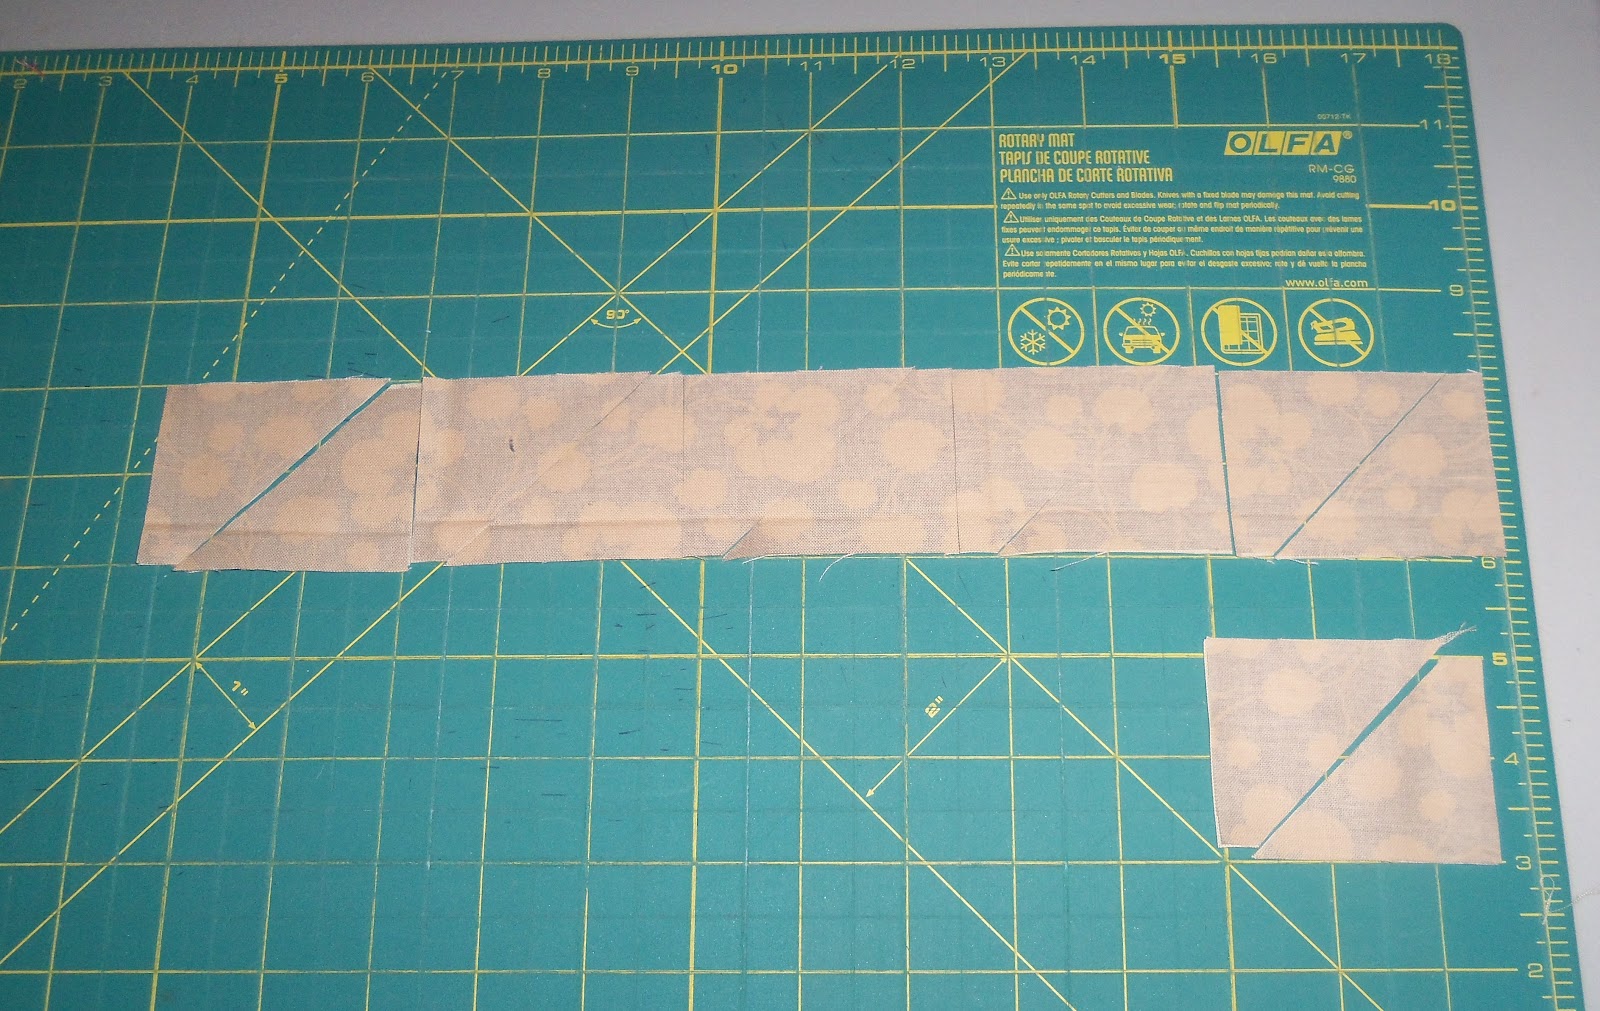
1. To make the half-square triangles (star points), pair a white 3 1/2” strip with a 3.5” printed strip. Place pieces right sides together. Using an easy angle ruler, cut each set to yield 2 half square triangles. Sew on the diagonal and press to the printed fabric. If you don’t know how to use an easy angle ruler follow this link for instructions.
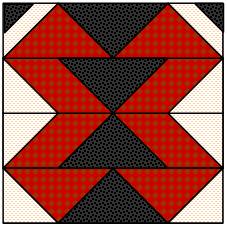
2. Assemble each of the star blocks as shown. Use the same green, red, and blue squares throughout each of the individual blocks. Use the half-square triangles randomly through each of the blocks.
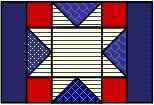
3. With right sides together, stitch the 2 1/2” x 10 1/2” to opposite sides of each of the 4 panel blocks. Press to the red border.4. Attach the 2 1/2” x 14 1/2” rectangles to the remaining sides of each of the 4 panel blocks. Again, press to the red border.
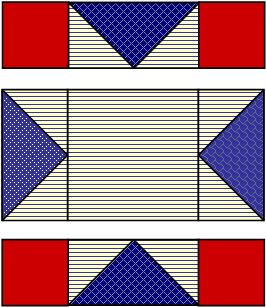
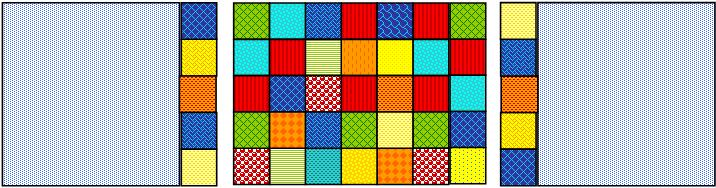
5. Assemble the quilt as shown below.

6. Sew the remaining 2 1/2″ white strips together. Sew to the outside for a border.
7. Quilt as desired and bind with the 5-2 1/2” x WOF strips.
Oink-A-Doodle-Moo: #3 Scrappy with PanelsCutting:
1. Using the remaining Jelly Roll strips, cut a total of 161- 2.5” squares.
2. Trim each of the panel blocks to 10.5”
3. Cut 5-2.5” strips from the binding fabric.
Sewing Blocks:
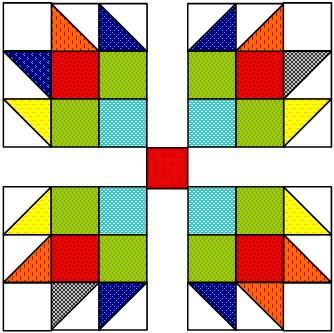
1. Sew the panels and squares into the following units.
Make four.

Make four.

Make two.

Make one.
2. Assemble the units as shown. Make one.

Make one.

Make one.

3. Sew the newly created units together to form the top.

4. Quilt and bind as desired.

THREE baby quilts…Yes, three from one jelly roll.
Quilt #1 with the woven blocks measures 48 1/2″ x 48 1/2″
Quilt #2 with the scrappy stars measures 44 1/2″ x 44 1/2″
Quilt #3 with the panel pieces measures 42″ x 42″

Don’t forget to come up to Jo’s Country Junction to sign up to win your own jelly roll.
Jo and Kelli Kramer
{www.joscountryjunction.com}