
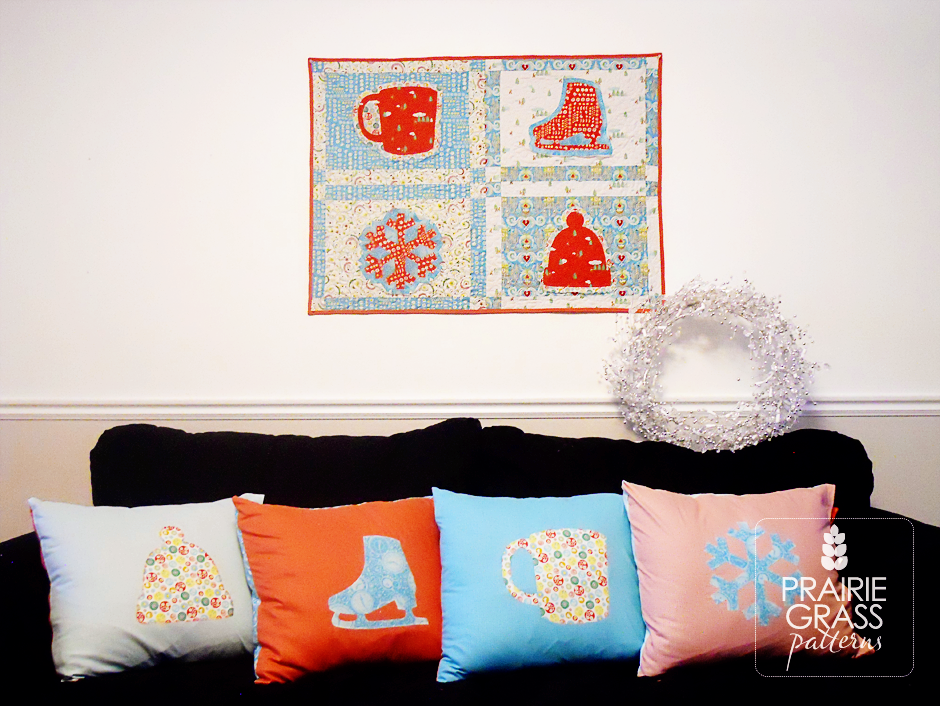
I’m April Rosenthal from Prairie Grass Patterns, and I’m so excited to show you my first recipe for the Moda Bake Shop–it’s a room makeover! With a few throw pillow slipcovers and a sweet wall hanging, you’ll want to make a set for each season and holiday. For even more versatility, make each piece double-sided.
(Psst! These slipcovers fit 20″ square throw pillows just right, but would also work great with an 18″ pillow.)

(1) Hideaway Fat Quarter Bundle (you will use 16)
40 x 46 Batting
1⅓ yards Heat ‘n Bond lite (for applique)
1⅓ yard red gingham (backing & binding)
Applique templates included in PDF

Choosing your fabrics:
The biggest thing to remember when making this recipe is contrast. You’ll want each applique shape to stand out as much as possible, so you’ll need to do a bit of color planning. I chose to use all the red, white, and aqua fat quarters from my Hideaway bundle, which left me just enough yellow and green fat quarters to make another batch of this recipe for early spring!
Choose 2 white and 2 aqua non-directional fat quarters for your wall hanging backgrounds. Then, choose 2 red, one white, and one aqua fat quarter for the applique shapes.
Now, choose 4 fat quarters as the fronts of your pillow slipcovers. This would be a good place for a larger overall print, or directional prints. The applique shapes for your pillow covers will come from the aqua and white fat quarters you chose above. Also choose 4 more for the backs of your pillows.
Making the Wall Hanging:
Using the 4 fat quarters you chose for your wall hanging background, trim each piece to 16″x21″ (be sure to remove the selvage first!). Set aside.
Next, trace the applique shapes onto your Heat ‘n Bond. The inner and outer lines will be traced together, and will form the cut lines for your applique outline, and your pillow shapes. The middle line (dotted) will be traced separately and will be the cut line for your inner shape on your wall hanging. (In the pictures you will not see inner and outer cut lines, I freehanded it. After doing that, I thought you’d be happier if I added the inner and outer lines for reference.) Since the applique shapes are a little larger than a regular piece of paper, you’ll have to piece them together.
Cut the shapes apart individually, leaving room around each shape. Do not cut on the lines. Following the instructions on your Heat ‘n Bond package, adhere each shape to the appropriate fat quarter. My shapes were ironed-on as follows:
- Single outline ice skate and snowflake: Red fat quarter #1
- Single outline snow cap and mug: Red fat quarter #2
- Double outline ice skate and snowflake: Aqua fat quarter
- Double outline snow cap and mug: White fat quarter
Cut out each shape on the lines, making sure not to cut into any of the shapes. On the double outlines, you will need to cut the inner line by folding the fabric, and cutting a small snip along the line, just large enough to get your scissors into, then cutting out. Same for the inside shapes, like the inside of the mug handle & the cutouts in the ice skate blade. You’ll need all these pieces later, so don’t ruin them! Set aside the inner shapes to use on your pillow covers.
Iron the single outline shapes to your background pieces, centered. Then, iron your contrasting outline piece on top, being sure to include any small detail pieces, like on the ice skate above. Your outline should cover all raw edges on the shape underneath.
Stitch around each shape. I used a large zig zag with matching thread (to emphasize the contrasts) for mine, but a blanket stitch or other decorative stitch will work well also. I do not suggest using contrasting thread, as it blurs the contrast between your applique shapes and colors.
When all pieces are stitched on, press from the backside and square up if needed. Make sure each piece still measures the same size.
Assemble a 4-patch “block” out of your 4 appliqued rectangles, placing your shapes as shown. Pay attention to which way your shapes are facing so that they end up right side up. First, place top two squares right sides together with the right piece on top, pin, and stitch down the right side. Press to the right.
Repeat for the bottom 2 squares, press to the left. Then, place top and bottom pieces right sides together, pin and stitch.
Open the newly stitched seam and press to one side.
Now comes the fun part (and the reason I told you not to use directional fabric for your backgrounds). Measure 2″ from the vertical middle seam, cut. Repeat on other side of seam.
Fold the middle piece at the seam, sew the opposite side together, and unpick the original seam. Open the newly stitched seam and press left and right in opposite directions, as shown below, reattach to both sides repressing seams on side pieces all one direction, ignoring the center seam.
Now, cut 2″ from each side of the horizontal middle seam, and 2″ from the top and bottom. Trade places with the bottom and top sections (see picture below). Reattach, re-pressing seams as necessary. Press toward border.
Now, cut 2″ from left and right sides. Rotate each piece 180 degrees. Reattach. Press toward border.
Back, quilt, and bind however you would like!
The Pillows
Using the (8) fat quarters you set aside for pillows, trim all so that they measure the exact same size, leaving selvage intact. Using method described above, attach the inner applique shapes to your pillow fronts, slightly offset as shown below.
Machine stitch around each applique shape to secure.
Now, putting right sides together, and matching up selvage edges, sew around 3 sides leaving selvage edge open. Zig zag around raw edge if desired.
Using your fat quarter scraps from the applique cut outs, cut (6) 8″x2½” pieces for each pillow, for the ties.
Fold lengthwise from edges in toward middle, press.
Fold bottom up 1/4.”
Fold in half lengthwise again. Press, then stitch as close to the edge as you can down both sides.
Fold the selvage edge in 1½”, pin in place. Then, lining up the ties directly across from each other (3 on front, 3 on back), pin a tie at the 4½, 9, and 13½” marks.
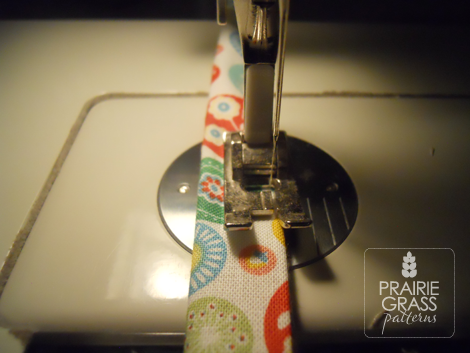
Sew around the hem twice, first about 1/4″ from the edge, and then about 1/2″. I just adjusted my needle position all the way to the right the first time around, and then all the way to the left the 2nd time.
Now fold the selvage up to the 1/4″ stitching line. Sew 1/8″ from the edge of the selvage, and again 1/8″ from the fold. This binds up the raw edges of the ties nicely and also creates a stiff edge so that your case looks more symmetrical and doesn’t sag on the tie side.
Your outside edge looks pretty cute too.
There you have it!
I hope you’ve had fun with this tutorial. While I was making these, I was thinking it would be really fun to make both the wall hanging and the pillow covers reversible, so that I could just flip everything around when the next season or holiday shows up. All you’d have to do, really, is applique another season’s shapes on the backside of the pillow, and make another wall hanging for the “backing” with the other colors. Do a little generic quilting, and voila! Easy to change holiday decor!
The winter shapes are included with this tutorial, but I’ll be posting shapes for other holidays/seasons on my blog very soon. Come stop by! And if you decide to try out the reversible thing, let me know, I’d love to see it.

1 seasonal wall hanging (29″ x 39″)
4 throw pillow slipcovers (fits a 18″ or 20″ square pillow)
April Rosenthal
{prairiegrasspatterns.com}
{21stcenturycharmschool.com}


