
![]()
Have you ever gotten an idea in your head and then had a hard time shaking it? It is like a song that inserts itself into your day and will not be abandoned. No matter what you do that silly song is right there with you.
This quilt is like that for me.
The idea grew from a comment I made in the instructions for my Twisted Charm quilt (posted on Moda Bake Shop on April 26, 2012) I had made the discovery, purely by accident, that if you cut your fabric while it was folded you could end up with half of your blocks turning at a different angle. I warned you that it would make your quilt look “jiggity” like an I-phone when you try to move the little icons around. Then I got a lovely bundle of Kapalua Batiks and wanted to make something beachy.
Jiggity is the blending of the blocks I warned you about and the summer time fun of Kapalua Batiks. It makes me think of bits of sea glass that are being tumbled in the ocean, broken bits caught in an undertow and polished until they delight us. I can smell salt mixed with a subtle hint of coconut oil drifting on a breeze….oh, that wasn’t the quilt….that was one of my boys walking by with a bowl of pop corn….different kind of summer time fun.
![]()
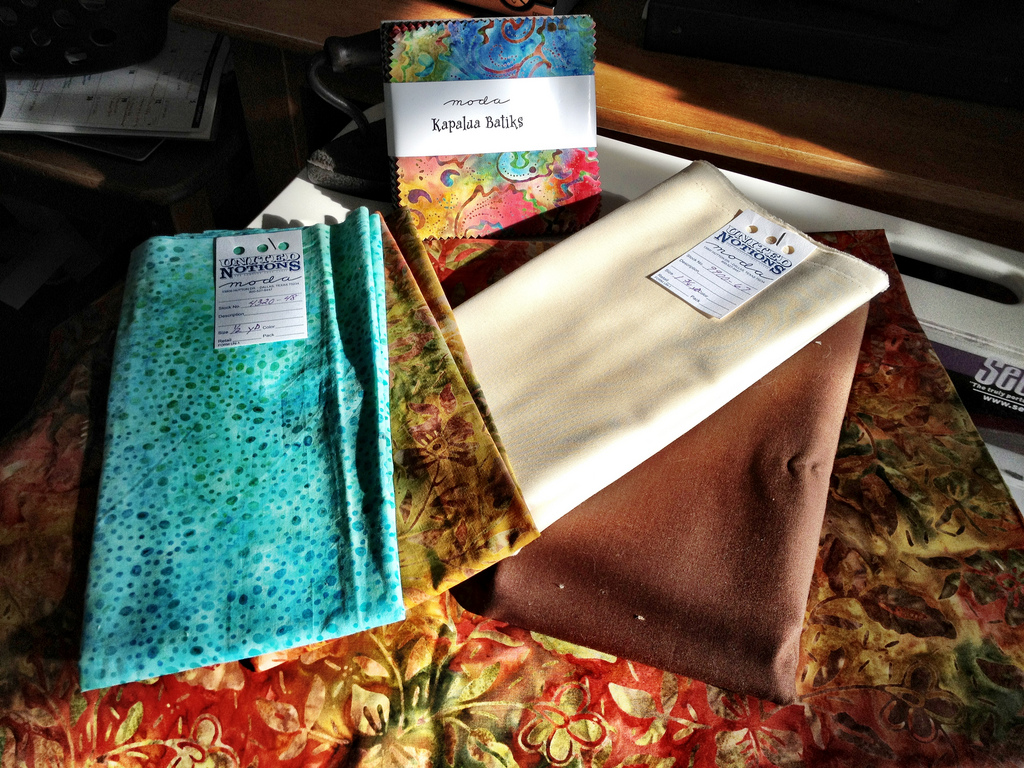
1 charm pack (40, 5″ squares) (Kapalua Batiks)
1 ½ yds cream solid (Bella Fig Tree Cream #9900-67)
1 3/4 yds chocolate brown solid (Bella Brown #9900-71)
½ yd inner border (Kapalua Batiks #4320-31)
½ yd binding (cut 2.5″ with wof) , and setting squares (Kapalua Batiks #4320-48)
3 yds backing (Kapalua Batiks #4320-31)
![]()
- Open the charm pack
- Remove the 10 charms that show the least amount of contrast with cream background fabric. The charms are set right against the cream fabric. Where there is no contrast there will be no gem sparkling on the sand.
- Of the remaining 30 charms, put every other patch in a different pile. Go through the whole pack until you have 2 piles of 15 patches. This will put approximately half of each color way in each pile.
- Cutting Directions:
- Block A – Single Twist (15 blocks)
- From cream
- cut 3 5″ width of fabric (wof) strips
- cut 2 wof strips into 14 3″ pieces each
- cut 2 3″ pieces from the remaining wof strip
- you should have 30, 3″x5″ rectangles
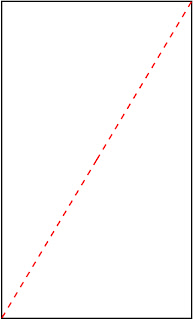
- sub-cut each rectangle once on the diagonal for a total of 60 triangles.
- If you are using a patterned fabric for the background DO NOT LAYER YOUR RECTANGLES WITH LIKE SIDES TOGETHER WHEN YOU CUT THEM. This will result in half of the triangles leaning the wrong direction. If both sides of your fabric are the same (like in a Bella solid) this isn’t an issue.
- From charm pack
- Please measure your charms. Do not assume that just because they are labeled 5″ squares that they are. Charms are pinked at the edges. Find out if 5″ is 5″ at the inside or the outside of the zigzag. It will make a difference.
- 15 5″x5″ patches
- Block B – Double Twist (15 blocks)
- From brown
- cut 3, 5″ wof strips
- cut 2 wof strips into 14 3″ pieces each
- cut 2 3″ pieces from remaining wof strip
- you should have 30, 3″x5″ rectangles
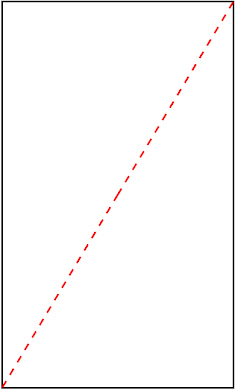
- THIS IS THE POINT OF THIS QUILT – PAY ATTENTION If you are using Bella or a similar solid you don’t have to worry about how you cut things; however if you are using a printed fabric you need to take note of which direction you cut the rectangles for Block A. Cut all rectangles for Block B in the opposite direction.
- sub-cut each rectangle once on the opposite diagonal for a total of 60 triangles. *Mind the warning in Block A
- From cream
- cut 2, 4″ wof strips
- from 2 wof strips cut 15, 2 3/8″ x 4″ rectangles
- sub-cut each rectangle once on the diagonal, in the same direction you just did for the brown triangles in Block B, for a total of 60 triangles. *Mind the warning in block A
- From charm squares
- trim 15 charms to 3 3/4″ squares
- Sashing
- From brown
- cut 3, 6 ½” x wof strips
- cut 36, 1 ½” x 6 ½” rectangles (28 from one wof strip and 8 from a second.)
- SAVE rest of second strip with the third strip.
- From setting square fabric
- Cut 2, 1 ½” x wof strips
- Sew setting strips to remainder of brown strips from previous along the long edge.
- Iron seams toward the brown
- Cut 35, 1 ½” x 7 ½” rectangles from pieced strips. These will look like brown match sticks with colored heads.
- From remainder of setting stip cut 7, 1 1/2″ squares
- Inner Border
- From setting fabric
- cut 4, 1 ½” squares
- From inner border fabric
- cut 5, 1 ½” x wof strips
- Outer Border
- From cream
- cut 5, 4 ½” x wof strips
- From setting square fabric
- cut 4, 4 1/2″ squares
- Binding
- Cut 6, 2 ½” wof strips


Time for a break. If you have completed all of this cutting and prepping, the rest of the quilt should go together easily.

Piecing Directions:
Sometimes a sewing machine can eat the points of a triangle as it is being fed through the feed dogs. If you have trouble with this, try using a leader. A leader is a small piece of fabric that leads the way for the rest of your sewing. Take a scrap of fabric and feed it through the feed dogs ahead of your triangles – like you are chain piecing an extra little bit before your real pieces. It seems to help.
Block A – Single Twist
- The goal is to make 15 blocks like this one. They will each have a different center.
- Align a cream triangle with the stubby angle 1/4″ over the edge of a 5″ charm and the pointy angle 1/2″ over the parallel edge
- Sew 1/4″ seam along the long cream edge. If you are careful not to stretch the fabric, you don’t have to pin.
- I’ve noticed that when using a machine with a 1/4″ foot, I can align my needle at the intersection of the two pieces and edge of the fabric right next to the flange of the foot and everything comes out where it should. The seam will start and stop at where the edges of the fabric intersect.
- Iron the seam toward the cream.
- Repeat on next side, 3 times until all four sides are added
- Trim to 6 1/2″ square. Really. Do this. I sized the pieces so that they would be big – to make the piecing easier. If you don’t trim them it won’t work right. Yes, it is tedious and boring. I don’t like to do it either. Do it anyway.
- If you have a 6 1/2″ trimming square center the center so that as close to 1/4″ of cream is between the points and the edge.
- It is fine if it isn’t perfect. Even if you sew a corner into the seam allowance when you piece the blocks together it will still look square. The blocks are set in brown- your eyes will fill in any corners that are missing.
- Make 15.


- Block B – Backwards Double Twist
- The goal, again, is 15 blocks.
- These will each have a different center and two twists.
- Add the cream triangles to the trimmed charms in the opposite direction from Block A.
- Trim blocks to 5″ squares.
- Add the brown triangles just like you did the cream ones a moment ago.
- Iron towards the cream.
- Trim to 6 1/2″ squares.
- Make 15.


- Center
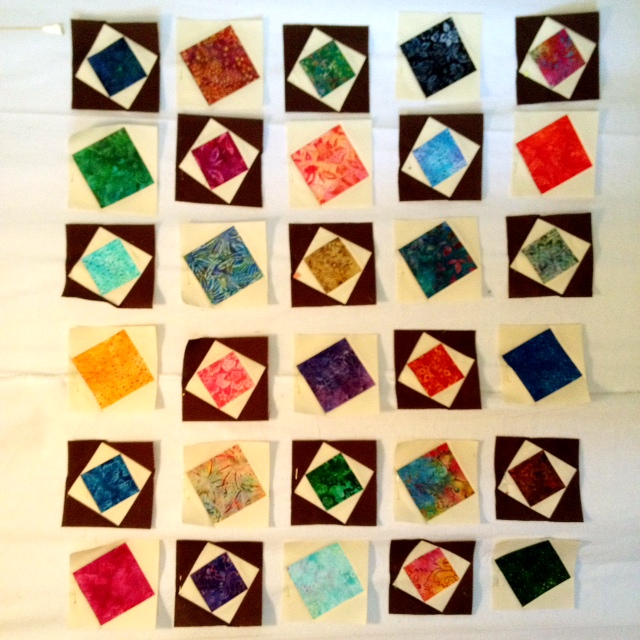
- Arrange blocks in a grid 5 blocks by 6 blocks alternating every other block.
- NOTE: to my OCD friends this quilt does not come out even. If you are really OCD you have already noticed this, and probably chosen not to make it…or you have altered the pattern. If you aren’t, you are doing it right if the corner blocks only match on one side.
- Step away from your arrangement and see if you still like it. If you can’t get very far from it try taking a quick photograph of it with your cell phone. Look at the picture to see if the distribution of colors pleases you.
- If you have a design wall this is a good time to use it. If you don’t there are other options. You can put them on the floor or lay them on a bed. You can close the drapes and pin your blocks to them. Or use the shower curtain. Use your imagination.
- You can also just wing it. Random is good – but I haven’t met many people who are actually happy with random.
- Vertical Sashing
- Once you are happy with the layout sew a brown “stick” to the right side of each block in each row.
- Sew the rows together:
- (block, stick)(block, stick)(block, stick)(block, stick)(block, stick)
- Sew a stick to the left side of the leading block
- Iron seams toward the brown sashing.
- Horizontal sashing.
- You need to make 7 rows of horizontal sashing.
- Sew 5 matchsticks together along the skinny side with the setting block (head) pointing toward the right.
- Sew one head on the end of the last match stick.
- Iron seams toward the brown sticks.
- Place one matchstick row between each row of blocks.
- Attach horizontal sashing.
- Snuggle sashing seams and pin in place
- Iron seams toward horizontal sashing.
- Borders
- Inner border
- Measure your quilt’s length and width. Write it down.
- It should be something like 36 1/2″ x 43 1/2.
- Sew one 1 1/2″ border strip to each of the skinny ends.
- Iron seams toward the border.
- Trim excess.
- Sew the remaining three skinny strips together, end for end.
- Cut two strips from this that are the length of your quilt as it was when you wrote it down. (It should be 2″ shorter than the top is now.)
- Sew a 1 1/2″ setting square to the ends of each of these strips. Iron seams toward the border strips.
- Snuggle corner seams together. Pin in place.
- Pin remaining length of borders in place.
- Sew on long borders.
- Iron seams toward border fabric.
- Outer border
- Measure your quilt’s length and width. Write it down.
- It should be something like 38 1/2″ x 45 1/2″, give or take.
- Sew 4 1/2″ border strips together end for end….making one very long and skinny strip.
- Cut 4 lengths from this strip that are equal to the measurements you just wrote down. (2 that are the length of the top and 2 that equal the width.)
- Sew short edges of the border on first.
- Iron seams toward the border.
- Sew a 4 1/2″ setting square to each end of each of the long strips. Iron seams toward the border strips.
- Snuggle corner seams together. Pin in place.
- Pin remaining length of borders in place.
- Sew on long borders.
- Iron seams toward border fabric.
- Layer and Quilt as desired.

![]()
1 crib or throw sized quilt, finished size: 46″ x 53″. A place to day dream away the long hot days of summer – a beach blanket for a tiny tot, a picnic spot for afternoon tea, a quilt to wrap up a water logged frozen child in.
Enjoy!
Cindy @ Tops to Treasures
{topstotreasures.blogspot.com}
![]()


