
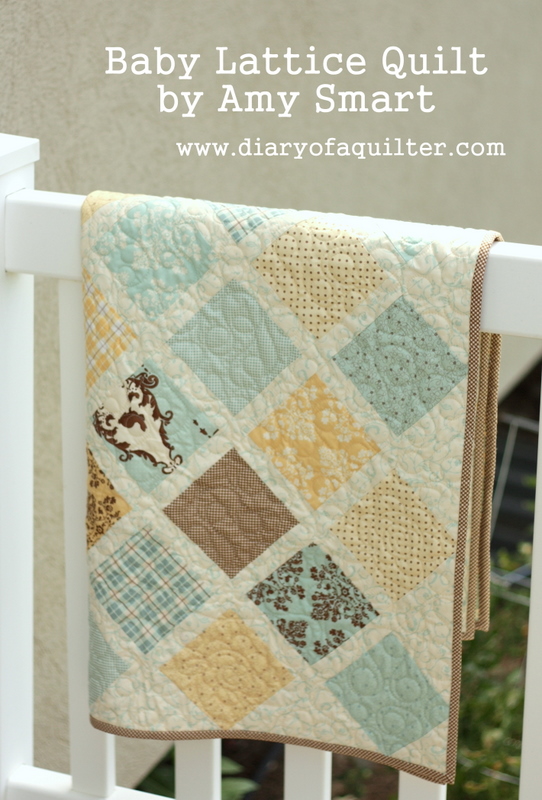
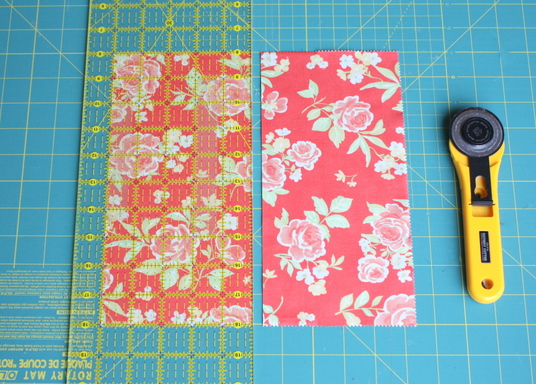
Hello fellow Moda Bake Shoppers! My name is Amy Smart and I enjoy sharing my quilting fetish at my blog Diary of a Quilter. I’m so excited to show you my first MBS recipe! This quilt is perfect for showing off large, graphic prints. I am using Sanae’s new Chrysalis collection for this project. Although this is a larger quilt (finishes 83″ x 83″), a Layer Cake and Charm Pack help it come together very quickly.

1 Charm Pack
1 Layer Cake
3 ¼ yards Bella Solid (I used Stone)
½ yard blue border fabric
5/8 yard binding fabric
4¾ yards backing + contrasting half yard

Cutting:
From the Bella Solid Gray cut:
(2) 9½” (x width of fabric) strips
(2) 14″ (x wof) strips
(13) 2½” (x wof)strips for sashing
(16) 2″ (x wof) strips for outside borders
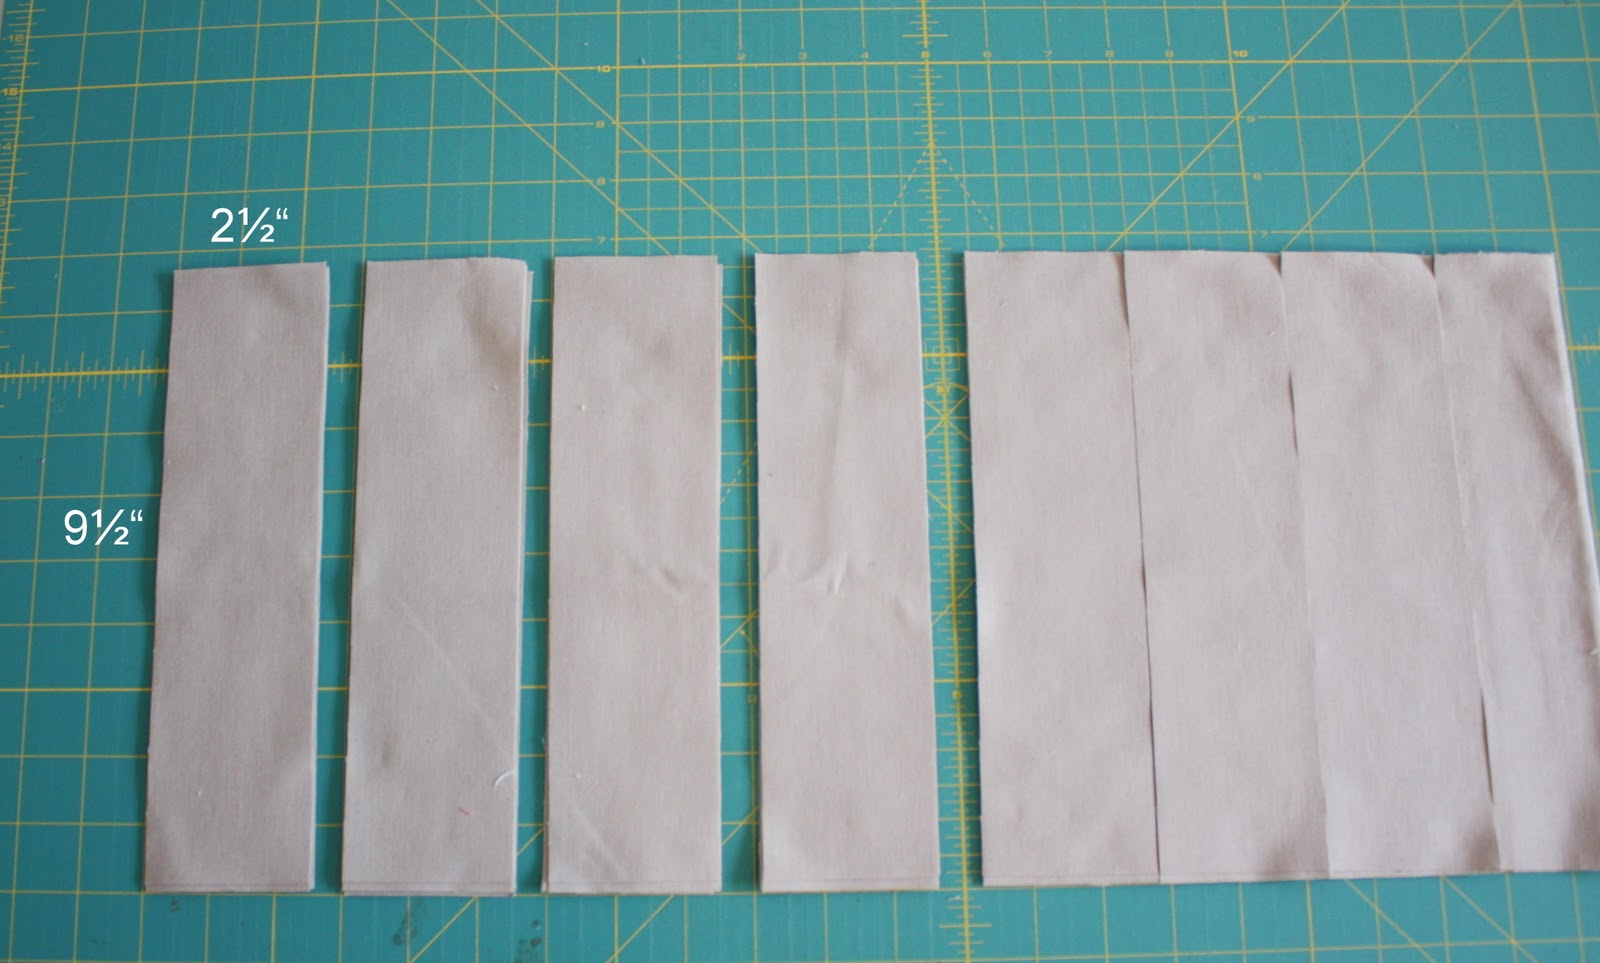
From each of the 9½” (x width of fabric) strips, subcut 16 units measuring 9½” strips x 2 ½”. You will need 32 total of these units.
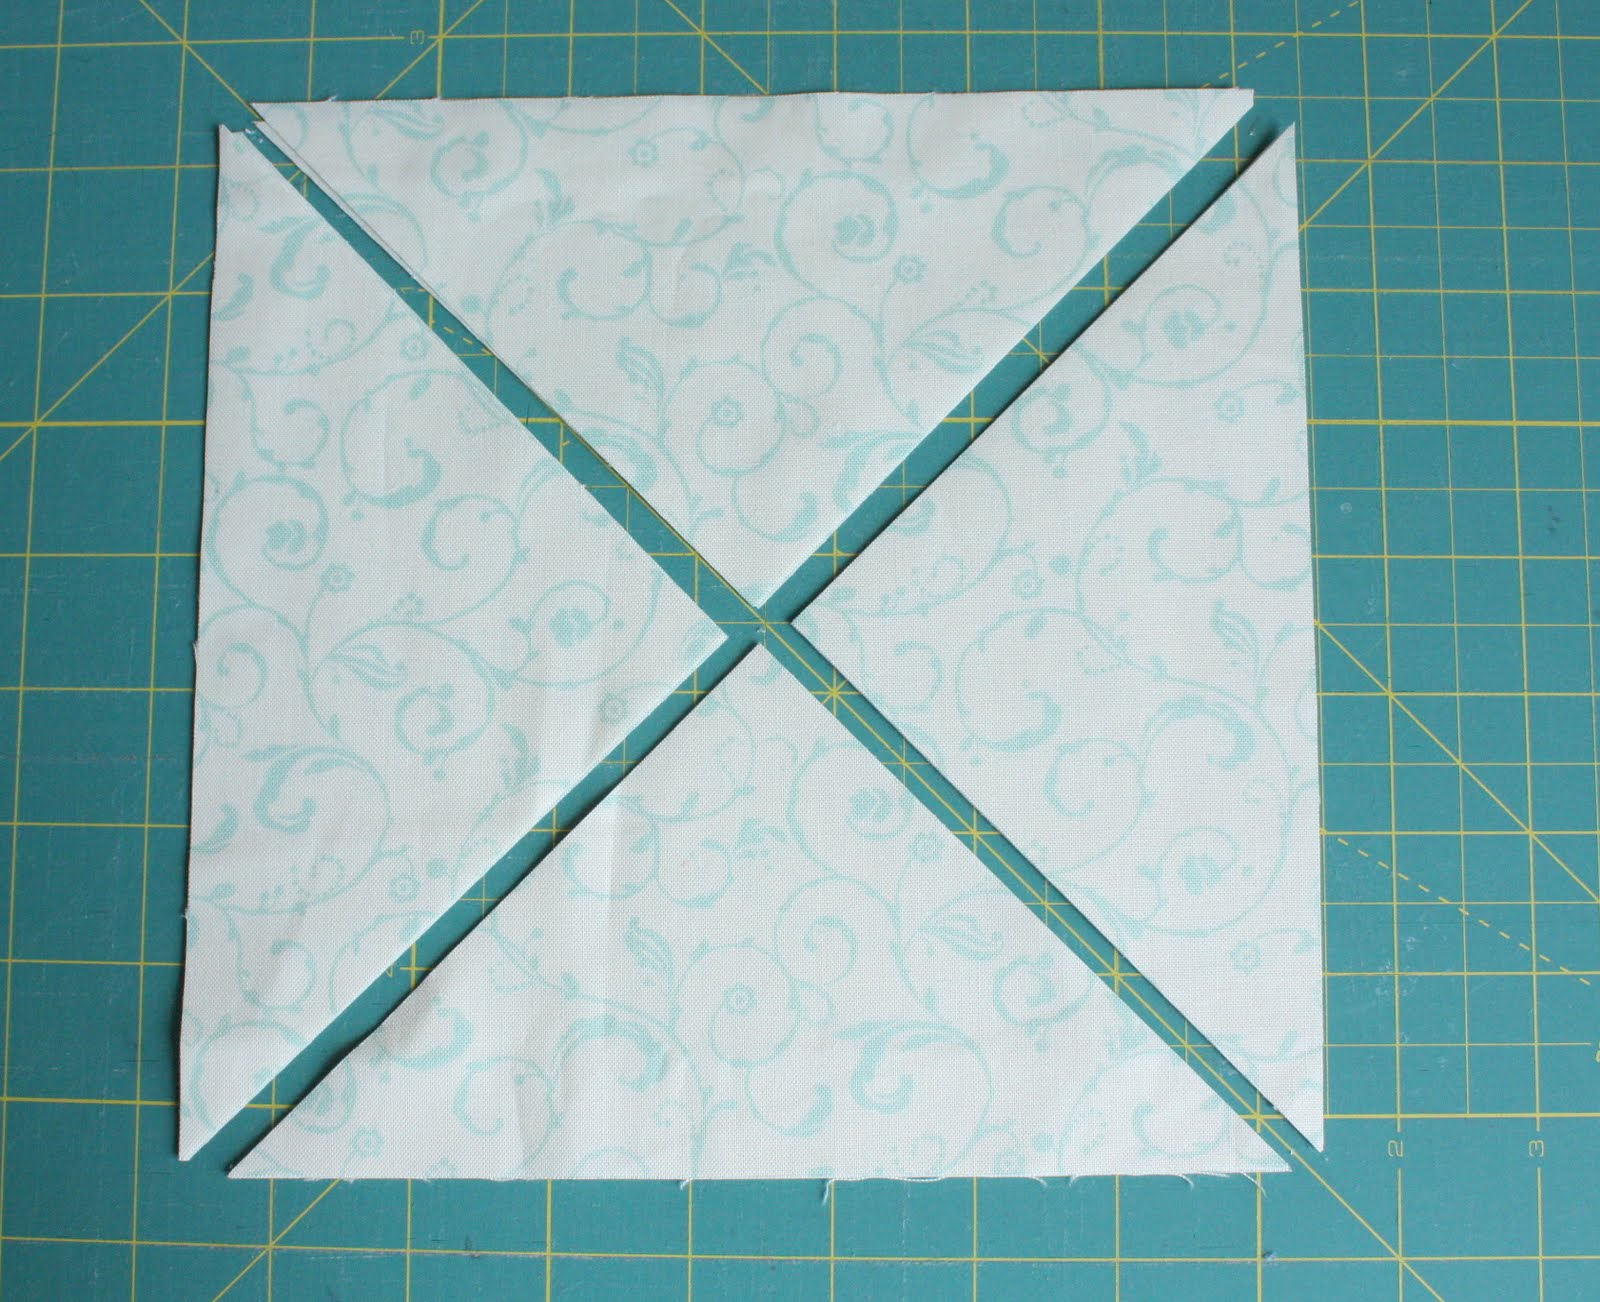
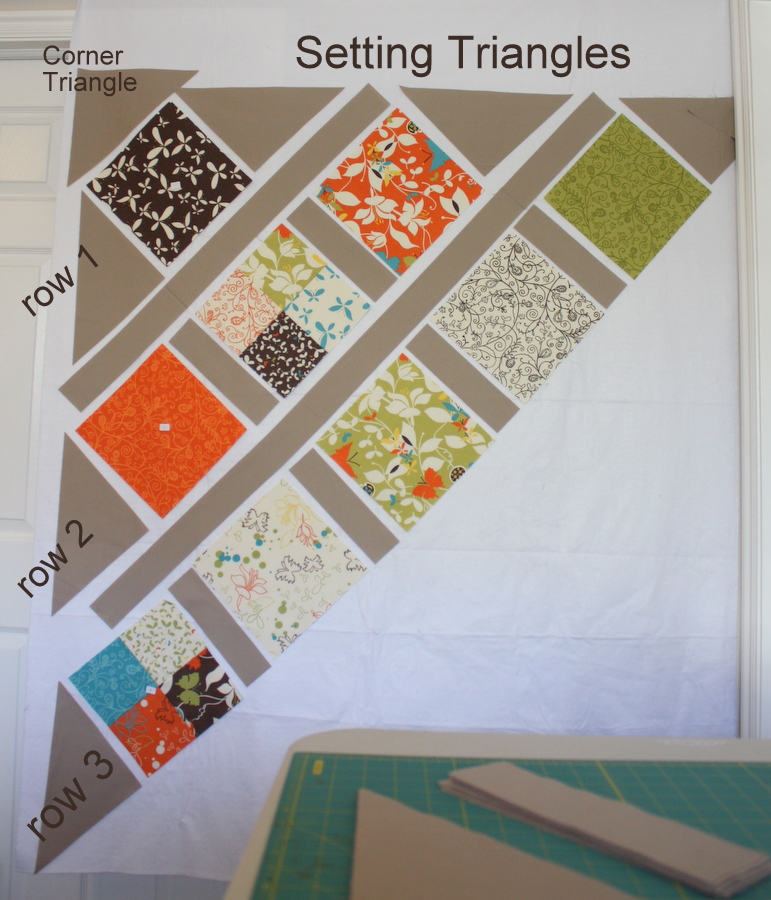
From the 14″ strips, cut a total of (4) 14″ squares. Reserve the extra fabric. Subcut each of these 14″ squares twice on the diagonal to create 4 equal triangles per square. Set these aside as Setting Triangles. You will need 16 Setting Triangles.
From the remaining piece of 14″ wide fabric, cut (2) 9″ squares. Cut them each once on the diagonal. These are your Corner Triangles. You will need 4 total.
Trim 33 of the Layer Cake squares down to 9½” squares.
Cut (8) 2″ x wof strips from the blue border fabric.
Cut (8) 2½”x wof strips from the orange binding fabric.
Assembly:
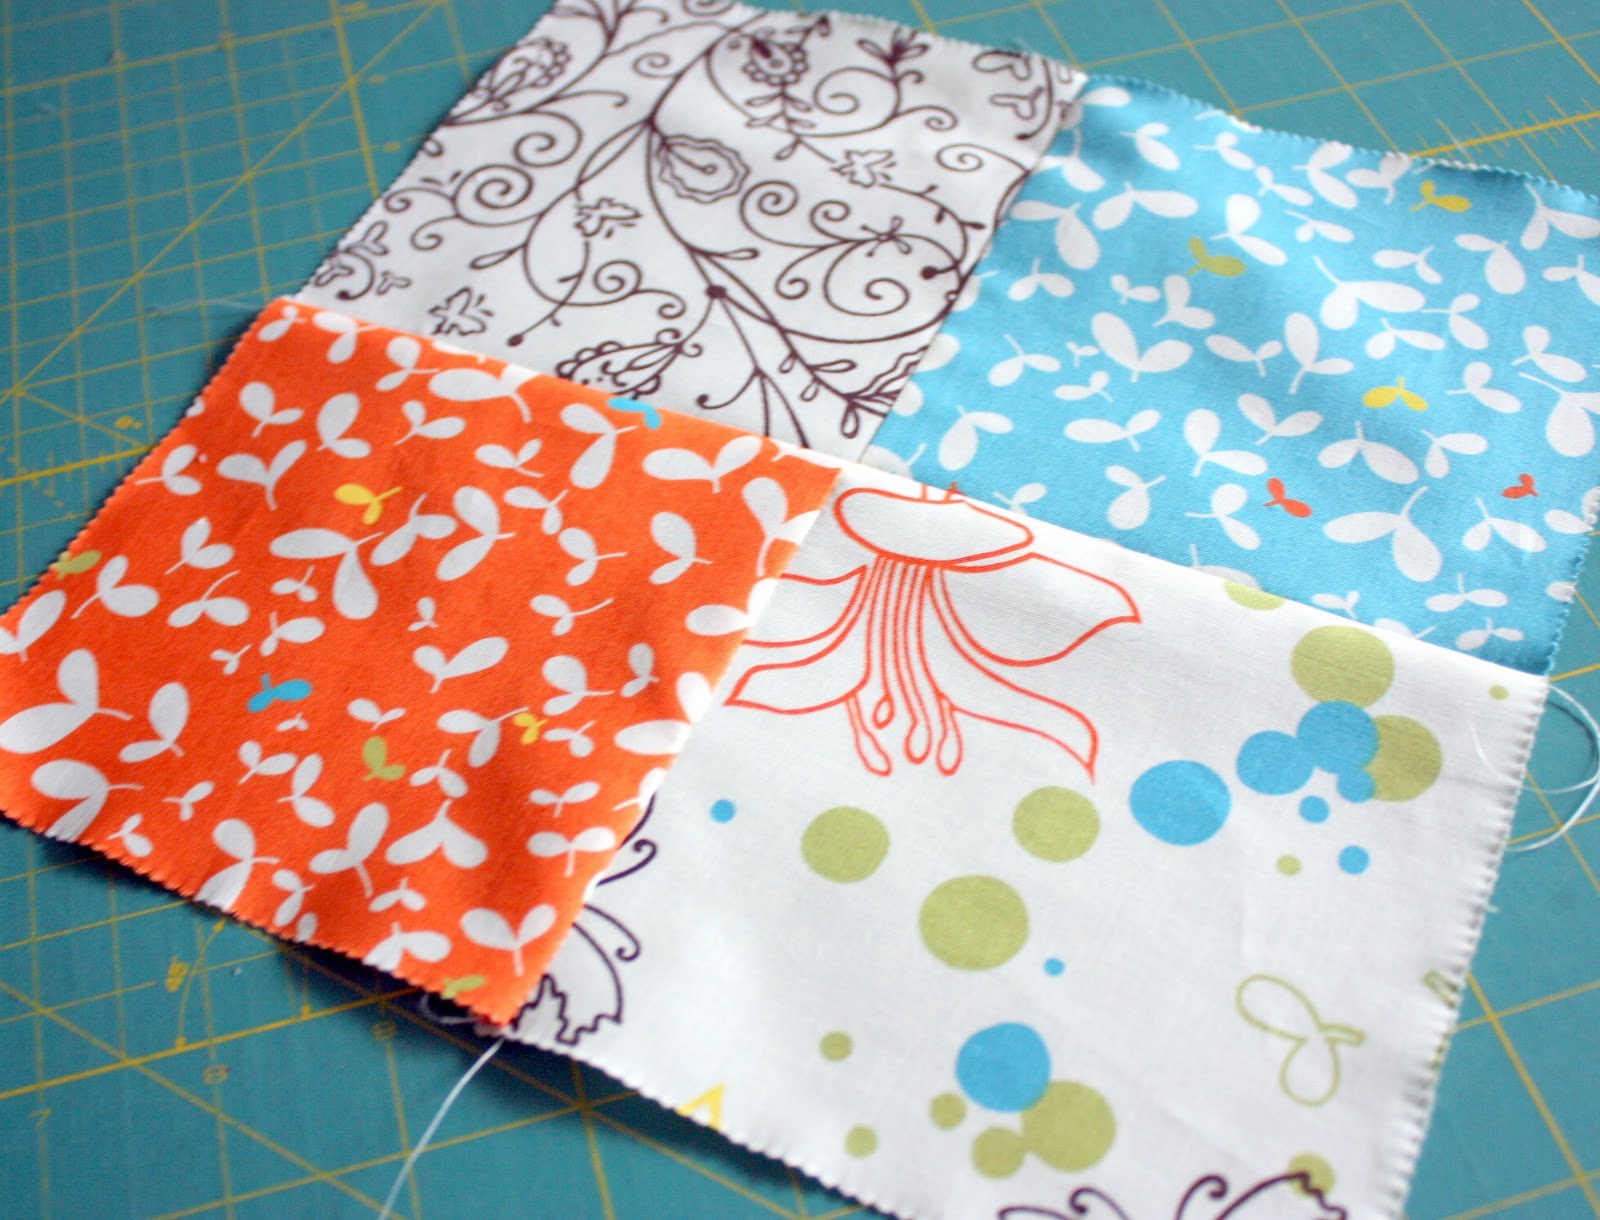
1. Using 32 of the Charm Pack squares, create (8) 4-patch blocks.
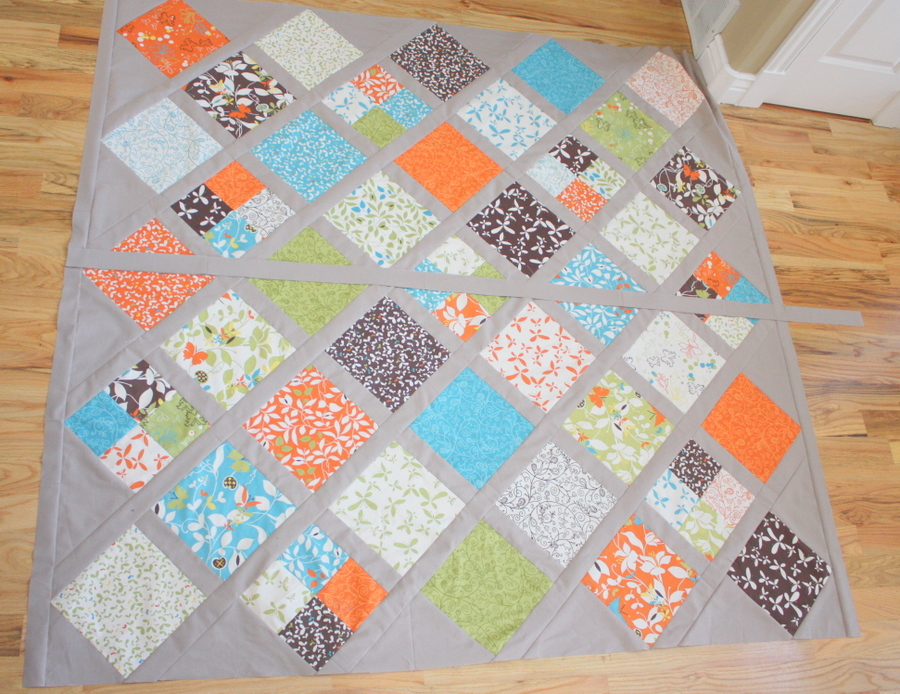
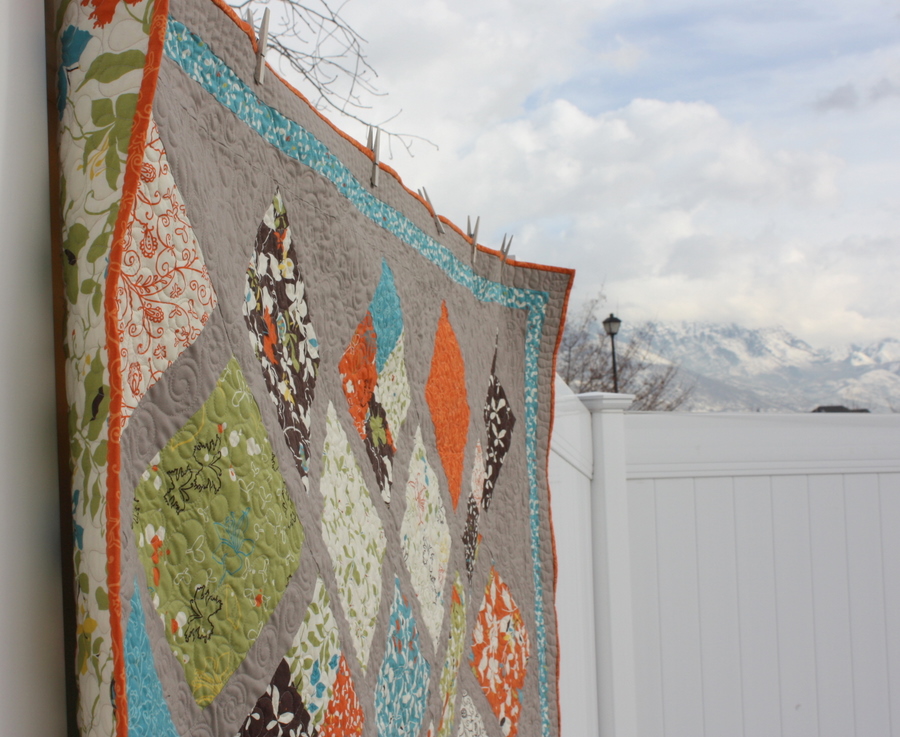
2. Using the 33 trimmed Layer Cake squares and 8 four-patch blocks, layout your 9½” squares on point starting with 5 squares across (see picture below) until you get the balance of color you like.
Then add the sashing strips and setting/corner triangles. Because you are assembling the quilt using diagonal rows, laying out the quilt on the floor or a design wall will help you keep track of which block goes where.
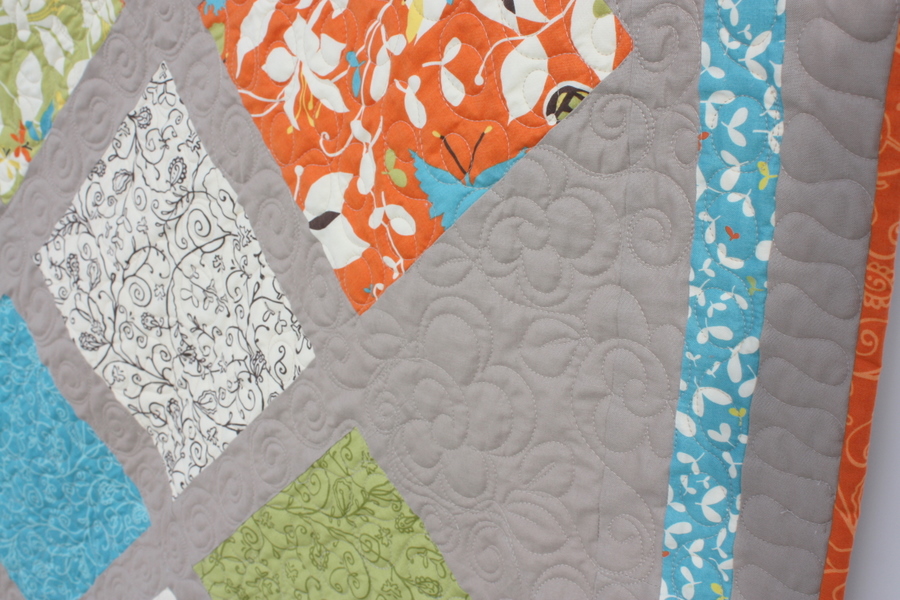
3. Start assembling rows diagonally with a Setting Triangle at the beginning and end of each row. Alternate 9½” x 2 ½” strips between the squares on rows 2-8. Sew a Corner Triangle at each end of row 5. I pressed seams toward the solid strips.
4. Sew 2½”x wof strips end to end to create the long sashing strips. Begin to assemble pieced rows with a sashing strip in between. Leave about 3″ of strip at the end of each row. (You’ll square-off the ends later.)
5. In order to make sure the side-sashing strips match up, place the row with the long-sashing strip sewn to it on top of the row to be attached, right sides together. Fold back the row with the solid sashing strip at the top and make sure the side sashing segments are lined up. Carefully return the top row back in place, pinning raw edges to sew together.
6. Press toward solid strips.
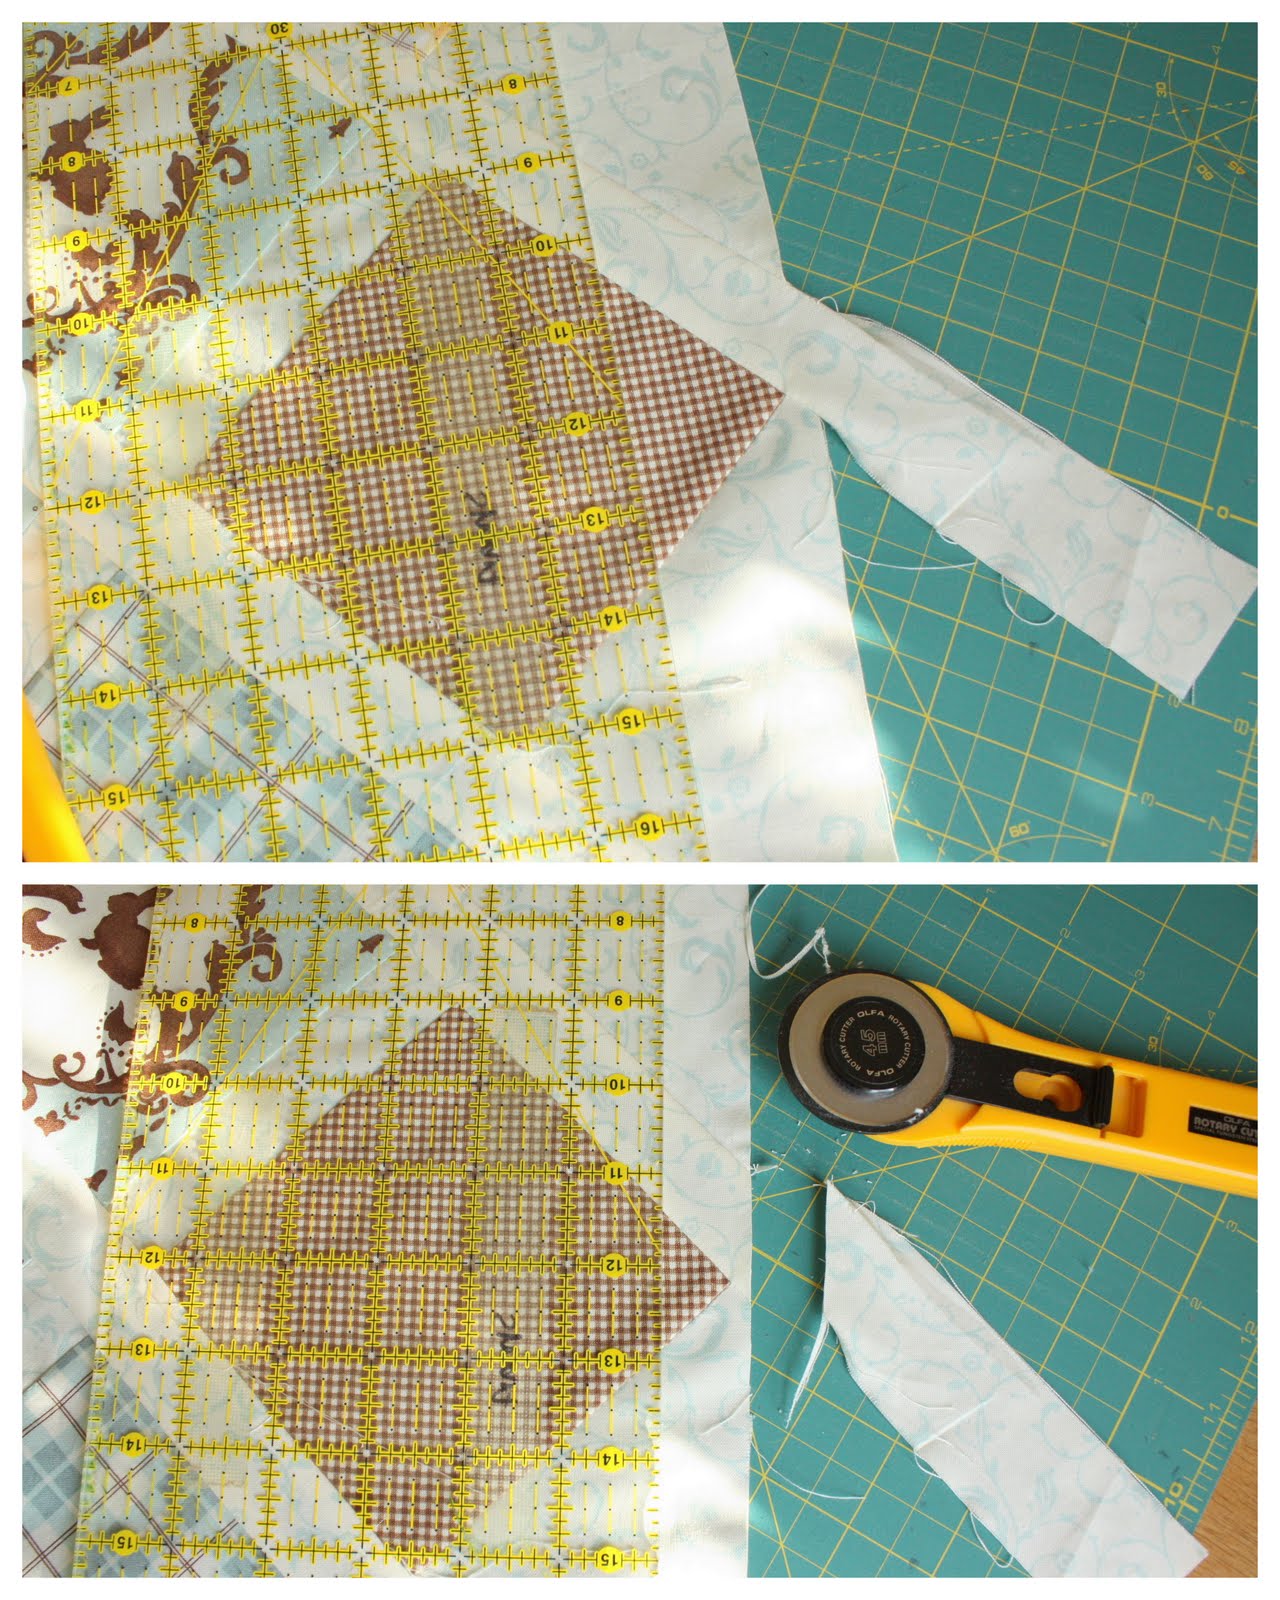
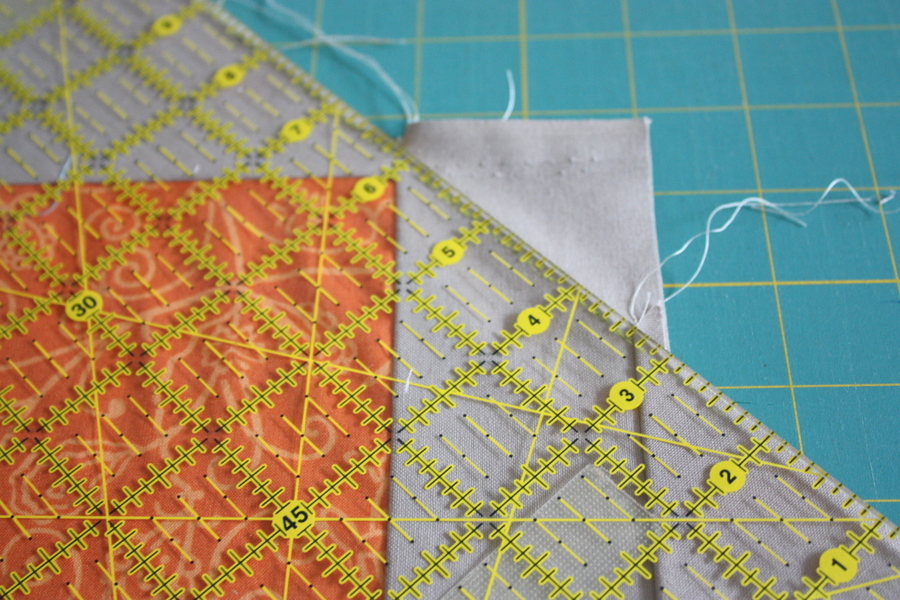
7. Square-off ends using a long ruler. Make sure to leave a ¼” seam allowance at the corners of the printed blocks.
8. Square-off Corner Triangles using quilt sides as your guide. Be careful to keep the corner square.
9. You are ready to attach the borders. This is my favorite method for attaching borders. It’s quick and simple, but it still keeps the quilt square and not wavy at the edges. Spread the pieced portion of the quilt flat on the floor. Before you measure the lengths of your border strips, trim off the selvage edges. Match up ends of the strips with one edge of the quilt and lay 2 of your border strips across the center of the quilt.
The other ends of the strip will hang off the end. Mark the quilt length with a pin and trim ends off with a rotary cutter.
Fold the border strip in half end-to-end and mark the center with a pin. Pin the center of the strip to the center of the edge of the pieced quilt. Then pin strip ends to the ends of the quilt edge. Space pins carefully along the rest of the strip to secure in place. (It’s not bad if the strip is slightly shorter than the edge of the quilt, but this is why pinning starting at the center and ends of the quilt is important.)
Repeat this step with all quilt edges. Start with (8) 2″ x wof strips for the first border. The second border (blue) requires (8) 2″ x wof strips and the last gray border requires (8) 2″ x wof strips. Sew two strips together end to end for each side and trim accordingly.
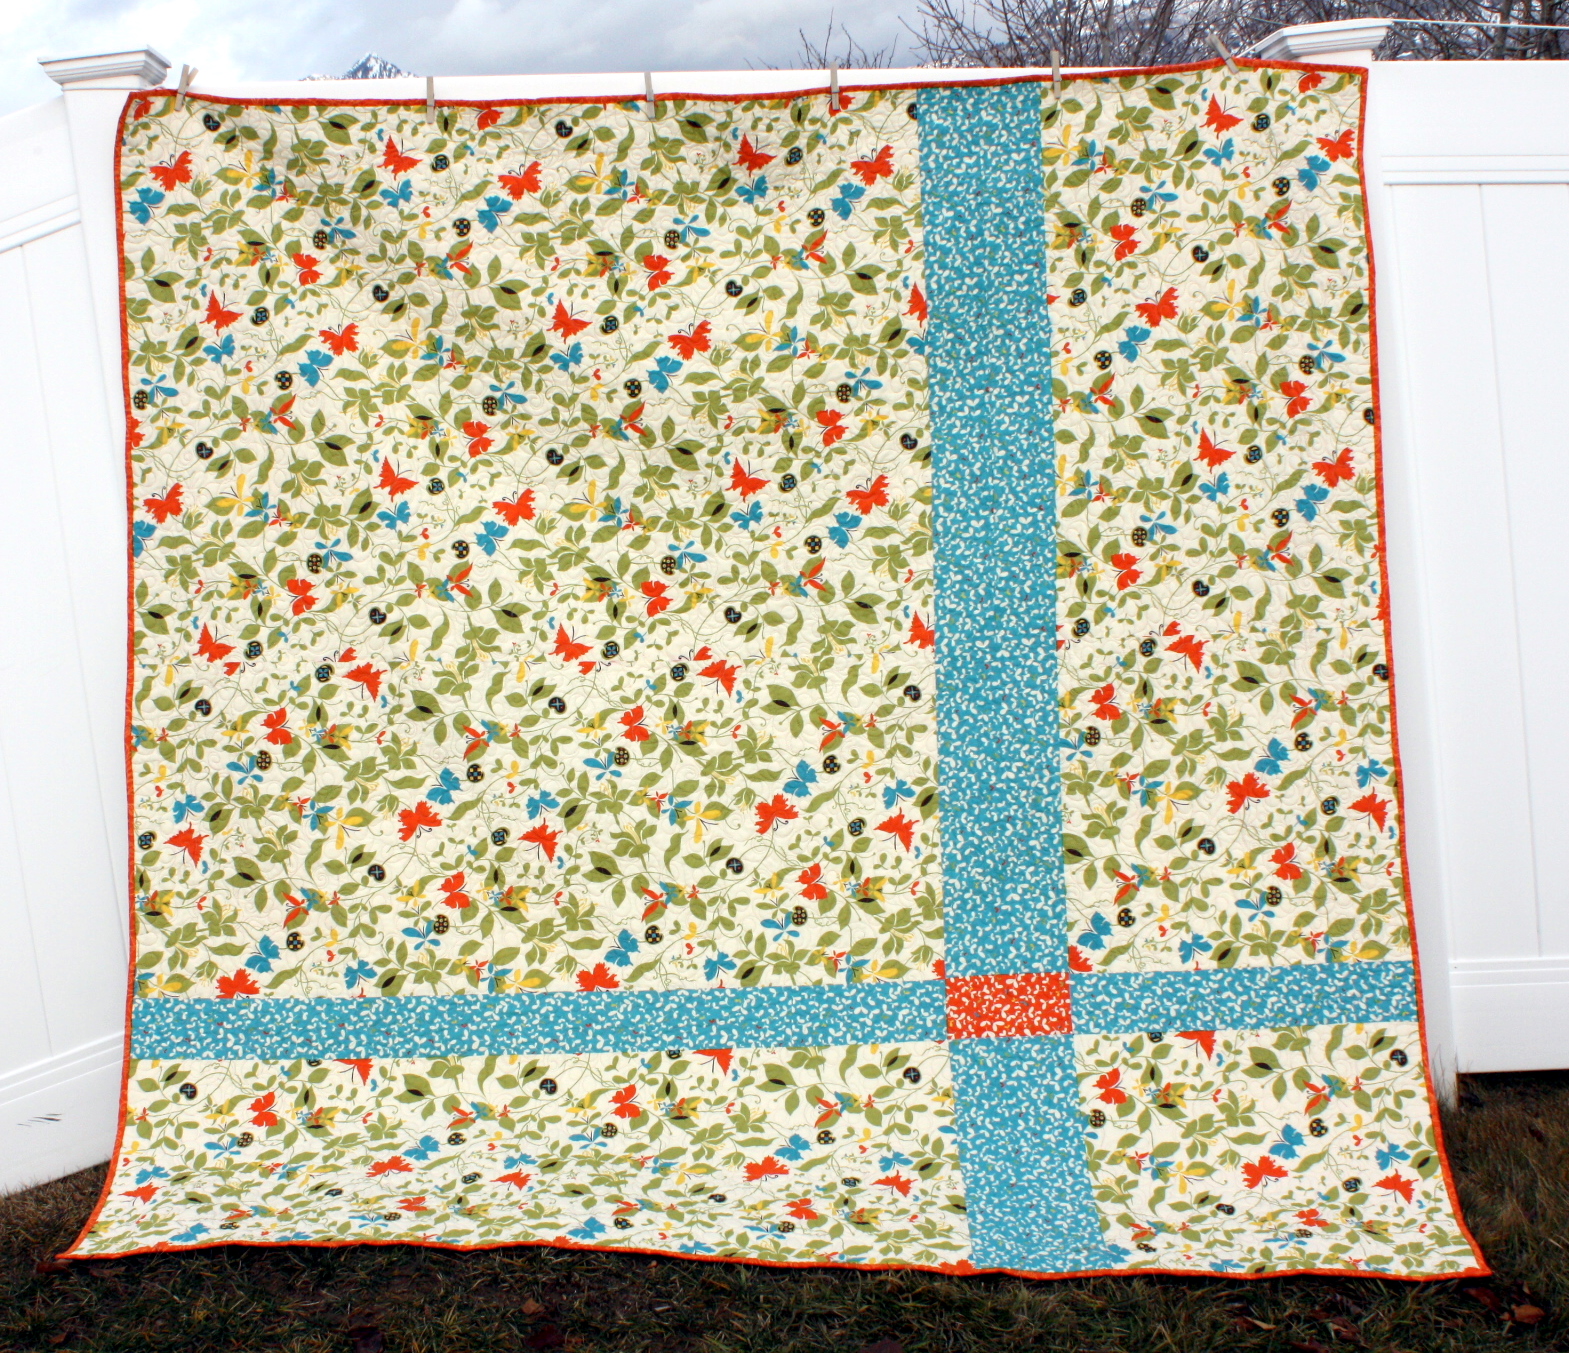
10. For the backing, you will need at least 4¾ yards. Cut the yardage into 2 23/8 (85.5″) pieces and sew them together lengthwise matching up selvage edges.
If you want a pieced back or a back that’s slightly larger for machine quilting purposes, you can do what I did:
Part One: Get an extra ½ yard of coordinating fabric. Cut into (4) 4½” x wof strips. Sew two sets of strips together end-to-end to create 2 strips measuring 4½” x (about) 85″. Take the back pieced together as above and rotary cut 22″ off the bottom of the back. Sew one of the 4½” strips where you’ve rotary cut and sew the 22″ piece back onto the bottom. (click on diagram to enlarge):

Part Two: Take large backing piece as is and rotate it 90 degrees. Rotary cut 22″ off from a perpendicular side (should cut through the new coordinating fabric.) Set these two backing pieces aside.
Take the second coordinating 4½” x 85″ strip and cut 22″ off from one end. Chose a contrasting fabric from your remaining Charm Pack squares and trim down to 4½”. Insert square here and then sew 22″ trimmed piece back onto the end of the strip.
Now, matching up contrasting Charm Pack square with the 4″ coordinating print, sew this strip to the large piece of backing fabric. Attach the 22″ trimmed piece to the other side of the coordinating strip.
10. Quilt using your favorite method (or use your favorite quilter.) My friend and co-worker, the talented Becky Heslop, did an amazing job quilting this for me. Thanks again Becky!
11. Binding. This is the method I used to bind my quilt.

One 83″ x 83″ quilt. This quilt is simple, but a perfect way to show off those pretty, larger prints. The sashing breaks them up and really highlights the fabric design. This quilt would work in so many different fabric styles – traditional to modern. Once again, I loved how quickly this came together for such a large quilt. It could easily become a queen or king size quilt just by adding wider borders.
I hope you enjoy making one of your own! It has been a lot of fun to come bake with Moda! I hope you’ll come visit me at
Diary of a Quilter. I would love to hang out more!
Amy Smart


