
![]()
Hi, I’m Sarah Price from It’s Sew Emma, and I’m really glad to share with you my first pattern on Moda Bake Shop. This quilt is all about warmth and comfort, a simple design that is captivating in rich colors. I hope you enjoy it! Let’s get started.
If you enjoy my version using Pheasant Hill, we have some quilt kits ready to go at Fat Quarter Shop!


Two Pheasant Hill Charm Packs
3/8 yard brown print for inner borders − I used brown Feather Grass Yardage SKU# 9382-16
5/8 yard tonal tan print for middle borders − I used tonal tan Feather Grass Yardage SKU# 9382-21
2 yards for mitered outer borders − I used navy Pheasant Row Yardage SKU# 9380-12
5/8 yard for binding − I used navy Turkey Tracks Yardage SKU# 9384-12
3 1/2 yards for backing

Cutting:
Select and set aside 8 matching pairs (the same print from each charm pack) of dark charm squares for half square triangle units.

Select another 8 matching pairs (the same print from each charm pack) of dark charm squares for four-patch units. From 16 dark charm squares, cut the following:
- 4 – 2 1/2″ squares, for a total of 64 – 2 1/2″ squares

Select 8 matching pairs (the same print from each charm pack) of light charm squares for four-patch units. From 16 light charm squares, cut the following:
- 4 – 2 1/2″ squares, for a total of 64 – 2 1/2″ squares

From your inner border fabric, cut the following:
- 2 – 2″ x 32 1/2″ strips
- 2 – 2″ x 35 1/2″ strips
From your middle border fabric, cut the following:
- 2 – 3 1/2″ x 35 1/2″ strips
- 2 – 3 1/2″ x 41 1/2″ strips
From your outer border fabric, cut the following:
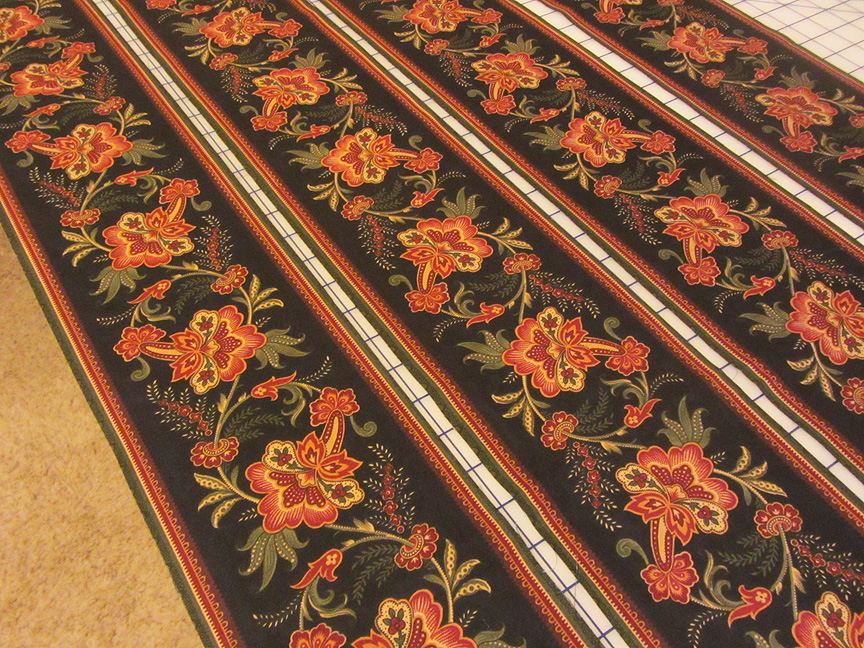
- 4 – 5 3/4″ strips, cut from length of fabric (refer to photo in instructions before cutting)
From your binding fabric, cut the following:
- 7 – 2 1/2″ x WOF (width of fabric) strips
Piecing:
1. Assemble two matching 2 1/2″ dark print squares and two matching 2 1/2″ light print squares as shown. Press towards the dark print fabrics. Four-patch unit should measure 4 1/2″ x 4 1/2″. Make four four-patch units from each pair. Make 32 total.

2. From the 8 matching pairs of dark charm squares you set aside, pair a matching pair with another matching pair for four sets of charm squares. From each set, draw a diagonal line on the wrong side of one matching pair. With right sides facing, layer a 5″ dark print square with a different 5″ dark print square from the set. Stitch 1/4″ from each side of the drawn line. Cut apart on the marked line. Press towards the darker print. Trim the half-square triangle units to measure 4 1/2″ x 4 1/2″. Repeat to make four units from each set. Make 32 total.

3. Assemble two identical 4 1/2″ four-patch units and two identical 4 1/2″ half-square triangle units as shown. Patchwork block should measure 8 1/2″ x 8 1/2″. Make two from each pair. Make 16 blocks total.


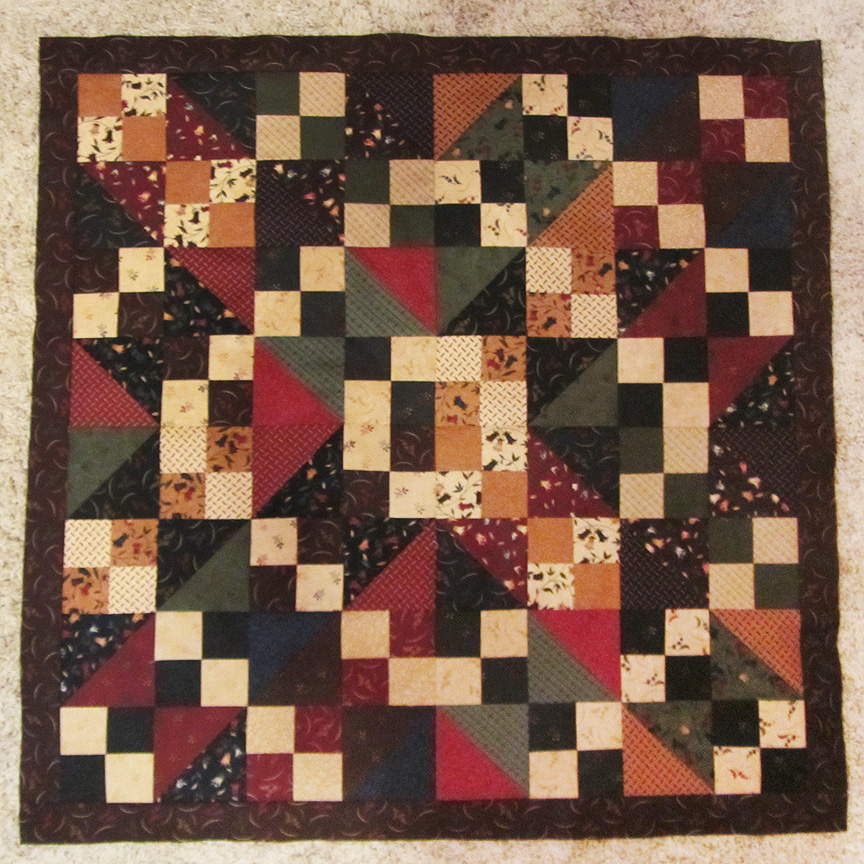
4. Assemble quilt center as shown. Quilt center should measure 32 1/2″ x 32 1/2″.


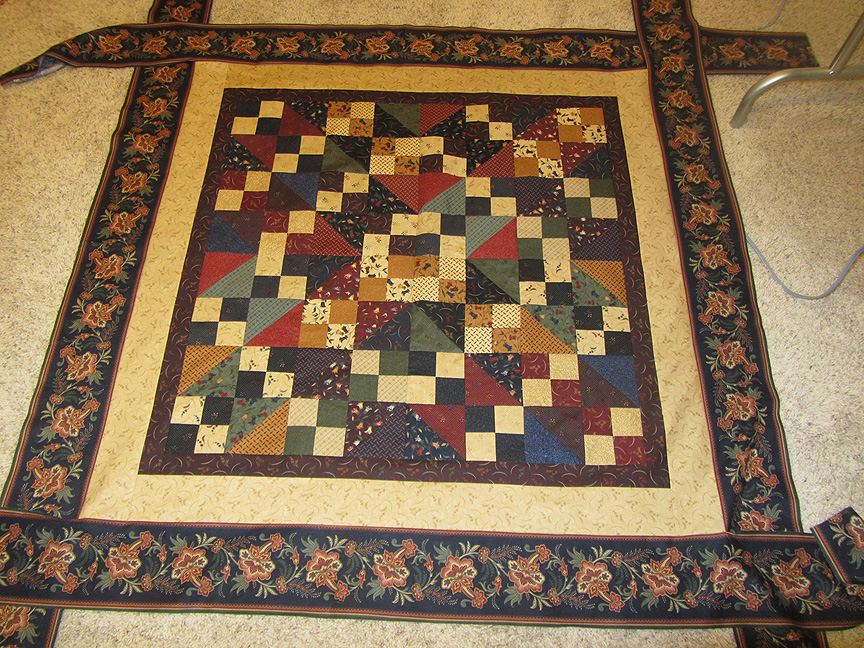
5. Attach inner side borders using 2″ x 32 1/2″ brown print strips. Attach inner top and bottom borders using 2″ x 35 1/2″ brown print strips.
6. Attach middle side borders using 3 1/2″ x 35 1/2″ tonal tan print strips. Attach middle top and bottom borders using 3 1/2″ x 41 1/2″ tonal tan print strips.

7. Cut four 5 3/4″ strips along the length of the fabric as shown for the outer border.
8. Attach all four borders to the quilt, repeating the following steps for each side. First, mark the center of the middle border. Mark the center of the 5 3/4” wide outer border. Match center marks and pin the border in place by starting in the center.

9. Sew the outer border to the quilt by beginning and ending 1/4” from the edge of the quilt. Backstitch at the beginning and ending of stitching to secure stitching. If your measurements have been accurate your stitched seam should measure 41”. If your measurement varies slightly, that is ok, but the same measurement needs to be used for every side to ensure your quilt is square.

10. All four borders are now attached and the tails of each border are hanging free.

12. Match up outside raw edges of the border and pin in place.
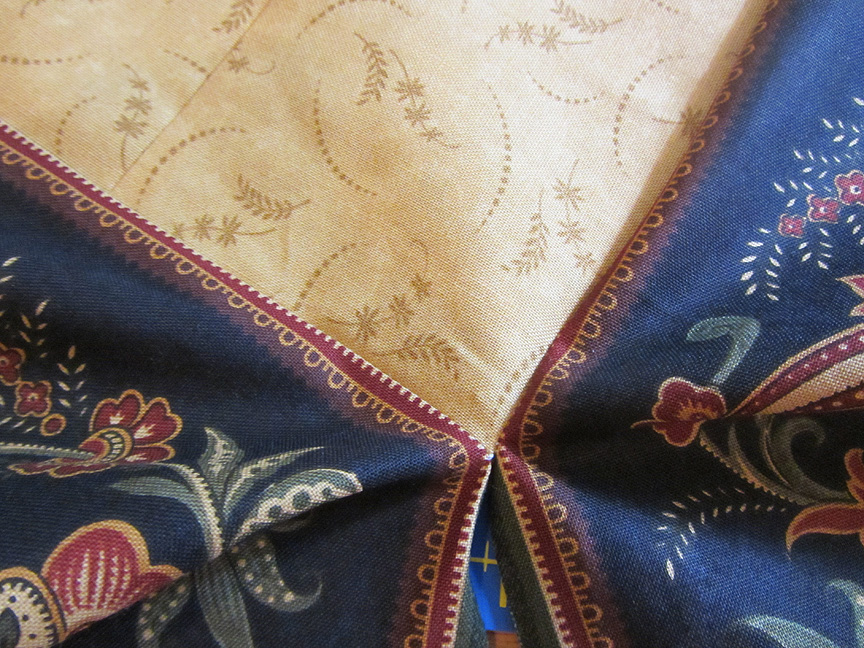
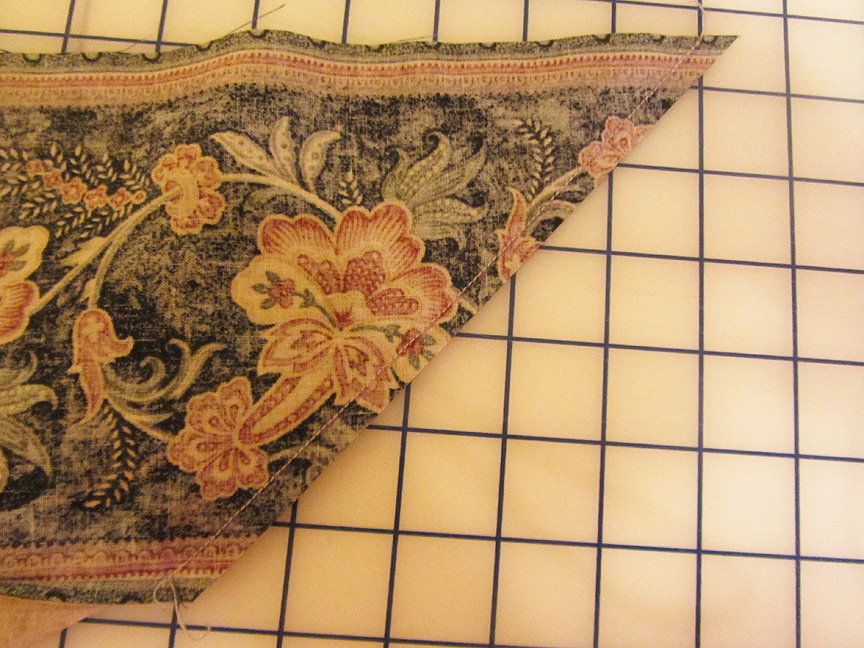
13. Using a ruler with a 45 degree angle marking, draw a line from the end of stitches to the outside edge of border as shown.

14. Stitch along the marked line, starting on the side attached to the quilt center at the end of the stitch from step 9. End the stitchng on the outer edge of the quilt.

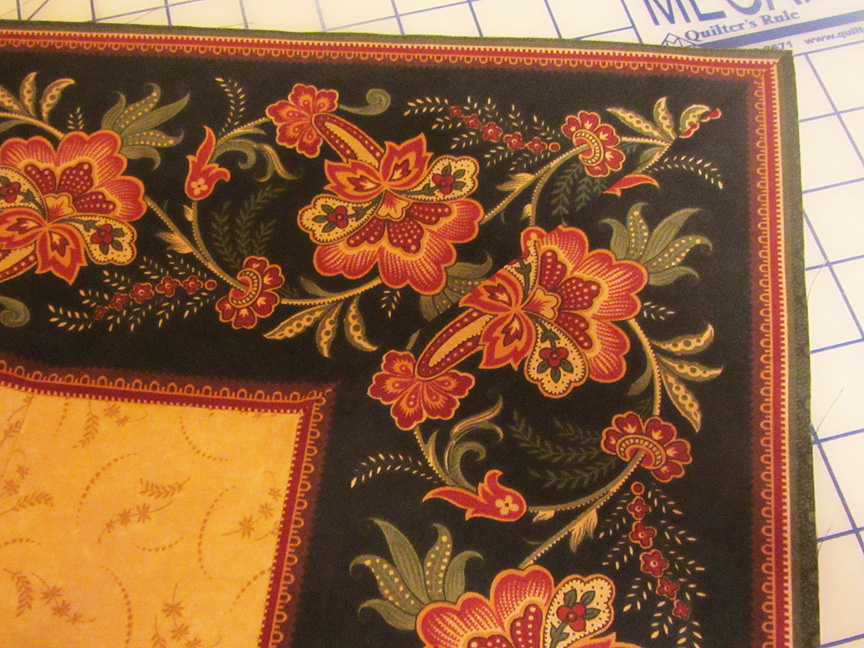
15. Backstitch at the beginning and end of stitching to secure stitching. Press open and trim 1/4” away from seam. You have just finished a mitered outer border!


Quilting & Binding
Piece 2 1/2″ navy print strips end to end for binding. Quilt and bind as desired.

A radiant 52″ square quilt!


Sarah Price
{www.itssewemma.com}
![]()
