Boho Patchwork Vintage Star Quilt


Thanks for checking out my latest Moda Bake Shop recipe!  I’m Sarah, from Sweet Dreams by Sarah, and you can visit my blog to read a little more about my inspiration for this quilt, and to get a sneak peek of other projects that I’m working on.  I mostly make baby quilts, because frankly, I like immediate gratification.  Even though this is a lap-sized quilt, it comes together so quickly, it will be done before you know it!

I love the modern feel of a traditional block that’s blown up, so today we’re making a giant vintage star, using patchwork to give it a fun, scrappy feel.  Let’s get started!
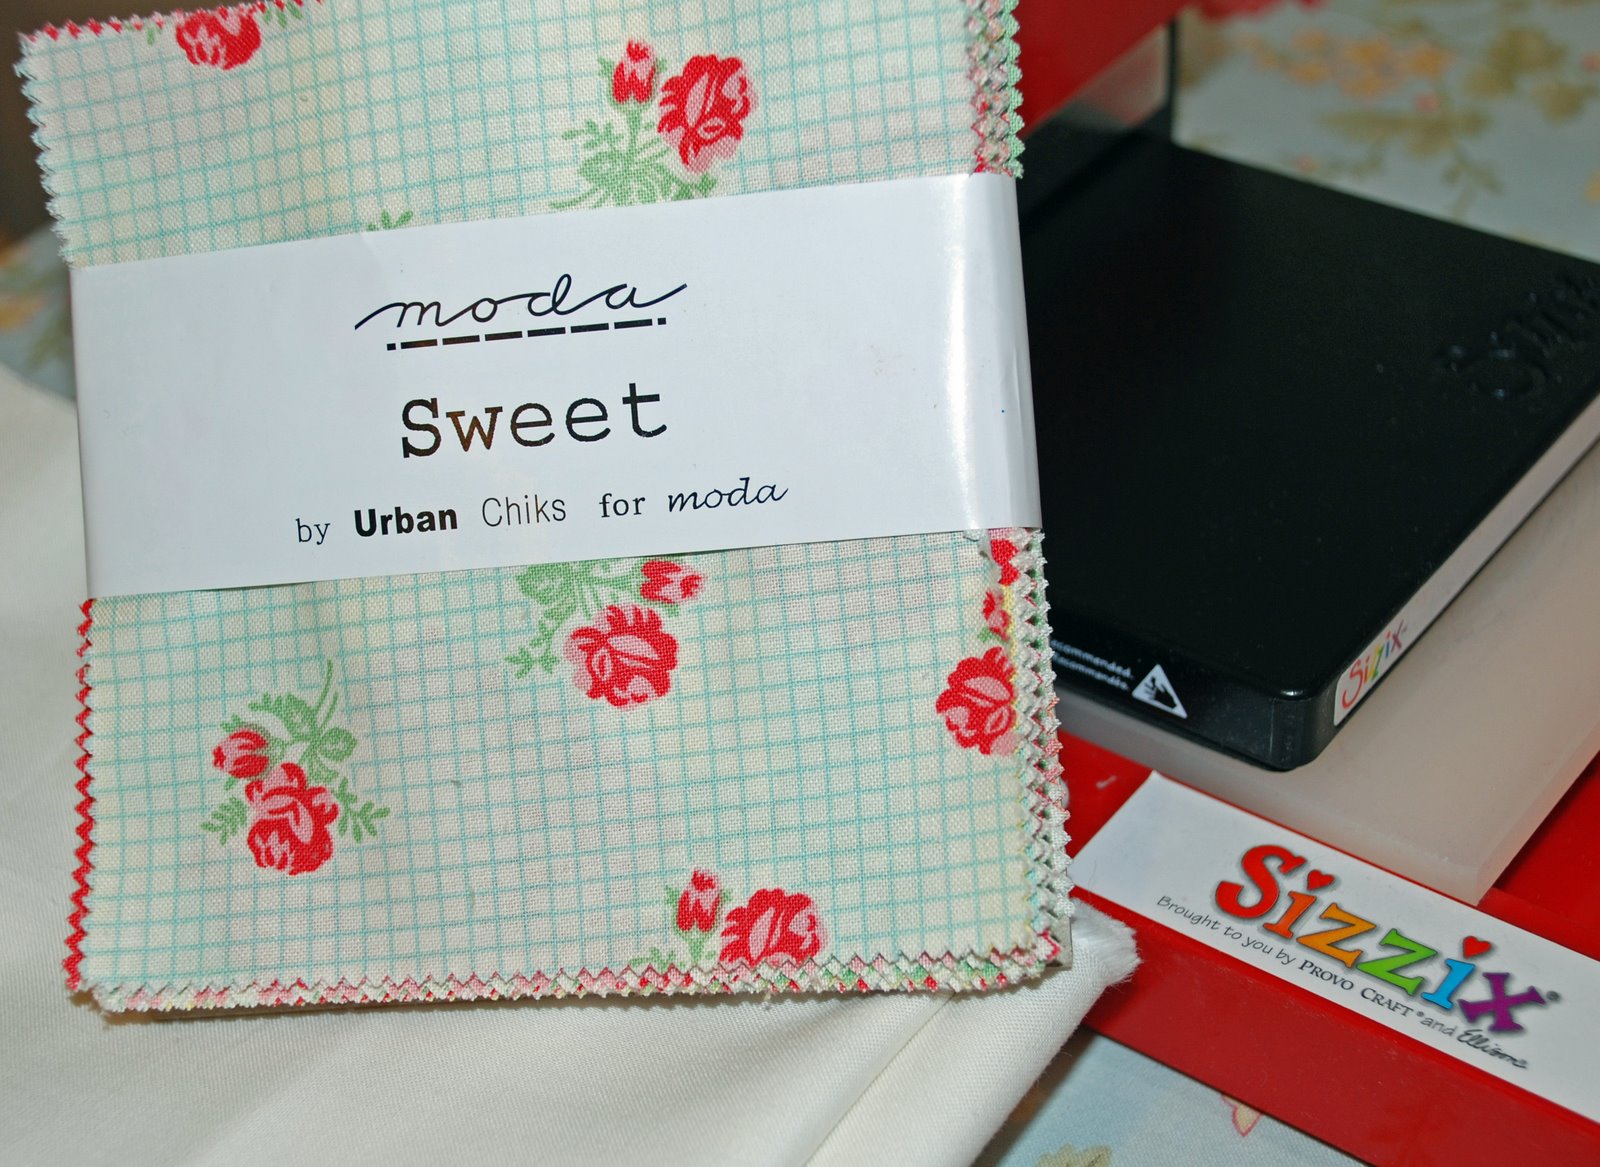

1 Boho Layer Cake
3 Yards Bella Porcelain
4 Yards of any coordinating yardage for backing – I used No. 31091-18 in Rain and No. 31095-14 in Whisper (you will also have some leftover Layer Cake pieces that you can use to make the backing more scrappy)
5/8 Yard Binding – I used No. 31094-14 in Rain
Cotton batting, measuring at least 70″ by 70″


Cutting:
First, we need to sort the Layer Cake.  The great thing about this project is that you can really use any Layer Cake that has definite color ways, plus some lower contrast prints.  You’ll want to pull the following from your Layer Cake:

Four colorway-sorted piles, with at least 4 different prints in each:

A lower contrast or multicolored pile, with at least 8 different prints:

Set aside the rest of the layer cake, as we’ll be using that for the borders!

Keeping each pile together, cut the squares in quarters, giving you little stacks of 5″ squares.

Remaining cutting:
From the Porcelain background yardage:

  • 6 squares that measure 14″, and 4 squares that measure 13 1/2″
  • 8 strips 3 3/4″ by width of fabric (WOF)

From binding fabric:

  • 7 strips 2 1/2″ by WOF

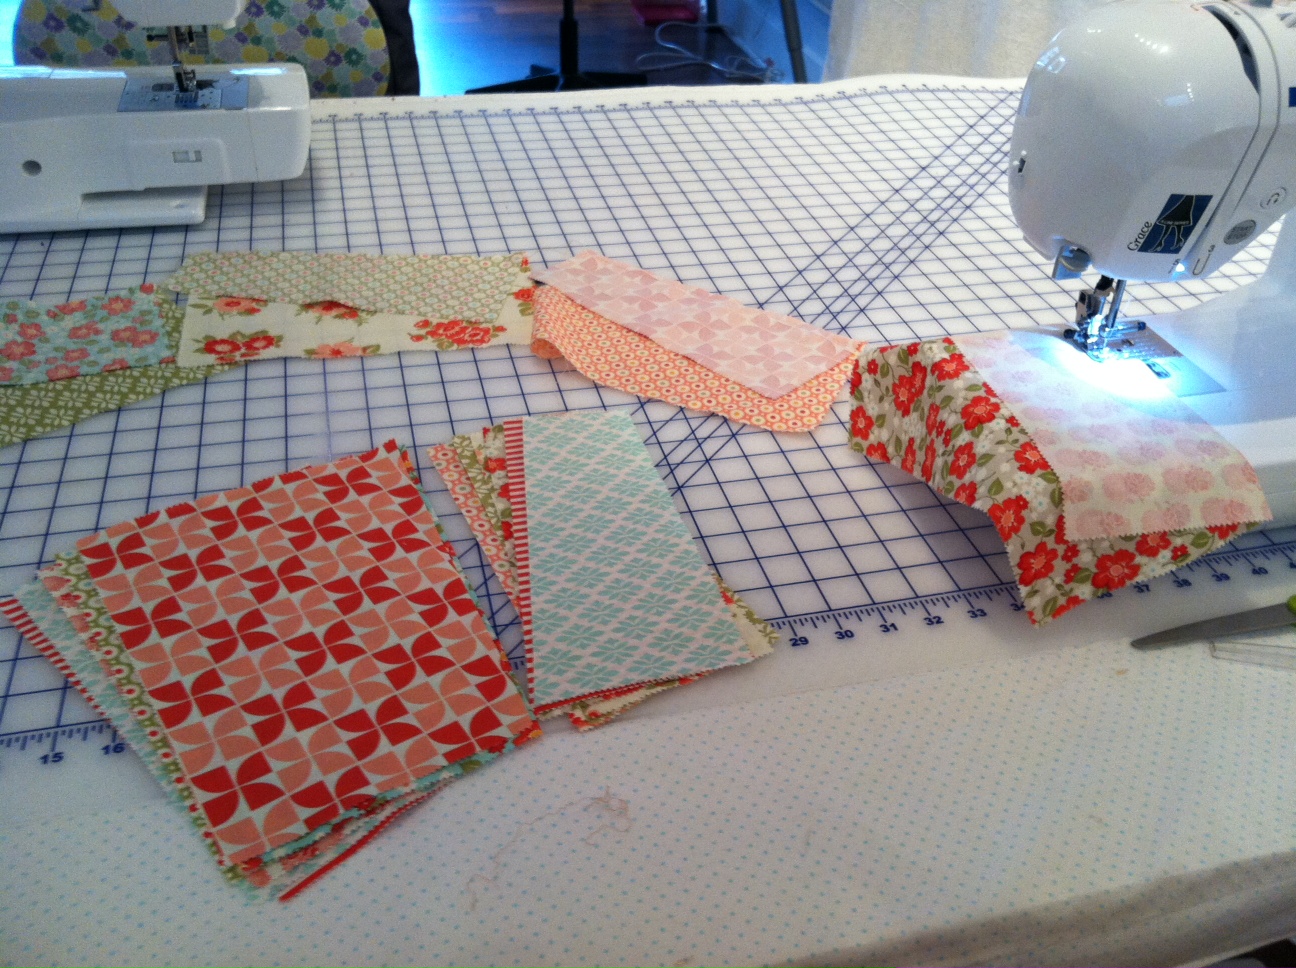
Now that we have all the pieces, let’s get sewing!  We’ll be using a 1/4″ seam for all seams.

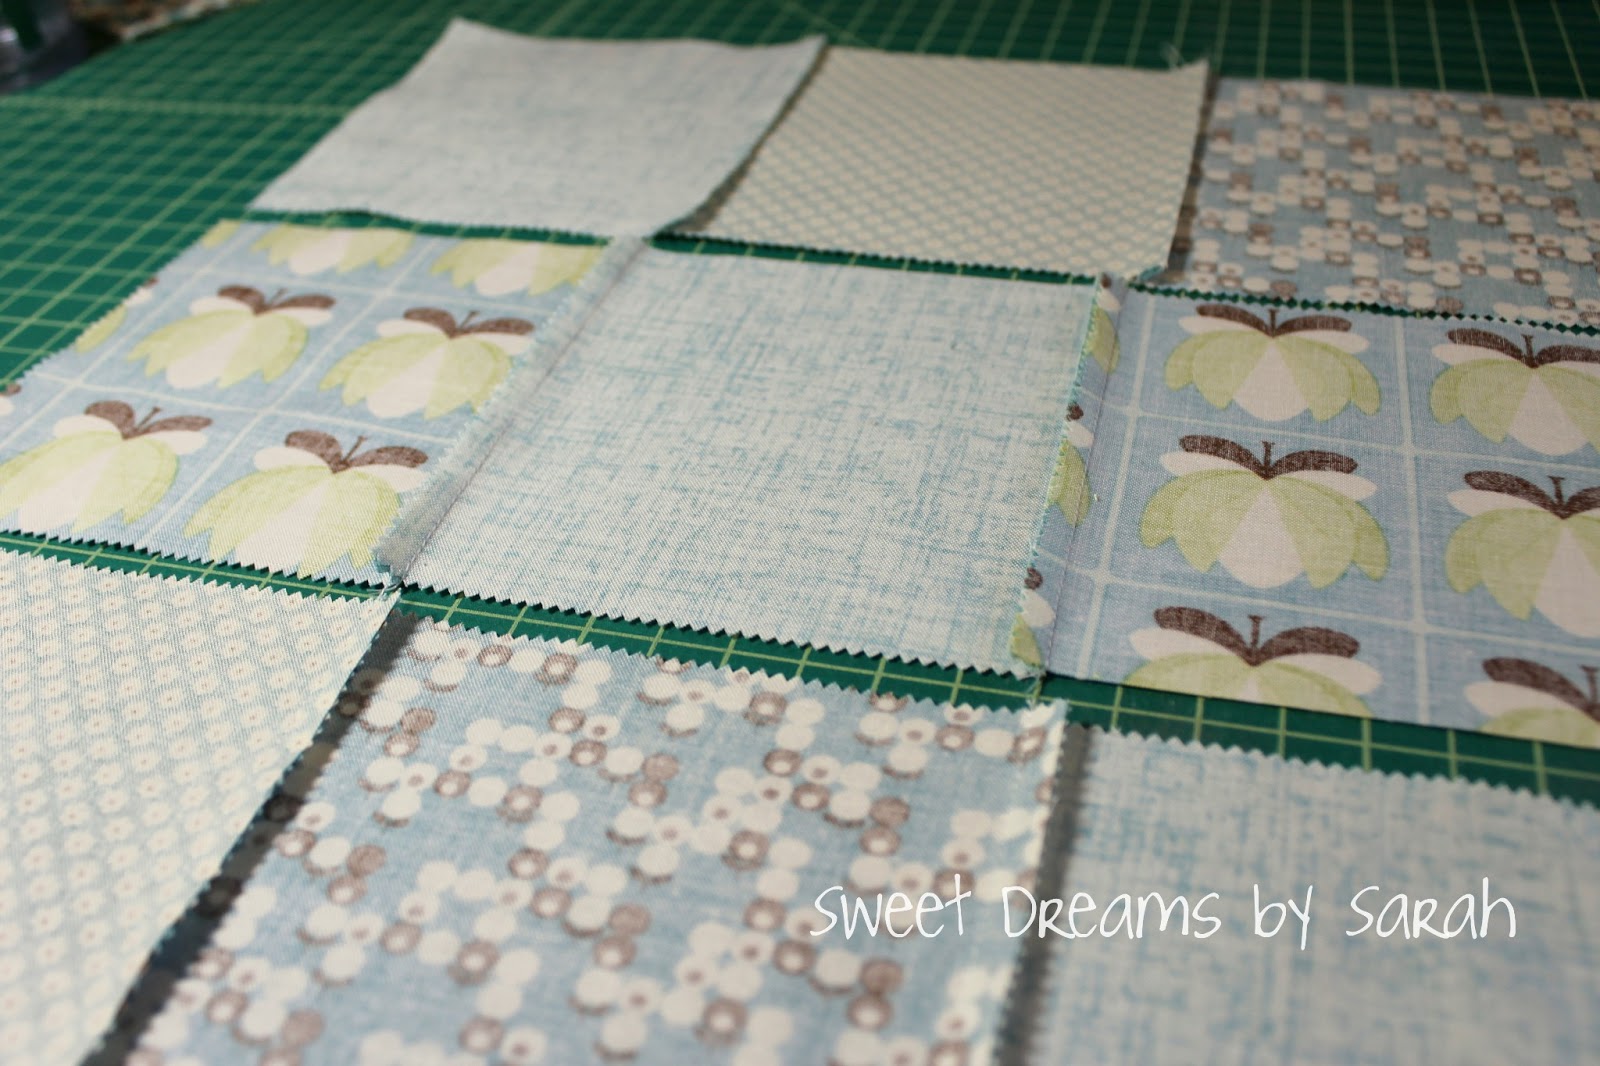
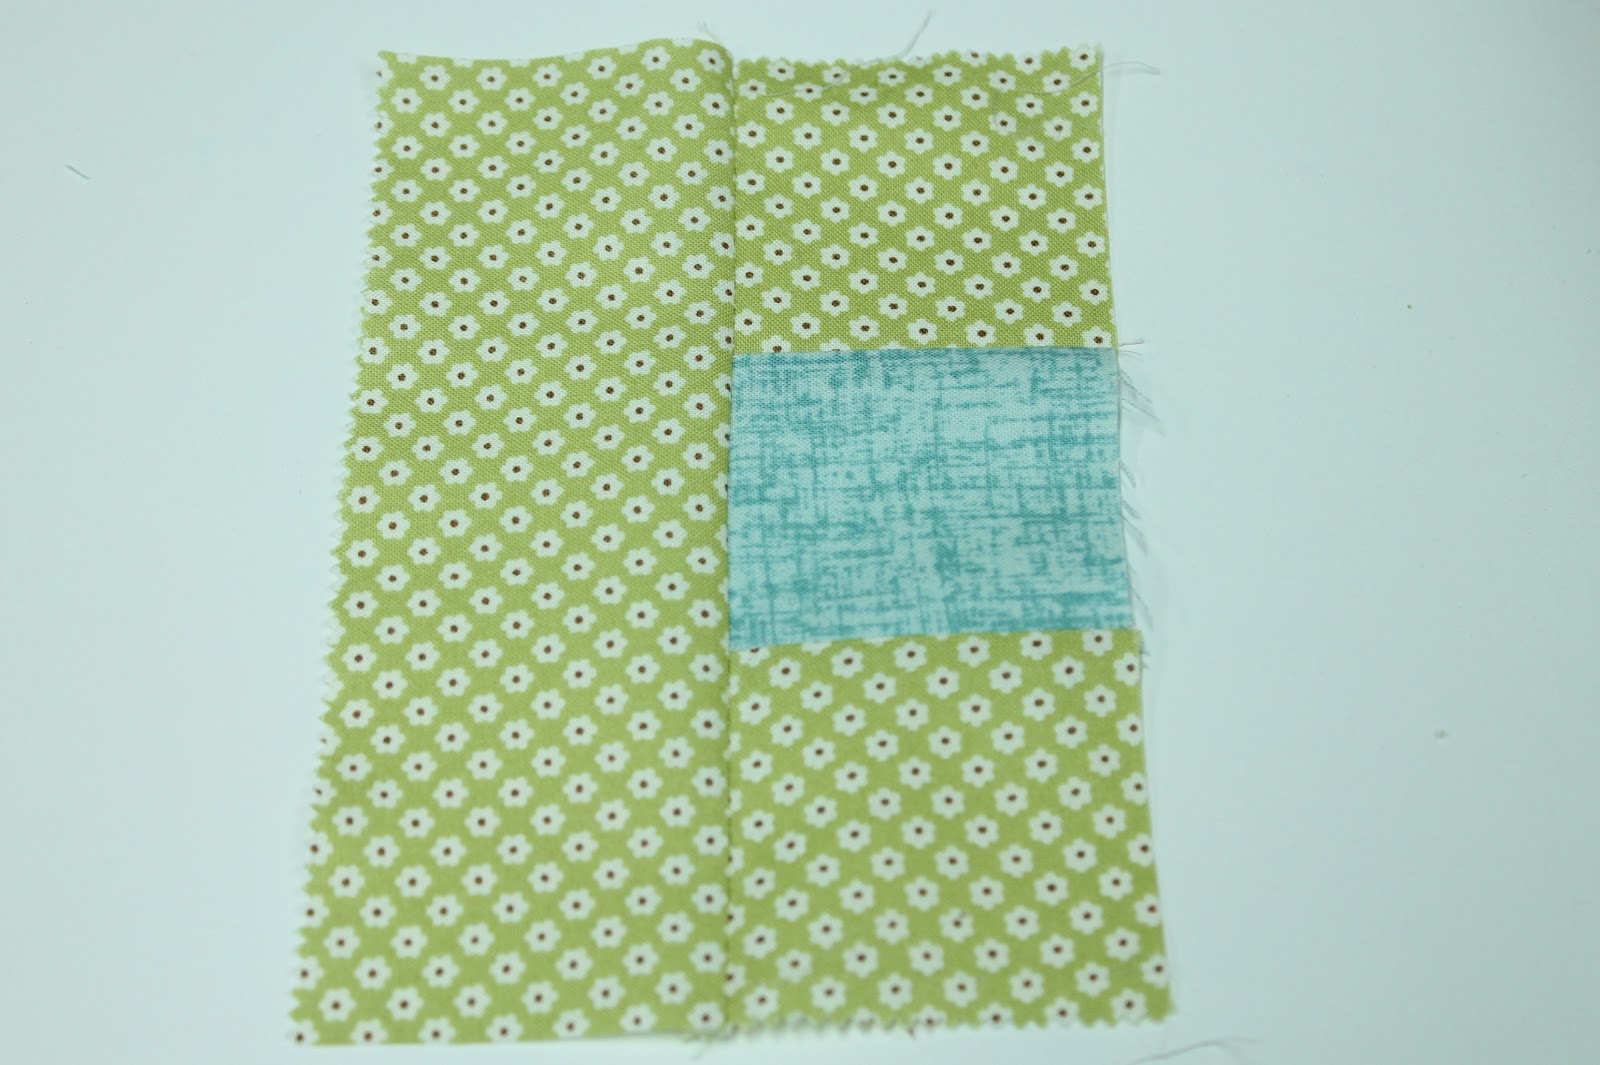
Using the squares we cut in the first step, and working with one color pile at a time, sew the squares into nine-patches.  Pick out 9 5″ squares from one of the colorways, and lay them out, trying to make it as scrappy looking as possible:

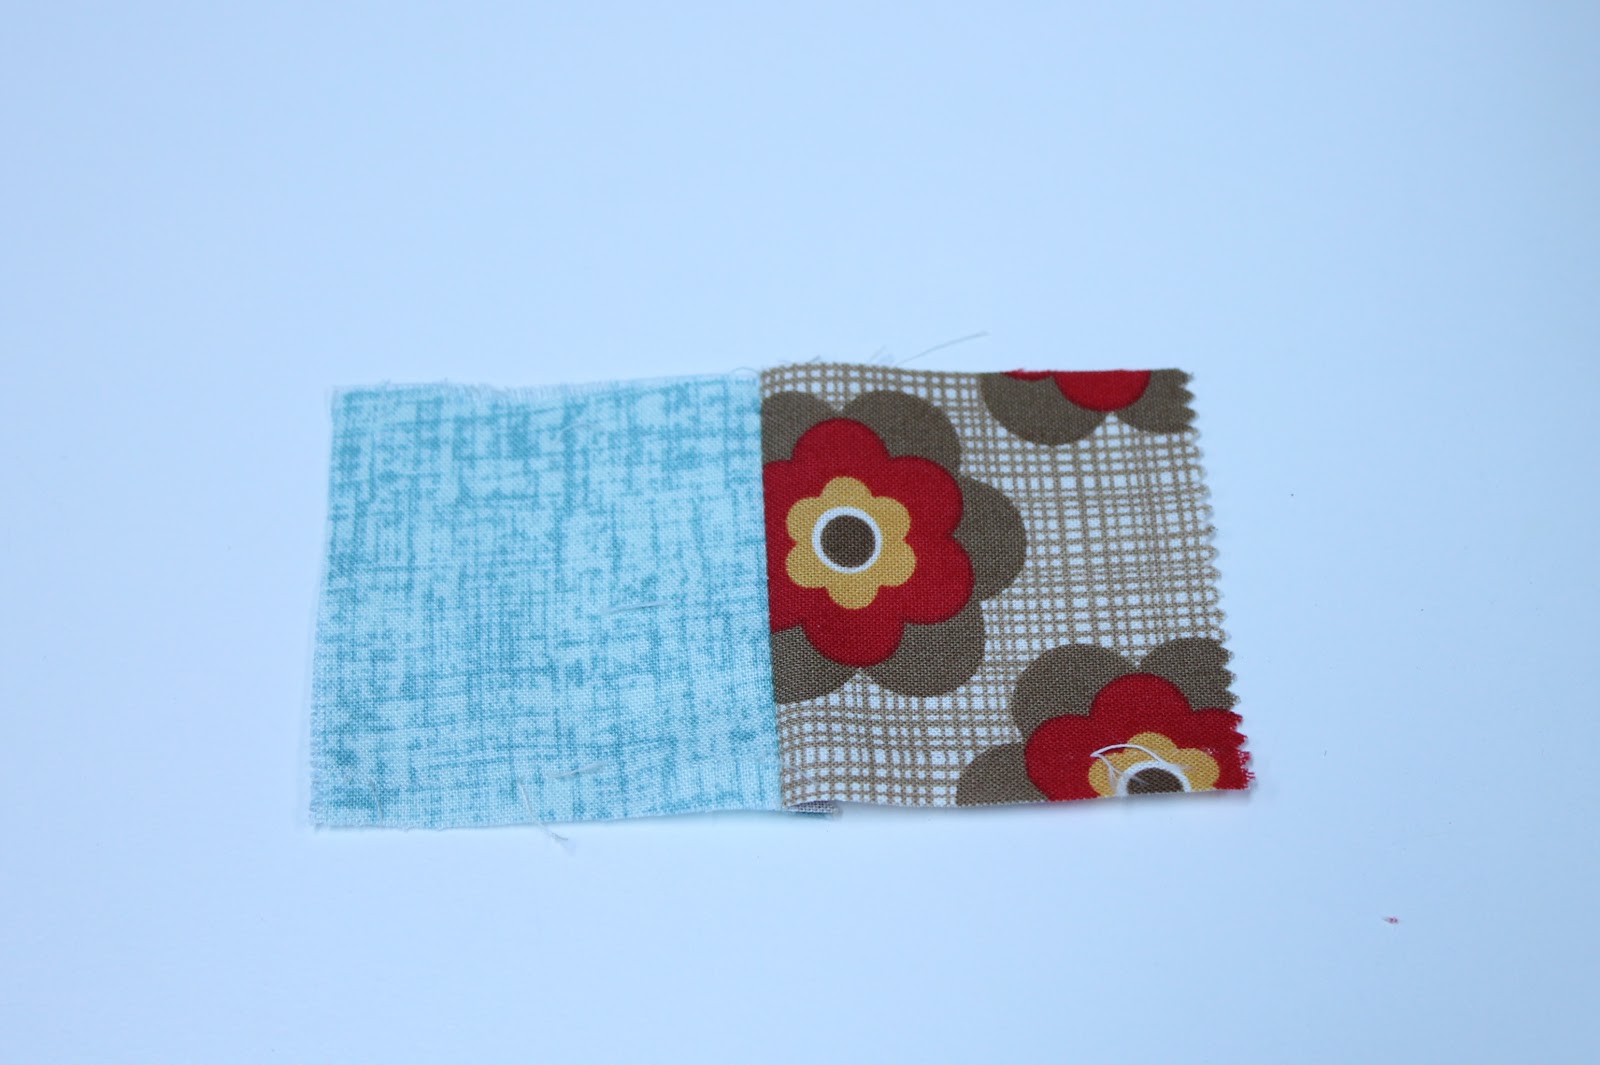
Sew the squares together into rows:

 And press out the rows with the seams going in opposite directions so that you can nest the seams:

 Sew the rows together and press for your nine-patch:

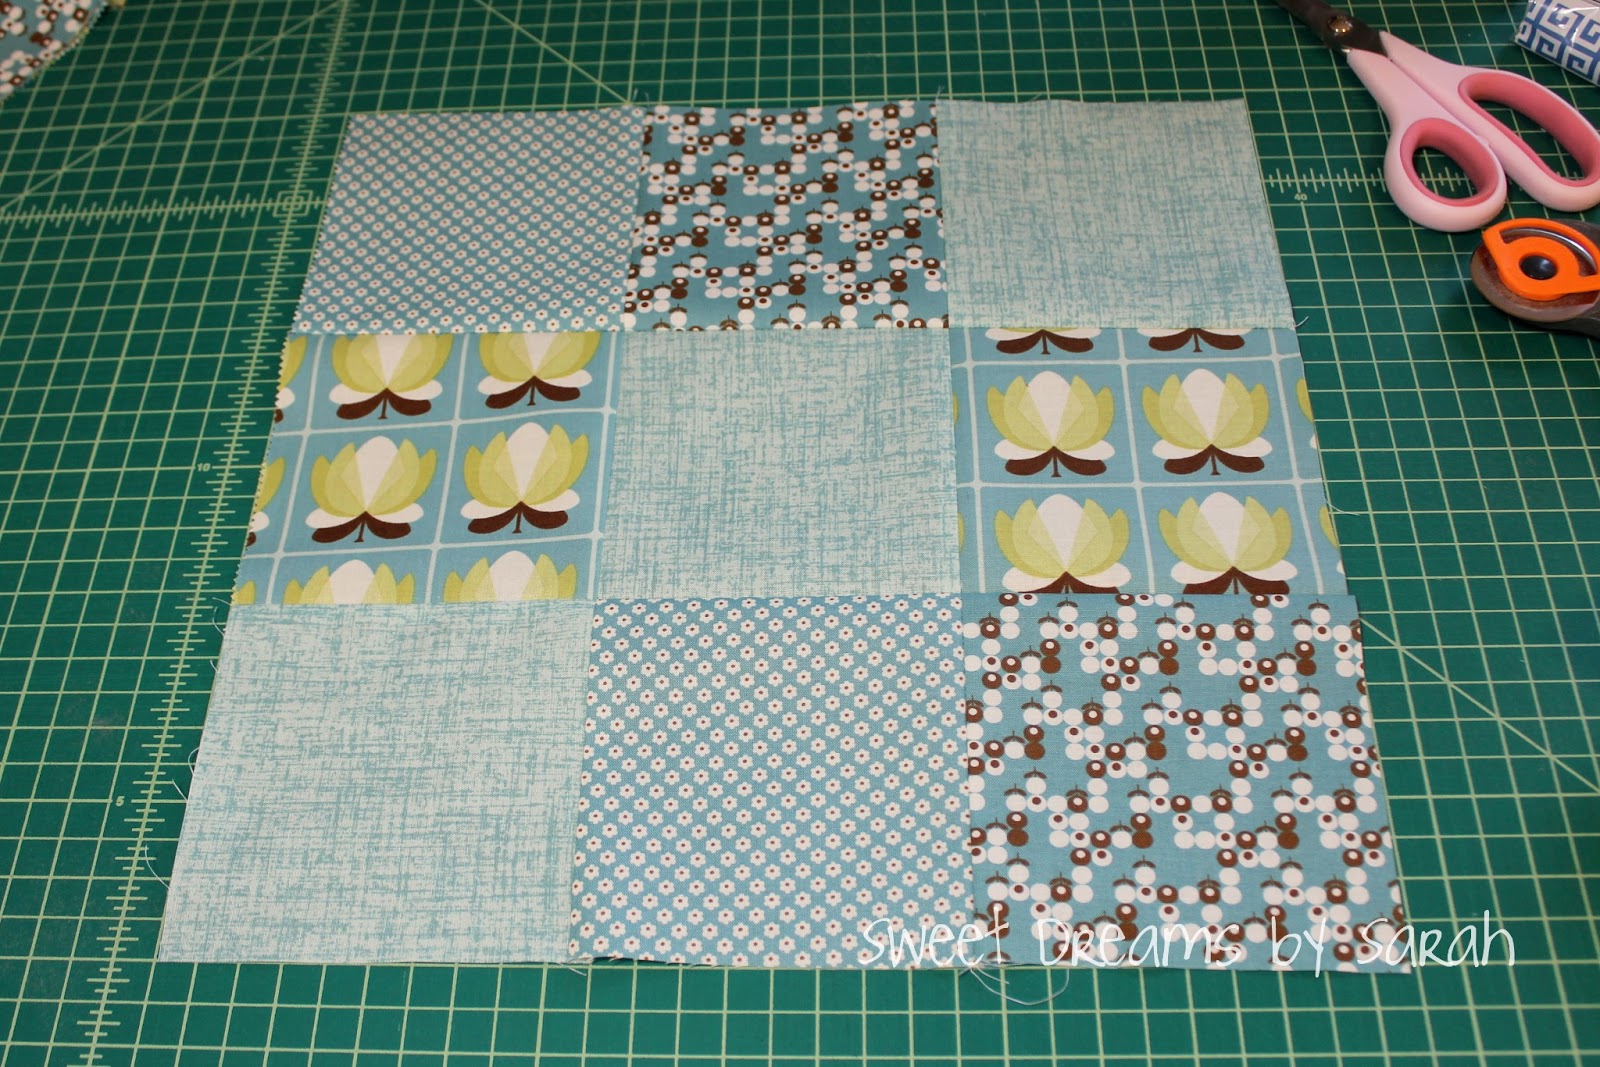
You’ll need 1 nine-patch in each colorway, and 2 in the low contrast fabrics.

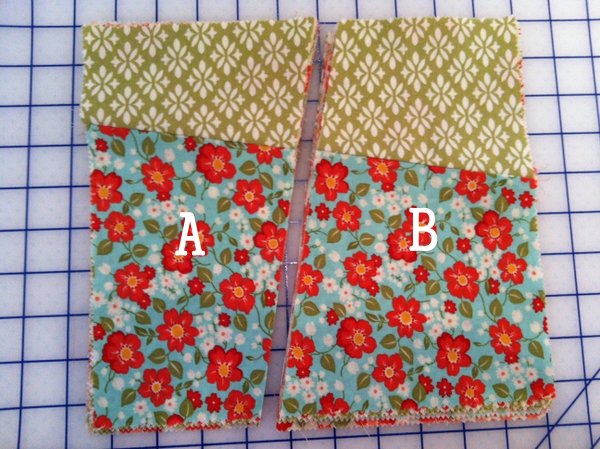
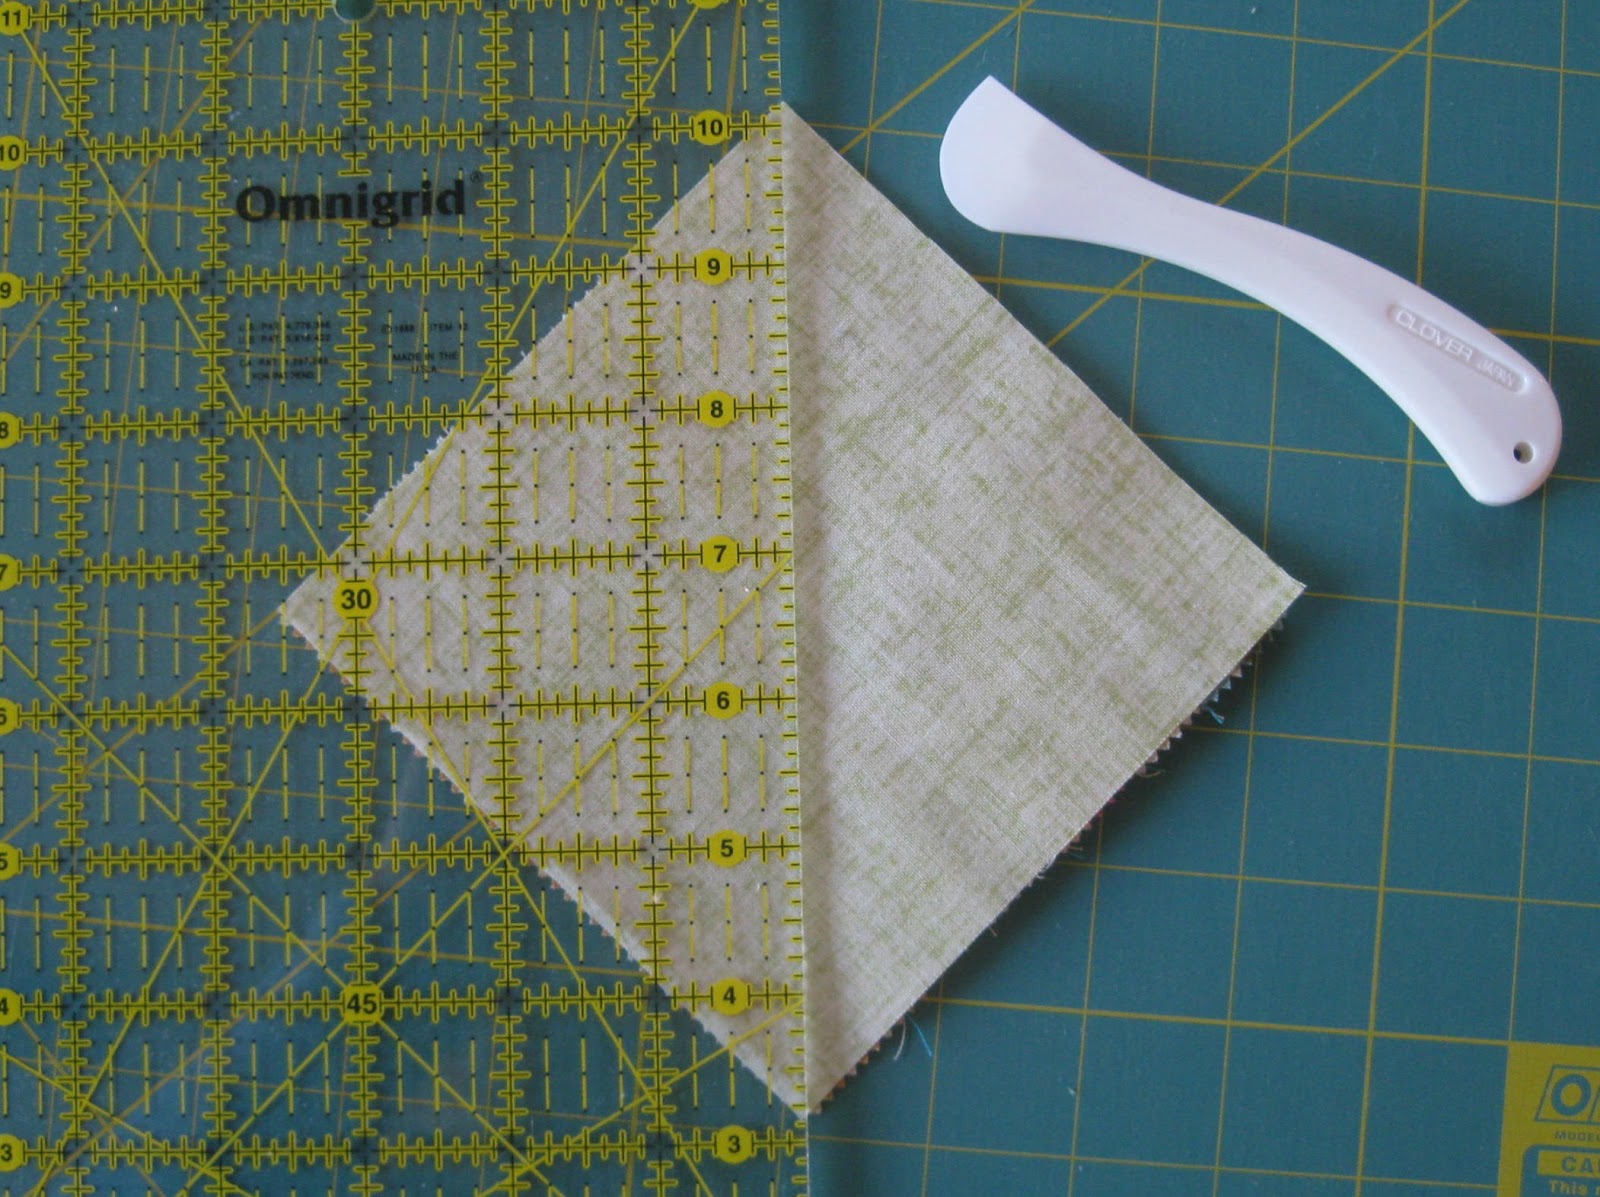
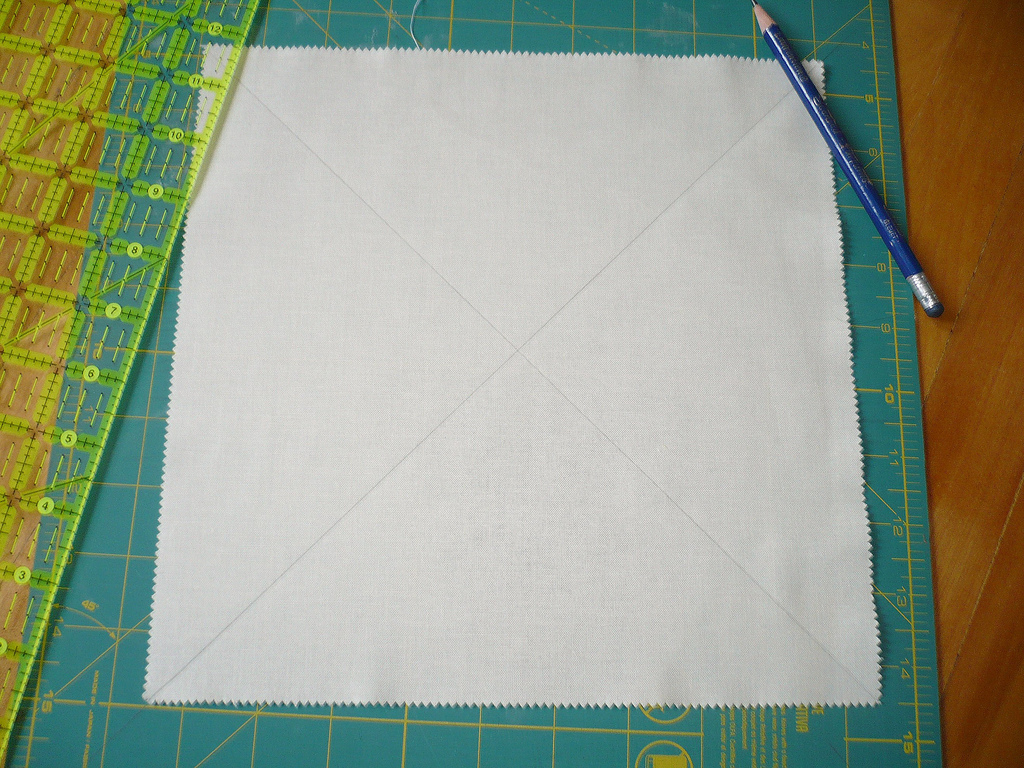
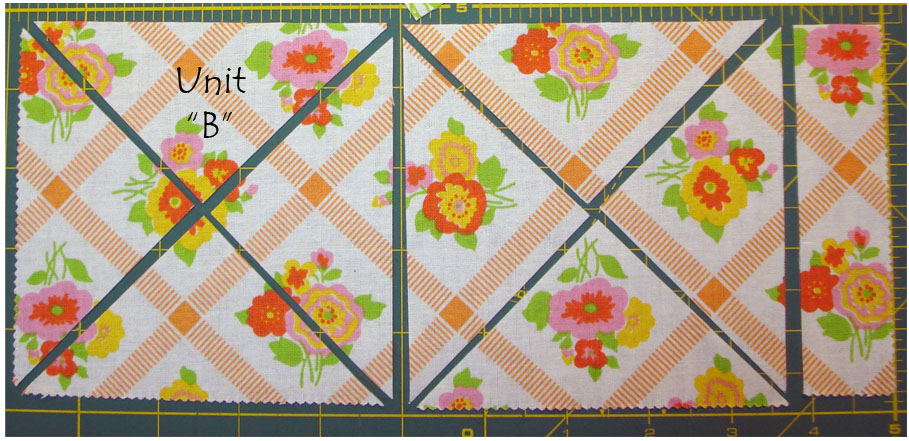
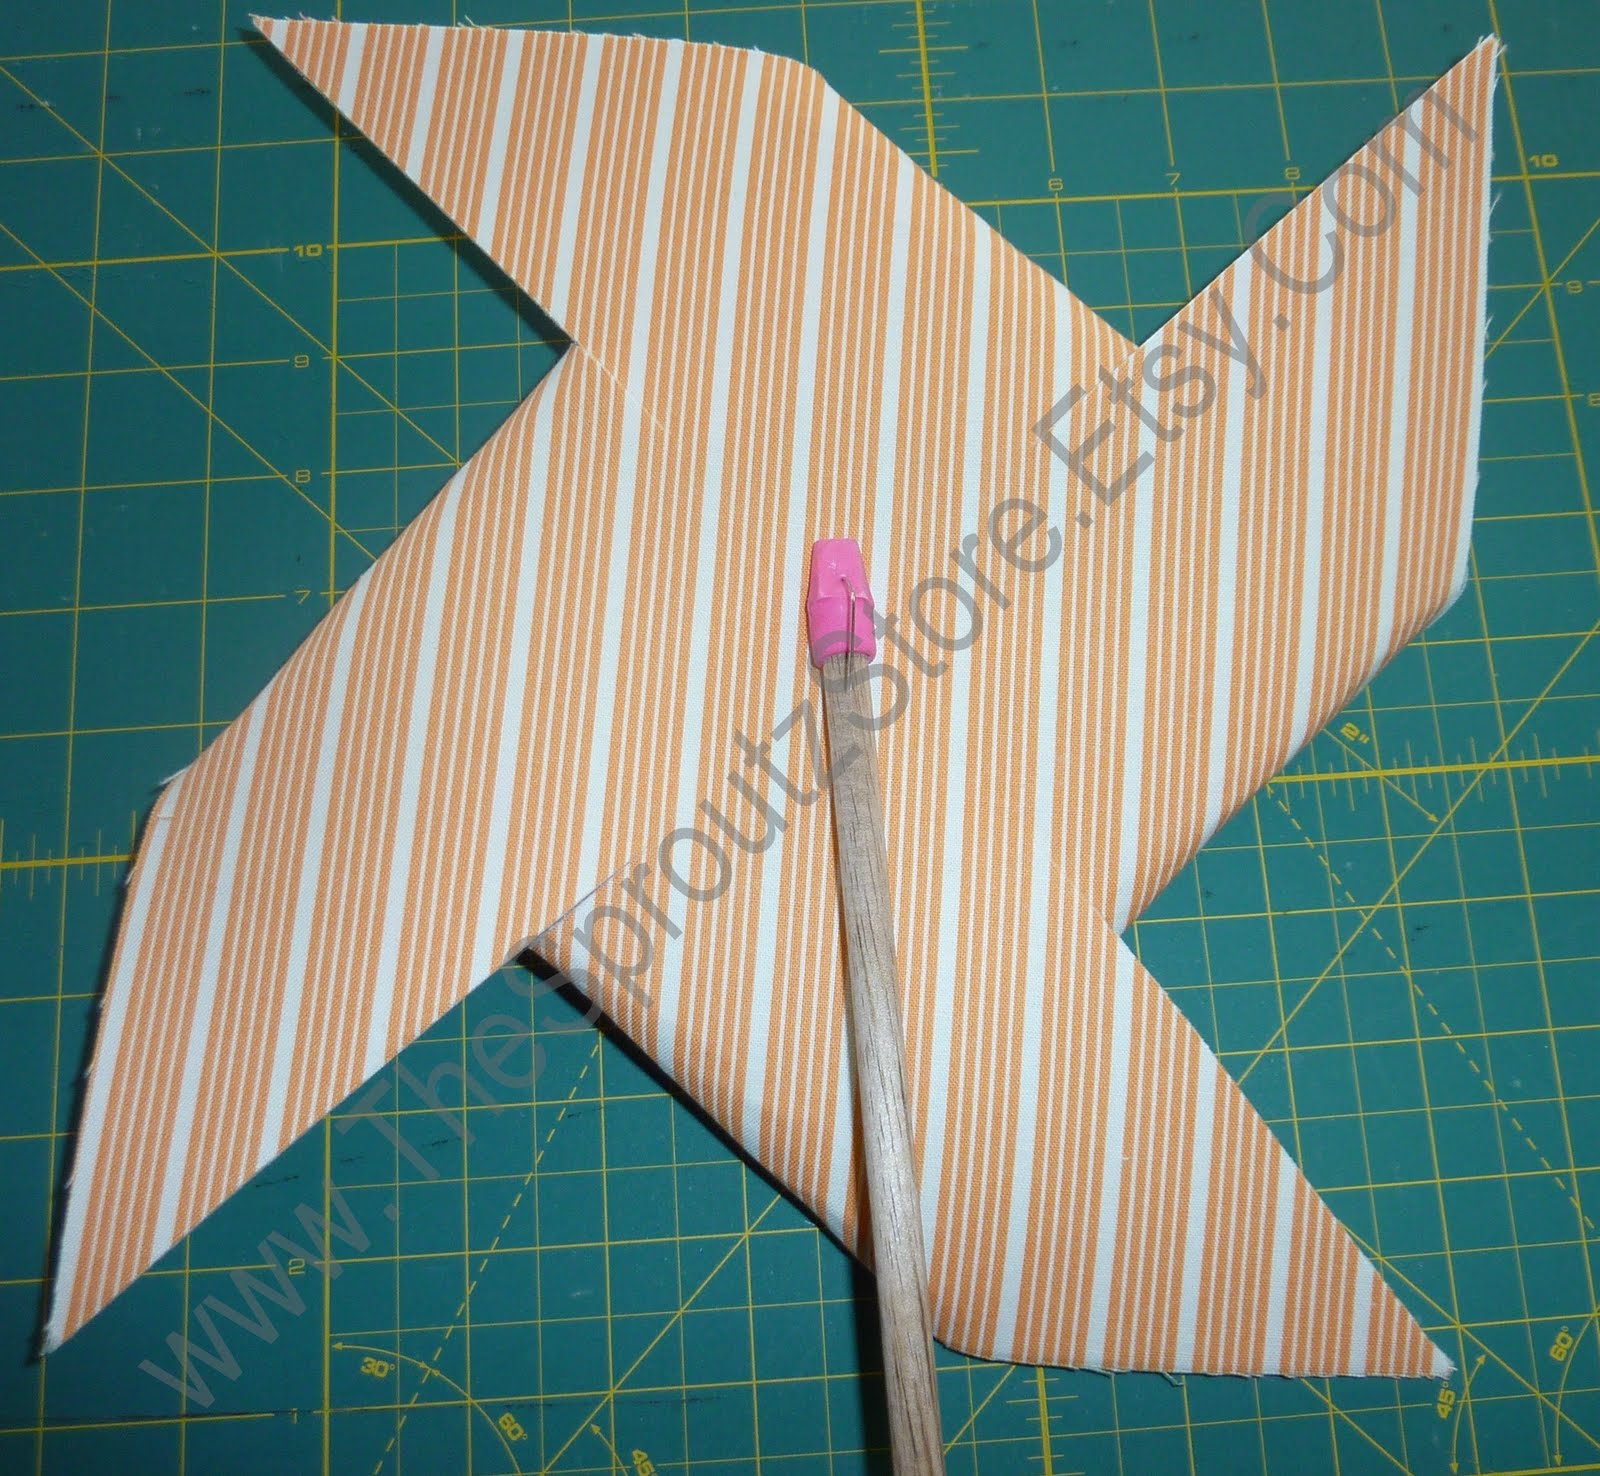
Next, we need to mark those 14″ squares we cut from the background fabric.  Mark the diagonal across the square, with your preferred marking tool.  We’re going to be sewing on either side of that line, so make sure you can see it.  Lay one of your nine-patches down, right side up, and then lay the background square on top, with your marking facing up.

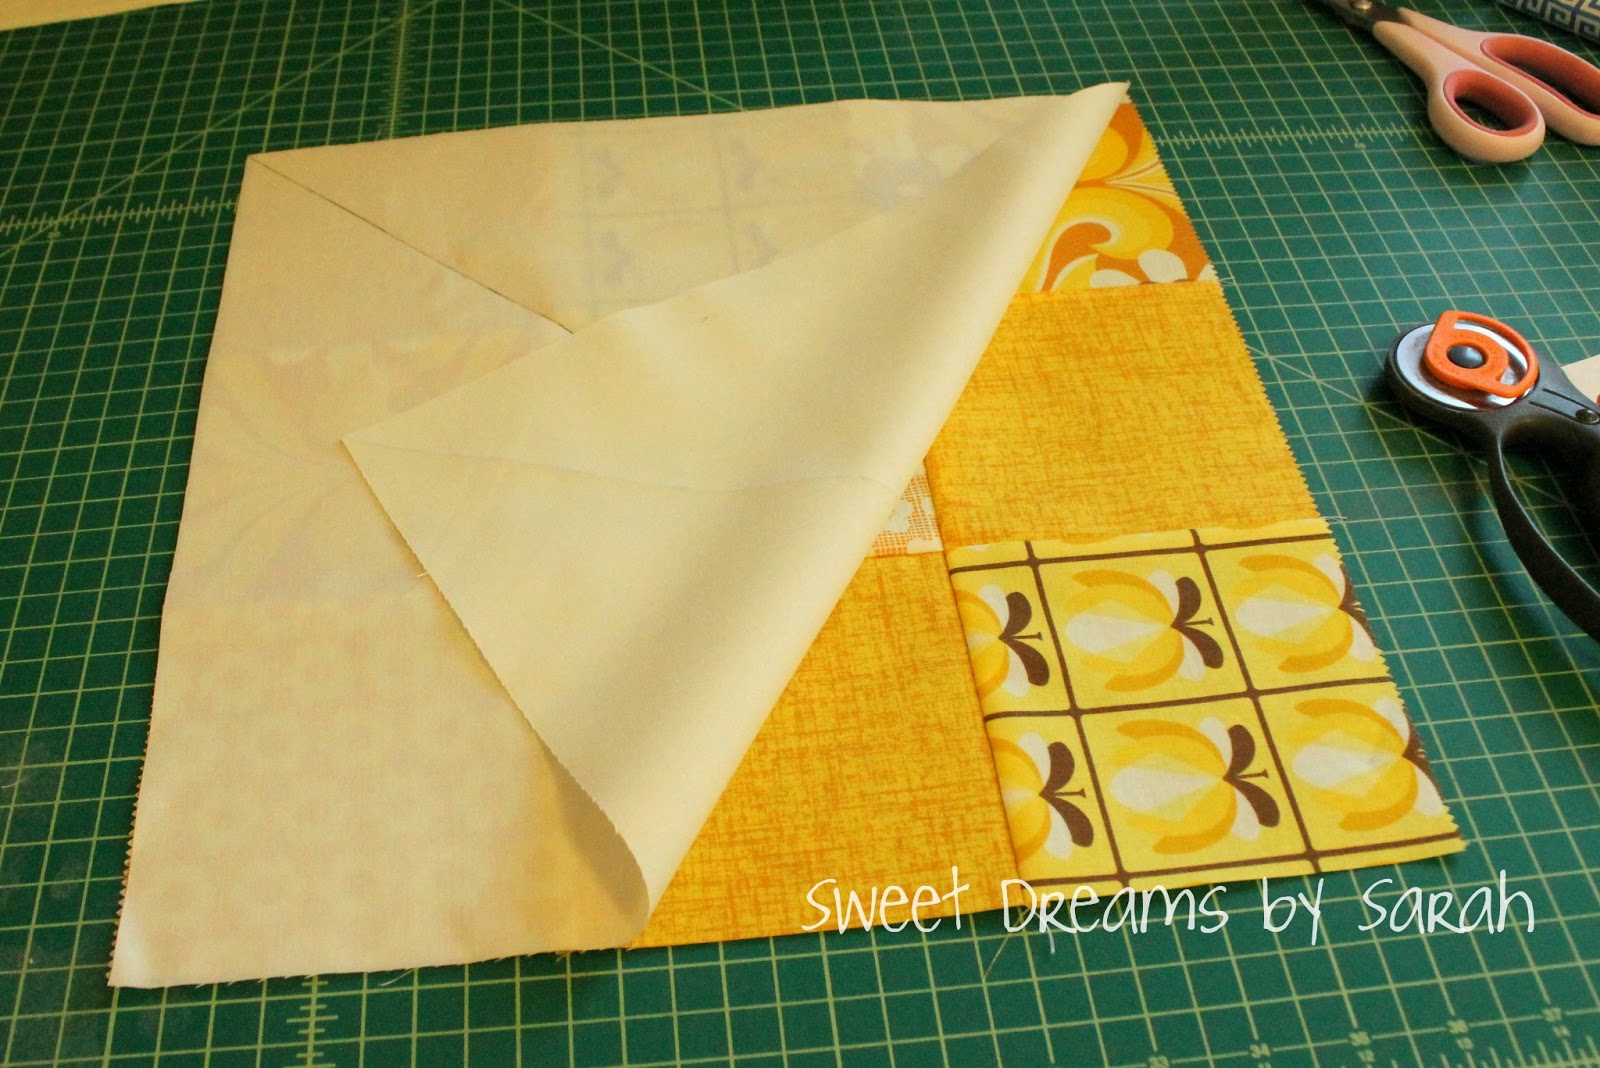
Pin this together, and then sew on either side of the line, 1/4″ away from the line:

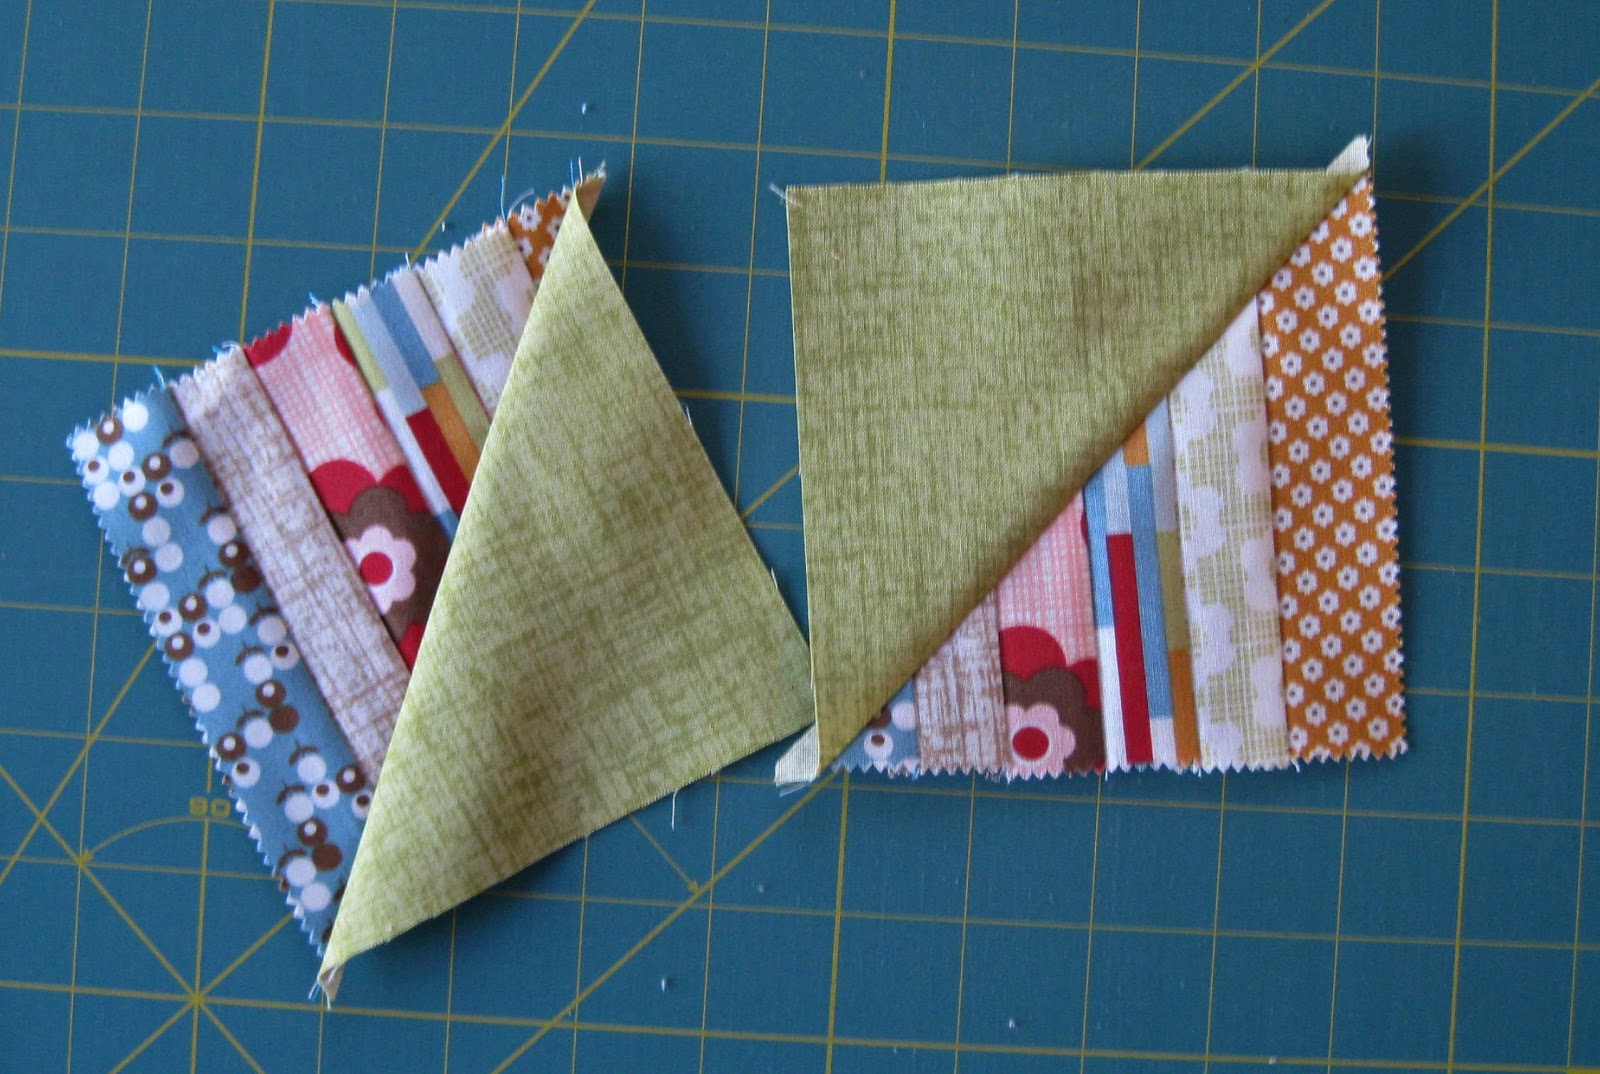
Do this with all 6 of the 9 patches that you’ve made up, and then go ahead and cut on those lines that you drew, going right between the lines that you sewed.

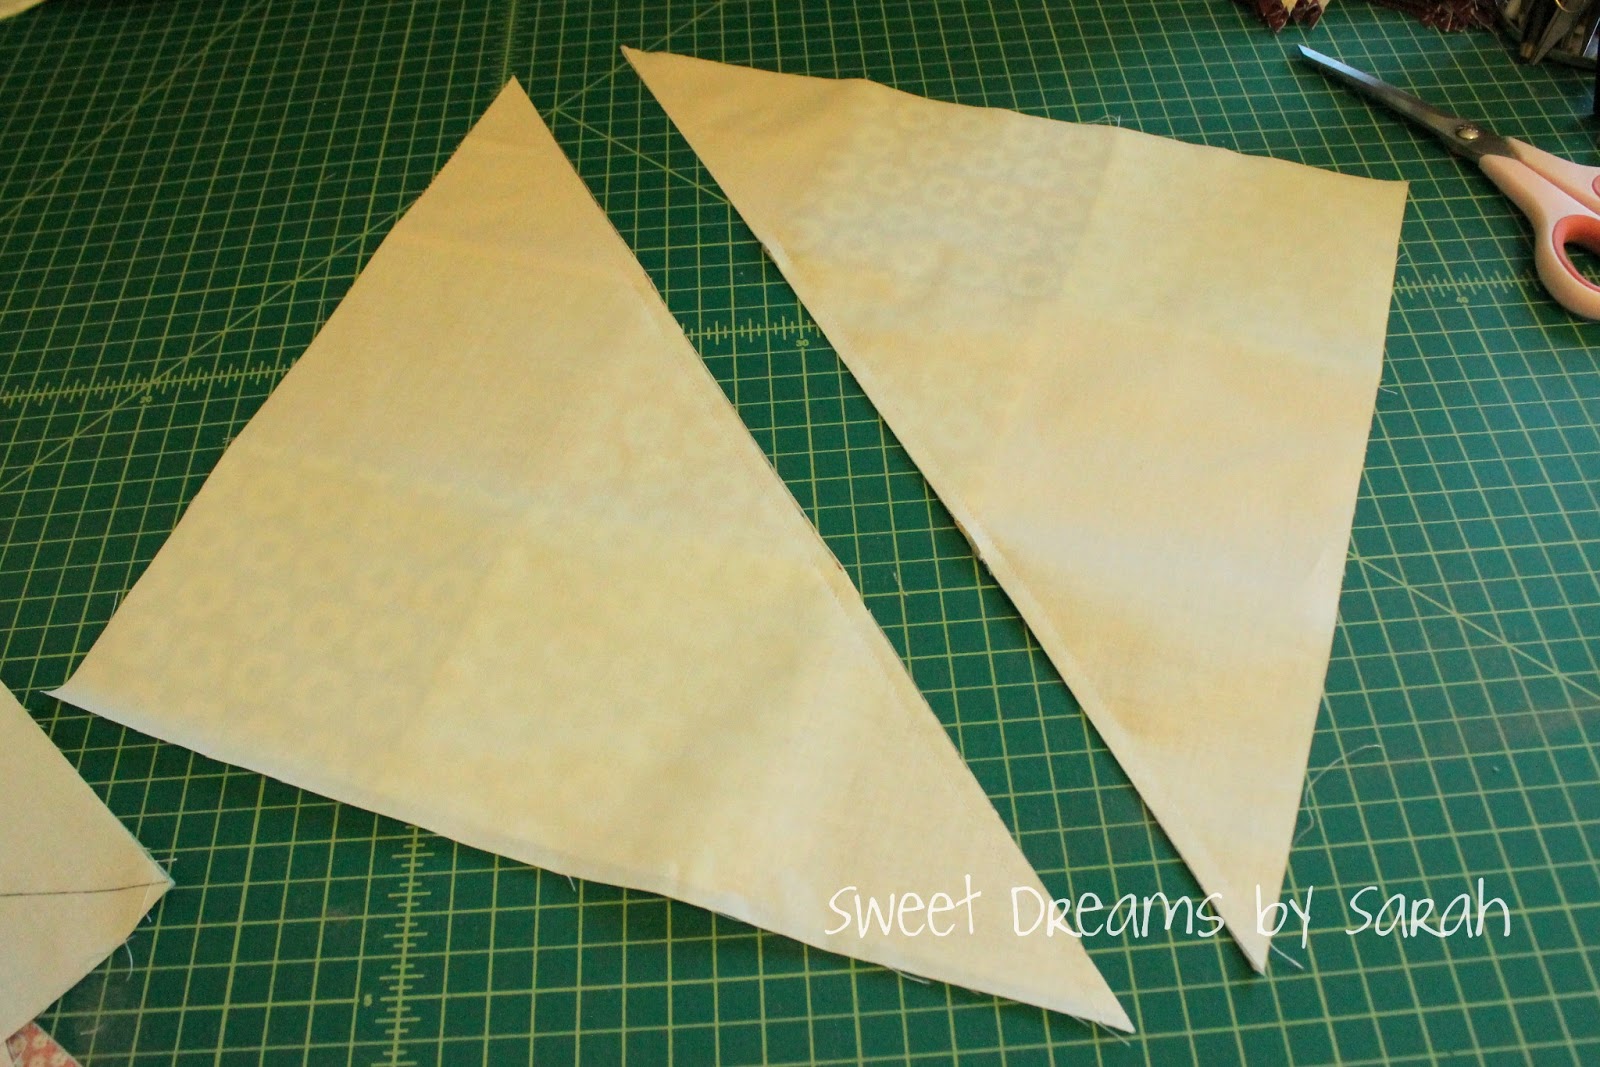
 Press these open, and you’ll see that you now have patchwork half square triangles!

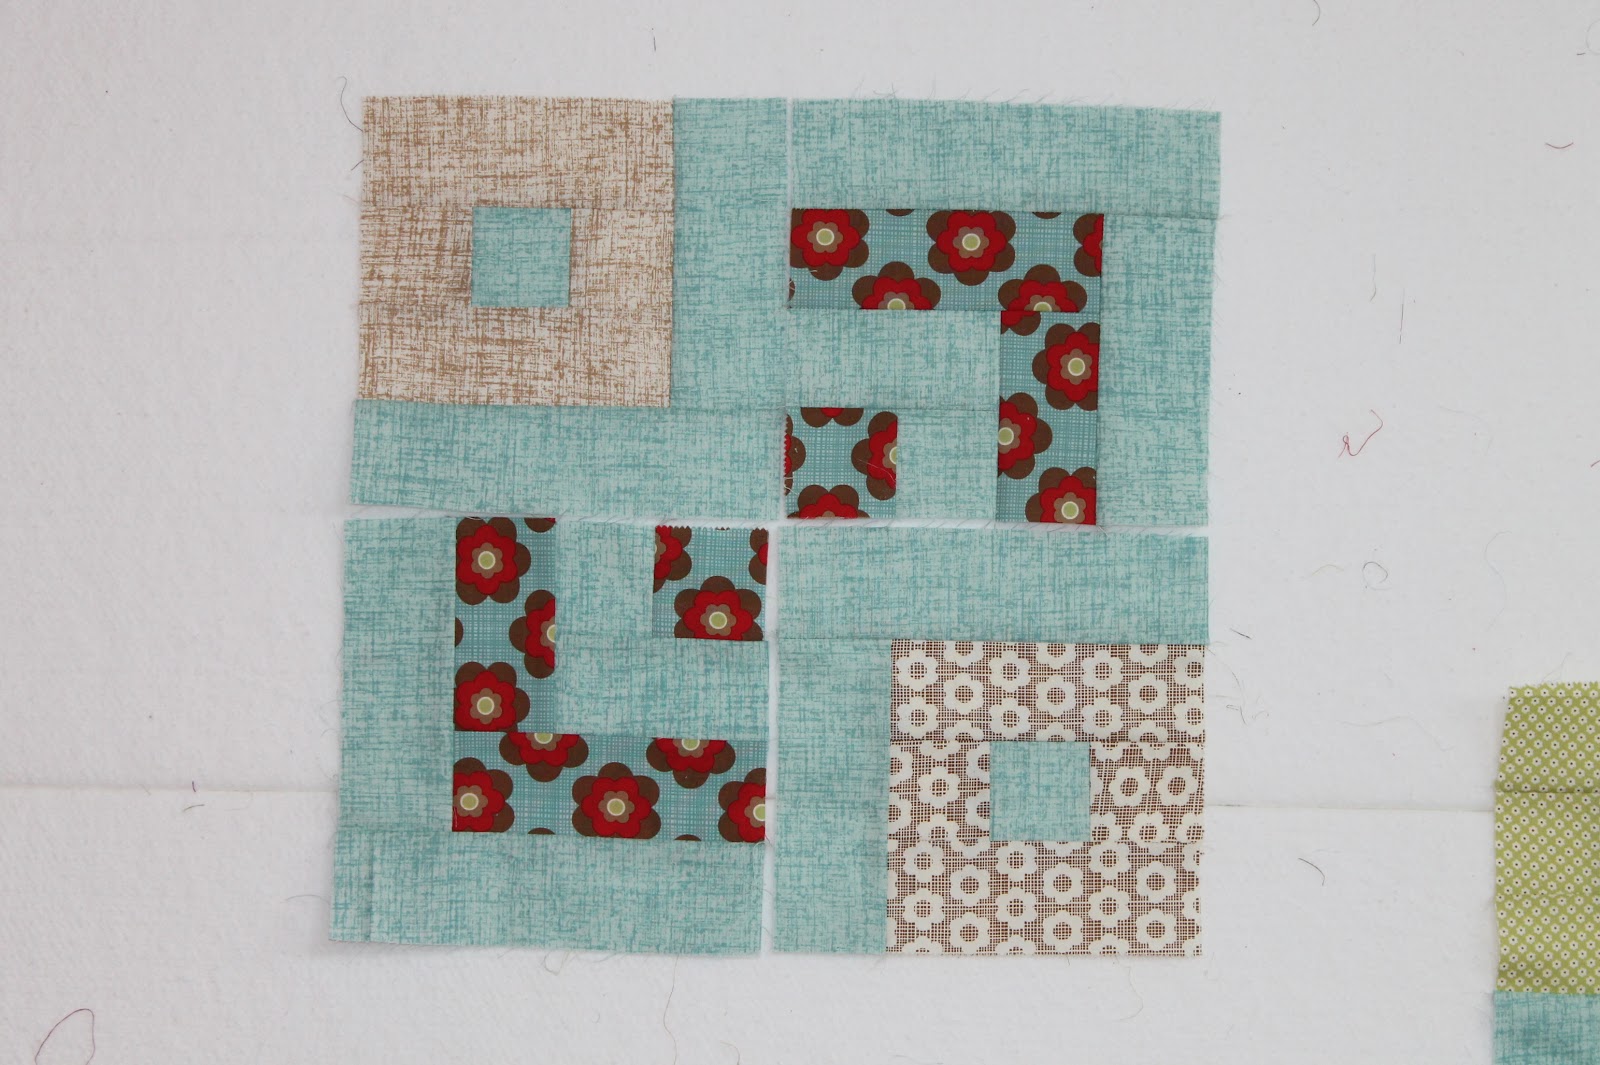
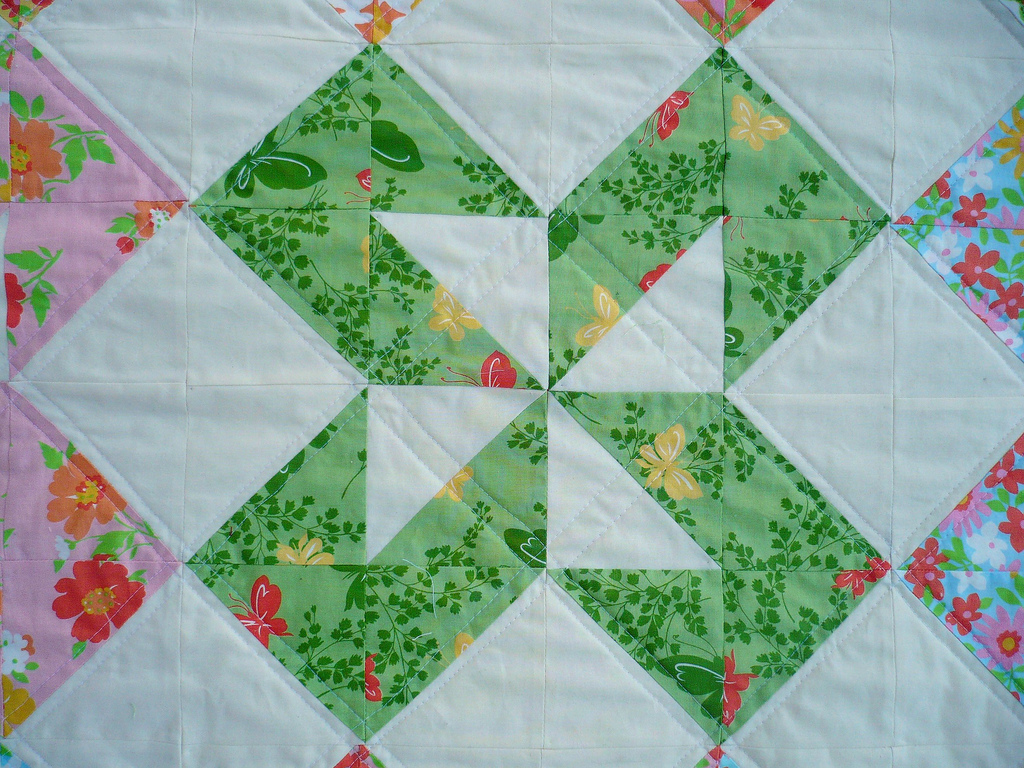
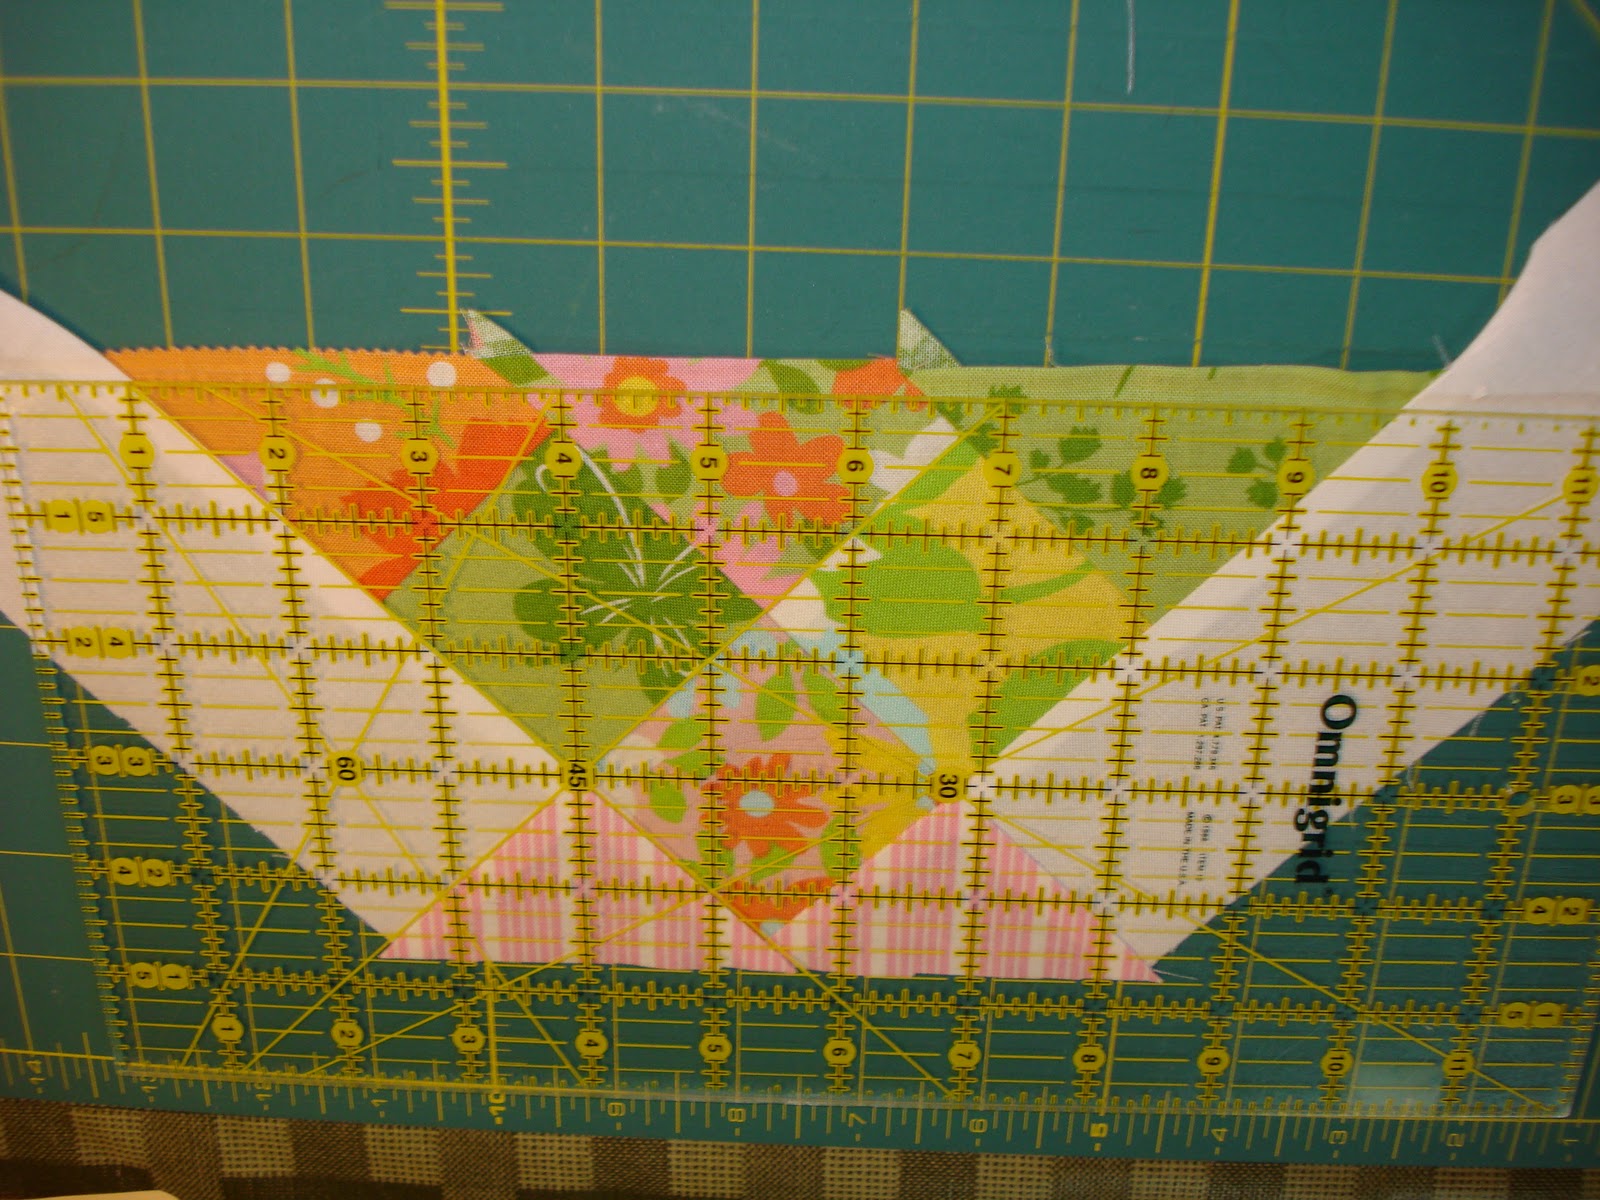
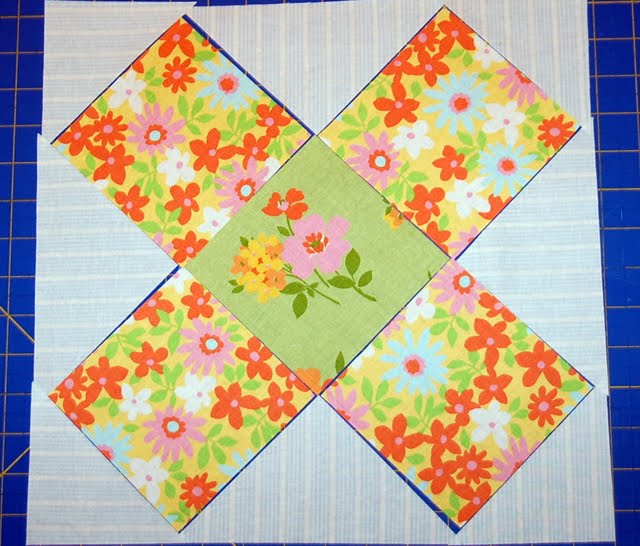
You should now have 16 blocks to work with – the 12 half square triangles, plus the 4 13 1/2″ background squares.  Using your design wall or your floor, arrange them for your quilt center.  Be sure to pair up the two half square triangles for the main colorways together, as you can see below:

Sew these squares together to create the center of the quilt.  To help the seams to line up, I usually handle this piecing in quadrants.  I sew together the 4 blocks in the upper left hand corner, then upper right, etc., to create bigger “chunks” that are much easier to manage when matching up corners.

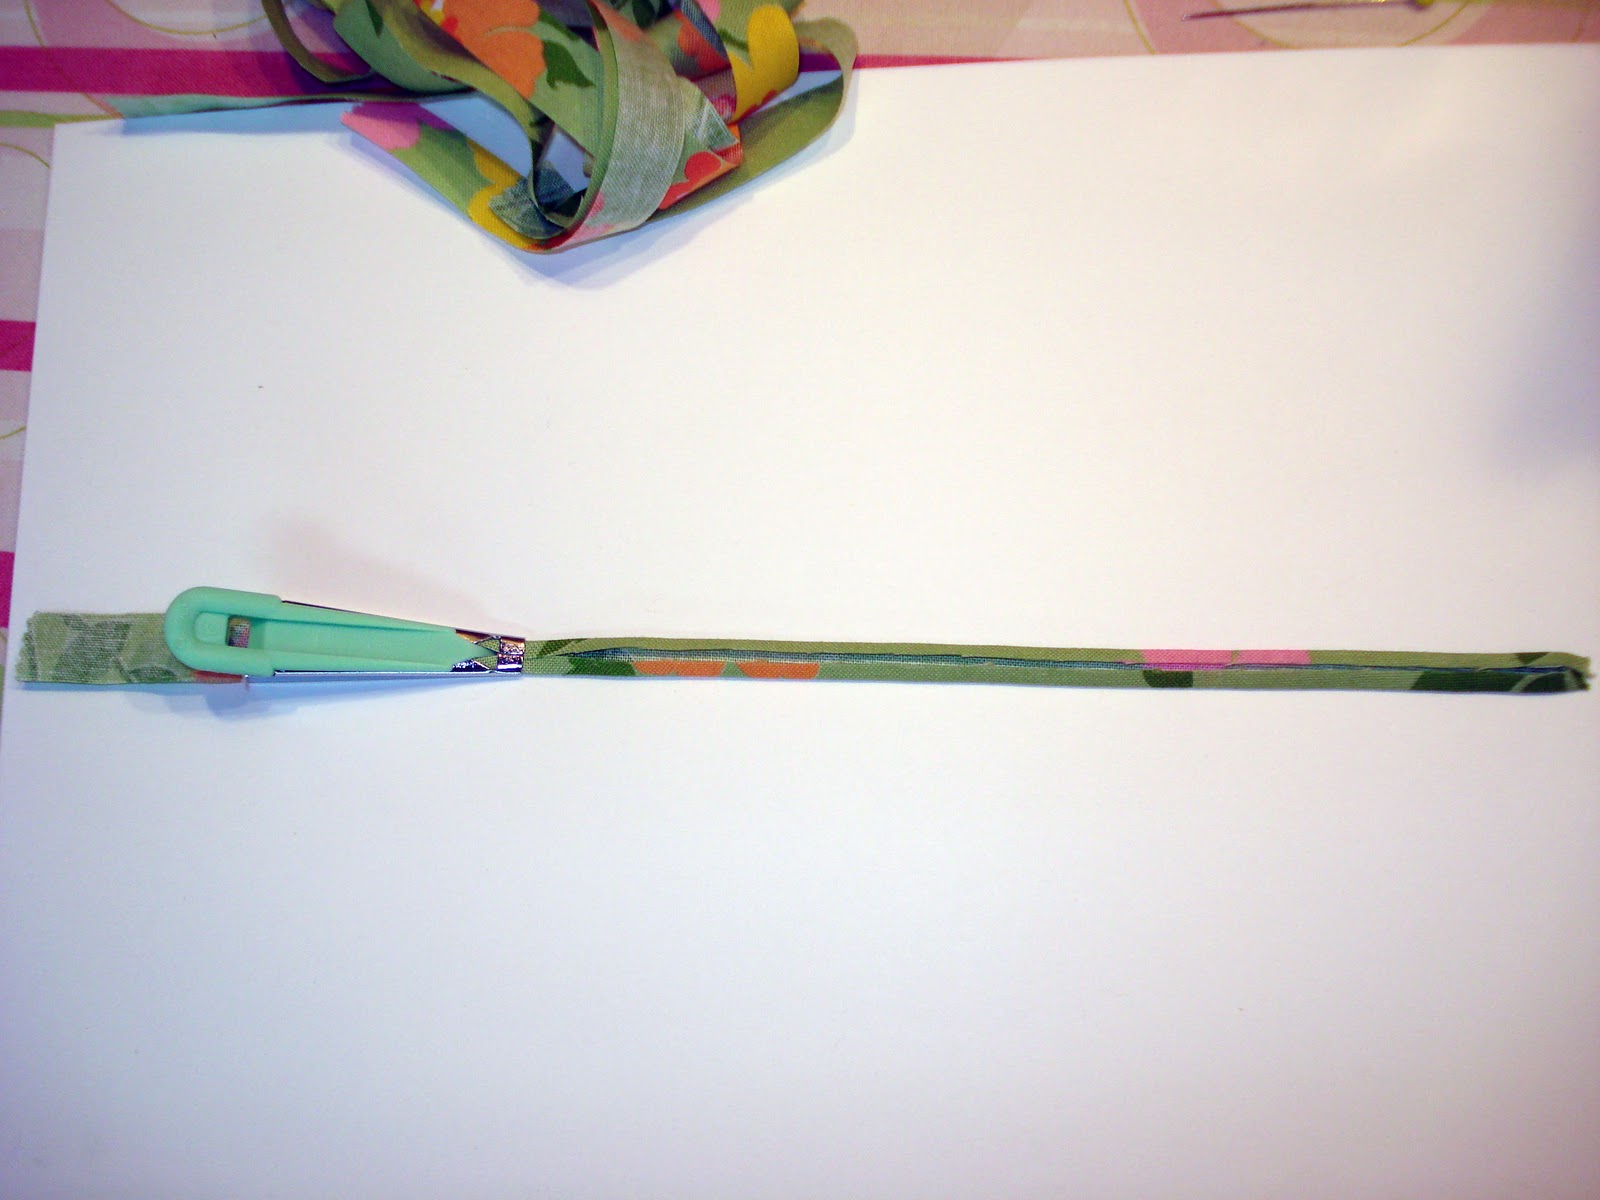
Next, we’ll add the inner border.  Grab the 3 3/4″ strips that you cut from the background.  Take 2 of them, and sew together end to end, to make a double-long strip.

Do this with all 8 strips, so that you have 4 double-long strips – one for each side of the quilt.  Press the seam to one side, and pin to the edges of your quilt center, matching up the seam between the two strips to the seam in the middle of the side of the quilt:

Sew the strips onto the quilt center, using a quarter inch seam:

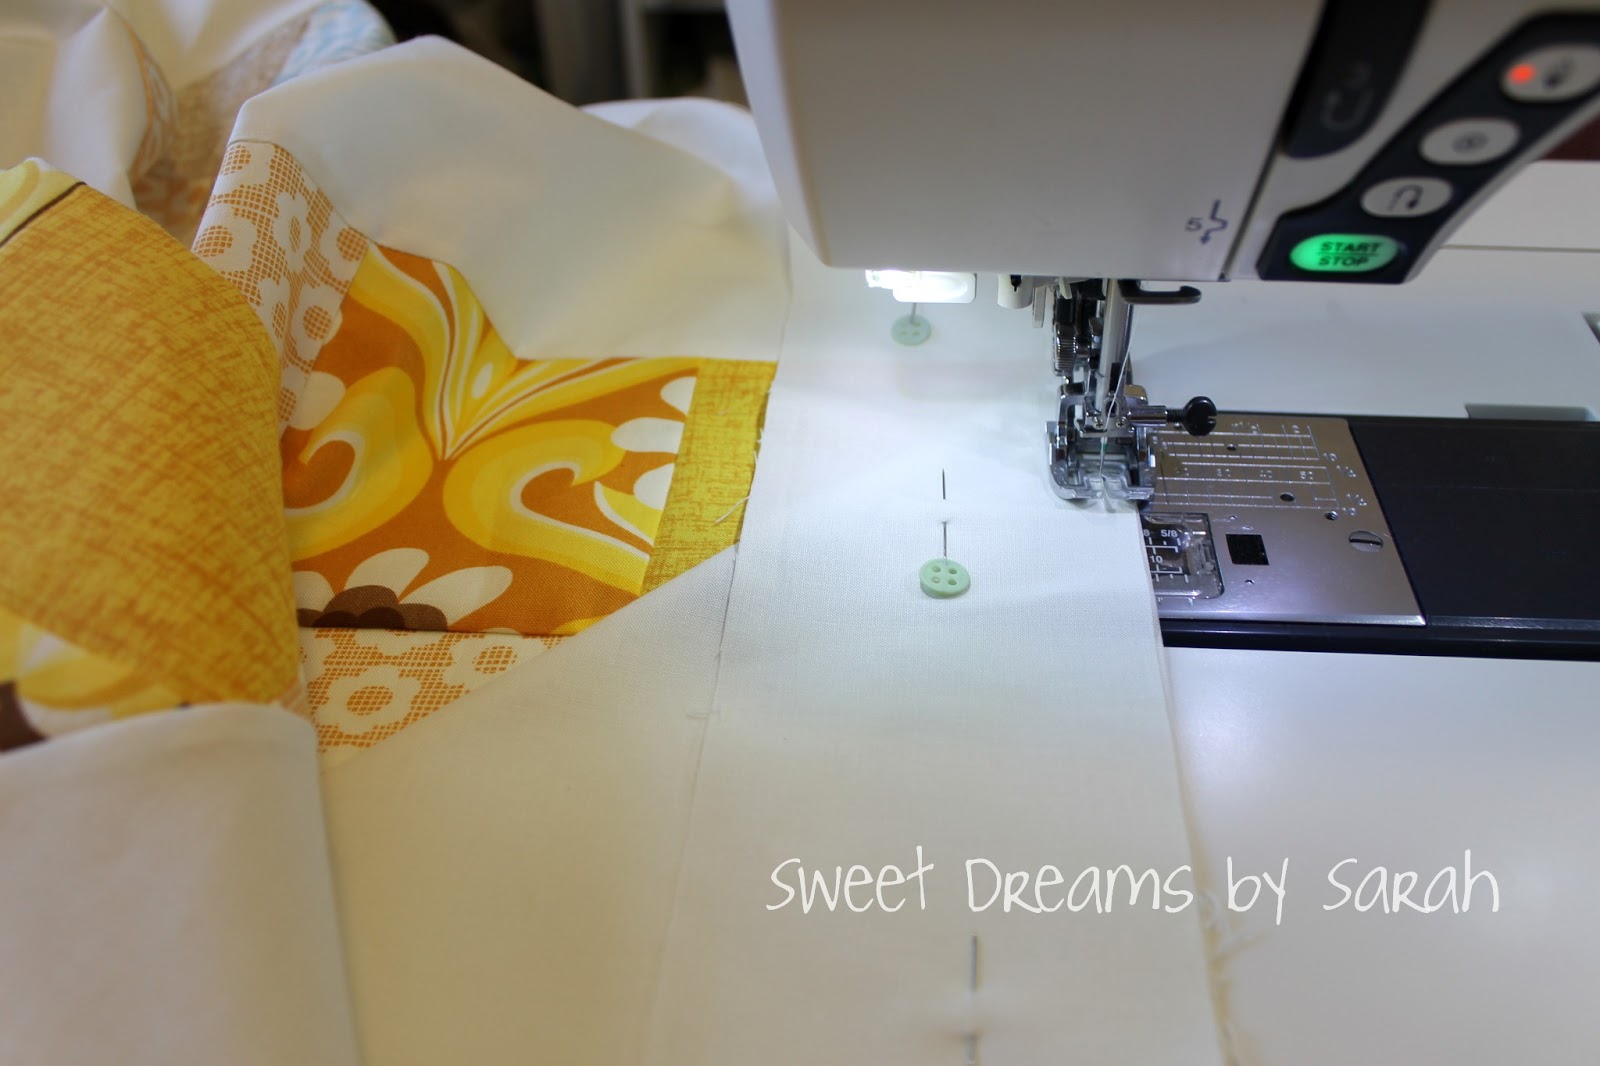
Sew these strips on the right and left side first, pressing and squaring up these sides before sewing the strips on the other two sides:

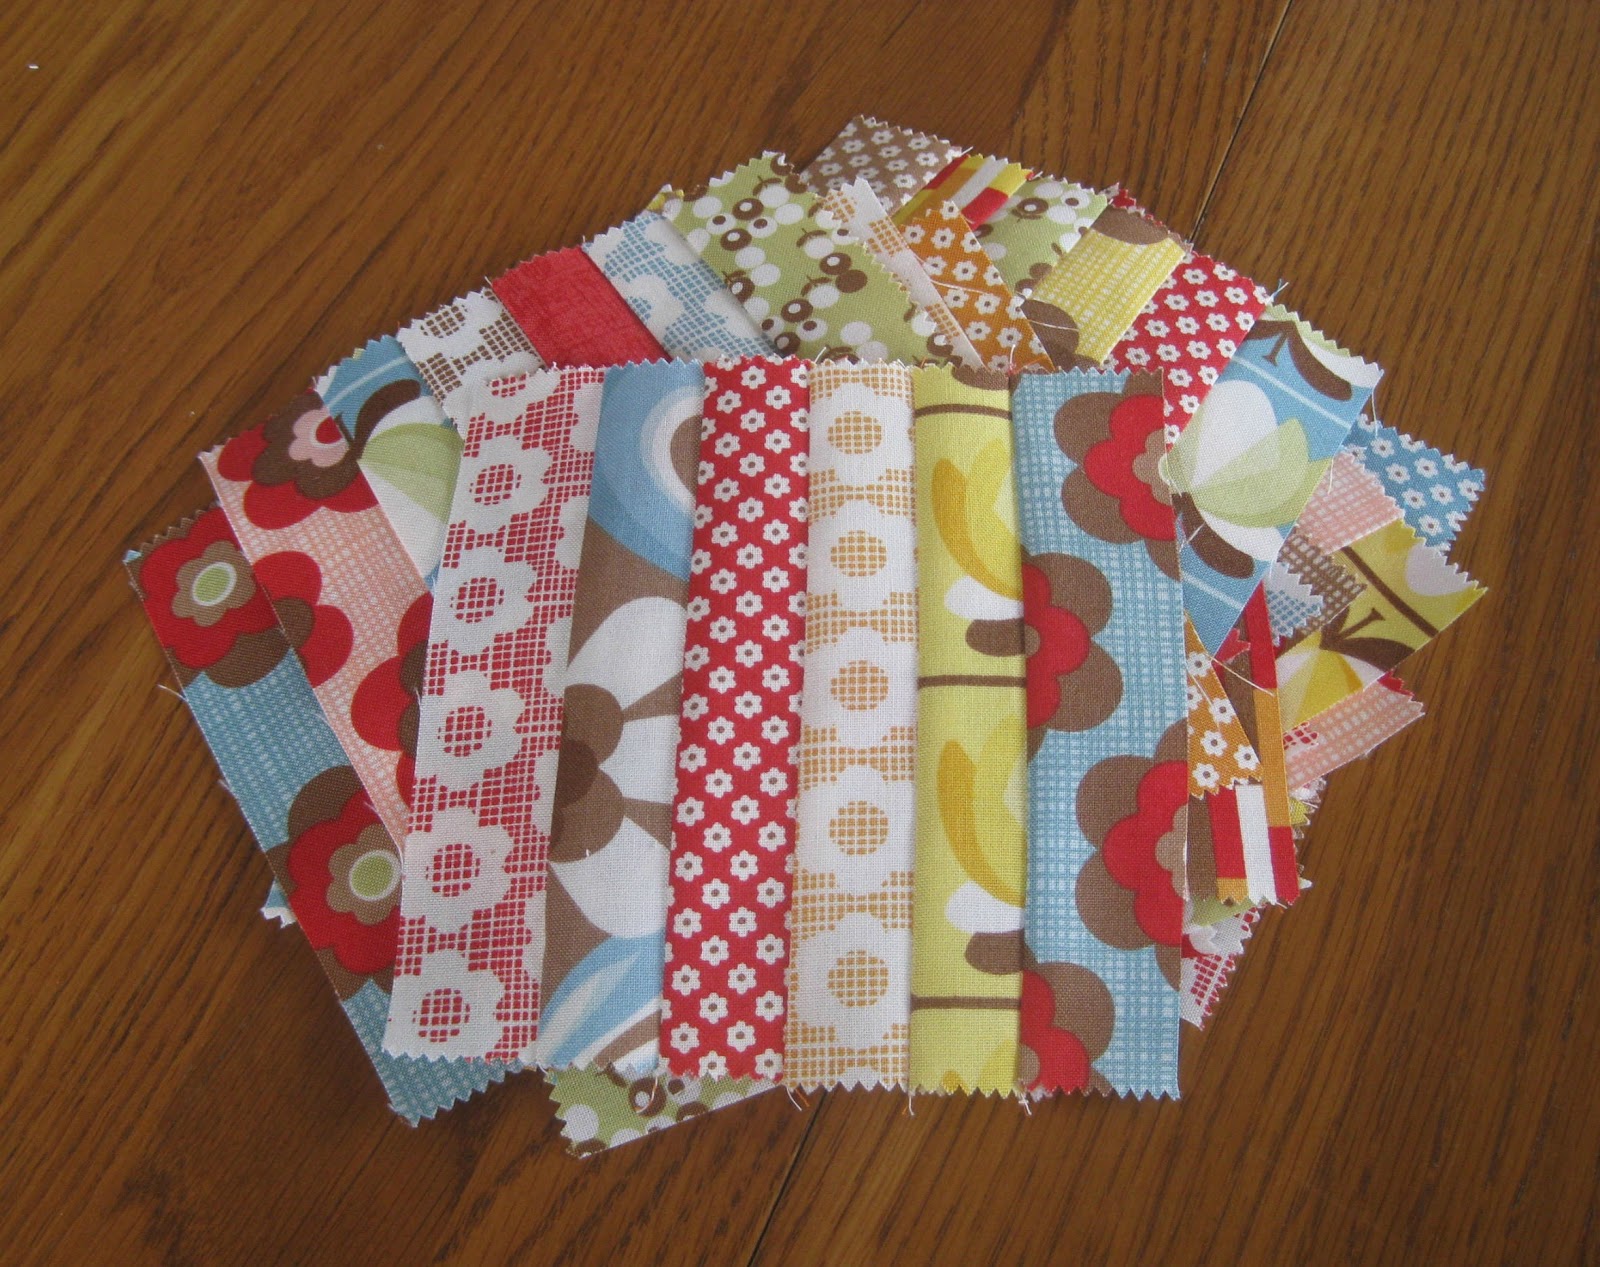
Next, we’ll work on the outer border.  Grab the extra 5″ charms that were left over from your 9-patches.  We need a total of 58, so pull about 5 more pieces from the layer cake – just choose your favorite prints here, as we’re still going for a scrappy look – and cut them into 5″ squares.

Choose 13 of the squares, and sew them end to end in a long strip.  Be sure to use a 1/4″ seam! I loosely arranged my squares by color so that I could control the color distribution a big as I sew them together.

Choose another 13, and sew them end to end as well.  Be sure to press these long strips well, and pin them onto opposite sides of the quilt.  Sew each strip onto opposite sides of the the quilt center.

Next, choose 15 squares, and sew them end to end in a long strip.  Do this twice also, which will give you the final borders to attach to the quilt.

Press it all well, and your quilt top is done!  The leftover layer cake pieces can be used in putting together your backing, or you can simply use yardage.  In this case, I used a few layer cake pieces to connect two pieces of yardage, for a scrappy looking back.

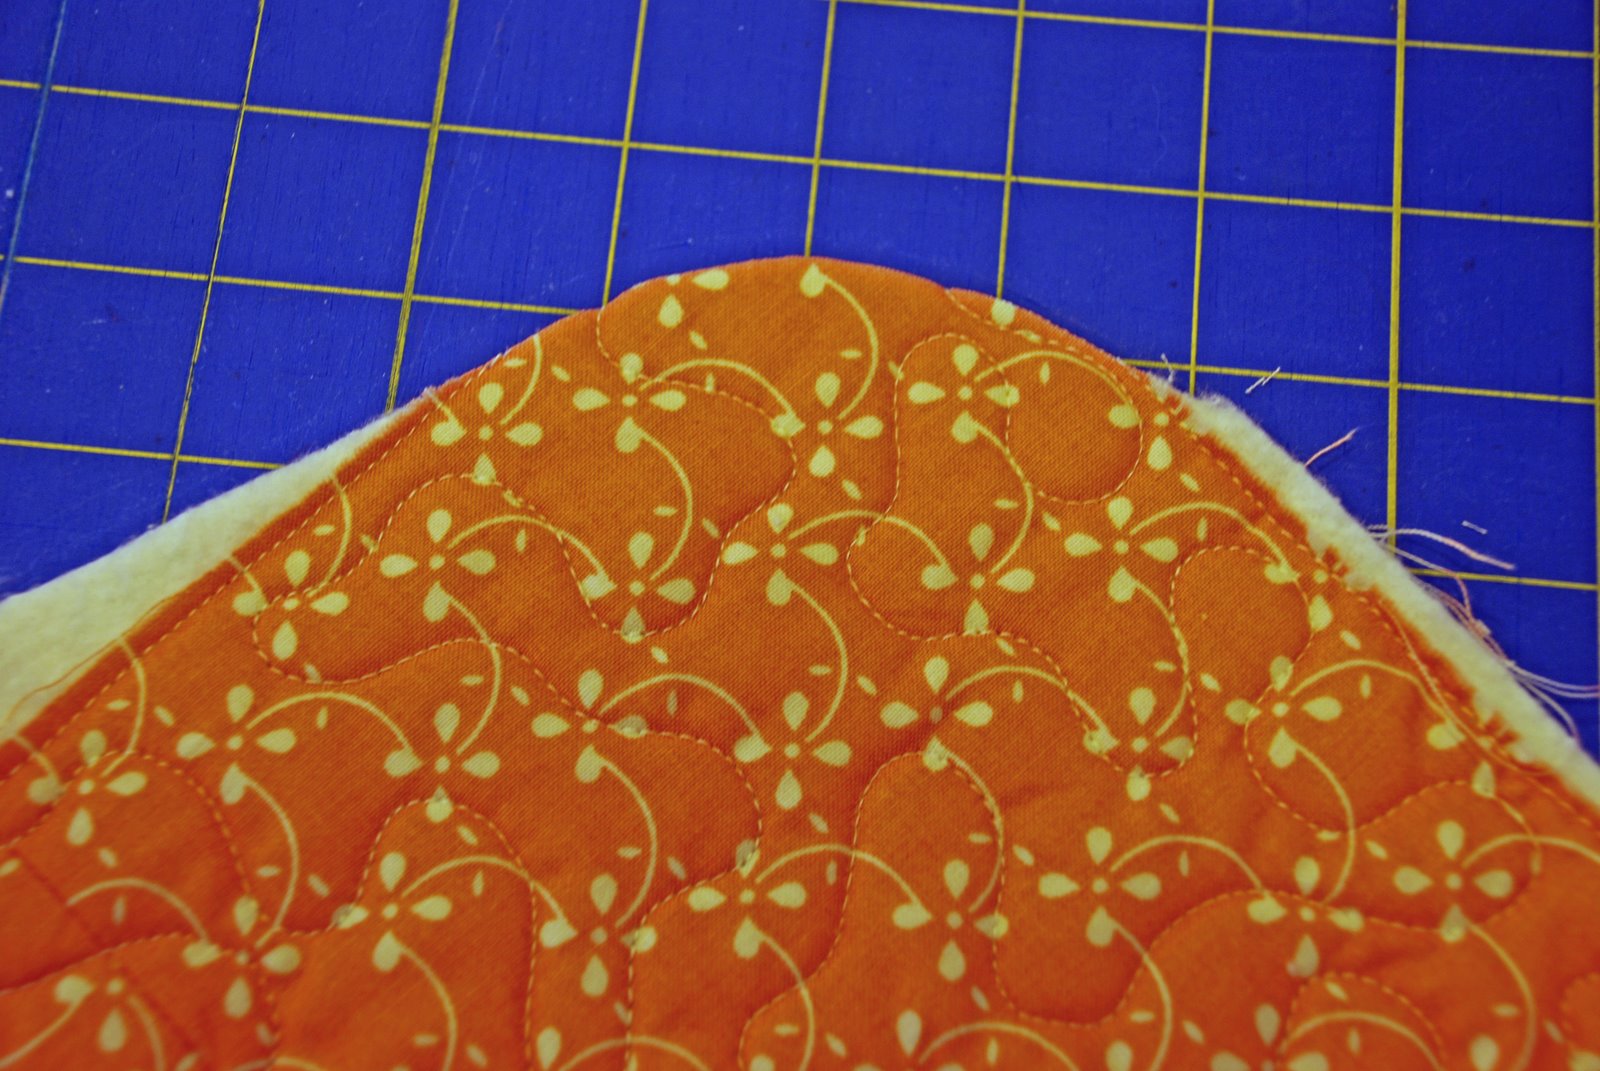
Quilt as desired, and use the 2 1/2″ strips that we cut from the binding fabric to construct your binding strips.  I bound this quilt using my preferred method of initially sewing the binding onto the back of the quilt, and then sewing on the front – both by machine.


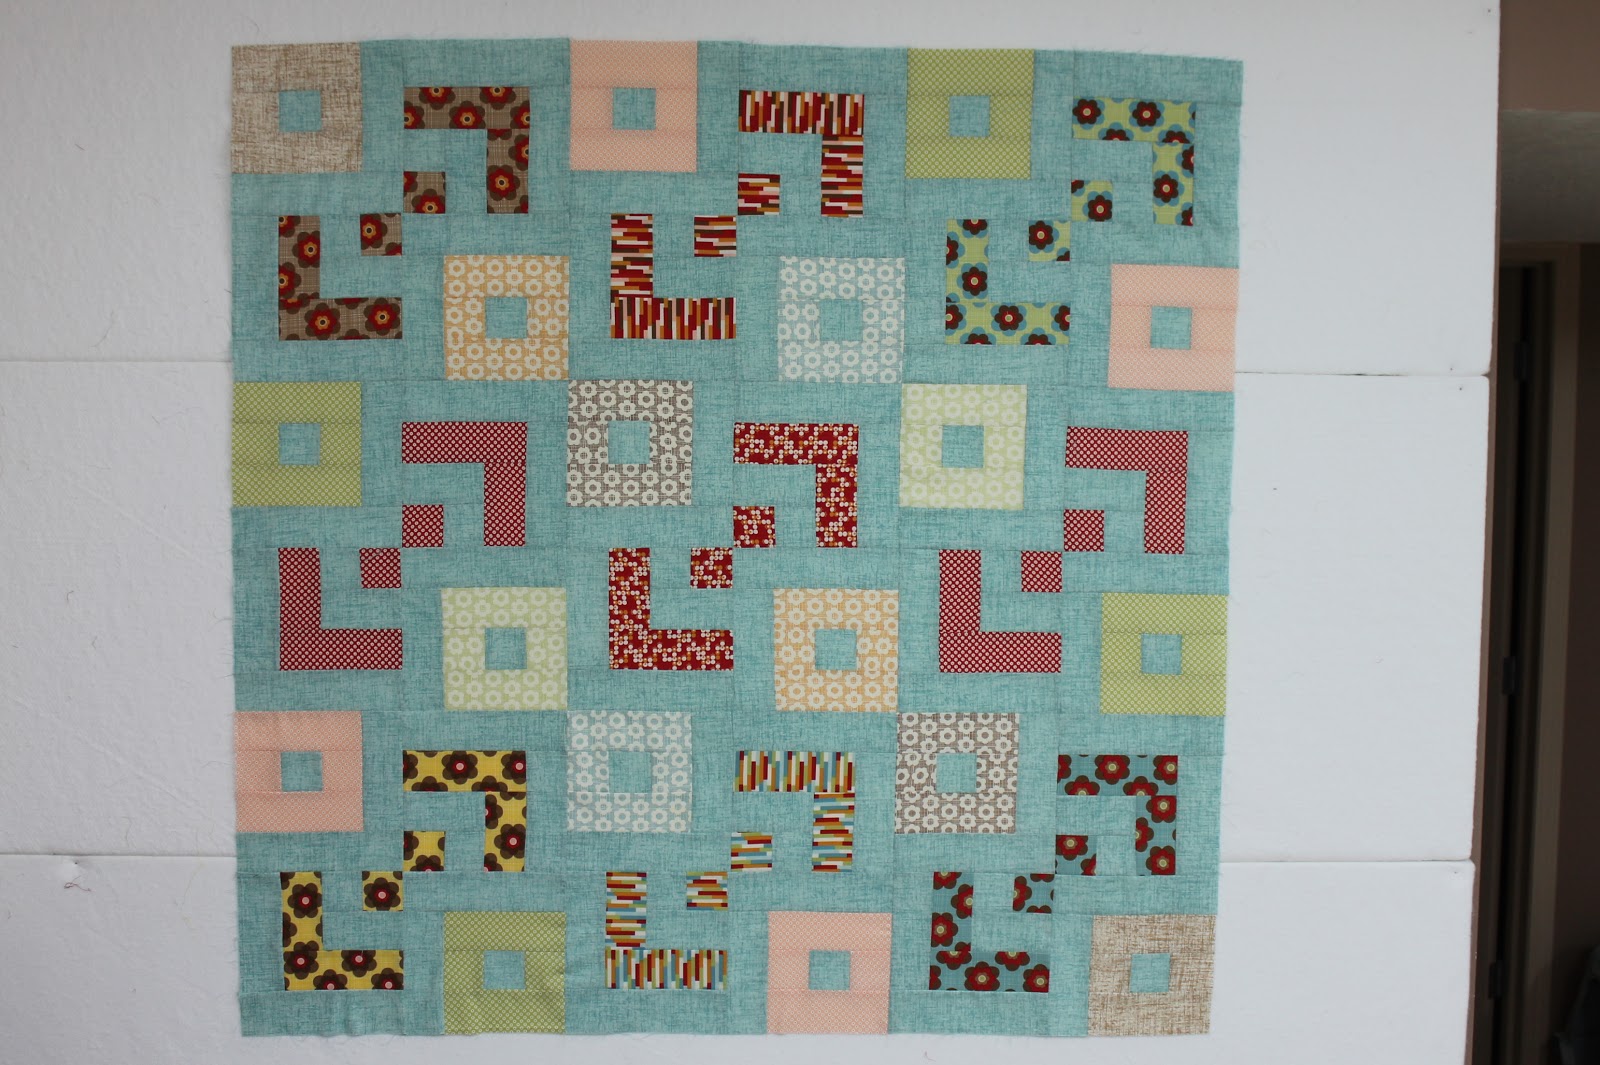
One 67×67″ lap quilt!

This quilt pattern can also be simplified and made a bit smaller by stopping after you finish the quilt center!  I made this version, using a Twirl (by My Sister and Me) layer cake, and it measures approx. 52″ by 52″.

Sarah Connolly
{www.sweetdreamsbysarah.com}

Boxes of Colour Quilt

IMG_8679

Hi everyone, it’s Andrea from Urban Quiltworks, also known as Millions of Thoughts.  I love colour contrast in quilts, and I have created a quick and easy child’s quilt for you to make using Boho by Urban Chiks.   The quilt uses two blocks in its design, with a bit of a play on the bento box pattern.  With the right colour placement, this pattern creates bright pops of colour to capture attention.    Visit me at  UrbanQuiltworks for more photos and ideas about this pattern.  If you do make it or any of my other tutorials, please let me know.  I love to see what you have been creating!

IMG_8680


1 jelly roll –   Boho by Urban Chiks
1.5 yards – 31090-18  Boho Basic Rain – Boho by Urban Chiks
0.5 yards binding fabric  –  31091-18  Boho Bohemian Daisies Rain- Boho by Urban Chiks
3.5 yards backing fabric – 31097-16 Boho Free Spirit Earth – Boho by Urban Chiks

Block A

Choose NINE of the lightest print jelly roll strips to make Block A.   Each jelly roll print chosen will make two of Block A.  (18 blocks total)

For each jelly roll strip cut:
4 – 2.5″ x 2.5″
4 – 2.5 x 6.5″

Blue fabric cut:
18 – 2.5″ squares
18 – 2.5″ x 6.5″ strips
18 – 2.5″ x 8.5″ strips

Block B

Choose NINE strips of the boldest prints from the jelly roll.  Each jelly roll print chosen will make two of Block B.  (18 blocks total)

For each jelly roll strip cut:
2 – 2.5″ x 2.5″ squares
2 – 2.5″ x 4.5″ strips
2 – 2.5″ x 6.5″ strips

Blue fabric cut:
18 – 2.5″ x 2.5″ squares
18 – 2.5″ x 4.5″ strips
18 – 2.5″ x 6.5″ strips
18 – 2.5″ x 8.5″ strips

Separate jelly roll into lights and darks.   Choose the lightest lights and the boldest darks:

Block A – For assembly of Block A, press after each step towards the outside of the block.

Choose one 2.5″ blue square and sew a light printed 2.5″ square to each side of it:

 Sew a 6.5″ matching strip to each side of the block:

 Sew a 6.5″ blue strip to the one side of the block:

Making sure the blue strip is on the LEFT side of the block,   sew an 8.5″ strip to the top of the block:

**Your completed Block A should have a blue frame on outer LEFT and TOP sides.

Block B –For assembly of Block B, press after each step towards the outside of the block.

 Attach a DARK 2.5″ square to a blue 2.5″ square:

Sew a 4.5″ blue strip to the pair:

 Sew a matching 4.5″ dark print as shown:

Sew a matching 6.5″ print as shown,  making sure that the dark print will be at the TOP and LEFT of the block:

 Sew a 6.5″ blue strip to the block as shown:

Sew an 8.5″ blue strip to the block as shown, making sure that the blue strips are on the TOP AND LEFT of the block:

Layout
There are many variations of this quilt.   I chose to use the light prints contrasting with the darks, so that the lights blocks look like they are floating over top of the dark prints.
I made a few extra blocks to have more choice for my layout – this is optional.

Choose two of block A and two of block B (matching block B prints)  and place together to make one large block as shown:

Before sewing each large block of four together,  I recommend playing around with the colours and layout.  I really wanted the prints and the colour to “POP”  so I changed the layout several times before I was happy with my final outcome:

 Sew together the blocks, row by row.   Press towards block A to ensure seams will nest together:

IMG_8685

IMG_8683

Quilt and bind as you wish.  I chose to quilt only the blue fabric using straight line and wavy quilting to make the colour blocks pop and out even more.


A quick and easy baby quilt measuring 48″ x 48″

Andrea Harris
{www.urbanquiltworks.com}

4-Step Flagstone Quilt


Hey everyone! It’s Jera from Quilting In The Rain bringing you this fun quilt top that you can finish in a weekend.

And here’s a sweet treat for all you pre-cut lovers…The West Seattle Fabric Company‘s online shop is offering Boho Quilt Kits, plus 10% off all pre-cuts and kits by typing in the code bakeshop at checkout.

 Grab a Layer Cake or a Boho kit and get this quilt top done within a few hours. Have fun!


For one big quilt measuring 54.5″x63.5″

  • One  Layer Cake (you will need all 42 squares)
  • coordinating thread
  • 1/2 yard binding
  • 3 1/4 yards backing 

OR

For two smaller quilts measuring 36.5″x45.5″ each

  • One  Layer Cake (each quilt uses 20 squares)
  • coordinating thread
  • 3/4 yard binding (will bind both)
  • 3 yards backing (will back both)


    Step 1 – Choose ten pre-cut 10 inch squares and lay them directly on top of one another making sure they are aligned. Using a ruler and rotary cutter, make a diagonal cut through all ten layers. Make sure the cut is similar to the one shown below (i.e. don’t make the cut too slanted).

    After you make the diagonal cut, you will have two stacks of fabric: Stack A and stack B.

    Step 2 –  From stack A, take the bottom piece and from stack B take the top piece. Place them together as shown below. Piece these two pieces together (with right sides facing together, sew a 1/4″ seam allowance). Repeat until stack A and B are all pieced together.

    Tip: For faster piecing, you can chain piece:

    Step 3 –  After you’ve completed Step 2, press open all of the blocks using an iron. Next, stack all of your blocks on top of one another, same as you did in Step 1. Make sure all the blocks are facing the same direction and are aligned. Rotate the stack and then make a diagonal cut again, as shown below.  Once again, you will have stacks A and B.

    Repeat Step 2 with stacks A and B:

    After sewing together, press open with an iron. A finished block will look like this:

    Repeat steps one through three with ten more pre-cut ten inch squares so that you will yield a total of 20 finished blocks. If you want to make the bigger quilt, repeat the steps until you yield a total of 42 finished blocks.
    Step 4 –  To make the smaller quilt, lay all 20 finished blocks in a 4×5 formation as shown below. To make the bigger quilt, lay all 42 finished blocks in a 6×7 formation. 
    To piece the quilt top together, first sew all four blocks together in each row, and then sew each row together. (Using a 1/4″ seam allowance, sew with the right sides facing each other, and then press open with an iron).

    Lastly, baste and bind your quilt. That’s all there is to it!


    Two smaller quilts measuring 36.5″x45.5″ each, or one big quilt measuring 54.5″x63.5″

    The fabric I used in the above images are from Moda’s Marmalade collection. Below I used a combination of Moda’s Sew Stitchy and Noteworthy collection. This pattern is so much fun I’ve used several different collections, so grab a Layer Cake and have fun!

    Happy Quilting 🙂

    Jera Brandvig
    {www.QuiltingintheRain.com}

    Turn On The Charm Placemats


    Hi there, it’s Amanda from Material Girl Quilts and I am so pleased to be back at the Moda Bake Shop today.  I am going to show you how to make a set of 4 placemats, perfect for any wedding shower gift.  And honestly, who doesn’t love a handmade gift?!


    1 charm pack (Boho by Urban Chiks)
    2 yards fabric for background, binding and backing (Boho basic in Meadow)

    Cutting Instructions:

    From yardage:
    Cut three 5″ strips (for blocks) and then sub-cut those strips into 24 5″ squares
    Cut eight 2 1/2″ strips (for binding)
    Cut four pieces approx. 22″ x 16″ (for the backings)

    Choose 36 charms and cut each into four 1 1/4″ x 5″ strips as shown below.

    Assembly Instructions
    
    *seam allowances are always 1/4″ inch
    Using 6 strips from various charms per block, piece 24 – 5″ blocks, as shown below.  **Note do not press your seams until all 6 strips are pieced together.
    

     Press the seams all in the same direction.

    Now select one pieced 5″ block and one 5″ background square. 

     With right sides together, mark a diagonal line across the back of the square as shown below.
    Sew 1/4″ on each side of your marked line and cut on the line between the seams.
    Open them up and you will have two half square triangles.  Press toward the background fabric.

    Trim all of your half square triangles down to 4 1/2″ blocks.  Use the 45 degree line on your ruler to line up with the diagonal seam in the block.

    Now choose 12 trimmed half square triangles per placemat.  The best thing about half square triangles, is that there are so many ways to lay them out and get different results.  I chose to use the layout below.

    Here are just a few of my other favorite layouts with these blocks.  Play around with yours to see what you like best.

    Once you have selected your layout, piece the placemat tops together, pressing your seams in alternating directions per row.

    Layer your quilt top, batting and backing and quilt as desired. 

    You will need two 2 1/2″ strips of binding per placemat.

    Four placemats approximately 12 1/2″ x 16 1/2″ perfect for any new couple in your life!  Now maybe they will invite you over for dinner 🙂

    If you make any placemats using this tutorial, I would love to see them!  You can also check out my blog for other tutorials.

    Amanda Castor
    {Material Girl Quilts }

    Summer Dreamin’


    Hi there! It’s me again, Kaye from Miss Print! I’m so happy to be back here at the Bake Shop with my second tutorial. It’s getting pretty cold here in many parts of the northern hemisphere, so why not make a quilt to remind yourself of the beautiful colours and warm evenings of summer? This is a quilt to snuggle, cuddle, and dream under.

    2 layers cakes – I used Dream On by Urban Chiks
    1 bella solids layer cake – I used Snow
    4 7/8 yards for backing – I used Groovy in Blue Moon from Dream On
    7/8 yard for binding – I used Old School in Grass from Dream On

    Select 20 squares from each of your Dream On layer cakes – the 20 squares from each layer cake should be matching, as you will need 2 matching printed squares to complete each block. You will also need 40 of the squares from your solid layer cake for a total of 80 layer cake squares.

    Divide your layer cake squares into piles containing your two matching printed squares and two solid squares – these four squares will be the basis for each block.

    The following directions are for one block:

    On the backside of each solid square, draw a line down the middle from each point (i.e. top right point to bottom left point, and top left point to bottom right point) so that you have an X traversing the whole of the square.

    Pair up one solid square and one printed square right sides together. On both sides of the lines you just drew, sew a 1/4″ seam.

    Now it’s time to cut your square – this will yield 8 half square triangles (HSTs):

    Do not cut down your diagonal lines quite yet. Cut your square in half so that you are left with two 10×5″ pieces.

    Now cut each 10×5″ piece in half so that you are left with four 5×5″ pieces.

    Cut down the diagonal line on each 5×5″ square. Press your seams toward the printed fabric.

    Repeat with your remaining solid and printed square. Each finished HST should measure 4.5″ square (trim if necessary).

    Lay out your 16 HSTs as shown in the picture below.

    Sew your HSTs together row by row.

    Sews the rows together to form your block. Look at that… your block is done! Your block should now measure 16.5″ square (to finish at 16″ square).

    Repeat the above steps with the rest of your block piles.

    Lay your blocks out in a 4×5 grid and sew into rows. Now sew your rows together and your quilt top is done!

    Sandwich, baste, quilt, bind and you’re done!

     Finished quilt will measure 64×80″.

    Since there are enough printed layer cake squares left to make a second quilt (obviously you will need to double the rest of the ingredients), why not swap squares with a friend so that you can each make two quilts but with different fabrics? Or get a little funky and incorporate some of your extra squares into a pieced back? I’m sure you won’t be short on ideas for how to use that awesome leftover yumminess!

    Kaye Prince
    {Miss Print}

    Spring Dreams

    I’m back for round two in the Moda Bake Shop! I’m dreaming of throwing as many little posies into these baskets as I can and I’d really love it if you could join me.
        – Marlene Biles – Sipiweske Quilts


    1 – “Dream On” layer cake by Urban Chiks
    2 yards background fabric
    .75 yards binding fabric (adjust amount if making bias binding)
    3 yards of backing fabric
    1 yard fusible web (Heat and Bond Lite)
    55” x 55” batting


    72 Buttons (assorted sizes)


    From the layer cake, choose 3 or 4 green prints and set these aside to use for stems and leaves. Also choose 11 additional prints for the borders and set aside. Flower shapes will be cut from some of the remaining squares so if there are a few special ones that you want to use for flowers only, set these aside also.

    Choose 12 prints from the layer cake to use for the basket blocks.
    From each of these 12 prints, cut 1 – 4 1/2” x 10“ strip and 1 – 5 1/2” x 10“ strip. Set the 5 1/2” strips aside.

    Sub-cut 9 of the 4 1/2” x 10” strips as follows:
    * 1 – 4 1/2” x 4 1/2” square. Cut this square twice on the diagonal to make the basket triangles (Unit “B”)
    * 1 – 2 1/2” x 5 1/2” strip, then sub-cut it into 2 – 2 1/2” x 2 1/2” squares (Unit “A”) for basket. You will have a 1/2” x 2 1/2” strip leftover to add to your scrap stash)
    * 1 – 2” x 5 1/2” strip (set aside for border)

    Sub-cut the remaining 3 – 4 1/2” x 10“ strips as follows:
    * 2 – 4 1/2” x 4 1/2” squares. Cut each of these squares twice on the diagonal to make the basket triangles (Unit “B”). You will have a 1” x 4 1/2” strip leftover to add to your scrap stash.


    Using all 12 of the 5 1/2” x 10“ strips that were previously set aside:
    Trace 12 scalloped handles (Unit “C”) from the attached template onto the paper side of the fusible web.

    Cut and trim shapes roughly 1/8” – 3/8” from traced edges.

    Fuse a handle shape (Unit “C”) to the wrong side of each of the remaining 5 1/2” x 10” strips ensuring that the top edge of the handle shape is very close to the edge of the fabric and as far to the right side of the fabric as possible (photo shows right side of fabric for demonstration purposes only).

    Cut out the handle shapes on drawn lines.  (See diagram, prior to fusing to ensure proper placement).

    Once the handles have all been cut out and using the remaining fabric pieces from this same strip, cut the following:

    *cut 2 – 2 1/2” x 2 1/2” squares (Unit “A”) for baskets;
    *cut 1 – 1 1/2” x 5 1/2” rectangle (set aside for border).

    Recap:

    From each of 9 of the 12 squares you will have cut:

    *1 – scalloped handle
    *4 – 2 1/2” x 2 1/2” squares
    *1 – 1 1/2” x 5 1/2” strips for border
    *1 – 2” x 5 1/2” strips for border
    *1 – 4 1/2” x 4 1/2” squares, cut twice on diagonal (36 triangles).

    From each of 3 of the 12 squares you will have cut:

    *1 – scalloped handle
    *2 – 2 1/2” x 2 1/2“ squares
    *1 – 1 1/2” x 5 1/2“ strips for border
    *2 – 4 1/2” x 4 1/2” squares, cut twice on diagonal (24 triangles).

    Background Fabric –

    Basket background:

    Unit “D” – Sides
    *cut 4 – 2 1/2” x 42” strips
    – sub-cut into 24 – 2 1/2” x 7” rectangles

    Unit “E” – Bottom
    *cut 1 – 5” x 42” strip
    – sub-cut into 6 – 5” x 5” squares
    – cut once on the diagonal (12 triangles)

    Unit “F” – Handle Foundation:
    *cut 2 – 11” x 42” strips
    – sub-cut into 6 – 11” x 11” squares
    – cut once on the diagonal (12 triangles)

    Unit “G” – Side and Corner Triangles (see diagram below for layout):
    *cut 2 – 15 1/2” x 42” strips
    – sub-cut into 3 – 15 1/2” x 15 1/2” squares
    – cut twice on the diagonal (12 triangles)

    Arrange the 2 1/2” x 2 1/2” squares (Unit “A”) and the cut triangles (Unit “B”) into twelve scrappy baskets.
    Position the 2 1/2” x 7” rectangles (Unit “D”) along basket edges as shown in above diagram.

    Sew triangles (Unit “B”) for the feet of the basket to the 2 1/2” x 7” background strips (Unit “D”) as shown in the diagram. 
    Sew the basket triangles (Unit “B”) and squares (Unit “A”) together in diagonal rows. 
    Sew one side unit (D and B) to one side. Press. Repeat for the other side to complete the basket unit.
    Trim the top edge of the basket as shown, ensuring that the 1/4” seam allowance is maintained along the top.
    Trim the bottom edge of the basket in the same manner, ensuring that the 1/4” seam allowance is once again maintained.

    Fold one of the previously cut background triangles (Unit “E”) in half and gently crease.  Line the crease up with the centre point of the basket base.  Pin and stitch in place.  Repeat for all 12 baskets. Press.

    Handles – Remove backing from fusible web on the handle (Unit “C”) and centre on the 1/2 square triangle background unit (Unit “F”).  Press in place and blanket stitch around both sides of the handle.
    Stems – Each basket will require a 2 1/4”, a 3” and a 3 3/4” stem made from bias strips (adjust lengths as needed). There are two methods I use to make stems. For the fusible method cut fusible web 3” x 10” and press to the wrong side of a 10“ x 10” green print square. Cut into 1/4” strips. Cut to desired lengths and press in place to the basket foundation unit. Using matching thread, blanket stitch down both sides of stem.

    If you prefer to use a bias tool, adjust your measurements as needed.  I cut 1/2” strips and used a 1/4” bias tape maker as shown in the above photo.  Pin in place and using matching thread, blanket stitch down both sides of stem.
    Flowers and Leaves – Trace the required number of shapes onto fusible web and fuse to wrong side of chosen prints.  Cut out on drawn lines and position as shown in cover photo.  Fuse in place.
    Sew the completed Unit “F” appliqued blocks to the basket units and gently press seams. Square up the blocks to measure 10 1/2” x 10 1/2”.
    Lay out the prepared blocks and side and corner triangles as shown in the diagram below. Sew together in diagonal rows and then sew rows together, carefully matching the seams for each row.

    Borders – From the original 12 basket squares you should have cut and set aside the following:
    *12 – 1 1/2” x 5 1/2” strips;
    *12 – 2” x 5 1/2” strips.
    Using the 11 additional 10” x 10” squares from your layer cake and cut as follows:
    – cut the 10” square in half creating 2 – 5” x 10” strips;
    – stack these strips together, aligning all edges and cut into 8 – 2 1/2” x 5” strips.
    Randomly take all of these strips and start sewing them into: pairs, fours, eights, and so on, until you have four strips that measure the length of each of the four sides of the quilt. Some of the strips will be 5 1/2” instead of the 5” and these can be cut down prior to finishing.
    I created four – 5” x 5” squares to use as corner squares so that my corner seam lined up with the quilt corners. You could also choose to make two strips the length of the top and bottom edges of the quilt and stitch these in place and then measure the remaining two sides and cut two more strips that measurement.
     
    Binding – Measure the side of your quilt and multiple by four.  Divide this number by 42” (width of fabric) and using the number you get, round up to the nearest whole number.  This is the number of 2 1/4” strips you need to cut for binding strips.  Using a diagonal seam, stitch these strips into a long continuous unit.  Press strip in half with wrong sides together.  Stitch to the right side of the quilt, aligning raw edges as you go and mitering corners as you come to them.  Turn edge over to the back side of the quilt and hand stitch in place.
     
    Make a flower label and attach with pride!  Enjoy your baskets and dream for an early Spring!!!


    One very dreamy 51″ x 51″ quilt.

    I have also made two of these blocks into a small tablerunner and have used rick rack stems instead of bias stems and yo-yo flowers instead of appliqued ones.  Stop over and have a peek here to see the different option and if you leave a comment on that post you might also win the tablerunner!

    Marlene Biles
    {sipiweskequilts.blogspot.com}

    Vintage Dreams Quilt


    Hi there!  I’m Amy from Amy’s Creative Side, where I’m gearing up for the next installment of Blogger’s Quilt Festival.  Stop over and learn what it’s all about. I’m excited to share my quilt project here with you today (it’s my first MBS tutorial!!).  These soft prints from Urban Chiks inspired me to look through vintage quilting books and design this quilt, with a nod to our rich quilting heritage.  I hope you give it a try, and share your pictures!

    Dream On  Layer Cake
    5/8 yard Grass 31064-24 for center squares
    2 yards Blue Moon 31065-14 for triangles
    2 yards Crush 31063-21 for inner border
    2 3/4 yards Pink Passion 31061-11 for outer border
    3/4 yard Grass 31062-13 for binding
    6 yards Moonlight Blue 31067-16 for backing


    To make 30 blocks, select 30 layers from your Layer Cake, and cut 4 – 4 3/4″ squares from each.  I chose the layers with the most contrast to the yardage that I added.

    Cut 30 – 4 3/4″ squares from the green floral

    Cut 60 – 4″ squares, then cut on the diagonal once.

    Cut 30 – 7 1/4″ squares, then cut on the diagonal twice.

    Lay out pieces in block formation.

    Working on the diagonal, using 1/4″ seams, sew the 3 squares together in the center, and the quarter-triangles on both sides of the individual square.

    Next, add the half-triangle to the corners.

    Trim the center piece, pin and sew the sides in place.

    Trim and square each block to 12 1/2″ – using my 12 1/2″ ruler, I lined up my center points at 6 1/4″ to ensure square blocks.

    Lay out your blocks 5 across and 6 down.  Sew the blocks into rows, and the rows into a complete quilt top.

    Cut borders from the length of fabric, at 3 1/2″ for the inner, and 6 1/2″ for the outer border.  Measure through the center of the quilt top for the best fitting borders.  Add the borders to the sides, then top and bottom.

    Quilt, bind and enjoy your new quilt!

    1 – 78″x 90″ Vintage Dream Quilt

    What do you think?  Any Vintage Dreams in your future?  I hope so!
    Happy Quilting!
    Amy

    Summer Pinwheels


    Hi! We are two sisters who love fabric. Our company is called The Sproutz Store. Check out our blog for great ideas and our ETSY shop for awesome patterns, and fabrics! We hope you enjoy this tutorial for pinwheels. We think they work great for a fun summer centerpiece.


    1 layer cake (we used “Dream On” by Urban Chiks)
    Heavy weight double-sided fusible interfacing
    Dowel
    Pushpin
    Eraser (the kind that fits on the end of a pencil)


    Button


    1. Choose (2) 10″ squares from your layer cake for each pinwheel you would like to make.

    2. Trim interfacing so it is slightly smaller than your 10″ squares of fabric. We trimmed ours to 9 3/4″.
    3. At the ironing board, lay one fabric square right side down and center your interfacing on top. Put your other 10″ fabric square on top of the interfacing right side up. Press until the interfacing is securely attached to the fabric.

    4. Trim your squares so that all edges (bottom fabric, interfacing, and top fabric) are even. Make sure you still have a perfect square.

    5. From each corner, measure 4 1/2″ diagonally to the center and mark. Repeat 3 times. These will be your cutting lines.
    6. Cut on lines.

    7. Bring every other corner to the center to make your pinwheel shape. Stick a pushpin through the center to secure all four corners.
    8. Put your eraser on the end of the dowel and push the pin through. Bend the pin down or trim so it won’t be too pokey. If your eraser won’t stay on the dowel, use some hot glue to secure.


    9. Add a button to the center of the front of your pinwheel. We used hot glue to secure the button.

    You are done!

    Note: You can also use a charm square to make smaller pinwheels. Use a medium to heavy weight double-sided fusible interfacing. You will need to measure and mark 2 1/2″ diagonally from each corner and then trim. You could also trim down some Layer Cake squares to make various sized pinwheels.


    1 pinwheel.

    A Sweet Baby Quilt


    4 Charm Packs-Sweet by Urban Chiks

    1/2 yard fabric for binding
    Batting that measures at least 47″ x 56″
    2 2/3 yards of backing fabric

    First, make your template. To do this, I used the cardboard that came in the back of the charm pack. How handy is that? Measure in one inch in from each side at the top and make a dot. Connect that dot to the lower corners and cut out your template.

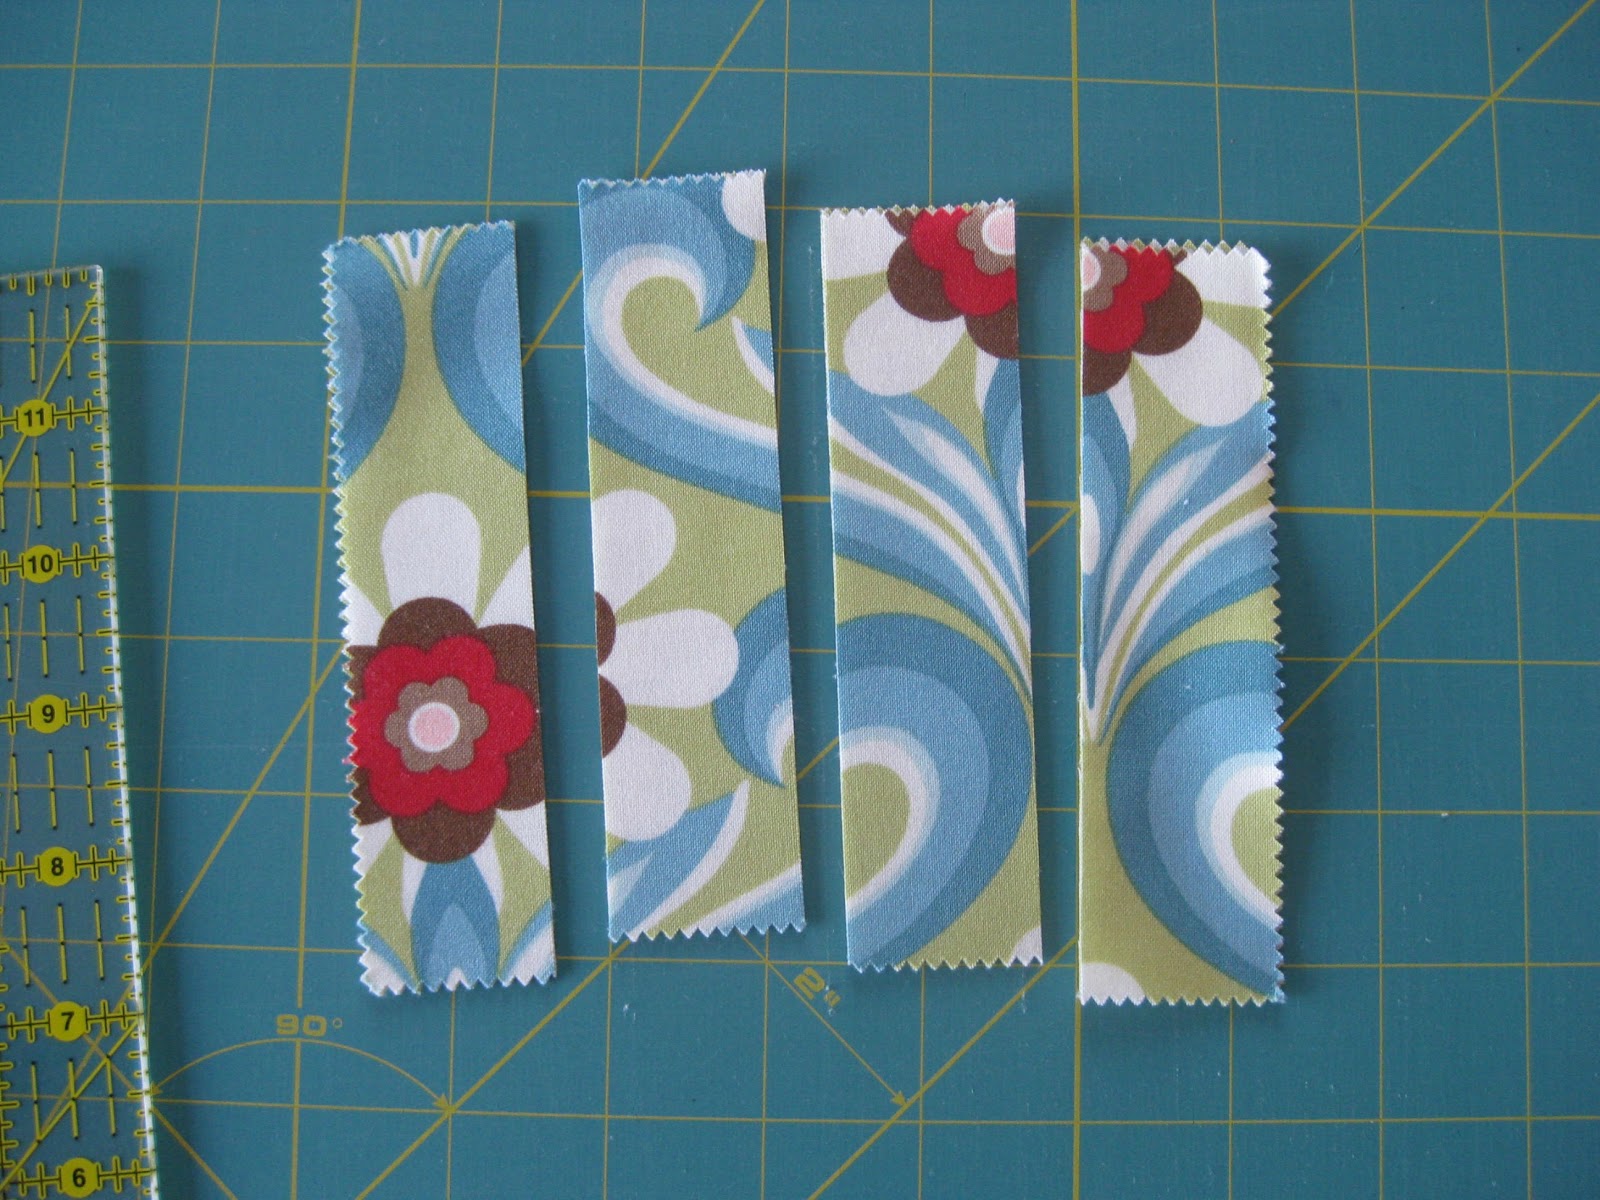
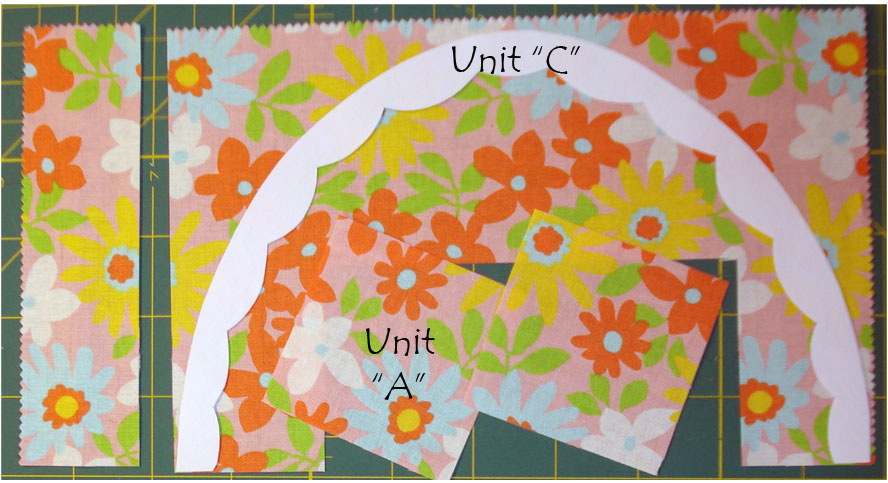
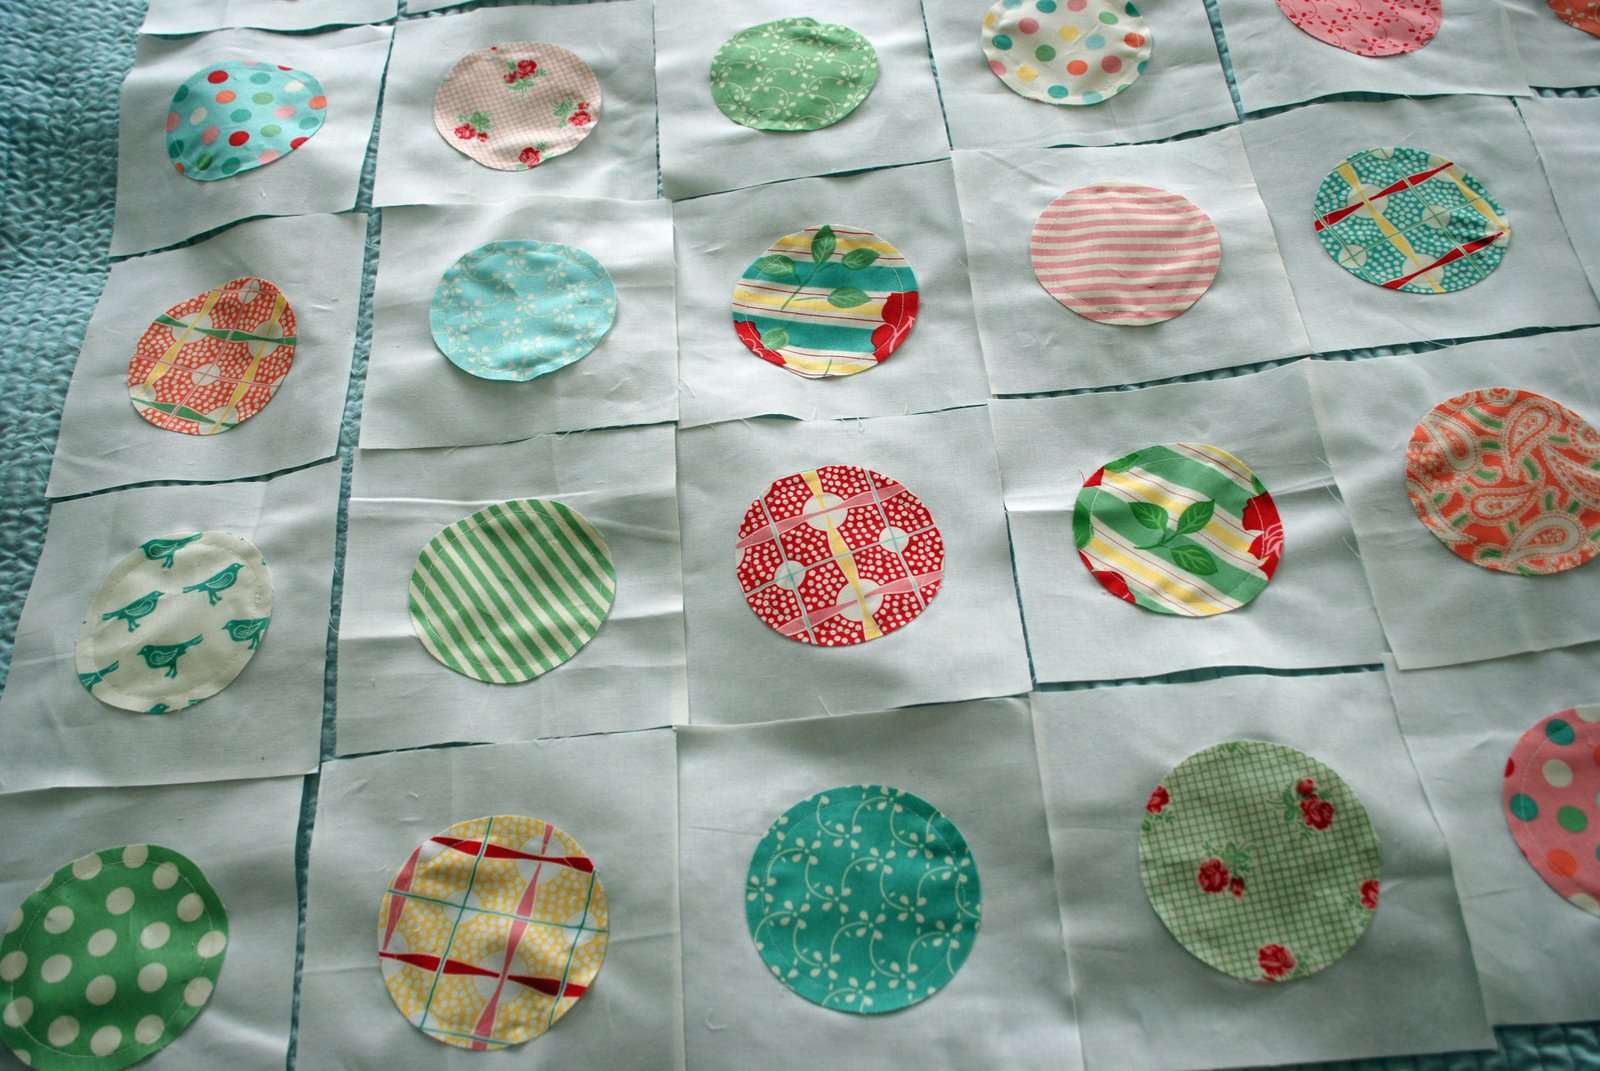
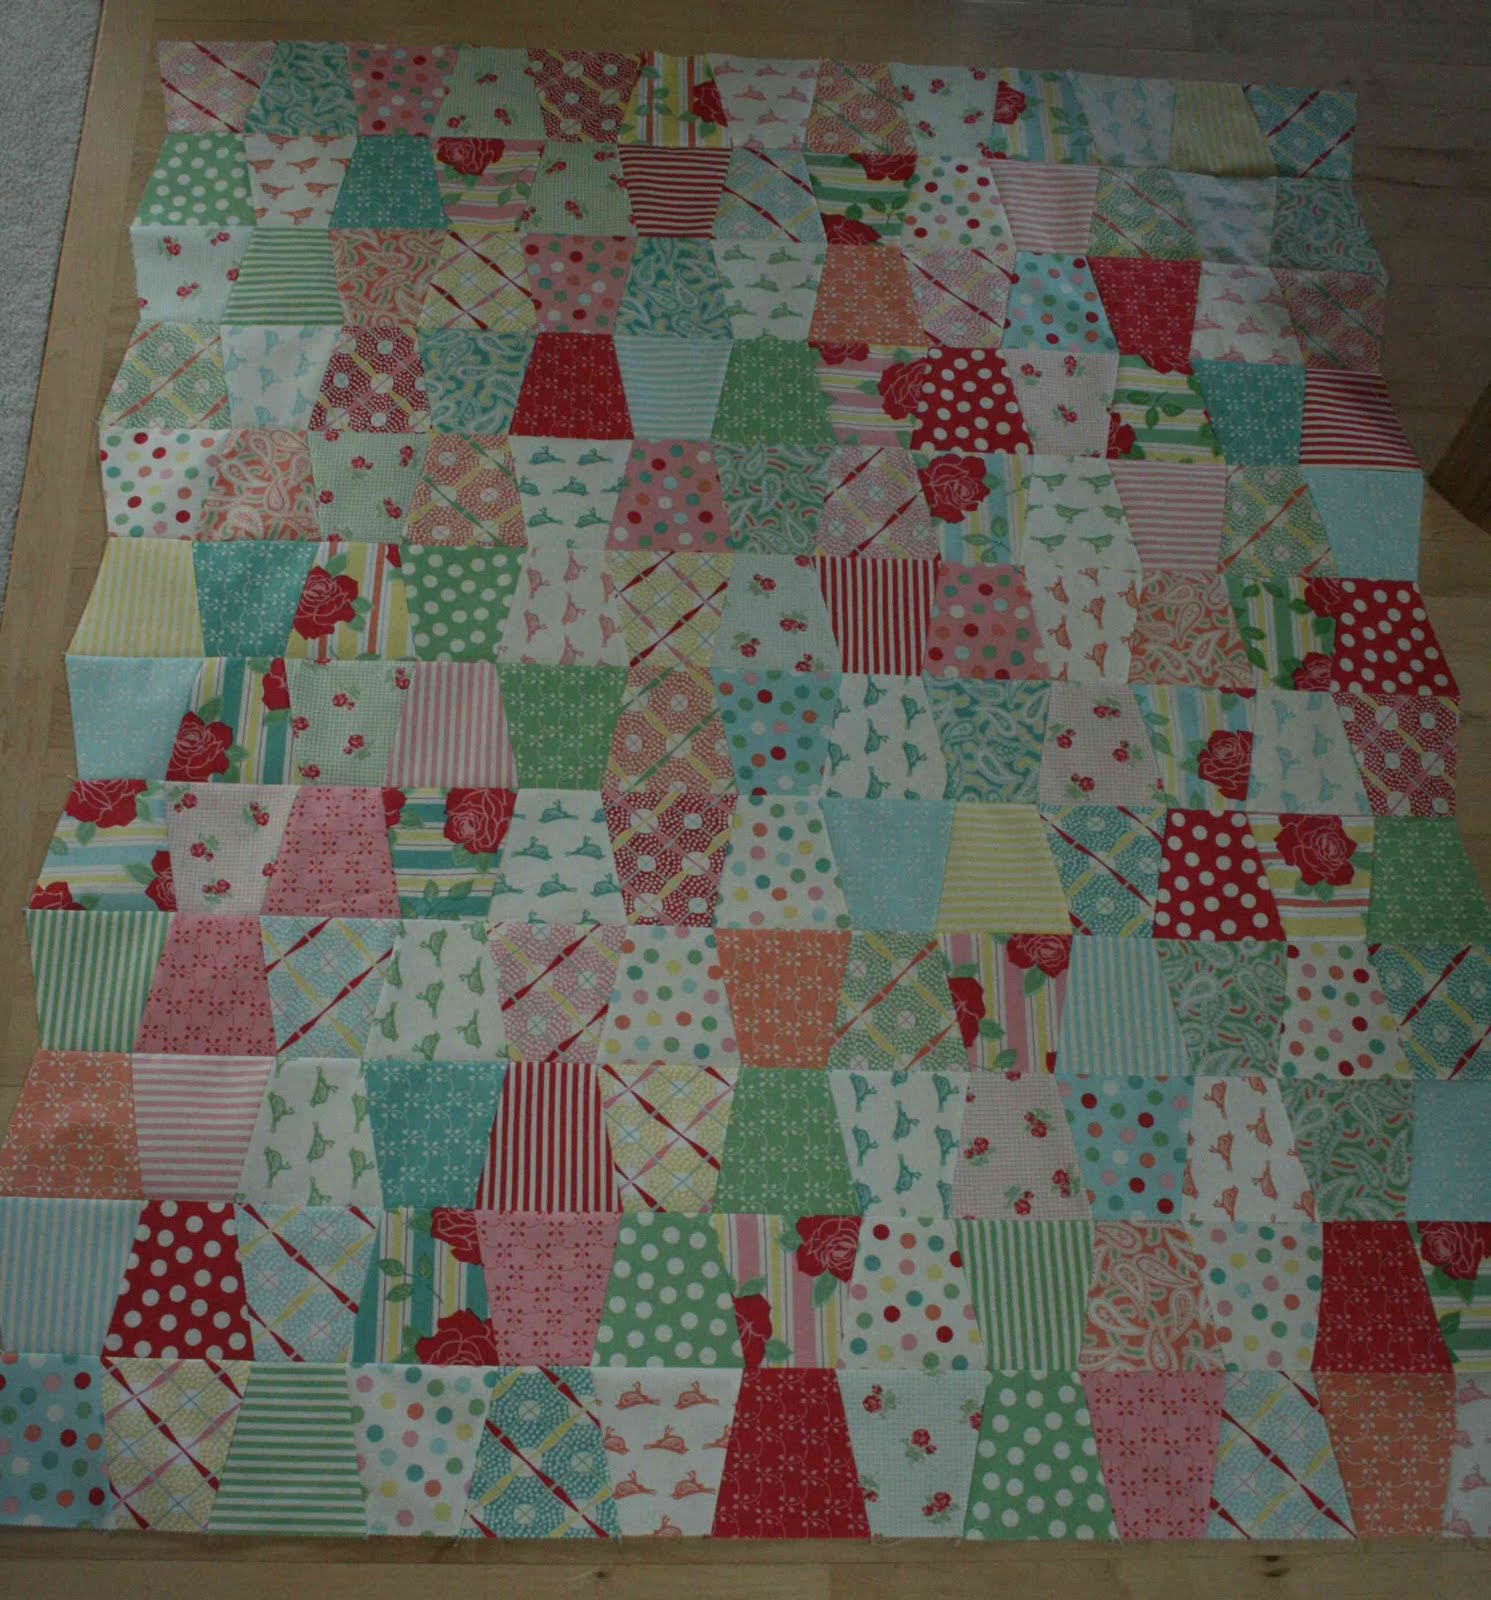
    Using your template, carefully cut out your blocks. You will be using all but 4 charms, so if you care to use those for a different project, set them aside now. You can cut up to 4 charms at a time-any more than that seems to compromise accuracy.

    Chose any two blocks…


    and prepare to sew them together. They will need to be offset the slightest bit, so when the seam is opened up, the blocks will form a straight line.
    Press the seam open. Repeat making rows 13 blocks wide. Make 12 strips of 13.

    Layout the rows and make sure they are in a pleasing arrangement. A digital photo really helps for this step.

    Take the first two strips, line up the seams, pin at each intersection and sew.
    Open up the seam and press.
    Continue this until you have sewn all the rows together.
    Trim the edges of the quilt square. (You could eliminate the trimming step and bind the angled edges, which would require bias binding.)

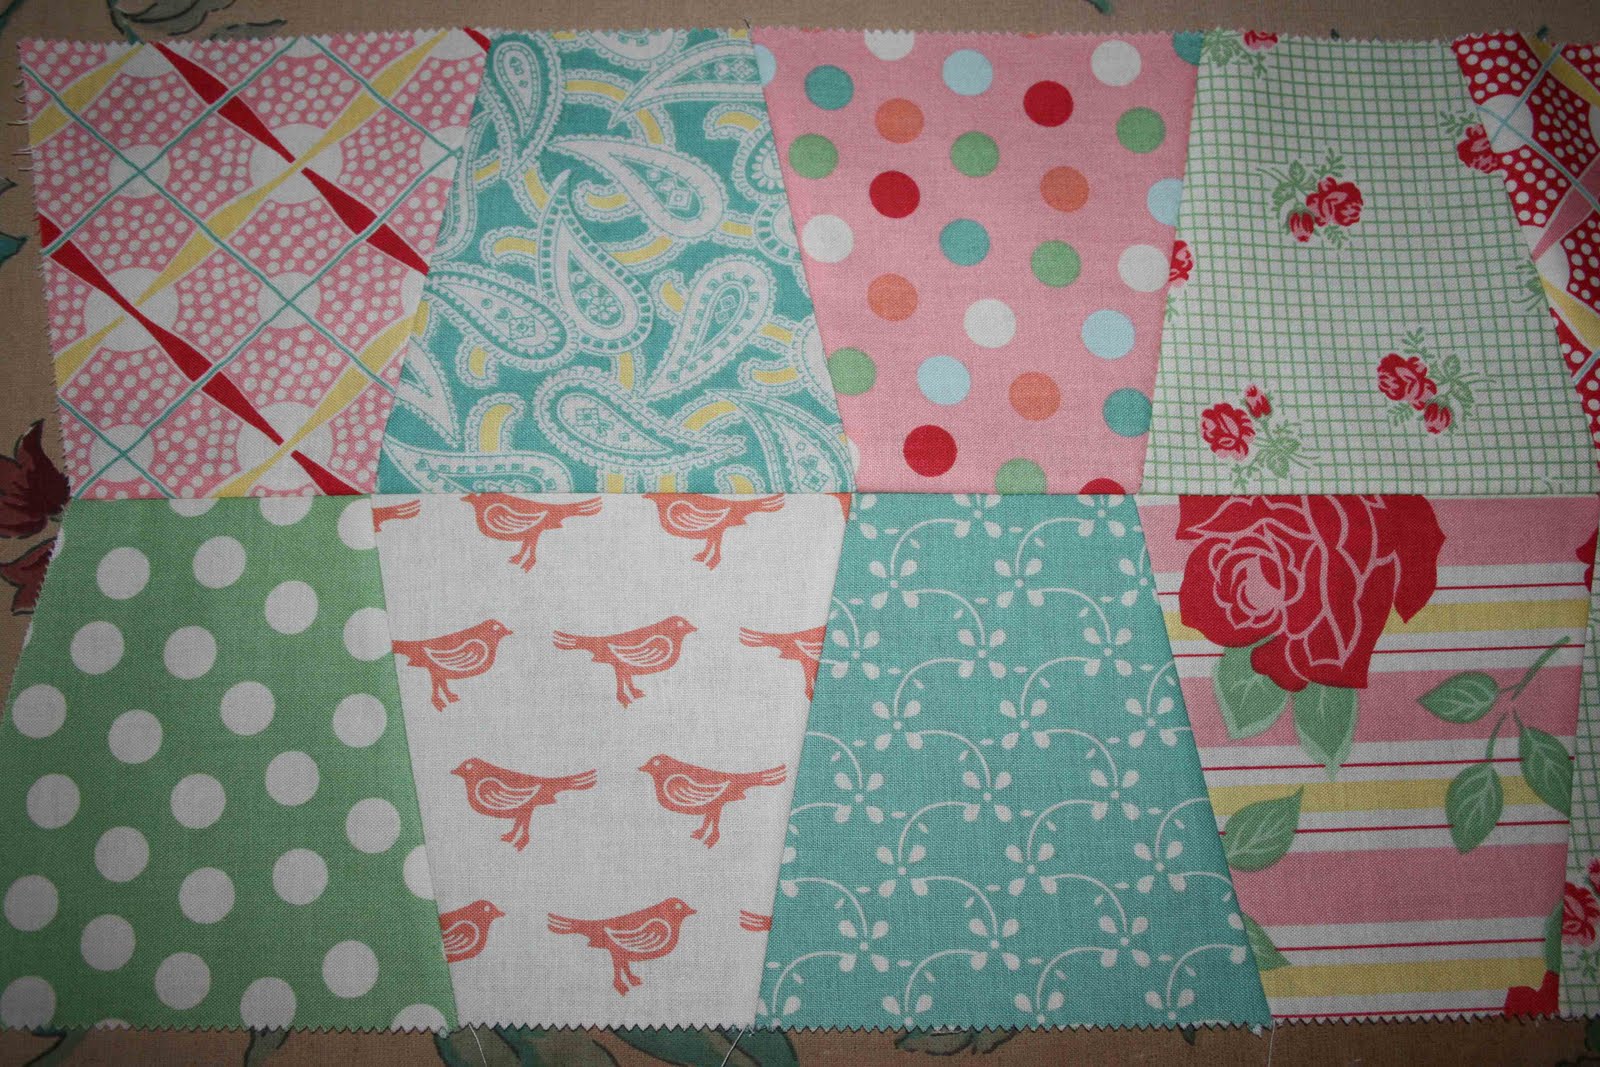
    And your quilt top is complete.
    Baste, quilt and bind.

    For quilting, I echoed the seam lines on each side using the edge of my walking foot as a guide.


    One sweet baby quilt that measures 45″ x 54″.
    by amandajean of crazymomquilts

    Candy Buttons Quilt


     Designed by Vickie Eapen


    • 2 Charm packs of Sweet by Urban Chiks
    • 1 1/4 yard background fabric Moda Bella Solid Snow sku# 9900-11
    • 2 yards border Sweet Sugar Creamsicle sku# 31056 28
    • 4 yards backing Spots Cream Bright sku#31054 11
    • 1 yard Sweet Candy Stripe Gumdrop sku#31057 17 bias binding
    • Sizzix Die cutter & Circle #1 and/or other 4 inch acrylic circle template (Omnigrid)
    • Clover large orange Yo-Yo maker
    • Batting 55 X 55 inches

    Gather all your supplies, 2 charm packs of Sweet, a 4 inch circle cutter or template, and background fabric.


    I used a Circle #1 for the Original Sizzix machine to cut my circles. I can cut 5 charms at a time. I know there are several other companies that make die cutting machines (Accu-Cut) and templates (Omnigrid), if you do not have access to a Sizzix. As long as it is a 4 inch diameter circle it will work.
    • cut 36 charm circles for the blocks
    • cut 25 charm circles for the yo-yo’s

    I used 6.5 inch background squares to finish to 6 inches.

    • cut (36) 6.5 inch background fabrics
    • layer the circles onto the backgrounds and pin in place.

    • sew around the circle edge with a 1/4 inch seam for all 36 blocks. Leave a raw edge.


    • Lay out the circle blocks on a design wall or bed, 6 blocks X 6 blocks.

    Begin sewing 2 by 2 until you have 6 rows of 6. At that point the cross rows can sewn together.
    Once the main quilt is sewn then prepare the yo-yo’s for applique.

    The 4 inch circle fits the large yo-yo perfectly.

    • Then applique the 25 yo-yo’s at the background fabric intersections.
    • Cut 4 strips of orange border fabric approximately 6 inches X 48 inches
    (measure your quilt top as seam allowances may vary)
    • Then sub cut 2 of the 4 strips 6″ X 36″
    • Sew the 36″ border to top and bottom of the quilt
    • Then sew the 48″ border to the sides.


    This quilt was custom by Jackie in CT. She quilted the swirls in the circle centers and meander around the yo-yo’s. The raw edges of the circles were NOT quilted to allow them to fray a bit for added dimension.


    The quilt will be square 47″ X 47″.

    • Next take a 5 inch acrylic Omnigrid circle template and line the curve with the corner of the border.

    • Using a rotary cutter trim the point off the quilt.
    Make bias binding with your favorite method and sew to quilt. Make sure to ease binding around the corners.


    A quilt about 47 X 47 inches.