Winter Wonderland Quilt

It’s never too early to get excited for Christmas! And since this whimsical wintery quilt requires a fair amount of hand-stitching, you’ll want to give yourself plenty of time to complete it. I love the meditate quality of applique, and its handmade nature is well-suited to holiday decor. Feel free to play around with different color combinations– a black background would be very striking, or a white one would emphasize the snowy feel of this scene.


Two Bella Solids Charm Packs (SKU# 9900PP-20)
One Bella Solids Moda Candy/Mini Charm Pack (SKU# 9900MC-30A)
1 1/2 Yards Bella Solids Gray for background and binding
1/2 Yard Bella Solids Snow for tree
1 Yard Christmas Countdown for backing
Card stock or preferred template material
Fabric pen or pencil


1. First, create four circle templates: one large 4 1/2″-diameter, one medium 3 1/2″-diameter, one small 2 1/2″-diameter, and one tiny 1 1/2″-diameter.

2. From the 5″ charms, trace and cut a total of 7 large circles and 24 medium circles, cutting along the traced line.

3. Trace a small circle in the center of each large circle, then cut out inside the traced line, allowing a generous 1/4″ seam allowance. Repeat with tiny circles in the center of each medium circle. You should have donut-shaped fabric pieces.

4. Trace a tiny circle on 24 of the 2″ charms, and cut out allowing a generous 1/4″ seam around the traced line circle. Do the same with the small circles, tracing them onto the 5″ squares and cutting out with a generous 1/4″ seam around the drawn line.

5. From the Bella Solids Snow, cut one rectangle 8 1/2″ x 4″ and another 17″ x 21″. Take the larger rectangle and fold it in half along the 21″ length, then trace a diagonal as shown. Cut along the traced line through both layers so that when you unfold the fabric you have a triangle.
6. From the gray fabric, cut a rectangle 42″ x 38″. Lay the triangle and rectangle in the lower left corner of the background fabric, approximately 2″ from the side and bottom. Since you will be folding under 1/4″ around the edges of both shapes when you applique, they should be overlapping a 1/4″ so that when you sew, the folded edges will be touching. Pin in place.


7. Arrange the circles on the tree and the upper right portion of the quilt top as you like. Each two-toned circle consists of either a large circle with a small circle layered (and centered) beneath it, or a medium circle with a tiny circle layered beneath it. I placed 2 large circles and 5 medium circles in the tree itself, then arranged the rest in a billowing motion starting at the top of the tree. Pin all pieces in place (I find it easiest to use safety pins for all initial pinning, then replacing these with straight pins as I begin stitching each segment).


8. Time for some hand stitching! The outside of the tree body and the tree stump are stitched with regular applique, folding under about a 1/4″ along the edges as you sew. I folded the top tip of the tree so it was flat for about 1/2″.
The circles are stitched with a combination of regular and reverse applique. Work on one circle at a time; first, cut into the interior 1/4″ seam allowance every 1/4″ or so, then reverse applique the interior in place, stitching through the quilt back and the smaller circle that’s layered underneath while folding the seam allowance under as you go. Then, stitch the exterior of the circle using regular applique, folding under a scant 1/4″. 


9. When you’re done with the appliqué, baste and quilt as desired. I stitched curlicues in the center of each circle, then swirls in the exteriors. I chose a loose and wavy stitch for the background to accentuate the winter wonderland feel. Use the remaining gray fabric for the quilt’s binding.


One festive wall quilt (38″ x 48″) to hang up during the holidays. You could also use it as a table centerpiece for a yuletide fete.

Pippa Armbrester
{www.pippapatchwork.com}

Opal Pillow


Welcome! This pillow was designed and created by Pippa from Pippa Quilts. It features the lovely hues of a Bella Charm Pack against a white background. The elegant modern design of the pillow is easy to stitch up in a couple hours and the envelope opening on the back, makes for easy cleaning. I like a nice big pillow, and this 26″ size is the perfect for lounging on the sofa with.


1 Bella Solids Charm Pack
3/4 Yards Bella Solids White
3/4 Yards Marble Flannel Pastel Grey
30″ Square piece of muslin
30″ Square piece of batting
1 26″ Square pillow form

1. Select 18 charms from your pack, whichever colors you like. Cut a 2 3/4″-wide segment from each of these charms. Set aside the leftover bits of the charms.

2. Sew together 2 of the 2 3/4″-wide charm pieces along their 5″-long side to create a two-toned square. Press the seam to one side. Repeat to create a total of 9 two-toned squares.
3. From the white fabric, cut 4 strips 3 3/4″ x 26″, and 12 strips 3 3/4″ x 5″. 
4. Decide how you would like to arrange your squares on the pillow top, following this arrangement as you continue piecing. Sew one of the 5″-long white strips to one side of a two-tone square. Press the seam toward the two-tone square. Repeat on the opposite side of the square, again pressing the seam toward the two-tone square.
                                     
5. Sew another two-tone square to this unit, then another white strip, continuing in this manner until you have 3 two-tone squares and 4 white strips pieced together, like so:
                                    
6. Sew a 26″-long strip to the top and bottom of this unit, pressing the seams toward the two-tone squares.
                                   
7. Create another unit of 3 two-tone squares and sew this to the above unit.
                                   
8. Sew another 26″-long strip to the bottom of this unit. In the same manner as above, add another row of two-tone squares, and the final 26″-long strip. The pillow top is now complete.
                                  
9. Layer the muslin, batting, and pillow top (right-side up). Baste the three three layers together and quilt as desired; I stitched a simple stippling pattern with white thread. When done, trim away the excess batting and muslin.
10. From the flannel, cut two pieces that are approximately 20″ x 34″. Fold in a 1/4″ inch along one of the 20″ sides of one of the pieces, then fold in another 1/4″ and stitch just along the fold to secure it. Repeat with the second piece of flannel.
                                  
11. Lay one of the pieces of flannel right-side up with the folded edge toward the bottom, then lay the second piece of flannel on top with the folded edge toward the top and layered about 5″ on top of the first piece of flannel. Lay the pillow top on the flannel, right-side down and so the top folded edge runs along the middle of the pillow top. Pin together and stitch around the perimeter with a generous 1/4″ seam allowance.

                                             
12. Trim away the excess flannel and sew along the perimeter with a zigzag stitch, catching the raw edges.

13. Cut across the corners and turn the pillow right-side out, gently pushing out the corners and pressing the seams. Insert the pillow form, and voila!
Pippa Armbrester

Spring Rainbows Quilt


1 1930s Colors Bella Solids Jelly Roll
1/2 yard Bella Solids Snow
1/2 yard Avalon Daisy (for backing)


This quilt is made in a truly improvisational style, which means minimal measuring and lots of free-wheeling cutting and sewing. Depending on how comfortable you are with this, you can measure a bit more as you go, but I like the slightly wonky, off-kilter effect of improvisation.

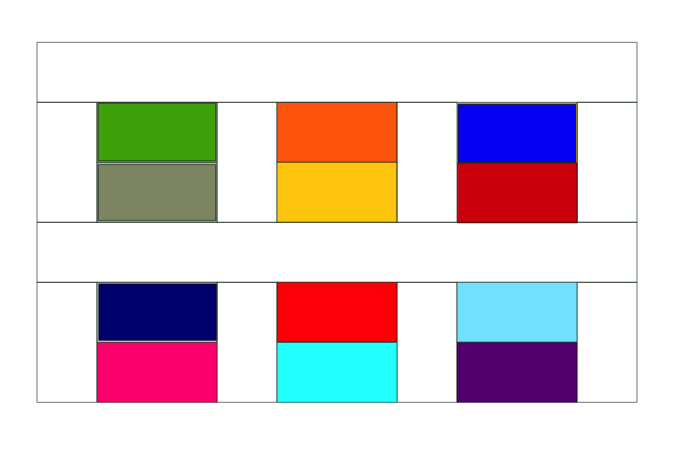
1. To start, unroll your jelly roll. Pull out one strip of each color. Cut each strip into approximately 3″-long pieces, then cut these pieces roughly in half (lengthwise). You’ll have lots of little strips of slightly different widths.

2. Then, freehand cut eight squares from the Bella Solids Snow. Make the squares approximately 2 1/2″-3″ each side. Don’t worry if they’re not perfectly square!

3. Sew together three of your small colorful strips along their long edges. Press the seam allowances to one side. Sew these three strips to one side of a square (they might be slightly wider or narrower than the square- that’s fine). 
4. Repeat on the opposite side of the square, then use a rotary cutter and ruler to trim the unit so it is exactly 6 1/2″ long. The strips and square might not be flush along the long edges- that’s fine.
5. Sew together approximately eight of the colorful strips along their long edges and press the seams to one side. Check to see if the strips are at least 6 1/2″ long; if not, add another strip. Also, make sure the strips are relatively flush along one side. Make another one of these 8-strip units for a total of two. 
6. Sew an 8-strip unit to the long edge of the 6 1/2″-long unit. Your 8-strip unit might be longer may have some extra length, that’s fine. Sew the other 8-strip unit to the opposite side of the unit. Press the seams to one side. 
Note: If your 6 1/2″-long unit wasn’t perfectly flush, line up and sew the two units together using a larger seam allowance as necessary to catch both units, then trim the seam allowance to 1/4″. This will give you a wonky, non-perpendicular effect.
7. Now trim the entire block so it is exactly 6 1/2″ square. Repeat to form seven more of these blocks. 
8. Now you’re going to create eight of the second type of block. Take one of each color strip from the jelly roll, and cut each strip into approximately 4″ to 4 1/2″-long strips. Cut these in half, similar to the freehand cutting you did before but with slightly longer strips. Also, cut five 2 1/2″-wide strips from the Bella Solids Snow, cutting from selvedge to selvedge. 
9. Sew together four of the colorful strips, pressing the seams to one side. Use a pair of scissors to freehand cut the edges so they are flush (but don’t worry about creating right angles).
10. Sew a white strip along the top of this unit, and trim with a pair of scissors to it’s roughly flush.
11. Repeat on the opposite end of the unit.  Trim this unit to exactly 6 1/2″ long, as you did with the other block type. Then sew white strips along the long edges, trimming with scissors so they’re flush, then cutting the unit to a perfect  6 1/2″ square when you’re done. Since I like some irregularity, I tried to cut so that the width of white varied in each block (you can also trim your strips shorter in some of the blocks to allow for more white).
12. Create eight of these blocks. Make four of them exactly as above, but for the other four, sew the first white strips on the long edges of the strip, so they end up like so:
13. Once you’ve created all sixteen blocks, it’s time to sew them together. You’ll want four rows of four blocks each, switching up the orientation of each block as shown. Press the seam allowances to one side, alternating the direction in each row.
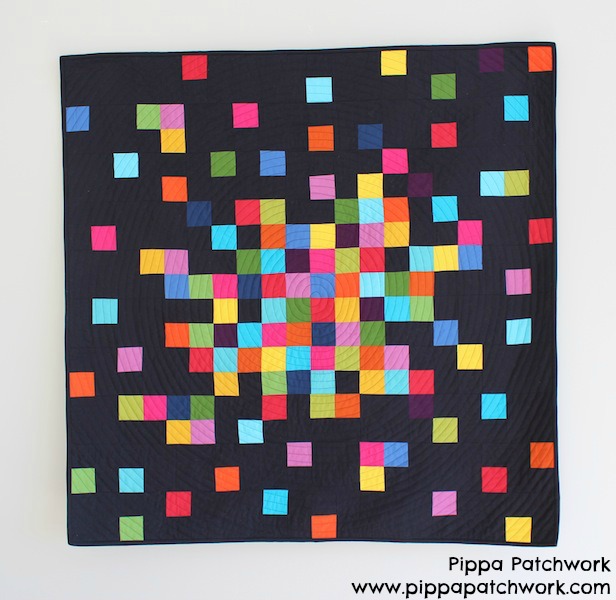
14. Once you’ve created four rows, sew these rows together, lining up the seams. And the quilt top is finished!
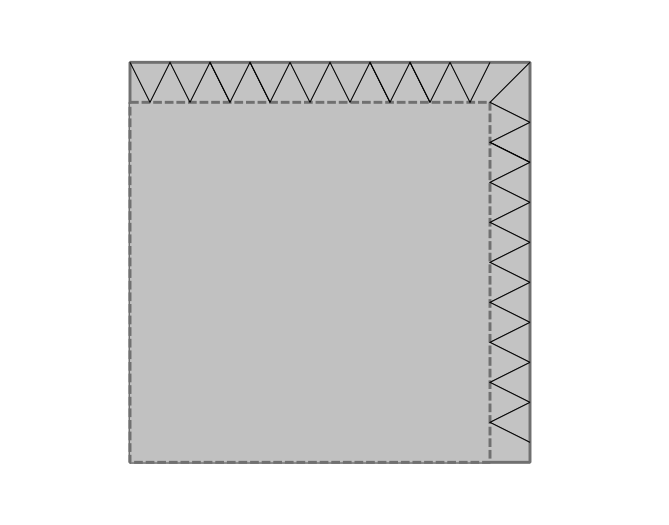
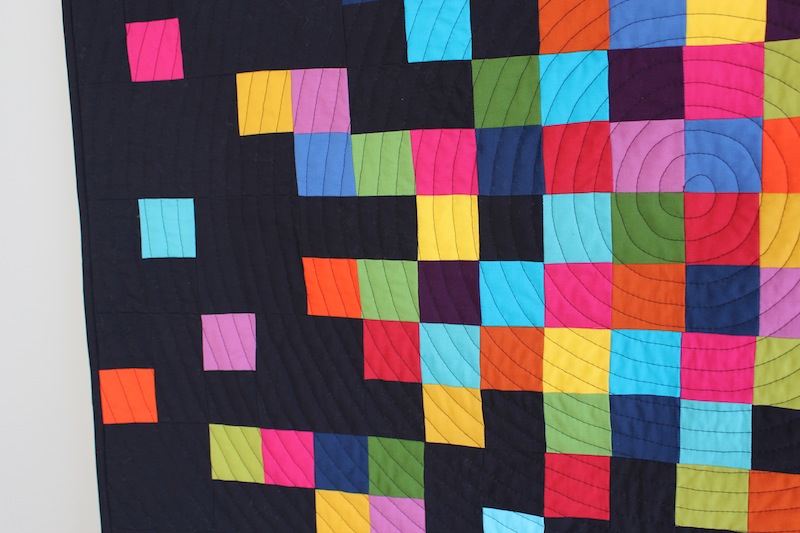
15. Baste your little quilt and quilt as desired. I stitched one continuous spiral, starting at the center of the quilt, using white thread.


One cheery quilt, 24″ square. Perfect for use as a table topper!

Pippa Armbrester
{www.pippapatchwork.com}

Pixelated Patchwork Quilt


1 – Bright Bella Solids Fat Quarter Bundle (9900AB-31)
1 – Warm Bella Solids Fat Quarter Bundle (9900AB-32)
1 1/2 Yards – Bella Solids Washed Black (9900-118)
1 1/2 Yards – Essential Dots Brown (8654-23)


From the black fabric, cut:

  • 1 rectangle, 10 1/2″ x 4 1/2″
  • 2 rectangles, 8 1/2″ x 4 1/2″
  • 6 rectangles, 6 1/2″ x 4 1/2″
  • 19 squares, 4 1/2″ x 4 1/2″
  • 34 rectangles, 4 1/2″ x 2 1/2″
  • 60 squares, 2 1/2″ x 2 1/12″
From the Bella fat quarters, cut a total of:
  • 132 squares, 2 1/2″ x 2 1/2″
This unique modern design is achieved with simple patchwork. You’ll create a total of 10 rows, each measuring 40 1/2″ x 4 1/2″, which you will sew together to create the final quilt. Use a 1/4″ seam allowance throughout and press all seams open. 
I’ll walk you through the first row to get a sense of it:
  • Sew together one 2 1/2″ red square and one 2 1/2″ black square.
  • Sew the above unit to a short end of the 10 1/2″ x 4 1/2″ black rectangle, with the red triangle on top. 
  • Sew an 8 1/2″ x 4 1/2″ black rectangle to the other side of the red-black square unit.
  • Sew together a 2 1/2″ black square and a 2 1/2″ light blue square.
  • Sew the above unit to the end of the row (the short end of the 8 1/2″ x 4 1/2″ rectangle. 
  • Sew a 4 1/2″ black square to the end of the row (the light blue-black square unit).
  • Continuing creating and adding units in this manner to create the first row, as shown:
Use the blow diagram to complete all of the remaining rows in this same manner (the first sew is shown again in the diagram), sewing together units and adding these units to the ends of the rows as you work. Sew each row to the previous row as you complete it. 
Notes: You don’t have to use the exact same color placements, just avoid having two squares of the same color next to one another. I’ve labeled the 10 1/2″ x 4 1/2″ and 8 1/2″ x 4 1/” rectangles for clarity. All other large black rectangles are 6 1/2″ x 4 1/2″. Keep an eye out for the dark blue and dark purple– they’re not black!

Baste and quilt as desired, using the Essential Dots as your backing fabric. I quilted a continuous curly cue, starting from the center of the quilt and using black thread.

Bind your quilt with the remaining black fabric. I used 2 1/2″ binding strips to create a 1/4″ binding that’s fairly subtle.


One colorful and contemporary 40 1/2″ x 40 1/2″ quilt. The perfect size for a baby quilt or wall hanging.

Pippa Armbrester
{pippapatchwork.com}