
I am so happy to be returning to the Moda Bake Shop with this quick-to-make but amazing little quilt! I blog over at www.mamaspark.blogspot.com, and I would love you to stop over and visit!
I have to say that I LOVED working with the Snuggles fabric by Moda. It was a dream to use and my quilter loved it too! This turned out a perfect size at 45″ X 50″ to use as a baby quilt or a lap quilt. You could make it larger with just a few adjustments too.
I hope you enjoy making this as much as I did. Let’s get started!


- 2-Sphere Charm Packs (1540PP)
- 2 yards 60″ Snuggles (60000 43) Aqua For top and backing
- 1/2 yard Sphere (Teal 1541 20) for binding
- 1/4 yard Bella Solids Feather (9900 127 ) This is a really, really light gray.
- Cotton Batting
- Thread

- Choose 48 Charms for the center of the quilt. Ten of these will be used to make the plus blocks.
- Choose 22 additional blocks for the 2 side borders, 11 for each side. I chose to leave most of the yellow out because I wanted an icy looking quilt to go with my aqua Snuggles.
- Cut Twenty 1.5″ x 6″ strips from your Feather solid. These will be used to make the + in the plus blocks.
Making the Plus blocks:
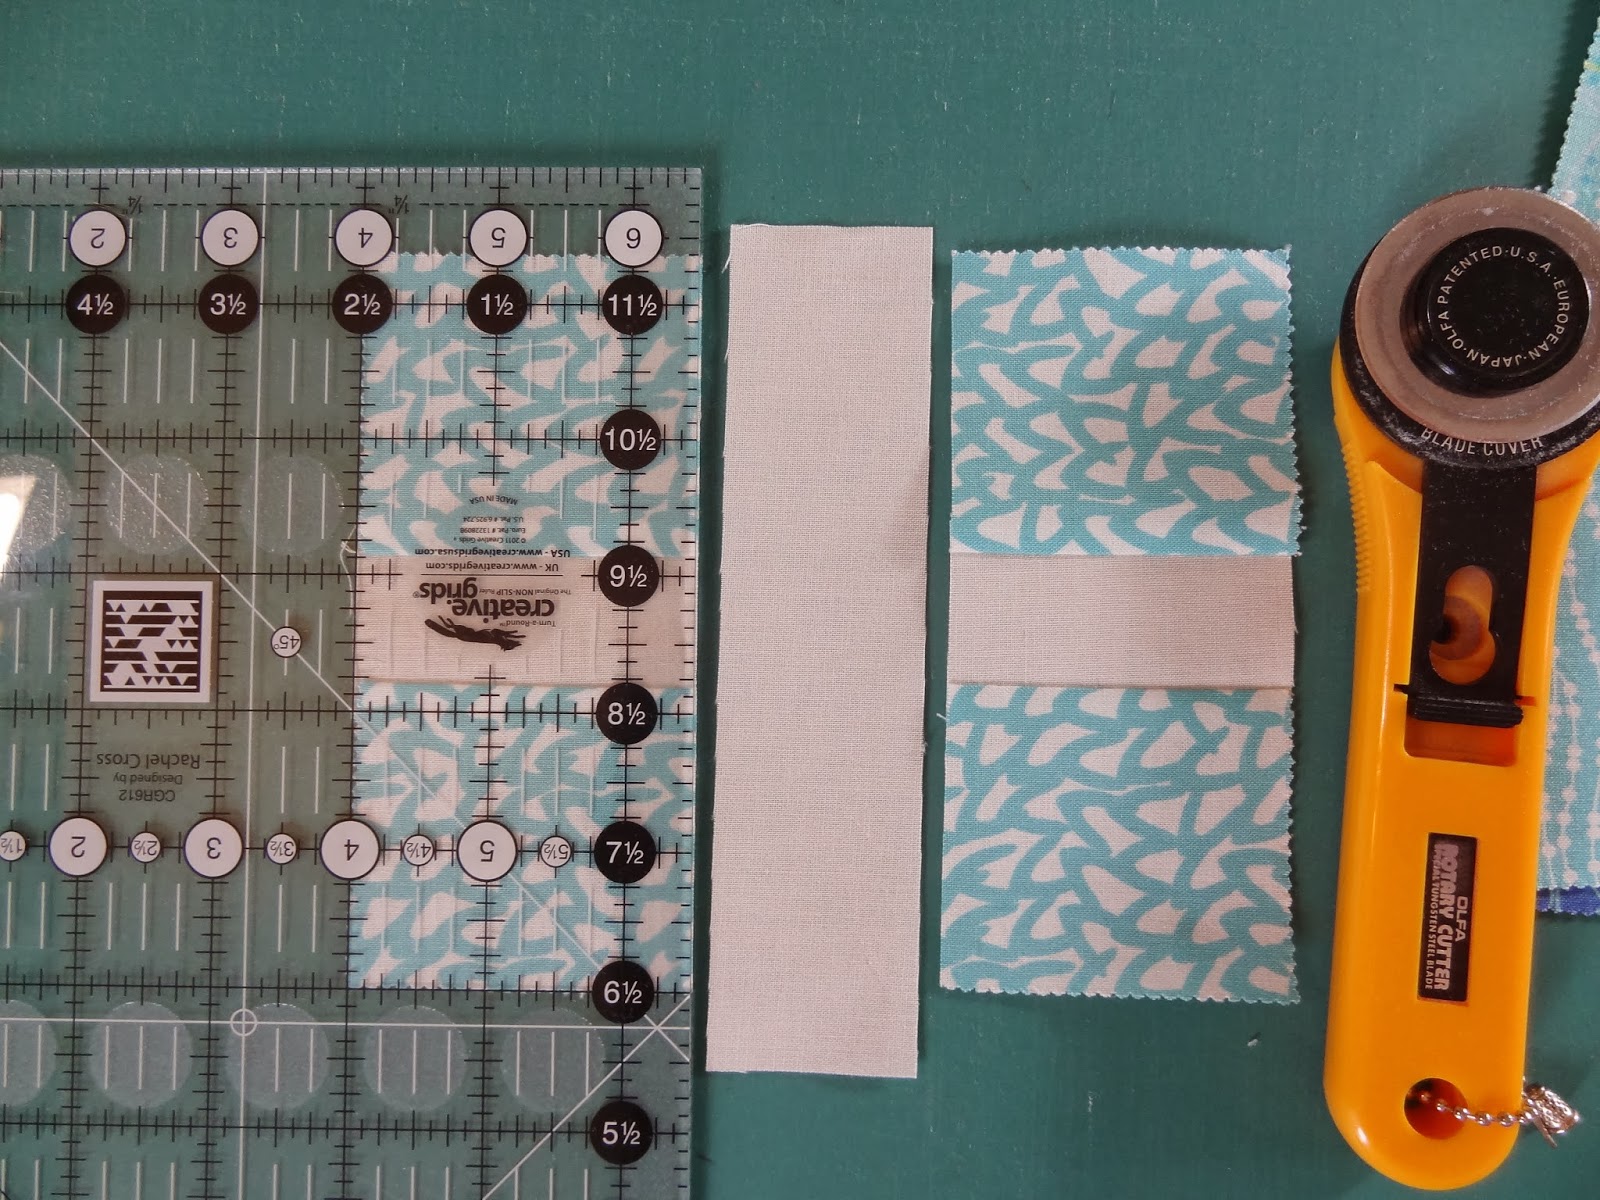
After you have chosen your 10 charm squares, cut them in half. You should have two halves that measure 2.5″ x 5″.


Sew strip to one half of the charm square

Trim the solid strip even with both sides of the charm square, it should be 5″.

Sew the other half of the charm you cut to this first unit making sure to align edges.
Cut the charm in half again at the 2.5″ alignment. (don’t worry about the other measurement)

Lay another 1.5″ x 6″ strip of your solid between your two cut halves. Sew to one of these halves.
Trimming even with the edge of the charm. Don’t worry that they are not 5″ at this point, you will be trimming them up soon. Sew this to the matching half and press.

Trim your plus block to a finished size of 5″. You can see that when I used my 5.5″ ruler the plus lines up beautifully and made the trimming a snap!

This is what your finished plus blocks should look like. I chose 10 plus blocks but you can make more if you like or use none at all for a really quick quilt! If you make more you may need a little more of your solid!

I like to chain piece so I cut all my pairs and lined them up to sew at one time.
Yeah for chain piecing!!

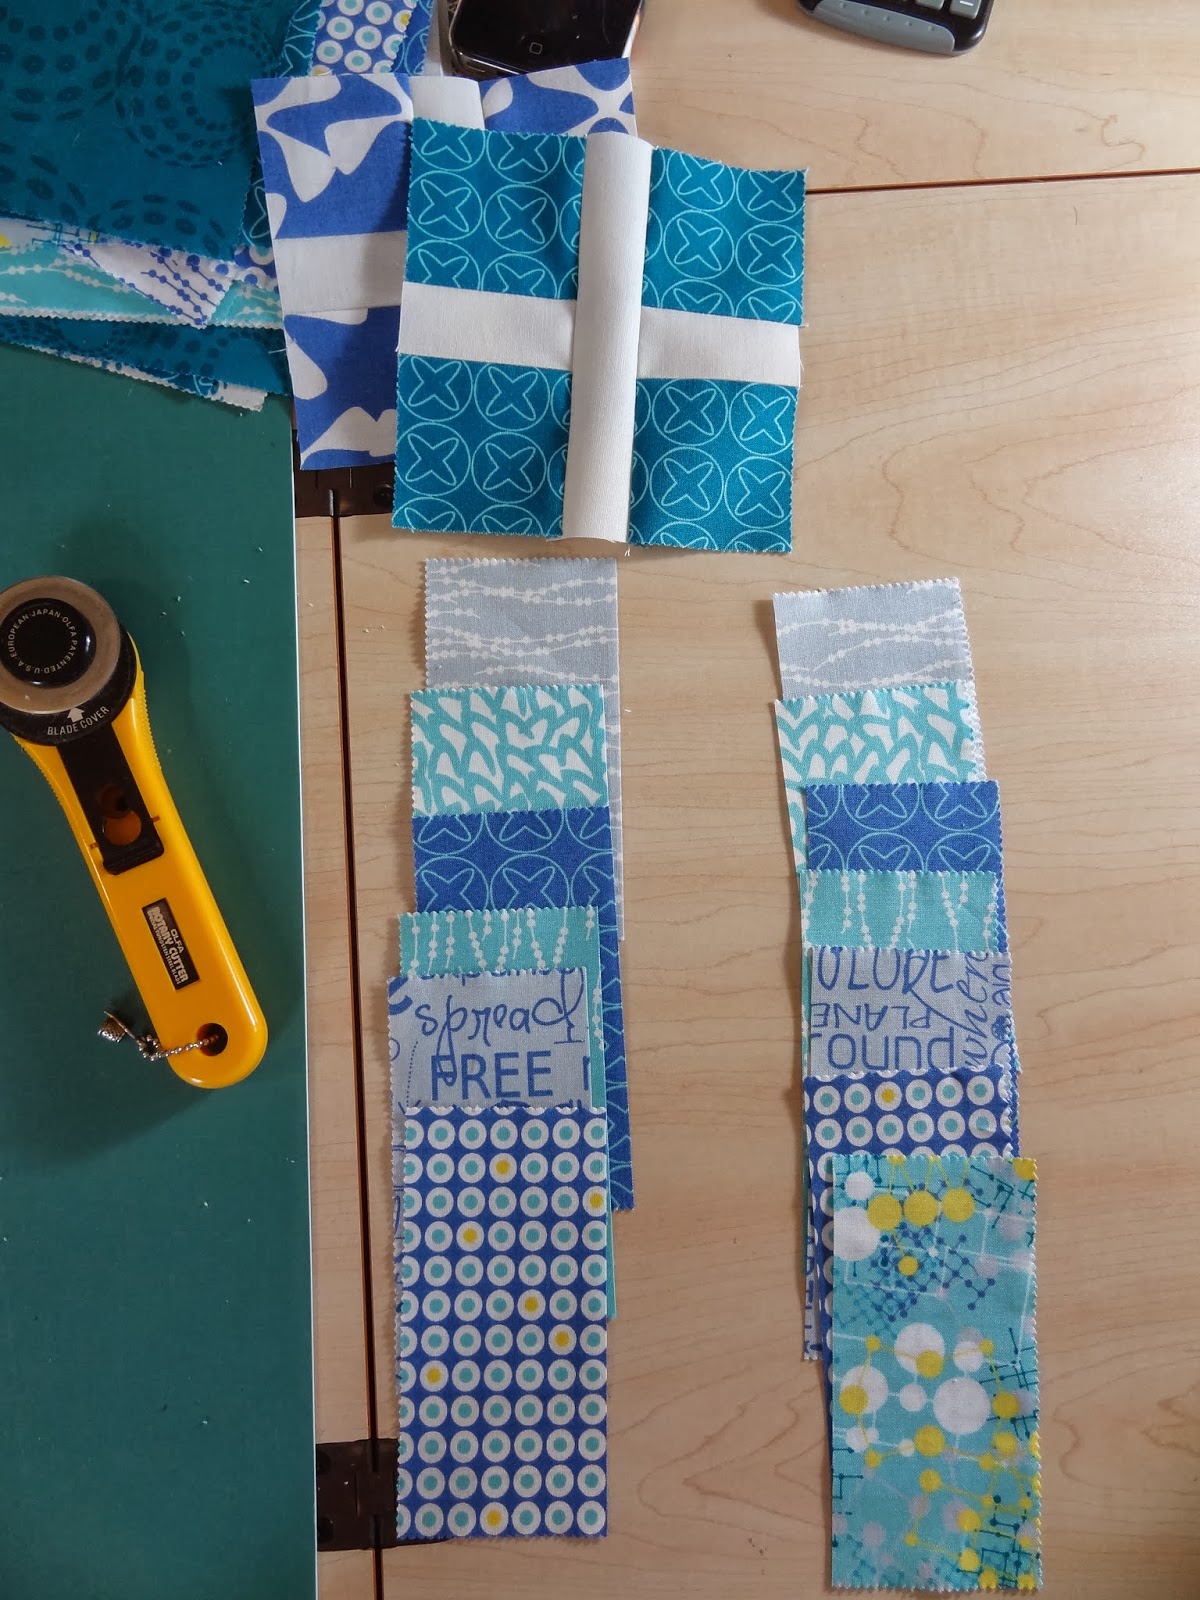
Now comes the fun part! Using a design wall begin to lay out your rows. I changed mine around a LOT! That’s part of the charm (get it?)

Once you are happy with the placement you can sew your charms into rows.


Next I cut the Snuggles that would alternate with the rows of charm squares. First I cut Five 5″ strips. Then I measured my rows and they were 36.5″. I then cut my Snuggles to fit my rows. Please measure yours before you cut and use that measurement.

Once you have all your Snuggles cut to fit your quilt rows you can begin to pin your rows together and sew.
I pinned at every seam and with one in between. I was not certain how the Snuggles would be to work with but it was just great!

Start with a charm square row then a Snuggles row. There will be 5 of these sets. The last row will be a charm square row. I wanted this to be easy for my long arm quilter to quilt so I thought I should not have the more stretchy fabric on the outside of the quilt. Although she did tell me that the Snuggles was much easier to work with than some of the other comparable fabrics.

Once you have all your charms sewn to your snuggles you will have 5 of these sets. Sew them together to make the center of your top, making sure to begin and end with a row of charms.
I put the top back on the design wall and added the charms I was planning on using for the borders in place. This allowed me to move squares as necessary until I was happy with the final placement.
Alternately you could do this when you lay out the top too. Either way works! Once you are happy with the placement of your side borders sew the charms into a row (remember they will go on the quilt vertically just in case you are using directional fabrics!)

Pin your borders to your top being careful to match the intersecting seams as you do so. Sew your borders to your top.


- For binding cut your strips from the teal Sphere fabric at 2.5″ (or as you desire).
- Join the strips, and bind using your favorite binding method.
- Quilt, bind and ENJOY! You just finished a great little quilt!
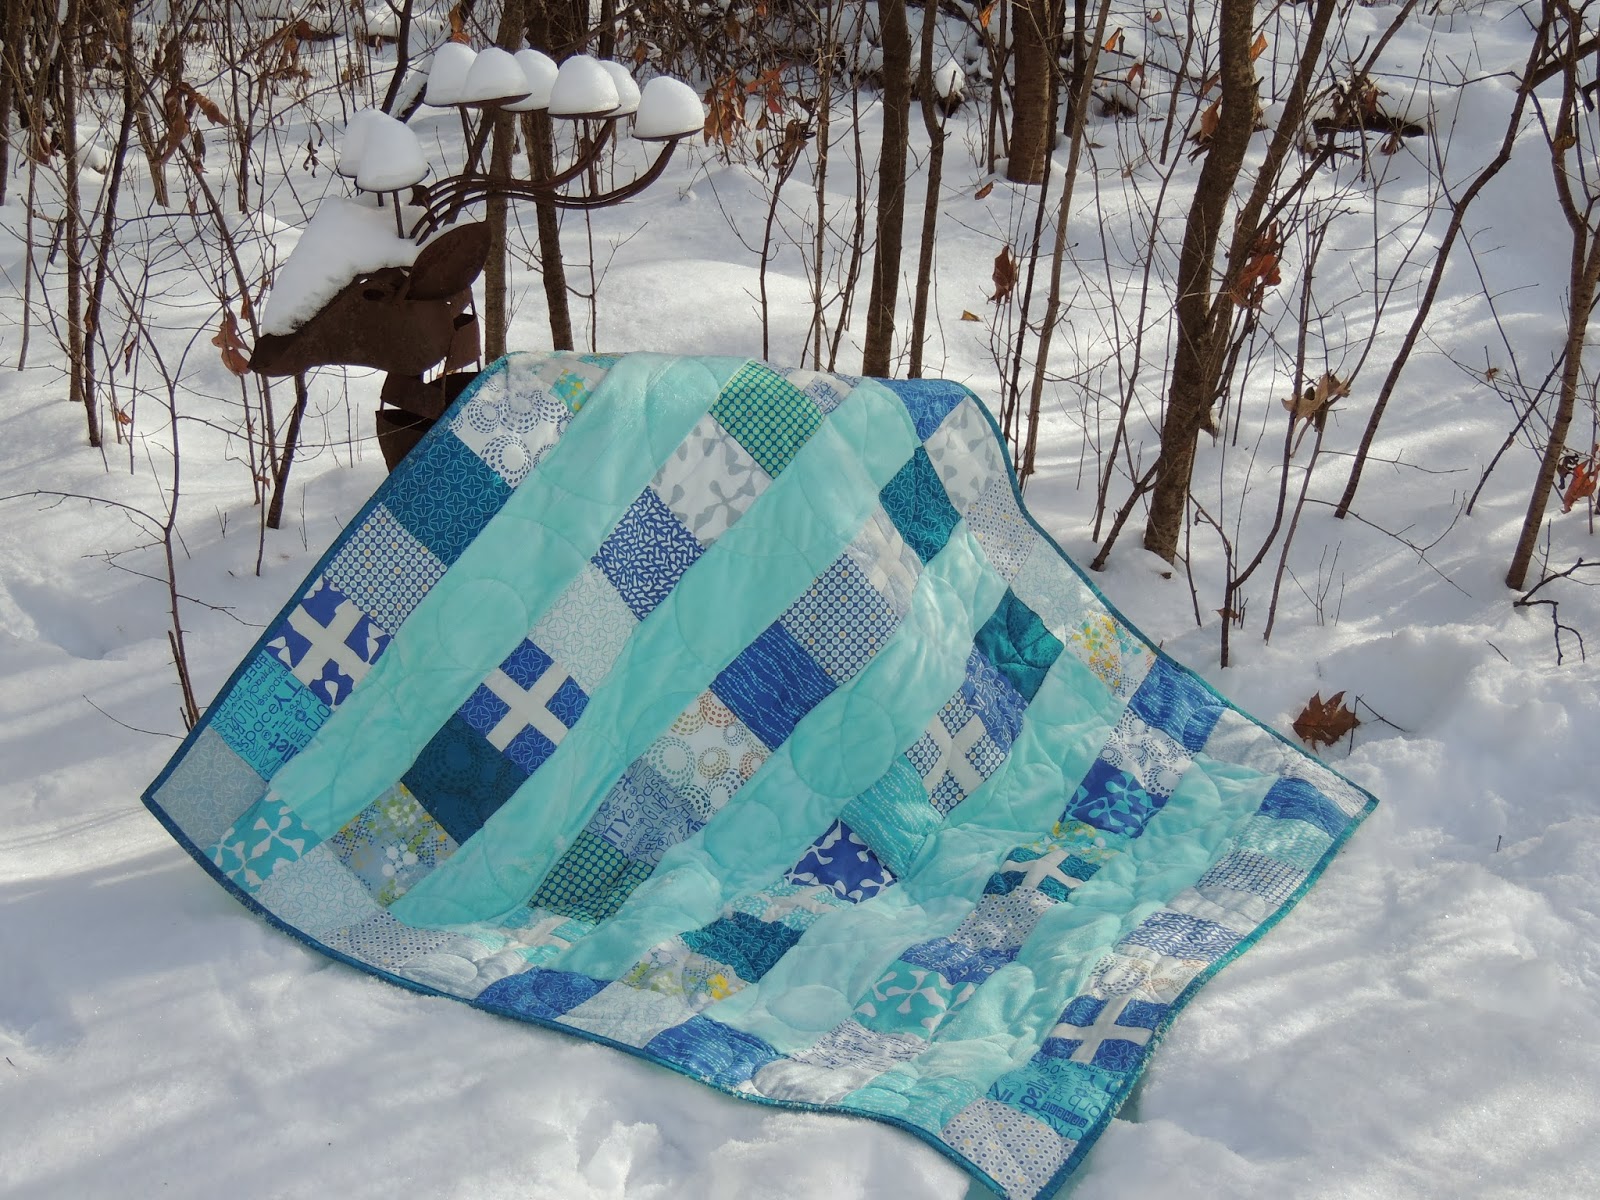

This pattern makes a 45″ x 50″ quilt.

~ XOP~
Pamela Lincoln
www.mamaspark.blogspot.com
![]()
