Cozy Campground Quilt


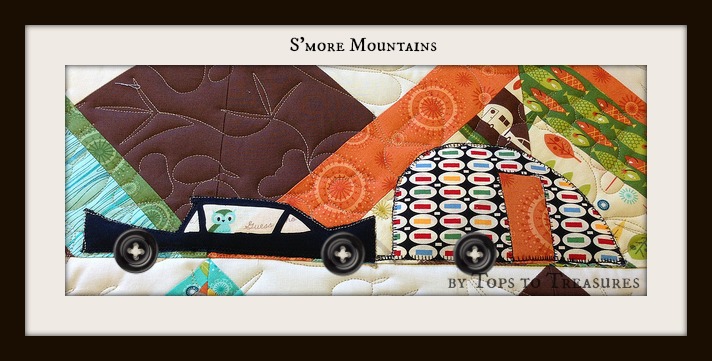
Hi, I’m Stacey and I blog at The Tilted Quilt.  Today, I am sharing a Cozy Campground Quilt with you.  I have two young sons and my husband is just dying to begin taking them on camping trips.  From the moment I saw the S’more Love line by Eric and Julie Comstock, I knew I had to have it. It will be a perfect family quilt to take with us to have out in front of the campfire while we are making S’mores.  I made sure to use a dark background and backing since I know this quilt will get lots of outdoor use!


This is a great pattern if you have not foundation pieced before and you want to dip your toe into this technique. 

I am going to give away my scraps from this project (including a nice size bundle of 10 leftover fat eights) – just swing by my blog over the next week for a chance to win. 

Here is a full mock up of the quilt for planning purposes:


All fabrics in this project are from S’more Love.

  •  Fat Eighth Bundle for blocks (you will use 16 for the blocks – there will be extras which can be used for binding or other projects)
  • 1 yard each of three different backgrounds for the blocks – I used:
    • pond (37075 17)
    • pine (37075 15)
    • campfire (37075 13)
  • 1 1/2 yards of wood grain background for alternating blocks in grizzly bear (37079 19)
  • 4 yards for backing and binding (37074 19)
  • batting
  • 64 sheets foundation paper


**Update** Thanks to the great feedback in the comments regarding the background fabrics – I have changed my suggested yardage from 3/4 yard to 1 yard.  I used 3/4 yard of the backgrounds plus the additional fat eighth that came in the bundle when needed.  I do tend to cut narrowly, but I should have allowed a teensy bit more wiggle room. I suggest bumping your yardage up to 1 yard for each background. Thanks!!***


  • 6 inch Add-A-Quarter ruler – this is not mandatory, but I couldn’t live without mine. 


Foundations:


I use a lightweight paper called vellum for my foundations, but you can use whatever you prefer.  You will need 64 copies of the block pattern (16 blocks x 4 sheets per block). Print at 100% or “actual size” – the pattern block should measure 5 ½ inches on each edge, for a 5” finished size.  I have included a 1″ test square so you can make sure you are printing the correct size.  To be safe, you should print all 64 of your pages at one time – just in case you accidentally change the page layout between printings (I speak from experience here!).

Download the foundation pattern here.


Cutting Instructions:


1. From the brown wood print*, cut

  • Nine 10 ½ inch squares 
  • six 11 inch squares – cut them down the middle on the diagonal to create 12 setting triangles for row ends
  • two 10 1/2 inch squares – cut them down the middle on the diagonal to create 4 setting triangles for corners 
 *If you are using a fabric with a directional print where the orientation of the design matters,  keep in mind as you cut that you will be laying these out on the diagonal. You may want to wait to cut these squares until you lay out the quilt below.

2.  Choose 16 prints from the fat eighth bundle.

From each print, cut

  • 4 pieces @ 4”x 6” 


3. For each block, you will choose a background fabric – from that background:

  • cut 8 pieces @ 3 ½” x 6 ¼ ”  (You will cut a total of 128 pieces this size, using your three different backgrounds)
  • cut 4 pieces @ 3 ½” x 4 ½” (You will cut a total of 64 pieces this size, using your three different backgrounds)

Sewing Instructions:


Each 10” finished “X” block is made from four-5” foundation pieced blocks.  Piece 1 is the block print and Pieces 2-4 are  the block background prints. 


When sewing on a paper foundation, remember that you will be sewing directly on the printed side of the paper with the fabric on the “un printed” side.  Lower your stitch length to 1.6 or 1.8.  For some additional tips on paper piecing, check out this tips post I did earlier this year.  That post also links to a video tutorial using the Add-A-Quarter ruler for trimming.

To create the block:  Choose a piece from your cut fat eighth stack –  place piece 1 with the right side facing away from the paper so that it covers the center wedge entirely – making sure that there is at least ¼” excess around all of the lines.  You may want to hold it up to a light source to make sure the lines are covered.  I like to put in a pin to make sure this piece stays put.

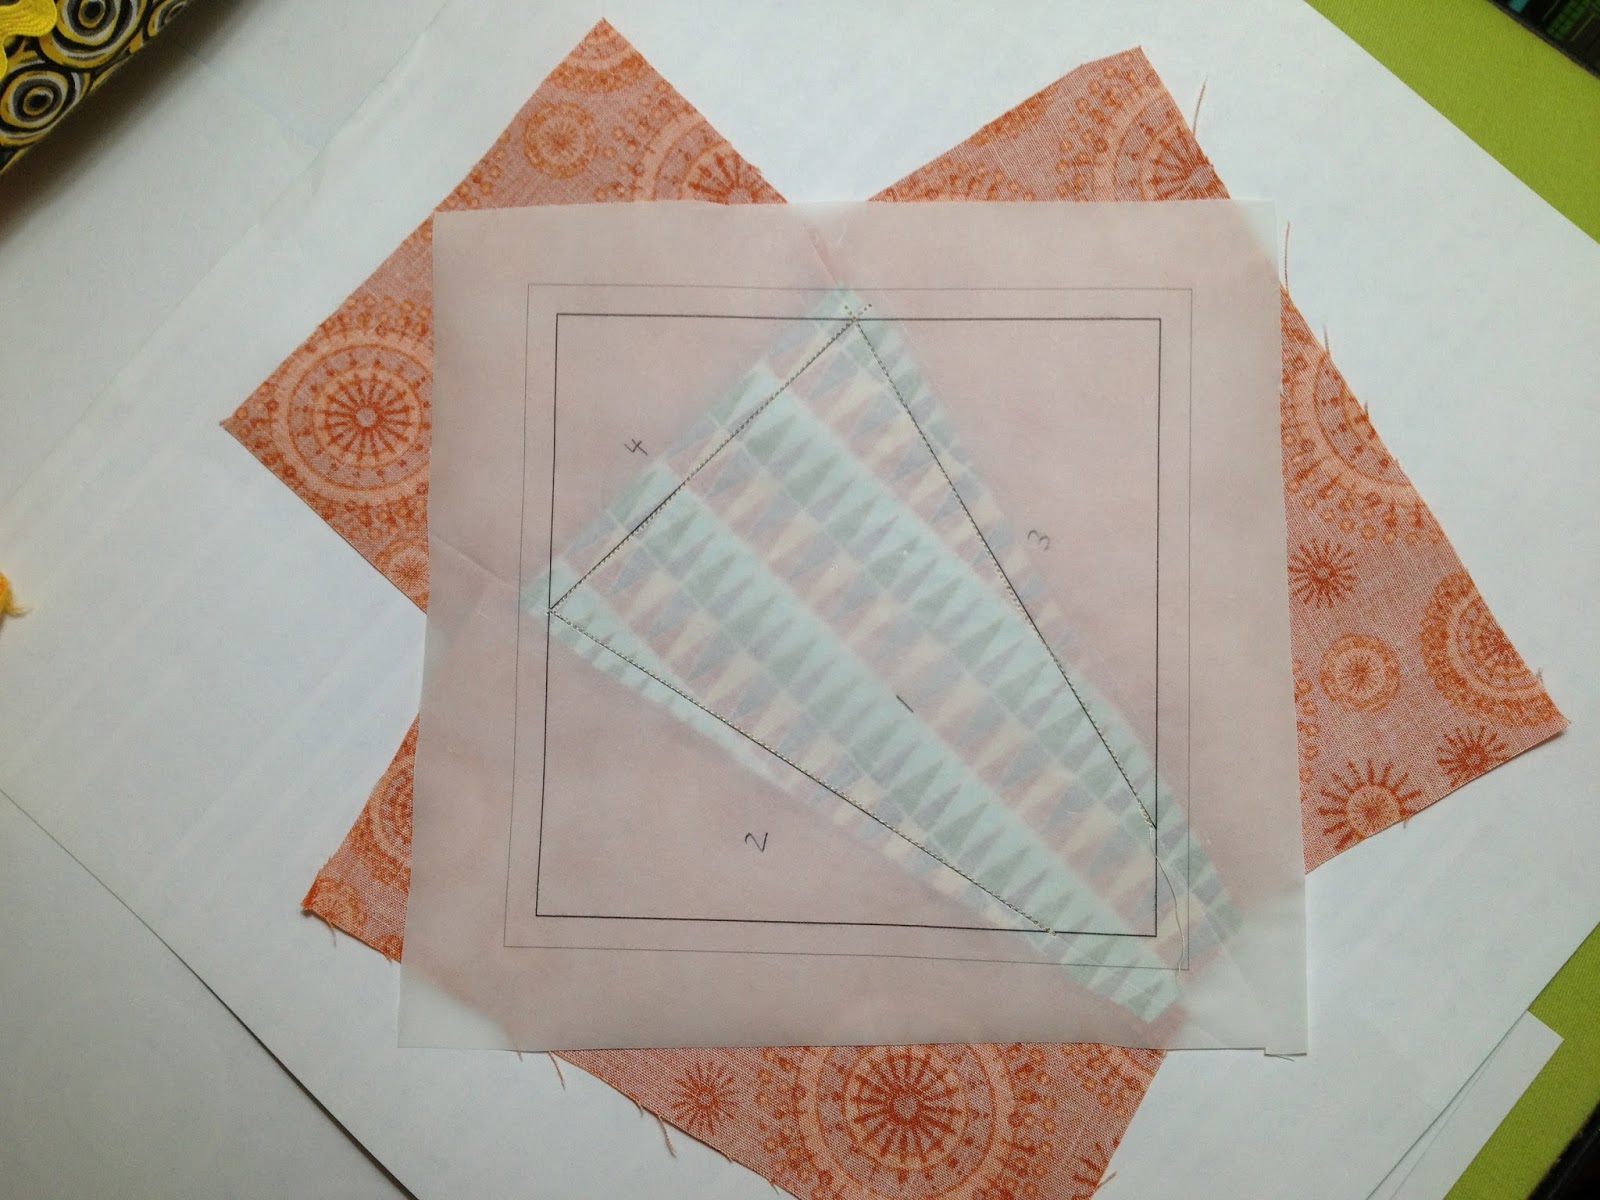
Your second piece of fabric is a background piece – it will be placed with the right side of the fabric facing the right side of the first piece of fabric you pinned.  You will be sewing on the line between piece 1 and 2.  Make sure the length of the background fabric extends a full ¼” past the edge of the block on both sides and that, when flipped over, it will cover the full corner of the block, including the ¼” seam allowance.


Using an open-toe foot (or your regular piecing foot if you don’t have an open-toe foot) begin sewing the line between 1 and 2. Backstitch a few stitches at the beginning and end to lock in your stitch.


Before you flip over Piece 2, trim the excess away (leaving ¼” seam allowance) by folding back the paper.


Once you flip over Piece 2, your block should look like this:

Next, you will want to trim ahead of your next piece to keep that nice ¼” seam.  I really love using an Add-A-Quarter ruler. I will demonstrate how it works.  If you don’t have one, continue to trim as you did in the previous step, after you sew the seam.  

On the paper side, take a postcard or index card and place it on the line between 1 and 3. 


Fold the paper back over the postcard creating a stiff edge.


Place the Add-A-Quarter ruler on the postcard edge.


Trim to a perfect ¼” seam with your rotary cutter.


Fold the paper back up and flip the block over.  Now you can line up your next piece directly on the cut fabric, right sides together.

Flip the block over and sew on the line between 1 and 3. Remember to backstitch at the beginning and the end of the line.

Flip the fabric over and press.

Repeat the steps above to trim the line between 1 and 4 with the Add-A-Quarter Ruler.

Add piece 4 along the cut edge of 1, right sides together.


Flip block over and sew along the line between 1 and 4.
Flip the fabric over and press.

This is what your block should look like now.


Flip the block over and trim away excess – cut on the OUTER line (this includes a ¼” seam allowance for the blocks).


Now, you have a trimmed block.

Create 4 smaller blocks to make one larger x block.


Switch over to your ¼” foot and increase your stitch length back to 2.5.  Join the bottom two blocks and the top two blocks and then sew the top row and bottom row together for a completed X block.


Make 16 of these blocks choosing assorted prints from your fat eighth bundle and backgrounds from your three background fabric choices. 

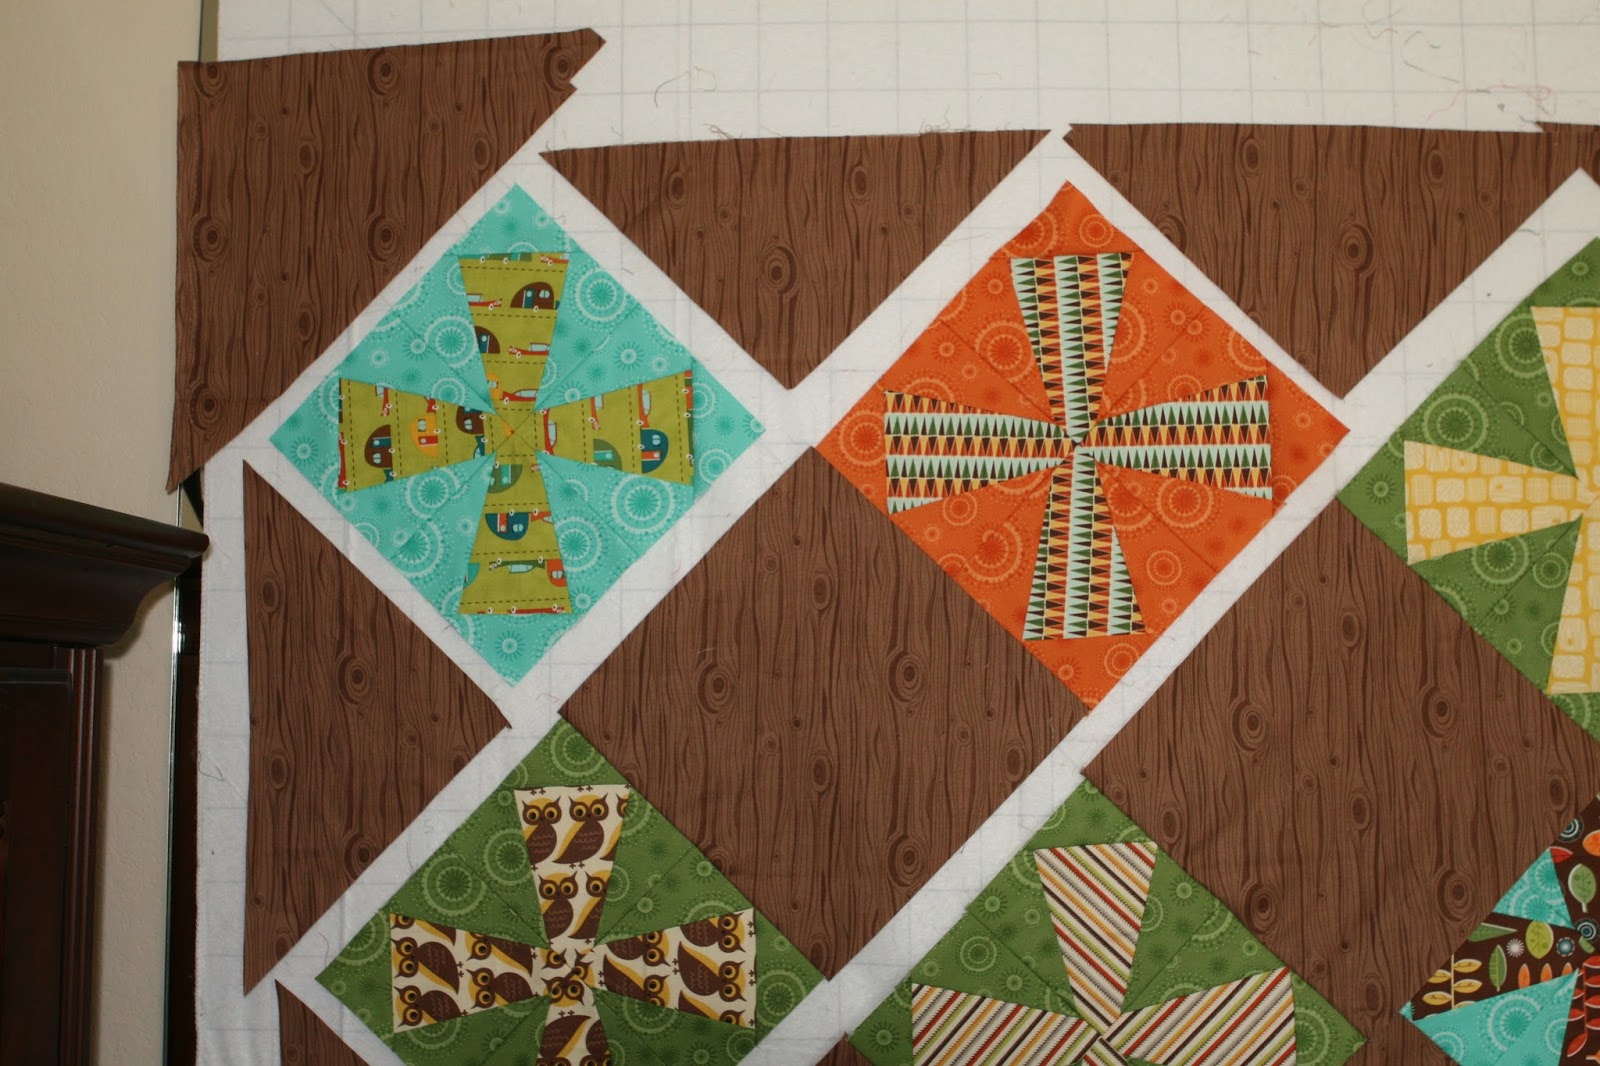
Lay out the blocks on point, alternating a solid square between each block.  If you are using a fabric where the orientation of the design matters, keep in mind as you cut that you will be laying these out on the diagonal.

Blocks are now on the bias, so be aware of stretching.


A design wall is invaluable for a layout like this – I needed to make sure the wood grain on my brown blocks all went the same way.  Now is a good time to cut the wood blocks and setting triangles if you have a directional print that matters for these blocks.  


I like to cut these blocks a little generous to make sure there is plenty when it comes time to trim them down.


Here is the corner all trimmed up.


I embroidered our last name to the quilt – aren’t you supposed to label everything you bring with you when you go camping? 😉

Make a quilt sandwich with your favorite batting and your backing.  The back will need to be pieced since it is larger than the width of standard fabric.

Quilt and bind according to your favorite method. I opted for a simple straight line quilting design to mimic the wood grain in the background.


58″ x 58″ lap size quilt, perfect for snuggling up in front of the fire on your family camping trip!


Stacey Napier
{thetiltedquilt.blogspot.com}

S’more Mountains Jelly Roll Quilt


Hello!  I’m so glad to be here with you today. Camping has a special spot in my heart.  My Dad designed camps for a living.  Yup, there is someone who gets paid to do that job….or there used to be.  Dad designed camps all over the USA for the Boy Scouts of America, the Girl Scouts, and the Presbyterian Church.  If there is a spot in our great country near and dear to your heart my dad could tell you all about it…intimately.  That was his super power!  When I introduced him to my husband, years ago before G was even my fiancé, Dad knew where his folks lived….literally.  He could describe the house and the yard.  He had been past it a hundred times on his way into the Sierra Nevada National Park…en route to one camp or another.  It tickles me pink to know that he had such a profound influence on people.  It is like having a little bit of my daddy with me every where I go.

S’more Love, by Eric and Julie Comstock is perfect for making a quilt to enjoy by the camp fire…or to enjoy in your RV… or living room long after the trip is over.  It would look great in a little boy’s bedroom.  The line is filled with whimsical characters and vibrant colors.

  • 1 Jelly Roll
    • I used S’more Love + 4 2 1/2″ x width of fabric (wof) strips
  • 1 1/4 yards dark fabric for distant mountains and inner border
    • I used Bella Chocolate #9900-41
  • 1  yards light fabric for distant sky
    • I used Bella Feather #9900-127
  • 1/4 yard for corner stones
    • I used Campfire star bursts #37075-13
  • 2 yards for outer border
    • Yardage is required for fussy cutting the stripes in S’more Love
    • I used Multi stripe #37070-11
    • If you do not fussy cut you only need 3/4 yard
  •  1/2 yard for binding
    • I used Campfire star bursts #37075-13
  • 4 yards for backing
    • I used Aspen green with cars on it #37071-14
  • Various scraps for applique
    • I used scraps of Home Town by Sweetwater, and Pezzy by American Jane 

    Helpful tools:

    • 9 1/2″ square quilting ruler.

    • 6, 3/4″ diameter buttons to use as tires for applique trucks and campers.

    This quilt is made from 42, 9″ finished blocks – two sets of 21 each.

    Cutting Directions:

    • From Dark Mountains fabric
      • Cut 11, 10 1/4″x 10 1/4″ squares (for distant mountains)
        • Cut 3, 10 1/4″x width of fabric (wof) strips
        • Sub cut  wof strips into 4, 10 1/4″x 10 1/4″ squares each for 12 squares
      • Cut 7, 1 1/2″x wof (for inner border)
    • From Light Sky fabric
      • Cut 11, 10 1/4″x 10 1/4″ squares (for distant sky)
        • Cut 3, 10 1/4″x width of fabric (wof) strips
        • Sub cut wof strips into 4, 10 1/4″x 10 1/4″ squares each for 12 squares
    • From Corner Stone fabric
      • Cut 4, 4″x 4″ squares (for corner stones)
      • Cut 2, 2 1/2″ x wof (to supplement jelly roll strips)
    • From Outer Border fabric
      • If fussy cutting –
        • Cut 2, 4″x 65 1/2″ strips along length of pattern
        • Cut 2, 4″x 56 1/2″ strips along length of pattern
        • from fussy cutting scraps
          • Cut 2, 2 1/2″ x 42″ strips to supplement jelly roll
      • If NOT fussy cutting –
        • Cut 6, 4″ x wof strips
        • cut 2, 2 1/2″ x wof strips
    • From binding fabric
      • Cut 7, 2 1/2″ x wof strips

    • Tips for working with Jelly Rolls:
      • Run a lint brush over the raw edged sides of the jelly roll before unwrapping it, otherwise you will have little fluffy lint fuzzes all over the place.
      • Iron strips flat before sewing.
      • GET STEAMED!!  It will help to realign the fibers is you use steam when you iron.  They will relax and loose the curl that has been forced into them by being rolled up


    Sewing Directions:
    LARGE STRIPED TRIANGLES:

    • From jelly roll (+ 4, 2 1/2″ x wof strips cut from corner stone and outer border fabrics)
      • Randomly sew 11 sets of 4 strips together along the long edge
      • Iron seam allowances open
        • To open seam allowances place the sewn strip on a hard surface (like a cutting table or desk)  Spread the larger pieces of fabric to the sides, right side down, then use your finger nail to nudge the seam allowances apart.  The  use STEAM to set the seams open.
      • Each strip set should measure approximately 42″ x 8 1/2″
      • Using the lines on your ruler cut 45 degrees from the corner of the first strip set.
      • Turn ruler over and make second cut on strip set at 45 degrees from the last edge cut.
      • Continue in this manner across set for 4 large right triangles per set
      • Because you will be working with biased edges the pieces will have a tendency to stretch.  Do the best that you can to keep things square, but don’t worry too much about it.  These triangles are large enough to be squared up when you get to the final step of block construction. 
      • Repeat process with remaining strip sets for a total of 44 large right triangles.
      • NOTE: As you only need 42, you will have two extras.

    MOUNTAIN BLOCKS:

    Mountain Block, Right Facing – make 21
    NOTE – This is a drawing.  In an actual block the striped pieces may be different widths.
    Mountain Block, Left Facing – make 21
    NOTE – This is a drawing.  In an actual block the striped pieces may be different widths.

    • Gather
      • 11, dark 10 1/4″x 10 1/4″ squares
      • 11, light 10 1/4″x 10 1/4″ squares
      • 42 large, striped right triangles
    • Make 21 half square triangles (HST)
      • Draw a line diagonally across the wrong side of each light 10 1/4″x 10 1/4″ square
      • Align one light square atop one dark square with right sides together
      • Sew 1/4″ to each side of the drawn line
      • Cut on line to make 2 HST
      • Iron seam allowances open.
      • Cut each HST in half diagonally, perpendicular to the seam to make 2 right triangles each (mirror images of each other)
      • Repeat process with remaining squares, but do not cut the last HST in half for 42 bi-colored large triangles.
    • Sew one striped triangle to one bi-colored triangle
      • The striped triangles will be bigger than the bi-colored triangles.  I did this on purpose so that the cutting would be easier.  I found trimming after the weird blocks were made more accurate than trimming stretchy triangles.
      • Align the triangles along the hypotenuse (the side opposite the right angle), with right sides together, pin!
      • Sew along the hypotenuse to make one large square-ish shape. 
    • Iron seam allowances towards the striped triangle.
    • Trim to 9 1/2″ x 9 1/2″ square – be sure to keep the center of the square where the hypotenuse and the seam of the bi-colored triangle meet.
    • Repeat with remaining triangles for 42 blocks.


    Assemble Center of Quilt:

    • Gather 42 Mountain blocks
      • 21 right facing
      • 21 left facing
    • Arrange 7 rows of 6 blocks each
      • 3 rows – left, right, left, right, left, right – notice how they make 3 striped peaks
      • 4 rows – right, left, right, left, right, left –  only two striped peaks here
    • Sew blocks together ironing seam allowances towards the left facing block
    • Sew rows together
      • It will help to keep your quilt square if you
        • Pin the rows together, making sure that the seams from each row line up with the seams to the next.
        • Sew the rows together with the white (sky fabric) on the top.  It is cut with the weave of the fabric and will not stretch as much as the edge of the striped mountains.
      • Start with a right left right row
      • Alternate rows
      • End with a right left right row

    Add Borders:

    • Gather
      • Center of quilt
      • 7, 1 1/2″x wof (for inner border)
      • 4, 4″ x 4″ corner stones
      • Outer border strips
    • Inner Borders
      • Sew 2 sets of 2, 1 1/2″ strips together along the short side.
      • Iron seam allowance open
      • Attach to long sides of quilt top.
      • Iron seam allowance toward the border.
      • Trim excess.
      • Sew remaining strips together, along the short sides, to make 2 pieces long enough to fit short ends of your quilt top.
      • Attach to the short sides of quilt top.
      • Iron seam allowances towards the border.
      • Trim excess.
    • Outer Borders
      • Measure the sides of your quilt top – record below
        • ________ top (short)
        • ________ bottom (short)
        • ________ left (long)
        • ________ right (long)
      • Cut 2 strips to fit the left and right sides as recorded above.
      • Attach to quilt top
      • Iron seam allowances towards the outer border
      • Cut remaining strips to fit the top and bottom as recorded above.  (Remember you are going to add a corner stone in the next step…your strip will be shorter than the edge of your quilt at the moment.)
      • Add corner stones to the ends of each strip.
      • Iron seam allowances towards the strip.
      • PIN strip to top, right sides together,  matching up seam at corner stones with seam of long borders.
      • Sew in place.
      • Iron seam allowances towards the outer border.
      • Repeat process for bottom edge.
    Your top will look something like this now. 


    Add Applique:

    This is totally optional.  The mountains do not need the applique to be a finished quilt.  Look at the picture above.  I think the quilt would be perfect just like this.  However, I wanted to play with the fun characters in S’more Love

    I found some wonderful drawings on Moda’s swatch pages for this line.   I cut and pasted and enlarged the images until I got what I wanted, then turned them into an applique. 

    I added a little bit of dimension by adding an extra piece of batting between the appliqued pieces and the core of the quilt.  (This is an old technique called Trapunto)  I like the way it makes my cars and RVs pop.
    

    Finish Quilt:  Layer and Quilt as desired.


    A perfect spot to dream about the next camping trip – 63″x 72″ big enough to cover a camping cot, or the skinny pull out bed in your RV. 

    I quilted mine in Vickie Malaski’s Animal Tracks pattern.

    I’d love to see your quilts.  Please share a photo of your finished quilt with my group, Tops to Treasures on Flickr.

    Cindy Sharp
    {topstotreasures.blogspot.com}