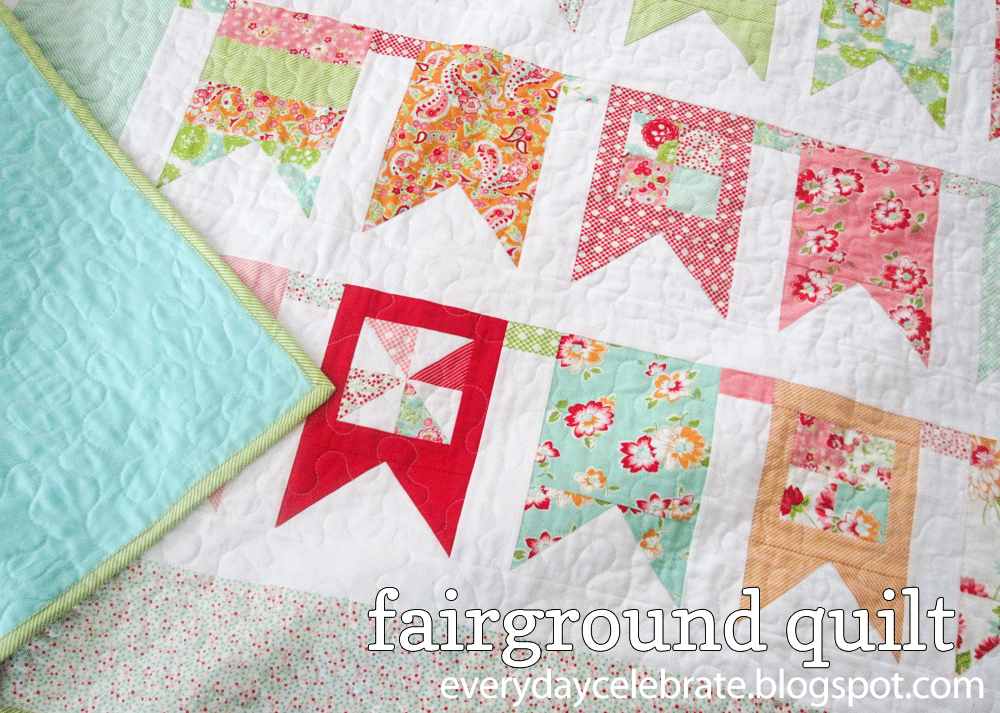
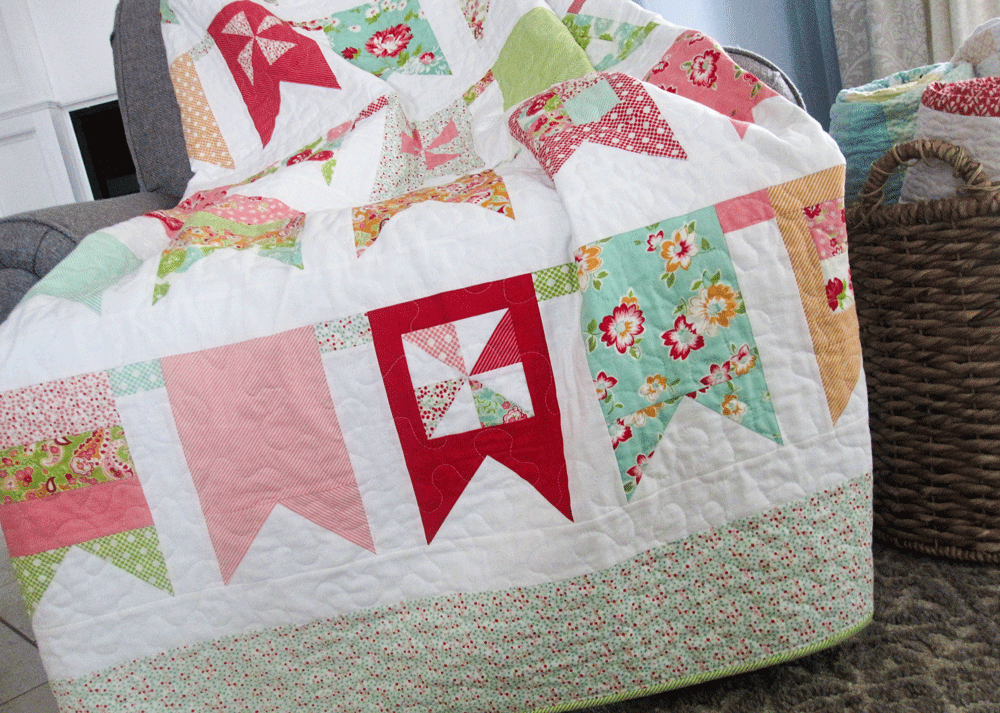
Hi everyone! It is LeAnne Ballard from Everyday Celebrations. Confession. I love banners! I have a banner for just about every holiday and season that I love to hang on my mantel. At the end of last year, I sketched up this quilt and got so so excited to make it, but I was waiting for the perfect fabric. When I saw Scrumptious I knew it was the one.

1 Scrumptious Layer Cake
2 1/8 yards neutral fabric – Bella Solid in Bleached White 97
1 1/3 yards for border – Scrumptious Berry in Aqua 55074-12
5/8 yard for binding – Scrumptious Bias Stripe in Lime 55071-13
3 3/4 yards backing – Bella Solid in Aqua 34
65″ x 85″ batting
finished size 61″ x 80″

1. All seams are 1/4″.
2. WOF means width of fabric.
3. HSTs stands for half-square triangles.
4. When cutting the layer cake squares, use the cutting diagrams. When you cut for blocks #1 and #2, some pieces will be used in other blocks. I recommend placing the pieces in piles and labeling with the corresponding measurement and block to avoid confusion.
This quilt is made up of four different blocks.
Decide if you would like your pinwheels in block #3 to be scrappy or not. If you choose scrappy note the change in the cutting of block #3. Otherwise, follow the cutting as follows.
{Cutting}
Neutral *based off 42″ wide fabric
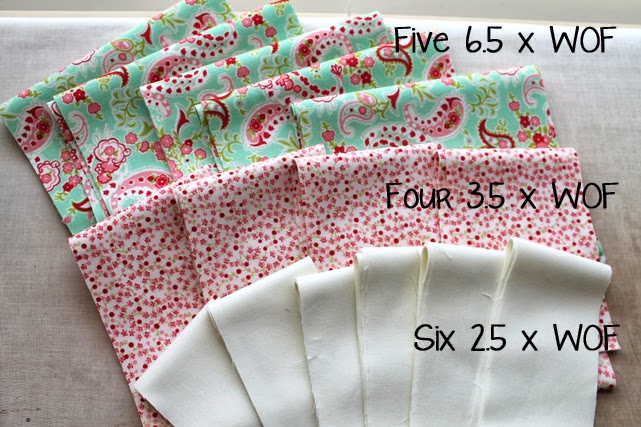
From the 2 1/8 yards of neutral fabric cut:
{6} 3.5″ x WOF strips
Subcut {6} 6.5″ x 3.5″ strips per strip for a total of {36}
{11} 2.5″ x WOF strips (you only may need {9} if your fabric is 44″/45″ wide)
Subcut {4} 8.5″ x 2.5″ strips per strip for a total of {42}
{9} 2.5″ x WOF strips strips for the sashing between rows
Border
From the 1 1/2 yards of border fabric cut:
{7} 6″ x WOF strips
Binding
From the 5/8 yard of binding fabric cut:
{8} 2.5″ x WOF strips
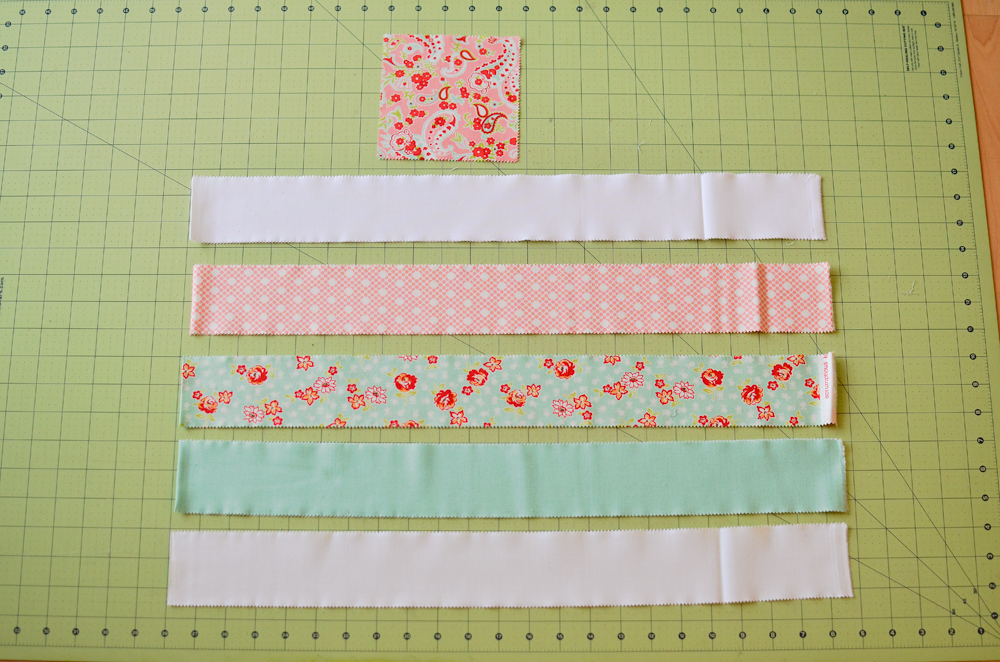
Layer Cake Squares – select 30 layer cake squares
There is very little waste so cut carefully; measure twice, cut once! I recommend cutting one or two before cutting multiple at a time. After you are done cutting for each block, stack pieces together and clearly label to avoid confusion.
If you are using HSTs from the Flying Geese, skip the following:
From any of the remaining layer cake squares cut:
{6} 2.5″ squares – Add to 2.5″ squares for block #2 for a total of {24}
{6} pairs of 3 3/8″ squares for a total of {12} – the contrasting part of the pinwheels in block #3
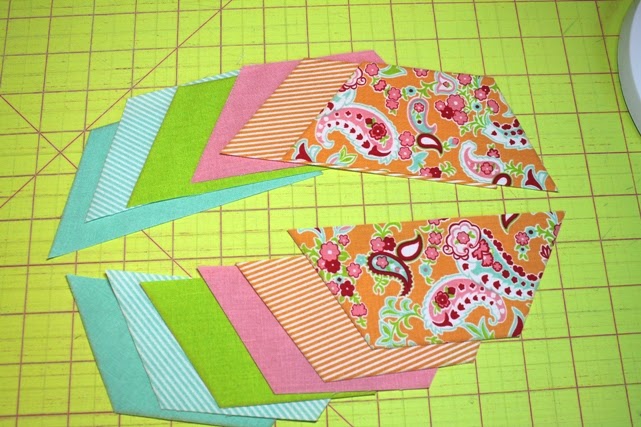
{Flying Geese}
All blocks use a Flying Geese unit. Draw a diagonal line on the back of all {72} of the 3.5″ squares. If you making the scrappy pinwheels, or if you want a bunch of FREE HST, draw a second diagonal line 1/2″ away from your first line on your 3.5″ squares.
1.Take one 6.5″ x 3.5″ neutral piece and place right-side up. Place one 3.5″ square as shown with the wrong-side up. Make sure the diagonal line is correctly positioned as shown below. (1a) If you have a second diagonal line for the HST, place so it is above the first line. (1b) Pin square in place.
2. Sew directly on the drawn diagonal line. (If you have a second diagonal line, sew on that line next.)
3. Next, use a clear ruler and place the 1/4″ line directly on top of your stitching. Cut on the outside with a rotary cutter. (3a) If you are making HST, this will yield one HST per side. (3b)
4. Press the seam to the print or top of the unit. (Do not IRON this seam, or you may get a wonky unit.)
5. Repeat on the the other side of unit. If you have a second line, position it ABOVE the first line.
6. Press entire unit.
7. If you are using HSTs from this step, choose {4} HSTs per block #3 for a total of {24} HSTs. Square up to 2.5″. Place your HSTs with your block #3 cutting.
Remember, keep these organized by block to avoid confusion. (For example. I made all my Flying Geese for block #1 then placed them with all my block #1 cutting. Then continued for the next block and so on.)
{Half-Square Triangles (HSTs)}
If you are using HSTs from the flying geese, skip this step:
For each #3 block, you will need {2} pairs of 3 3/8″ squares. One fabric will be the same as the outside part of the block. Call this the “neutral”. The other fabric will be the the contrast part of the pinwheel. Call this the “color”.
1. Using a pencil, lightly draw a diagonal line on the back of your neutral squares.
2. Place one neutral square and one color square right sides together with the diagonal line facing up.
3. Sew 1/4″ from the diagonal line on each side.
4. Cut directly on the drawn diagonal line to yield {2} HSTs.
5. Press the seam towards the darker of the two fabrics.
6. Square up your HSTs to 2.5″.
7. Place HSTs with your block #3 cutting.
{Block Assembly}
unfinished size 6.5″ x 9.5″
Block #1
For each block #1 you will need:
{1} 6.5″ square, and {1} flying geese unit – all from same fabric
1. With wrong sides together, pin a flying geese unit to a matching 6.5″ square as shown below. Sew together and press seam towards the 6.5″ square.
2. Repeat for a total of {18} blocks.
Block #2
For each block #2 you will need:
{2} 1.5″ x 4.5″ strips, {2} 1.5″ x 6.5″ strips, and {1} flying geese unit – all from same fabric
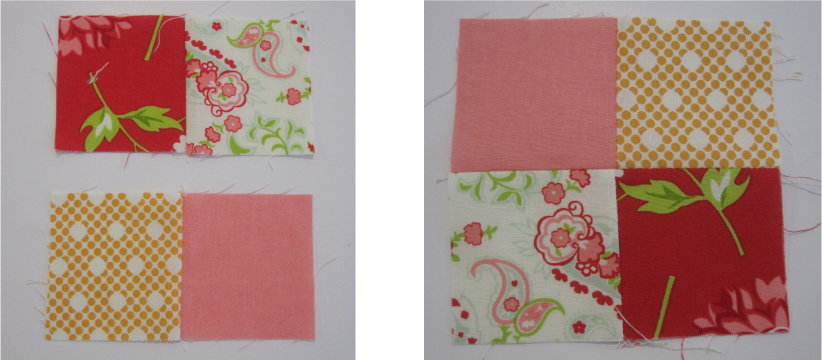
{4} 2.5″ squares from various fabrics
1. Choose {4} 2.5″ squares four each four-patch unit. Sew together in two rows of two and press seams in opposite directions. Pin the rows together, nesting the seams, and sew. Press seam open to reduce bulk.
2. Sew a 4.5″ x 1.5″ strip to both sides of the four-patch unit. Press seams to outside. (2a) Sew a 6.5″ x 1.5″ strip to both sides of the four-patch unit. Press seams to outside. (2b) The unit should measure 6.5″.
3. With wrong sides together, pin the matching flying geese unit to the four-patch unit as shown below. Sew together and press seam towards the four-patch unit.
4. Repeat for a total of {6} blocks.
Block #3
For each block #3 you will need:
{2} 1.5″ x 4.5″ strips, {2} 1.5″ x 6.5″ strips, and {1} flying geese until – all from same fabric
{4} HSTs
1. Arrange {4} HSTs into a pinwheel design.
2. Sew together in two rows of two and press seams in opposite directions. Pin the rows together, nesting the seams, and sew. Press seam open to reduce bulk.
3. Follow step two in block #2 for attaching the 1.5″ strips to each side. Press seams to outside. The unit should measure 6.5″.
4. With wrong sides together, pin the matching flying geese unit to the pinwheel unit as shown below. Sew together and press seam towards the pinwheel unit.
5. Repeat for a total of {6} blocks.
Block #4
For each block #4 you will need:
{1} flying geese unit – shouldn’t match any of the other fabrics for this block
{3} 2.5″ x 6.5″ strips – each a different fabric
1. Sew {3} 2.5″ x 6.5″ strips together along the 6.5″ side. The unit should measure 6.5″.
2. With wrong sides together, pin a flying geese unit to the stripe unit as shown below. Sew together and press seam towards the stripe unit.
3. Repeat for a total of {6} blocks.
{Quilt Assembly}
Layout your blocks in {6} rows of {6}. In each row I included {3} of block #1, and {1} each of the other blocks. Then alternate their position from row to row. (I know this picture only shows five rows. I decide to add another row after this picture.)
{Sashing}
1. Sew {1} 2.5″ x 1.5″ tag piece to the top of {1} 8.5″ x 2.5″ neutral piece. Press seam OPEN. Repeat until you have {42}.
2. Sew {1} sashing strip to both sides of the first block in the row.

3. Sew {1} sashing strip to the right side of the remaining blocks in the row.
4. Sew the the row together. Press seams out towards the sashing.Press the entire row. Repeat for six rows.
5. Sew together {2} of the 2.5″ x WOF sashing strips. Press seam OPEN.
6. Using a tape measure, measure each row. If they are different take the average. Mark this measurement on your sashing strip and mark with a pin. Pin and sew sashing between rows. Trim after sewing, saving the excess for remaining sashing. Repeat between all rows.
7. After adding the sashing between all rows, measure the width of the quilt at the top, middle, and bottom. If they are different, take the average. Measure this on a sashing strip and mark with a pin. Sew to the top of the quilt. Trim after sewing, saving the excess. Repeat for the bottom.
{Borders}
1. Sew together {2} border strips. Press seam OPEN.
2. First we will attach the side borders. Measure the length of the quilt at both sides and down the middle. If they are different, take the average. Measure this length on the border strip and mark with a pin. Bring the end of the border strip to the pin and mark the middle of the strip with a pin.
3. Fold your quilt top in half lengthwise and mark with a pin.
4. Place border strip and quilt top right sides together. Using the pins as a guide, match the middle of the quilt and the middle of the border strip. Pin in place. Match the ends of the quilt with the ends of the border and pin in place. Pin between the middle and ends.
5. Sew border in place. Trim border and check corner is square. Repeat with other side.
6. Next, measure across the width of the quilt at the top, middle, and bottom. Again, if different take the average. Fold your quilt top in half widthwise and mark with a pin. Repeat the same process in step 4 for the top and bottom border.
Next, comes everyone’s favorite phrase in quilting, “Baste, quilt, and bind”. Then wash, love, cuddle, and use your Fairground quilt.

one darling 61″ x 80″ quilt
LeAnne Ballard
{everydaycelebrate.blogspot.com}