I’m back for round two in the Moda Bake Shop! I’m dreaming of throwing as many little posies into these baskets as I can and I’d really love it if you could join me.
1 – “Dream On” layer cake by Urban Chiks
2 yards background fabric
.75 yards binding fabric (adjust amount if making bias binding)
3 yards of backing fabric
1 yard fusible web (Heat and Bond Lite)
55” x 55” batting

72 Buttons (assorted sizes)

From the layer cake, choose 3 or 4 green prints and set these aside to use for stems and leaves. Also choose 11 additional prints for the borders and set aside. Flower shapes will be cut from some of the remaining squares so if there are a few special ones that you want to use for flowers only, set these aside also.
Choose 12 prints from the layer cake to use for the basket blocks.
From each of these 12 prints, cut 1 – 4 1/2” x 10“ strip and 1 – 5 1/2” x 10“ strip. Set the 5 1/2” strips aside.
Sub-cut 9 of the 4 1/2” x 10” strips as follows:
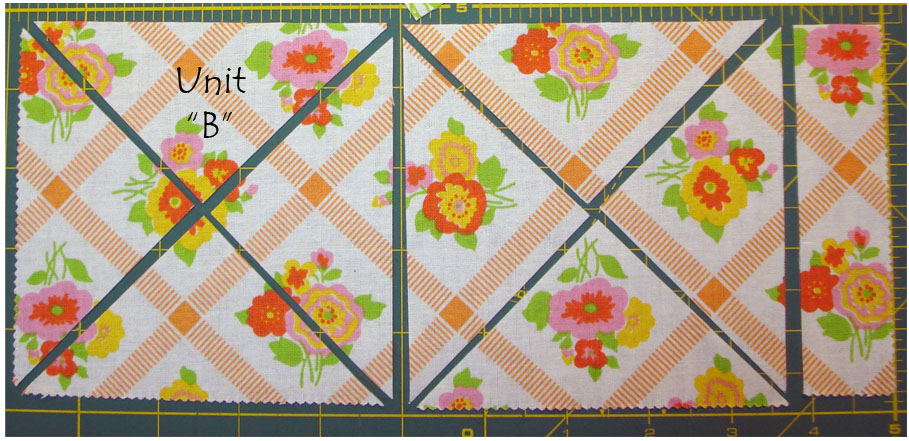
* 1 – 4 1/2” x 4 1/2” square. Cut this square twice on the diagonal to make the basket triangles (Unit “B”)
* 1 – 2 1/2” x 5 1/2” strip, then sub-cut it into 2 – 2 1/2” x 2 1/2” squares (Unit “A”) for basket. You will have a 1/2” x 2 1/2” strip leftover to add to your scrap stash)
* 1 – 2” x 5 1/2” strip (set aside for border)
Sub-cut the remaining 3 – 4 1/2” x 10“ strips as follows:
* 2 – 4 1/2” x 4 1/2” squares. Cut each of these squares twice on the diagonal to make the basket triangles (Unit “B”). You will have a 1” x 4 1/2” strip leftover to add to your scrap stash.
Using all 12 of the 5 1/2” x 10“ strips that were previously set aside:
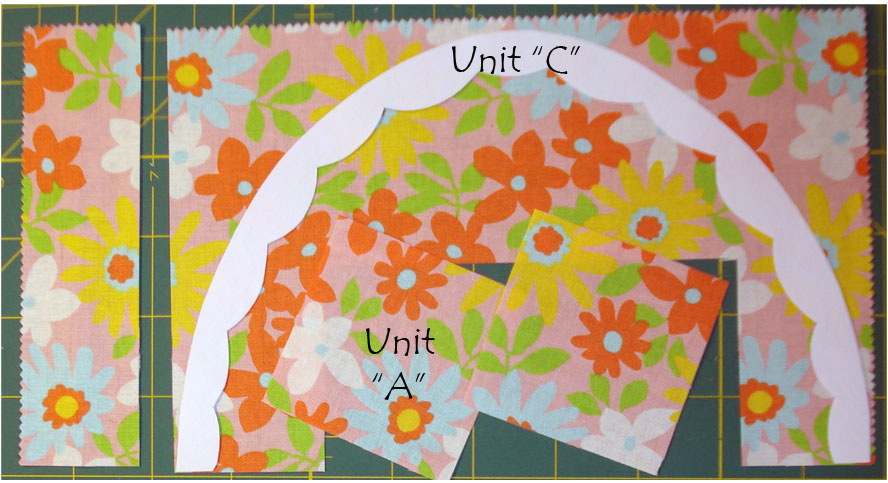
Trace 12 scalloped handles (Unit “C”) from the attached template onto the paper side of the fusible web.
Cut and trim shapes roughly 1/8” – 3/8” from traced edges.
Fuse a handle shape (Unit “C”) to the wrong side of each of the remaining 5 1/2” x 10” strips ensuring that the top edge of the handle shape is very close to the edge of the fabric and as far to the right side of the fabric as possible (photo shows right side of fabric for demonstration purposes only).
Cut out the handle shapes on drawn lines. (See diagram, prior to fusing to ensure proper placement).
Once the handles have all been cut out and using the remaining fabric pieces from this same strip, cut the following:
*cut 2 – 2 1/2” x 2 1/2” squares (Unit “A”) for baskets;
*cut 1 – 1 1/2” x 5 1/2” rectangle (set aside for border).
Recap:
From each of 9 of the 12 squares you will have cut:
*1 – scalloped handle
*4 – 2 1/2” x 2 1/2” squares
*1 – 1 1/2” x 5 1/2” strips for border
*1 – 2” x 5 1/2” strips for border
*1 – 4 1/2” x 4 1/2” squares, cut twice on diagonal (36 triangles).
From each of 3 of the 12 squares you will have cut:
*1 – scalloped handle
*2 – 2 1/2” x 2 1/2“ squares
*1 – 1 1/2” x 5 1/2“ strips for border
*2 – 4 1/2” x 4 1/2” squares, cut twice on diagonal (24 triangles).
Background Fabric –
Basket background:
Unit “D” – Sides
*cut 4 – 2 1/2” x 42” strips
– sub-cut into 24 – 2 1/2” x 7” rectangles
Unit “E” – Bottom
*cut 1 – 5” x 42” strip
– sub-cut into 6 – 5” x 5” squares
– cut once on the diagonal (12 triangles)
Unit “F” – Handle Foundation:
*cut 2 – 11” x 42” strips
– sub-cut into 6 – 11” x 11” squares
– cut once on the diagonal (12 triangles)
Unit “G” – Side and Corner Triangles (see diagram below for layout):
*cut 2 – 15 1/2” x 42” strips
– sub-cut into 3 – 15 1/2” x 15 1/2” squares
– cut twice on the diagonal (12 triangles)
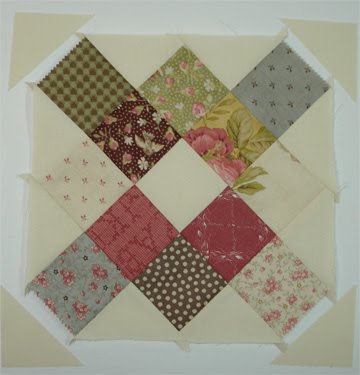
Arrange the 2 1/2” x 2 1/2” squares (Unit “A”) and the cut triangles (Unit “B”) into twelve scrappy baskets.
Position the 2 1/2” x 7” rectangles (Unit “D”) along basket edges as shown in above diagram.
Sew triangles (Unit “B”) for the feet of the basket to the 2 1/2” x 7” background strips (Unit “D”) as shown in the diagram.
Sew the basket triangles (Unit “B”) and squares (Unit “A”) together in diagonal rows.
Sew one side unit (D and B) to one side. Press. Repeat for the other side to complete the basket unit.
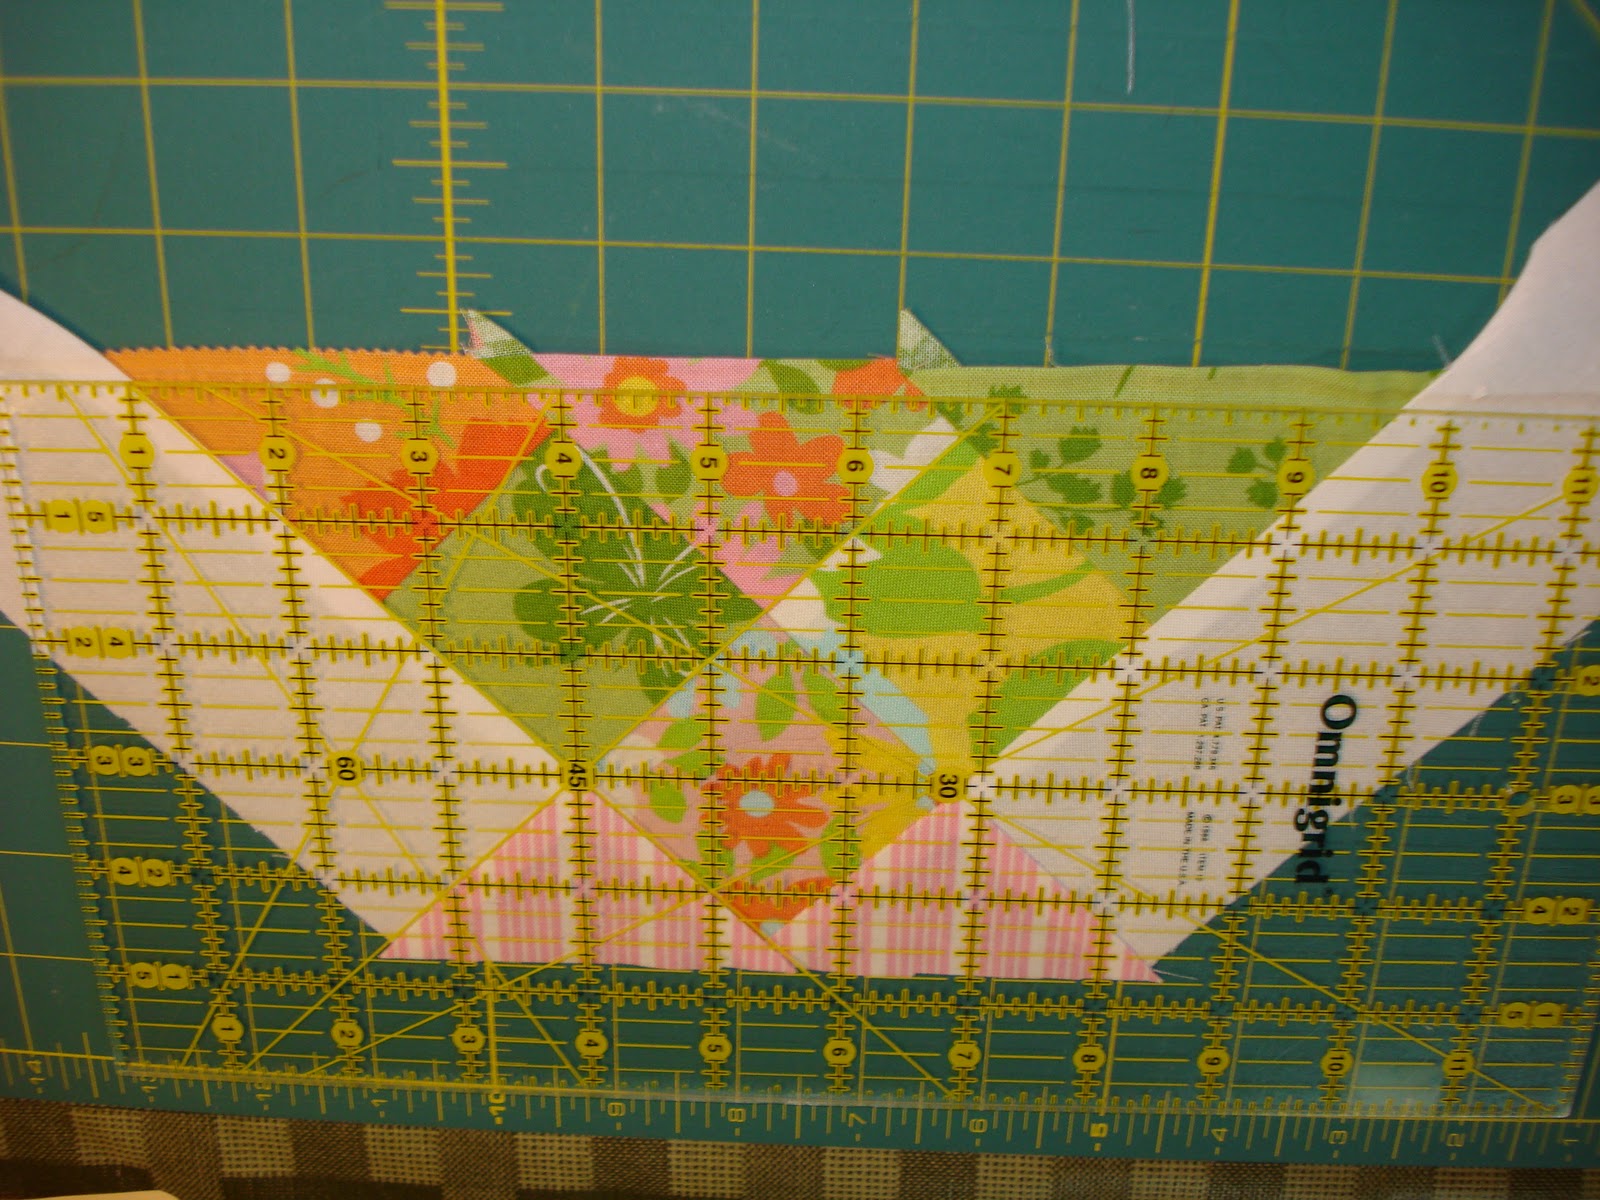
Trim the top edge of the basket as shown, ensuring that the 1/4” seam allowance is maintained along the top.
Trim the bottom edge of the basket in the same manner, ensuring that the 1/4” seam allowance is once again maintained.
Fold one of the previously cut background triangles (Unit “E”) in half and gently crease. Line the crease up with the centre point of the basket base. Pin and stitch in place. Repeat for all 12 baskets. Press.
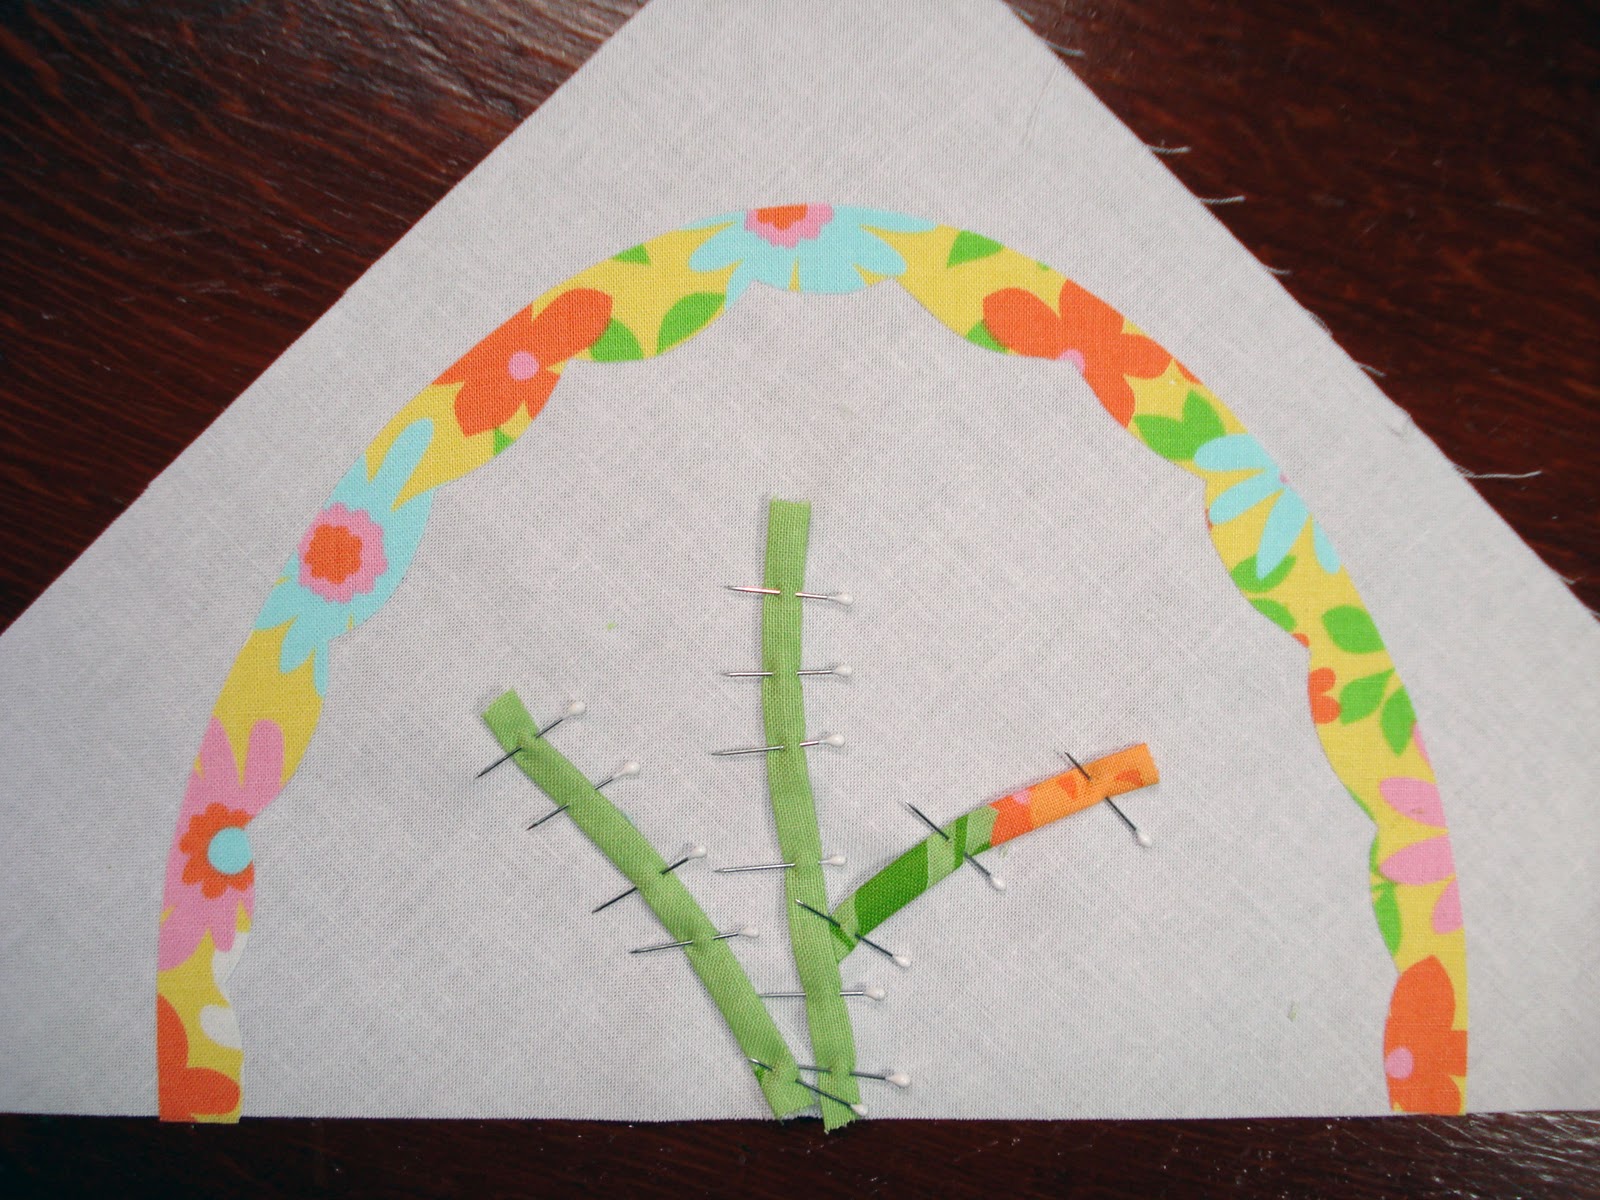
Handles – Remove backing from fusible web on the handle (Unit “C”) and centre on the 1/2 square triangle background unit (Unit “F”). Press in place and blanket stitch around both sides of the handle.
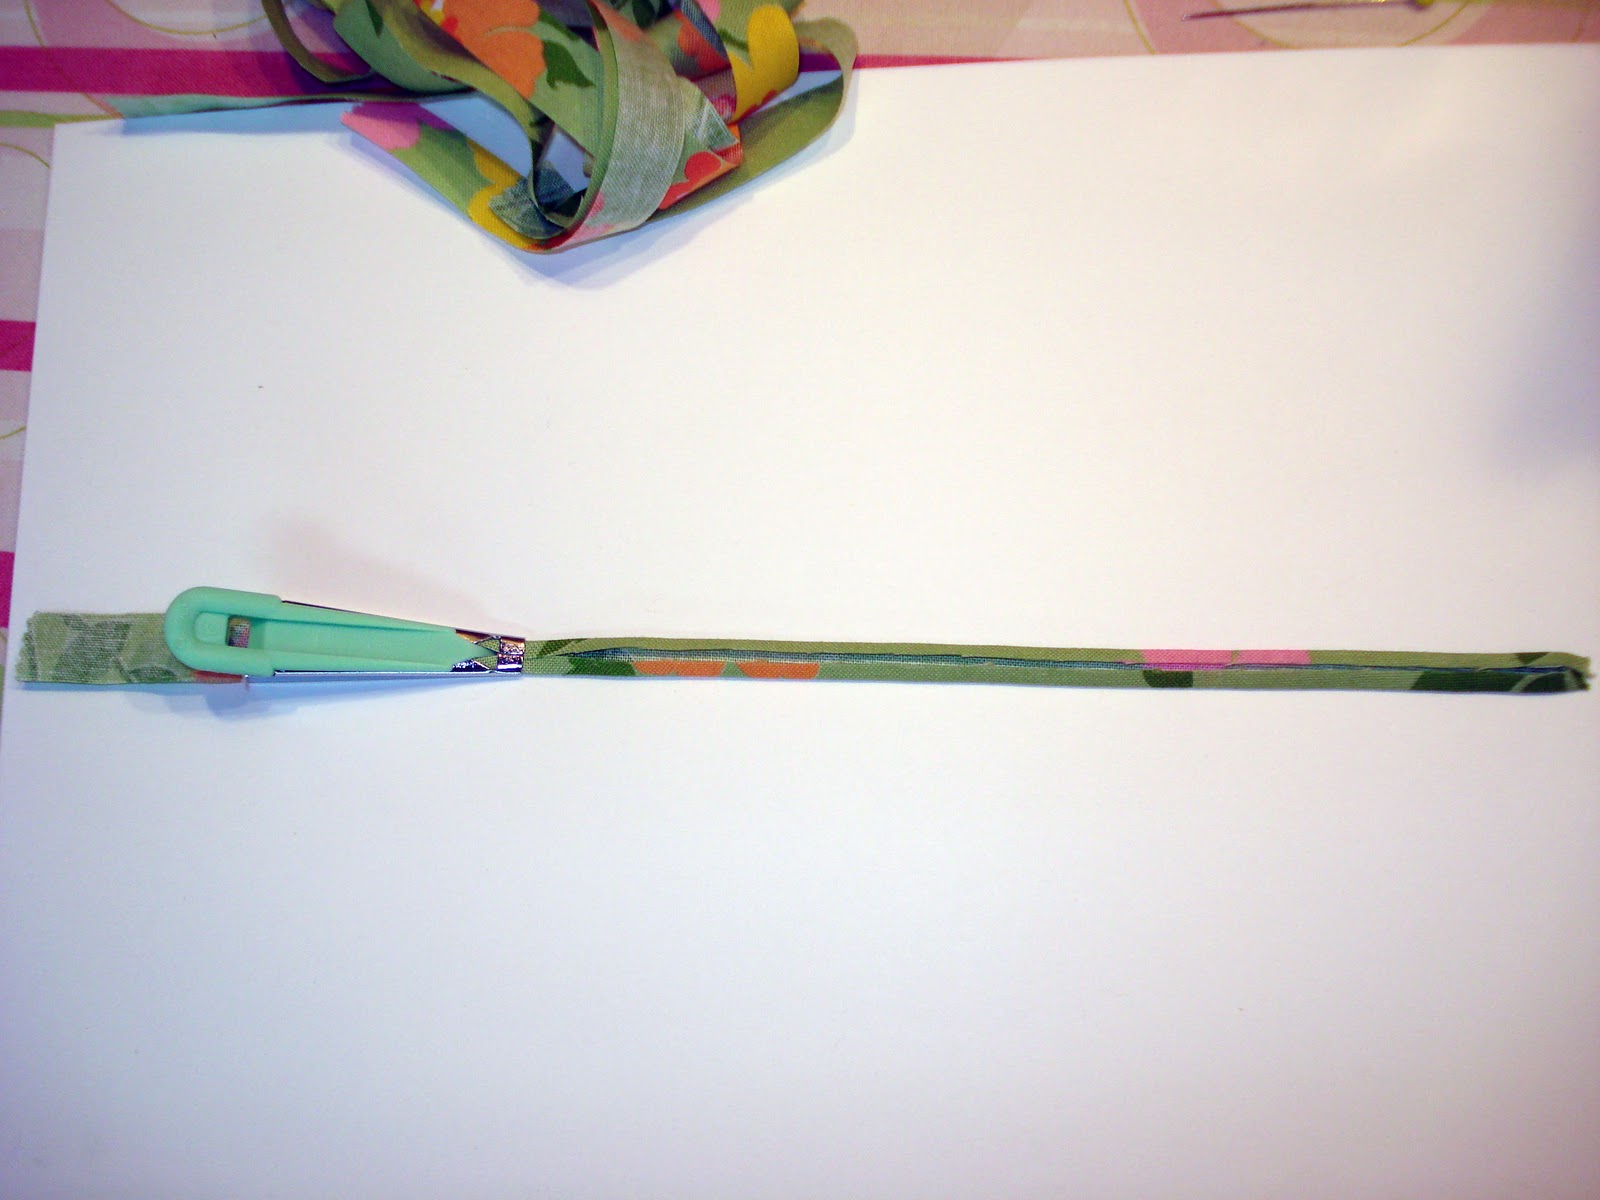
Stems – Each basket will require a 2 1/4”, a 3” and a 3 3/4” stem made from bias strips (adjust lengths as needed). There are two methods I use to make stems. For the fusible method cut fusible web 3” x 10” and press to the wrong side of a 10“ x 10” green print square. Cut into 1/4” strips. Cut to desired lengths and press in place to the basket foundation unit. Using matching thread, blanket stitch down both sides of stem.
If you prefer to use a bias tool, adjust your measurements as needed. I cut 1/2” strips and used a 1/4” bias tape maker as shown in the above photo. Pin in place and using matching thread, blanket stitch down both sides of stem.
Flowers and Leaves – Trace the required number of shapes onto fusible web and fuse to wrong side of chosen prints. Cut out on drawn lines and position as shown in cover photo. Fuse in place.
Sew the completed Unit “F” appliqued blocks to the basket units and gently press seams. Square up the blocks to measure 10 1/2” x 10 1/2”.
Lay out the prepared blocks and side and corner triangles as shown in the diagram below. Sew together in diagonal rows and then sew rows together, carefully matching the seams for each row.
Borders – From the original 12 basket squares you should have cut and set aside the following:
*12 – 1 1/2” x 5 1/2” strips;
*12 – 2” x 5 1/2” strips.
Using the 11 additional 10” x 10” squares from your layer cake and cut as follows:
– cut the 10” square in half creating 2 – 5” x 10” strips;
– stack these strips together, aligning all edges and cut into 8 – 2 1/2” x 5” strips.
Randomly take all of these strips and start sewing them into: pairs, fours, eights, and so on, until you have four strips that measure the length of each of the four sides of the quilt. Some of the strips will be 5 1/2” instead of the 5” and these can be cut down prior to finishing.
I created four – 5” x 5” squares to use as corner squares so that my corner seam lined up with the quilt corners. You could also choose to make two strips the length of the top and bottom edges of the quilt and stitch these in place and then measure the remaining two sides and cut two more strips that measurement.
Binding – Measure the side of your quilt and multiple by four. Divide this number by 42” (width of fabric) and using the number you get, round up to the nearest whole number. This is the number of 2 1/4” strips you need to cut for binding strips. Using a diagonal seam, stitch these strips into a long continuous unit. Press strip in half with wrong sides together. Stitch to the right side of the quilt, aligning raw edges as you go and mitering corners as you come to them. Turn edge over to the back side of the quilt and hand stitch in place.
Make a flower label and attach with pride! Enjoy your baskets and dream for an early Spring!!!

One very dreamy 51″ x 51″ quilt.
I have also made two of these blocks into a small tablerunner and have used rick rack stems instead of bias stems and yo-yo flowers instead of appliqued ones. Stop over and have a peek here to see the different option and if you leave a comment on that post you might also win the tablerunner!
Marlene Biles
{sipiweskequilts.blogspot.com}


 Ingredients for Star Cabins:


