The Love Bunny Skirt


Hi!  I’m one of the Elizabeth’s from over at Simple Simon and Company and today we are sharing how to make one of our favorite things—skirts for our girls. This skirt in particular was made for my Grace to wear through out both the Valentine and Easter seasons.  Here’s how I made it.


One Layer Cake:  I used “Jubilee” by Bunny Hill
1/2 Yard of Bella White
1 inch elastic
bonding material (like Heat’n Bond)


2 Pompoms for the bunny tails

Today’s skirt is a a simple tube with a gathered, elastic waistband.
To get started you will need to take just 2 measurements.  First measure the circumference of your little one’s waist.  (Grace is 18 inches.)  Next measure your little one from her waist to her knee.  (Grace is 13 inches.)  Ok, write those numbers down and save them—you’ll need them in a few minutes.
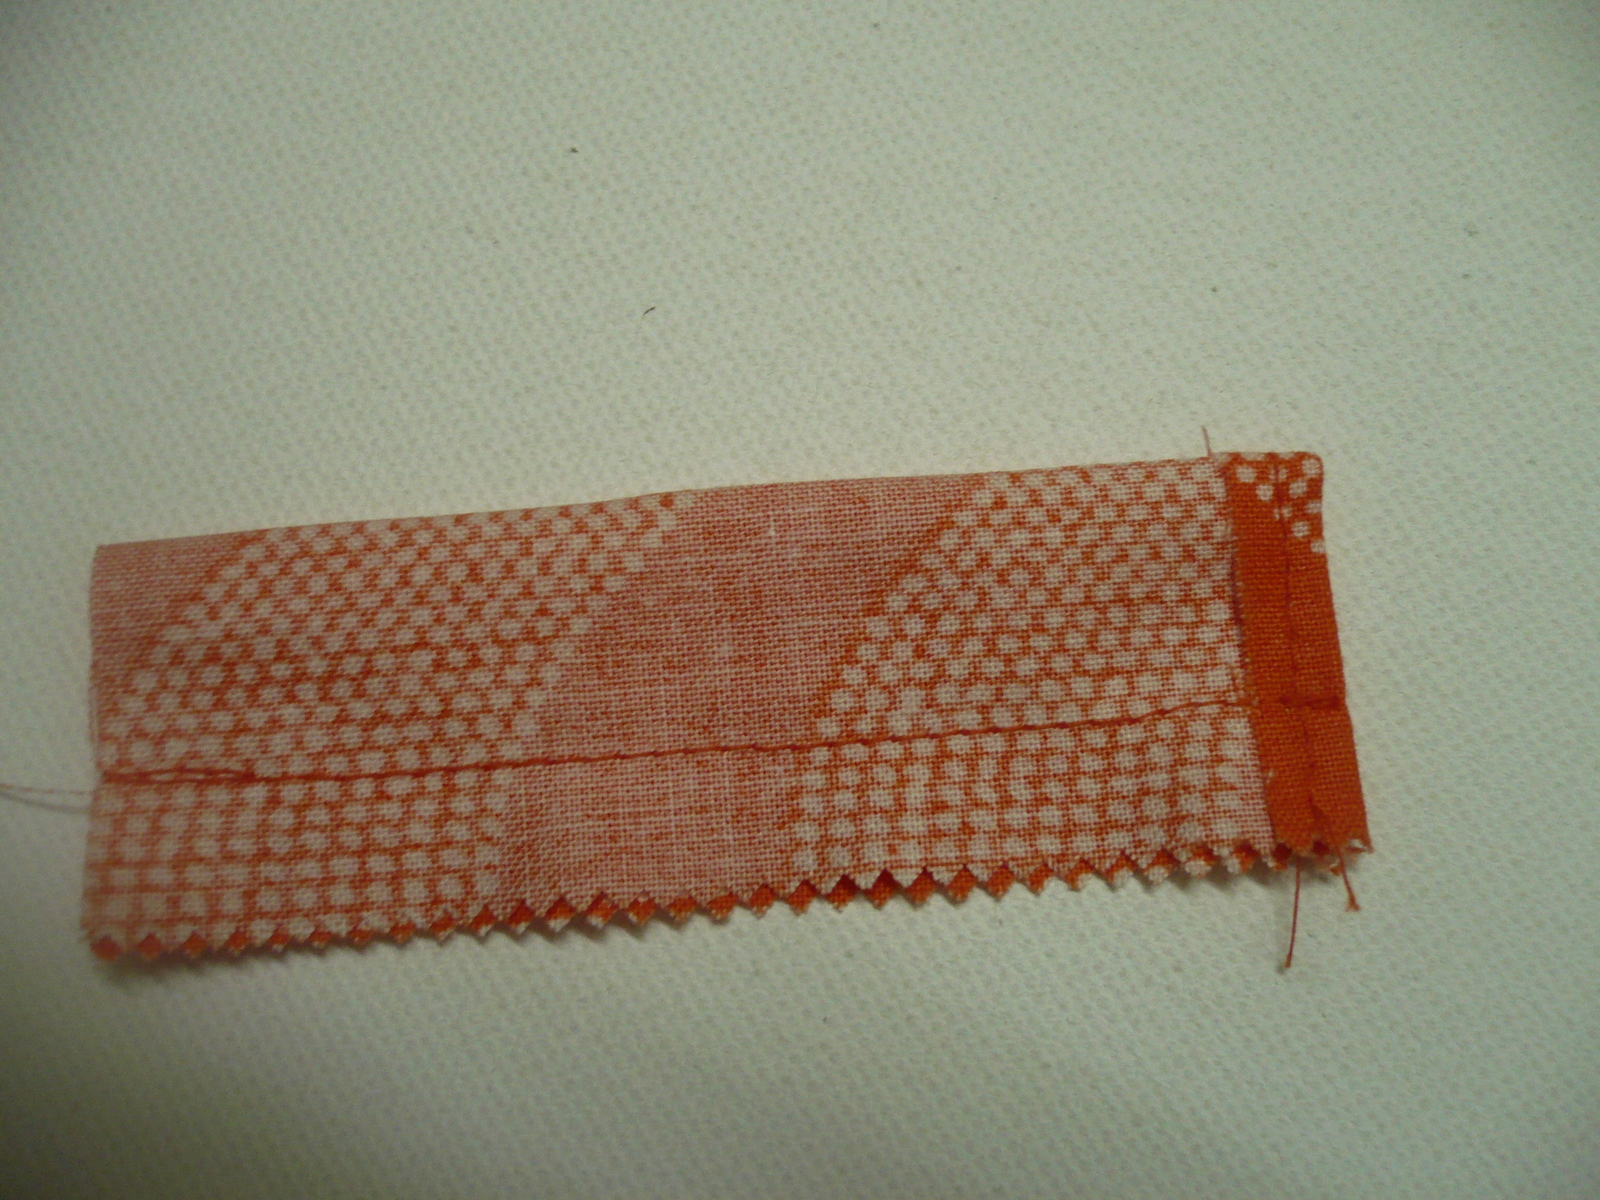
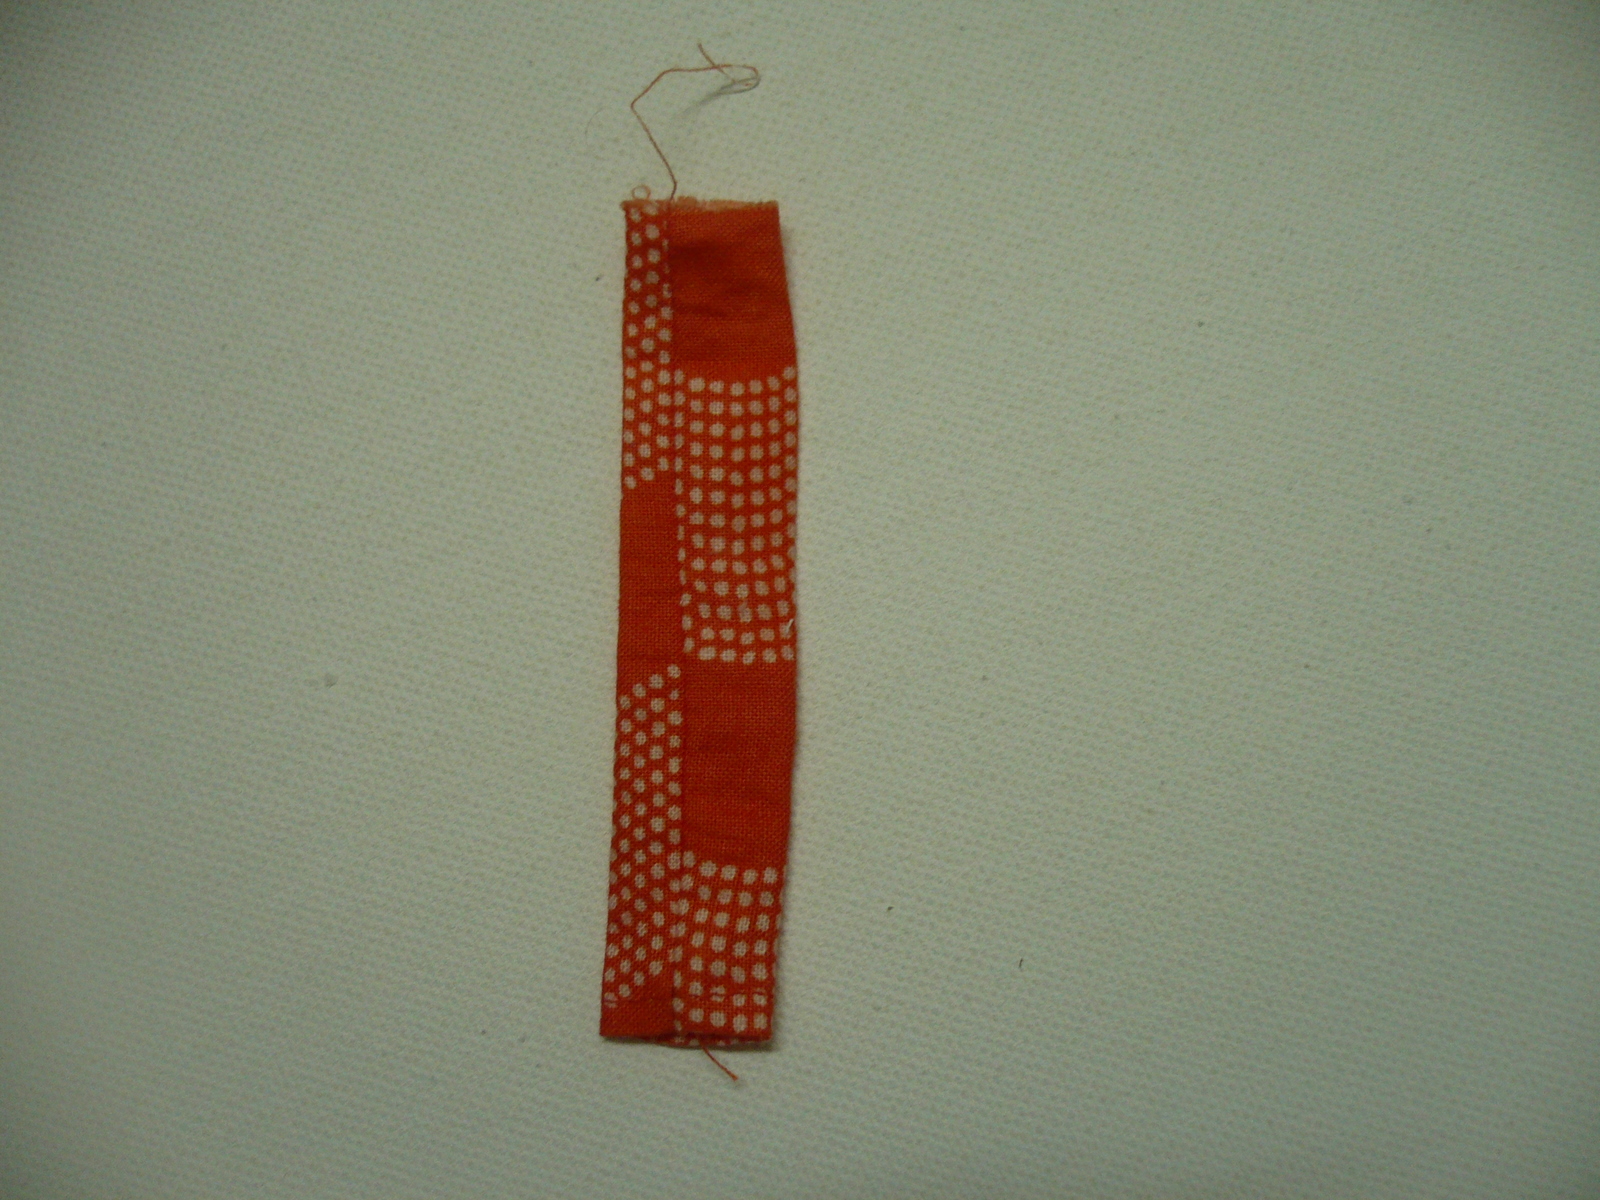
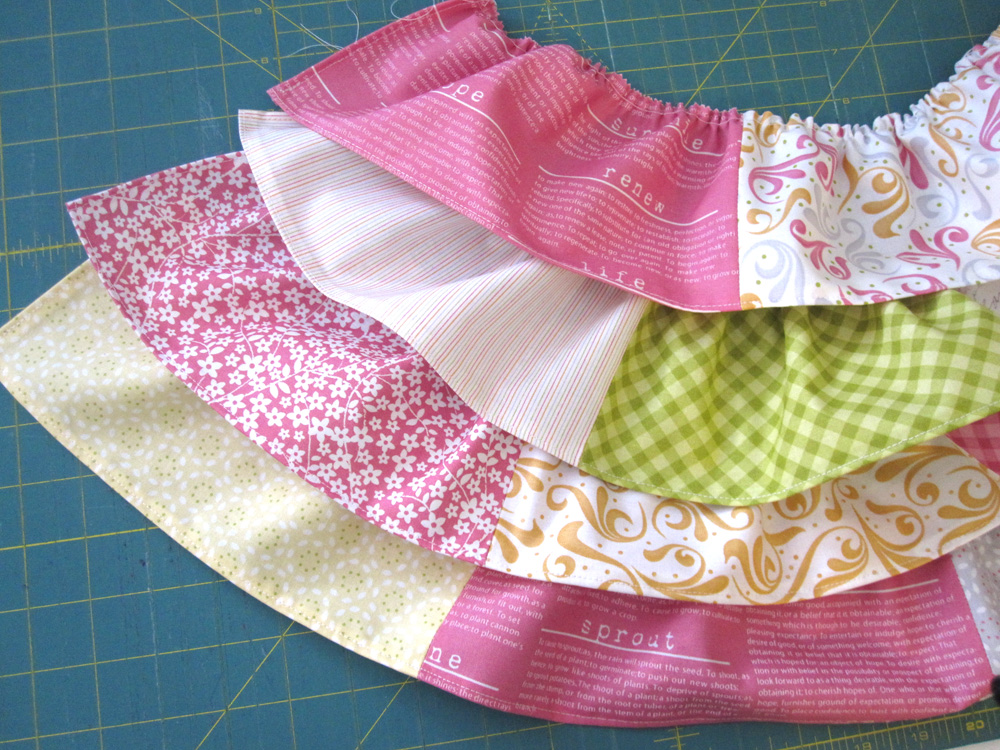
Now let’s get down to business. Choose 3 of your favorite squares from the Layer Cake and cut them each into 4  rectangles measuring 4 and 1/2 inches tall by 5 inches wide.
Next sew the squares together (in a repeating pattern) into one long strip.
(You’ll sew them right sides together.)
 When you are finished iron them nice and flat.
(This will be the patterned strip at the bottom of your skirt.)
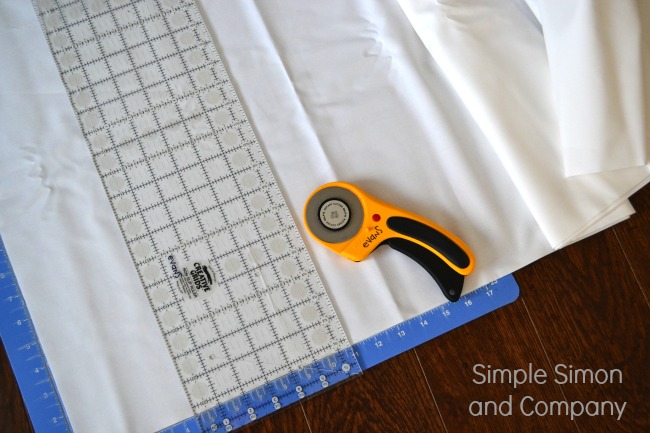
Now we need to cut the solid white portion of your skirt.  I like my girls skirts to have some body to them so I make them as wide as the fabric is (44 inches) and as for the length…well, we’re going to have to do some math.
Right now your patterned strip for the bottom is 4 and 1/2 inches high.  But when we hem it we will loose a half inch and then when attach it to the white fabric we will loose another 1/4 of an inch so that leaves us with 3 and 3/4 inches of length for the skirt.
For Grace’s skirt I wanted it to be 13 inches long so what I did was take that 13 inch measurement and then subtract from that the 3 and 3/4 inches (from the patterned strip) which puts me at 9 and 1/4 inches.  Easy…but we aren’t done just yet. 
Now I need to add in 1 and 1/2 inches to fold over the top for the elastic casing and add an extra 1/4 inch for where the white will be sewn to the gray strip. 
So after I add this extra 1 and 3/4 inches I know that I need to cut the white portion of my skirt 11 inches long.
Which I did.  Which means I cut my white piece of fabric 11 inches long by 44 inches wide.
(The length of your white area may be longer or shorter depending on the hip to knee measurement of your little one.)
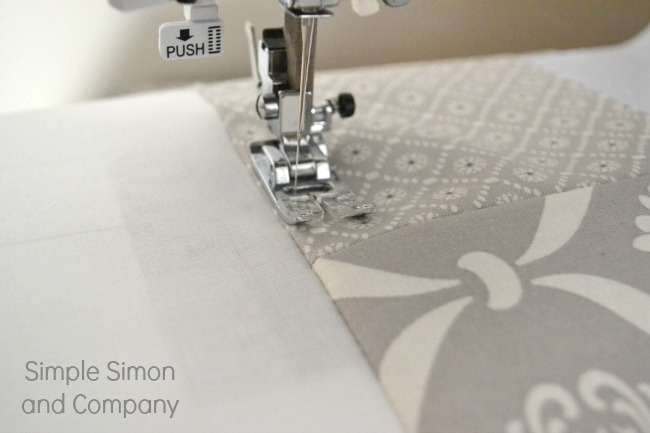
Now with right sides together sew your patterned strip to the bottom of your white strip.
Iron.
Then top stitch.
You will have a little excess patterned fabric left over on the end of your patterned strip.  Just cut that off so it is even with the end of your white fabric.
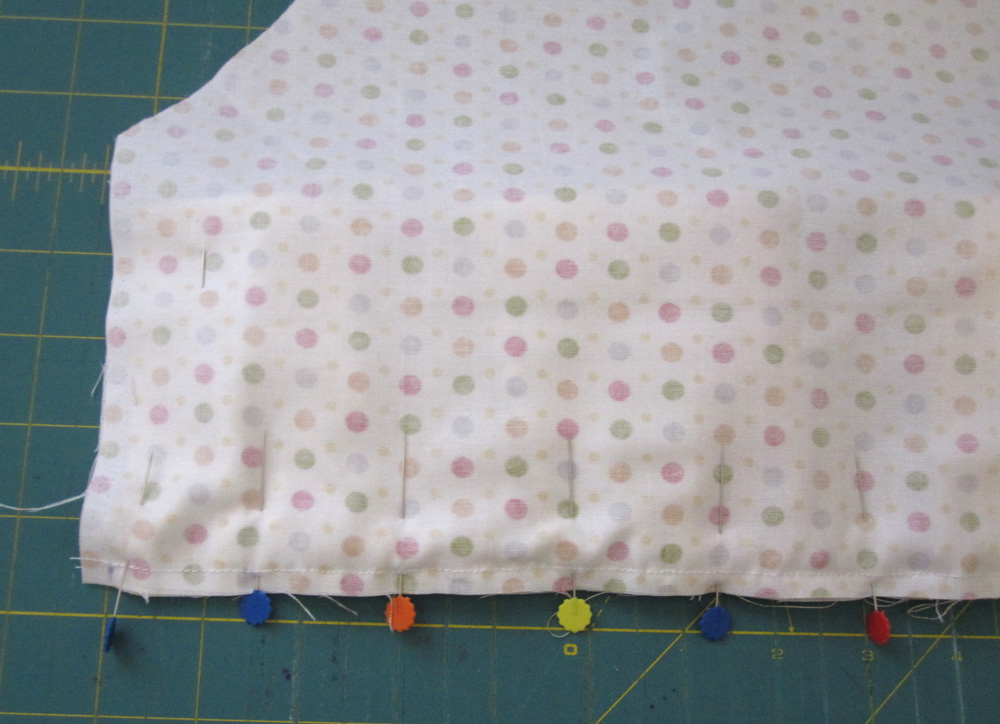
Now turn under the bottom (patterned) edge of your skirt 1/4 of an inch, iron, and sew.  Then repeat (turning it under another 1/4 inch, ironing, and sewing).  This will finish off the bottom hem of your skirt. 
  
Next we get to attach our heart and bunnies!
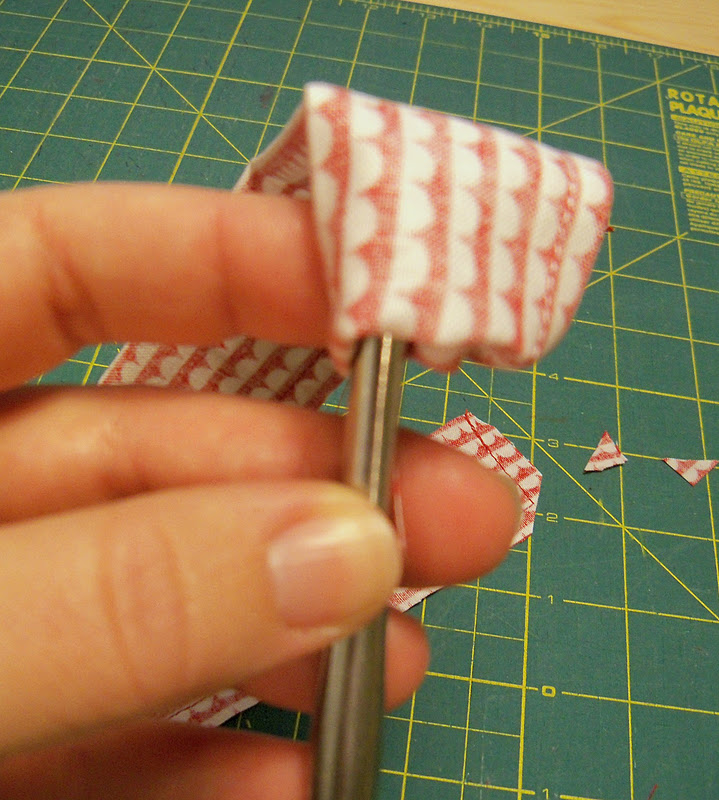
Select the fabric you would like for your heart and bunnies from the layer cake.
Then, following the instructions from the medium of your choice, iron on your bonding material to the back of your bunny’s fabric.
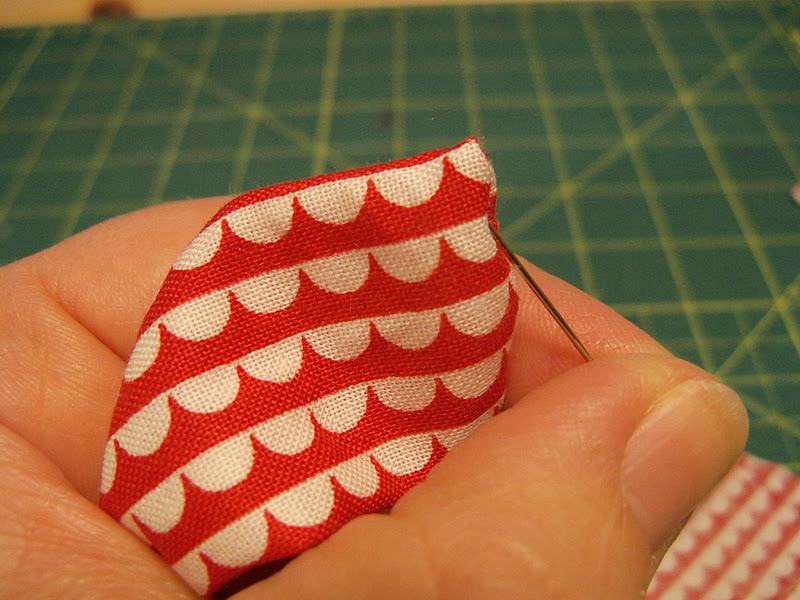
Now print out the bunny and heart template (which you can download HERE) and trace them onto your fabric.
Cut out and position them on your skirt.
(I like mine off to one side.)
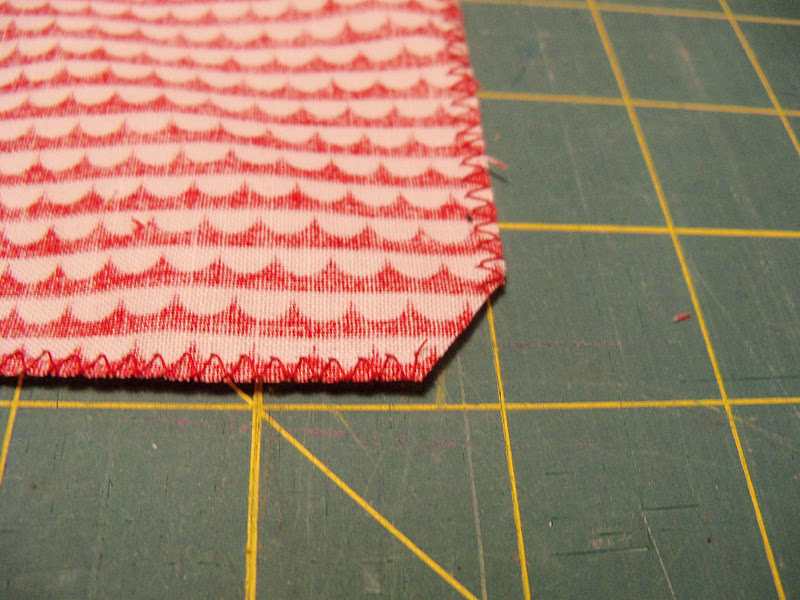
Iron them on.
Next I set my machine on the following settings and stitched around all the edges of both bunnies and the heart.

Once that is finished we need to add the bunny tails which is easy—just tack on a pom pom with a needle and thread.
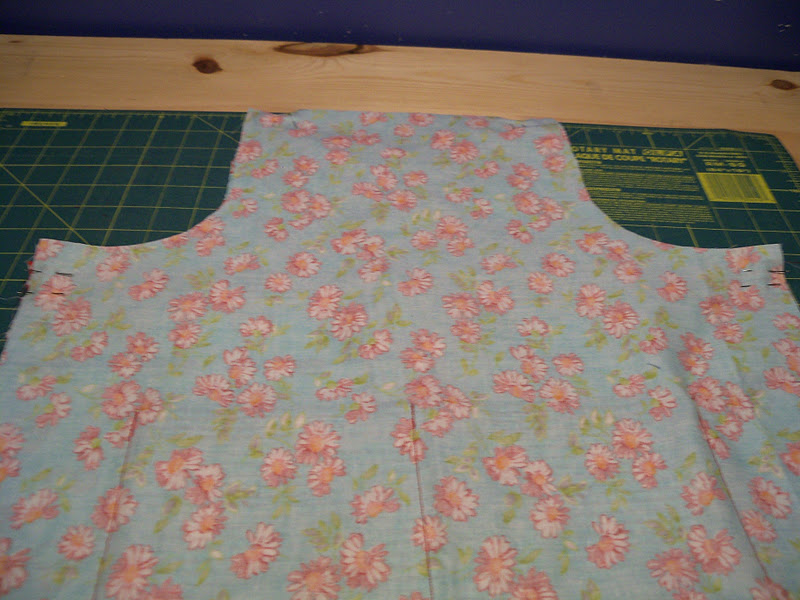
Now all we have left to do is close up the back of our skirt and add the elastic. 
To close up the back just fold your skirt in half, right sides together, and starting at the bottom sew your skirt together to make the back seam.  (Then top stitch if you’d like.)
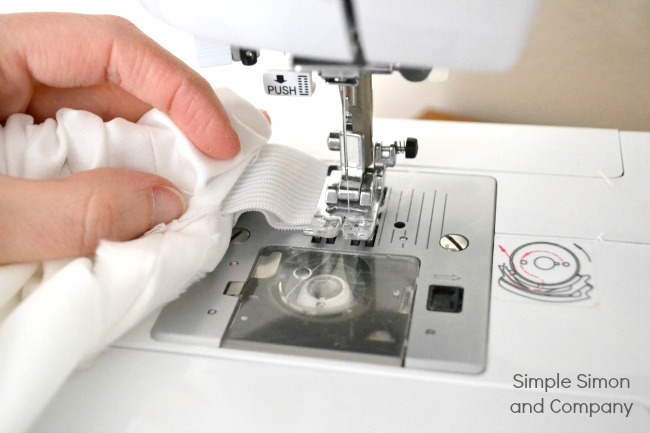
Next, make the casing for your elastic. 
To do this fold the top of your skirt over (wrong sides together) 1 and 1/2 inches and iron. 
Stitch along the bottom of the fold to make the casing for your elastic. 
As you stitch leave an opening about an inch wide so you can insert your elastic.
  
To determine the length of elastic you will need take the measurement of your little one’s waist and minus one inch.  (Grace is 18 inches around so I cut the elastic for her skirt at 17 inches.) 
Cut your elastic. 
Now thread the elastic through your casing.
(I always attach a safety pin to the end of the elastic that I am threading through the casing…It makes it easier to push it through.) 
Sew the two ends of the elastic together.

Tack the elastic down in the back along the seam.
Close the opening you used for threading the elastic.
You are finished! And your little one has a brand new spring skirt!
I love this fabric. It’s so young, sweet, and clean. It is perfect for little girls and springtime!
I had so much fun with it that we ended up making Grace a bunny doll that matches her skirt.  If you’d like the pattern for her just stop over at Simple Simon and Company and check it out.
Thanks for letting us visit today.  We love any chance we get to talk about sewing and fabric!
Simple Simon & Co 


One adorable skirt.

*Note you will have enough fabric left over from your layer cake to make a stuffed bunny, matching hair bows, or another skirt—especially if you have more Bella White fabric!

Simple Simon & Co.

{www.simplesimonandco.com}

Jelly Roll Tu-Tu


1 Jelly Roll Cuzco from Kate Spain (or leftover strips from another)
1/2″ wide elastic cut to 16″ for 3-6 month old girl (see below for other sizes)
Pinking shears


Hot glue if you don’t want to sew!
Leggings or diaper cover for underneath


Step 1: Measurements
This Tu-Tu is easily to make custom for your little one.  Take measurement around the waist where you want the skirt to lay and add 2.5″.  This accounts for the seam and the extra bulk of the ties around the waist.  If you don’t have a child available you can measure around the waist of the leggings or diaper cover.  The next measurement you need is from the waist to where you want the skirt to hit on the leg.  Multiply that by 2 and add 2″ to account for the knot.

Here are the numbers I have for a 3-6 month size:
Waist: 16″ + 2.5″= 18.5″ cut of elastic
Length: 6″ x 2= 12″ + 2″= 14″ strip cut from the jelly roll

Step 2: Cutting
Now that we’ve got your numbers let’s begin!  Begin by cutting your elastic and making it one continuous loop.  You can do this by either sewing it, hand stitching or a hot glue gun.  The overlap should be about 1/2″.

Next using your jelly roll strips cut with pinking sheers to the length you determined before in your measurements.  For me that was 14″ so I could get 3 strips from each jelly roll.  I used a total of 25 14″ strips for the whole skirt.  Your numbers may differ slightly from that, just cut a good amount to start and you can easily add as you go.
Tip: The reason you need to use pinking sheers is that those edges (the zig-zag cut) do not fray. That’s why this is perfect for jelly rolls – the sides are already pinked!
Step 3: Tying and finishing!
Fold the fabric in half lengthwise.  Wrap around the elastic and knot it once.  Take care not to pull it too tight, you don’t want the elastic to gather.  Knot one more time, make sure all the knots are to the bottom of the skirt.  See the following three images for a guide.

Continue around the skirt until it is to the fullness you desire!

A super sweet, scrappy and sassy little Tu-Tu!

Megan Jimenz
{quiltstory.blogspot.com}


Reversible Child’s Apron


Do you know a small child who likes to help in the kitchen?  My four girls certainly love to.  How about making them an apron?  
This apron is fully reversible with a large pocket on both sides.   
It has ties at the neck and waist making it fully adjustable and fits children ages 4-8.
But do you know what the best part is?  It only takes 3 fat quarters to make! 
Come on, let me show you how!
 
I used prints from Ruby by Bonnie and Camille.

 Three Fat Quarters:

-One for the front of the apron
-One for the back of the apron
-One for the ties and pockets
 
Cutting:
Trim the fat quarters for the front and back to 18 x 21 inches.  If you have to cut them a bit smaller to square the fabric up it isn’t a problem at all, just make sure they are the same size.  I like to lay the front and back apron fabric on top of each other as I cut to make sure they are the same size.

Cut a piece of paper 4.5 x6.5 inches in size.  Use a bowl to draw a soft curve in one corner.  Cut off the corner following the line.  This is your pattern piece for the apron.

 Place the pattern piece in the upper left hand corner of the fabric.  Pin.  (You can pin and cut through the front and back apron fabric at the same time if you wish.)

 Cut along the pattern.

 Repeat on the other side of the apron.  This is the main body of the apron.

With some careful cutting all of the pockets and ties can be cut out of one fat quarter:
First:  cut two 2.5 x 18 inch strips for the waist ties
Second:  cut two 2.5 x 14 inch strips for the neck ties
Third:  cut two 7 x 12 inch rectangles for the pockets


Sewing:

Fold each of the 2.5 inch wide tie pieces in half length wise.  Press and pin if desired.

Sew along one short end and the long side of the tie with a 1/4 inch seam.  Remember to back stitch at the beginning and end of the stitching.

Trim off the corners of each tie.

Turn the tie right side out.  I used the handle of a spoon to poke the sewn end of the tie back into the casing.

Continue to push the end up into the casing and pull the casing along the spoon handle until you see the end of the tie poking out.  Grab the end of the tie and pull it out.

Iron the tie flat and use a pin to pull the corners of the tie out if necessary.

Repeat for all of the waist and neck ties.

Next, take the 7×12 pocket pieces and zig zag along each edge.

Trim about a 1/4 inch off of the bottom corners.

Turn over the bottom and side edges a quarter of an inch and press.

Turn under the top edge 1/4 of an inch and press.  Turn the top over another inch and press again.

Fold the pocket piece in half and press down the middle until you have a nice sharp crease.

Top stitch along the edge of the top fold.  Repeat this process for both pocket pieces.

Lay the top hemmed rectangular pocket in the middle of the bottom section of the apron and pin.

Starting at the hemmed edge, stitch along the outside edge of the pocket about 1/8the of an inch from the edge.  Stop with the needle down 1/8th of and inch from the corner, lift the presser foot and turn the fabric 90 degrees.  Continue stitching along the other edges.  Do Not Stitch along the top hemmed edge.

When the outer edge stitching is completed, find the pressed line in the middle of the pocket.  Starting at the top, stitch along the line, back stitching at the top and bottom of the pocket.  Repeat for the other side of the apron.

Next pin the shorter neck ties to the top of one apron piece.

Pin them just slightly farther than 1/4 of an inch from the sides.  Use at least 2 pins so that the ties do not sift during sewing.

Pin the longer waist ties slightly more than 1/4 inch below the curved corner of the apron.

Secure the ties with multiple pins to the center of the apron so that they don’t flop around and get caught in the side seams by accident.  I speak from experience.  😉

Yea!  It’s looking like an apron now!  You should have two apron pieces, each one with a pocket and one with the ties pinned in place.

Place the two apron pieces right sides together and pin all the way around.

Starting at the bottom, stitch along the edge of the apron using a 1/4 inch seam allowance (the edge of the presser foot).

Back stitch over the ties to give the seam extra strength.  Be careful turning the corners not to stitch along the sides of the ties.

Stop and back stitch about 6 inches short of the start of the seam.

Make small clips along the curved edge.  This will help the fabric lay flat when the apron is turned right side out.

Turn the apron right side out and iron the edges.  Pin the opening shut.

Top stitch about 1/8 of an inch from the edge of the apron.  This gives the apron a nice flat finish and closes the hole at the bottom.

I like to tie the neck ties in a double knot with just enough room that they can pull it on and off by themselves.

One super cute reversible apron for your favorite child!

I think this apron would be brilliant with a boyish fabric on one side and a girly fabric on the other.
 Happy sewing and cooking!

Leila Gardunia
{sewnbyleila.blogspot.com}

Banner Day Skirt


Ellen Luckett Baker is author of The Long Thread, where she writes about her adventures with sewing, crafting, and kids. Her book 1, 2, 3 Sew was recently published by Chronicle Books and her debut fabric collection for Moda, Quilt Blocks, will be available by the end of this month. Ellen lives in Atlanta with her husband, two daughters, and a growing number of pets.

This skirt features my new Quilt Blocks collection with festive bunting triangles to celebrate the warmer weather! With a simple elastic waist and quick patchwork hem with a lined band, this skirt comes together in a snap. This skirt fits a size 6, but is easily adjustable by adding or subtracting an inch or two of length. I have two daughters, ages seven and nine, who wear simple handmade skirts like this almost every day. As I was making this skirt, I realized how easily this pattern could be adjusted to make a pillowcase, or curtains for a child’s room. Or this design made into a quilt with rows of banners would be perfect for a new baby.


Note: For a proper fit, be sure to measure your child’s waist to determine the length of the elastic.


Charm Pack or eleven 5″ squares of Quilt Blocks fabric
1/2 yard Flying Geese in Spectrum color way
1/2 yard white cotton
One yard 1″ elastic
Matching thread

Seam Allowance: 1/4″


Step 1: CUT FABRIC.
Cut triangles according to the template {included in the Printer Friendly Version at the bottom of this post}. 

You will need 11 patterned triangles and 12 solid white triangles. Cut the white fabric for the back of the hem to 39 1/2″ x 4 1/4″. Cut the Flying Geese fabric to 39 1/2″ x 15″. 

Step 2: MAKE PATCHWORK FRONT OF HEM BAND.
With one patterned triangle and one white triangle right sides facing, sew them together on one of the long sides, as shown in the image. 

Continue sewing triangles together, alternating patterned and white fabric to create the bunting flag design. Press all seams towards the darker fabric.

Step 3: LINE AND FINISH THE HEM BAND.
Once you have sewn all of the triangles together and pressed the joined fabric strip, you will sew the end triangles to one another, forming the band. Then, sew the white fabric right sides together along the short ends to form the lining band (with a 1/4″ seam allowance). You will now have two hem band pieces as shown in the photo. 

Place the white fabric band inside the patterned triangle band with right sides facing. Pin together and sew together along the side with the tips of the patterned triangles. This will form the bottom hem. Press the seam open, then press the joined piece flat with the white fabric backing the patterned band. 

Step 4: SEW THE BAND TO THE SKIRT PIECE.
Next, take the larger skirt piece and sew the short ends with right sides facing, forming the side hem of the skirt (still using a 1/4″ seam allowance). Follow with an overcasting or zig-zag stitch to prevent fraying. Place the triangle band piece inside the skirt tube, with right sides facing and raw edges aligned. Sew together, then use an overcasting or zig-zag stitch. Press the hem flat and topstitch just 1/8″ above the seam as shown in the photo.

Step 6: CREATE THE WAISTBAND.
Working on the wrong side of the fabric, fold the unfinished top edge of the skirt down by 1/2″ and press. Fold again by 1 1/2″ and stitch in place, 1 1/4″ from the top, forming the elastic casing. Be sure to leave an opening of 2″ – 3″, as shown in the photo, to insert the elastic.


Place a safety pin at the end of the elastic and insert the elastic into the casing. Feed it through and pull it out the other side. Lay the elastic over itself and sew it together with a zig-zag stitch. Push it into the elastic casing and close the opening in the casing with a straight stitch.


One Banner Day Skirt!
Happy Sewing! 

Ellen Luckett Baker
www.thelongthread.com

Look! My new book 1,2,3 Sew from Chronicle Books is available now. 


SLICED Tutorial: Quilt Story Apron


Hello!! I’m back sharing another tutorial from a project I made for the Moda Sliced Competition!  You can also check out my Pea Pod Pincushion tutorial from the competition.  I hope you enjoy making this sweet apron.  Make sure to come and say hi at Quilt Story too! 🙂


2-3 fat quarters for bodice and pockets
Six 1/4 yard cuts for skirt and ruffles
1/4 for scallops
1/4 yard for neck straps
Fat quarter for center waistband
1/3 yard for waistband ties

Pattern Pieces {included in the Printer Friendly Version}:
Main Bodice
Side Bodice
Top Band
Scallop & Pocket


Four 1 yard cuts of ric rac, lace, pom poms, etc.
1 yard medium weight interfacing for bodice and pockets
Tape measure for flower pin
1 yard thin ribbon


*** Use half inch seams for construction of this apron unless otherwise noted.
***The bodice for this pattern is a women’s size 5.

Part 1: Bodice Construction


Use a medium-weight interfacing and sew bodice sides to main bodice piece, then add the top band. Main bodice pattern, side bodice pattern, and top band pattern are included in the Printer Friendly Version.  Repeat and create an identical lining piece, no interfacing needed.

Add iPod pocket to inside of lining.  Cut two pieces, 5″ x 6″ and interface one piece.  Sew right sides together along each side and top, leave the bottom open.  Turn right side out and press.  When pressing, turn in the edges of the unfinished bottom by 1/4″ and press.  Add a trim along the finished top if you’d like.  Pin the pocket in place and sew around sides and bottom.  Reinforce the tops of each side.
Next, top stitch a ribbon across the seam of top band and bodice. Create a bow and tack into the middle of  ribbon bodice.
Create neck straps by cutting 2 strips of fabric, 4″ x 38″. Fold in half lengthwise and sew down entire strip with an angle at the end. Turn right side out and press.
Next is the bodice ruffle trim. Fold in  half lengthwise RST (right sides together) a piece of fabric measuring 2.5″ x 20″. Sew short edges together. Turn right side out and press. Run a narrow gathering stitch along raw edge. Gather to a ruffle to match the top of the bodice. Add the ruffle with a narrow top stitch to front apron bodice piece, along the top band piece. *Minding the half inch edges on each side of bodice. 
Put bodice and lining RST and pin neck straps in between and to the sides of bodice.  However you will leave a little more than a half inch on edges so they don’t get sewn into the seam.  Stitch together sides and top, turn inside out and press. 
Bodice complete.
Part 2: Skirt Construction
Cut 5 strips for the skirt.  From top to bottom my measurements are 5.5″, 6″, 4.5″, 5.5″ and 3.5″ inches long, all by 25″ inches wide.  Sew together in that order.
Using the trims, and coordinating threads, sew trims cross all the seams (as pictured).  Serge or turn side edges in 1/4″ and 1/4″ again and stitch to finish sides of apron. 
Make a wide gathering stitch across top of apron as shown.
Create your bottom ruffle by cutting a piece of fabric 2″ x 40″, turn bottom edge 1/4″ in, and 1/4″ in again press and stitch. Do this to the two sides as well.  Make a wide gathering stitch 1/4″ from raw edge. Gather evenly to match apron width. Set aside.
Cut scallop fabric in half widthwise, to have two pieces 4.5″ x WOF.  Using the scallop pattern {in the Printer Friendly Version}, trace onto the wrong side of your fabric and create four full scallops.  Take the wrong sides of the scallop fabrics and pin together.  Sew along tracing and trim 1/4″ around.  Turn right side out and press.
Take your ruffle and scallop and with RST pin to the apron along the bottom edge. Serge or stitch 1/4″. Open and press. Do a very narrow top stitch on the bottom apron edge.
Create your pocket using pattern piece {found in the Printer Friendly Version}. Embellish as you would like with trim, different fabrics, embroidery etc. Using same pattern piece create a lining piece out of white or coordinating fabric.  Interface one side of the pocket.  Using 1/4″ seams, stitch around the sides and rounded bottom of pocket, leaving the top open. Turn right side out and press. Turn top edges in about a 1/4″, press really nicely and top stitch closed.  Pin pocket in place on apron and use a narrow top stitch to stitch in place. Be sure to reinforce each side at the top.
Gather top of skirt to match finished apron top. With RST pin and sew or serge together.
Part 3: Finishing
Using the fat quarter piece for the center waistband cut a piece 7″ x 13″.  RST sew together lengthwise.  Press with the seam in the center.  Also press the short ends 1/4″ in for a finished look, but do not stitch yet.  Set aside.  Cut two waistband ties 6″ x 34″.  RST sew together lengthwise and on one end of each finish at an angle.  Turn right side out and press. 
Place the waistband ties into the unfinished edges of the center waistband piece.  Center the waistband piece over top of the bodice and skirt seam.  Pin in place and sew a narrow top stitch around the entire center waistband, closing the sides as you go. 
Part 4: Tape Measure Flower Pin, optional
Clip metal ends of measuring tape off. Using hot glue, create a circle center roughly the size of a finger. Create petals by softly folding measuring tape and gluing to center. Alternate sides of flower while rolling and rotating softly.  Start with smaller folds and get larger as you get to the end of the flower.  Try first without glue to get a feel for the process.
Once you’ve finished the tape measure flower you can add some fabric petals or leaves.  Fold a 2″ piece of fabric in half and in half again. Trim raw edge sides into a curve. Add hot glue and place little fabric petals within the measuring tape flower.  Create larger petals using the same method and 3″ pieces of fabric. Put 3-4 of these at the base of the measuring tape flower.  Hot glue a pin clasp thing (that’s what they are called right) 🙂  to the back of the flower, and pin where you would like.

One darling apron!

Thank you so much for all of you who left comments during the competition, it was so much fun and we had a blast!  Thanks to Moda too!! 🙂  I’ll be posting a tutorial for my portable file folders soon!
Be sure to visit our blog, Quilt Story.  We’d love to have you!
Quilt Story

Lucky Layers Tiered Dress in Size 2T


Hi, this is Anshu from Blooms And Bugs. When I started sewing this dress from Kate Spain’s Good Fortune Collection, I spent a lot of time fretting upon the color combination, choosing prints, etc. Finally I gave up because it was so difficult to pick just a few favorites from this line of amazing prints. I just decided to start with one print for the bodice and add other prints as I went. In hindsight though, I should have spared myself the trouble. This is such a well thought out collection that no matter what prints you put together, they will look great. Congratulations to Kate for coming up with such a fascinating collection. I’m calling this Lucky Layers dress, as a nod to the name of the line – Good Fortune. I hope you like the dress design and make it for the little girls in your life.


For a two year old size:

  • 3 layer cake squares for the bodice
  • 4 fat quarters – 3 for the skirt, 1 for the shoulder straps and bias tape on the bodice.
  • elastic thread for shirring


Drafting the bodice:

1.

Measure the waist of the child. Lets call this measurement W.

For the front bodice you will need two layer cake squares. I have taken two similar ones, but you could choose two different squares as well. Keep them on top of each other (right sides together).

2.

Measure 7 inches from one end of the length. Cut along the 7 inch mark to get a rectangle of 10 inches X 7 inches.

3.

On this rectangle, measure 4 inches from top left corner on the width (10 inches side). Mark this point (Point A). Join this point to the bottom left corner with a slanted line.

4.

At the diagonally opposite corner, measure 3.5 inches in length  (8 inches side). Mark this point. as Point B.

5.

Now join point A and point B with a convex curve. There’s no right or wrong here, just draw a curve that looks pleasing to you. You could even draw a straight line if you are not comfortable drawing a curve.

6.

Cut out the curve and the slanted line you drew.

7.

Pic above shows the two bodice pieces you will get.

8.

Now overlap the slanted lines of these pieces by 3 inches.

9.

Take a layer cake square and cut it in half in length. Join the two pieces on the shorter side  (right sides together).

10.

Now fill your bobbin with elastic thread and sew 4-5 seams on this rectangle about 1 inch below the edge. Here’s a great tutorial on shirring in case you’re not familiar with shirring.

11.

Now measure how wide you want your back piece to be. You have to first measure the overlapped front bodice and deduct it from the total waist measurement W ( taken in step 1). The back piece should be equal to the remaining width +1 inch sewing margin. Now measure the shirred piece to the required width on both sides of the seam you made to join the two layer cake halves. It is important to do the shirring first and then measure the back piece because shirring is a function of lot of factors – fabric type, machine, elastic thread type etc. The final shirred width of a given fabric is difficult to determine beforehand, so it is best to shir a lengthy piece first and then cut it to the required width.

Sew the back to the front bodice on both sides with right sides together. Make sure that the top edges of both back and front pieces line up. There will likely be a small length of back piece hanging off because we have cut the back piece longer than the front. We will fix it later.

12.

Make bias tape with one fat quarter. Here’s a tutorial on how to make five yards of bias tape from one fat quarter. Sew the bias tape on the slanted edges of the front bodice. If the back bodice piece is longer than the front bodice, cut it off at this point to equal the bodice bottom edge.

13.

Now leave about 10 inches hanging and sew the bias tape to the rest of the top edge of bodice starting from one end of the front bodice, leave another 10 inches hanging at the other end for ties.

14.

Sew a seam on the hanging bias tape, making it into narrow straps for shoulders.

Making the skirt:

15.

Cut two strips 4.5 inches long and 18 inches wide from a fat quarter. Join them at both short ends ( right sides together), to make a wide tube. This will become the first tier of the skirt.

16.

From another coordinating fat quarter, cut three strips 4.5 inches long and 18 inches wide, join the three strips together with a seam along the short ends (right sides together). These will become the second tier of the skirt.

17.

  • Now sew a seam along the raw edge of tier 1 with the widest stitch possible. Pull the bobbin thread gently to gather the tier slightly. Make the gathered skirt equal to the bodice width.
  • Sew a seam along the raw edge of tier 2 with the widest stitch possible. Pull the bobbin thread gently to gather the tier slightly. Make the gathered skirt equal to the width of tier1.
  • Sew tier 2 to the ungathered edge of tier 1. Right sides together.

Joining the skirt and the bodice:
18.

Sew the raw edge of tier 1 to the raw edge of bodice, right sides together

19.

Sew the hanging ends of shoulder straps to the back if you like. Here you have the option keeping them hanging and having a halter neck dress, or sewing them at the back straight or across. Sew them at the back whichever way you like, or keep them loose for a halter neck dress.

20.

At this point you can decide if you want it to be a short dress or a long one. Both look equally cute. If you decide to go for a long one, take another fat quarter and cut 4 strips 4.5 inches long and 18 inches wide. Join all the four strips at shorter ends (right sides together). This will become tier 3. Fold one end twice with the minimum width possible and sew a seam. At the raw end sew a seam with the widest stitch length, pull the bobbin thread to gather it slightly and sew it to the raw end of tier 2, right sides together.

21.

Serge the raw inner seams on each tier, or sew a zig-zag if you don’t have a serger.

Your Lucky layers dress is ready. Put it on the little one, bet she’s been waiting to wear this one.

PS: I get queries about how to make a given clothing in bigger sizes so I decided to include some notes on how to extend the pattern to bigger sizes.

The dress can be made in a variety of sizes with the same basic construction. To make it bigger you could use any/all of the following tips

1. Keep more of the shirred bodice piece you prepare. I had to cut off about half of it to make it in a two year old size. So if you like to make it in a bigger size keep more of it, that would add a few inches to the bodice width. Also shirring at the back ensures that the dress fits for a long time on a growing child.

2. Add longer shoulder straps. For older kids, you could easily add about two inches to the shoulder straps. In fact, I keep about two inches of shoulder straps hanging off at the inside of the dress, just so I can extend the dress length if I need to.

3. Add one more tier to the skirt. The thing to keep in mind here is that the maximum 4.5 inch strips possible from a fat quarter are 4 (which I have used above). So if you want to add one more tier, you may need more than a fat quarter. However, you could always mix two prints and make a patchwork tier. I think it would look good.

Anshu Jain
{Blooms And Bugs}

Belle Layered Skirt for Toddlers

Hello Moda Bake Shop readers. I am Anshu from Blooms And Bugs. I mostly sew little girls clothes. Today I’ll show you how to make this pretty layered skirt with 2 half-yard fabrics. I chose Kate Spain’s Good Fortune collection for this skirt and I loved how the fabric brought out the best in the skirt.


2 half yards of coordinating fabric (there will be quite a bit of leftover)

1 jelly roll strip for Bias tape at the hem of inner layer

1 jelly roll strip for ruffle at the hem of outer layer

1 jelly roll strip for belt loops

1.5 yard Grosgrain ribbon for belt (about 1.5 inch wide)

For making the skirt in a 2 year old size:

Cutting and preparing the layers:

Cut two rectangles of length = 11.5 inches and width = 36 inches from two coordinating fabrics.

Sew both rectangles into a tube by sewing raw ends together along the length (right sides together).

Now place the outer layer fabric so the seam lies in the middle

Fold one-third of the width over itself from one side.

Fold one-third from the other side.

Mark on the fold on both sides. Basically, we’re trying to mark the thirds on bottom of each side of this tube.

Once we have our marks, sew a U shaped seam (about quarter inch apart) of 6 inches starting from the bottom of this tube and going up vertically at each of the marks. I have shown the seams by the ugly black lines above. Leave some thread hanging at both ends of these seams. We will use them to gather the top layer vertically.

Making Belt Loops:

Cut 4 pieces of 4 inches from a jelly roll strip.

Fold and sew a seam about quarter inch on one end of width. I cut 5 of these but used only four in the skirt.

Fold in the in half along the width with right sides together and sew a seam along the length. The width of strip is actually too wide for the belt loops so I recommend a sewing margin of half inch for these.

Turn out and press so the seam is in the middle.

Your belt loops are ready.

Assembling the skirt:

Please read the instructions carefully here. This skirt is assembled a little differently than other skirts so make sure you follow the instructions, or you will be cursing me and reaching for your seam ripper very soon.

Place the outer layer tube inside the inner layer tube so the right side of outer layer touches the wrong side of inner layer. Make sure you keep the bottom part (where you had sewn vertical seams earlier) at the bottom. In the pic I have shown the outer layer peeking out, but that is just to show you how to place them. While sewing, the edges should be perfectly aligned.

Now insert the belt loops between the two layers. Here, be careful to place belt loops so that:

1. The raw end of the loop is at the top, lined up with the raw edges of layers. Here I have shown it sticking out a bit just to show you what I mean and also because the length I chose is a little longer than required. You can also let them hang out half an inch or so to make it easy to place them.

2. The seam should be facing the right side of outer layer.

3. Although you could the placement of loops yourself, I found it very easy to use the vertical seams in the outer layer as a guide for belt placement. It gave me perfectly spaced belt loops.

Now sew all around the edge of the skirt layers, while inserting the belt loops as you go (or just pin up everything before you sew):

This is how mine looked after sewing.

Cut the extra from the belt loops.

Turn out.

Topstitch as close to the edge as you can.

Sew another seam just above the other end of belt loop, so the belt loop gets sewn down and elastic casing gets prepared all at once. Leave a gap of one inch for inserting the elastic.

Finishing the hems:

To make a ruffle for the outer layer, fold and cut a jelly roll strip in half along the length. Sew together two short ends (right sides together) to make a long narrow strip.

Now hem it at one long edge. I serge the edge and then fold and sew a seam, but any technique – rolled hems or folding twice would work as well. What we really want is a thin strip that is hemmed on one side, and we’ll ruffle it on the other side.

Now we will ruffle this strip by setting machine tension to highest and stitch length to longest. Note that I didn’t hem my strip before ruffling and it was a big pain to do it afterward, you don’t want to do it like me. Just hem it first.

By the way, isn’t that fabric so pretty…?

Now pull the thread of the vertical seams gently to gather the skirt vertically. Adjust with hand until you get a shape you like. Now sew a narrow zigzag seam to fix the gathers.

Now attach the ruffle you just made by sewing a seam at the raw ends (right sides together)

Use another Jelly Roll strip to make a bias tape. This is not really a bias tape since these strips are not cut on the bias, but for this project it won’t matter because we are using it on a straight fabric.

Now use this bias tape to hem the inner layer of the skirt. The way I sew bias tape is line up the raw end of smaller side of bias tape with the raw end of skirt edge and sewing along the fold in the tape. Once this seam is done, I fold the tape to the other side and sew as close to the (but not on the) top edge of the tape on the right side. This ensures that I catch the other fold of the tape on the wrong side.

Inserting elastic in the skirt:

Remember this space you had left while sewing the waistband. Lets insert the elastic here.

Using a safety pin, insert elastic here and go all the way round and back to the opening. One rule of thumb I follow to determine elastic length is to measure the waist of the child and cut an elastic 3-inches shorter than that. You could also tie the elastic around her waist and see what length is comfortable on her.

Sew both ends of the elastic by overlapping them about half inch.

I use the stitch 1-14 on my machine that looks like a broken zigzag stitch to sew elastic, but if you don’t have it zigzag would work as well. Just go over the elastic 3-4 times.

Belt:

Cut a grosgrain ribbon that is long enough to be looped through the belt loops and tied into a bow in front. Cut diagonally at the ends and seal with a lighter flame, or with fray check to prevent fraying.

Size 2T Belle Layered skirt that is ready for a little one!

Anshu Jain
{bloomsnbugs.blogspot.com}

My Little Butterfly Infant Romper

Hi, I’m Anshu from Blooms and Bugs and today I’ll show you how to make this cute “My little butterfly romper” for a 3-6 months old.

For 3-6 months old infant size:
1 fat quarter
1 layer cake square
6 jelly roll strips
6 inches of elastic
2 buttons

1. Fold the fat quarter in half along the length. Cut at the fold.

2. Cut 15 inches from the width.

3. Fold the layer cake square into half along the width. Cut on fold. Now cut a small arc at the bottom.

This is how the pieces will fit later on. Don’t sew anything yet. First we need to add ruffles to front layers.

Making Ruffles:

4. Set your machine tension to the highest, stitch length to the longest, and machine speed to the fastest. Take the jelly roll strips you would like to make ruffles from and sew along one of the long edges. This machine setting results in nice even ruffles.

5. Now sew the ruffle along the curved sides of the layer cake. Right sides together. Do the same for the other half.

6. Fold the ruffle hems twice near the top of main fabric. This will allow for hemming later on. Make sure you fold as little as possible. Hand-baste or pin if needed. Sew both parts over the main fabric joining at the top.

7. Now cover the whole thing with the other half of main fabric. With the right side touching the right side of front layers. Sew along the sides leaving about 2 inches at the bottom.


Making the shoulder straps:

8. We will make the shoulder straps from leftover fat quarter fabric. Fold the remaining fabric into half along the width.

9. Cut at the fold, you will get two strips – about 3 inches wide.

10. Fold each of these in half and sew along one smaller and one longer (raw) side. Turn right side out and iron.


The Band:

Next we will make the chest band. This is the piece that will join shoulder straps to the main body. This will also be used as elastic casing at the back, so the baby has lots of room to grow.

11. Now sandwich these shoulder straps between two jelly roll strips (right sides together) about 2.5 inches apart from each other. Make sure the raw end of straps lines up with the raw edges of jelly roll strips. Sew a seam catching both the strips and shoulder straps.

12. Turn out.

13. Now position the band with shoulder straps such that the shoulder straps are centered at the front of main body of romper. Align the raw edge of the band with the raw edge of main body and sew a seam along the raw edge.

14. When you approach the end, determine how much more of the band you would need, add about an inch of sewing margin and snip off the rest. Now sew both ends of the band (right sides together), and sew the rest of the band to the romper body.

15. Now fold the other raw end of the band at the wrong side of the main fabric. Mark a crease so the folded portion of the raw edge goes just a little over the seam joining band and main body. This will ensure that when we sew a seam in the front, it will catch this fold in the back. Iron in place if needed.

16. Now sew a seam as close to the band as possible on the right side but only on the back of the romper.

17. Use the band as an elastic casing. Insert an elastic in this back band. Secure the elastic by sewing at both ends. Now finish the rest of the bend by sewing as close to the band as possible in the front side as well.

18. Sew on 2 small buttons at the back of the band, about 2 inches apart in the center.

Determine how long you want your shoulder straps to be and make a buttonhole in each of the strap.

Note:
I made two buttonholes in each strap so that the straps can be adjusted to be longer if needed. Moda produces very high quality fabrics that will last a long time; so one of my goals while designing a garment is also to maximize the usage of garment and to accommodate fast growing babies for a longer time. In this garment, the elastic at the back and the adjustable buttonholes in the shoulder straps are the design elements that achieve this goal.

Adding the ruffle at the bottom:

19. Ruffle two jelly roll strips the way you did for the front layers.

20. Now sew those ruffles to the hemline by lining up the ruffled edge with the raw hem ( right sides together). Do it separately for back and front.

21. Now serge the raw edges of ruffles and fold. If you don’t have a serger, just fold the edges twice and hem.

At this step , you also need to make sure that all the layers are equal at the sides. The two front panels will likely come out longer than the front and back pieces because the layer cake is longer than half of the fat quarter. If that’s the case, fold the ruffles on front panels a little more than the ruffles on the main fabric.
22. After hemming all the ruffles, sew the sides until you reach the bottom (remember we left a little un-sewn earlier).

One butterfly romper. Now put it on your little butterfly and see her flutter with joy!

Anshu Jain
{bloomsnbugs.blogspot.com}

Grow and Gather Dress

6 strips from jelly roll ( 2 for shoulder ties, 2 for waist belts, 2 for bottom ruffle)

2 squares of layer cake ( for bodice front and lining)

2 fat quarters ( for bodice back and skirt)

20 inches of Elastic (1/4 inch wide)

I used Deb Strain’s Meadow Friends collection from Moda Fabrics for the dress. Can I just take a moment to tell you how much I love the prints in this collection? Thanks for the awesome prints Deb, you rock!


Bodice:
Lets first assemble the pieces for bodice.

Shoulder Ties and belt on waist:


Fold the jelly roll strips in half and sew along both long edges.


Snip the corners. Turn the tubes inside out and iron flat. I have only shown 3 but you should get 4, 2 of each print.

Sew the bottom ruffle strips into one continuous strip by sewing along the shorter edge (right sides together).

Bodice Front:

Fold a layer cake square into half along the width

.

Fold it one more time (again along the width).

Iron. You will get 3 creases.

Now sew two rows of seams along each crease.

Pull the bobbin threads on each of the three sets of seams to gather. Set aside.

Bodice Front lining: Keep one layer cake square for front bodice lining. Cut it into half along the length.

Bodice Back:

Cut a 17 inches wide and 9.5 inches long fabric from a fat quarter.

Fold it in half along the length.

Sew a seam 1 inch below the fold, parallel to the edge. The seam is kind of hard to see but it is along the pins I have placed to show you the seam. This will be the elastic casing for the back of bodice.

Take a 1/4 inch elastic and insert into this casing with the help of a safety pin.

Assembling the bodice:

Place the shoulder ties on the gathered bodice front such that the ties are positioned on the two gathering seams on the side and raw ends of belt are aligned with raw end of bodice. Now cover with half layer cake square that you picked for lining. Now sew along the raw edge where raw ends of shoulder ties are placed. Make sure you catch both layers of fabric and both the shoulders ties in the seam.
Turn out. Do NOT top-stitch yet. Here you can see that my lining piece hasn’t been cut into half yet. I skipped doing it earlier, I cut it at this point. You can do it at any point up until this step.

Now lets join front and back of bodice, as well as waist belts.

First open the front piece and lining apart.

Place one waist belt on the gathered bodice such that its raw end aligns with raw side of gathered bodice piece.

Now place the back piece on the gathered bodice, again line up the raw sides of both pieces. Make sure a little bit of elastic is sticking out.

Now cover the whole thing with the back of the bodice. And sew along the raw side.

Snip the corner at the top, turn out.

This is what you will get.

Now pull the elastic at its free end to gather the back. Keep the final width of front plus elasticized back of bodice to be a little less ( ~3 inches less) than the chest of the child. This will make sure that the bodice is snug on her body.

Now make the sandwich again at the other side. Gathered bodice front (right side), waist belt, bodice back. All raw edges aligned, elastic sticking out, cover with the front bodice lining. Sew along the raw side, snip corners, turn out.
Here’s your bodice, all done.

The back of bodice.

Now lets work on skirt:
Fold the fat quarter into half along the length. Cut on the fold.
Join the two pieces by sewing along the smaller sides (Right sides together).

Now sew two seams close to one raw edge for gathering the skirt. Gather by pulling bobbin threads. Adjust the gathers such that the width of skirt becomes equal to the width of bodice.

Adding the bottom ruffle:

I prepared the bottom ruffle by setting my machine’s tension to the highest, stitch width to longest and sewing at highest speed. You can choose to do the same or you can sew a straight seam at regular settings and pull the bobbin thread to gather.

Now align it with the un-gathered edge of the skirt and sew a seam along ( with right sides together).

To finish the raw edge of the ruffle, serge the edge and then turn inside and sew a seam along the edge. If you don’t have a serger you can also turn it in twice to make sure no raw ends are visible.

Joining skirt and bodice:

Align the raw edge of bodice with the gathered raw edge of skirt, sew along the edge to join both. Make sure you catch both the lining and the front pieces of bodice. Serge or sew a zigzag to finish this seam on the inside.

Turn out.

A little dressy dress for your mini diva. The sizes I showed above work for 12-18 months old.

The elastic in the bodice makes sure that there’s room for her to grow. The shoulder ties give you some flexibility with the length. Wear it with a t-shirt in the cooler months or wear it as is during the summer.

No matter how she wears, she will surely stand out in the crowd!

The front

And the back.

Put it on the little one and admire!

Anshu Jain
{bloomsnbugs.blogspot.com}

Sunkissed Aprons

Hi there Moda Bake Shop Bakers, it is LeAnne over at Everyday Celebrations. With all the baking going on around here, it is about time to make some aprons!  The great thing about this project is you can pick whatever fabric line you love to make aprons that fit your personality. One layer cake will yield at least four aprons. Or, since only 10 squares are needed, use some leftover layer cake squares from a previous project.  Whatever layer cake you decide to use will result in a darling apron that will make you want to get baking in the kitchen or the sewing room!

 {Absolutely loving the color combo of gray and yellow!}

1 Layer Cake
3/4 yard for lining and front of apron ( 1 1/4 yards if you are going to increase the size of the apron)
1/2 yard for ties and straps
1/4 yard neutral fabric (this will not be seen)
Pattern piece, found in the Printer Friendly Version. Make sure ‘auto scale’ and/or ‘shrink to fit’ option ARE NOT SELECTED.


Note on Sizing:
This apron fits teens (as modeled) through adult. (I wear a size medium/large top and I still had room in this apron.) To get an idea how this apron will fit on you, take a tape measure and measure 21″ from  hip to hip. This is how the apron will measure across you when finished. The apron top measures about 14″ across at the bust.  Instructions for increasing the size of the pattern are included with the Printer Friendly Version.  (In the measurements an * indicates where changes need to be made if you are altering the size of the apron.)

1. Unfold your 3/4 yard of fabric. Fold one selvage to the middle of the fabric. (Make sure it is the EXACT middle or you may not have enough for the lining.) Place pattern piece on the fold and cut. This will be the ‘front’ of your apron. You will cut the lining from the remaining fabric shown in the photo.

Optional: To make a pieced section at the top of the apron, as shown in the gray and yellow apron, cut the apron front as marked on the pattern piece. (For the lining however, cut as directed in step 2.)

Next, cut out the following pieces from the layer cake squares:
(1) 2.5″ x 3.75″
(2) 3″ x 3.75″ 
(1) 2″ x 3.75″
(1) 4″ x 3.75″
(1) 1.75″ x 3.75″

Sew the pieces RST end-to-end using 1/4″ seam allowance. The length of this piece should be about 13.5″. Press seams open. Sew this piece to the top edge of the apron front using 1/4″ seam allowance. Press seam open. To curve the edge of this new piece, fold the apron front in half and use the pattern piece to trim to size.

2.  From the remaining fabric above, cut (1) 25″ long x 21.75″* wide piece. Fold in half, matching the long edges. Place pattern piece on the fold as shown below. Cut only along the curved edge of the apron as shown in the second photo below.

 3. When you unfold the lining it will look like this:

4. From the neutral fabric cut:
(3) 4″ x 21.75″* pieces (for the under ruffle pieces)

From the 1/2 yard strap and tie fabric cut:
(4) 3.5″ x WOF pieces (ties) – trim selvages off and cut to 36″ in length
(1) 2.25″ x WOF piece (strap) – trim selvage off and cut in half

5. Take (2) 3.5″ x 36″ tie pieces and place RST. (Pressing helps keep edges lined up.) With the two ties still RST angle one end of the tie as shown below. Repeat for remaining tie.

6. Sew the tie RST using 1/4″ seam allowance. Leave the not angled end open for turning. Clip corners at the angled end of the strap. Turn right side out and press. Repeat for remaining tie. 

7. Topstitch around the tie about 1/8″ away from the edge. (I did not topstitch the opening.) Repeat for remaining tie.

8. Press under 1/4″ on one of the short ends of a strap. (This end will be the end you want showing on the apron.)

9. Fold the strap in half lengthwise and press to crease. Unfold the strap and fold one long edge to the center crease. Press. Repeat for the other side.

10.  Fold strap in half again and press. (The raw edges will now be turned to the inside.)

11. Sew the strap closed by starting at the end that you folded under. Start sewing away from fold and continue down the open side of the strap. Backstitch at the beginning and end. (Basically I didn’t sew down the folded edge of the strap.) Repeat steps 8 -11 for the other strap.

12. Select 8 – 10 Layer Cake Squares. Cut in half so they measure 5″x10″. (You will only need 16 5″x10″ rectangles, so you can either choose 8 Layer Cake squares and use each print twice, or choose 10 Layer Cake squares to have a little  more variety in prints.)  Lay out the 5″x10 rectangles in four rows of four to help you determine which prints you want to make up each ruffle strip.

13. Sew each row of four rectangles together short end to short end using 1/4″ seam allowance. Press seams open.  (These seams will be the only exposed raw edges. Serge or zig zag if you desire. However, I just left the pinked edges as they were.)

14. Turn under the bottom edge of ruffle strip 1/4″ and press. Repeat. Sew folded edge in place.

15. Turn under the short ends of each ruffle strip 1/4″ and press. Repeat. Sew folded edge in place. Repeat steps 14 – 15 for all the ruffle strips.

16. Ruffle the top edge of each ruffle strip using the method of your choice. (Ruffle about 1/8″ away from the edge.) Need help with ruffling? Check out my tutorial here. Repeat for all the ruffle strips.

So pretty!

17.  On the apron front piece and three under ruffle pieces, mark 1/4″ from both bottom short ends. (See my purple marks below.)

18. With the right side down, pin one ruffle strip to the bottom edge of the apron front. Use the mark you made above to place the ruffle strip 1/4″ away from the edges of the apron front. I like to place a pin at the bottom of ruffle strip to keep the strip nice and straight. (See green pin in the second picture.) Sew ruffle in place 1/8″ away from the edge.

19. With the ruffle strip still right side down, place one under ruffle piece on top of the ruffle strip.  (Make sure the edge with the purple mark is at the top. See outlined black circle.)

20. Flip over the apron to the back and pin under ruffle piece in place. (I pin from the back because I will be sewing on the back.)

21. Sew just beyond the stitching line from sewing on the ruffle, about 3/8″ from the edge. Backstitch at beginning and end. Press seam up towards the top of the apron. Topstitch the seam in place.

22. Turn the ruffle to the top of the apron. You will now see the under ruffle piece. Place another ruffle strip right side down and repeat steps 18 – 21 for remaining ruffle strips/under ruffle pieces except for the very last ruffle strip. 

23.  When you add the last ruffle strip, you will only repeat step 18.

24.  Mark 1/4″ from the bottom of the curve on the apron front. Place a tie below the mark and pin as shown. Baste tie in place with 1/8″ seam allowance. Repeat on the other side. (Keep tie pinned down in the middle of the apron.)

25. Mark 1/4″ in along the top edge of the apron. Line up the edge of a strap with the mark and pin. Baste strap in place with 1/8″ seam allowance. Repeat on the other side.

26. Since this apron is lined, pin the straps to the middle of the apron to keep  in place.

27. Using basting pins, pin the ruffles away from the edges and to the center of the apron.

28. Place the lining and the apron RST and pin from the back. (Again, I like to sew from the back so I can watch my stitching lines.) Sew the apron together using 1/4″ seam allowance. Leave an opening along the bottom for turning. After sewing, press, clip corners, and turn. Remove all pins.

29. Topstitch beginning along the bottom edge, making sure to close the opening.  Continue top stitching around the rest of the apron. When you get to a ruffle, backstitch, stop sewing then remove apron from machine. Clip threads, return apron to the machine, and begin sewing after the ruffle.


One layer cake will yield 4 – 8 aprons

LeAnne Ballard
{Everyday Celebrations}