Fair Isle Baby Quilt and Crib Bedding


Leah Douglas from Buggspot again! I am SO EXCITED to share this with you. There are lots of tutorials out there on the web for making your own nursery bedding, but I think this one is the best. 😉

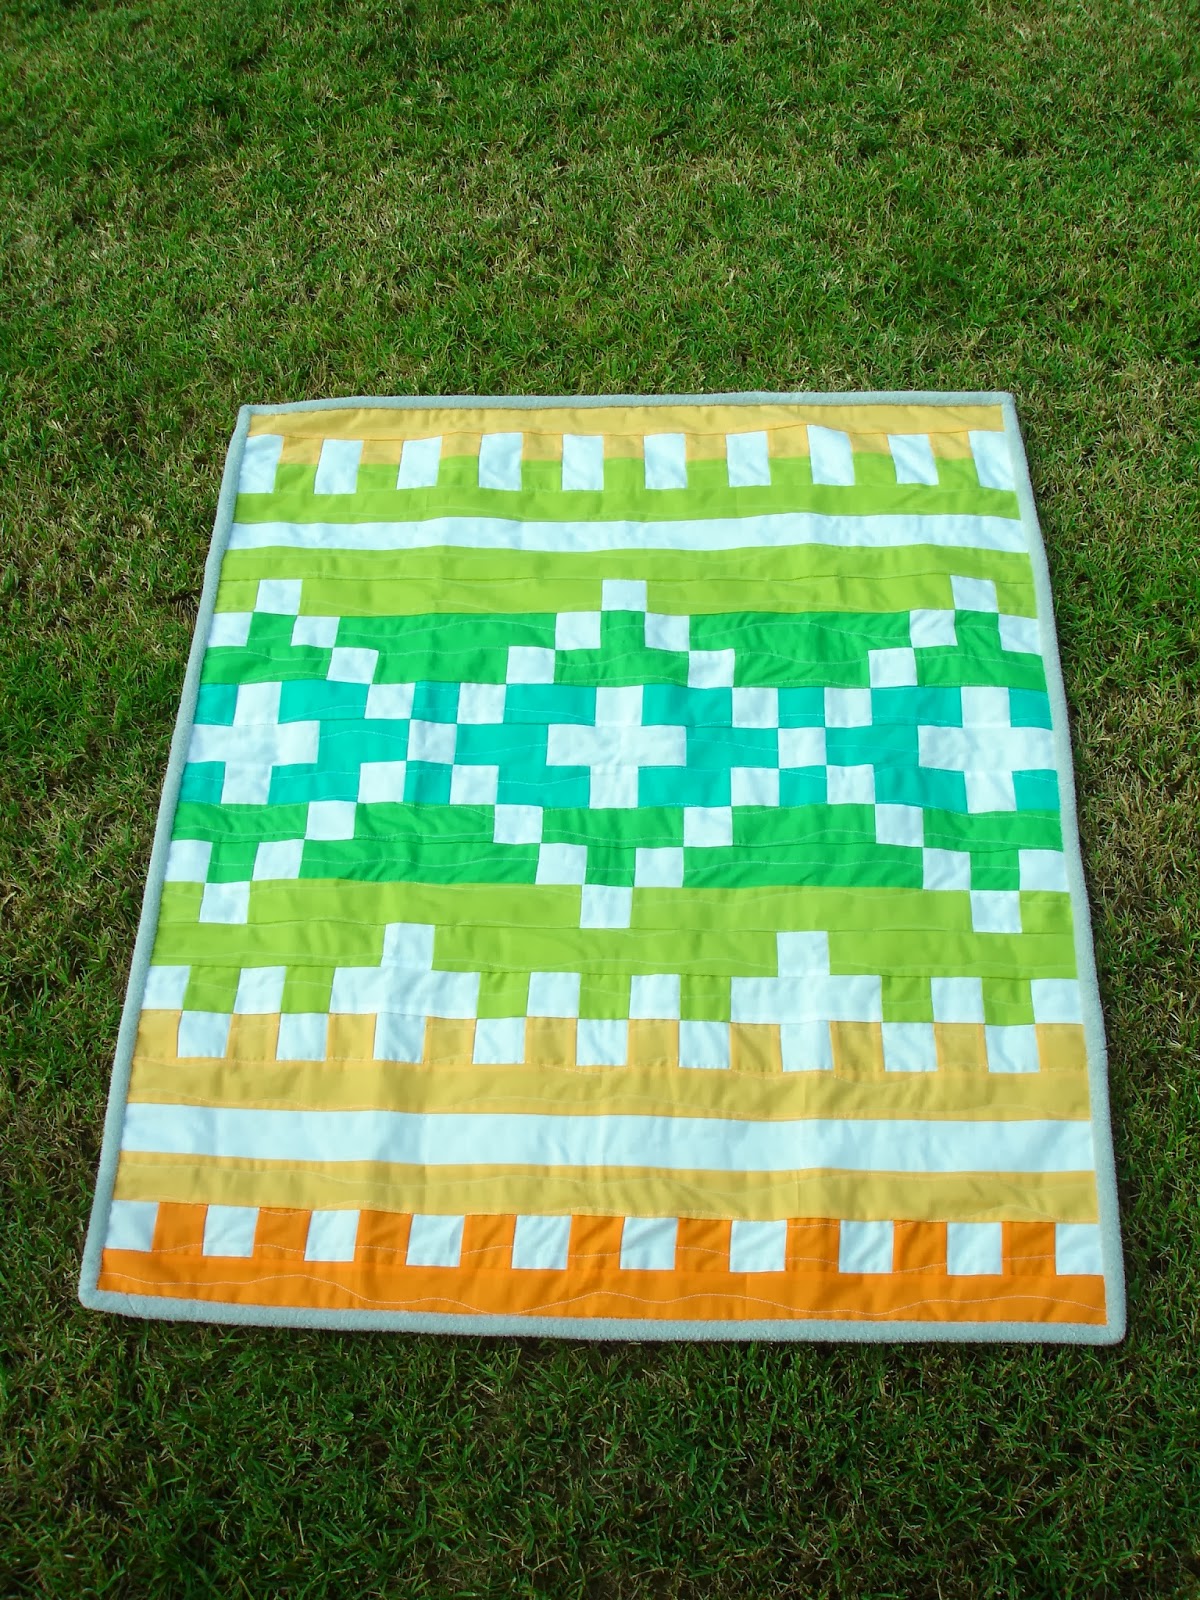
This is a tutorial in THREE PARTS. First up is a fair isle style imitation baby quilt using solids and a very thin soft fleece for the backing, sure to entrance the eyes and be snuggled up to by your newest arrival. Second is the chevron crib skirt, with one pleat in the center of each long side, as well as a matching customized breathable bumper (my *favorite* kind of crib bumper because it won’t suffocate any little guys who aren’t yet strong enough to move their heads if they get smothered AND because it keeps all arms and legs safely inside the crib and safe from becoming stuck or caught…I guess that was a big issue for my kids for some reason!). Third is the crib sheet!

Fair Isle Quilt Tutorial


1 Fat Quarter (FQ from here on out) of Amelia Orange
1 FQ Goldenrod Yellow
2 FQ Pistachio Green
1 FQ Green (the darker green)
1 FQ Turquoise
1/2 yd. White
1 yd. 60″ wide Fireside Pale Grey (the super soft stuff; this way we skip the batting)
1/3 yd. binding (OR you should have enough of the soft fleece leftover from the backing to skip this if you want)
white thread


When cutting these fat quarters into strips, always cut so that the strip ends up being 22″ long and not 18″ long.

If you weren’t able to find fat quarters, you can use regular cuts of fabric. Your instructions will be in {brackets}. If using FQs then just ignore the {brackets}!

From Orange cut: 3 FQ strips 2″ wide {that’s 2 strips of a full length cut if you are not using Fat Quarters}
From Yellow cut: 7 FQ strips 2″ wide {4 full length}
     Cut a 2″ square off the end of one of these strips. Save this. Don’t set it somewhere to be lost! 😉
From Lighter Green cut: 10 FQ strips 2″ wide {5 full length}
     From these strips cut:
          2 rectangles 8″ x 2″
          5 rectangles 11″ x 2″
          11 squares 2″ x 2″
          save 4 FQ strips {or save 2 1/2 strips full length}
From Darker Green cut: 6 FQ strips 2″ wide {3 full length}
     From these strips cut:
          6 squares 2″ x 2″
          4 rectangles 8″ x 2″
          10 rectangles 5″ x 2″
From Turquoise cut: 3 FQ strips 2″ wide {2 full length}
     From these strips cut:
          8 squares 2″ x 2″
          12 rectangles 3 1/2″ x 2″
From White cut: 7 full length strips 2″ wide
     From these strips cut:
          10 rectangles 3 1/2″ x 2″
          49 squares 2″ x 2″
          5 rectangles 5″ x 2″
          2 half-strips (just cut one full strip in half)
          save 2 full strips

BE SURE ALL YOUR SEAMS ARE 1/4″ WIDE! Be precise.
Also, always press towards the darker colored fabric whenever possible.

Sew a yellow FQ strip to a light green FQ strip (long side to long side). Press.

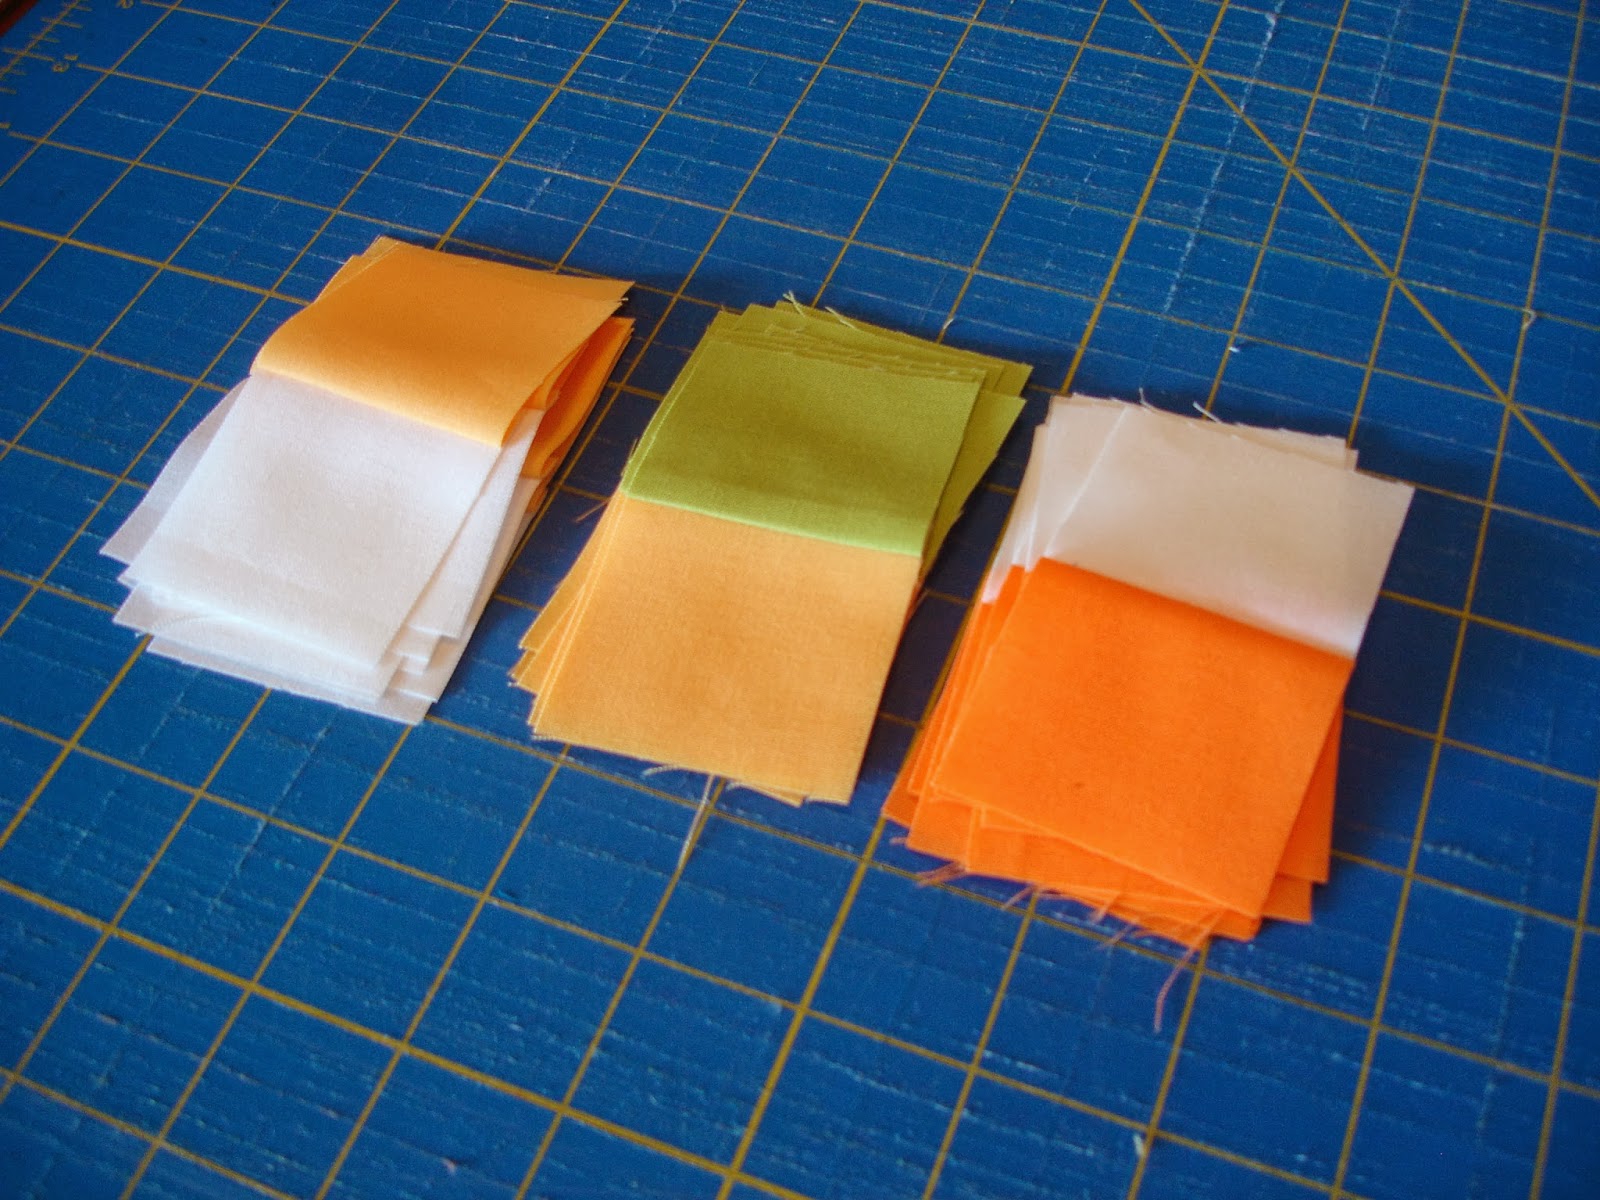
Sew a yellow FQ strip to a half-strip of white. Press.

Sew an orange FQ strip to a half-strip of white. Press.

Cut 9 of these from the yellow and light green:

Cut 9 of them from the yellow and white and then 9 from the orange and white. 

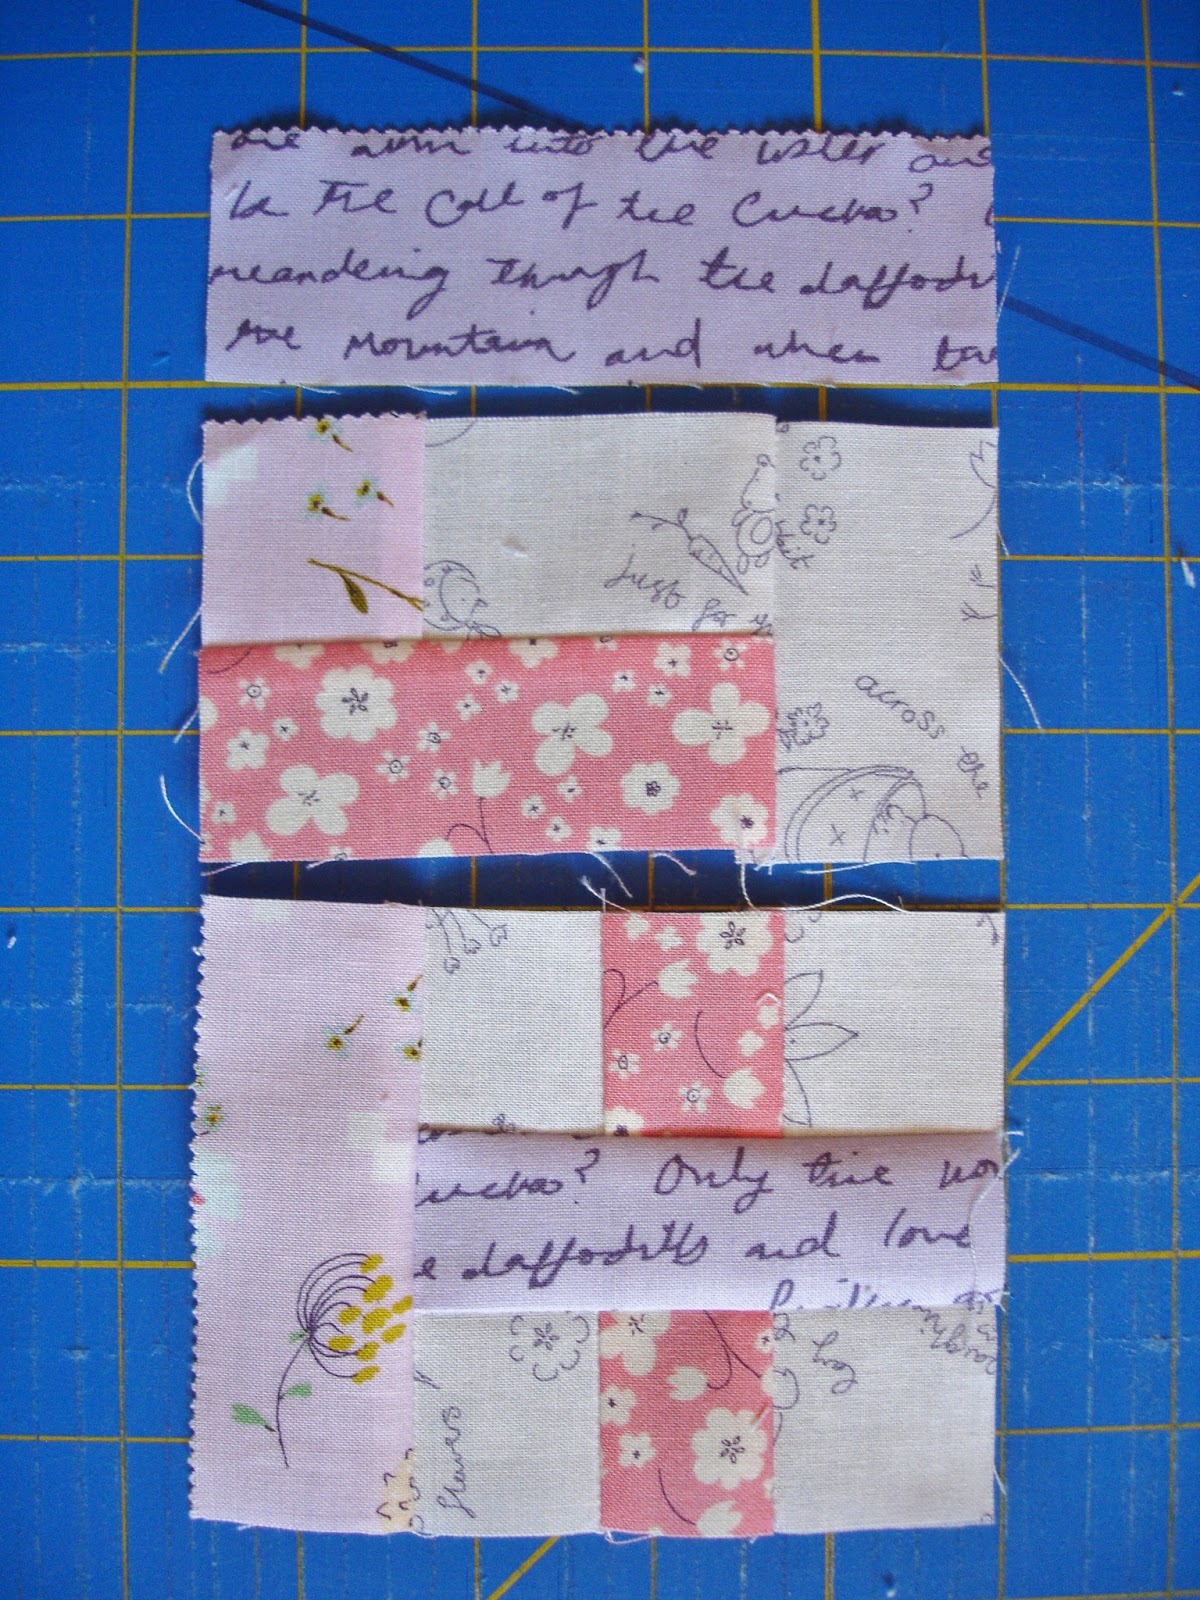
Sew the light green and yellow rectangles that you just made to the white rectangles 3 1/2″ x 2″ with WHITE on each end. Press.

Sew 3 yellow FQ strips into one long strip with a diagonal seam. A diagonal seam works like this (I know it’s not yellow, just pretend):

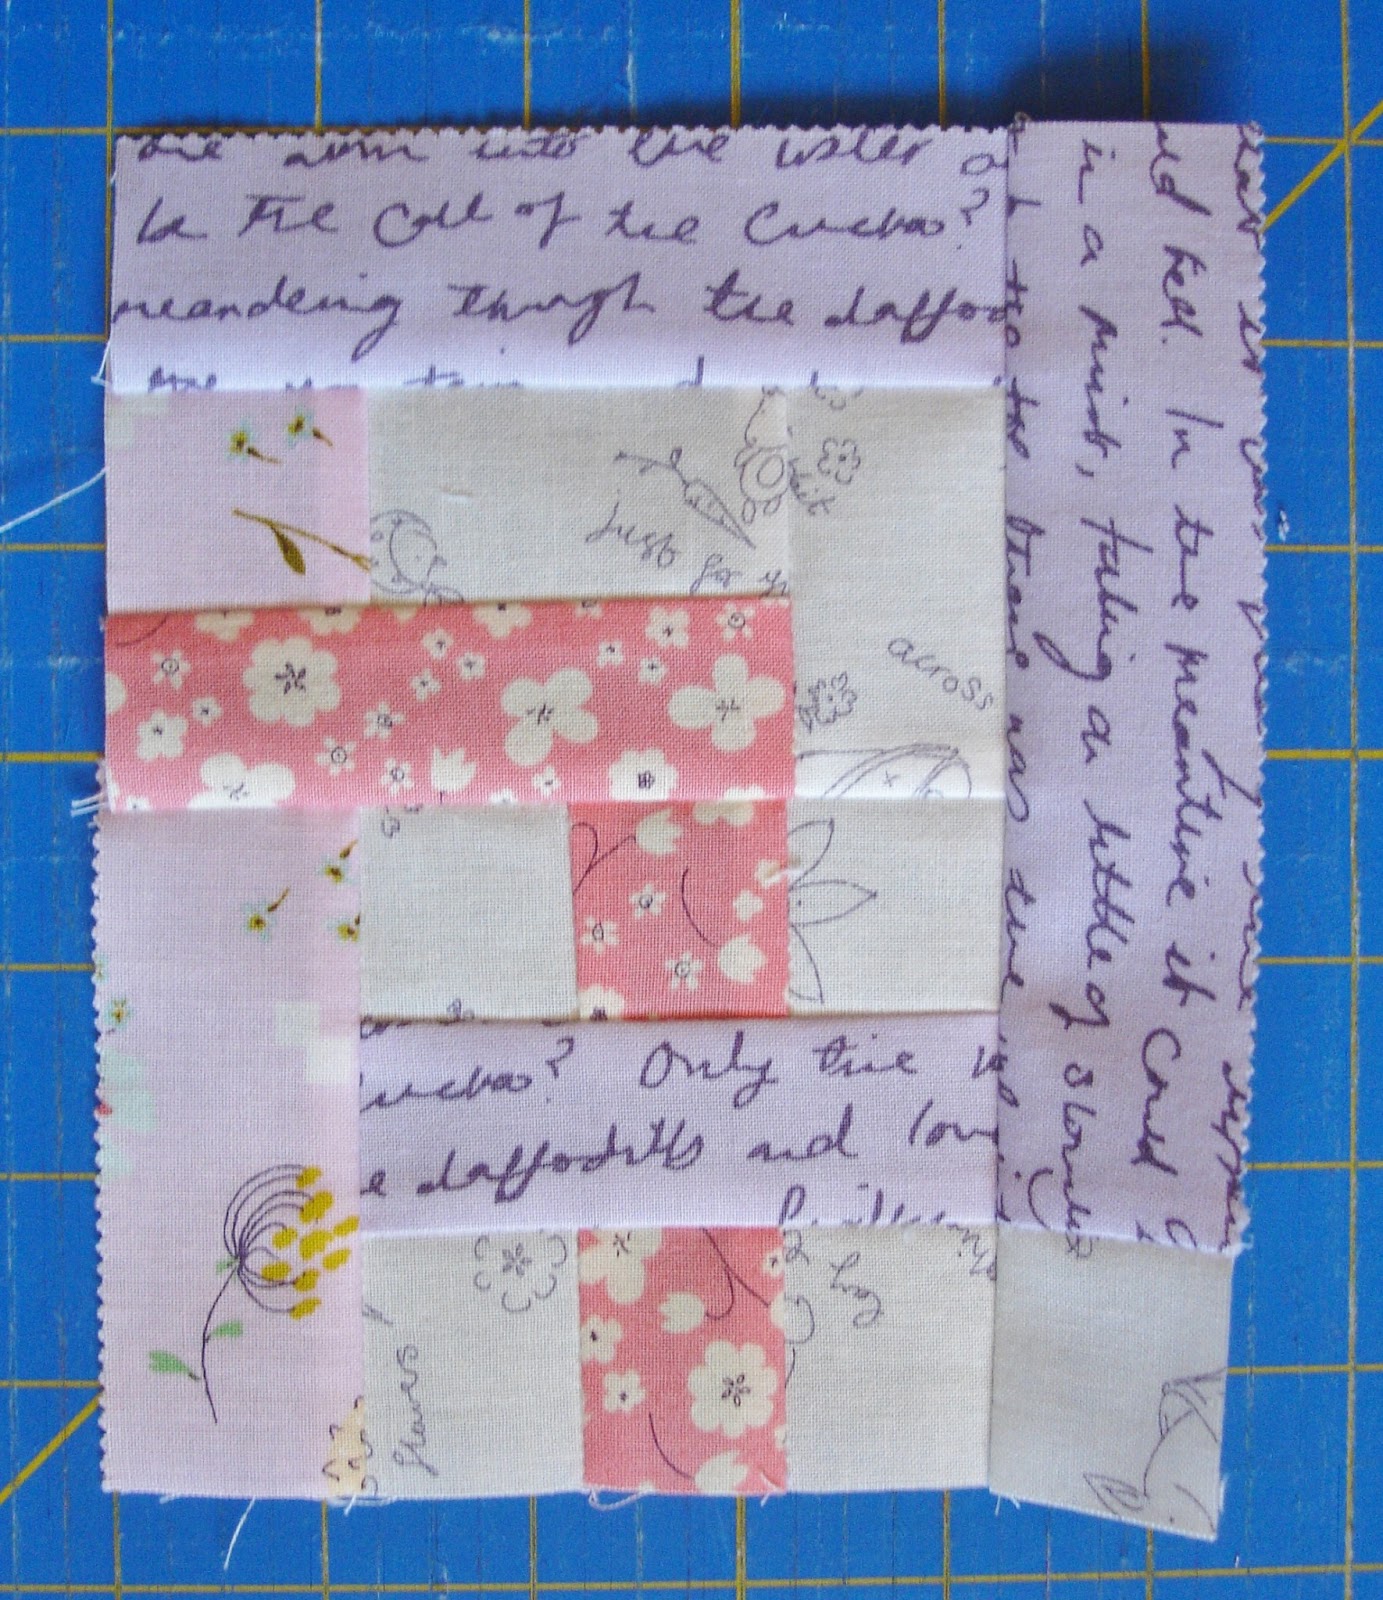
Sew this long yellow strip to the yellow side of the row you just created above. Press toward the yellow strip. Trim ends and square them to the rest of the row. 

Sew remaining light green FQ strips end to end into one long strip like you did with the yellow. Sew alongside a full length white strip. Press and trim ends. Sew remaining light green strip to the other side of the white strip. Press and trim.

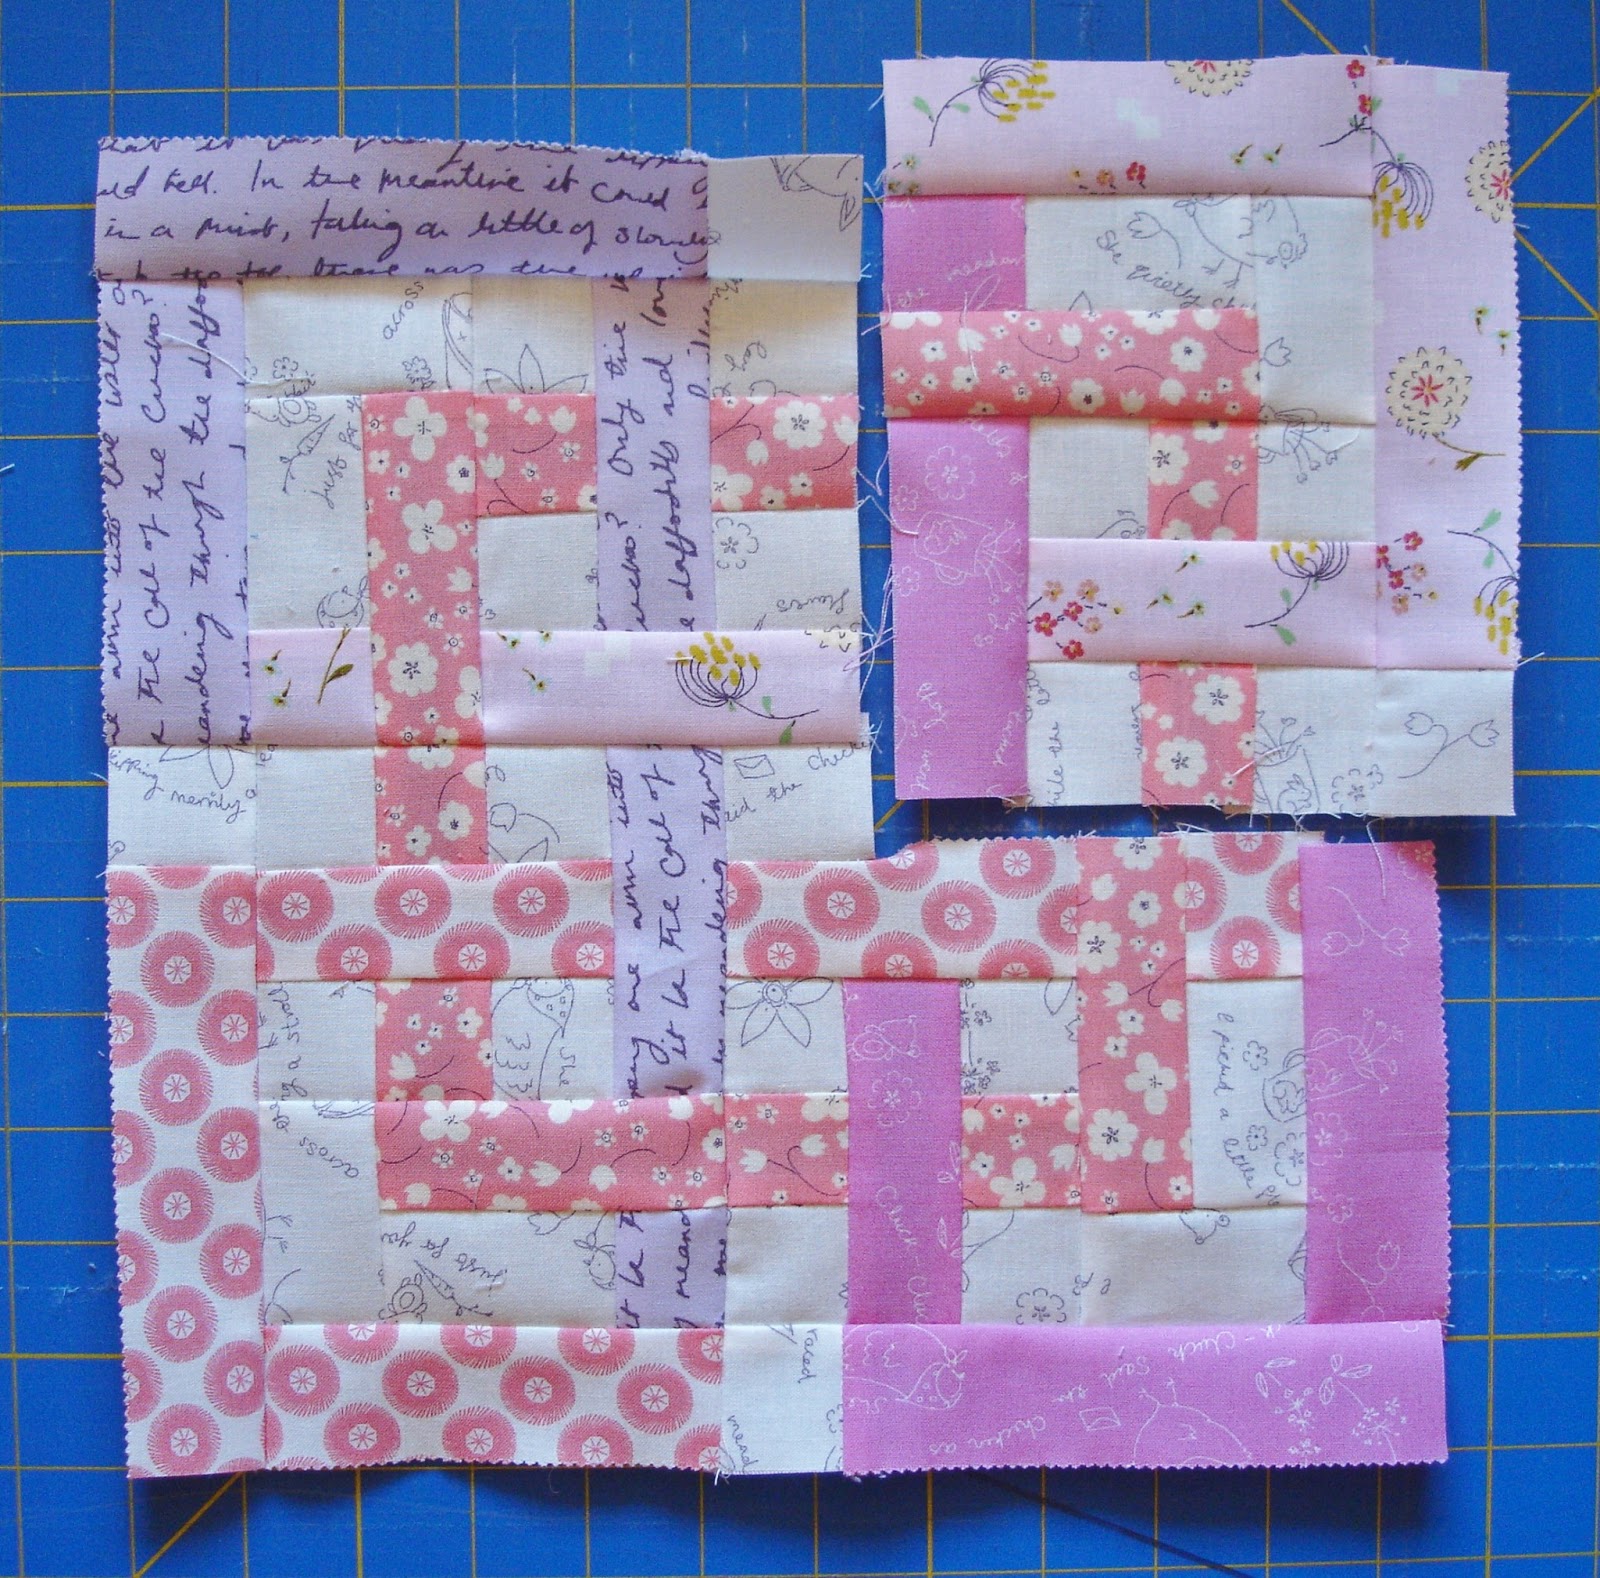
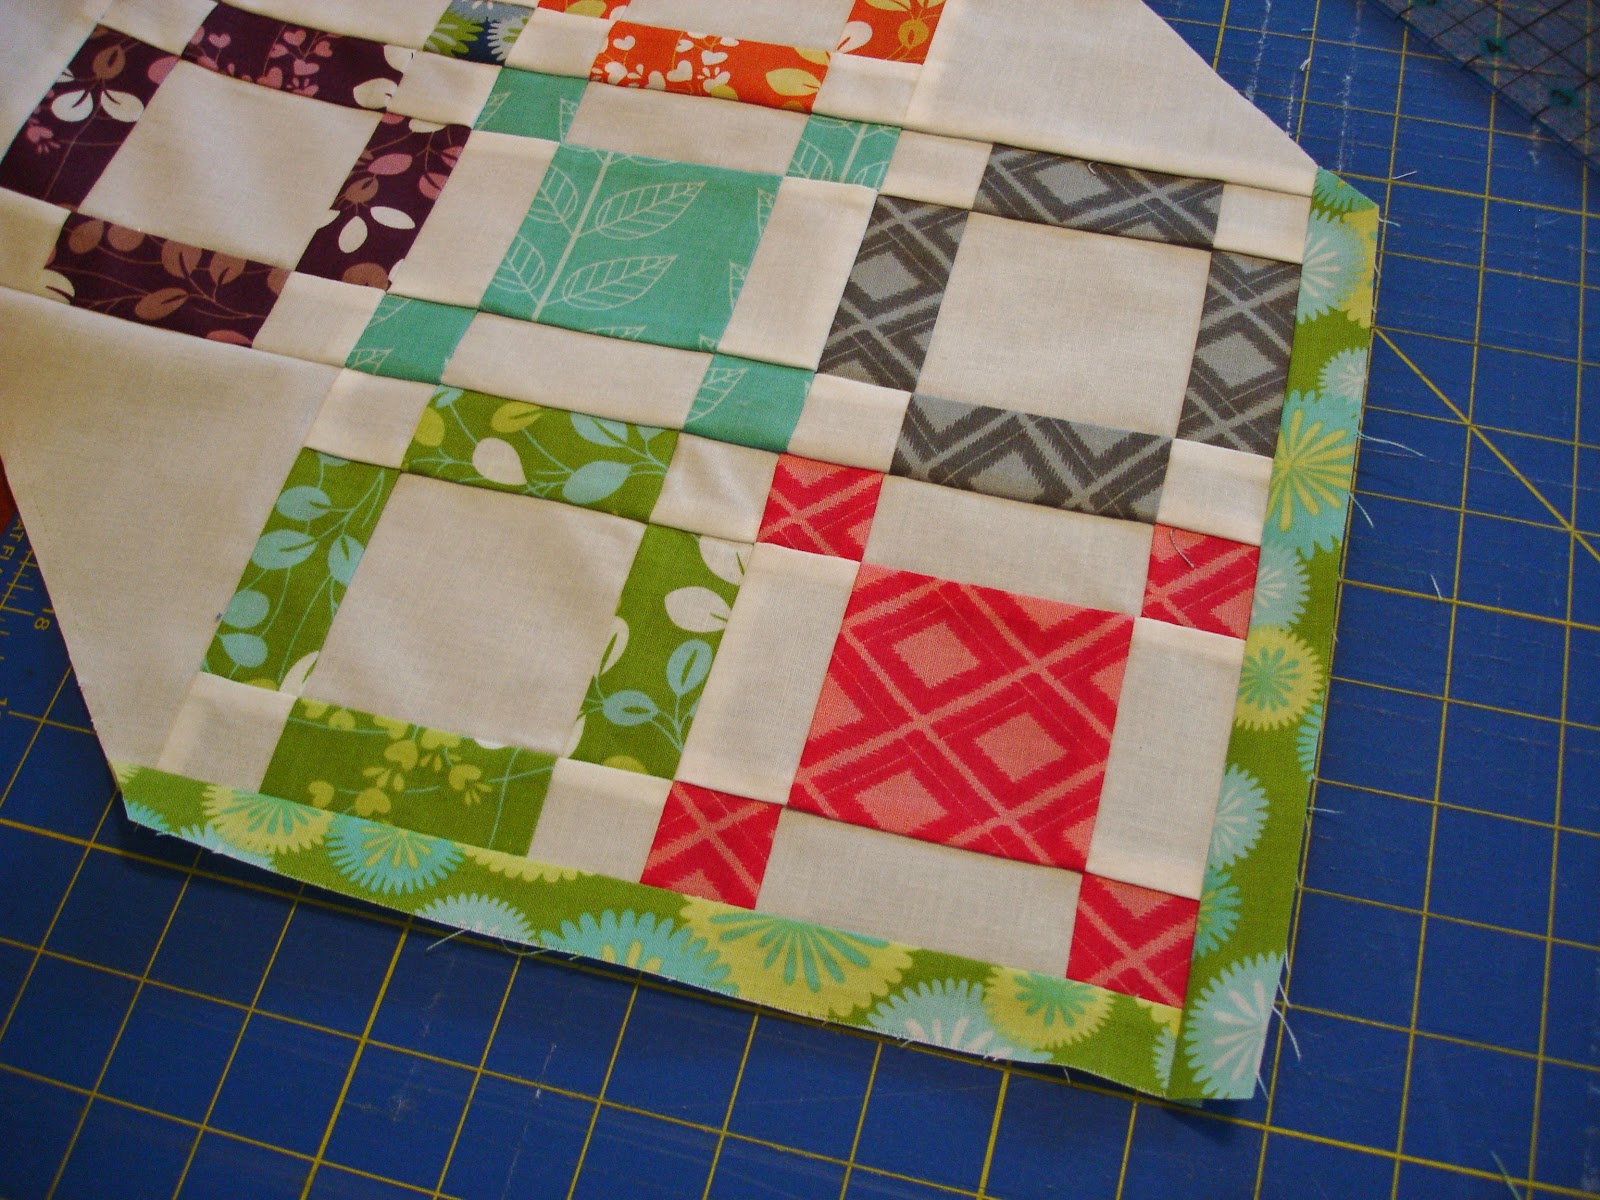
Sew your two rows together:

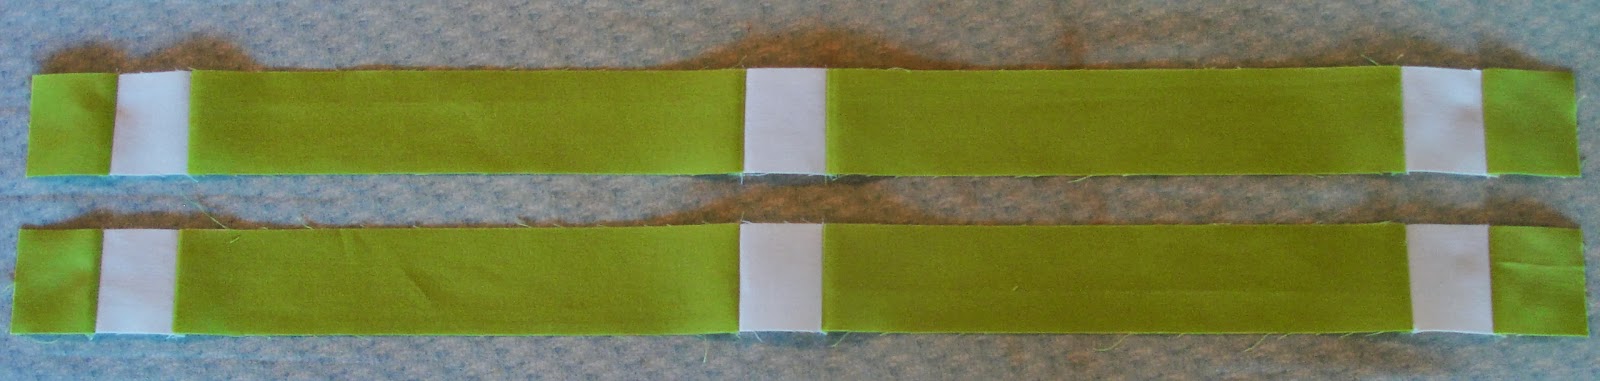
Using 6 white 2″ squares, 4 light green rectangles 11″ x 2″, and 4 light green 2″ squares make TWO of these rows:

Using 9 white 2″ squares, 2 white rectangles 5″ x 2″, and your remaining light green pieces, sew the following:
Using all your turquoise pieces, 16 white 2″ squares, and 3 white rectangles 5″ x 2″, sew the following:

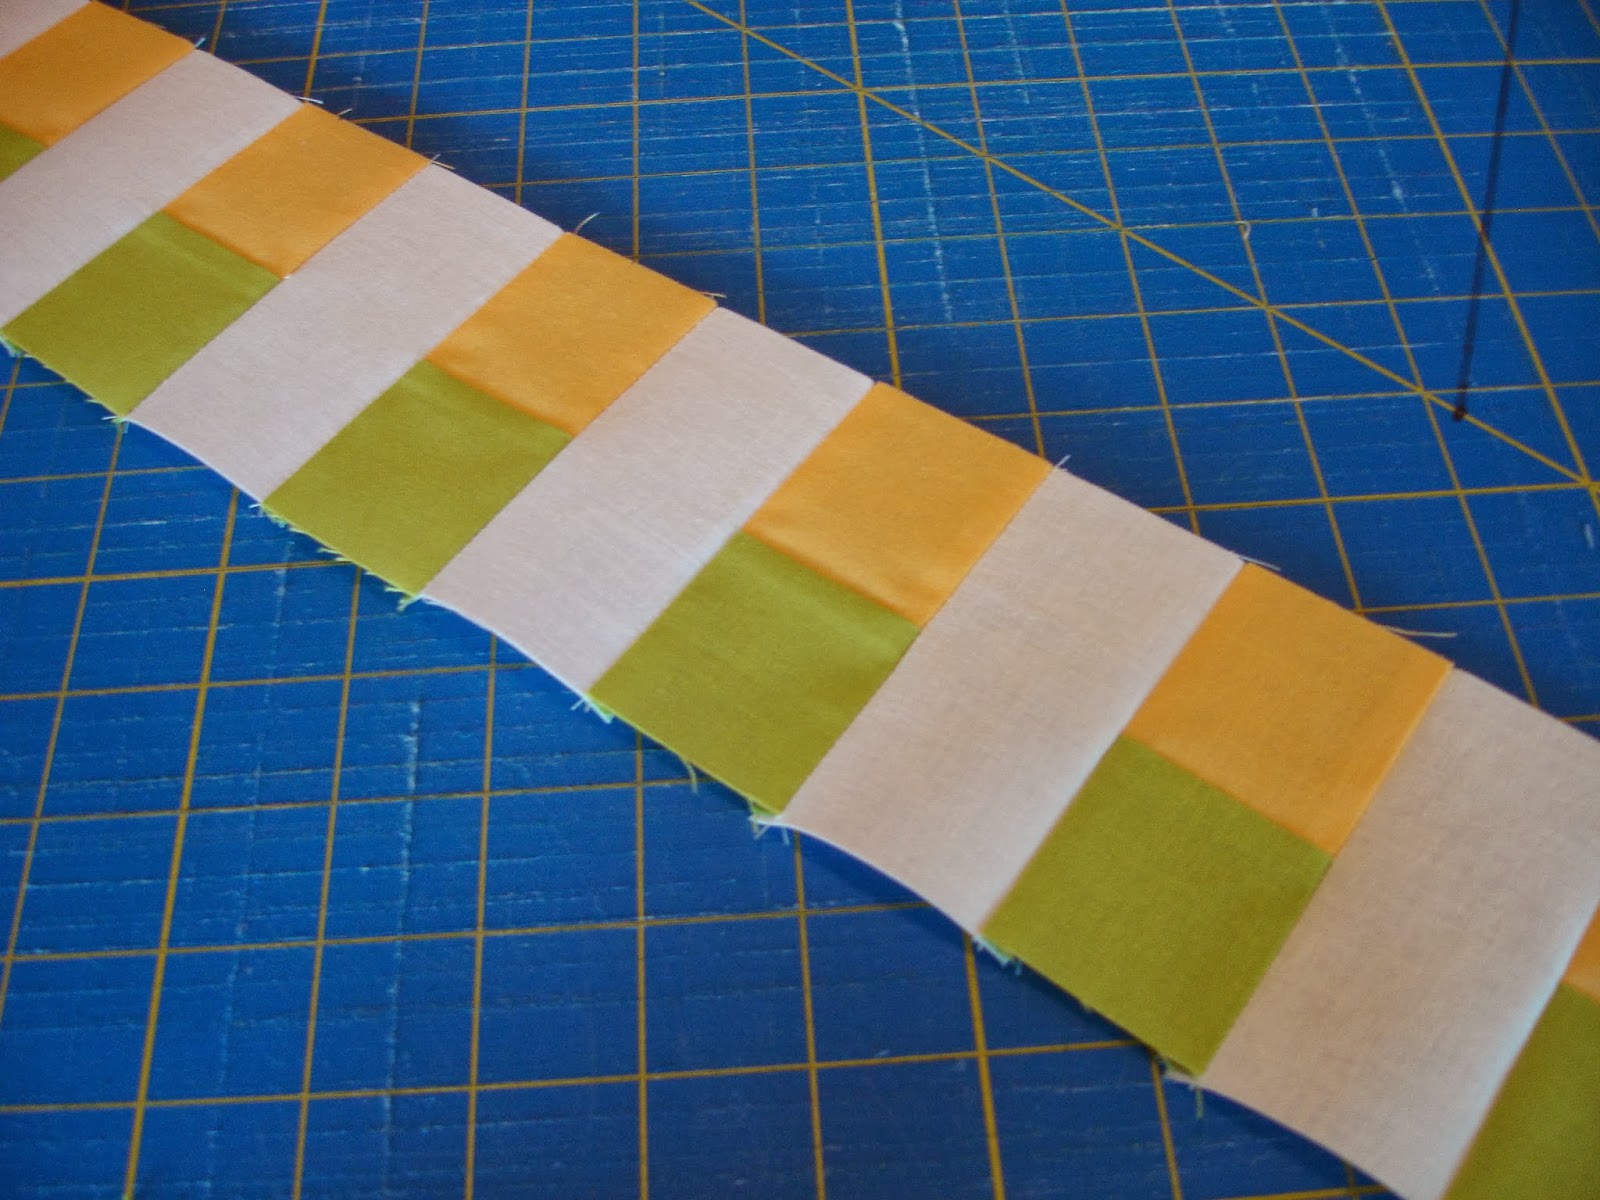
Sew yellow and white blocks from way earlier end to end starting with yellow and adding that additional yellow square onto the other end (so yellow is on each end of the long row). 

Sew yellow FQ strips end to end into 1 long strip. Cut in half. Sew to each side of a full length white strip. Then add the yellow and white strip from the previous step:

Sew orange and white blocks from way earlier end to end starting with white and adding an additional white square onto the other end (so white is on each end of the long row).

Sew remaining 2 orange FQ strips together (with diagonal seam again). Sew this strip to the orange and white row from the previous step:
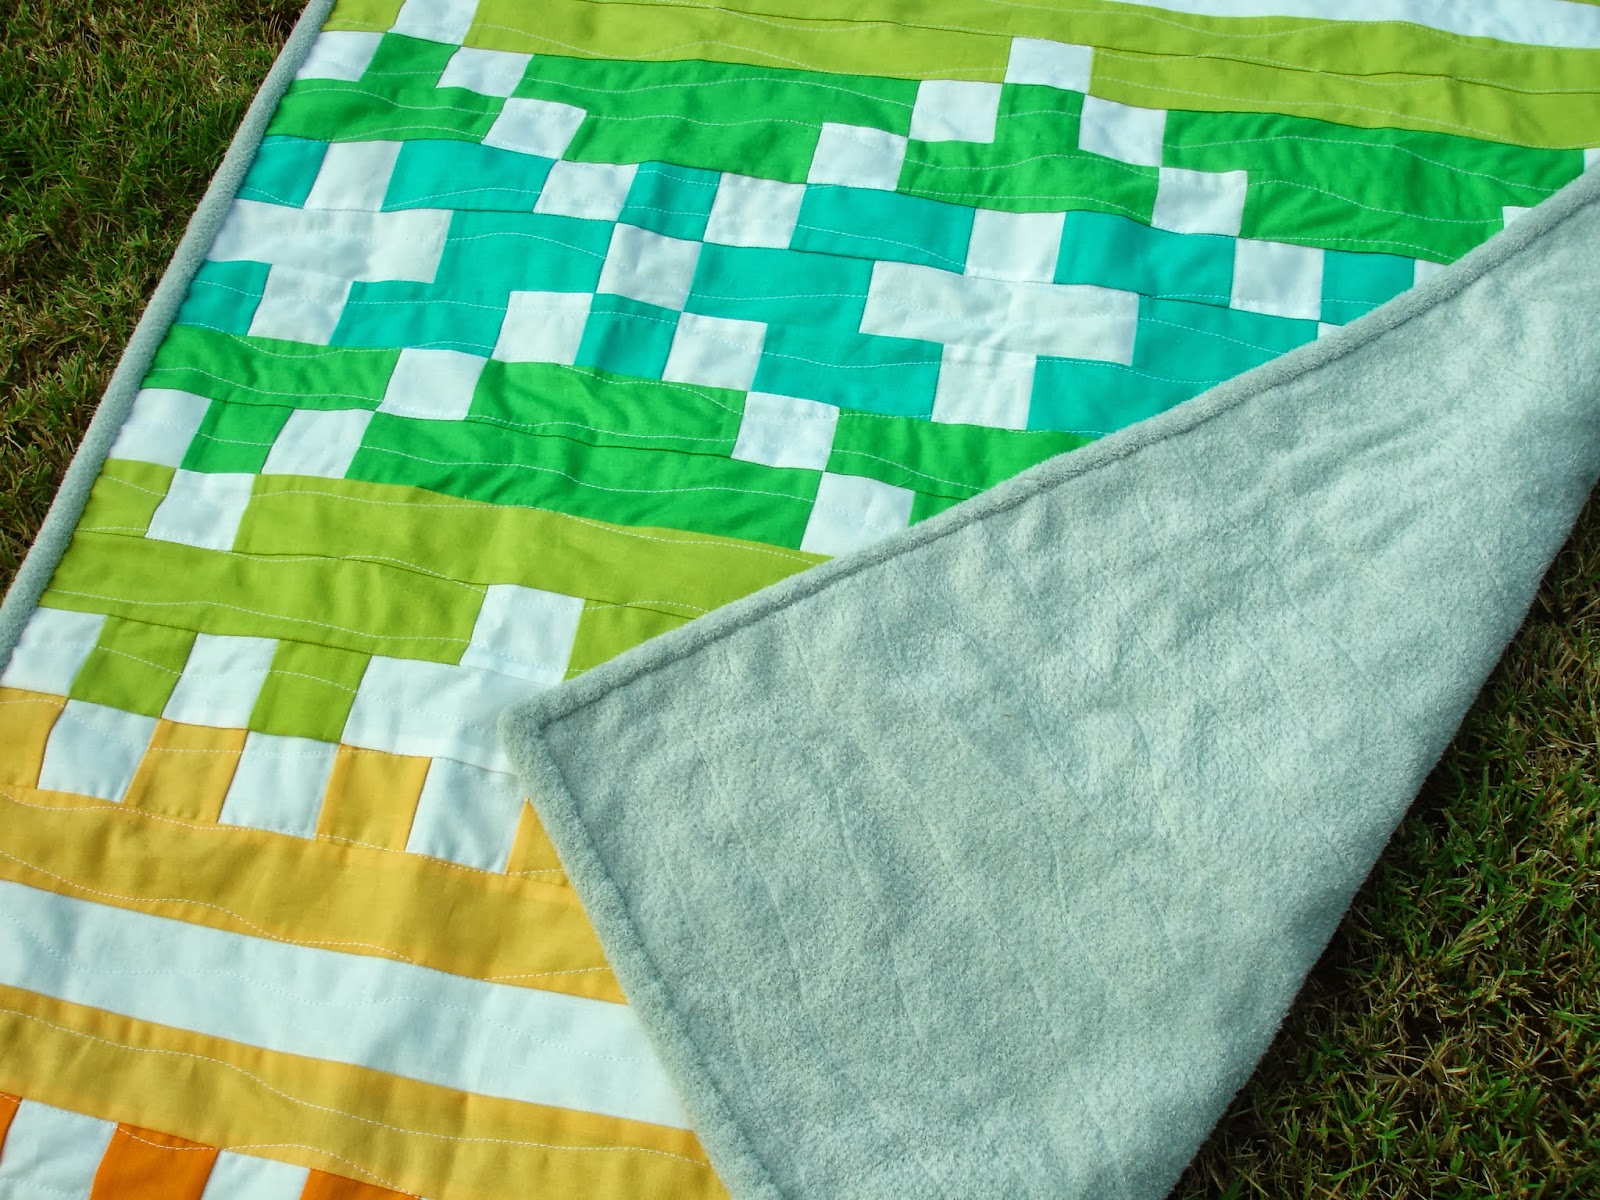
Sew your rows together like this and you’re done with the quilt top! Use your fuzzy soft material as your backing and if you live in Texas, feel free to skip the batting altogether. I also used the fuzzy stuff for the binding, because I know my babies would love the quilt that much more if the edges were soft on their cheeks too. 


29″ x 36″ finished baby quilt

Crib Skirt and Bumper Trim


3 1/2 yds. Half Moon Modern Zig Zag Steel
1 1/2 yds. White
a set of breathable bumpers in White

First let’s concentrate on the crib skirt. BE SURE YOUR ZIG ZAGS WILL ALL BE GOING THE SAME DIRECTION AROUND THE CRIB.
You need to cut 2 rectangles from the Zig Zag fabric: 17″ x 62″
And 2 more rectangles from the same zig zag: 17″ x 30″

You should have lots of looooong scraps leftover after cutting these panels. SAVE THEM for the bumpers. They will all be going the same direction as the chevrons in your skirt, which is definitely desirable. Just set them aside. 
Also cut a white rectangle measuring 28 1/2″ x 52 1/2″.
Turn in the vertical edges (the edges measuring 17″) of all 4 of your zig zag rectangles 1/2″ and press:
And again, fold over 1/2″ to create a double fold. Press.

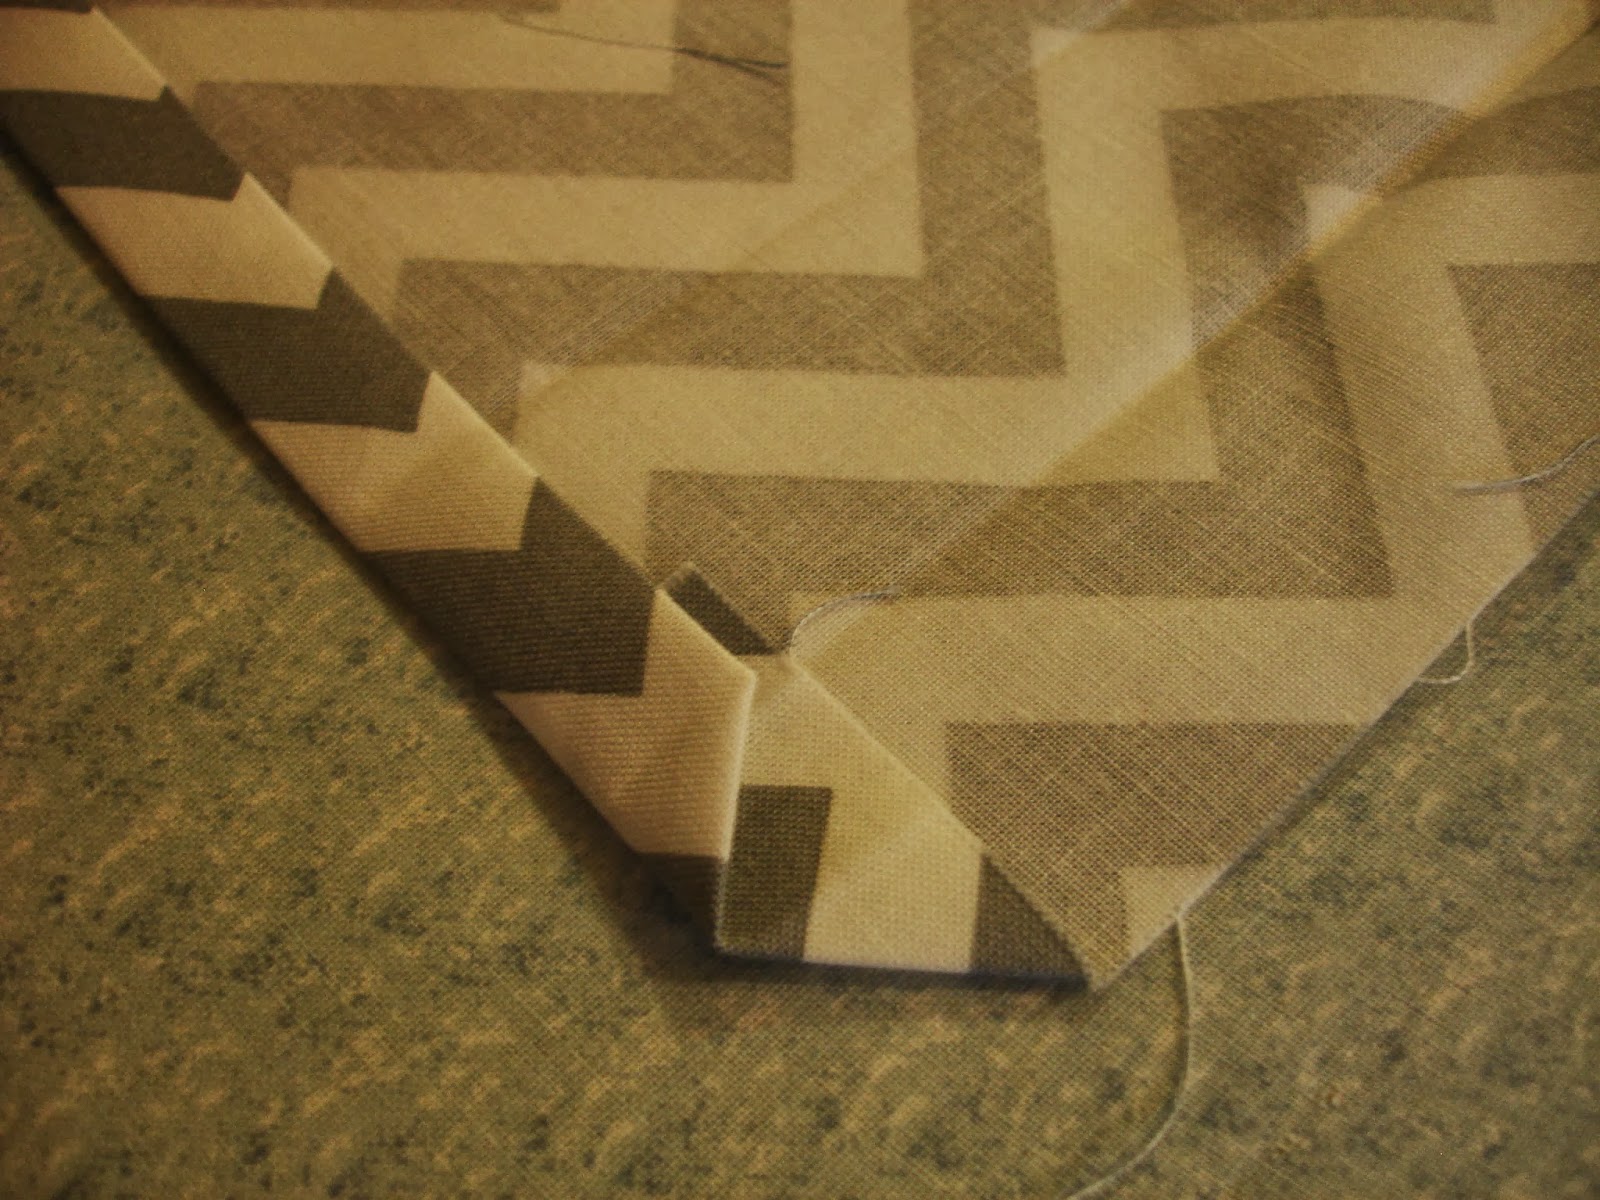
Now create a 1 1/4″ double fold along the bottom of your 4 rectangles and press. When unfolded, your corners should look like this:

To miter the corners, fold the corner up like this and gently press (this doesn’t have to be super precise):

Then press your double folds back in place. You should end up with nor raw edges showing.

Sew just under a 1/2″ seam down one vertical side until you come to where the bottom is folded up. See these next two pictures:

Just keep that vertical stitch going until you’ve come one or two stitches onto that bottom double-fold. Backstitch before cutting your thread. Then, using the above picture as a guide, start to sew (Backstitch first!!) from the edge of your bottom double-fold. Sew across and backstitch when you come to the end. Then start the next vertical side as seen below (backstitch first!) and sew until you come to the unfinished top edge:

Do as above for all 4 panels/rectangles.
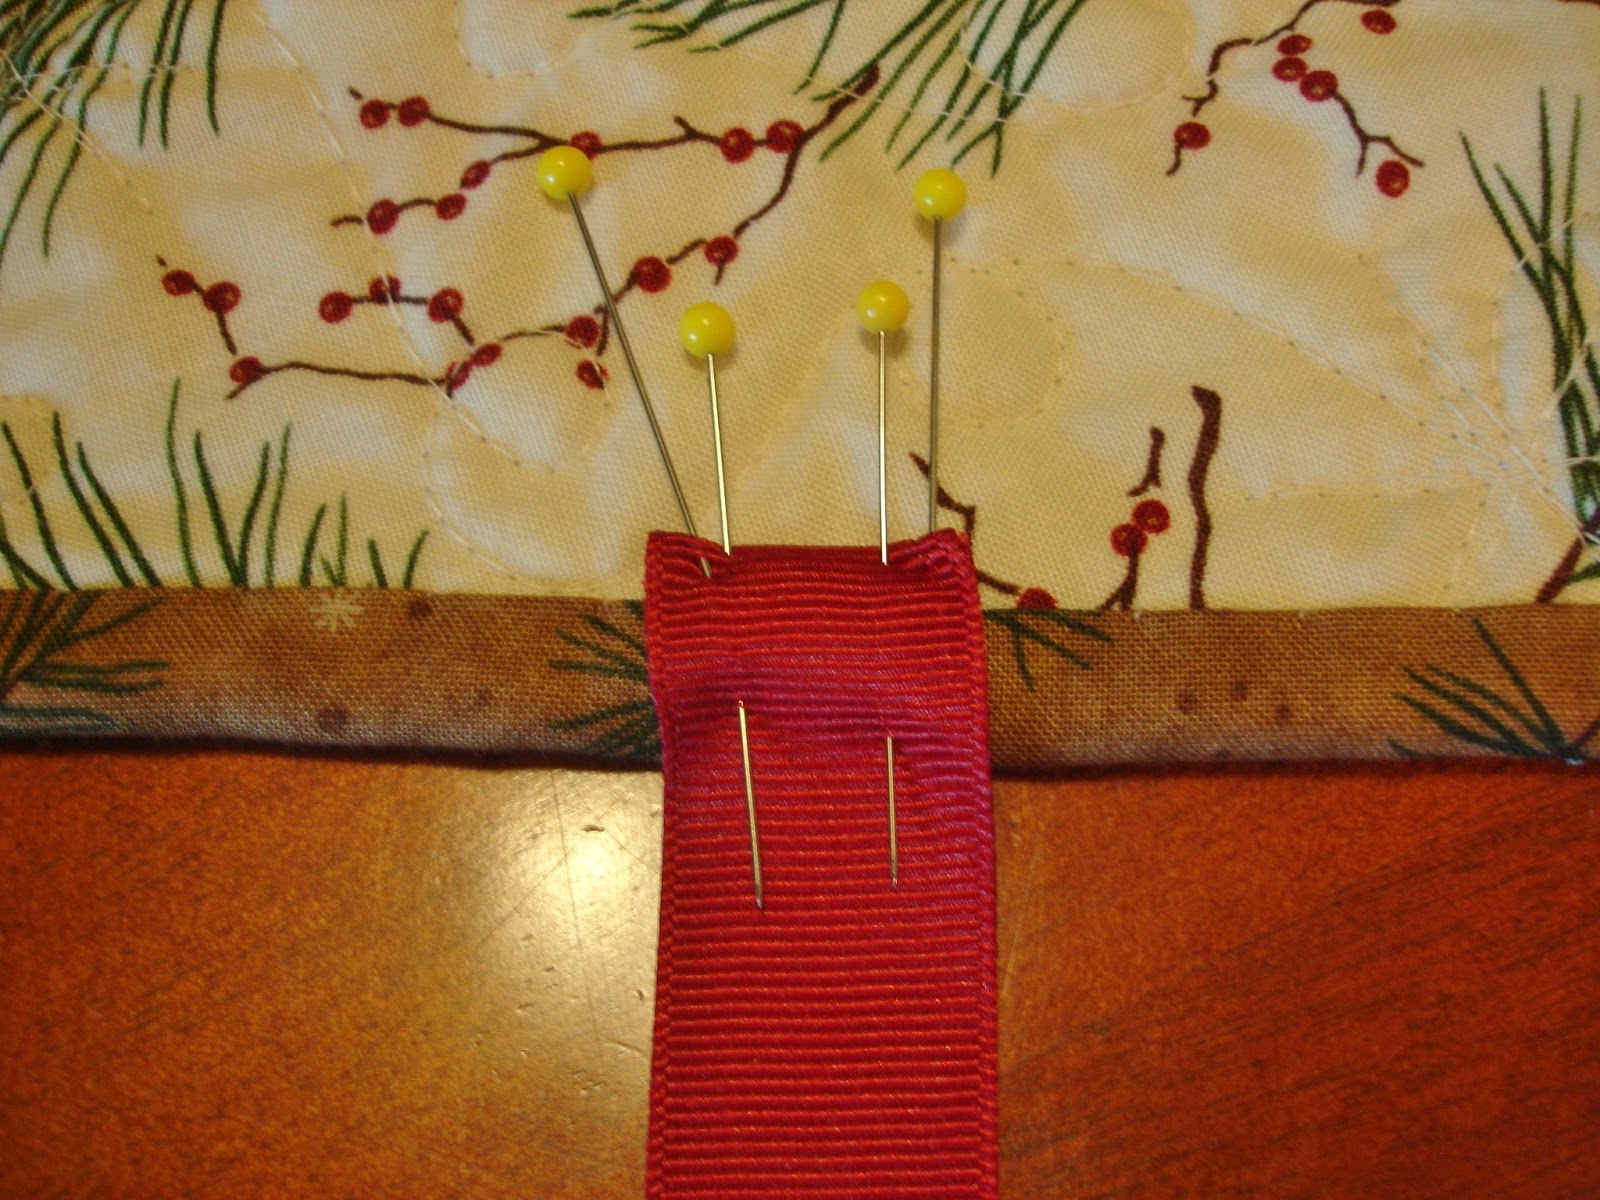
Now to make a pleat in the center of each long panel. Find the very center of your panel and use a pin to mark it on the unfinished edge. Then measure 4″ out on either side and mark with two more pins:

Bring these pins in to the center pin:

Pin everything in place as smooth and straight as possible. Repeat for second long panel. 

Time to sew the panels to the big white rectangle. I used my serger, but if you don’t have a serger, feel free to use a tight zig-zag stitch. The bedskirt is not something that should be going through the wash nearly as often as the sheet or quilt, so this doesn’t have to be quite as durable. But if you *do* have a serger, go ahead and pull it out for this. 
Pick a panel and match it to a side of the white rectangle. You should have about a 1/4″ of white sticking out on either side, and this is GOOD. Pin it all in place and sew together. Repeat for the opposite side as well.

Do the same for the other two ends. 

Your corners should end up like this:

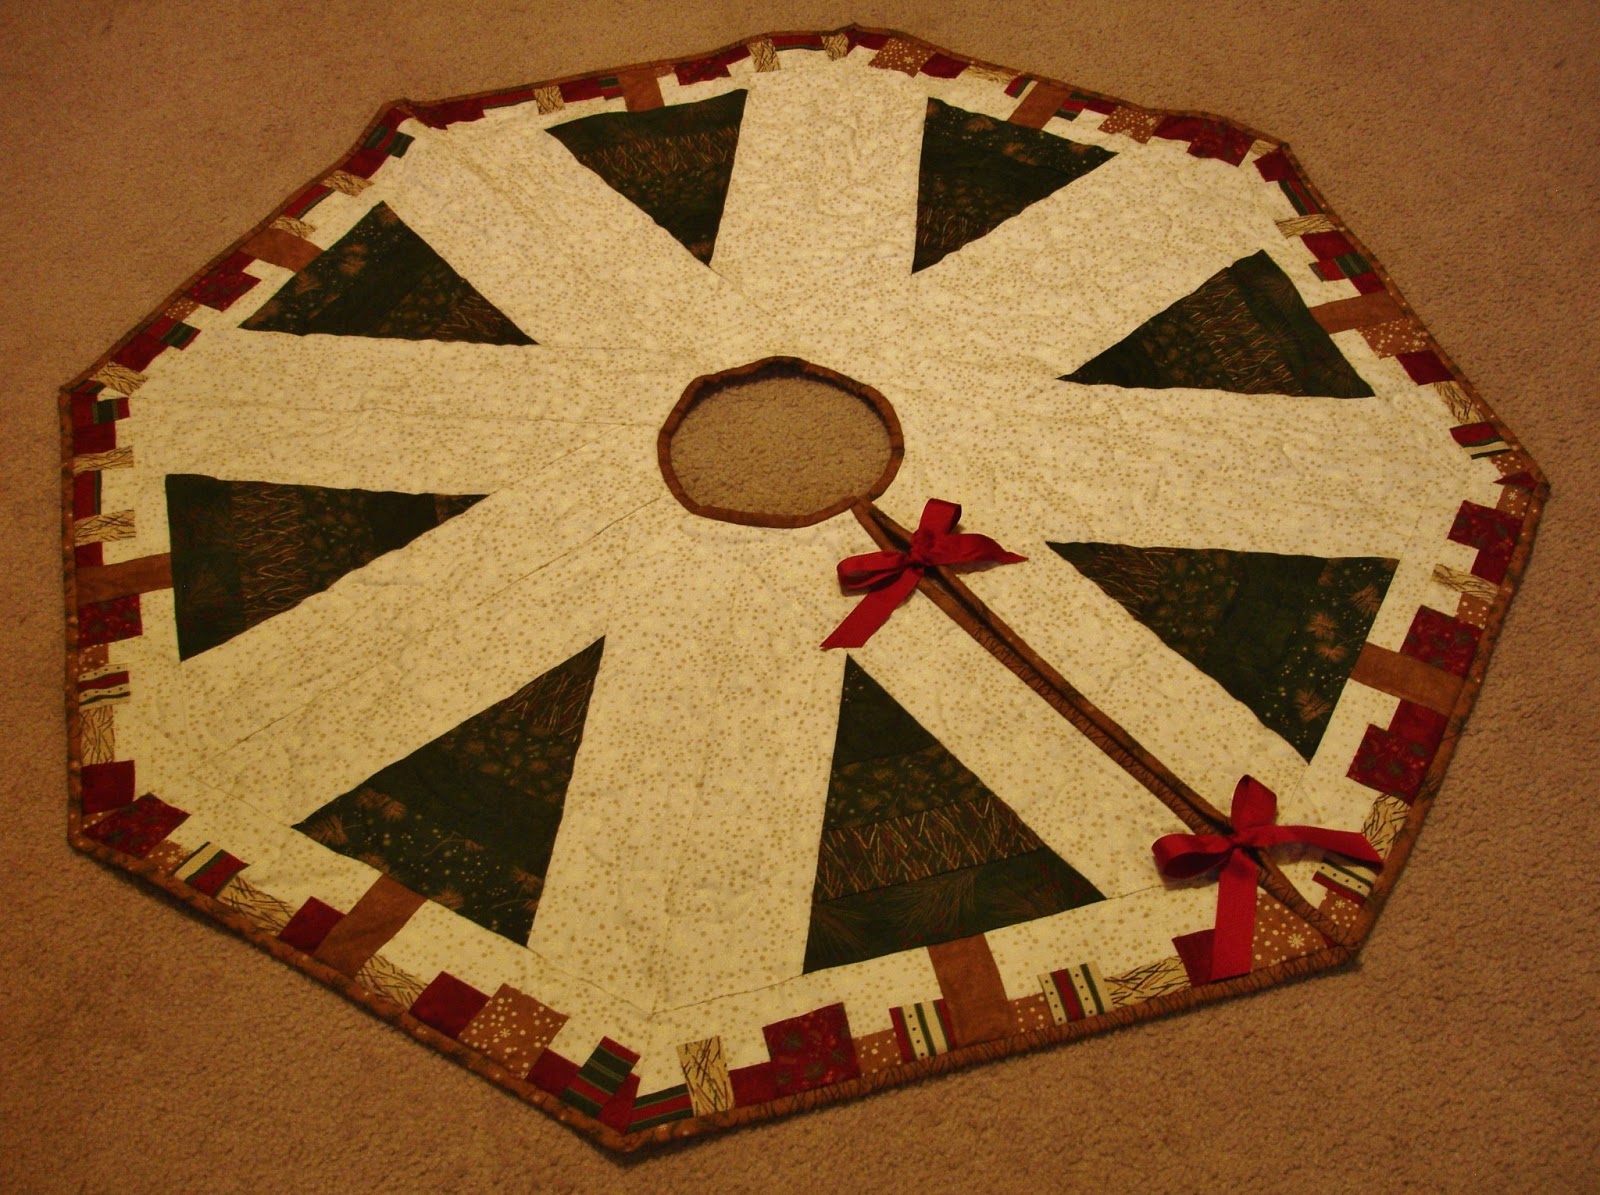
It’s a pleated crib skirt! 

Back to your previously set aside strips for the breathable bumper customization. Cut these strips to 3″ wide. You will need about 420″ total in length, which means you probably still don’t have enough. So using the remaining unused chevron fabric, cut more 3″ wide strips. BE SURE TO CUT THEM THE SAME DIRECTION AS YOUR OTHER STRIPS. If you’re not using stripes or chevrons, this won’t matter, but if you *are*, be sure not to mess this up!!

To be more specific, I still needed 290″ more in length. Using a 21″ cut of fabric, and cutting these strips *horizontally*, I came up with 14 strips 3″ wide to give me the amount I needed.

Using a diagonal seam (as demonstrated above in the quilt section), sew these strips together until you’ve come up with:
   2 lengths 120″
   2 lengths 88″
Press them all flat, with open seams. Then fold over and press the long edges 1/2″ on each side all the way down. Then press in half all the way down. You’ve just created a kind of binding, right? 🙂
Now pull out your fresh package of breathable bumpers. I got mine on Amazon. I’ve had two babies and I LOVE these “bumpers”. 

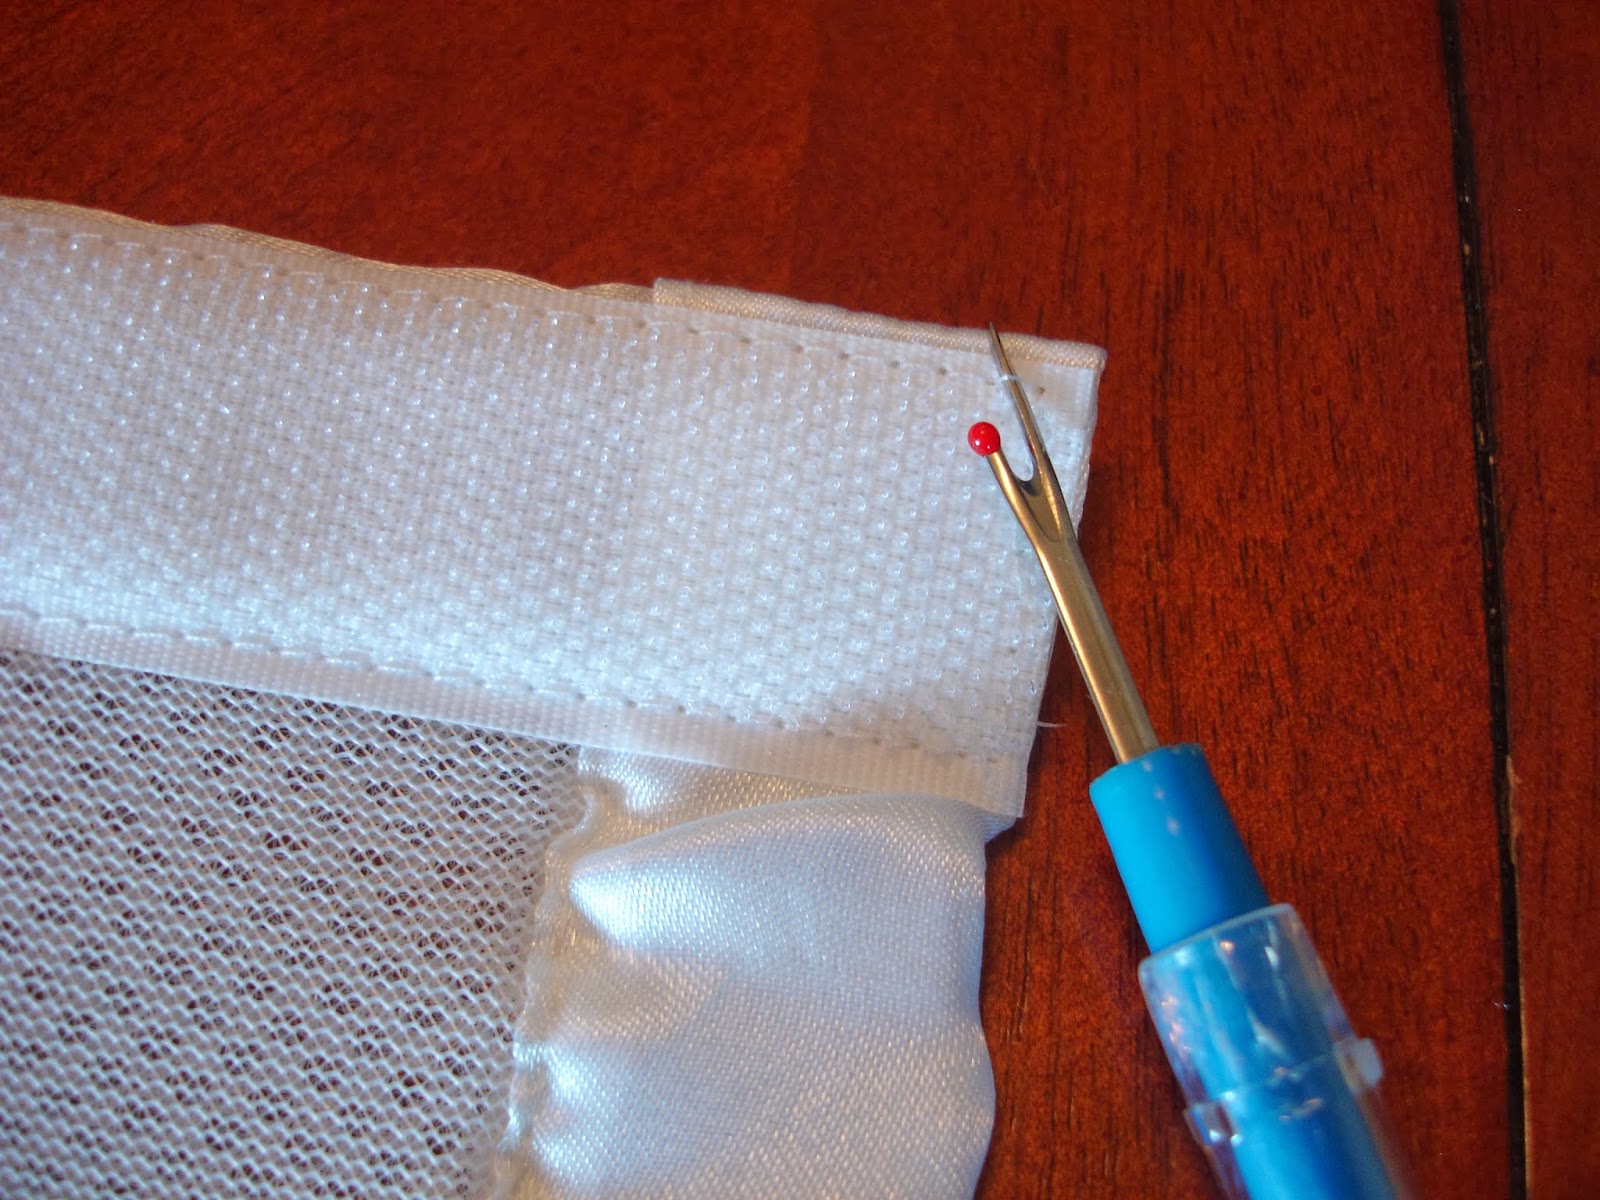
This part is going to be tedious. You need to carefully remove all the velcro and save it for later. Note that there are longer and shorter pieces and remember as best you can which pieces generally went where. It’s not too hard. 

After removing the velcro, it will look like this. Don’t worry. 

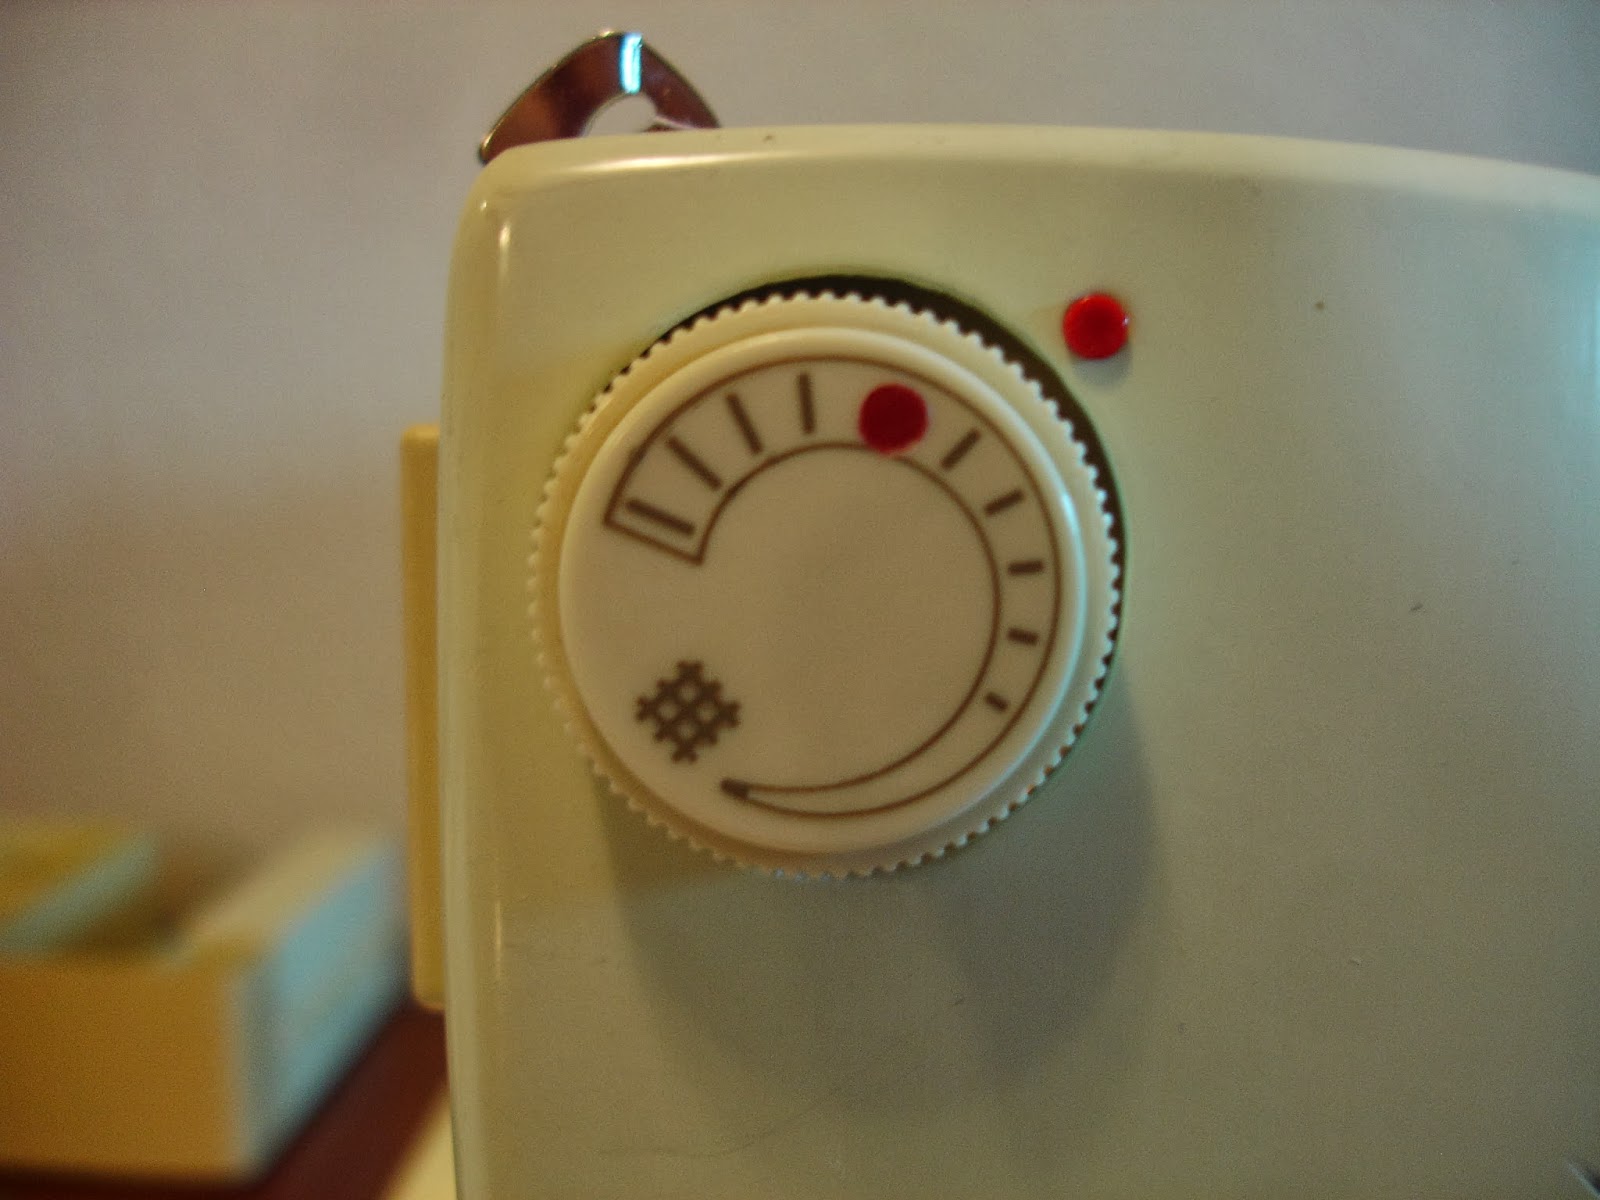
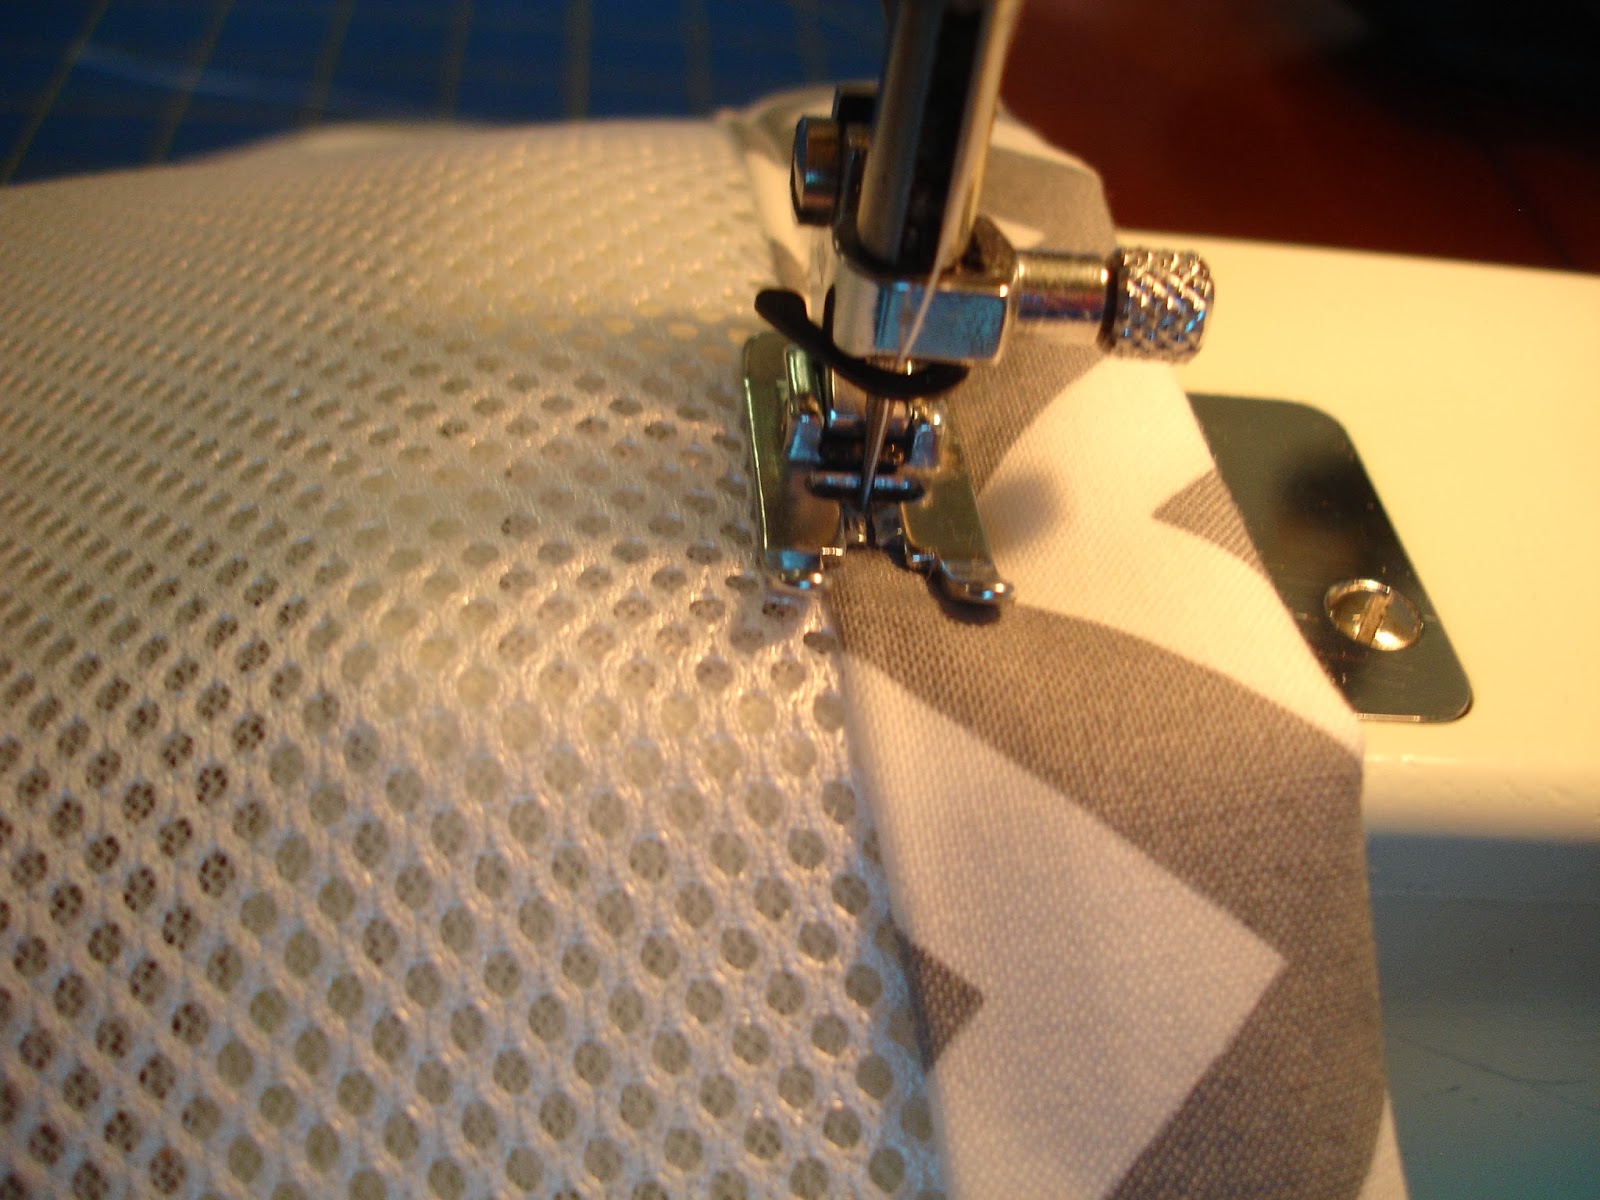
Using your chevron binding created above, sew it over the top of the satin already on the bumpers. First, you’re going to fold the edge under about 1/2″. Press. Line up this fresh fold with the very edge of the bumper. I suggest setting your machine for a thicker setting. On my ancient machine (it’s older than I am!) it looks like this. This isn’t a huge deal, but if you’re having trouble with your binding becoming stretched or pulling funny, this will certainly help.
Backstitch at the beginning before you get going and then sew along:

Stop in place a couple inches before the end of the bumper:

Cut the “binding” about 1/2″ beyond where the bumper ends. 

Finger press it under and then sew to the end, backstitching those last couple stitches in place.

Do this for all horizontal sides of your breathable bumpers! Reattach Velcro strips in the correct spots. Wasn’t that easy? 


One crib skirt and one set of breathable bumpers for a standard crib measuring 28″ x 53″

Crib Sheet
I know it’s hard to cough up the money for fabric that is 108″ or 60″ wide, but trust me, it’s worth it. I’ve had two babies and made some of their bedding, obviously, but the homemade sheets using regular width fabric only barely covered the mattress and because it was stretched so much, it looks worse for the wear. Go ahead and buy this nice fabric. You won’t regret it after it’s been pooped, spit up, and peed on and through the wash literally hundreds of times and it *still* holds up great. Honestly, if I were you, I’d make *two* of these sheets.

1 1/3 yds. 108″ Dottie Quilt Backs Steel (or you could get 2 yds. of 60″ wide fabric)
70″ of 1/4″ wide elastic

Cut yourself a rectangle measuring 47″ by 72″.

Make sure those edges and corners are all parallel and square.

Cut out 10″ squares from all 4 corners of your large rectangle. 

You should have this:

Now fold those funky corners like this, WRONG SIDES TOGETHER:

Pin in place.

Sew a very scant 1/4″ seam. Or if you prefer, sew it at a regular 1/4″ and then go back and trim the seam smaller.Be sure to backstitch at the beginning and end of your seam. 

Flip it inside out and then pin again:

Sew a 1/4″ seam (backstitch at beginning and end). 

Congrats, you just made a French Seam! Do this for all 4 corners. 

Now for the elastic casing. Measure and press a 3/8″ seam. 

Make a double fold by measuring and pressing in 3/8″ again. 

Starting with a good backstitch, sew all the way around the sheet UNTIL you come about 3″ from where you started. Backstitch.

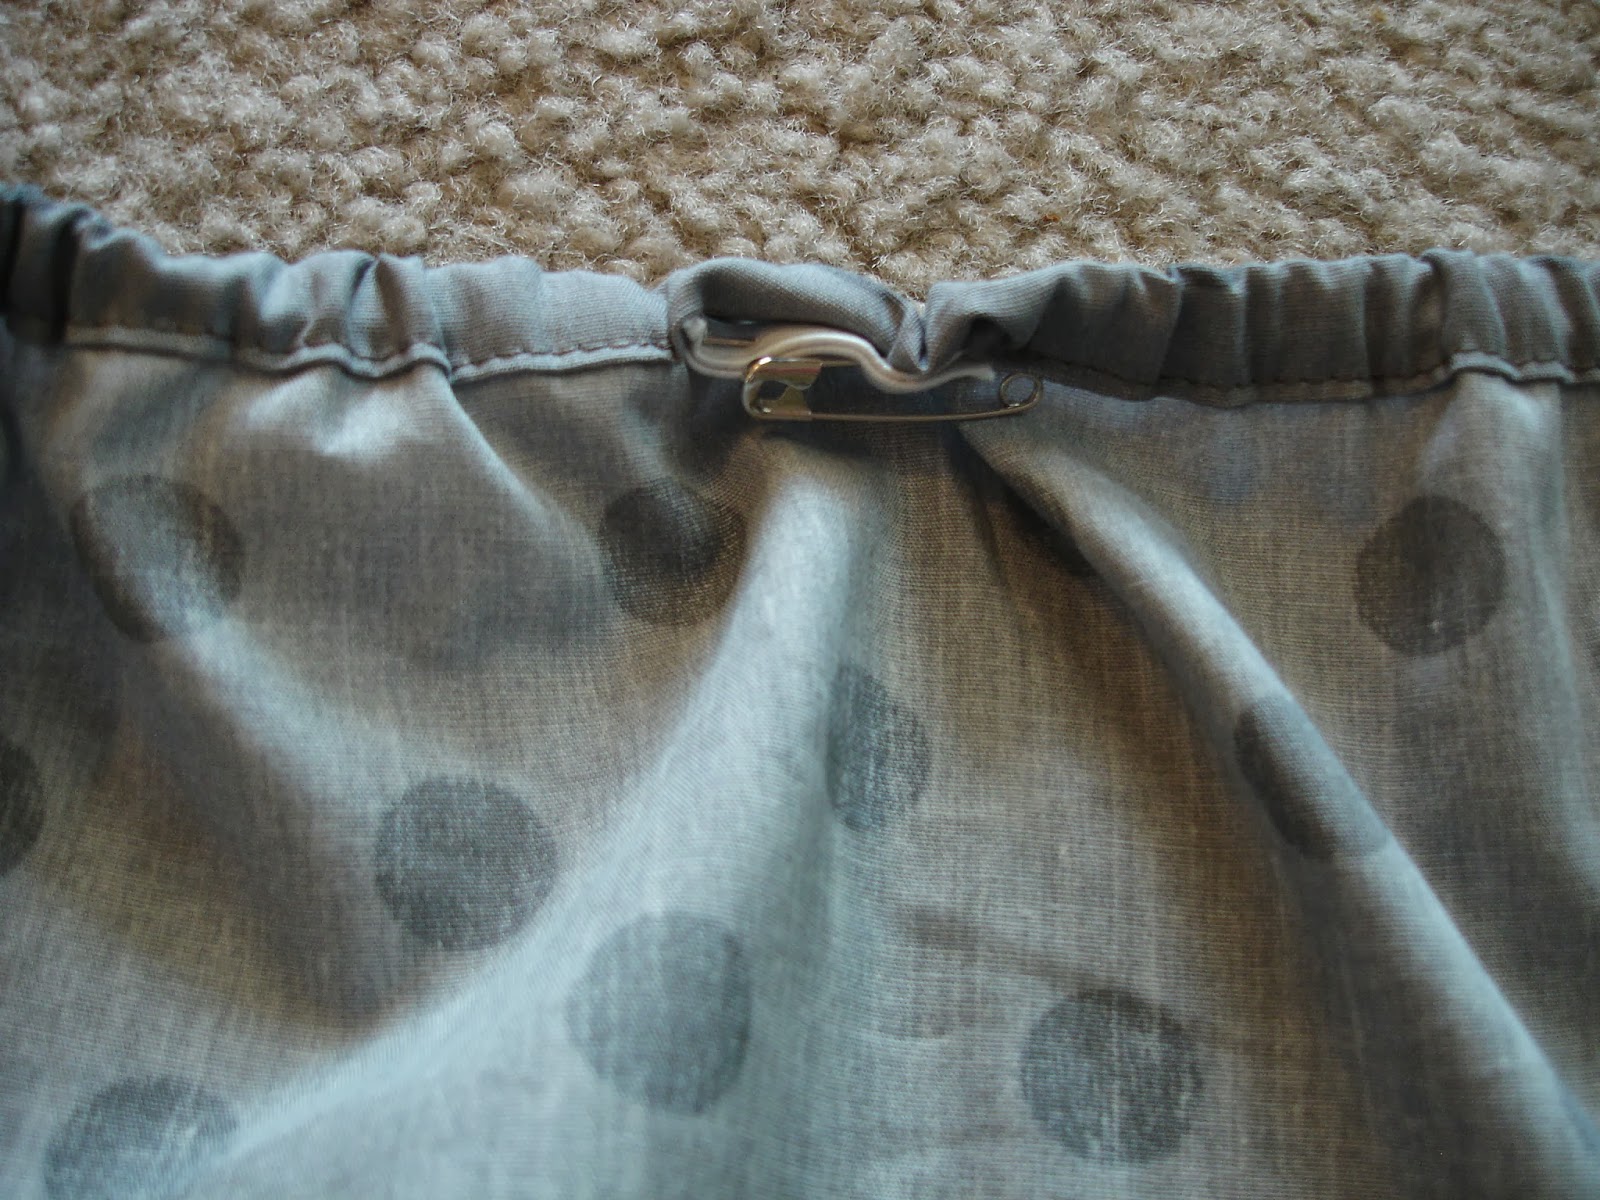
You should have an opening in your elastic casing like this:

Using a safety pin at the end of your elastic piece, thread the elastic through the casing, being sure not to pull the other end all the way into the casing too. 

Once you’ve gone through the whole thing, pin the ends together. 
I used a zig zag stitch down and back and down again to be sure that elastic wasn’t gonna go anywhere. 

And I forgot to take a picture of sewing up those last three inches in the casing, but if you made it this far, you can figure that out. 😉


One crib sheet for a standard crib measuring 28″ x 53″

Look what we just made! Isn’t it fantastic??!!

A note from Oda May: The American Academy of Pediatrics recommends against using padded bumpers in cribs. Please consult with your doctor and the latest AAP guidelines when choosing bedding for your infant.

Speedy Christmas Tree Skirt


Leah Douglas again from thebuggspot.blogspot.com here to celebrate Christmas in July. Hope you enjoy this simple little tree skirt pattern!


1 jelly roll Holiday in the Pines by Holly Taylor
1 1/3 yds. Ivory snowflake fabric (6513 11)
1 1/2 yds. Ivory big print boughs (6511 11)
1 1/2 yds. red ribbon
batting
ivory thread
dark green thread


The following instructions always assume a 1/4″ seam.

Step One: Pick 5 of the green strips from your jelly roll and sew them together, side by side. Press seams in the same direction. Then cut at a 45 degree angle to create 8 “trees”, like this:

Using the ivory snowflake material, cut 8 strips measuring 4″ wide. Line up and sew a tree 4″ below the selvage on the ivory material, like so:
Press towards the green and trim the ivory material like this…: 

…and like this:

Using the rest of the ivory strip you just cut off, sew onto the other side of the tree:

Press towards the green and trim:

Make 8 trees total in this way. 
Step Two: Choose 10 jelly roll strips that are NOT green or ivory for your “presents” beneath the tree. Cut lots of different presents in several sizes. I came up with:
          30   2″ squares
          32   1 1/2″ squares
          18   tall boxes: 1 1/2″ x 2 1/2″
          20   wide boxes: 2 1/2″ x 1 1/2″
          24   2 1/2″ squares
Using the ivory snowflake fabric, cut complementary background pieces for your presents: 
          30   1″ x 2″ rectangles
          32   1 1/2″ squares
          20   1 1/2″ x 2 1/2″ rectangles

Sew your complimentary pieces together and press seams towards the darker fabrics:

Arrange your presents the way you like, in a somewhat random way, and then sew together into one ENORMOUS strip. This strip needs to measure a good 160″ or more. Press seams towards the darker fabrics. 

Using more ivory snowflake material, cut 4 strips measuring 1 1/2″ wide:

Sew these 4 strips end to end, press open seams, and then sew this background strip to the tops of your looooong present strip. Press seams towards the presents. This strip should be 3 1/2″ wide.

I failed to take pictures of the next part. =/ I like to blame it on the toddlers in the house. 😉
Cut this enormous strip of presents into 10″ chunks. You will need 16 total. 
Take the solid brown strip from the jelly roll and cut it into 8 rectangles measuring 3 1/2″ x 2″. 
Sew a 10″ present strip onto either side of this brown tree trunk. Do the same for the remaining 7 trunks.
Step Three: Take one of your 8 trees from step one. Pin the very center of the bottom of each tree:
Pin your tree trunks to the bottom center of each tree:

Sew together, press towards the green, and trim either side like so:

Step Four: Lay out your blocks and sew them all together into one enormous circle:

Step Five: Lay out your backing (ivory large boughs) and batting and quilt that baby all together:
Now cut out a small circle in the very center of your quilt (I traced around one of my fiesta bowls, about 8″ in diameter, then folded my quilt in half and cut out a half circle, which of course was actually a full circle upon unfolding the quilt). Also cut a straight line down the middle between two of your trees from the edge of the quilt to this new center circle:
Using 6 brown strips from the jelly roll, make your binding and bind the quilt, as in the picture above.
Step Six: Using the red ribbon, cut 4 lengths measuring about 11″. You want one end cut perpendicular and the other end at an angle:

Roll the perpendicular side over twice and pin in place:

Measure down and mark 3″ from the inner circle along the back of the tree skirt (on the BACKING, not the front):

Pin the ribbon in place at that mark, rolled side down. 

Sew in place (be sure to back stitch at the beginning and the end):

Do the same for the other ribbons (I ended up sewing the ribbons on the outer edge 4″ from the edge instead of 3″):
You’re done!


One Christmas Tree Skirt measuring 47″ point to point

Leah Douglas
{thebuggspot.blogspot.com}

A note from Oda May – If you have trouble or questions about cutting the 45 degree trees, see Leah’s blog post {here}.

The Love Knot Block

Leah Douglas from thebuggspot.blogspot.com here. St. Valentine’s Day is soon arriving and I’ve whipped out a little table runner in anticipation of the Saint’s Day celebrating the man who performed marriage ceremonies for Roman soldiers who had been denied the luxury by the Emperor Claudius II. There’s your history lesson for the day.

And here are some roses from my hubby. He’s so romantic.
Let’s get started!


1 jelly roll (Posy)
     1 jelly roll will make 16 blocks (approx. 2 1/2 strips per block) but you probably don’t want to use
       any strips that are similar in color to your background fabric, so more like 12 blocks total
white background (cluck daisy white)
     1 1/2 strips (at 2 1/2″ wide) per block


These are instructions for making ONE love knot block. I chose to make three total and turn them into a table runner, because that’s what I happened to need at the time. You should be able to make 12 blocks easily out of one jelly roll and turn them into a 3 x 4 block quilt if you would like. Each block finishes at 11″ square.

Cutting the Love Knot Block:

Start by choosing 5 strips from your jelly roll. Trim them from 2 1/2″ wide down to 1 1/2″ wide. If you have a honey bun instead of a jelly roll, that will be perfect without any trimming.

Set aside one of the five strips to be used for the middle square of the block. You have four strips remaining. Cut each of the four strips remaining in half. You will only use half of each strip, so save the rest for a different block later. Fold each of the four strips in half. 
Pick one strip and cut as follows:
     Cut a rectangle measuring 1 1/2″ x 3 1/2″. You should have two total. 
     Unfold the strip. Cut one rectangle 4 1/2″ wide, another 5 1/2″ wide and one 1 1/2″ square. You will 
     have a smidge leftover fabric to do with as you please. 

     Do the same with the three other strips (not that one you set aside earlier for the center square 
     though, that’s next).
Now take the strip you chose to use for the center square. Fold it in half twice. Cut 4 rectangles measuring 1 1/2″ x 3 1/2″ and 8 squares 1 1/2″ x 1 1/2″. You will have some leftovers to set aside for whatever you’d like.

Next the white background fabric. 
From your 1 1/2 or 2 strips of white cut 8 rectangles measuring 1 1/2″ x 2 1/2″ and 21 squares measuring 1 1/2″ x 1 1/2″. 
The pieces required to make one love knot block:

Sewing the Love Knot Block together:
Perfect 1/4″ seams are 
INCREDIBLY 
important for this block!
Take your 8 squares from the center square fabric (my center square will be white flowers on a pink background) and 16 white background squares.
Using that perfect 1/4″ seam, sew together like this:

IRON, IRON, IRON. I always iron away from the white fabric. This will result in tricky seam matching later, and some ironing towards the white, but if I can get over it, so can you. We’ll all be fine.
To be sure your seams are the correct width, check to make sure the pieces pictured above all measure exactly 3 1/2″ across. If not, find the “scream” ripper and do it again. It’ll be grand.
Now set out the first of four corners for your block. 
top row: purple 4 1/2″ wide going horizontal, purple 5 1/2″ wide going vertical
second row: baby pink square and 2 white rectangles 2 1/2″ wide
third row: center fabric 3 1/2″ wide
fourth row: baby pink 3 1/2″ wide (vertical), white square, center fabric square, another white square
fifth row: purple 3 1/2″ wide
sixth row: white square, center fabric square, 2 more white squares

 Start by sewing these pieces together and then iron (ironing will be assumed from now on):

Then add the 3 1/2″ baby pink to the left side:

Set that section aside and sew this one:

Add the 2 1/2″ white rectangle to the right side:

Sew the 5 1/2″ purple to a white square:

Sew these three pieces together, careful to match your seams:

Then add the long purple with white square to the right side:

Woohoo! This is one quarter of your block. 
Rotate your finished quarter-of-the-block COUNTERCLOCKWISE and lay out the pieces for the next quarter-of-the-block like so: 
Sew it together the same way you did above. It should go something like this:

Once again, rotate things counterclockwise and begin the third quarter-of-the-block:

And the last quarter-of-the-block:

See that extra little white square I threw in the middle of the above picture? That is what pulls everything together here. Sew that little guy onto one of your quarter-blocks leaving a 1/4″ unsewn like this:
It should look like this below, ready to be sewn to the second quarter-of-the-block: (match the seams!)

Sew those two together, rotate counterclockwise, and sew the third quarter-of-the-block on:

Now the tricky part. Adding that last bit. 

You can start from that middle white square or from the outer edge of your blocks, whichever you choose. Either way should be fine if you are being careful to line up all your seams along the way. However, look at the picture below and notice that the last little 1/4″ near the center white square is not sewn.

That’s so you can sew up the other side and turn out a beautiful little 11 1/2″ block like this!

You’re done! 
Here’s a few snapshots of how I finished my 3 blocks into a table runner.
First, I cut (2) 11 3/4″ squares into 4 triangles:
Second, I laid it all out to be sewn into rows:

Quilt top finished!

Isn’t this fabric fantastic? Here’s my backing after quilting:
Table runner complete with roses from my love. 


One Love Knot Block measures 11″ square, finished
1 jelly roll yields 12+ blocks
My table runner measures 15″ x 45″

Leah Douglas
{thebuggspot.blogspot.com}

120-Minute Gift: Hugs and Kisses Quilted Table Runner


Quilt Top:
1 pkg. charm squares (I used a layer cake and trimmed them down to 5″ x 5″)
1/2 yd. white (a background fabric contrasting with your charm squares)
1/3 yd. inner border fabric

Binding:
1/3 yd. grey or coordinating fabric

Backing:
1/2 yd. grey or coordinating fabric (your runner will be reversible, so pick a fabric that looks great all by itself)

 Choose your favorite 16 squares from the charm pack. They need to be darker or bolder than your background fabric (my background fabric is white). Six of these 16 squares will be turned into X blocks, while the remaining 10 will become O blocks. If you have any large prints that you want to show off, set those in your X stack.

White Squares:
Cut your white or contrasting fabric into 20 5″ squares.

 Cutting the X Block:
Line up four X squares perfectly on top of each other. Cut a 3″ x 5″ rectangle, leaving you with another rectangle measuring 2″ x 5″, which you will set aside for a moment. Cut a 3″ square from your 3″ x 5″ rectangle. This is the center of your X block. Use the remaining pieces to cute 5 sets of 1 1/2″ squares. (You will use four of these squares in the X block and the fifth set of squares will be used in the outer border of the quilt.) Cut the remaining two charm squares the same way.

Cut 10 of your white 5″ squares in this same way as well.

Your X Block will be cut like this:

Cutting the O Block:
Line up four squares perfectly on top of each other. Just like with the X Block, cut a 3″ x 5″ rectangle, leaving you with another rectangle measuring 2″ x 5″. From your 3″ x 5″ rectangle, cut three rectangles measuring 3″ x 1 1/2″. From the 2″ x 5″ rectangle, cut one rectangle measuring 3″ x 1 1/2″. You will have a spare 1 1/2″ square that you can use in the outer border of the quilt. 
Cut 6 of your white 5″ squares in this same way as well.
Your O Block will be cut like this:
Cutting the Triangles:
With the remaining four white 5″ squares, cut across the diagonal, like this:

Cutting the Inner Border:
You will need 3 strips of the inner border, 1″ wide.
Cutting the Squares for the Outer Border:
Using the remaining uncut charm squares, come up with 130 little squares measuring 1 1/2″ x 1 1/2″. 
Ready to Sew!
Start with your X Blocks. Lay out your block like a 9 Patch. THE CONSISTENCY IN SIZE OF YOUR SEAMS IS EXTREMELY IMPORTANT! Keep it right at 1/4″. Always. 
Sew into three small rows, like this:
Press the seams away from the lighter fabric and towards the darker fabric. Then sew those three little rows together:

If you’ve pressed your seams correctly and maintained that 1/4″ seam, your pieces should nest perfectly as you sew along. 
Press these seams toward the dark center of the X Block:
Your O Blocks will be done the same way, with the exception of the direction you press the seams. Always press away from the lighter colored fabric. 
   

 Lay out your blocks the way you like them.

Sew into rows.

Press the first row one direction, the second row in the opposite direction, the third the same direction as the first row, etc. Then sew your rows together, remembering to nest those seams perfectly together.

It’s time to square off your corners. You want each end of your runner to be perfectly square, while the sides of your runner need to meet at a 135 degree angle, if that makes any sense at all…Like this:
Now sew on the first edge of your inner border. Cut the ends of the border strip flush with the edges of your quilt.

There needs to be 1/4″ left on the long sides of your quilt, where the white triangles are.

Add the rest of your inner border, keeping the same things in mind while cutting the edges.

Press seams away from the quilt body, towards the inner border.
For the Outer Border, sew those 130 little squares together into one enormous strip. Then add this strip the same way you added your inner border. Pull the outer border snugly as you sew along to prevent having a wavy quilt edge. 
Press seams toward the inner border, away from the outer border.
Your quilt top is finished! Sandwich your top, batting and backing and quilt away. Finish off with your binding. (For an excellent binding tutorial, visit here.)
One table runner measuring approximately 16″ x 42″.
Leah Douglas