Tumbling Around Quilt


Hi there! Konda Luckau from Moose on the Porch Quilts here. I have loved playing around with honeycombs! I have a tumbling block quilt from my grandmother that I love. I have wanted to make one for a very long time. These Honeycombs finally make this quilt easy, and fun, to make! I have a new technique for piecing these blocks by machine – including being able to chain piece the blocks. I have a new book coming out this Spring full of projects using this new technique. Give it a try. You just may like it!

1 25th & Pine Honeycomb
1 1/4 yards White Bella Solid
2/3 yard Honky Tonk Red Plaid
1 1/4 yards Backing
Plastic Hexagon Template from Honeycomb


Cutting Instructions:
1. Take the plastic hexagon template from the honeycomb. Cut it as shown below.

2. Cut the white background fabric into 4 – 2 1/2″ strips, 4 – 4 1/2″ strips, and 3 – 2 5/8″ strips.
3. Using the diamond template, cut 28 diamonds from the 2 5/8″ strips.
4. Cut the red accent and binding fabric into 4 – 1 1/2″ strips and 4 – 2 1/2″ strips.
5. Take 25th & Pine Honeycomb and cut each hexagon into three diamonds as shown below.

Sewing Instructions:
6. Reorganize the diamonds into three stacks according to color.

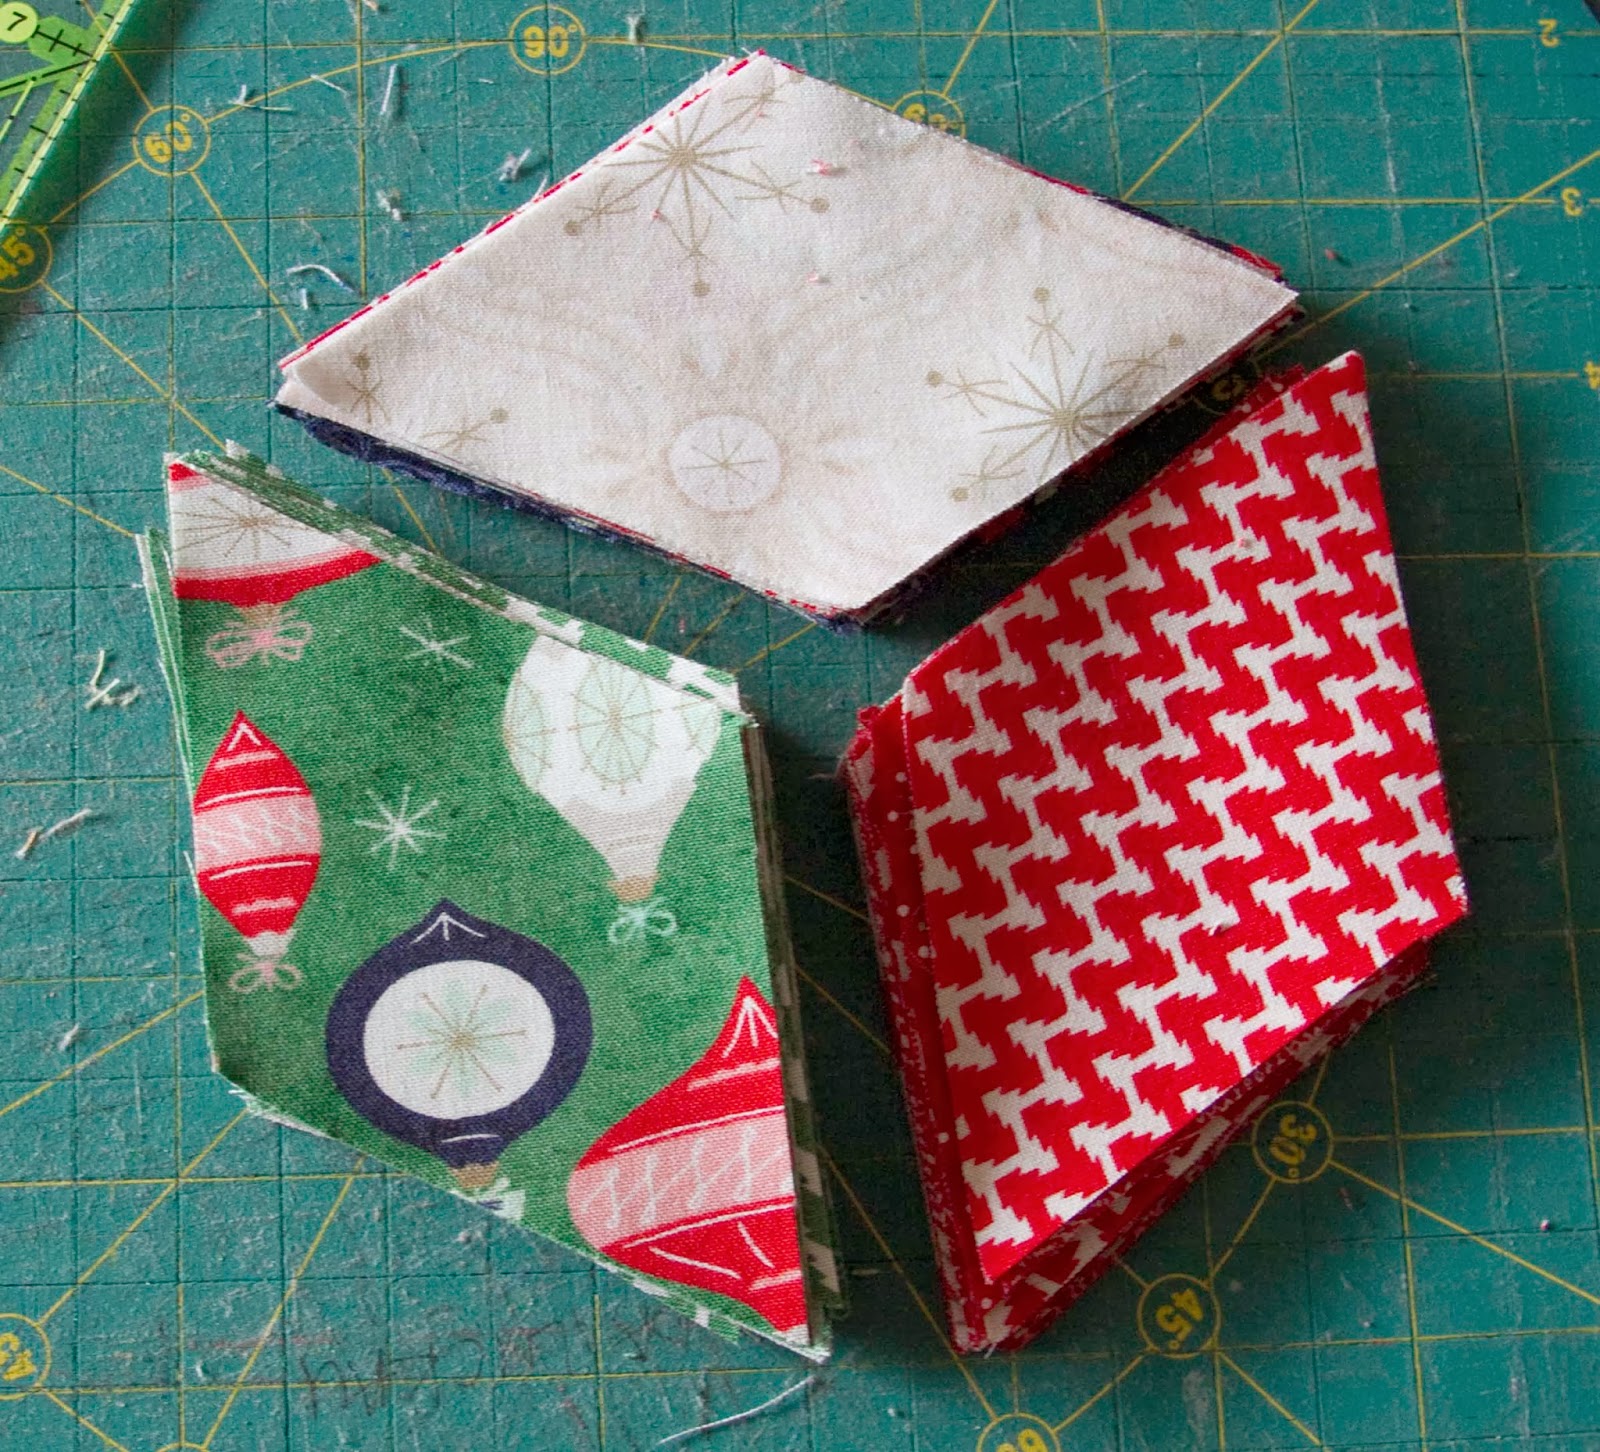
7. Now for the magic! This is the trick to piecing y-seams on a sewing machine. The difference between my method and traditional machine piecing techniques is that my method can be chain pieced! Chain piecing means it is a lot faster and less thread waste. Refer to the picture below.
    a. Start the seam 1/4″ down from the corner.
    b. Sew 1/4″ into the diamond parallel to the top edge of the diamond.
    c. Sew down the right edge of the diamond with a 1/4″ seam.
    d. Stop 1/4″ from bottom edge.
    e. Sew to the right edge parallel to the bottom edge.
    f. Now it is ready for the next piece!

8. Seams will be pressed clockwise.

9. The bottom diamond is sewed on one seam at a time. Using the same method as above, matching diamond points, sew the right seam.

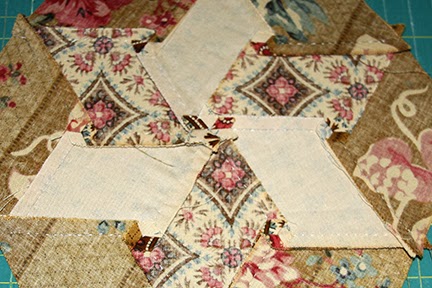
10. This is what it looks like opened up.

11. Fold hexagon in half matching points and sew the last seam as shown below.

12. Press the seams clockwise opening up the center of the seam allowances into a bitty hexagon.

13. With those three seams, one tumbling block is created! Repeat to make 38 tumbling blocks.

 14. Lay out the center of the quilt as shown below.

15. Using the same machine piecing technique as before, sew the tumbling blocks into rows.

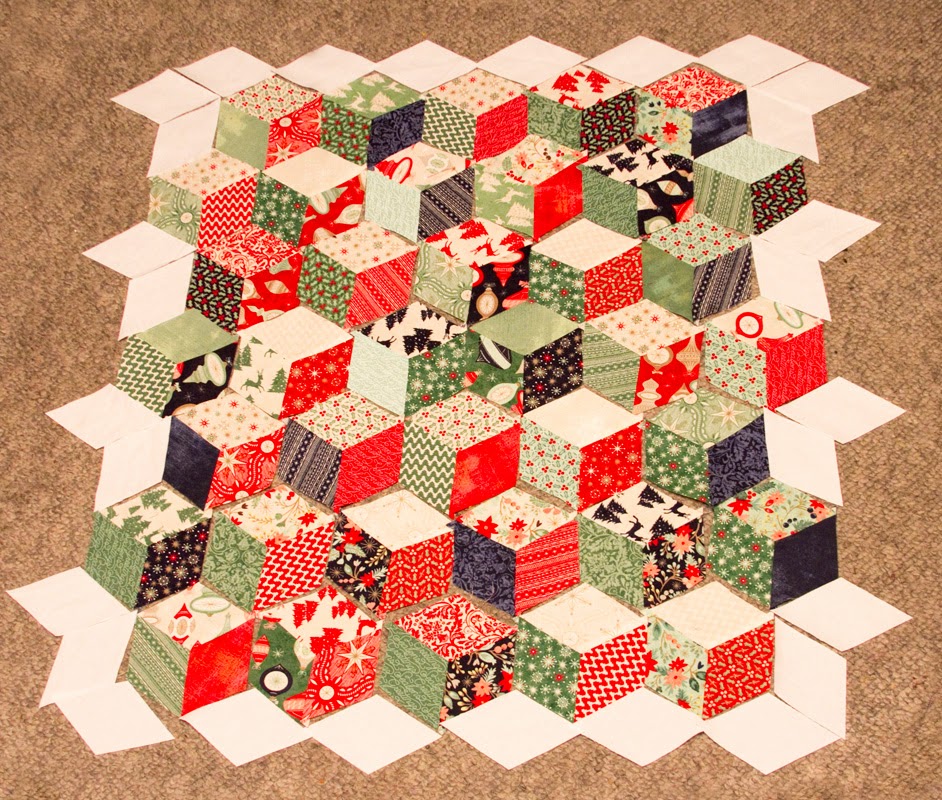
16. Again, using the same machine piecing technique as before, sew the rows together.

17. Trim the left and right sides even. Trim the top and bottom 1/4″ outside of the points. The quilt should now measure about 26″ x 27″. Your measurements may differ slightly because of the many bias edges. Press carefully.

18. Use the 4 – 2 1/2″ white background strips to sew on the first border. Measure carefully before cutting the length of border strips.
19. Use the 4 – 1 1/2″ red accent strips to sew on the second border. Measure carefully before cutting the length of the border strips.
20. Use the 4 – 4 1/2″ white background strips to sew on the third border. Measure carefully before cutting the length of the border strips.
21. Quilt and use the 4 – 2 1/2″ binding strips to bind the quilt.

One fabulous quilt machine pieced tumbling block quilt that measures about 39″ x 40″.

Konda Luckau
{www.moosequilts.com/blog}

Hallie’s Hexi Stars

My name is Konda Luckau of Moose on the Porch Quilts. I have been quilting for a long time. In the past, I have always said that the only reason I can quilt is because I could do everything on a machine. With 6 kids from 4 – 14, I don’t always get as much time to quilt as I would like. I love precuts because I can start sewing faster. I love quick projects because I can actually get them finished.

I have recently been changing my mind. I still like to see projects finished, but I have tried hand piecing and hand quilting. I started small. I found that hand applique is too slow of a process for me. Hand piecing surprised me. I enjoyed being able to work on it while waiting for kids in various places.

If you haven’t tried hand work, this might be a project to change your mind.

1 Hope Chest Prints Honeycomb
3/4 yard backing
3/4 yard square batting
1/2 yard binding


1. Take 28 of the hexagons, 14 light and 14 dark. Each hexi star takes 2 light hexagons and 2 dark hexagons.

2. Cut each hexagon into three diamonds as shown. Using a ruler from corner to corner, cut half way.

3. Turn the hexagon and cut half way again. Repeat to make three diamonds as shown. 

4. Take 2 sets of 3 light diamonds and 2 sets of 3 dark diamonds for one hexi star.

5. Lightly mark the 1/4″ seam allowance on one of each dark diamond in a narrow V as shown. Lightly mark the 1/4″ seam allowance on all 6 of the light diamonds in a wide V as shown.

6. Lay out half of the star with the marked diamond between two unmarked diamonds.

7. Align two adjacent diamonds. Sew with a running stitch along marked line.

8. Tie off the thread at the corner and align the next diamond. Continue sewing down the next side. Tie off and cut thread. Finger press.

9. Repeat with the other three dark diamonds to make two half stars as shown.

10. Mark the 1/4″ seam allowance along one side as shown.

11. Pin the two halves together and sew along the marked line.

12. Press seams in a circle and press seams open in the middle rotating in the opposite direction.

13. Take one of the light diamonds. Align and pin it onto one dark diamond as shown. Sew along the marked seam allowance. Knot thread, but do not cut.

14. Align the light diamond to the next dark diamond. Pin and sew the next marked seam allowance. Knot thread again, but do not cut unless you need to.

15. Repeat with the next light diamond.

16. Continue sewing the light diamonds around the dark star. That makes one Hexi Star.

17. Repeat to make six Hexi Stars with a dark center and light edges. Make one Hexi Star with a light center and dark edges.

18. When pressing, always rotate seams.

19. Lay out seven Hexi Stars as shown. Hand piece in the same manner.

20. Layer backing, batting, and top. Baste with pins or spray. 

21. Hand or machine quilt.

22. Cut the 1/2 yard of binding fabric into 2 1/2″ bias binding. Bind.


One approximately 24″ table topper that you will be very proud to show off!

I hope you will give hand piecing a try. If you do, I would love to see it! My email is kluckau(at)moosequilts.com. I hope you have as much fun as I did!
Konda Luckau