
Hi I’m Wendy, and I ramble often at Sewing in the Wendy City, right here in the heart of the Texas Panhandle. This is my FIRST Moda Bake Shop Tutorial, and I am over the moon about it!
I am an avid quilter, but I must admit that my favorite kind of projects are ones that involve not only beautiful fabric, but also can involve my children. I have a toddler and a preschooler, and we share a love of crafting together! This “recipe” was one of those fun projects, and I am thrilled to share it with you.


1 jelly roll of Pom Pom de Paris by French General
1/3 yard of any fabric in the line. I used the pink and brown bird print (#13572-16 )
1/3 yard of a solid color. I used the ivory solid (#13529-70)
batting (a piece approximately 36″ x 36″ will work)
thread for piecing
thread for topstitching (I used red)
disappearing ink fabric marker
sewing machine with both a presser and a free-motion foot
chopstick for turning triangles
iron

acrylic paint (I used a mix of two pinks to match the fabric)

First, please cut your solid into an 8″ strip, selvedge to selvedge.

Then, let’s do some measuring. On one side, measure 3.5″ and make a mark. On the other side, measure 7″ and make a mark. These are the points for your first triangle. Then from each mark, measure off 7″. Cut as shown below. Leave the fabric folded so that you can cut all 8 triangles.

Here’s a cutting diagram (drawn with love by me):

Then, with much fear and trepidation, break into your lovely jelly roll. Before cutting that rubber band, admire it one last time.

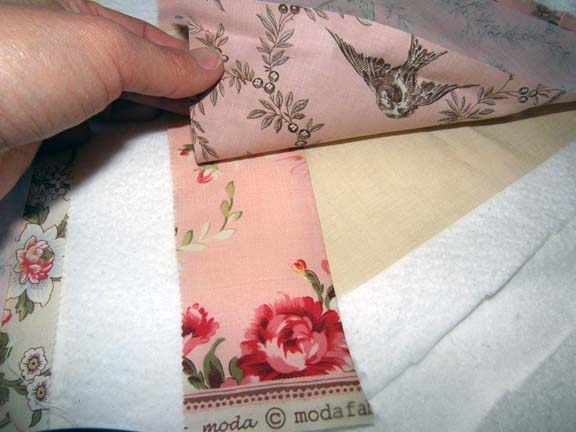
Choose 8 strips that will be the outer edges of your pennants. I chose the pink tones. See how nice they look with my backing fabric?

Take one of your triangles and one of your jelly roll strips. Allow at least 2 inches extra of the strip on top of the triangle and at least 3 inches extra on the tip. Sew.

Press your seam under the jelly roll strip.
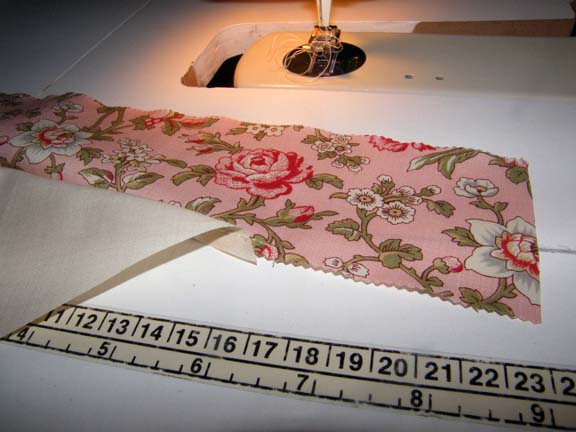
Then add a strip (of the same fabric) to the opposite side of the triangle. (Now you can see why we needed the extra at the tip.)

And press it under the pink as well.
Repeat this process for all 8 triangles.
Grab your backing fabric and cut it into an 11.5″ strip. From one side, measure 5.5″ and mark. From the other side, measure 11″ and mark. Then measure 11″ from each mark.

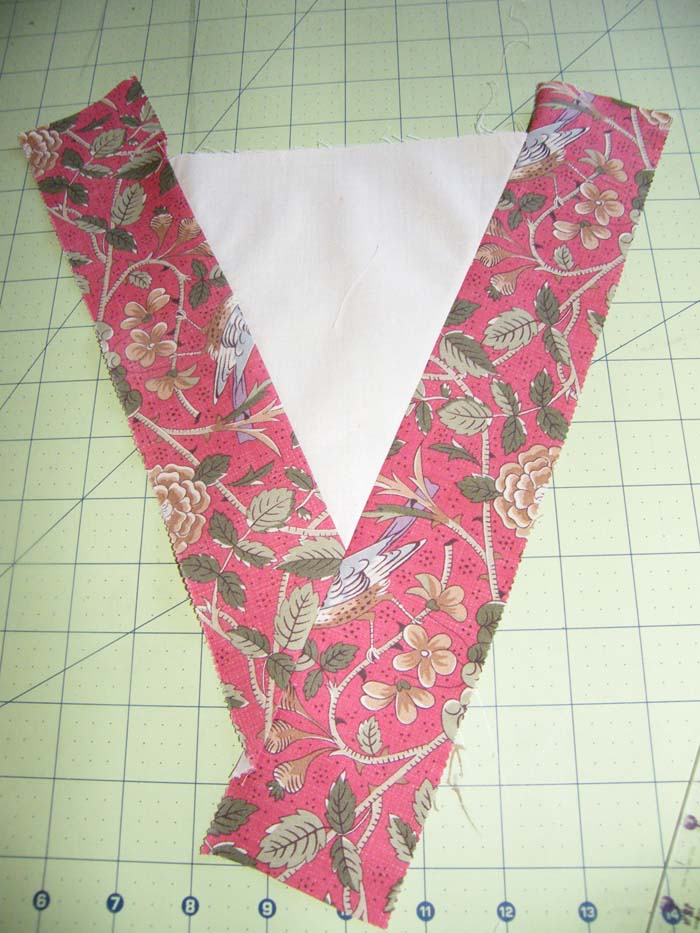
Now we need some batting. Stack your batting, then your pieced pennant front, then your backing fabric. The 2 fabrics should have their right sides together, as shown. Pin.
I pinned several and then cut them apart to sew.

Sew a 1.4″ seam on the 2 sides of the triangle with the jelly roll strips. Leave the top open.

Trim off any excess so that you only have 1/4″ excess beyond the seam.

Clip straight across at the tip of the triangle. Be careful not to clip your stitches!
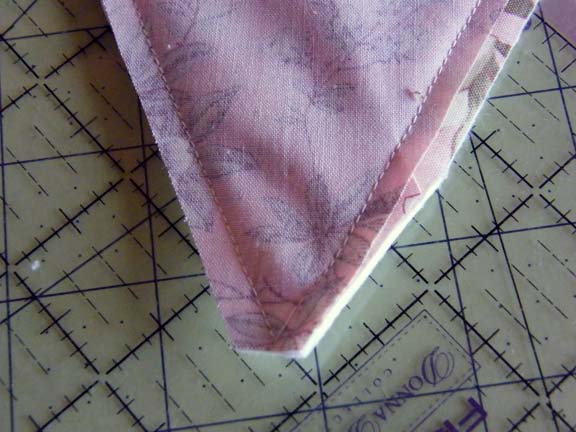
Use a chopstick or turning tool to turn the pennant.

Press your pennant so the edges stay nicely in place to be topstitched down.

Load your machine with your topstitching thread (I used a lovely shade of red!) and topstitch around the edges of your pennant.

I also stitched around the inner part to give it some definition…
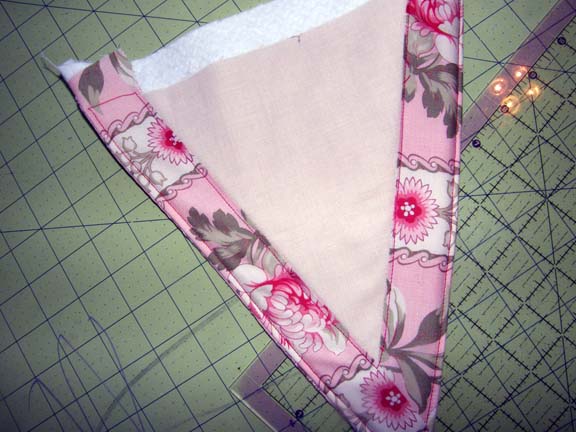
I then added some free-motion loopy quilting down the middle of the border just for fun.

Now, for the connecting piece! Choose 3 strips. I went with the reds this time so they would stand out.

Cut each piece into 4 strips, 10 inches wide.

Sew them together end-to-end, alternating your prints.

Two options here… You can press this long strip in half so that the pinked edges show, like this:

Or you can make double-fold binding…

And it will finish up looking like this:

Either way, press your long strip, and lay out your pennants. When you have them in a pleasing order, pin them into the binding strip.

Beginning at the very end, start stitching and catch each pennant as you go.

When you get finished, you’ll have something that looks like this:

Now, to the decorating… if you want to:
First, find the cutest hands in your house. Here are the ones at my house. (Aren’t they darling?)

I wanted to match the pink in the pink prints, so I ended up mixing 2 paints to match it properly. If I’d had time to visit another store I might have been able to find an exact match… but you see those cute hands up there? Well, they were helping me shop!

Mix the paint in a bowl, and use a paper towel to blot paint onto cute hands.

Have them carefully put their prints on the pennants. I did one pair on the far left, other pair on the far right.

On the 4 middle pennants, I added some small hearts.

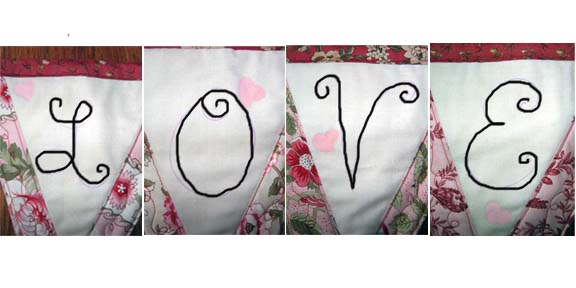
And then I used a Disappearing Fabric Ink pen to write the letters L-O-V-E on those 4 middle pennants. Photoshop and I worked together to show you what that step looks like:
Using your free-motion quilting foot, trace around the hands. I went around each twice because I like the effect of the 2 imperfect lines.

Try to stop and start at the same place so it’s easier to pull the threads through to the back with a needle and tie them off.

I used my free-motion foot to trace the letters. I went over each letter 4 or 5 times. I also traced the little hearts to give them more definition.

a fabulous Valentine’s Day bunting with special meaning…

that looks lovely across your mantel where all those little hands can admire their work.

You’ll have enough strips in 1 jelly roll to make 3 buntings with 8 pennants each.
Thanks so much for allowing me to post here. It’s a true honor.

And please stop by Sewing in the Wendy City anytime!
Wendy Poling
![]()
