
Hello fellow bakers!! My name is Angela from Quilting is my therapy and I am going to show you how to make the perfect picnic quilt. It features the beautiful new fabric, Northcote Range, by Cabbages and Roses. When designing this quilt, I knew that I wanted to combine bold piecing and scrappy borders to really make the fabrics shine! This quilt is fun, easy to make, and perfect for a tea party or a picnic. Enjoy!

(The stock number for the fabrics used is in parenthesis)
Focus fabrics:
Center focus fabric (Northcote Range 35203 11): 1 fat quarter
Corner focus fabrics (36203 16, 35203 23, 35201 11, 35203 11): 1/4 yd each
Border fabric:
6 Jelly Roll Strips (or six 2 1/2″ strips) (35208 12)
Background fabric:
Bella Cream 1 yd
Bella Cream 1 yd
Border fabric:
Assorted scraps of 2 1/2″ wide pieces.
Assorted scraps of 2 1/2″ wide pieces.

Cutting:
Center focus fabric- Cut one 9 1/2″ x 9 1/2″ square

Four corner focus fabrics:
Out of each fabric, cut a 7 1/2″ x 7 1/2″ square and a 7 1/2″ x 9 1/2″ rectangle


Out of the background fabric cut:
1 strip of 1 1/2″ x WOF (width of fabric)
2 strips 6 1/2″ x 31 1/2″
2 strips 6 1/2″ x 43 1/2″

Set aside 2 of the jelly roll strips. Sub-cut the remaining jelly roll strips into:
4 strips 2 1/2″ x 7 1/2″
4 strips 2 1/2″ x 9″
6 strips 2 1/2″ x 9 1/2″
2 strips 2 1/2″ x 13 1/2″
Keeping the different size strips in different piles to keep organized.

Piecing:
Now we are ready to start piecing the quilt!
Now we are ready to start piecing the quilt!
Sew a 2 1/2″ x 9 1/2″ strip of the red border fabric to the top and bottom of the center focus fabric square. Press toward the border.

Sew a 2 1/2″ x 13 1/2″ strip to each side of the same square and press toward the border fabric. Set block aside for now.

Sew a jelly roll strip to each side of the 1 1/2″ x WOF strip of background material. Press toward the darker fabrics.

Carefully sub-cut the strip into four 9 1/2″ segments. The blocks should measure 5 1/2″ x 9 1/2″. Set aside for now.

Sew a 2 1/2″ x 9″ border piece to the long side of a 7 1/2″ x 9″ block of one of the corner focus fabric. Press toward the border fabric.

With the border piece on the top, carefully cut the block in half lengthwise. You will have 2 pieces that measure 4 1/2″ x 9 1/2″.


Set aside and repeat with the other 3 focus fabrics.

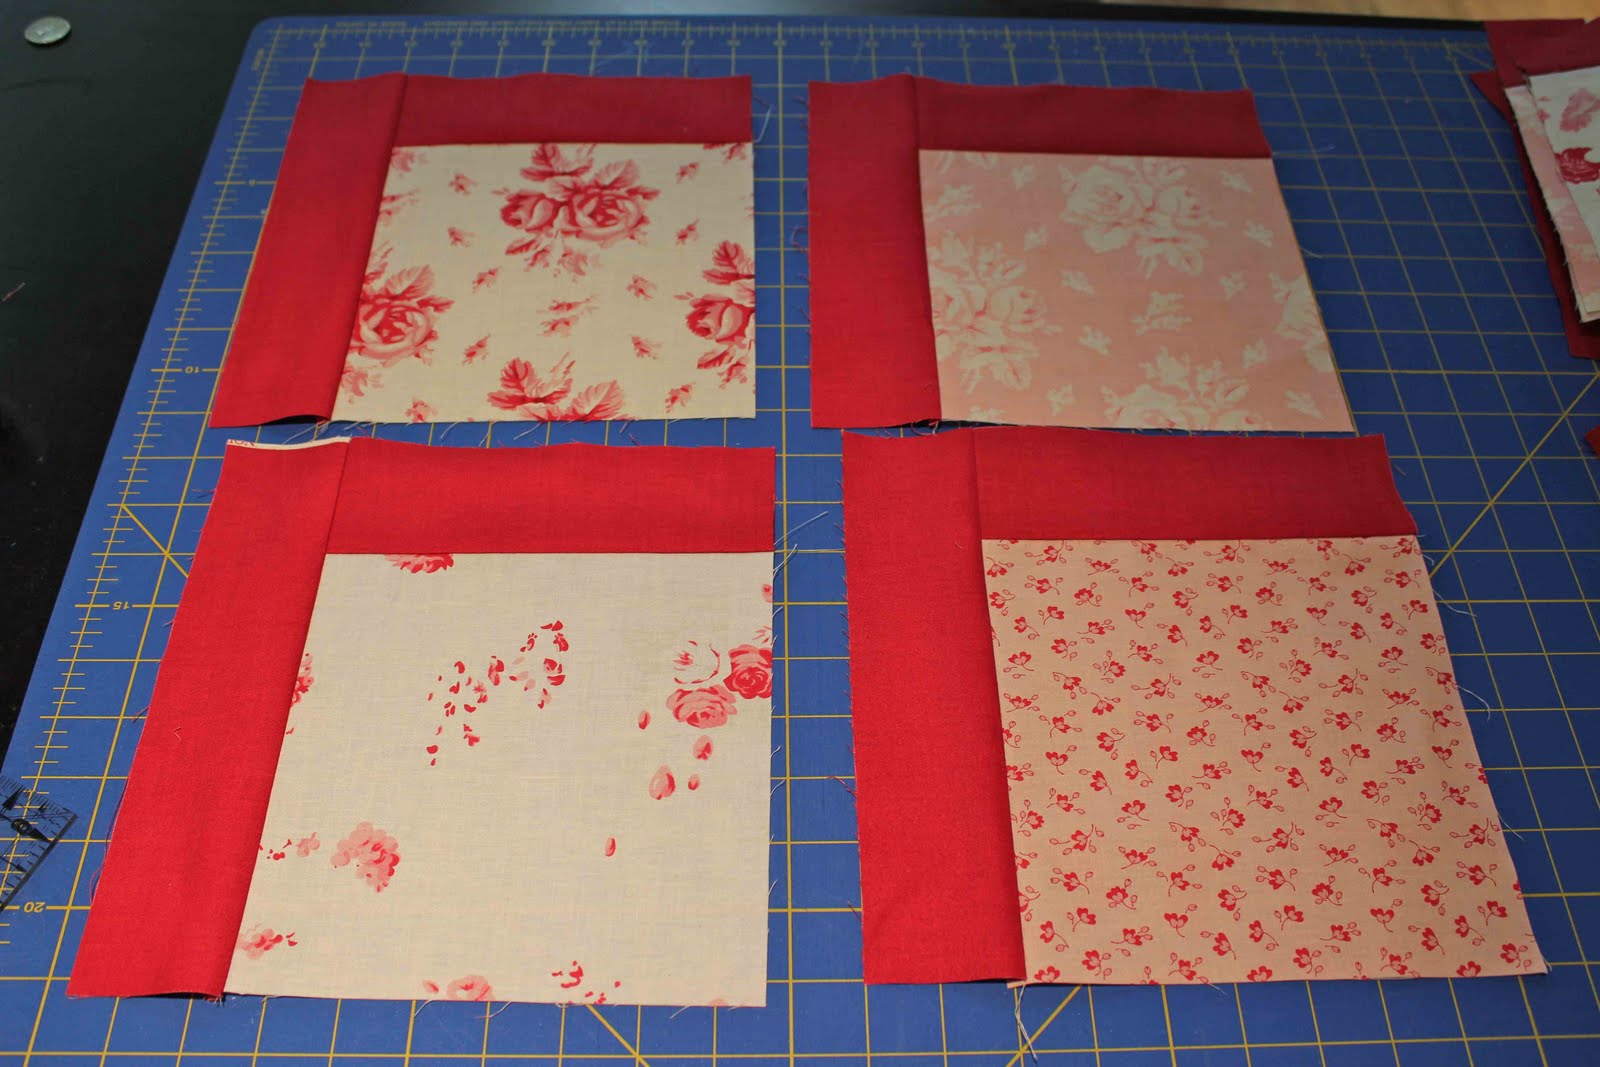
Take a 7 1/2″ square of one of the focus fabrics and sew a 2 1/2″ x 7 1/2″ strip of border fabric to the top. Press towards the border.

Then sew a 2 1/2″ x 9 1/2″ piece of border fabric to the left side of the block. Press towards the border fabric.

Repeat with the other 3 focus fabrics.
Now it’s time to assemble the center of the quilt. Using the picture below for reference, layout the blocks as shown. All of the focus fabrics should be in the same corners.

Sew the blocks in the top row together in the order they are laid out.

Press carefully and repeat with the bottom row.

To assemble the center row, sew the 3 blocks on the right together to form one block, press the seams.


Repeat with the three blocks on the left.
 Sew the three center blocks together.
Then sew the three rows together to form the center of the quilt. Press the seams.
The quilt should look like this:
 Once the center is finished, it is time to add the cream borders to the quilt. Sew a 6 1/2″ x 31 1/2″ strip of cream fabric to each side of the quilt. Press toward the red fabric.
Sew a 6 1/2″ x 43 1/2″ strip of the cream border to the top and bottom of the quilt. Press toward the red border.

To add the scrappy border to the quilt:
Gather (or cut) strips of 2 1/2″ fabric of random lengths and prints. The scrappier, the better! (This is a great time to raid your scrap bin)

Sew the pieces along the short side to make a strip that is 43 1/2″ long. Make 6 long strips and sew them along the length to make two borders that measure 6 1/2″ x 43 1/2″.

Sew the two borders to the top and bottom of the quilt.
Repeat the above steps, making 6 strips that measure 2 1/2″ x 55 1/2″. Sew the strips together to make 2 borders of 3 strips. Sew to the top and bottom of the quilt.

Quilting:
I personally believe that the quilting is the most fun part! With all the open spaces on this quilt, let your quilting run free! In the scrappy border, I alternated between several different designs to give the borders a nice texture. In the cream border, I quilted a couple of feathers in the opposing corners and finished off the quilt with some more feather motifs!
Bind and enjoy!

One perfect picnic quilt!

