Mimi’s Daisy Chains Quilted Throw

Mimi's Daisy Chains


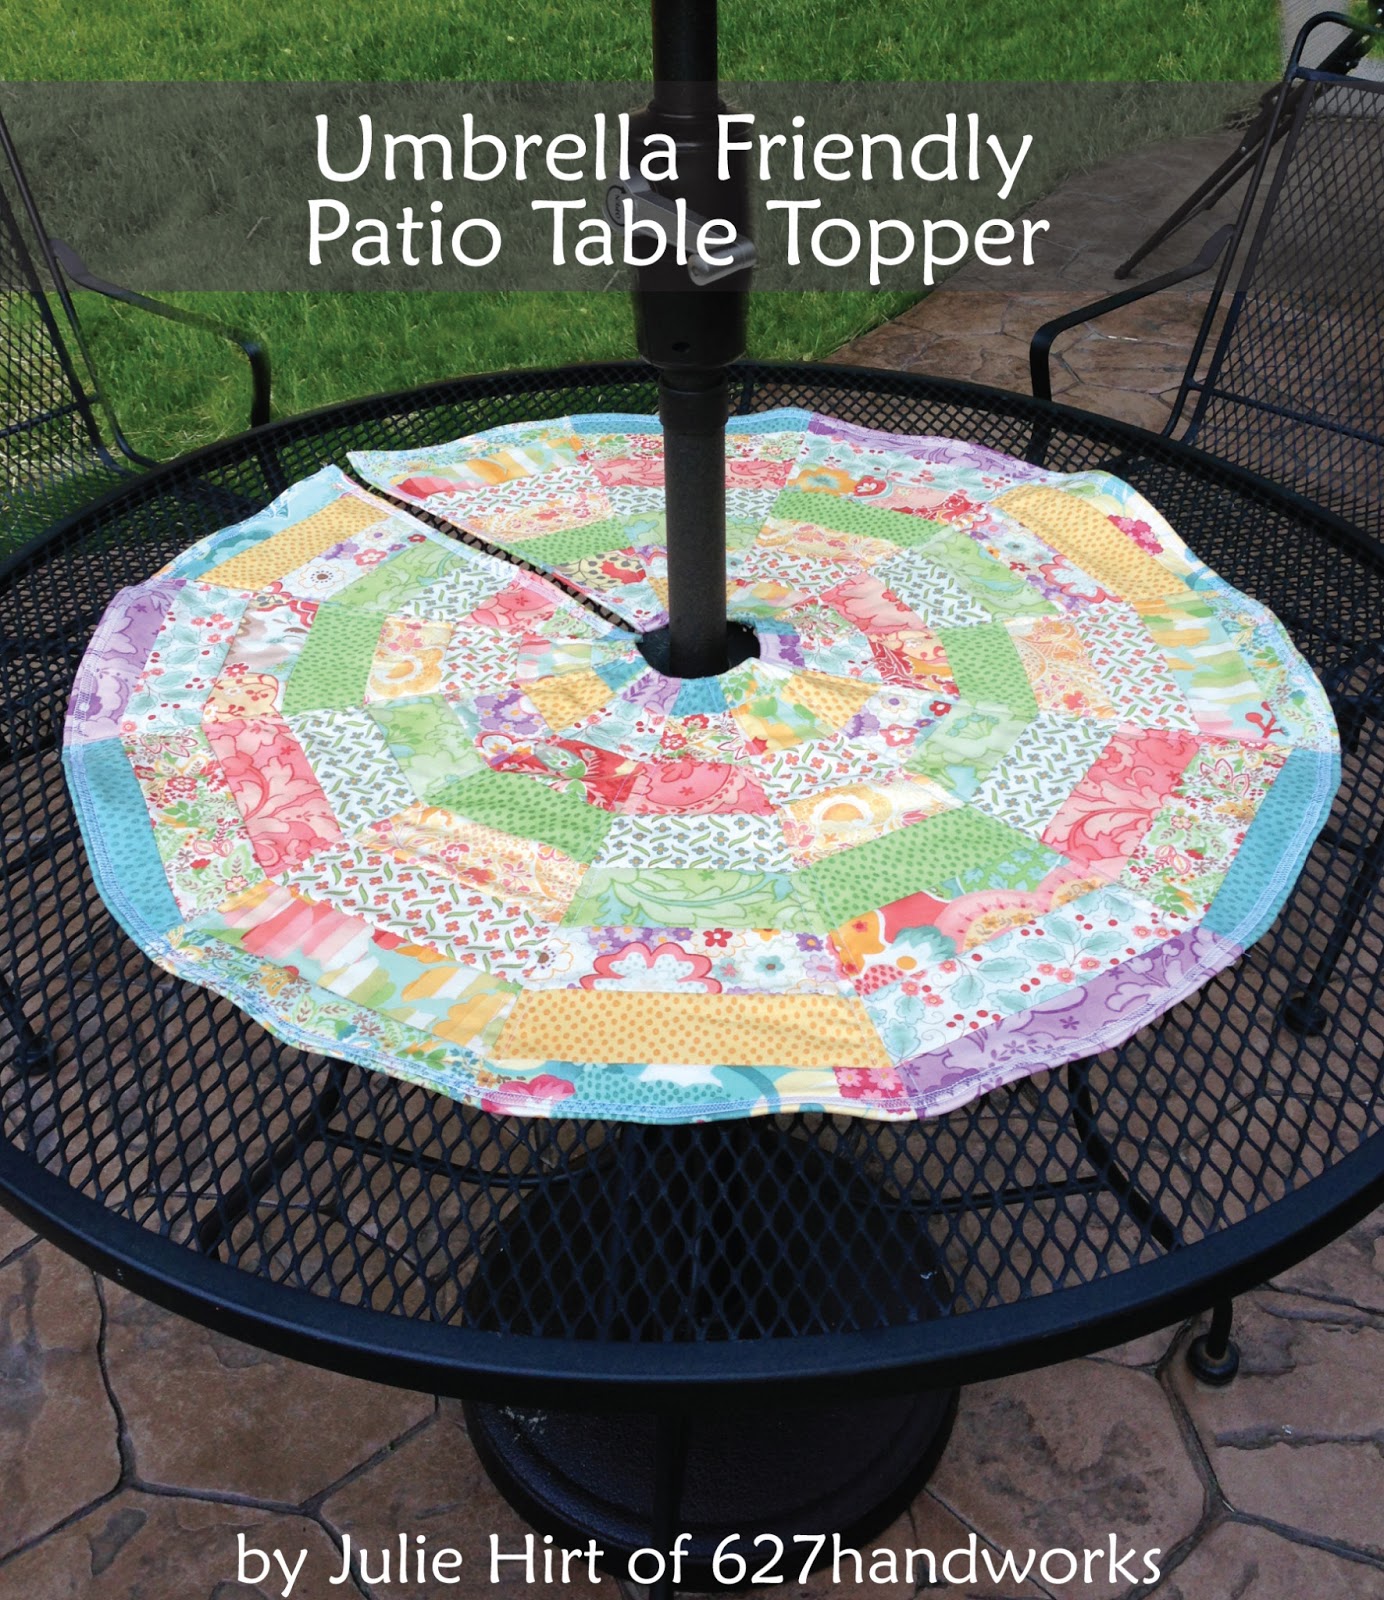
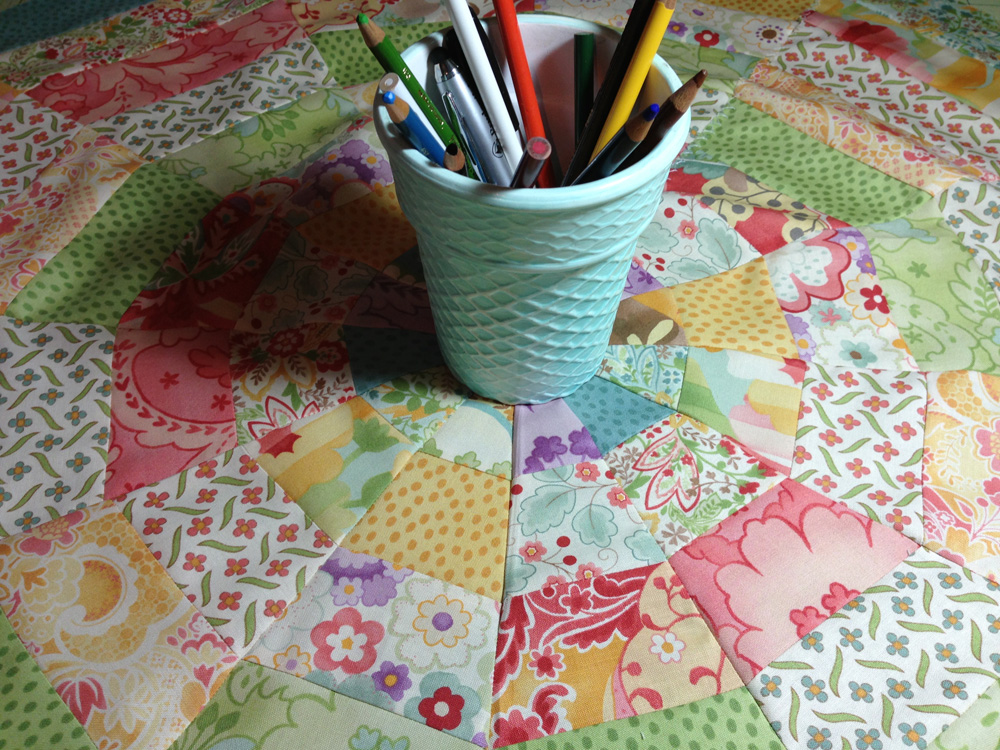
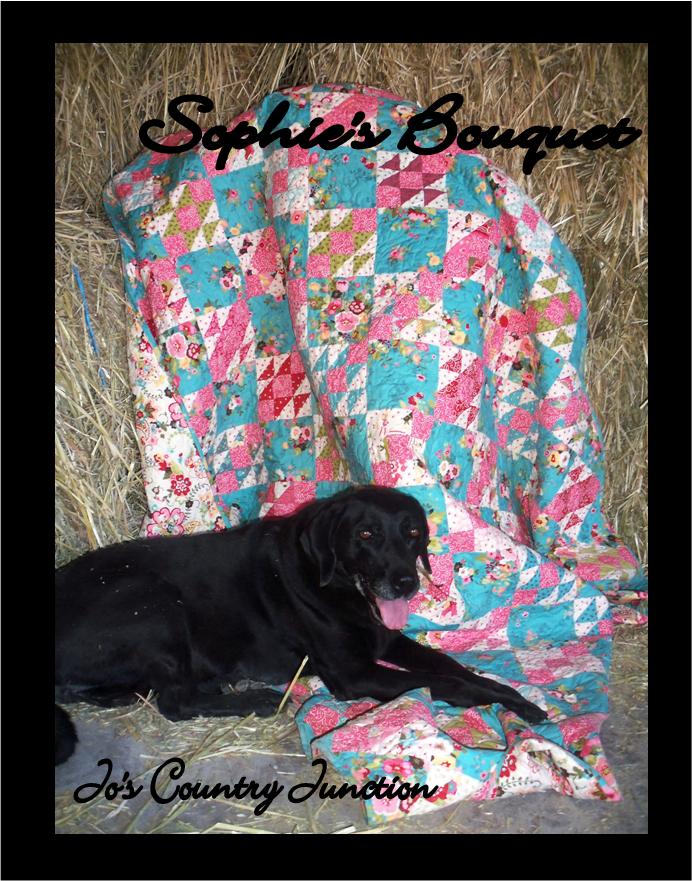
It is a thrill to be back at the Bake Shop today.  Nothing charms my geeky soul like designing a quilt and writing directions for it.  Nothing comes close…except for memories of my Nanny.  I grew up in a household that had room for the whole family.  There was always room for one more.  My maternal grandparents were a daily presence and made my life that much richer.  I know in some homes, especially in the American South, Nanny would have been called Mimi, so my thought turned to her as I finished this quilt.

Nanny was English – naturalized as an American as a little girl – she never lost that lovely English way of doing things…nor the accent!  Gosh I miss her.  She would have loved this fabric line.  I can imagine her sitting with me on top of this quilt playing board games, or snuggled under it on the front porch reading together.  It isn’t a hard stretch at all, even 13 years after she celebrated her last birthday.

Spring time, little girls, grandmothers, it all combines to make a great song…sweet and homey.  This quilt is the product of that song.  I hope you like it.
 

  • 1 layer cake
    • I used Mimi by Chez Moi
  • 1/3 yard for flower centers
    • I used #16098-15 – yellow dots;
  • 1 1/4 yards solid for background on 9 blocks (dominant background)
    • I used Bella snow #9900-11
  • 1/2 yard solid for background on 4 blocks (secondary background)
    • I used 9900-169 ruby ice
  • 1/3 yard for inner border
    • I used #16098-19 – red dots
  • 2 yards for setting triangles and outer border
    • I used #16095-11 – flowers on cream and aqua
  • 1/2 yard for binding
    • I used #16098-22 – aqua dots
  • 6 yards for backing
    • I used #16094-13 lavender leaves
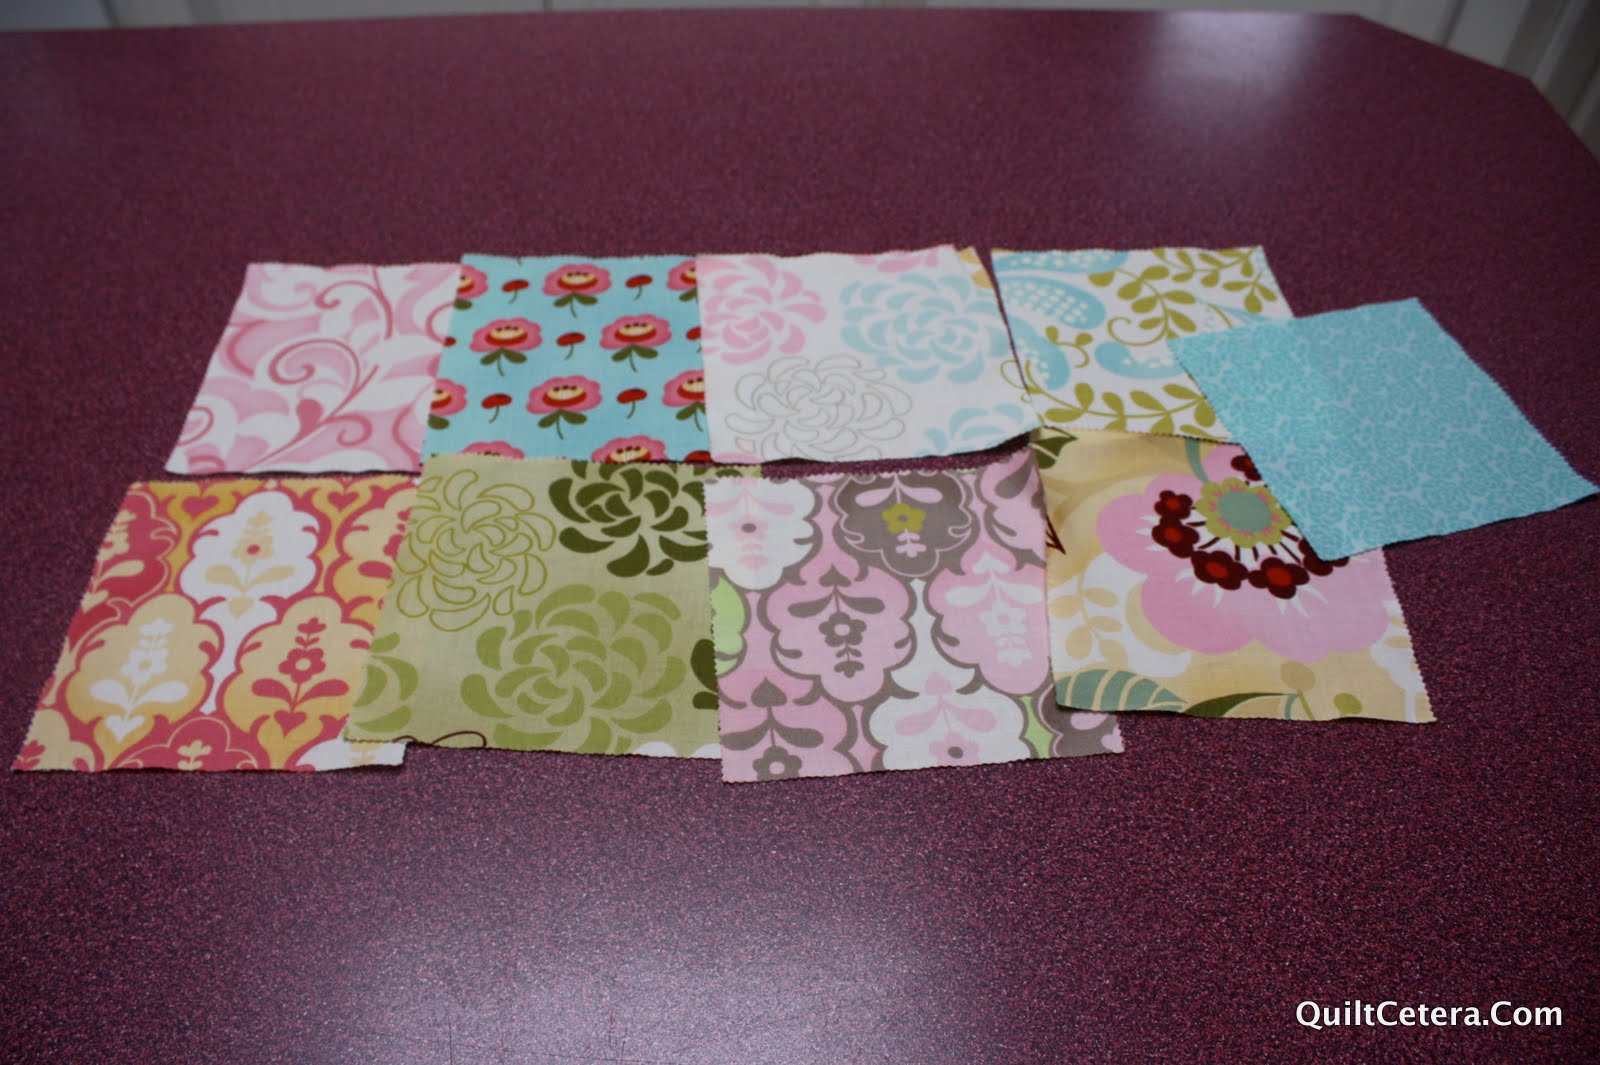
Cutting Directions:
  • From Layer Cake
    • Cut 52, 5″x5″ squares (in sets of 4)
      • select 13 slices for flower petals that will contrast with your background and your flower center fabric
      • cut each slice into 4, 5″x 5″ squares for 52 squares
  • From flower center fabric
    • cut 13, 5″x 5″ squares
      • cut 2, 5″ x width of fabric (wof) strips
      • sub cut first strip into 8, 5″x 5″ squares
      • sub cut second strip into 5, 5″x 5″ squares plus a remnant
  • From dominant background fabric
    • cut 36, 5″x 5″ squares
      • cut 5, 5″ x wof strips
      • sub cut 4 strips into 8, 5″x 5″ squares each for 32 squares
      • sub cut remaining strip into 4, 5″x5″ squares plus a remnant
    • cut 180, 1 3/4″x1 3/4″ squares
      • cut 8, 1 3/4″ x wof strips
      • sub cut 7 strips into 24, 1 3/4″x1 3/4″ squares each for 168 squares
      • sub cut remaining strip into 12, 1 3/4″x1 3/4″” squares plus a remnant
  • From secondary background fabric
    • cut 16, 5″x5″ squares
      • cut 2, 5″x wof strips
      • sub cut strips into 8, 5″x5″ squares each for 16 squares
    • cut 80, 1 3/4″x1 3/4″ squares
      • cut 4, 1 3/4″x wof strips
      • sub cut 3 strips into 24,1 3/4″x1 3/4″ squares each for72 squares
      • sub cut remaining strip into 8, 1 3/4″x1 3/4″ squares plus a remnant
  • From inner border fabric
    • cut 6, 1 1/2″ x wof strips
  • From setting and outer border fabric
    • 7, 5″ x wof strips (for outer border)
    • cut 2, 20 3/4″x 20 3/4″ squares (for setting sides)
      • cut 1, 20 3/4″ x wof strip
      • sub cut strip into 2, 20 3/4″ x 20 3/4″ squares
      • LEAVE AS SQUARES UNTIL NEEDED
    • cut 2, 10 1/2″ x 10 1/2″ squares (for setting corners)
      • LEAVE AS SQUARES UNTIL NEEDED
  • From binding fabric
    • cut 7, 2 1/2″ x wof strips
Field of Flowers
Break time – if you have done all of that cutting you need to take a break now.  Make yourself a tall cold drink.  Go outside and enjoy the sunshine.  Stretch your back.  Breath.  Mimi would want you to.
Sewing Directions:
Make Blocks – This quilt is made from 13 large, nine patch blocks.  There are 9 with a light background (dominant background) and 4 with a secondary background.  Set on point these create a fun argyle effect.  The blocks are made the same way regardless of the color of the background.

  • Make Snowball Units:
Snowball unit
    • Gather
      • 52, 5″x 5″ squares (in sets of 4) – flower petals
      • 13, 5″x 5″ squares – flower centers
      • 180, 1 3/4″x 1 3/4″ squares – dominant background
      • 80, 1 3/4″x 1 3/4″ squares – secondary background
    • Draw a line diagonally across the wrong side of all  (260) 1 3/4″x 1 3/4″ squares
    • Sort – to keep the backgrounds with the right flower petals and centers
      • Dominant Squares
        • 180, 1 3/4″x 1 3/4″ squares – dominant background
        • 9, 5″x 5″ squares – flower centers
        • 9 sets of 4, 5″x 5″ squares – flower petals
      • Secondary Squares
        • 80, 1 3/4″x 1 3/4″ squares -secondary background
        • 4, 5″x 5″ squares – flower centers
        • 4 sets of 4, 5″x 5″ squares – flower petals
    • Place Secondary group to the side.
    • With right sides together align one 1 3/4″x1 3/4″ square with the corner of one 5″x 5″ square so that the diagonal line cuts across the corner.
    • Sew along diagonal line, just to the outside of it….closer to the corner than the body of the larger square.
    • Trim the background fabric
      • 1/4″ from stitch line
      • to the outside of stitch line – on the side of the tiny outer corner.
    • Iron little square in half along the sew line.
    • Repeat process with remaining corners of 5″x5″ square.
    • Trim block back to 5″x 5″ if needed.  This is a pain, but well worth the effort as you blocks will sew together more neatly.
    • Repeat process 44 times with remaining centers and petals in group for 45 snowball blocks with dominant background corners.
    • Repeat process with secondary group for 20 snowball blocks with secondary background corners.
  • Make Daisy Chain Blocks:
    • Gather
      • 45 snowball blocks with dominant background corners
      • 36, 5″x 5″ squares – dominant background
      • 20 snowball blocks with secondary background corners
      • 16, 5″x 5″ squares – secondary background
    • Sort – pieces into 13 stacks each containing the following 9 pieces:
      • 4 matching petal snowballs
      • 1 center snowball with matching background corners
      • 4, 5″x 5″ squares – background to match corners of petals and center
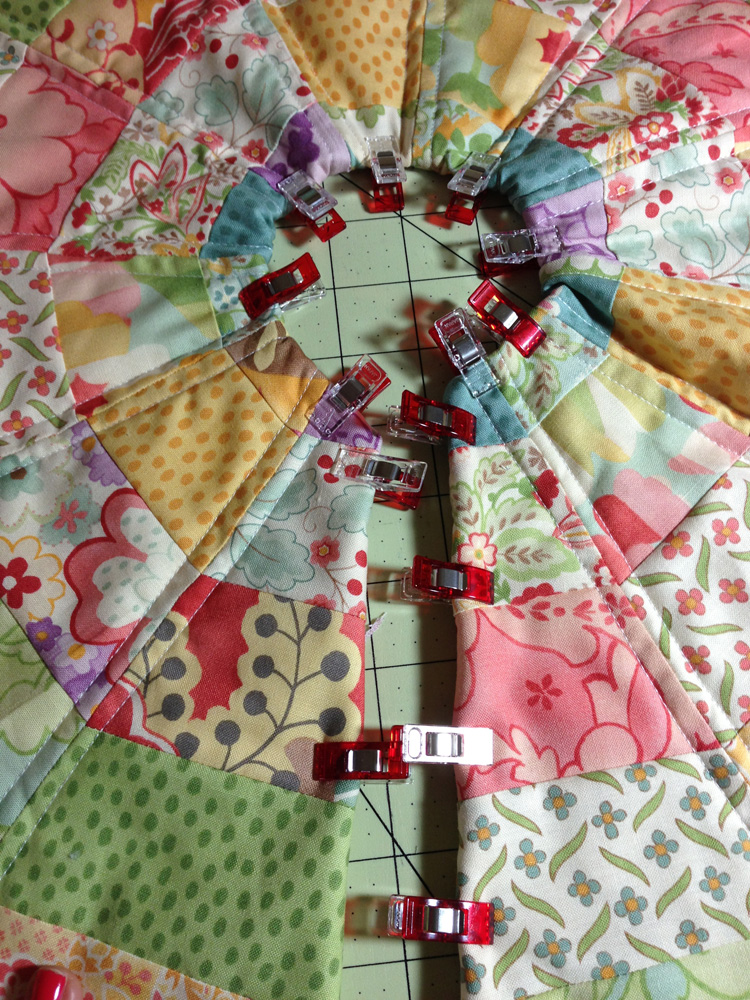
    • Arrange pieces from 1 stack so that they look like the picture below.
Daisy Chain Block
    • Sew rows
      • rows 1 & 3
        • background square, petal, background square
        • iron seam allowances towards the background square
      • row 2
        • petal, center, petal
        • iron seam allowances towards the center
    • Sew rows together to make block
    • Repeat 12 times for 13 blocks.
Assemble Center of Quilt Top:
Mimi’s Daisy Chains is arranged on point.  The rows are assembled at a 45 degree angle…well, no you don’t have to sit wonky in your chair…the rows are assembled just like the rows of any quilt, but they are set at an angle in the finished quilt.
This is a good time to drag out your design wall….otherwise know as the floor, your bed, the living room drapes, or shower curtain.  You need a big flat surface on which to arrange the blocks to your liking.  It shouldn’t be too hard…there are only 13 blocks, and 4 of those are limited to where they can go.  Ultimately I don’t think it is going to matter too much where each block goes…but you need to be happy with the arrangement.  Take the time now to arrange them and you will be happier later.
Row Assembly
  •  Gather:
    • 13 Daisy Chain blocks
    • 10 3/8″ x 10 3/8″ square border fabric (for setting corners)
    •  2, 20 3/4″ x 20 3/4″ squares border fabric (for setting edges)
  • Stabilize setting triangles – These pieces are going to be the edges of your quilt before you attache the inner border.  Because of their size and the fact that they are cut on the bias they will be very stretchy.  Take a moment now to stabilize them.  You will be glad you did.
    • For setting sides:
      • Gather 2, 20 3/4″ x 20 3/4″ squares
      • Iron and starch them liberally.
      • Draw 2 diagonal lines on the wrong side of each.
      • Using a single layer of fabric sew next to, about 3/16″ from each side of the lines
      • It will look like a big double X sewn onto a single layer of fabric.
      • Cut on lines
    • For setting corners:
      • Gather 2, 10 1/2″ x 10 1/2″ squares
      • Iron and starch them liberally
      • Draw 1 diagonal line on the wrong side of each.
      • Using a single layer of fabric sew next to, about 3/16″ from each side of the lines
      • Cut on lines.
  • Assemble rows
    • When working with setting triangles
      • Align the right angled corner with the corner of your daisy chain block.
    • When working with corner triangles
      • Find the center of the hypotenuse
      • Find the center of the block to which you are attaching the triangle
      • Pin centers, right sides together.
      • Pin from center out to the edges 
      • There should be a tiny 1/4″ bunny ear sticking over the edge.
  • Iron seam allowance towards the dominant background
  • Sew rows together to make top.
    • Pin rows together starting with center squares.
    • Pin seams for large blocks first then pin seams within the blocks
    • There should be a bunny ear sticking over the edge where the setting triangles meet the ends of your rows.
  • Add final two setting triangles to complete square.
Add Borders:
Border Assembly
  • Gather
    • Center of quilt top
    • 6, 1 1/2″ x wof strips – inner border fabric
    • 7, 5″ x wof strips – outer border fabric
  • Inner border
    • Sew 2 wof strips together along a 1 1/2″ side
    • Iron seam allowance open
    • Attach to side of quilt
    • Iron seam allowance towards border
    • Trim excess
    • Sew remnant to 1 wof strip along a 1 1/2″ side
    • Iron seam allowance o pen
    • Attach to parallel side of quilt
    • Iron seam allowance towards border
    • Trim excess
    • Repeat process with remaining sides of quilt.
  • Outer border
    • Sew 2 wof strips together along a 5″ side
    • Iron seam allowance open
    • Attach to side of quilt
    • Iron seam allowance towards border
    • Trim excess
    • Sew Iron seam allowance o pen
    • Attach to parallel side of quilt
    • Iron seam allowance towards border
    • Trim excess
    • Repeat process with remaining sides of quilt.

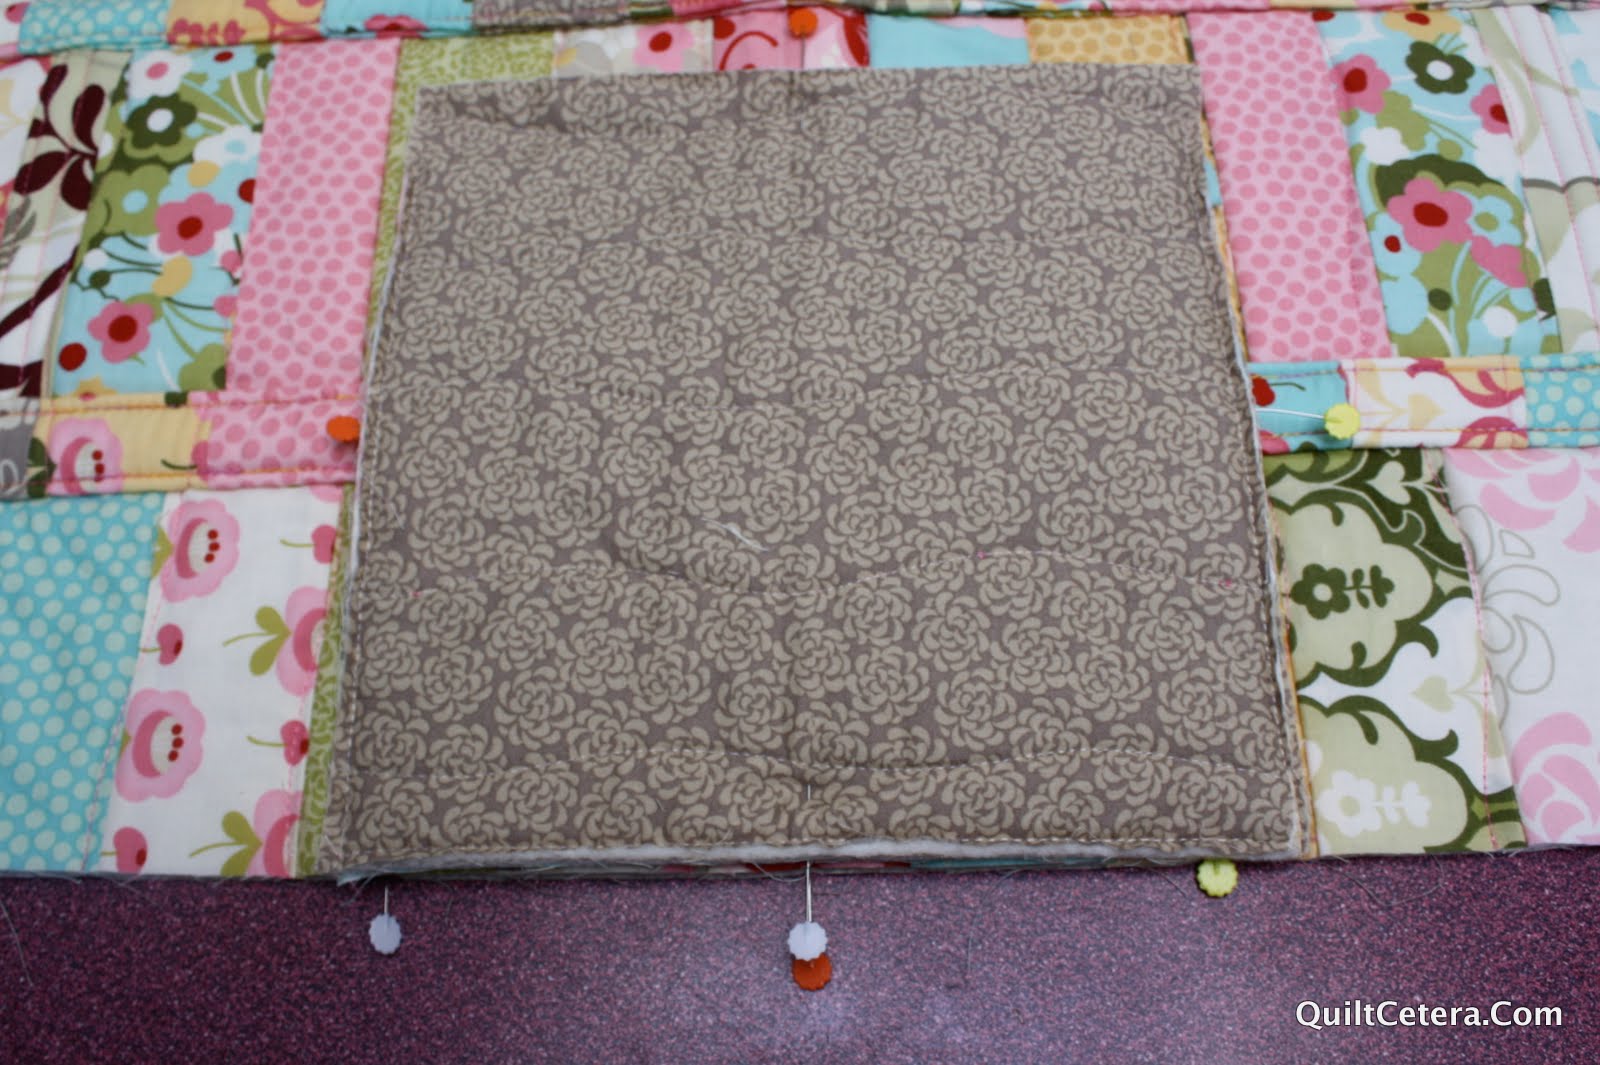
Finishing – Layer and quilt as desired


Don’t forget to add a label!

4,900 square inches (70’x70′) of day dreaming loveliness; a magic carpet of meadow flowers; a safe place on a rainy summer day; sweet memories of Mimi.
 
Please share a photo of your finished quilt with my group, Tops to Treasures on Flickr.

Cindy Sharp
{topstotreasures.blogspot.com}

Umbrella-Friendly Patio Topper


Hello!  I’m so happy to be here as this is my first project for the Moda Bake Shop.   During the warmer months we spend a lot of time outdoors and tend to eat outside as well. I thought it would nice to pretty-up our outdoor space.  Using a jelly roll gives the topper a nice patchwork look and tons of color. 


1 Jelly Roll (I used Mimi by Chez Moi)
1 1/8 yard of coordinating fabric
40″ square cut of thin batting or heavy canvas
Fabric Pen or Chalk
Spray Baste or Basting Pins
Wonder Clips or Pins
5 yards of binding

Select 16 strips from your Jelly Roll

Arrange your strips into two groups of 8

Place 2 strips together.  Line up the selvedge end and sew down the length using a 1/4″ seam allowance.

Iron the seam open and grab your next strip. 

This time align your strip on the opposite end and sew.   Changing direction for each strip prevents the strip set from curving.

Keep adding strips until you have 8 pieced together.

Bring your strip set over to your cutting mat and trim off one end. Leave the other end uncut.


MARKING:
Using a ruler mark the TOP edge of your strip set at 9.5″ and 10.5″.

Move your ruler edge down to your 10.5″ mark.  Mark again at 9.5″ and 10.5″.  
Do this all the way down the top of the strip set.

Using your ruler mark the BOTTOM edge of your strip set at 4.25″ and 5.25″.

Move your ruler edge down to your 5.25″ mark.  Mark at 9.5″ and 10.5″.  
Continue marking at 9.5″ and 10.5″ down the length of the strip set.

CUTTING:
Line up the top left corner and the first mark (4.25″) at the bottom of your strip set.  
Double check.  Cut!

Line up your ruler with the first mark at the top (9.5″) and at the bottom with the next mark available (originally 5.25″) and cut.
This provides you with your first ‘wedge’.  It should be 9.5″ along the top and 1″ along the bottom.

Repeating the cuts (6 wedges) the length of the strip set.  Use the next mark available on the top and bottom as your cutting guide.

Each cut will be 1″ on one end, 9.5″ on the other end.   Your ruler will change angles each cut.

You will have enough fabric to cut 7 wedges but you only need 6.  I’m saving my extra for another project.

Repeat the above steps with your second fabric set.

SEW:

Arrange the wedges to your liking.  You will have 3 wedges of edge color variant for a total of 12.

Sew 2 wedges together a time. Pin each seam together – it really helps to keep everything lined up and looking nice.

Then complete 2 sides. (Bojangles wanted to say hello!)

Then sew one more side together – leaving seam open.

Find a circle approximately 3″ in diameter, trace over the center hole and cut.  This cleans things up a bit and makes it easier for quilting.

Prepare your topper for quilting by stacking:
Backing fabric (pretty side down), then your batting or canvas, then the topper (pretty side up).

You may use a light batting or a heavy canvas like duck cloth. I find the canvas is a little easier to work with and the finished result lays a bit flatter. The pictures below are using a thin cotton batting.

Baste using your preferred method.  Spray baste is a quick and easy option for this project.
 

I chose to sew 1/4″ down the length of each side of the wedges.  You can be as elaborate as you want!

After quilting, trim off the batting and backing. Be sure to trim the open seam and center hole.

Since we are going for a circle it makes it nice to trim a little off the points.
1/4″ or less – just enough to get the pointy part off.

It should be looking something like this.

OPTIONAL:
If you chose to use store bought binding or want to make your own binding, now is the time to add it.
Then you are done!

If you are going to use the folding method for finishing, keep going!

Baste 1/8″ all around the unfinished edges.  This just helps hold all of the layers together.

After basting:  Starting at a corner fold under 1/4″, then fold again.  Pin or clip in place.
This should create a nice, tight 1/4″ double fold.


Continue clipping all the way around.

Due to the curving and tight fold, you will need a lot of pins or clips.  
Be sure you are folding under, not to the top.
 

I find it easier to clip a section, sew, then clip another section.

Sew between 1/4″ and 1/8″ all the way around the top. This will be enough to catch the folds underneath.

For the final step I decided to stitch all the way around using one of those decorative stitches that I never get to use!  This is purely optional.

You are done!  Take it outside and enjoy.


1 Jelly Roll will make 2 table toppers.

If you are attending any outdoor barbeques or parties this summer these table toppers would make a nice gift for the host.

Julie Hirt
{www.627handworks.com}

Chic Mama Stroller Organizer

Hello again, it’s Jennie from Clover & Violet and I’m here today with a fun project for those with little ones!  As a busy mom, I am always looking for ways to incorporate quilting with fun and function, so today I’m sharing my quilted stroller organizer.

1 {Coquette} Charm Pack
1/2 yard Small {Flowers} Print
1/2 yard Large {Paisley} Print
1 yard Fusible Woven Interfacing
1 – 10″ zipper
1 – 16″ zipper
10″ Stem-a-Seam {optional}
20″ – 5/8″ Velcro
6 Mini Anorak Snaps & Snap Tools

Begin by selecting 27 charms, cut 6 in half  for 12 – 2 1/2″ x 5″ pieces, from one 2 1/2″ x 5″ rectangle, cut a 2 1/2″ square.

Sew the charms into seven rows of three whole squares and one half as shown.  Sew one additional row out of three 2 1/2″ x 5″ rectangle and one 2 1/2″ square.  Cut the rows of whole charm squares in half lengthwise.  Arrange the rows as shown into 12 rows for the body of the organizer and 3 rows for the pocket.

Optional:  The stroller I made this for is a convertible with a lower, second seat.  So, I’ve added these three toy loops so my little one can have toys.

Cut an additional charm square in half and use the leftover piece from the 2 1/2″ x 5″ rectangles for the loops.  Fold the pieces in half longways, right sides together, stitch long seam, turn right side out, and fold in half.  Sew the loops to one of the center rows of the organizer.  Continue sewing all the rows together to form the main panel.  Sew the three pocket rows together and set aside.

Fuse one 16″ x 25 1/2″ piece of woven interfacing to the wrong side of the patchwork panel and quilt as desired {I used random horizontal and vertical lines}.  Note: for a more quilted look, use fusible fleece or batting.  I chose the woven interfacing because I wanted my organizer to be lightweight.

From the small print half yard, cut one 10″ x 19″ rectangle for the zipper pocket.  Line one 10″ edge up with the first row of strips on the main organizer, right sides together, pin in place.  One inch below the edge of the pocket piece, draw an 8 1/2″ x 5/8″ rectangle.  Stitch around the rectangle.  Then, carefully cut a slit down the middle of the stitched box, clipping toward the corners.  Push the pocket piece through the opening and iron.

Cut the strip of Steam-a-Seam in half and fuse to the right side of the zipper.  Remove paper and fuse zipper to the inside of the pocket.  Using the zipper foot, stitch in place.  Fold the pocket piece in half and stitch around three sides as shown.  I stitched through the bag front as well, to give the pocket the largest amount of room.

Next, take the pieced pocket panel that was set aside, fuse a 16″ x 6 1/2″ rectangle of interfacing to the back.  From the small flower piece, cut one 16″ x 6 1/2″ rectangle, this is the pocket lining.  Layer the pocket piece and lining right sides together.  Sew along the top and bottom edges, leaving the sides open.  Turn right side out, press.  Then quilt in the same manner as for main organizer.

Following the manufacturer’s directions punch holes for the snaps on the pocket panel and the main organizer.  I positioned mine at 1/4″ from the bottom of the third row of tiles on the main organizer, 6″ from each edge.  When punching the holes on the main organizer, be sure not to punch through the zipper pocket piece.  Punch matching holes on the pocket.  I use Fray Check around my punched holes to keep them in place.  Apply snaps.

Snap the pocket piece to the main organizer.  Then stitch 1/8″ and 1/4″ from the bottom edge of the pocket to secure in place.

From the small flower cut two 2″ x WOF strips for the ties.  Sew, right sides together, along the long seam, back stitching at beginning and end.  Turn right side out.  Position the ties 3/4″ from edge, with an equal length of fabric on the top and bottom of organizer. 

Stitch the tie down.  I stitched mine in three boxes, 1/2″ from top, right above the pocket, and right below the pocket, that way I could hang a clip for my keys, shopping bags, or sunglasses from the loops.

Cut the Velcro into two 10″ lengths.  Sew the hook side to the back of the organizer, 3/4″ from the edge.  Cut the loop portion of the Velcro into four 5″ pieces.  For my stroller I measured 7″ for the ties to hook around the handles.  Pin Velcro in place and trim tie to 1/2″ longer than Velcro.  Fold the 1/2″ under the Velcro for a finished edge.  Stitch in place.  Note: I added snaps to my organizer ties for sturdiness, since my baby will be sitting under it.  However, the Velcro allows me to move it to different strollers and adjust the ties.

From the large flowers cut two 16″ x 12 1/2″ for the lining and two 16″ x 7″ for the inside pocket.  Construct the pocket as for outside pocket, omitting interfacing and quilting.  Place the pocket on one inside lining piece.

Divide pocket in thirds and sew along lines to create three pockets.  Note, if you use specific cups or bottles, adjust your pocket widths accordingly.

To install the top zipper, place the zipper face down on the outer piece.  Note:  Make sure the zipper pull is on the same side of the organizer as the smaller zipper’s.  Place one lining piece, right sides together, on top of the main organizer.  Use the zipper foot to sew near the zipper.  Turn right sides out, then place zipper, face down, on other side of main organizer.  Layer lining as before, sew.

Place the lining right sides together and the main organizer right sides together, pin zipper tape toward lining.  Stitch along the sides of organizer and lining with a 1/2″ seam allowance.  Stitch along the bottom of the lining, leaving a 4″ opening.  Turn right sides out through the opening.  Stitch the opening closed near the edge of the lining.  Then, just tuck the lining inside the organizer and zip!

Optional:  As I mentioned before, I chose to add snaps to secure my organizer when using my double stroller.  I added the snaps after sewing the organizer together, to help keep the lining in place on the inside.  I placed the snaps right above and below the Velcro, as shown.

One fun organizer sure to spice up any stroller and carry everything you need on hand!

{Clover & Violet}

Sophie Car Seat Quilt


Hello!  I’m Jennie and I blog {along with my mom} over at Clover and Violet.  I have two little kids, both born in the winter.  With my little boy I quickly discovered how easily blankets are kicked off, so I designed a little quilt that tied to the infant car seat handle.  When I found out my second was a girl, I knew she needed a girly version for the car seat too!  This little quilt also works great for a stroller and can be a little play mat in a pinch too!

If you’re interested in making one of these too, my friends at Sew Lux Fabric and Gifts have put together a a few special kits at a special price just for this quilt {the kits feature a few different fabrics as they’re already sold out of Sophie charm squares…I think I might need to make another one!}.  Click here for details.

1 Charm Pack
1 yard large print for backing and binding
1/4 yard small print for borders
1/2 yard Bella Solids Snow for sashing
1 yard cotton flannel or batting

First, select 18 charm squares and pair them up {for 9 pairs}.  Then, chose 7 more charms for the setting triangles, cut them in half diagonally {from point to point}, set aside.

Place the pairs right sides together, then draw a line a line on the wrong side of one of the charms from point to point.  Stitch through both charms 1/4 inch from the centerline on both sides of the line.

Cut the pair of charms in half along the drawn line.  Press the halves open to make two half-square-triangle pairs.  Trim each new square to 4 1/2″.

Once you have sewn all 18 pairs and have 18 new squares, arrange the squares and setting triangles into rows, as shown:

From the Bella Snow, cut ten {10} 1 1/2″ strips.  Leave behind the very last triangle of each row and sew the remaining pieces onto about four {4} of the sashing strips.  Cut the blocks from the strips and begin forming quilt rows as shown:

I like to leave a little bit of the sashing hanging past the blocks so that I can trim it after I’ve sewn the rows, this gives a nice straight finish.  Then sew the remaining triangle onto the end of the row.

After completing the rows, begin sewing the rows onto about three {3} remaining sashing pieces.  In order to line up the short sashing rows, I fold the top half-square-triangle row in half, line up the short sashings and pin at the intersections.  This creates a nice grid.

Once you’ve completed sewing all your rows together, trim the quilt.  To get nice, accurate points, trim 1/4″ past each of the points, always lining up at least two points while you’re trimming.

Use the remaining sashing pieces to create a border around the quilt.  Then, from the small border print, cut four {4} 2″ strips.  Sew the border on in the same manner as the sashing.

Layer using your favorite batting.  I used prewashed cotton flannel in my little quilt because where we live a heavy quilt isn’t necessary.  This is a great option for a warm climate or a spring or fall baby, when a little warmth is needed, but not as much as a full quilt.  I quilted with an allover meander.  Because my quilt was lightweight, I also used a single fold binding method.

Instead of using a 2 1/2″ piece of binding folded in half {as for a standard double fold binding}, use a 1 1/2″ piece not folded.  Then pull it flat, tuck the raw edge in, and wrap it around to the back.  I always pin or clip my binding down when using a single fold to avoid excess fraying.

Now, the final touch to this little quilt is adding the ties.  Cut two 1 1/2″ x 28″ strips {I cut mine from the remaining backing piece}.  Fold in half, press, then fold both raw edges toward the center seam as for bias binding.

Pin one ties ten inches {10″} from the top of the quilt on each side.  Stitch in place and your quilt is ready for outings!

One 25″ x 30″ quilt, ready to be tied on to any car seat or stroller!

Oh, and hopefully one cozy warm {and stylish} baby too!

I hope you enjoy this design, and if you make it I’d love for you to share it to the Clover & Violet and the Moda Bake Shop Flickr groups.

{Clover & Violet}

Auntie’s Diamonds


Finished Size: 57″ X 88″
Hello again!!  It’s Jamie from SunFlower Seeds with my new Moda Bake Shop project! Auntie’s Diamonds is a quilt made from a Layer Cake and a Bella Solids Charm Pack!  I hope you like it and if you make one please add it to my Flickr Group!!  As always, be sure to check out my blog {jamiemueller.blogspot.com} for a giveaway!


1 Layer Cake “LC” (Sophie by Chez Moi)
1 Moda Bella Charm Pack “CP” (brown)
½ yard inner border fabric (blue houndstooth)
1 ¼ yard outer border fabric (paisley floral)
5 ½ yards backing fabric
¾ yard binding fabric (pink houndstooth)


Cutting Blocks:

1. Choose 40 LC squares (there are 42 in each pack) and cut each one in half. You will have 80- 5” X 10” rectangles.

2. Take 20 Charm Squares (1/2 of the pack) and cut each one in half horizontally and vertically. You will have 80- 2.5” squares.

Block Assembly:

1. Take one 2.5” square, fold in half diagonally and press. The pressed line will be your stitching line. Repeat with all 80- 2.5” squares.

2. Place one 2.5” square RST (right sides together) on the top right corner of one 5” X 10” rectangle. Pin in place and stitch on pressed line of 2.5” square. Repeat until you have 40 total on the top right corner. See photo:

3. Place one 2.5” square RST on the top left corner of one 5” X 10” rectangle. Pin in place and stitch on pressed line of 2.5” square. Repeat until you have 40 total on the top left corner. See photo:

4. Trim off excess fabric ¼” from sewn line. See photo:

5. Press all 40 RIGHT corner blocks towards the solid corner.

6. Press all 40 LEFT corner blocks towards the printed fabric (larger piece).

7. Square (trim) all blocks to 5” X 10”.

Top Assembly:

1. Layout blocks 8 rows of 10 blocks each as desired, making sure to match the small triangle corners to make the diamond in the center. See photo:

2. Sew blocks together in 4 patches to have 20 larger blocks, making sure to match seams of small triangles. See photo:

3. Sew the 20 larger blocks of four together until the center of the top is complete.

Inner Border:

1. From inner border fabric cut 7- 2 ½” X WOF (width of fabric) strips.

2. Measure center length of quilt top and cut 2 strips to that measurement. (You will have to sew 2 of the 7 strips short ends together to have enough length).

3. Sew side strips on each side of the quilt. Press towards border.

4. Measure center width of quilt top and cut 2 strips to that measurement. (You will have to cut 1 of the left over strips in half and sew each half strip to the short end of each top and bottom strips).

5. Sew top and bottom strips on the quilt. Press towards border.

Outer Border:

1. From outer border fabric cut 9- 4 ½” X WOF strips.

2. Measure center length of quilt top and cut 2 strips to that measurement. (You will have to sew 2 of the 9 strips short ends together to have enough length).

3. Sew side strips on each side of the quilt. Press towards border.

4. Measure center width of quilt top and cut 2 strips to that measurement. (You will have to cut 1 of the left over strips in half and sew each half strip to the short end of each top and bottom strips).

5. Sew top and bottom strips on the quilt. Press towards border.

Quilt as desired.

Binding:

1. From binding fabric cut 8- 2 ½” strips

2.Sew all 8 strips together (short ends) to make 1 continuous strip. Fold binding strip in half wrong sides together and press. Attach binding to right side of quilt (raw edges even) and machine stitch all the way around. Turn binding to back and hand stitch down.

Finished Size: 57″ X 88″

Your new quilt is done!! ENJOY!

Jamie Mueller
{jamiemueller.blogspot.com}

Mod Circles Appliqued Baby Quilt


Hi there, I’m Lindsey from LRstitched. I’m very excited to share my first recipe at the Moda Bake Shop!

Today, I’m going to show you how to make a fun and easy appliqued baby quilt.

  • 1 Charm Pack, “Sophie” by Chez Moi
  • 1 yard background fabric (Moda Bella Solid “Home Town Sky”)
  • 1 yard backing fabric (Sophie “Blue Fiesta Collage”)
  • 1/2 yard for the binding (Sophie “Green Peas Houndstooth”)
  • batting (minimum 34×44)
  • 8″ circle and petal templates (included in the Printer Friendly Version)
  • water soluble pen
  • measuring tape/ruler
  • scissors
  • fabric glue (My favorite is Liquid Stitch).
  • template plastic (optional, if you’d like to transfer your paper templates for ease of use)

One charm pack will give you enough petals to make 2 of these baby quilts.

We will be using 72 petals for one quilt (18 charms). Keep that in mind, if you would prefer to only make one quilt, select 18 charms and save the rest for another project.

If you would like to make 2 quilts, you will use 36 of the 42 charms. You’ll also need to double the fabric requirements for background, backing and binding, as well as batting.

Once you’ve decided whether to make 1 or 2 quilts, grab your charm pack and let’s get started!

——–

With the printed petal template, trace four petals per charm as shown below.

I like to cut my petals by hand since I’m trying to use every last scrap of fabric. However, if the thought of hand cutting makes you cringe, you can certainly use a rotary cutter!

If you choose to use a rotary cutter, be careful using this layout because space is tight. You may want to bump down to 3 petals per charm.


Now we need to prepare the background. Take your 1 yard background fabric (approx. 36″ by 44″) and cut down to 32″ by 42″. Press well.


Next we are going to trace our guide circles onto the background piece.

You will need the 8″ circle template and a fabric pen. Lay out your background fabric on a hard surface and beginning in the top left corner, lay down your template. While measuring, adjust the circle template until it rests 2″ from the top and 2″ from the left and trace.

Measure 2″ to the right of the first traced circle and repeat. Continue until you have traced all 12 circles as seen below.

Once the circles are traced, it’s time to layout the petals. You will need 6 petals per circle.

If you imagine a line down the center of each circle, you will be placing 3 petals to the left of the line and 3 to the right.

Place your first petal on the top left side of the circle you’ve traced. The drawn circle will be your guide for placement as you work your way around.


Once all 12 circles are filled, adjust the petals if necessary until you’re happy with the placement.


Now we need to secure the petals to the fabric to prepare for applique.

Begin by removing one petal from its place; apply a thin coat of glue and press firmly back to its spot on the background fabric.

Repeat for each petal until all are secured.


Once everything is glued down, you can start appliqueing each petal to the background fabric. I’m using a blanket stitch in the picture below.

If your machine doesn’t offer that option, you can zigzag or straight stitch close to the petal edge.


We’re almost done!

After appliqueing all the petals, press your top well. Take the backing fabric and layer it along with your batting and top, then quilt as desired.


Trim off the excess backing and batting and square up your quilt. Using your preferred method, make and apply the binding.

All finished!

A beautiful baby quilt, approximately 30″ x 40″.

Thanks so much, I hope you enjoyed this tutorial!

Lindsey Rhodes

{www.LRstitched.com}

If you do make a Mod Circle quilt, I’d love to see it! Feel free to share it in the LRstitched Flickr pool.

Sophie’s Bouquet

Fresh from the oven at Jo’s Country Junction is the latest Moda Bake Shop recipe….Sophie’s Bouquet. Our old farm dog, Pepper, is showing off the quilt that features fabric from the line Sophie by Chez Moi. I am in love with the fabric. I am especially in love with the turquoise blue floral fabric that is used as the setting squares. The floral design is amazing. The quilt uses one jelly roll along with extra yardage.


To get you started, Kimberly over at the Fat Quarter Shop is sponsoring a giveaway over on my blog to get you started on the project. After you’re done here, hop on over and check it out.


1 Jelly Roll-Sophie for Blocks and Scrappy Binding


4 1/4 yards Nosegay Blue Fiesta (32501-11) for Setting Squares, Setting Triangle and Corner Triangles


2 yards Sophie Leafy Swirl Pink Sorbet 32504 13- for constant pink in the blocks and the inner border


1 3/4 yards Sophie Petal Pink Sorbet 32506 22-for background fabric in the blocks


6 yards Sophie Paisley Floral Cream 32502 14


You will also need a half square triangle ruler such as an Easy Angle.

If you would want to fussy cut the setting squares, you will need extra yardage.


From the setting fabric:
Cut 12~ 6 1/2″ strips. Sub cut into 72~ 6 1/2″ squares.


Cut 3~ 9 3/4″ strips. Sub cut into 9~ 9 3/4″ squares. Cut these squares twice on the diagonal to get your setting triangles. You will use 34.


Cut 2~ 5 1/8″ squares. Cut once on the diagonal to create 4 corner triangles.


From the pink constant fabric in the blocks:
Cut 17~ 2 1/2″ strips. Sub cut into 270 2 1/2″ squares.

For the background fabric in the blocks:
When I made my version, I used the lights from the jelly roll pieces for some of the back ground in the blocks. I cut the remainder from the light yardage. You can do it the way I did or you can make all of the background from the same fabric. You will need a total of 23~ 2 1/2″ strips for the background.

I pulled out the strip of fabric that matches the setting fabric and set it aside.


Take one of the jelly roll strips. Layer it right sides together with one of the light 2 1/2″ strips as shown. Place it on the cutting mat. Take the half square triangle ruler and position it over the top. Cut a straight edge on the side as shown.

Following the manufacturers instructions that came with the ruler, cut triangles as shown. Flip the ruler as you make each cut. Each block needs six sets of triangles. Continue cutting across the strip making triangles. You will get four sets of six triangles per strip.

Chain piece the triangles, keeping the like triangles together.


Cut the triangles apart. Clip the dog ears and press towards the dark fabric. Continue keeping like squares together.


Layout the half square triangles along with three pink squares as shown.


Sew the blocks into rows.


Sew the rows into blocks. Continue until you have 90 blocks. Press blocks.


Now is the fun part…the layout. This quilt is set on the diagonal. It’s easy to get blocks twisted or turned. I kept watching and checking to make sure those pink squares were lined up in rows.

Continue laying the blocks out in a 9 x 10 setting. Sew the blocks into rows then sew the rows into a quilt top. Notice the pink squares are all in a line.

Take the backing fabric and cut it in half. From the remaining jelly roll strips cut 6~ 21″ pieces. Piece them together connecting them on the diagonal as you would binding strips. Sew the strip between the two backing pieces. This isn’t completely necessary. I just like to do it so that I don’t have to try to match the prints in the backing fabric.


Layer the backing, batting and quilt top together. Quilt as desired.


Cut eight 2 1/2″ strips of the blue floral fabric. Use them to bind the quilt.


One 74″ x 83″ quilt.


Come on over to my blog, Jo’s Country Junction, and see all the pictures I took while making the quilt. There were a few mishaps that went into this quilt. You will also want to check out the giveaway that Kimberly from The Fat Quarter Shop is sponsoring there.


Jo Kramer
{Jo’s Country Junction}

Shabby Spring Quilt


Hey Moda Bake Shop readers! It’s Tam from Sew Dang Cute Crafts back again to share with you this fun, “Shabby Spring” quilt. Rag quilts are so great because you can do so many things with them and finish them without actually “quilting”.

* 1 Layer Cake (I used Chez Moi’s beautiful Hunky Dory line)

* 1 Jelly Roll * 1/4 yard coordinating fabric (my blue)

* 1/2 yard coordinating fabric (my cream)

* Warm and natural batting

* Coordinating thread(s)

* Ruffle foot (not necessary, but definitely makes things easier)

Any desired appliques.

1. The first thing we need to do is cut our fabric. To make things a little easier to understand, I’ve included a diagram of our pattern.

– Select 12 layer cakes and cut into 1/4’s to make (48) 5″x5″ squares – (B) in the pattern.

– Select 10 layer cakes for your big squares (A) and several others for appliques if doing any.

– Cut jelly roll strips into (16) 10″ pieces – (E) in the pattern, except the center square. (I used 2 jelly roll and 2 layer cakes: pink and blue).

– Cut (7) 2 1/2″ strips from the 1/2 yard coordinating fabric (my cream). From those strips, cut (16) 13″ pieces and (4) 10″ pieces – (D) in the pattern, except the center square, and (E) of the center square.

– Cut (2) 2 1/2″ strips from the 1/4 yard coordinating fabric (my blue). From those strips, cut (2) 13″ pieces – (D) of the center square.

– Select 8 different jelly roll strips and cut (64) 5″ pieces from those – (C) in the pattern.

Now that you are done cutting, you should have something similar to this. Remember you are making both the top and back of the quilt, so you’ll need to arrange your pattern with this in mind. Here’s how mine looks (top shown).

2. Let’s start with (B). Cut (24) 3 3/4″ x 3 3/4″ squares of warm and natural batting. Layer one (B) wrong side down, then one piece of warm and natural, followed by one (B) right side up. Stitch from corner to corner as seen in the photo below to form an “X” and create your fabric sandwich. You don’t need to worry about backstitching when doing these. Repeat to form 24 (B) squares. I have found the fastest way to do this is by doing a chainstitch. Line all your squares up diagonally and stitch corner to corner in one direction. Then simply clip between each sandwich and line them all up again to stitch from the other corner to corner. 3. Let’s move on to (A). Cut (5) 8 3/4″ x 8 3/4″ squares of warm and natural batting. Layer the fabric and batting as you did in step 2. If you are using appliques, apply those to your top square piece. I used my Silhouette and their fabric interfacing, which was fabulous. Stitch down your appliques through the entire sandwich, or stitch an “X” as you did in step 2 if you aren’t using appliques. I used invisible thread to make it easier for me, rather than changing my thread multiple times. And this is how it looks from the back side. Repeat to form the (5) A pieces. 4. Cut (32) 3 3/4″ x 1 1/4″ strips of warm and natural batting for your (C) pieces. Sandwich in the same manner. Instead of forming an “X”, I chose to simply stitch one line down the middle of the strip to create my sandwich. Repeat to make 32 (C) strips. Again, don’t backstitch and I highly recommend doing a chainstitch to make things faster. 5. Cut (10) 11 3/4″ x 1 1/4″ strips of warm and natural batting for your (D) pieces. Sandwich and stitch together as you did the strips in step 4, with a single stitchline down the center. Repeat to create your 10 (D) strips.

6. Cut (10) 8 3/4″ x 1 1/4″ strips of warm and natural batting for your (E) pieces. Sandwich and stitch together, again just like in step 4, with a single stitch line down the center. Repeat to create your 10 (E) strips.

7. Now we get to sew all our sandwiches together. This is where you want to grab your walking foot if you have one.

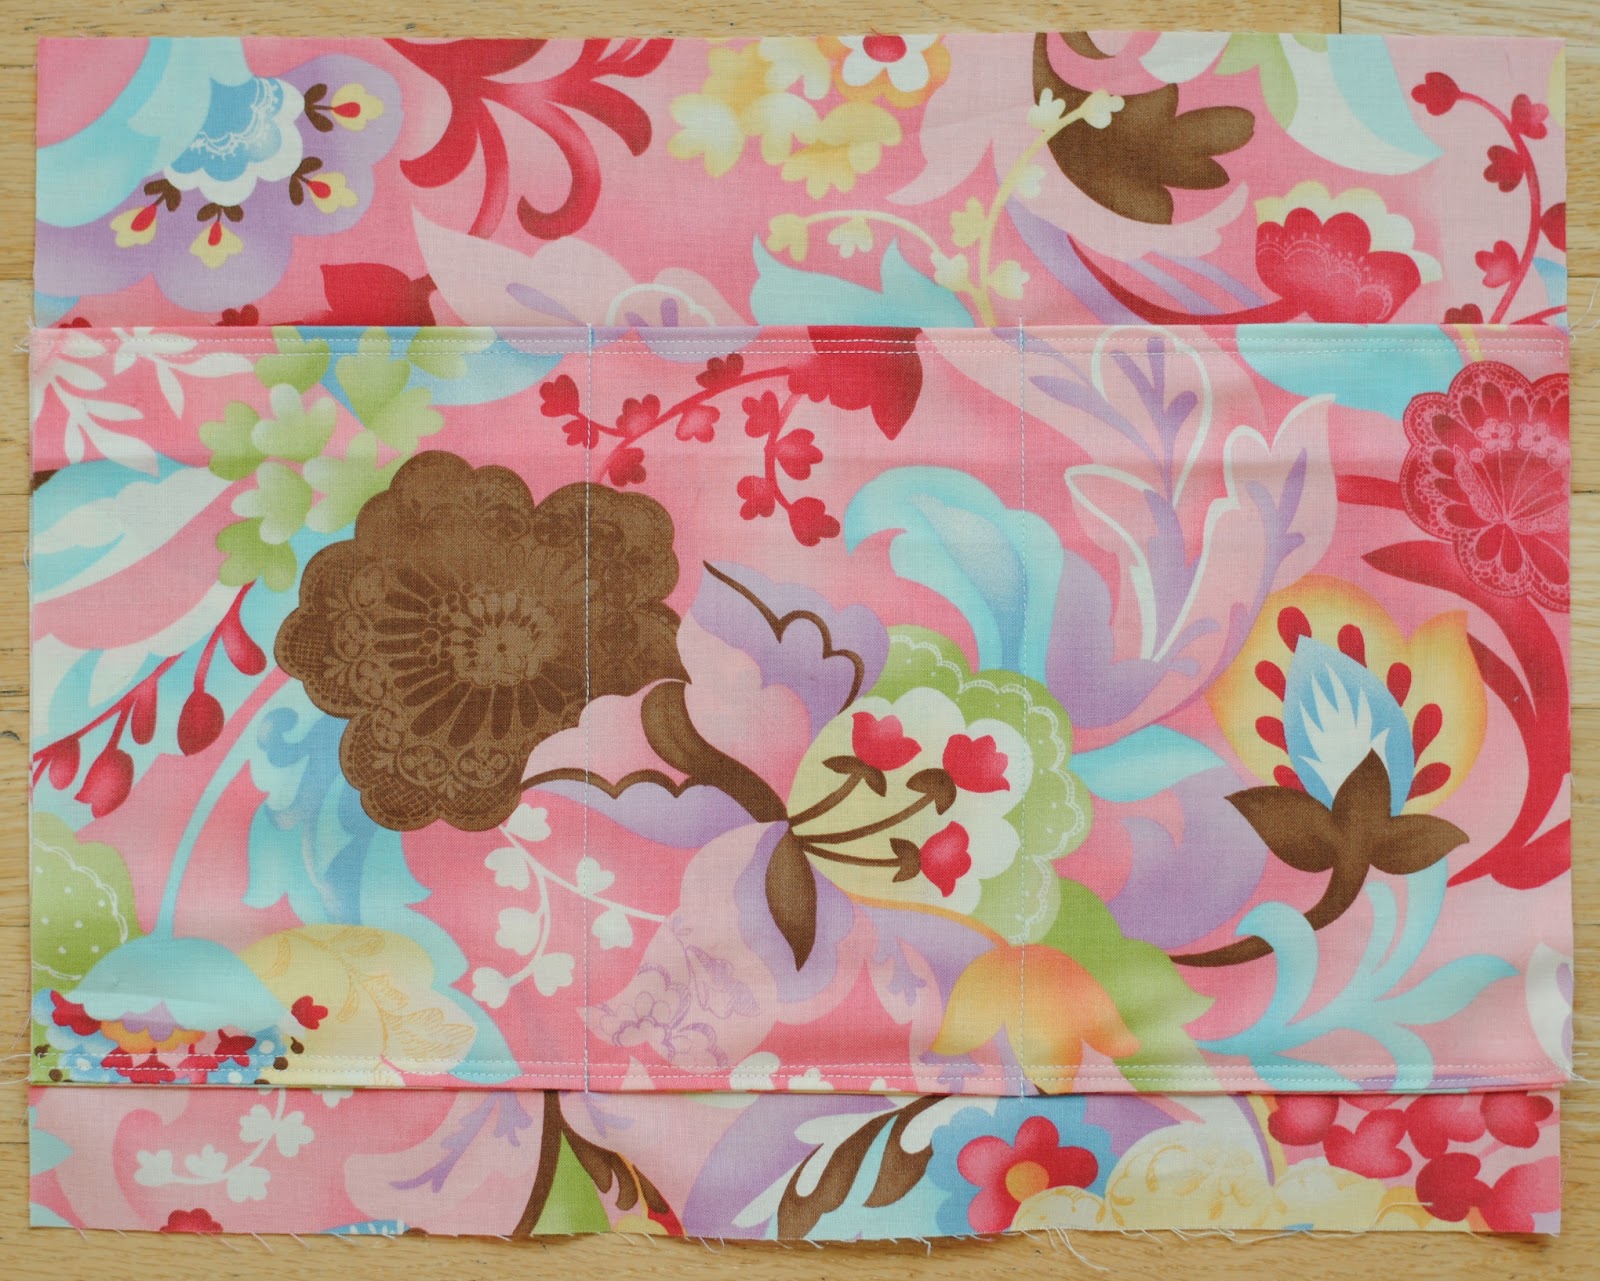
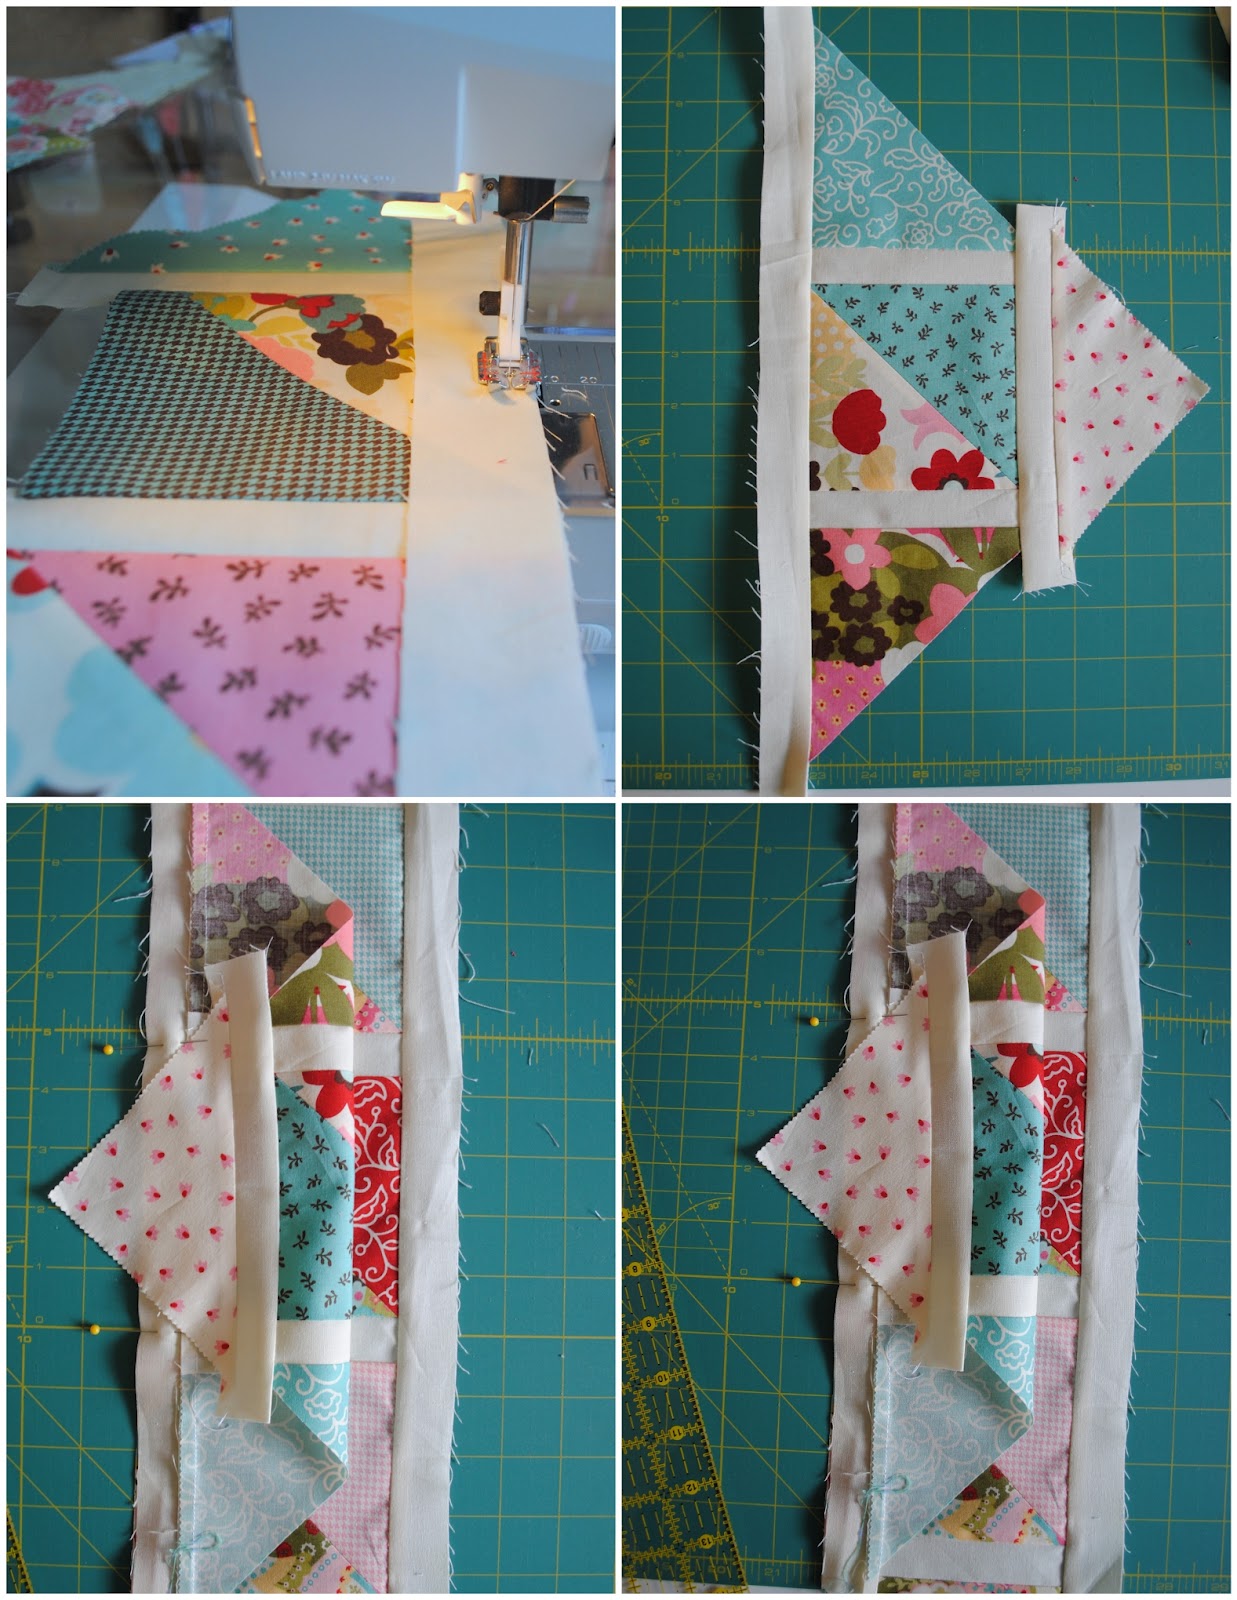
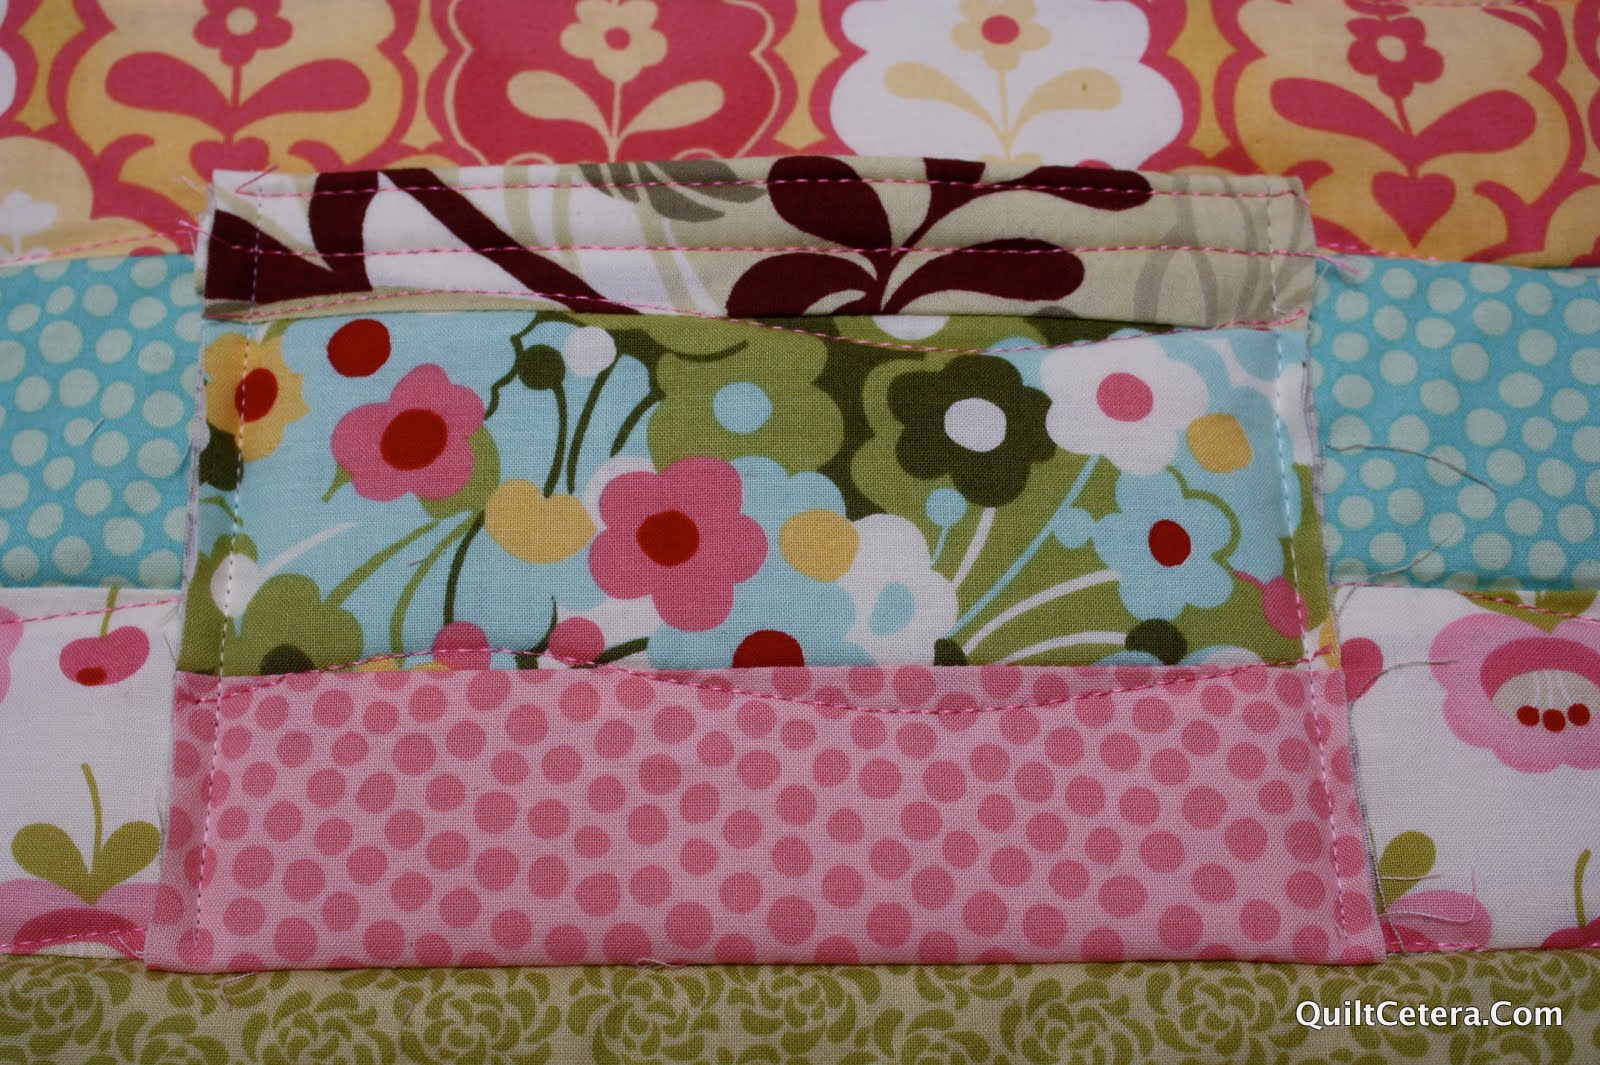
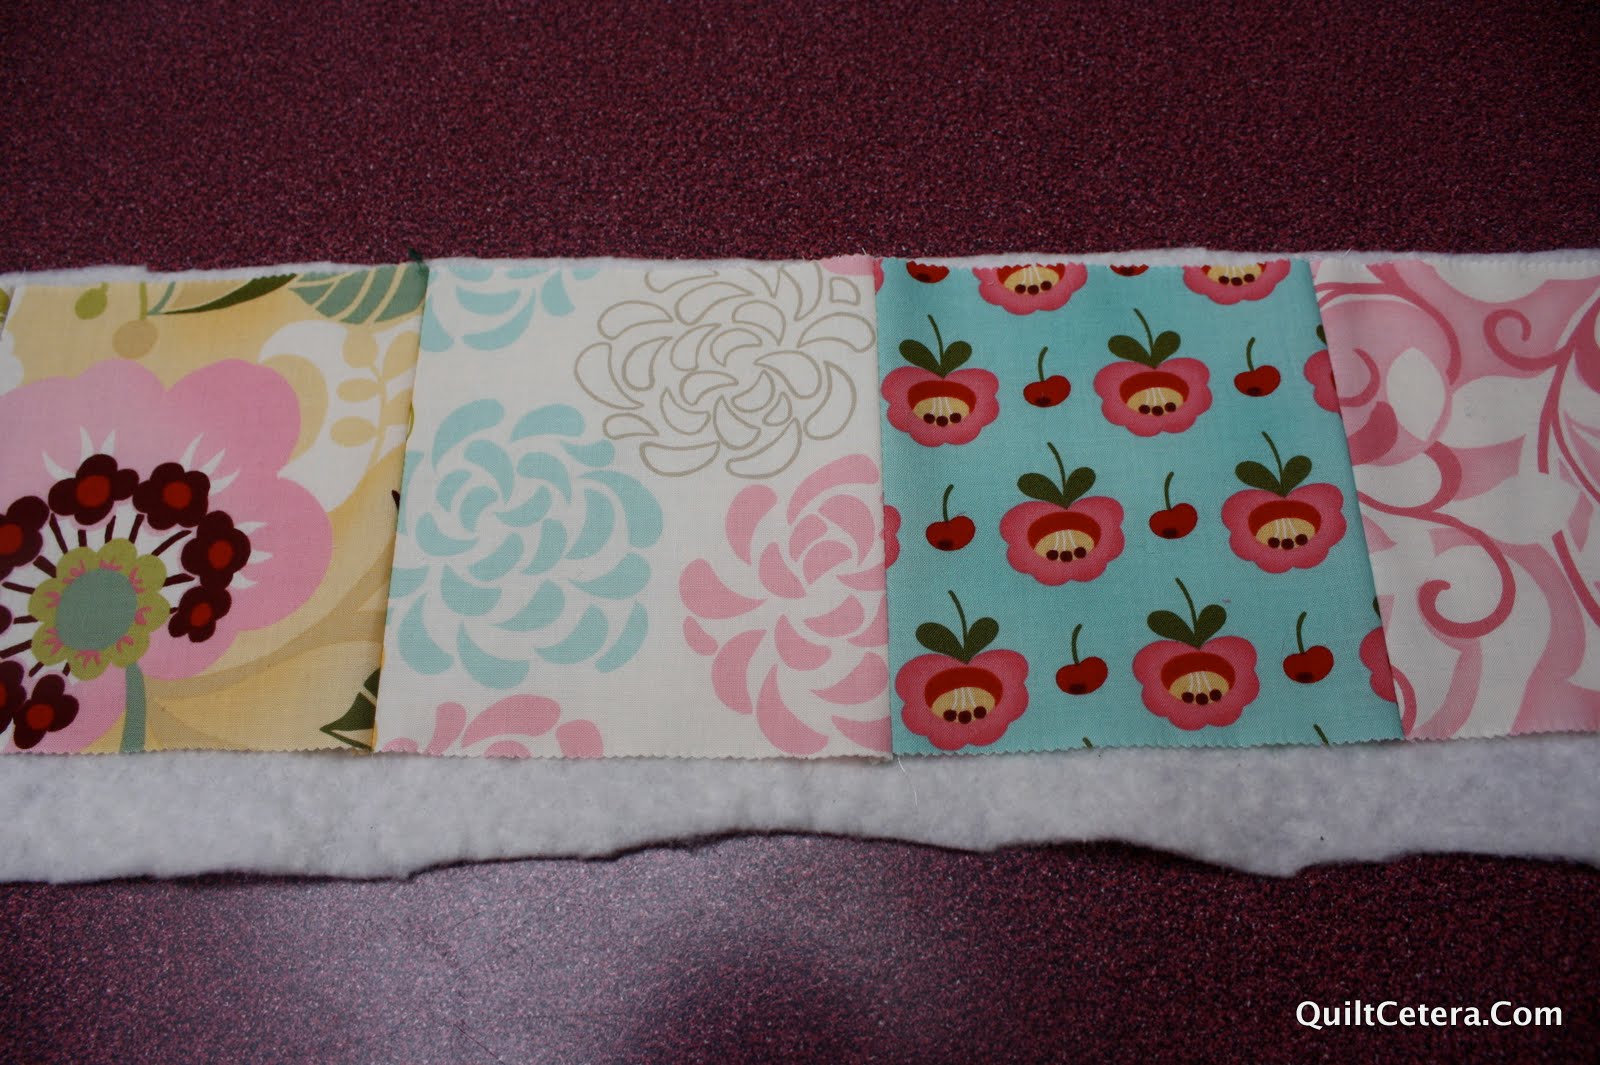
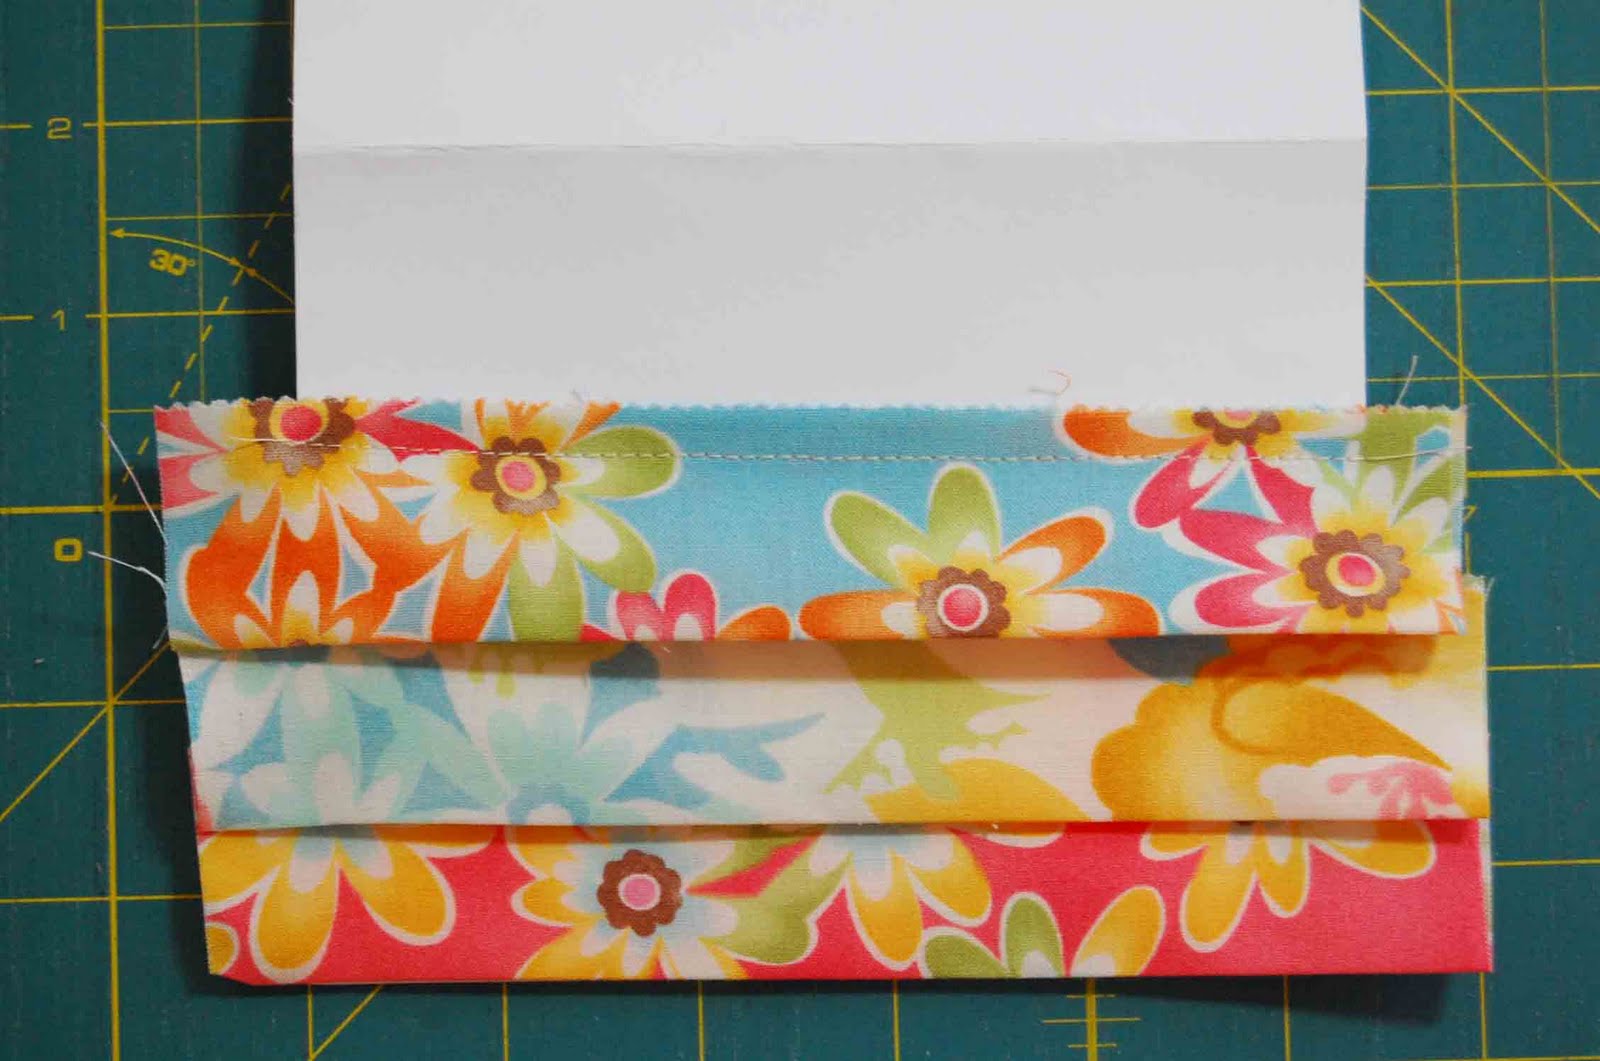
The walking foot makes it so the fabric is fed through evenly and you avoid bunching – great for when you are working with numerous layers of fabric! 
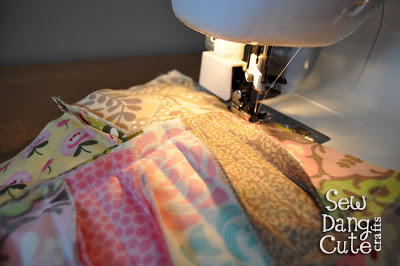
Grab three of your (B) squares. *Note: You can do a larger or smaller seam, depending how much fringe you want. I chose to do a 1/2″ seam for this rag quilt. Using 1/2″ seams, sew the back sides of the quilt together, so the seam is sticking out on the top side of the quilt. Using the same method of sewing back sides together, sew another three (B) squares together and eight (C) strips to create three rows. Then sew those three rows together to form one big block. Repeat with the other 3 blocks that are this style. For the other five blocks, we are going to sew two (E) strips to one (A) square first, then two (D) strips to create one big block. Repeat for the other four of this style. Sew three of the big blocks together to form a row. Repeat to create three big rows. Then sew those three big rows together and stitch around the entire perimeter of the quilt. You are done sewing! 8. Grab a good pair of scissors and a great movie and begin clipping all of those seams that are sticking up. Just keep clipping away until every seam has been clipped. 9. Toss the blanket in the washer, then dryer and be sure to clean out your filters afterwards. You are now done and have a beautiful rag quilt!!! Here’s how it looks from the back.

One rag quilt 36″ x 36″.

I hope you will all come visit me over at Sew Dang Cute Crafts! Thanks for letting me be here today!!

Tamarynn Bennett
{Sew Dang Cute Crafts}

Baby On The Go Diaper Bag

Hello Moda Precut Lovers! It’s Bradie, from A Quilty Kind of Girl here to share my Baby on the Go Diaper Bag Tutorial. I have made this bag a couple of times now, and every Mommy who gets one just loves it! A single jelly roll will yield two bags!

For this project you will need:

One Jelly Roll of Hunky Dory by Chez Moi.
One Charm Pack of Moda’s Hunky Dory.
1 1/2 yards of coordinating fabric for inside of ONE bag.
17 inch zipper.
44 X 48 inch piece of batting.
6 inch by 45 inch piece of batting.

Separate the jelly strips into two piles of 20. Each pile of 20 will make one diaper bag.

Layout your strips for the diaper bag in the order you like. Then sew the strips together, first in pairs, stitching from top to bottom. Then sew the remaining seams in the opposite direction, bottom to top. This will keep your piecing nice and straight. Your finished piece will measure 40.5 X 44 inches.

Sandwich like a quilt top with batting and the bag lining fabric. Quilt however you like. Mine has wavy lines stitched along the seams. Quick and Easy! Trim away the extra batting and backing so your piece measures 40 X 44.

Now you can cut the following size pieces from your diaper bag quilt sandwich:


Main Body of Bag 33 X 16 inches
Sides 2 Pieces 9 X 9 inches.
Side Pockets 2 Pieces 9 X 9 inches.
Front Pockets 2 pieces 6 X 6 inches.
Handles 2 pieces 4 X 40 inches.

The remaining pieces are extra and may be set aside for some other creative endeavor!

Now to prepare the pockets. You need TWO (9 X 9) inch squares, and the TWO (6 X 6) inch squares. Fold 1/2 inch of the top edge over to the wrong side and press. Then fold another half inch and pin in place. Stitch in place to create a finished edge for the top of the pocket. Repeat for the other pockets.

Use this diagram to make the following markings on the bag body. Use a marking method which will wipe away easily once project is complete.

MAIN BODY OF BAG – MARKINGS:
A – 12 INCHES FROM VERTICAL CENTER
B – 4 INCHES FROM VERTICAL CENTER
C – VERTICAL CENTER
D – BOTTOM OF SMALL POCKETS – 5 INCHES FROM CENTER
E – HORIZONTAL CENTER
F – 8 INCHES FROM VERTICAL CENTER (mark both sides of bag)

Mark the center of the two smaller pockets, and place the two pockets face down on the bag body, lining up the pocket center with the pocket marking line.

Pin in place and stitch 1/4 away from raw edge. Stitch only the bottom of the pocket. Repeat for second pocket.

Fold pocket up so right side is showing and pin in place. Baste the sides of the pocket to the bag body. We will stitch over these again when we attach the handles.

Stitch the two handle strips together at both ends to form a long circular handle 80 inches long. Lay handle right side down on ironing board. Fold the two long edges in to meet in middle. Then fold the entire strap in half, pressing as you go to hold in place. Stitch down the long side with matching thread to hold handle together. Lay out the handle on the bag body. Center handle over the sides of the two pockets to cover the raw edge of the pocket. Pin handle in place.

Stitch handle to bag body using same thread used for quilting. Stitch up to and along the 12 INCH marking line, then cross the strap and stitch down the other side of the strap. You do not want the handles stitched onto the top portion of the bag.

A close up view of the handle and pocket after stitching.

Oh! The charm pack! What are we going to do with these…

Now to make a shoulder strap for your diaper bag! Choose nine squares….

Sew them together in one long row. Place right side up on top of the 6 inch by 45 inch piece of batting. Stitch around the entire strap about 1/8 inch from the edge.

Trim away all the excess batting.

Fold strap in half the long way, with right sides of fabric facing each other. Stitch down the long side, leaving the short sides open. Turn strap right side out and press with seam to one side. Top stitch the strap with your matching thread, about 1/4 inch from edge, on both long sides of the strap.

Now this is my favorite part… I know I’m getting soooo close to being DONE!! Mark the center of all four pocket sides. See picture….

Place pocket, right sides facing, on the center marking line of the bag body. Line up the center pocket marking, with the center bag line and pin in place. Repeat with second pocket on opposite side of bag. Begin stitching (with a HALF INCH seam allowance) half an inch from edge of pocket, and finish stitching half an inch from pocket edge. This will give your bag nice square corners. 🙂 Repeat for pocket on other side of bag.

This is how the bag will look, once pockets have been attached.

Now we will stitch the side of the pocket to the side of the bag. Fold the pocket over top of the bag to line up the pocket center marking with the EIGHT INCH marking line on the bag. Pin in place. Again you begin stitching half an inch from pocket edge, and finish stitching half an inch from pocket edge. Repeat for second pocket.

Look! You’re getting closer!!

Now fold the pocket over to line up the other side of the pocket. Pin in place and stitch the same way as you did the other two sides.

Another peek…

Now… let’s attach the shoulder strap, k? Mark the center of the short side of strap and pin to the center of the pocket TOP. Make sure your strap is NOT twisted, (Don’t ask…) and pin to the other side of bag as well.

Baste the strap to the bag. We will reinforce these stitches when we finish this edge of the bag.

NOw to attach the zipper… keep the bag inside out. Pin the zipper, right sides facing to the raw edge of the bag top. Stitch 1/4 inch from zipper edge.

Pin other side of zipper to other side of bag top. Stitch in place.

Turn the bag right side out, and top stitch along the edge of zipper with your matching thread. Stitch about 1/8 inch from the edge.

Now, believe it or not!!! it’s time to finish those last two edges of the bag! Pin the opening in place and stitch closed. It is wise to stitch with the zipper side up to anticipate the metal fixtures on the zipper (Again, don’t ask….)
It is a good idea to go back along the inner seams of the bag and finish them either with seam binding, or even a simple zig zag stitch in the seam allowance. This will improve the durability of your bag and it will hold up better if laundering is required. 🙂

One ridiculously cute diaper bag to carry baby’s every need! Bag is large finishing at 16 X 8 X 8 inches. Shoulder strap has a 17 inch drop.

Bradie Sparrow
 A Quilty Kind of Girl

Ruffled Note Card

Ruffled Note Card by Stefanie Roman 
Hello! I am Stefanie from Little Lady Patchwork. I am so pleased to be sharing my first Moda Bake Shop project with you.
I love to make and receive handmade note cards. My Ruffled Note Card is quick and easy. All crafters, not just quilters can make it.
It is the perfect way to personalize a gift. If you were giving a quilt as a gift, my Ruffled Note Card would make a great matching accessory. You could even make several of them and give them away as gifts.
Have fun making your Ruffled Note Cards!

Leftover Jelly Roll strips (I used leftover jelly roll strips from Swanky by Chez Moi)
8 1/2″ X 11″ white card stock
Glue Stick
Ribbon or Ric Rac for embellishment
4 1/2″ X 5 3/4″ Envelope
Bone Folder or Dull Butter Knife
Pencil
Ruler

Cutting Instructions:

Cut the white card stock in half so that it measures 8 1/2″ X 5 1/2″.
Fold the card stock in half so that it measures 4 1/4″ X 5 1/2″.

Here are a few tips for making a crisp, clean fold in your card stock:
  • Measure 4 1/4″ away from the left side of your card stock.
  • Using your pencil, make a small dot at the 4 1/4″ mark. This will become your 1st registration mark. 
    • Move your ruler closer to the top of your card stock.
    • Measure 4 1/4″ away from the left side of the card stock.
    • Using your pencil, make a small dot at the 4 1/4″ mark. This will become your 2nd registration mark.


    • Use your ruler to line up the two registration marks. 
    • Use your bone folder to score a fold along the side of your ruler. If you do not have a bone folder, you can use a dull butter knife.
    • You may need to run the bone folder along the edge of the ruler several times in order to get a good fold line.

      •  Fold your card stock in half using the fold line that you created. Your card should measure 4 1/4″ X 5 1/2″.
      Choose (5) coordinating jelly roll strips. I chose 5 jelly roll strips from Swanky by Chez Moi, however you can use any jelly roll strips you might have in your stash.
      Cut (1)  2 1/2″ X 6 1/2″ strip from each of the coordinating jelly roll strips.
      You will need a total of (5)  2 1/2″ X 6 1/2″ coordinating jelly roll strips.

      Step 1:
      • Fold the 2 1/2″ X 6 1/2″ strip in half.
      • Press the strip with your iron.
      • Repeat for each of the (5)  2 1/2″ X 6 1/2″ strips.
      Step 2:
      • Align the first jelly roll strip with the bottom of the white card stock. The jelly roll strip will overlap the edges of the white card stock.
      • Lift up one end of the jelly roll strip and place a dab of glue on the center of the white card stock. This will help hold the jelly roll strip in place while you sew it down.

      Step 3:
      • Sew 1/4 ” away from the raw edge of the first jelly roll strip.
      Step 4:
      • Lay the 2nd jelly roll strip on top of the first jelly roll strip. Use your stitch line as a guide for keeping the second jelly roll strip straight.
      • Lift up one end of the jelly roll strip and place a dab of glue on the center of the white card stock.

       Step 5:
      • Sew a 1/4″ away from the raw edge of the second jelly roll strip.
      • Your Ruffled Card should look like this:

        Step 6:

        • Repeat Step 5 for the 3rd and 4th jelly roll strips.

        Step 7:

        • Align the last jelly roll strip with the fold line on the white card stock.
        • Lift up one edge of the jelly roll strip and place a dab of glue on the center of the white card stock.
        • Place your scrap piece of ribbon on top of the last jelly roll strip.
        • Lift up one edge of the ribbon and place a dab of glue on the center of the white card stock

        Sew down the center of your ribbon.

        Your Ruffled Note Card will look like this:

        Step 8:

        • Turn your Ruffled Card over to the backside.
        • Align your ruler with the edge of the white card stock.
        • Trim off the excess fabric.

        Step 9:

        • Turn your Ruffled Note Card over to the front side.
        • Sew a 1/4″ seam away from the left edge of the Ruffled Card.
        • Sew a 1/4″ seam away from the right edge of the Ruffled Card.
        Voila!

        One Ruffled Note Card measuring 4 1/4″ X 5 1/2″.

        Your finished Ruffled Note Card will look like this:
        Simply slide your card into the 4 1/2″ X 5 3/4″ envelope. It is now ready to give to someone special!

        Here are a few more Ruffled Note Card options:

        Stefanie Roman

        Please check out my blog for more inspiring projects.
        I will have more Ruffled Note Card photos posted on my blog.
        Thank you for baking with me!