
![]()
Hello fellow bakers 🙂 I’m Melissa Corry from Happy Quilting and I am super excited to share a new quilt with you today. Twists and Turns is a super easy quilt that is made from one block but has endless layout possibilities. So whether you are into a modern square, an improv maze, or a traditional braid, you are sure to find the quilt design that fits you 😉 So, let’s get right to it 🙂

To make a Twists and Turns 84″x 84″ picnic size quilt you will need:
2 Bluebird Park Jelly Rolls by Kate and Birdie
2 1/6 Yards of the Grey Flower print (13106 18)
1 1/6 Yards of the Yellow print (13108 19)
5 Yards of any print for Backing


STEP 1 – CUTTING
We will start with the Yardage. From the Grey print yardage, cut (30) 2 1/2″ x WOF strips. From those strips sub-cut (36) 2 1/2″ x 2 1/2″ squares, (36) 2 1/2″ x 12 1/2″ strips, and (36) 2 1/2″ x 14 1/2″ strips. Set aside. From the Yellow print yardage, cut (15) 2 1/2″ x WOF strips. From those strips sub-cut *36) 2 1/2″ x 6 1/2″ strips and (36) 2 1/2″ x 8 1/2″ strips. Set Aside.

Now it’s time to move onto the jelly rolls. From the 2 Jelly Rolls select 54 strips. I used the light grey, green, blue, and coral strips setting aside the yellow and dark grey strips for binding.

Divide the 54 strips into 2 piles, one pile of 18 strips and one pile of 36 strips. Evenly distribute the colors in each pile.

From the pile of 18 strips, cut each strip while folded into a 10 1/2″ and (2) 4 1/2″ increments. This will create (4) 2 1/2″ x 4 1/2″ rectangles and (2) 2 1/2″ x 10 1/2″ strips from each strip. Cut all 18 strips this way and group the pieces into piles of similar size.

From the pile of 36 strips, open the strip and cut one of each of the following pieces from the strip. A 2 1/2″ x 12 1/2″ piece, a 2 1/2″ x 10 1/2″ piece, a 2 1/2″ x 8 1/2″ piece, a 2 1/2″ x 6 1/2″ piece, and a 2 1/2″ x 2 1/2″ square. Cut each of these pieces from all 36 strips. Group these with the other prints into piles of similar size.

From your Jelly Rolls you should now have the following pieces

STEP 2 – BUILDING BLOCK
To start the block, gather a grey yardage 2 1/2″ square and a colored print 2 1/2″ square. Place with right sides together and stitch a 1/4″ seam along the edge, aligning as you sew.
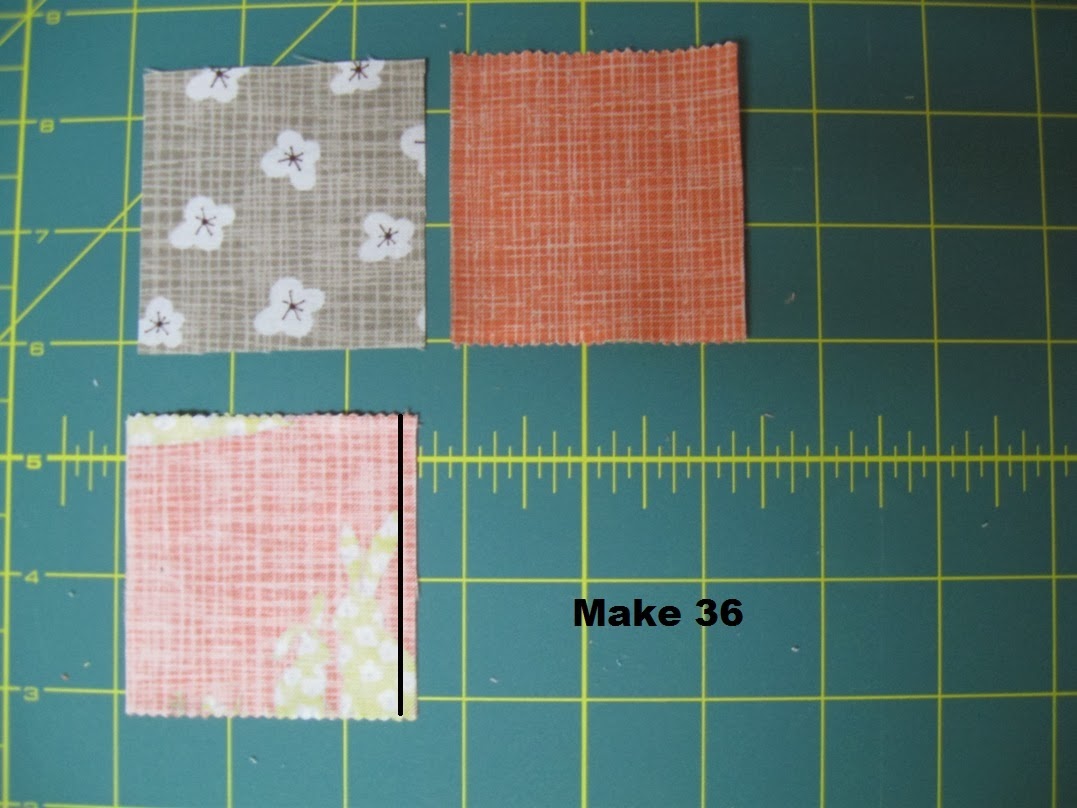
Chain stitch 36 similar sets. Chain stitching is just sewing one set after another without clipping threads in between. Once you are through sewing all 36 sets, clip the threads and press toward the colored print.

Now, layout your pieced set and a colored print 2 1/2″ x 4 1/2″ rectangle as shown. Place the rectangle onto the pieced set with right sides together and aligning the raw edge. Stitch a 1/4″ seam along the edge.

Repeat for all 36 pieced sets chain stitching as you go. Once you have chain stitched all 36 sets, clip the threads and press towards the 4 1/2″ print piece.

And now the process will repeat again and again 🙂
Grab a colored print 2 1/2″ x 4 1/2″ rectangle and place it onto the side of the pieced unit with right sides together and aligning raw edges as shown. Stitch a 1/4″ seam along the edge. Repeat for all 36 sets chain stitching as you go. Clip the threads and press towards the newly added piece.
Now, grab a colored print 2 1/2″ x 6 1/2″ rectangle and place it onto the top of the pieced unit with right sides together and aligning raw edges as shown. Stitch a 1/4″ seam along the edge. Repeat for all 36 sets chain stitching as you go. Clip the threads and press towards the newly added piece.

Grab a yellow yardage 2 1/2″ x 6 1/2″ rectangle and place it onto the side of the pieced unit with right sides together and aligning raw edges as shown. Stitch a 1/4″ seam along the edge. Repeat for all 36 sets chain stitching as you go. Clip the threads and press towards the newly added piece.
Now, grab a yellow yardage 2 1/2″ x 8 1/2″ rectangle and place it onto the top of the pieced unit with right sides together and aligning raw edges as shown. Stitch a 1/4″ seam along the edge. Repeat for all 36 sets chain stitching as you go. Clip the threads and press towards the newly added piece.

Grab a colored print 2 1/2″ x 8 1/2″ strip and place it onto the side of the pieced unit with right sides together and aligning raw edges as shown. Stitch a 1/4″ seam along the edge. Repeat for all 36 sets chain stitching as you go. Clip the threads and press towards the newly added piece.
Now, grab a colored print 2 1/2″ x 10 1/2″ strip and place it onto the top of the pieced unit with right sides together and aligning raw edges as shown. Stitch a 1/4″ seam along the edge. Repeat for all 36 sets chain stitching as you go. Clip the threads and press towards the newly added piece.

Grab a colored print 2 1/2″ x 10 1/2″ strip and place it onto the side of the pieced unit with right sides together and aligning raw edges as shown. Stitch a 1/4″ seam along the edge. Repeat for all 36 sets chain stitching as you go. Clip the threads and press towards the newly added piece.
Now, grab a colored print 2 1/2″ x 12 1/2″ strip and place it onto the top of the pieced unit with right sides together and aligning raw edges as shown. Stitch a 1/4″ seam along the edge. Repeat for all 36 sets chain stitching as you go. Clip the threads and press towards the newly added piece.

Almost done!!!
Grab a grey yardage 2 1/2″ x 12 1/2″ strip and place it onto the side of the pieced unit with right sides together and aligning raw edges as shown. Stitch a 1/4″ seam along the edge. Repeat for all 36 sets chain stitching as you go. Clip the threads and press towards the newly added piece.
Now, grab a grey yardage 2 1/2″ x 14 1/2″ strip and place it onto the top of the pieced unit with right sides together and aligning raw edges as shown. Stitch a 1/4″ seam along the edge. Repeat for all 36 sets chain stitching as you go. Clip the threads and press towards the newly added piece.
You should now have (36) 14 1/2″ x 14 1/2″ blocks that look something like this 🙂

STEP 3 – ASSEMBLING QUILT TOP
And now is the really fun part. This is where you get to decide what kind of a quilt layout you want. There are so many possibilities. These are a few of my favorite 🙂 Play with the blocks until you have the layout you love, and there are lots more options than shown 😉 Once you have a layout you like, sew the blocks into rows and the rows into the quilt top 🙂


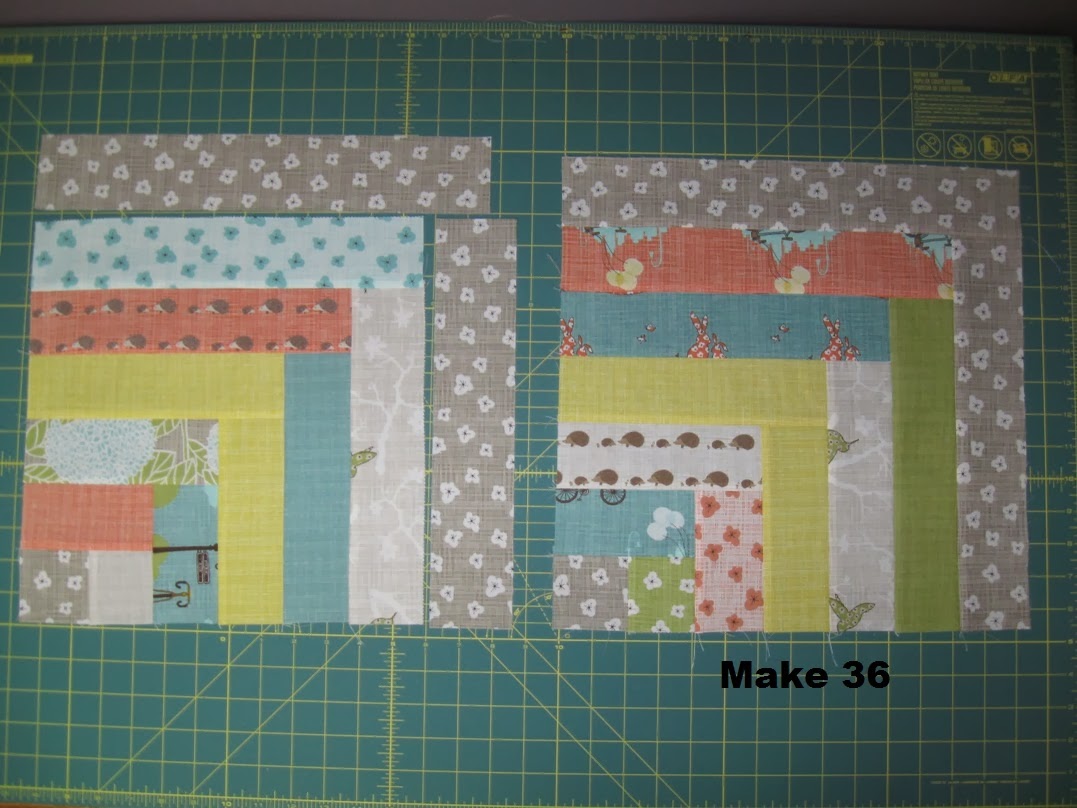
If you decide to do the staircase layout, the same as I did, it is easiest to first sew the blocks into the two sets of two shown below, making 9 of each set.

And then sew the sets into two sets of row, making 3 of each row as shown.

And lastly, sewing the rows into the quilt top.

STEP 4 – FINISHING
Now just Baste it, Quilt it, and Bind It. I know, I make it sound so easy. If you are new to finishing your quilt, I have created a video tutorial series that goes over the basics of each of these three steps. You can find it at my blog 🙂 You will use 8 strips you set aside at the beginning to do the binding.


One adorable 84″ x 84″ Twists and Turns Quilt that is just the design for you 🙂 Thank you so much for joining me and I hope you enjoyed the tutorial. If you make your own Twists and Turns Quilt I would love to see it. You can add it to my Inspired by Happy Quilting Flickr group here 🙂

Have a Happy Quilting Day!!!
Melissa Corry
{www.happyquiltingmelissa.blogspot.com}
![]()
