
![]()
Emily here today from Em’s Scrapbag for a perfect staycation project!

4 fat quarters (I used Simply Style by V and Co.)
4 grommets
Grommet tool


From on fat quarter cut a 15 1/2″ x 20″ rectangle for cover
From another fat quarter cut a 15 1/2″ x 20″ rectangle for lining
From third fat quarter cut 2- 12 1/2″ x 9″ for pockets
From fourth fat quarter cut 2- 3 1/2″ x 12″ rectangles for crayon holders and 2- 3″ x 15″ strips for handles

On each of the pockets fold the top edge down 1/4″ twice press and stitch in place.

On each of the crayon holders fold the short ends in 1/4″ and press.

Fold down the top edge of each of your crayon holders down twice making sure that the ends stay pressed in.

Run a gathering stitch along the top and bottom of your crayon holders.
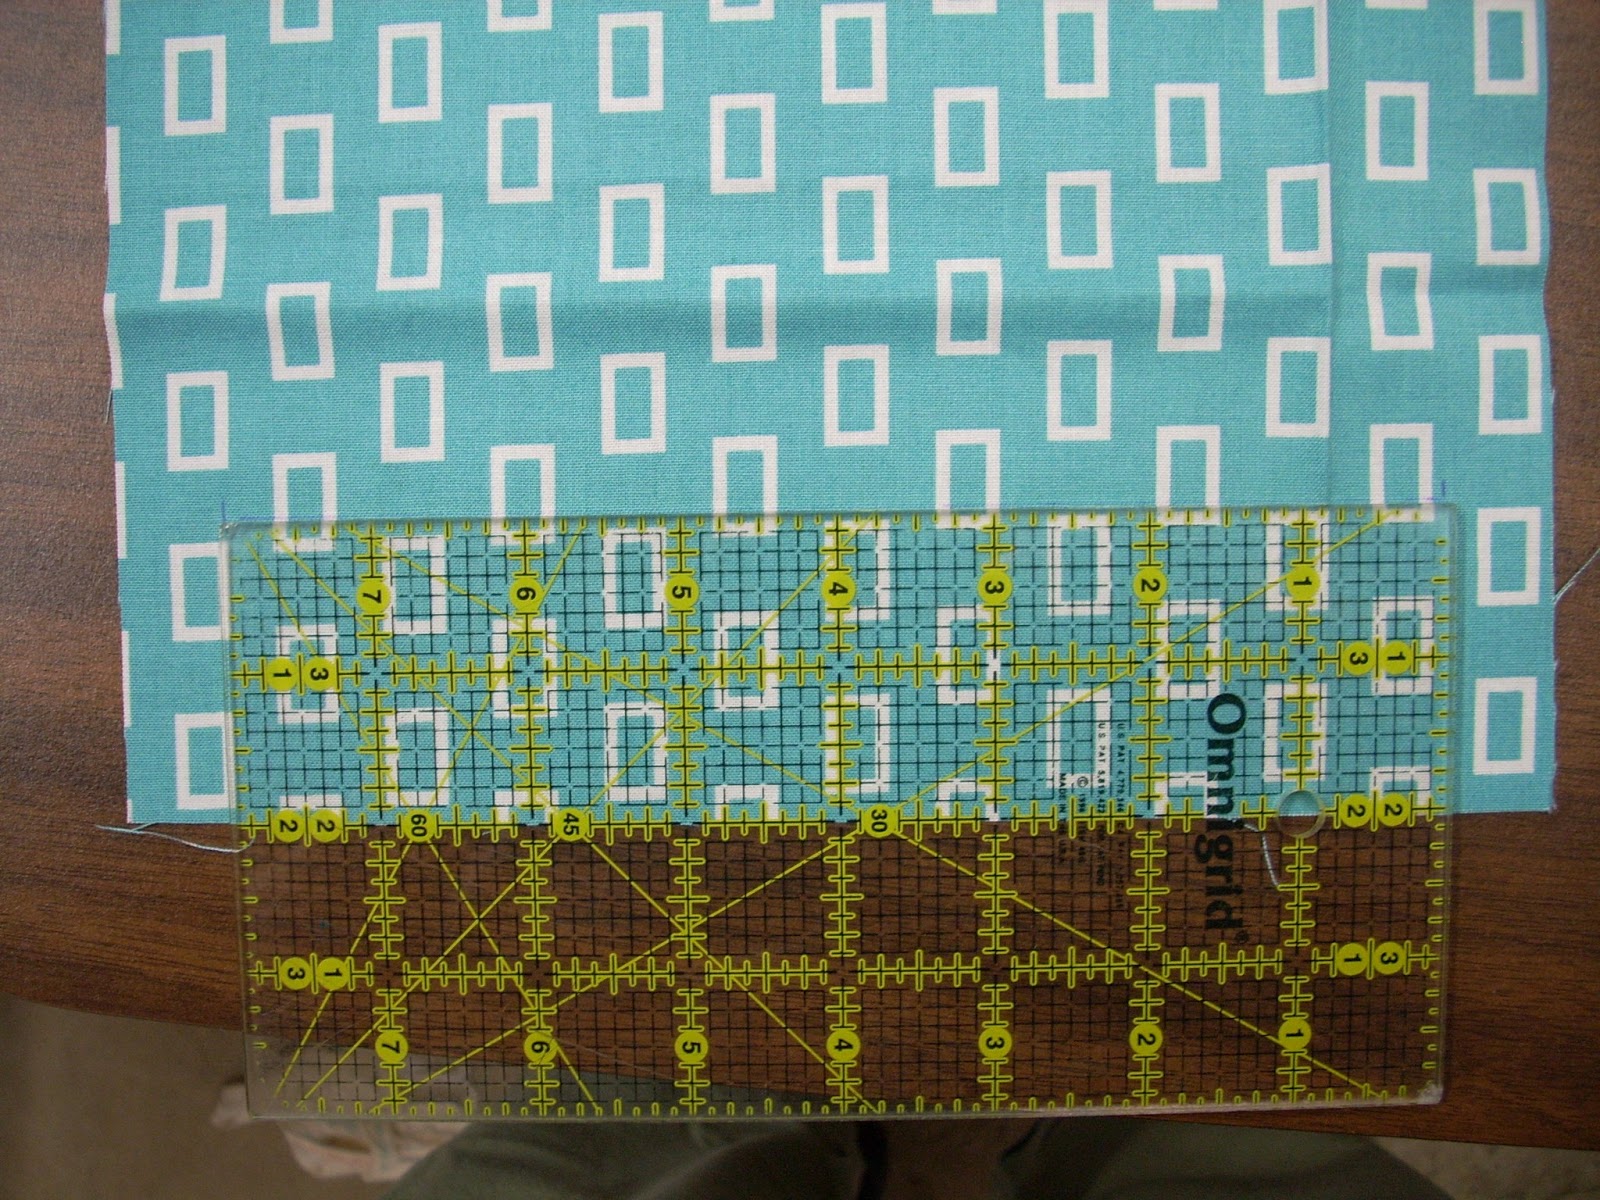
Center an 8″ ruler 2″ from the bottom of one of your pockets. Draw an 8″ line along the top of your ruler.

Gather the unfinished edge of your crayon holder so that it fits in the 8″ marked space. Placing right sides together pin along the line you drew and stitch in place.

Use your 8″ ruler to make marks about 2 1/4″ up from where you sewed the crayon holder on. Bring up the crayon holder up. Gather the finished side so it fits between the marks you made and stitch the sides in place.

Divide your crayon holder into 12 equal spaces. Just over 5/8″ and mark.

Sew on each of these marks through the crayon holder. Back stitching to reinforce.

Measure 2″ from the top of your first crayon holder. Mark your 8″ line and repeat process with second crayon holder.

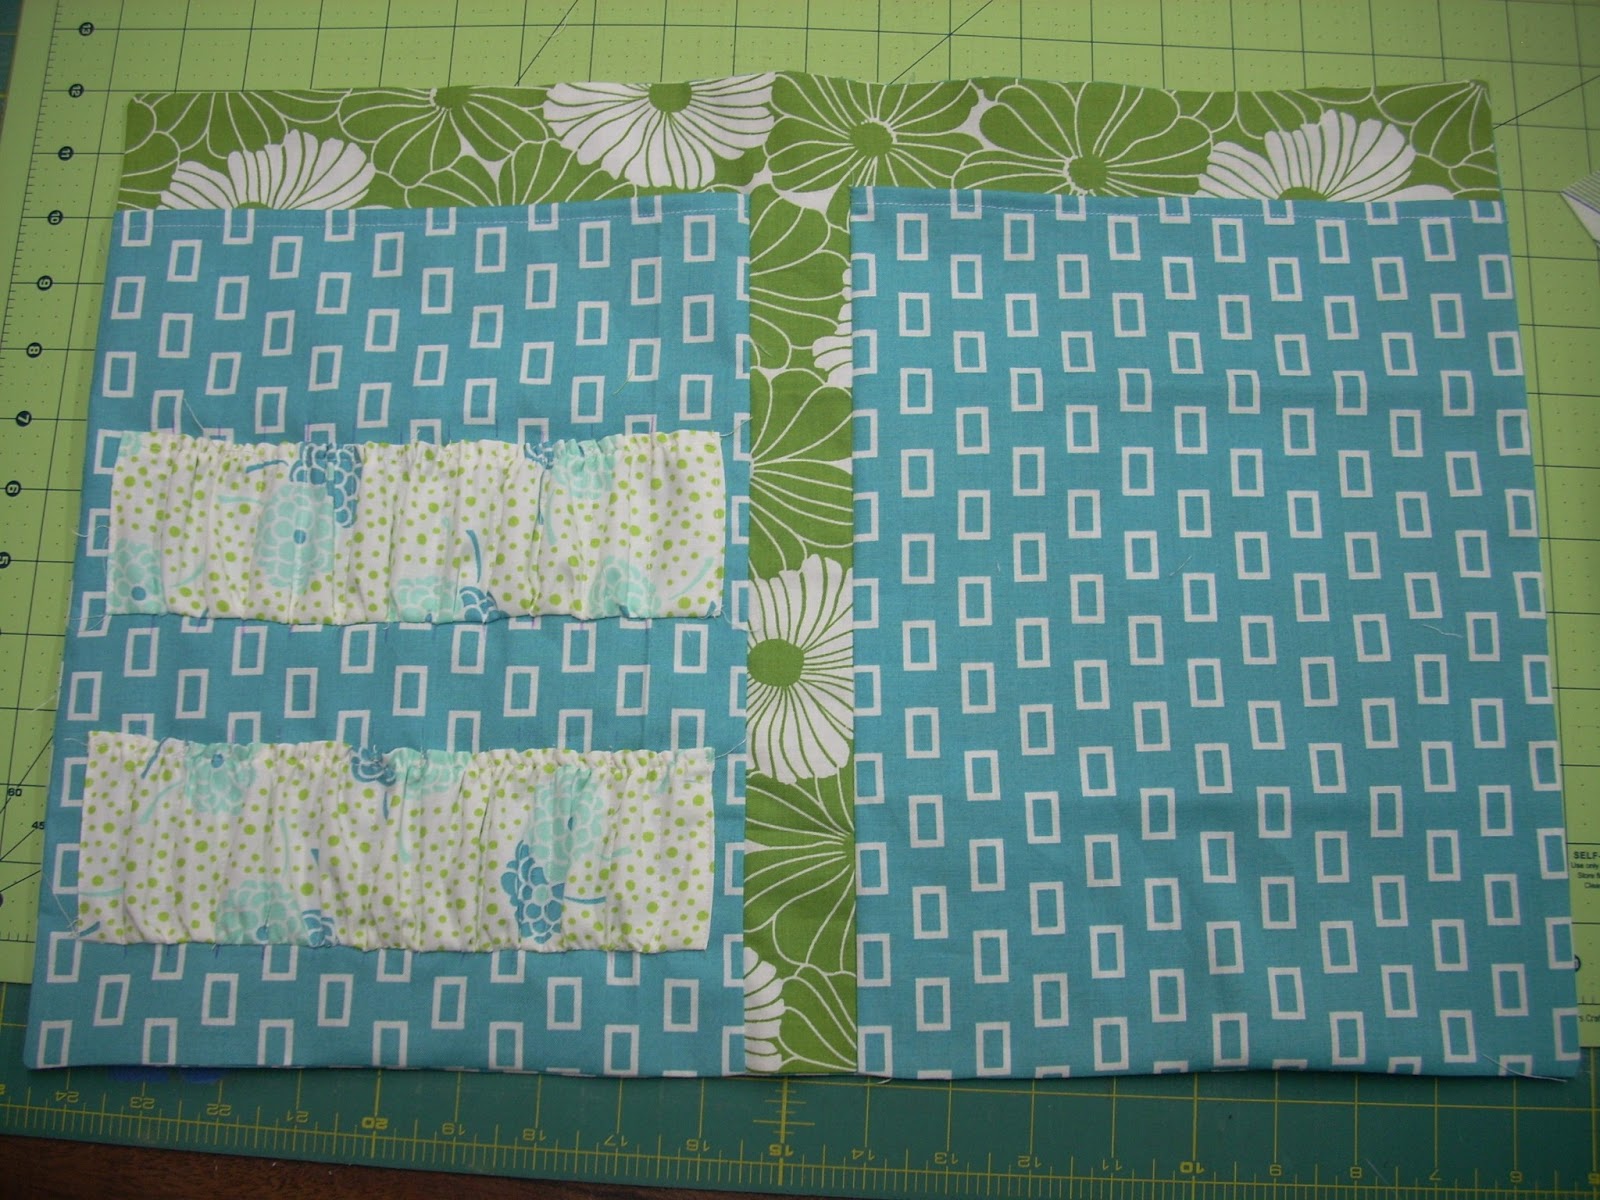
On your 15 1/2″ x 20″ lining make a 12 1/2″” long line 9″ from the left side. Place the pocket with the crayon holders right side together along the line you drew so that the 9″ is not covered by the pocket and sew 1/4″ seam. Flip and press so that the edges of your pocket line up with the edge of your lining.

Measure 9″ from the right side and repeat process with the remaining pocket.
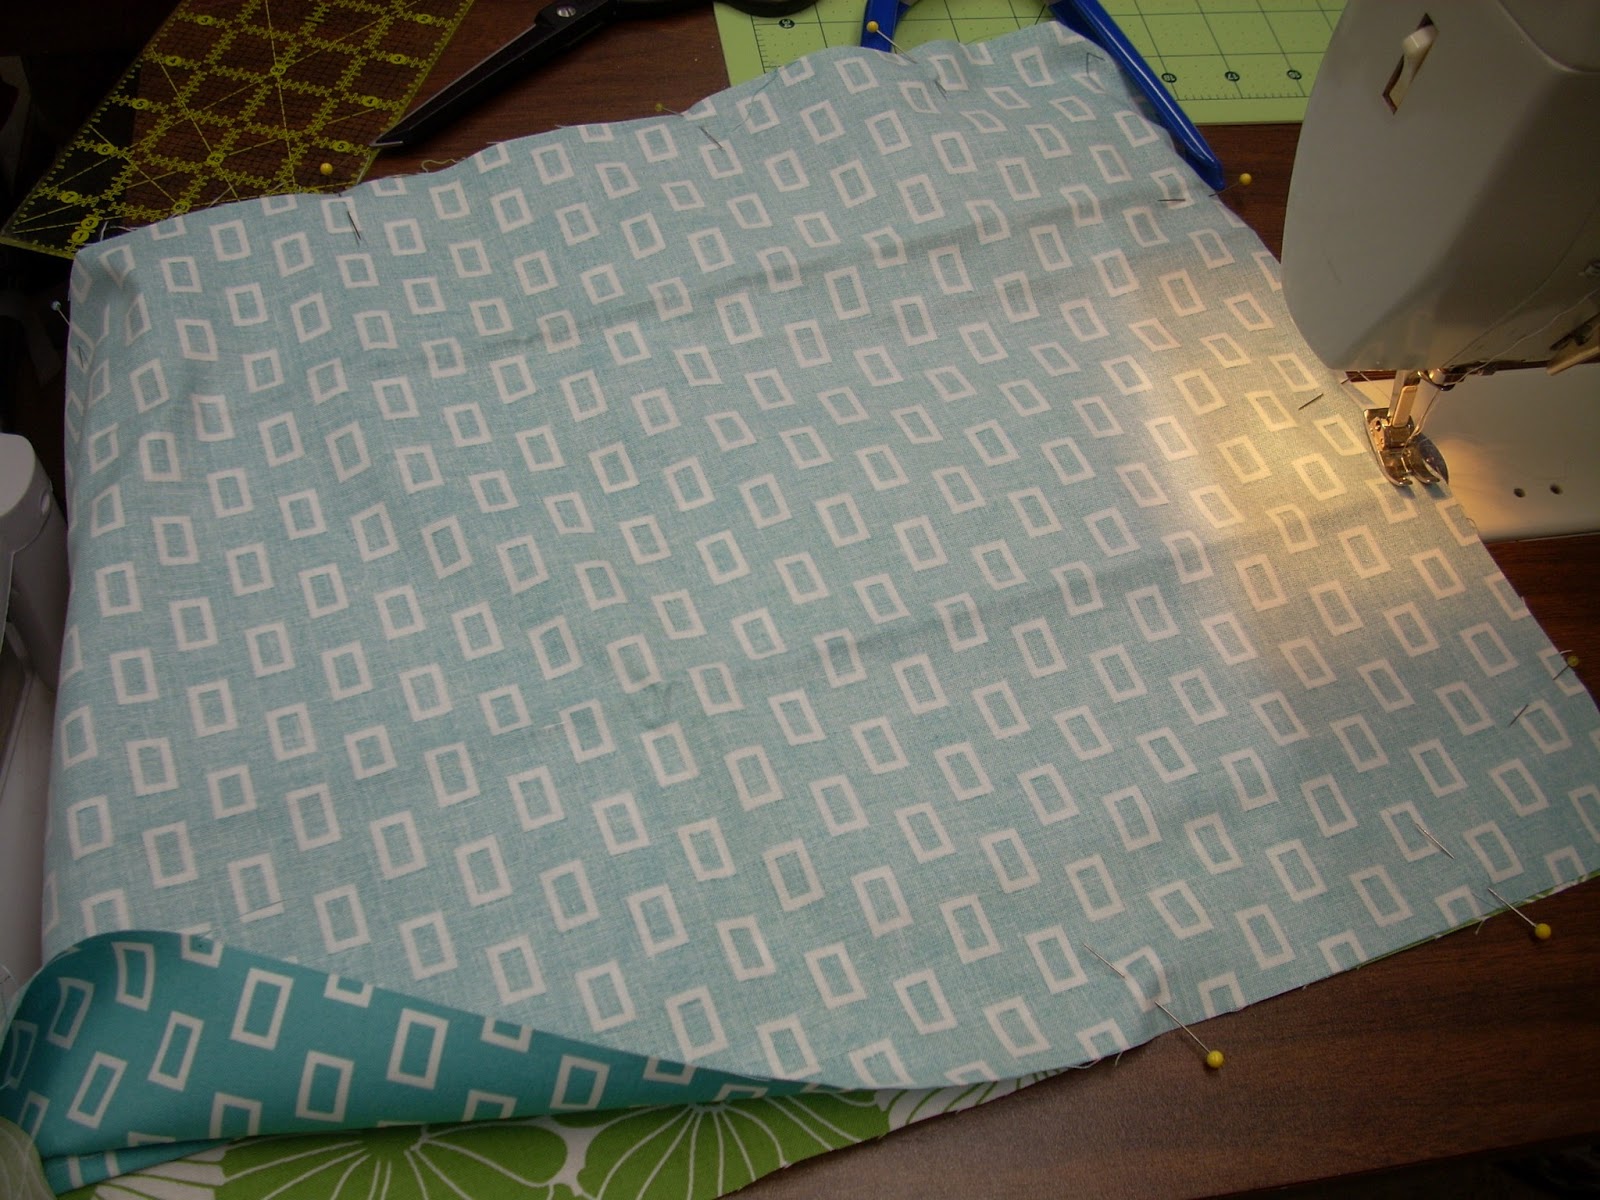
Place the cover over your lining piece right sides together, pin. Starting at the bottom sew around the edge leaving an opening to turn right side out.

Press to make crisp edge around where you have sewn and to finish edge on opening.
Top stitch in place.

Place a ruler 1/2″ down from top edge. Measure 3 1/4″ and 6 1/4″ from side edge place grommets here. Following the directions with your grommet tool apply grommets. Repeat on other side.

Fold the short ends of each handle in 1/4″.

Fold in half along the long side.

Open up and fold bottom edge into the center fold. Press

Fold the top edge into the center fold. Press.
insert photo

Fold in half and top stitch in place.

Place handles through grommets so ends show on cover.
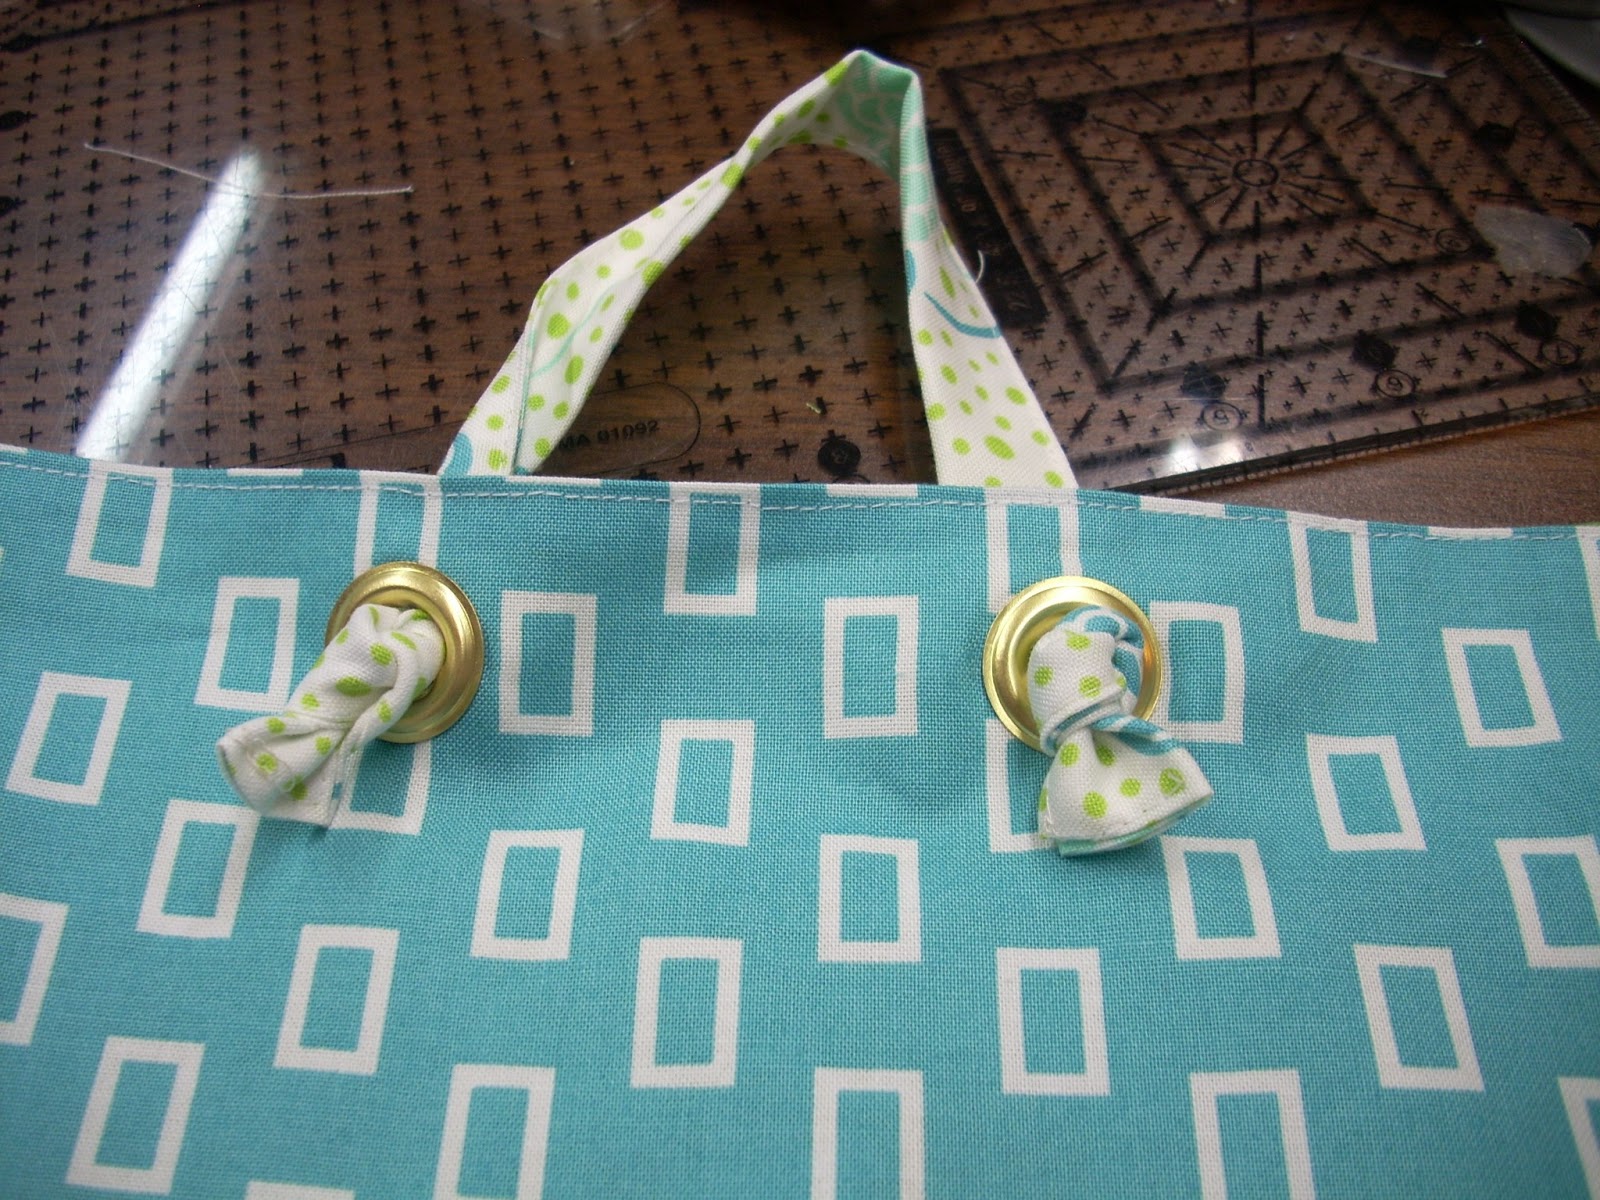
Tie a knot in each end.

Place a 24 pack of crayons in the crayon holders and a sketch pad in the other pocket. Place the cardboard from a old sketch pad in the pocket behind the crayons to give it stability.

One artist on-the-go tote


Emily Bailey
![]()


 first you’ll want to separate your colors. you’ll want 8 strips for each block (i used 2 colors of each color for each block)
 once you have your 8 strips you are going to sew your strips together 2 at a time
 press the seams.
  once you have two of them together sew 4 together and so forth.
 you will end up with all 8 strips sewn together.
 cut off the excess so you have a nice clean line
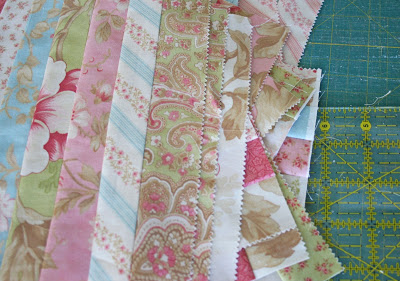 next you are going to cut your strips to 8 1/2 inches in length (
 once you have all your blocks cut out, you want to place your stripped blocks horizontal and perpendicular

 i wanted a square quilt so i laid out 5 squares by 5 squares.
 sew them to left and right side of your blocks.
 then you will sew the last three 5 1/2 inch strips together (end to end)to make one long strip. (these will make your top and bottom borders.)
 cut your back fabric to fit the finished front.
  once all that is done you are ready to bind your quilt.
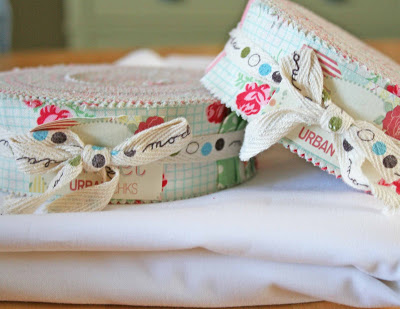
 1 honey bun of your choice (featured is “Swanky” but another cute softer option would be
 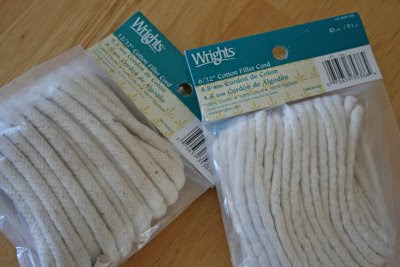 *1 package of piping (6yards) I used Wrights 12/32″ cotton filler cord
 start by sewing together 4 strips alternating colors randomly (I cut mine in half ,at the fold, because I wanted a more scrappy look but you can keep your strips full length).
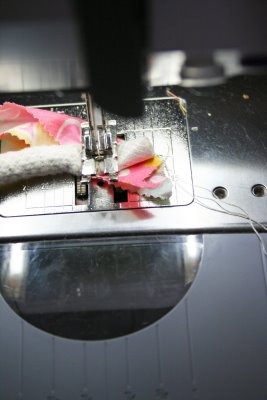 once you have 4 strips together fold in half and sew onto your thick piping.
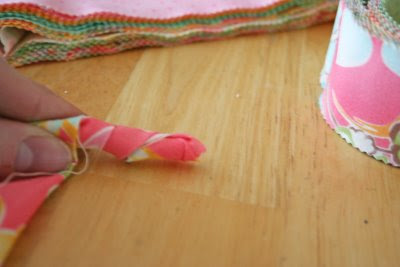 i then started to ravel around my piping with the fabric.
  once I got close to the end of my strips, I sewed 4 more strips onto the
  keep going through the full 6 yards of piping that comes in the package.
 when you get to your end of the piping, sew just like you did when you started through the piping and the fabric. this will not let the fabric unravel.
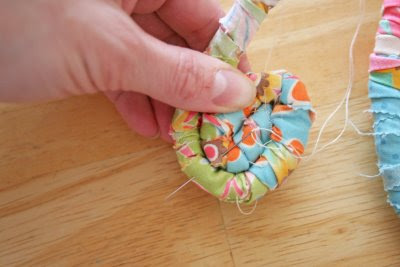 start your coil and hand sew together from the center out by sewing the outer coil to the inner coil
 when you get to the 7
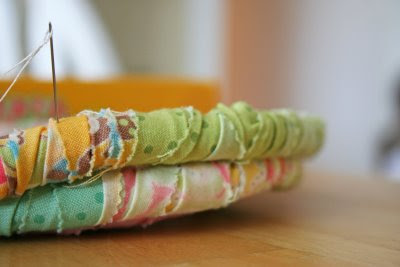 just like when it was laying flat but now you sew it together from the top coil to the “stacked on top of” coil
 here’s the best angle I could get of the stacked coil with the needle going in on the top and out of the “stacked on top of” coil do this for the whole basket till you get close to the end.
  where your “stacking” started (on the bottom),you will want to end your basket top. this way it won’t be lopsided (counting from the bottom up i have 8 rows all around).make sure you sew right before you are going to cut on the piping so the fabric wont unravel. cut off extra (should be a small tail NOT enough to go around one more time). and then tuck in a little so the raw end doesn’t show from the top.
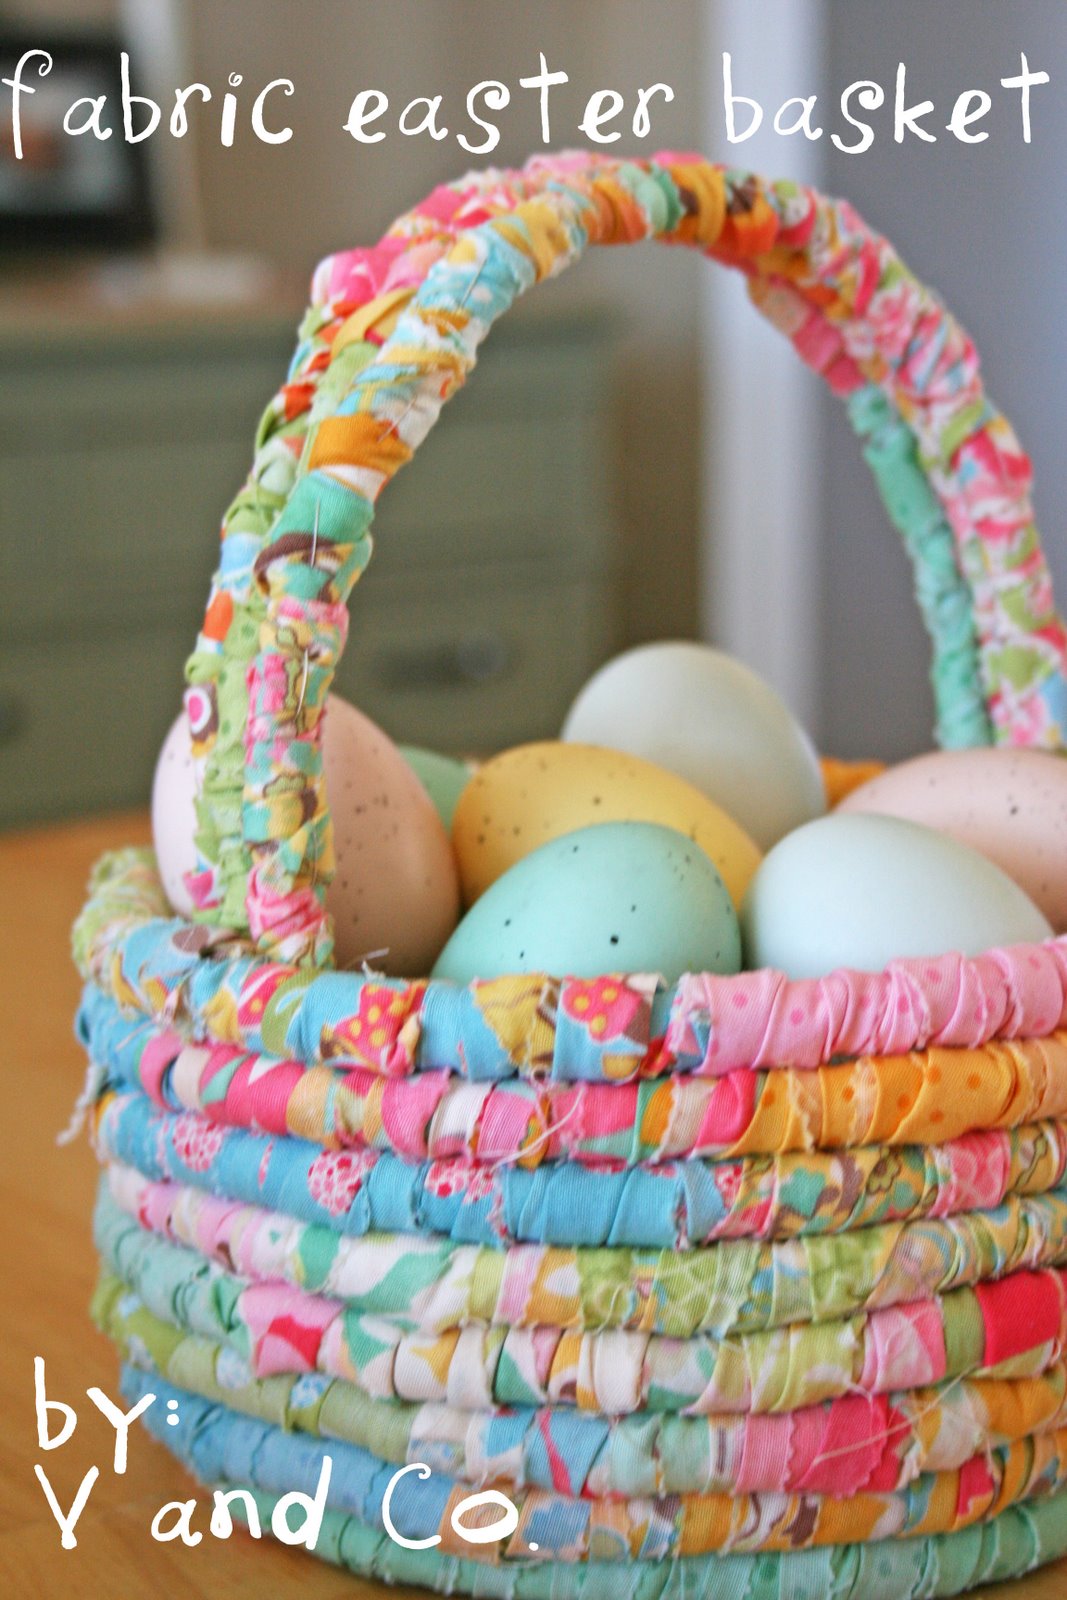
  you now have the base of your basket.
 just how you started your basket you are going to start your handle. I used the smaller piping for this and i cut it to 39 inches. fold fabric in half length wise and sew your fabric onto your piping at the end of the piping.
 when done raveling, sew the end so it doesn’t unravel.
 fold your 39 inches of piping three even ways like so.
 you are going to sew through all three piping and sew the whole thing together
 you will end up with this
  to
to  and back through the outside. do this quite a few times to make the handle super sturdy. do the same to the other side of the handle.
 instructions by Vanessa from
 cut your 4 yards of white fabric to 1 1/2 inch widths (yup ALL of it)

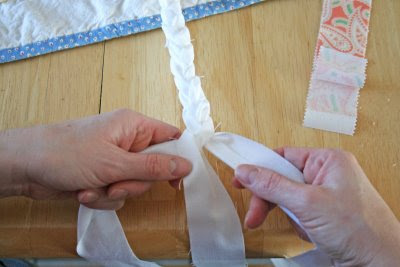 start braiding your white fabric
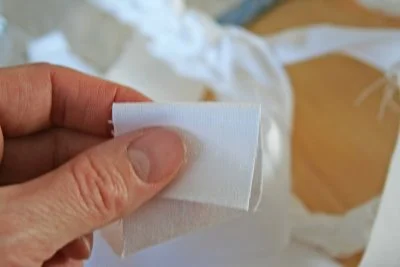 once you get close to the end of your braid you are going to fold over the end of your strip and snip with your
  like so, and then you will do the same to the next strip that will be the following strip to lengthen your braid (do this to each of the three strips)
 you will take the next strip and place it on top of the braided strip
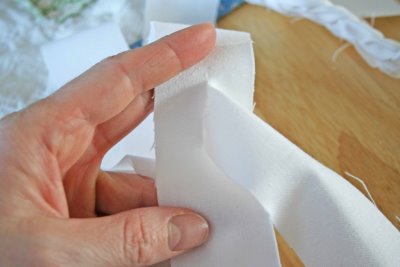
 this will adjoin your strips and you will be able to continue your braid
 this is what it should look like, now keep braiding.
 once you get close to the end of your braid you are going to do the same as you did before and make a slit at the ends of your braided strips and at the beginning of your next strips this time wanted to add color so i took one strip of the honey bun and two of the white strips i cut out.
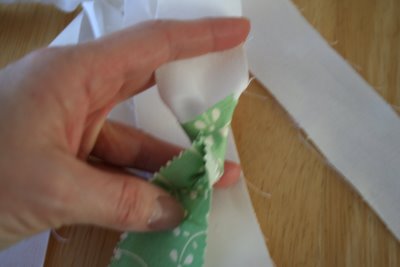
 it should now look like this. this will be what you do through out the whole process of braiding your rug. one color in the middle and two whites on the outside.
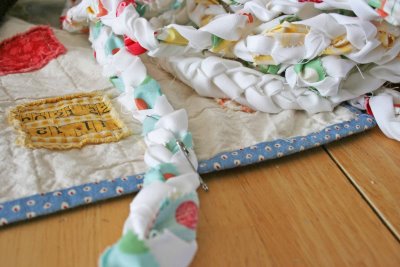 as you continue to braid your braid will get too long so unhook your
 once you have completely braided ALL your strips together. you are going to sew you braid “shut” this tail will be tucked at the very end and you wont see it.
 now that you have a whole mess of a braid going on…we are off to hand sew it together.
 get some
  you are going to continue to hand stitch your braids together, do this for the whole rug. what you are sewing is your back, when you are done, the stitches should be fairly hidden from the top. (the other side)
 when you get to your end, make sure you tuck and stitch the end of your braid so that the tail is on the bottom of your rug and hidden when you turn it over. (snip the extra part of your tail if you like)
 look what you made! isn’t it pretty? and it will look so great ANYWHERE! (make some smaller circles to make bar stool seat covers!)