Oink a Doodle Moo (x) times Two..or Three


Hello from Jo and Kelli at Jo’s Country Junction.  If you’ve read our blog, you know that we are farm gals and our guys are farmers. When we saw Moda’s new line “Oink a Doodle Moo”, we just knew we had to design something using it.  We live, breathe, eat and sleep farming…we might as well sew it too!  We ended up with not one, not two, but THREE baby quilts all from one jelly roll!! Isn’t that neat? After you read the tutorial, you’ll want to come over to our blog and sign up for a chance to win a free jelly roll to help you get started on your own set of quilts.  Read on and we’ll show how to make them.

Oink-A-Doodle-Moo:  #1 Woven Edge
Fabric Requirements:
-24 Jelly Roll Strips (Blocks)
-1/2 yard solid Red (Blocks)
-3/4 yard solid Yellow (Inner Border/Binding)
-1 yard Center Background (Center)
-1//4 yard cow print (Corner Blocks)
-2+ yards backing  We used scraps and added a strip to the back making it wide enough.
Oink-A-Doodle-Moo:  #2 Scrappy Bear Paw Stars
Fabric Requirements:
-1 Panel Set
-5 Red Jelly Roll strips (12.5” total of each print)
-5 Blue Jelly Roll strips (10” total of each print)
-5 Green Jelly Roll strips (20” total of each print)
-20 assorted Jelly Roll strips (3.5” total of each print)
-1 1/4  yard white (blocks and outer border)
-¾ yards red print (panel borders)
-1/2 yard (binding)
-2+ yards Backing We used scraps and added a strip to the back making it wide enough.

Oink-A-Doodle-Moo:  #3 Scrappy with PanelsFabric Requirements:
-Remaining Jelly Roll Strips
-1 Panel + 2 remaining Panels from previous quilt
1/2 yard (binding)-2 yards Backing


Oink-A-Doodle-Moo:  #1 Woven Edge Note: WOF=width of fabric  All seams are 1/4″ unless noted.
Cutting:

1.  From each jelly roll strip, cut 2-6 1/2” rectangles and 1-2 1/2” square.
2.  From the solid red, cut 3-2 1/2” strips
                -Subcut into 48-2 1/2” red squares.
3.  From the solid red, cut 1-4 1/2” strip.
                -Subcut into 4-4 1/2” squares.
4.  From the solid yellow, cut 4-1 1/2” strips.
                -Subcut 2 strips to 34 1/2” long and 2 strips to 36 1/2” long.
5.  From the solid yellow, cut 5-2 1/2” strips to be used for binding.
6.  From printed center fabric, cut a square 34 1/2” square.
7.  From cow print, cut 1-6 1/2” strip.
                -Subcut into 4-6 1/2” squares.
8.  From the remainder of the cow print 6 1/2” strip, cut 4-2 1/2” squares.

Sewing Blocks:
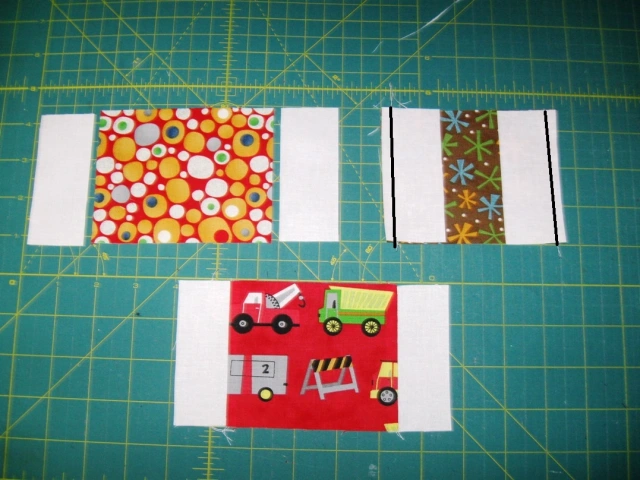
1.  To make 1 woven block, you will need 2 matching 6 1/2” rectangles, the matching 2 1/2” square, and 2 red 2 1/2” squares.

2.  Using the 2 1/2” squares, connect 1 printed square to 1 red square.  Press to the red square.
3.  Connect the second red square to the printed square.  Press to the red square.


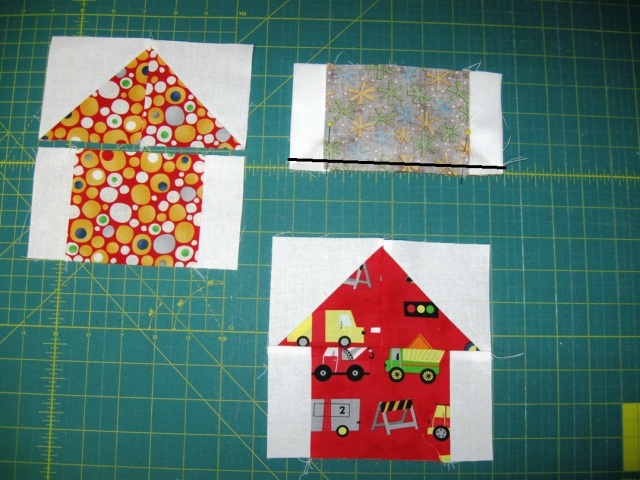
4.  With right sides together, connect 1 pieced rectangle to a printed rectangle on the long side.  Press to the printed rectangle.  Repeat with the second printed rectangle.

5.  Repeat to make a total of 24 blocks.6.  To make the cow print corner blocks, place a red 4 1/2” square in the corner of a 6 1/2” cow print square with right sides together.


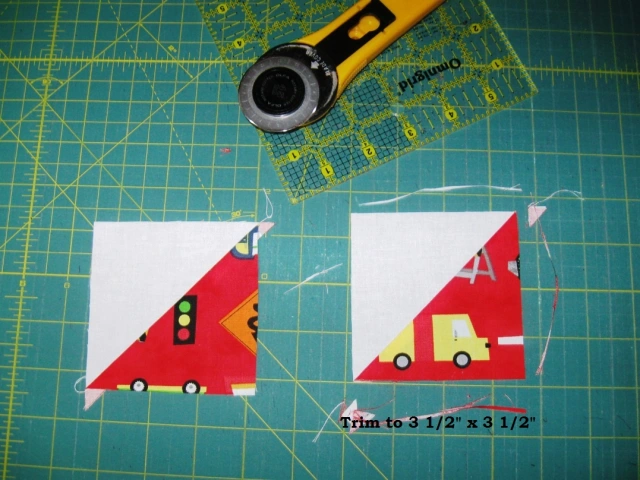
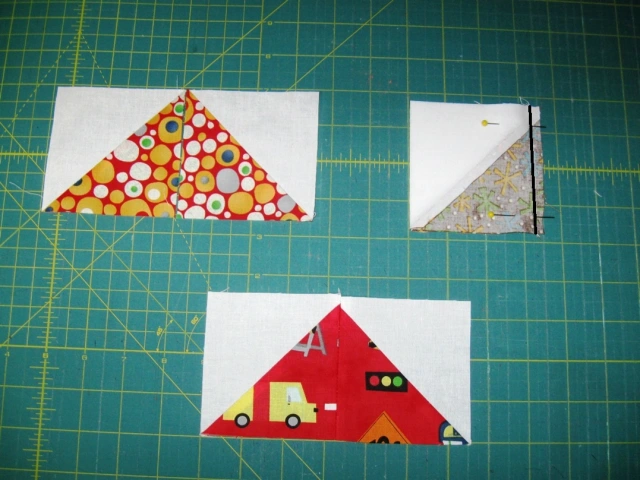
7.  Sew diagonally from corner to corner of the red square.  Trim seam to approximately ¼” on the outside of the block.  Press to the red triangle. To create this.

8.  Place a cow print 2 1/2” square in the same corner with right sides together.
9.  Sew diagonally from corner to corner.  Trim seam to 1/4″ on the outside of the block.  Press to the cow print triangle.  To create this.


10.  With right sides together, sew the 34 1/2” yellow 1 
1/2” strips to opposite sides of the 34 1/2” center square of fabric.  Press to the yellow border.
11.  Add the 36 1/2” yellow strips to the remaining opposite sides of the center fabric.  Press to the yellow fabric.
12.  Join the 24 woven blocks into 4 sets of 6 blocks.

13.  Assemble the quilt as shown.

14.  Quilt and bind using the 5-2 
1/2” solid yellow strips.
  
Oink-A-Doodle-Moo:  #2 Scrappy Stars 
Cutting:
1.  From the panel, trim 4 blocks to 10 1/2” square.
2.  From each of the red jelly roll strips, cut 5-2 1/2” squares.
3.  From each of the blue jelly roll strips, cut 4-2.5” squares.
4.  From each of the green jelly roll strips, cut 8-2 1/2” squares.
5.  From each of the assorted jelly roll strips, cut a 3.5” rectangles from each strip.
6.  From the white fabric, cut 15-2 1/2” strips.
                -Subcut 4 strips to yield a total of 20-6 1/2” x 2 1/2” rectangles.
                -Subcut 2 strips to yield a total of 20-2 1/2” squares.
                -Subcut 2 strips to yield a total of 20-2 1/2” x 3 1/2” rectangles.
                -Save 5 strips for outer border
7.  From the white fabric, cut 5-2” x WOF strips.
8.  From the printed red fabric, cut a total of 7-2 1/2” x WOF strips.  I fussy cut the printed fabric so that it looked like the tractors and other farm vehicles were “driving” around each of the panel blocks.
                -Subcut 3 strips to yield 8-2 1/2” x 10 1/2” strips.
                -Subcut 4 strips to yield 8-2 1/2” x 14 1/2” strips.
9.  From the binding fabric, cut 5-2 1/2” x WOF strips.
Sewing Blocks:
1.  To make the half-square triangles (star points), pair a white 3 1/2” strip with a 3.5” printed strip.  Place pieces right sides together.  Using an easy angle ruler, cut each set to yield 2 half square triangles.  Sew on the diagonal and press to the printed fabric.  If you don’t know how to use an easy angle ruler follow this link for instructions.

2.  Assemble each of the star blocks as shown.  Use the same green, red, and blue squares throughout each of the individual blocks.  Use the half-square triangles randomly through each of the blocks.

3.  With right sides together, stitch the 2 1/2” x 10 1/2” to opposite sides of each of the 4 panel blocks.  Press to the red border.4.  Attach the 2 1/2” x 14 1/2” rectangles to the remaining sides of each of the 4 panel blocks.  Again, press to the red border.

5.  Assemble the quilt as shown below.


6.  Sew the remaining 2 1/2″ white strips together.  Sew to the outside for a border.


7.  Quilt as desired and bind with the 5-2 1/2” x WOF strips.

Oink-A-Doodle-Moo:  #3 Scrappy with PanelsCutting:
1.  Using the remaining Jelly Roll strips, cut a total of 161- 2.5” squares.
2.  Trim each of the panel blocks to 10.5”
3.  Cut 5-2.5” strips from the binding fabric.
Sewing Blocks:
1.  Sew the panels and squares into the following units.

Make four.

Make four.

Make two.

Make one.

2.  Assemble the units as shown.  Make one.

Make one.

Make one.

3.  Sew the newly created units together to form the top.

4.  Quilt and bind as desired.

THREE baby quilts…Yes, three from one jelly roll.

Quilt #1 with the woven blocks measures 48 1/2″ x 48 1/2″

Quilt #2 with the scrappy stars measures 44 1/2″ x 44 1/2″

Quilt #3 with the panel pieces measures  42″ x 42″

Don’t forget to come up to Jo’s Country Junction to sign up to win your own jelly roll.

Jo and Kelli Kramer
{www.joscountryjunction.com}

Chenille Baby Blanket

I am so happy and excited to be back at the Moda Bake Shop to show you this wonderful Chenille Blanket.  My name is Pamela Lincoln and I blog over at Mama Spark’s World.  I am always on the look out for a great baby shower or new born gift and this is perfect!  With a few simple ingredients and a few hours you will have a fantastic gift.  I have some other examples over on my blog too if you want to see more.  Are you ready to get started?

2 Charm Packs of Oink-A-Doodle-Moo 30520LC  (I love this fabric line!!)
1 yard windsor blue marble flannel F9880-14
1 yard orange marble flannel F6727
2 one yard cuts of hot red marble flannel F9881-36
1/2 yard denim blue horseshoe fabric (for binding) 30526-17

Basting needle and thread
Masking Tape
Chenille scissors are really helpful too

The very first thing you need to know is do NOT pre-wash your fabrics. This is pretty important as in the end you want the flannel to fuzz up. So no washing!

You will be making the back of your blanket first.  You will use most of your 2 charm packs for this.  Lay out your squares so you are happy with the design you are using.  (Yes I used my Peacock for my design wall). Your lay out will be 10 squares across by 8 squares down.

Once you are happy with your layout,  sew the squares together to from a row.  You will have 8 rows of 10 squares.  I like to chain piece these.

Then you will sew your rows together to form the back.  If you press each set of seams from the even rows in one direction and the odd rows in the other direction your seams should nest and your intersections will match up nicely as you do this.  I like to pin my intersections.

 Don’t sew over your pins though as you don’t want to hurt yourself or your machine. Sew just up to the pin and remove it.

 Your back will look something like this when you are all finished sewing your rows together.

Next you need to make sure all four pieces of flannel are pressed.  It will help you make a smooth top.

Lay your back on a large table right side down. 

 At this point you need to think about the order you put your flannel down.  The layer closest to the back will not get cut and will not add to the chenille portion of your blanket.  The top three layers make the actual chenille.  I like to use a contrasting back fabric.  (This makes things easier when it is time to do the cutting.)   Lay the flannel down on top of the wrong side of the back (wrong sides together) and smooth into place to cover the back entirely.  Continue adding the other 3 flannels in the same manner.

 My favorite way to make the chenille is to make a color sandwich.  I like to make the top and the third layer the same color with a different color in the middle.  Experiment with colors and you will figure out what you like best too.  I have done all 4 different and all the same but in the end I like this method best.  You need to lay down each layer of flannel and smooth it over the previous layer until you have all 5 pieces of fabric layered together. 

Take a roll of masking tape and with the help of a friend lay the tape diagonally across the fabrics, being careful to make sure you are going corner to corner.  Press tape in place.

You are now ready to baste your layers together.  I like to use a large basting needle to do this.  Put a LOT of thread on your needle and starting close to the tape take some largish stitches along the length of the tape.  Make a few stitches at the end and go back the other direction until the whole half of the blanket is basted.  Then repeat on the other side.  This will hold everything together when you are ready to take it to the sewing machine.

You are now ready to take your sandwich to the sewing machine and begin sewing your lines.  At this point you should put your walking foot with guide on your machine.

You will want to sew along the tape line as close as you can on one side without sewing through the tape.

 Once you have sewn your first line, corner to corner down one side of the tape you may remove the tape.

 I set my guide at 5/8″ from my needle.  This will be your guide for sewing your lines.  line the guide up on your first sewn line, keep it there and sew another line.  When you get to then end of the top, break your thread and start back at the top, always guiding off the previous line.  Alternately, you could mark each line but if you have a guide this is so much quicker! 

It will look something like this as you go along.  I like to remove my basting threads as I stitch along and try not to stitch over them.

Now comes some fun!  You will be using your chenille scissors or cutter to cut through the top 3 layers of flannel.  Be very careful not to cut through the layer closest to the back (in my case it is the blue layer, another good reason for a contrasting back color is that it makes it easier to know which layers to cut!)

You can see that I have cut 3 of the 4 flannel layers right here.  I find that for me, the scissors don’t distort the the flannel as much as the cutters but both will work.

Continue to cut through all the channels you have sewn until the entire top looks like this.

Whew!  I don’t know about you but my hands are tired!!  We are almost finished.  It’s time to square up the top.  Using charm squares for the back makes this a little easier since you can line things up.  First fold your blanket in half one way, with the charm squares on the outside.  It doesn’t matter which way as you will do it both ways eventually.  I used a few pins to make sure things were lined up.  I checked the top edge and pinned.

I also checked the first intersection at the top and put a pin.  You can see the raw edge we will be trimming.

I lined up my ruler using the fold as the straight line and trimmed off the raw edge.  This is easier using a 60mm cutter as there are a LOT of layers.  When you finish with one side, turn the quilt and do the other edge the same.  After you have trimmed both edges one way refold the blanket, match in the same way and trim off the raw edges.

For me the second fold edge I was trimming contained the selvedge edges.  I  had to trim slightly more here to get rid of the selvedge edge.  I lined up the sewn line with the 4″ on my ruler and made my trim that way.  I did the same thing on the other side.  You could do all 4 sides the same or just the 2 like I did.  How much you want to trim is up to you.

Here is my blanket all trimmed and square and ready for applying the binding.  

I cut 5 binding strips at 2 1/2″ and sewed them into one continuous length.  I pressed the strips in half and cut off the ends.  On the flannel side, match raw edges of the binding with the raw edge of the blanket. 

 Sew binding on using your walking foot.

 It should look something like this when you are finished.

Once you have applied all your binding you are ready to turn it and stitch it down on the back.  A good tip is to press the binding from the flannel side in the direction of the back.  This will make it easier to stitch hand stitch the binding down.  I usually hand stitch my binding in place but machine stitching in place works too.

 Once your binding is secured put your blanket into the washer with soap and softner if you wish.  Wash on a normal cycle.  Mine went into the washer looking like this.

When it is finished washing pop it into the dryer and dry on high.  Be sure to check your lint trap frequently, every 15 minutes or so, as you will generate a LOT of lint!

Now for the MAGICAL part!  Are you ready??  This is my favorite part.  It comes out looking like this!

When it is done drying, remove blanket from the dryer and admire your beautiful, fluffy creation!!!

Here is a close up of the chenille part. 

I loved using the Moda flannel it was so soft and luxurious! Can you see the bits of white in the chenille?  That’s because the color in this flannel did not permeate all the way to the back, ie the back looked “white”.  If you use a flannel where the color goes all the way through, your chenille will be a little more uniform/saturated in color.  I really liked the effect the white gave to the chenille in this one.

You just know a baby is going to love the tactile nature of this blanket!  Beware though, once you begin making these everyone is going to want one.

One Chenille Baby Blanket that measures approximately 36″x 45″

I hope you have enjoyed making this fabulous blanket along with me and will stop by my blog and say hello!  If you do make one I would love to see it.  Please add it to my Flickr group.  I have one just for Chenille blankets.  Happy stitching!!

 ~XOP~ 

Pamela Lincoln
{www.mamaspark.blogspot.com}

Quilted Toy Leash


Hi! My name is Lisa Calle, and I blog at Vintage Modern Quilts. This is my first tutorial for the Moda Bake Shop, though I have been a Moda and Bake Shop devotee since I first learned to quilt.

I had my first baby, a boy named Benjamin, in November 2011, and I’ve been obsessed with baby sewing projects ever since. Today I have a project for all you mamas that have picked dropped toys up off the floor a few times too many. This toy leash also makes a great gift and sews up quickly.


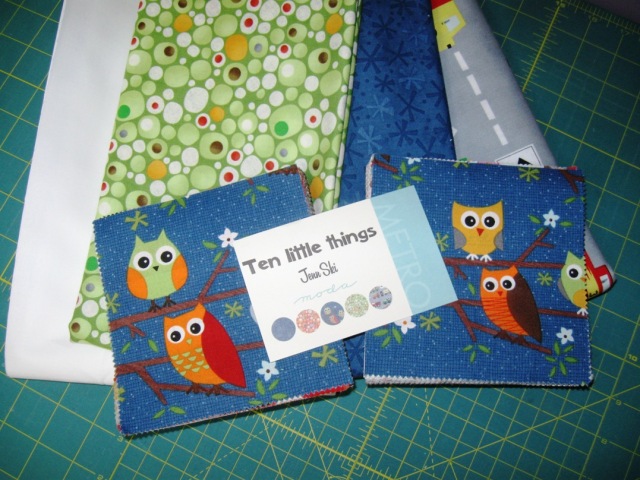
4 charm squares (I’ve used Ten Little Things by Jenn Ski)
1 piece of batting (measuring 2″ x 21″)
1 plastic toy link (available in baby stores and most grocery stores and pharmacies)
2-inch strip of Velcro

Lay out your charm  squares in a pleasing pattern and then join together, using a 1/4″ seam. Press seams to one side.

Place your batting strip in the center of your pieced charms. Fold the left edge in 2 inches over the batting. Pin in place.

Line your foot up with the raw edge of the fabric and sew the length of the strip.

Fold the right edge in so it butts up against the batting strip.


Fold again and pin in place. Sew a 1/4″ seam along the length of the strip at this new fold.(Your seam should match up with the first one, but if it doesn’t, you can camouflage with your quilting.)

Quilt your strap as desired. The more quilting, the sturdier it will feel. Top stitch the long edges of the strap for a finished look. (The right side in the image below has been top-stitched; the left side has not.)

Trim any excess batting at both ends of the strap. Fold the top edge of the strap towards the inside 1/4 inch (the inside has the visible fold).

Sew 1/8″ from the raw edge, and back stitch at each end. Trim any excess batting and threads. Repeat on the bottom edge of the strap.

Now it’s time to add your final touches. Slip the strap through the plastic toy link and fold over so it covers the link and leaves room to stitch (about half an inch is enough).

 
Use a zipper foot to sew close to the link.

To add the Velcro, separate your hook and loop pieces (the hook is the pokey part and the loop is the soft part). Place the hook piece of Velcro so the top is aligned with the edge of the strap and it is centered across the width. Pin in place. Top stitch around the Velcro.

Measure just a hair under 6 inches from the bottom of the hook part of the Velcro to find the spot where you will attach the loop part. Pin your loop piece of Velcro in place as shown.

Top stitch around the Velcro.


One super cute and very helpful toy leash!

Lisa Calle
{www.vintagemodernquilts.com}

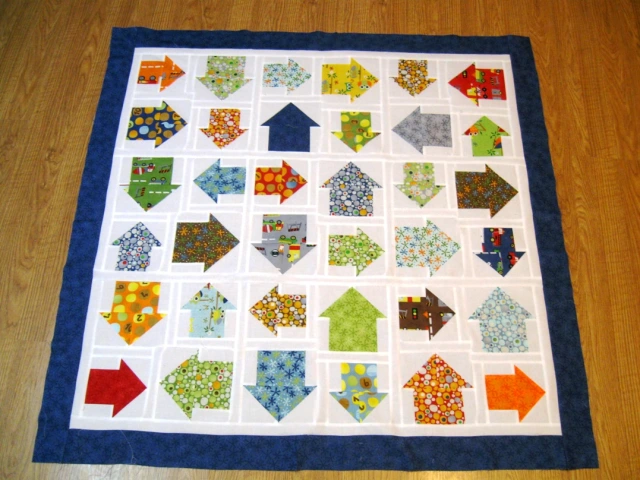
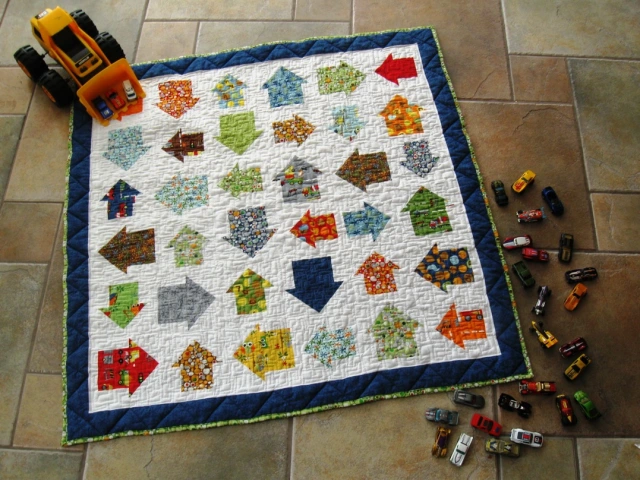
On The Go Baby Boy Quilt


Hello fellow quilting enthusiasts.  It’s me, Melissa from Happy Quilting!!  I am so excited to share another fun filled tutorial with you today.  When I saw Jenn Ski’s Ten Little Things line I knew I had to make something with it, I mean it isn’t every day a fabulous line comes along shouting All Boy!!!  So I designed a pattern to go right along with that All Boy, perfect for a special little guy 🙂  This particular one is for my little nephew slated to arrive any day now 🙂

And if you have a special little guy to make an On The Go quilt for then pop on over to Burgundy Buttons where Leah has made up a fabulous On The Go Quilt Kit just for you 🙂  And of course, it is at great Burgundy Buttons prices 🙂

And as always, should you have any questions at all, please do not hesitate to write me at happyquiltingmelissa (at) gmail (dot) com.  I would love to help out in any way I can.  And, when you are finished your own version of On The Go please add a picture of it to my Happy Quilting Flickr group.  I absolutely love seeing your work!!!

All Right . . . Let’s get going 🙂   To make your own On The Go baby boy quilt you will need 🙂

2 Ten Little Things Charm Packs
1 1/4 Yards of Bella Solid White for Quilt Top Background
1/2 Yard for Applique and Binding (I used 30505 40 – Navy Stars)
1/2 Yard for Borders and Pieced Back (I used  30504 17 – Lime Dots)
1 1/2 yard for backing (I used 30501 19 – Grey Trucks)

STEP 1 : CUTTING


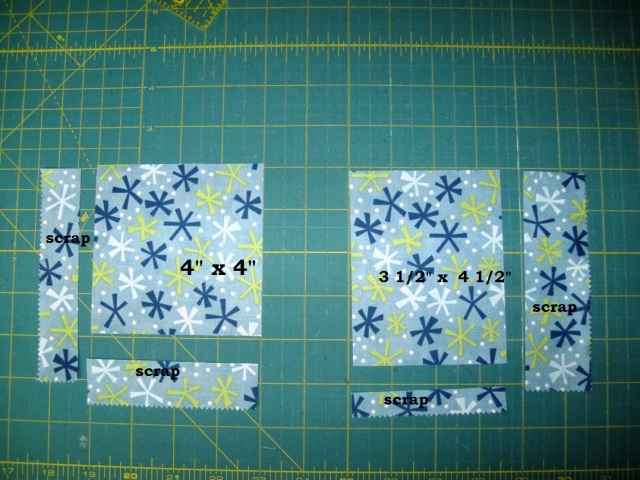
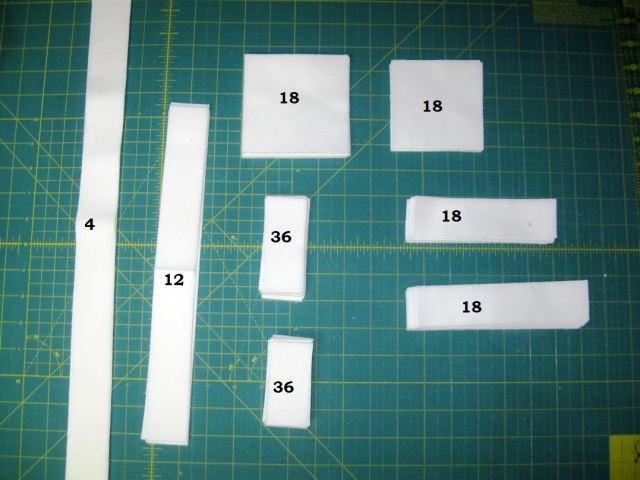
For pieces for the small arrow select 18 prints from your first charm pack and then gather the same 18 prints from your second charm pack.    From the first set of prints cut a 3 1/2″ x 3 1/2″ square out of each charm.  From the second set of prints cut a 3 1/2″ x 3″ piece out of each charm.  Set squares aside.
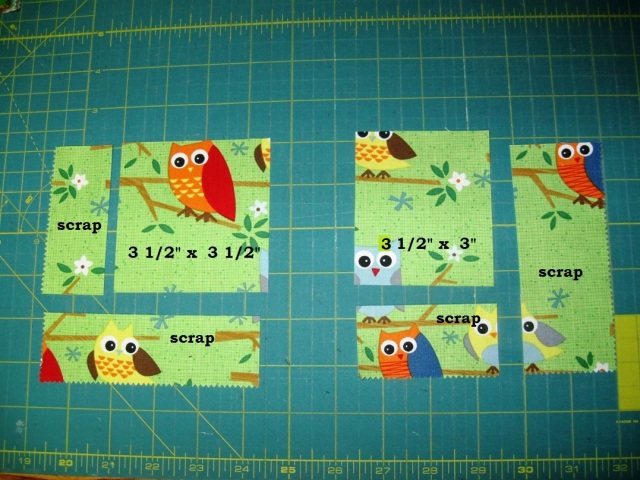
For pieces for the large arrow select another18 prints from your first charm pack and then gather the same 18 prints from your second charm pack.  From the first set of prints cut a 4″ x 4″ square out of each charm.  From the second set of prints cut a 3 1/2″ x 4 1/2″ piece out of each charm.

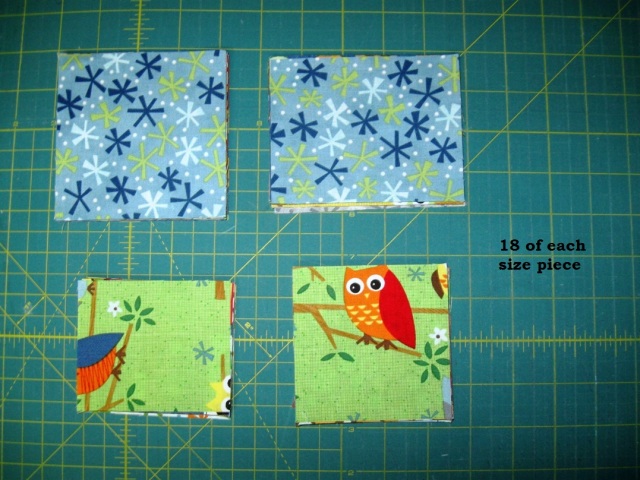
You should now have 18 squares of each of the 4 designated sizes. (2 piles for the small arrow, and 2 piles for the large arrow)  Great 🙂  Let’s keep cutting!

From your white yardage you will need to cut the following:

   For the Small Arrows                                                     For the Large Arrows  
     (36) 1 1/2″ x 3″ rectangles                                             (36) 1 1/2″ x 3 1/2″ rectangles
     (18) 3 1/2″ x 3 1/2″ squares                                           (18) 4″ x 4″ squares

   For the Small Arrow Sashing                                         For the Quilt Top Sashing               
     (18) 1 1/2″ x 5 1/2″ rectangles                                       (12) 1 1/2″ x 12 1/2″ rectangles
     (18) 1 1/2″ x 6 1/2″ rectangles                                       (4) 1 1/2″ x Width of Fabric strips
 

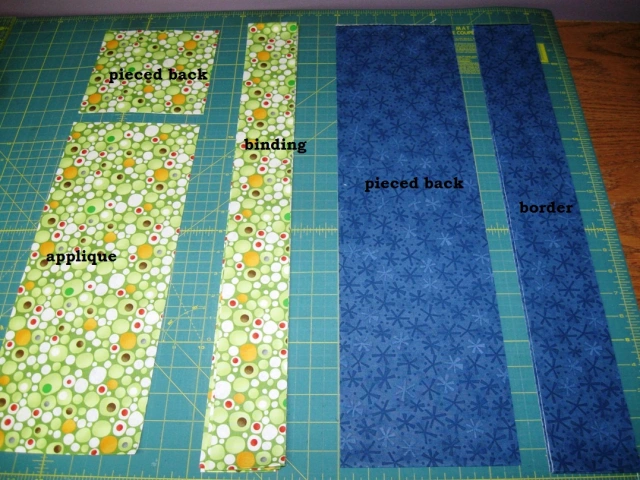
From your remaining yardage you will need to cut the following:

From your Pieced Back and Border Yardage cut
        (4) 3″ x Width of Fabric strips
        (1) 6″ x Width of Fabric strip
From your Applique and Binding Yardage cut
        (5) 2 1/2″ x Width of Fabric strips
        (1) 6″ x 5 1/2″ rectangle  (if they cut a little crooked you can just do 6 x 6 🙂
         Set the rest aside for your applique

STEP 2 : MAKING THE ARROWS

***  Note… Sew all of step 2 assembly line fashion.  For each part of the direction repeat the process 18 times and when stitching make sure to chain stitch, this will save a lot of time 🙂

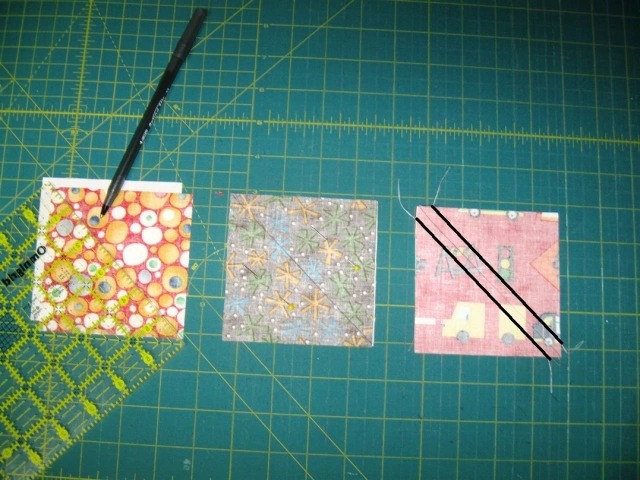
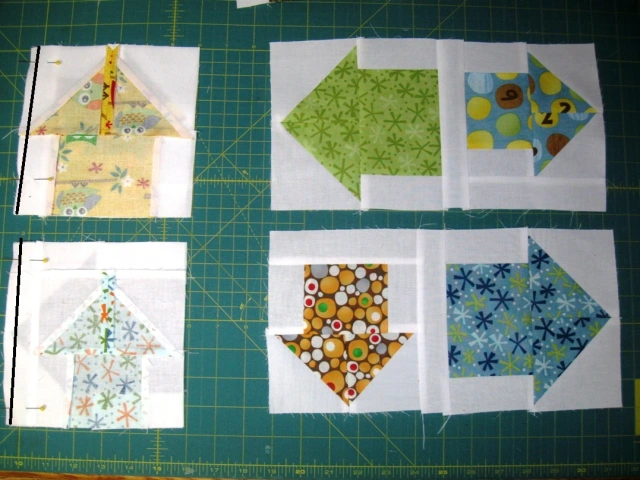
 We will start with the Large arrows.  So grab your pile of 4″ x 4″ cut charms and your 4″ x 4″ white squares.   Draw a diagonal line from corner to corner on the back of the charm.  Place the charm with right sides together on a white square.  Pin along either side of the drawn line.  Sew a 1/4″ seam on either side the drawn line by chain stitching all 18 left hand seams, clip your threads, and then go back and chain stitch all 18 right hand seams and clip your threads.

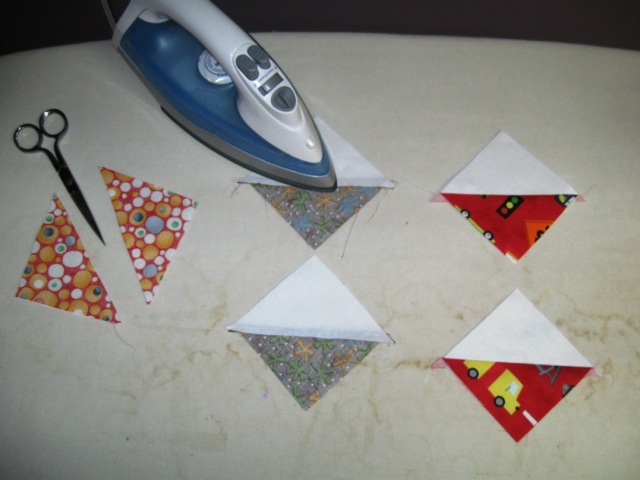
Cut down the drawn line. (you can use your rotary cutter or scissors, whatever is easier for you)  Press your seam towards the charm fabric.

Now you should have 36 HST’s and they are ready to be trimmed up.  Using the diagonal on your ruler trim the HST’s down to 3 1/2″ x 3 1/2″.  If you are unsure how to trim your HST’s please see the tutorial I have here for help 🙂

Now we are ready to make the arrow points.  Take your 2 HST’s of the same print and lay them out as follows.  Place the left HST onto the right HST with right sides together.  Pin if you desire.  Stitch a 1/4″ seam along the pinned edge.  Clip your threads  and press seams open to reduce bulk.

And for the bottom of the arrows, grab your 18 print 3 1/2″ x 4 1/2″ print rectangles and your 36 1 1/2″ x 3 1/2″ white rectangles.  Lay them out as follows.  Lay a white rectangle onto the left hand side of a cut charm with right sides together.  Stitch a 1/4″ seam along the edge.  Repeat the same process on the right hand side. Clip threads and press towards charm print.

And now you can put your arrows together.  Match your arrow point prints to your arrow square prints and layout as follow.  Lay the square print piece onto the point print piece and pin.  Sew a 1/4″ seam along the edge.   Press the seam open to avoid bulk.  You should now have 18 Large Arrows 🙂  Set them aside.

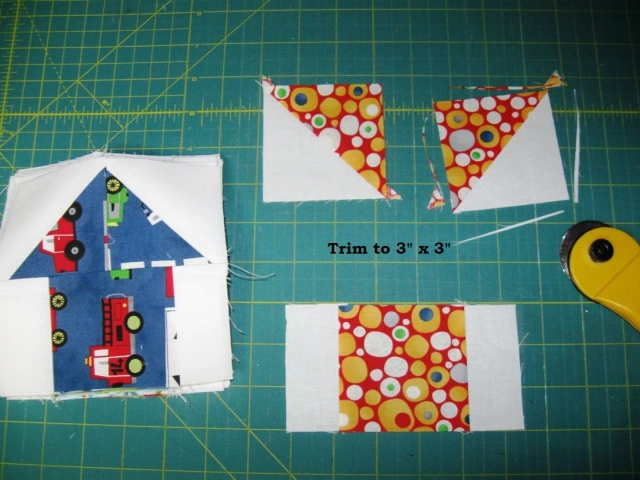
Onto the small arrows,  These are made in the same fashion with just a minor change.  So grab your small arrow pieces ((18) 3 1/2″ x 3 1/2″ cut charms, (18) 3 1/2″ x 3″ charms, and (36) 1 1/2″ x 3″ white rectangles)  and use the same steps you used to create the small arrows.  The only difference being that when you trim your HST’s trim them to 3″ x 3″.  You should now have 18 small arrows.

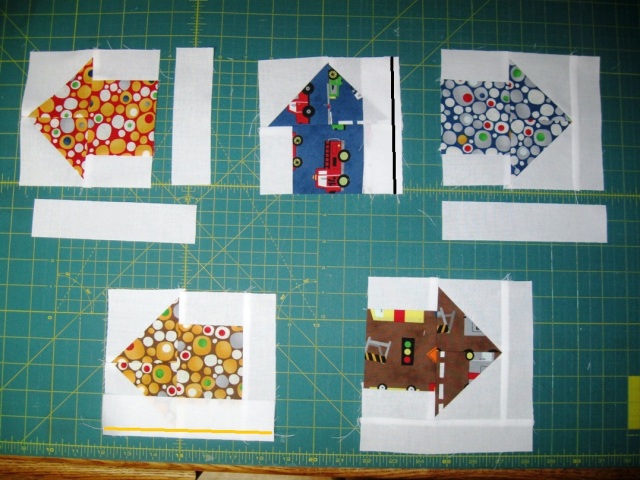
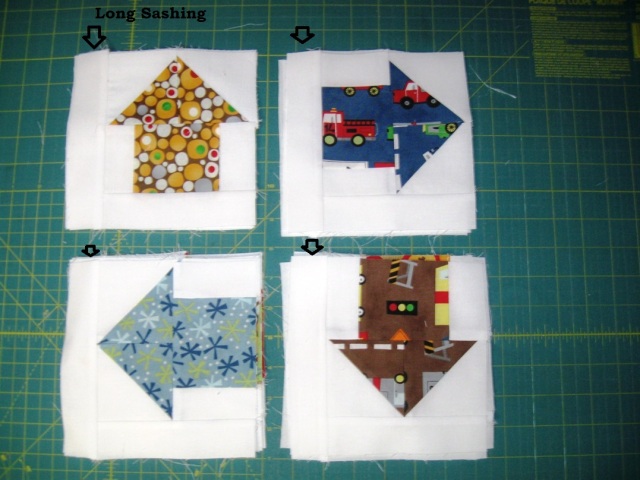
Now you can add the small arrow sashing.  Retrieve your small arrow sashing pieces. ((18) 1 1/2″ x 5 1/2″ rectangles and (18) 1 1/2″ x 6 1/2″ rectangles. )  Choose any side of the block to start on.  Lay a small sashing piece onto the side with right sides together.  Stitch a 1/4″ seam along the edge.  Press the seam towards the white.  Now lay the long sashing piece along the bottom of the block with right sides together.  Stitch a 1/4″ seam along the edge.   Press the seam towards the white.

I tried to make sure that I was creating 4 – 5 blocks pointing each way.  This gives you a lot more flexibility when laying out your quilt to make it look more random 🙂  And now your arrows are done.

STEP 3 : BUILDING THE BLOCKS

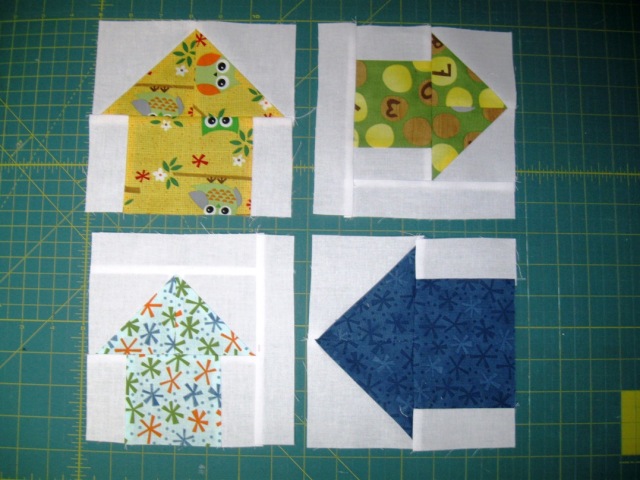
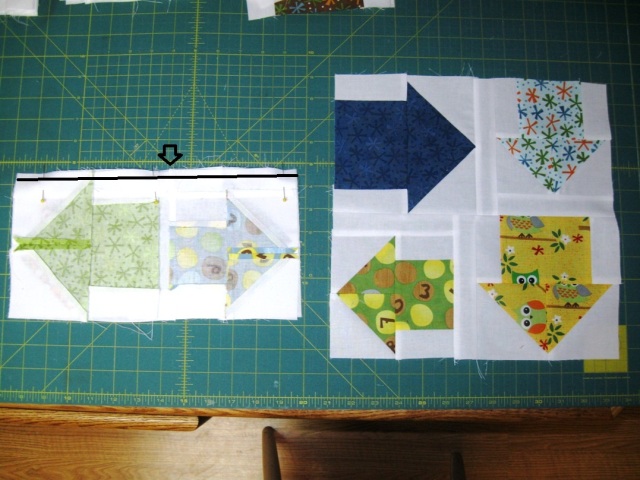
With your arrows, you can low build your blocks.  For each block you will need 2 small sashed arrows, and 2 large arrows.  Lay them out taking care that the sashing pieces of the small arrows are on the inside of the block and opposite corners, as shown.  Point your large arrows any direction you choose.  You will be making 9 blocks this way so you can lay them all out and piece your blocks assembly line or do them individually 🙂

Lay the left hand block onto the right hand block on both the top and bottom rows.  Pin along the edge.  Stitch a 1/4″ seam along the pinned edge.  Clip threads and press towards the small arrow sashing.  (This will allow you to nest your seams in the next step.)

         
Now lay your top row onto your bottom row with right sides together.  Pin taking care to nest your center seam.  Sew a 1/4″ seam along pinned edge.  Press seam open to avoid bulk.  You now should have 9  12 1/2″ unfinished blocks.

STEP 4 : PIECING THE TOP

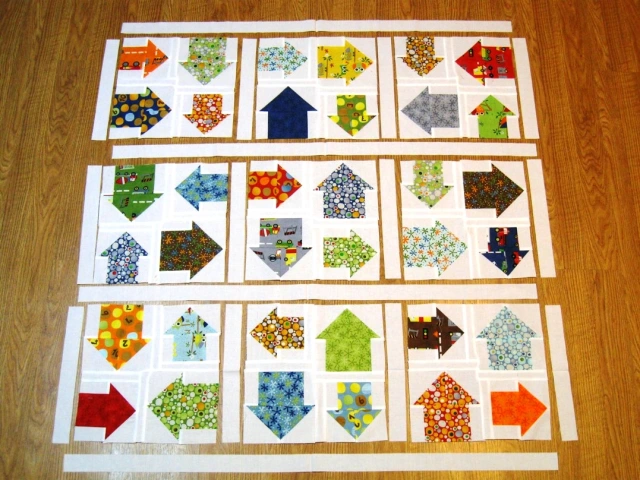
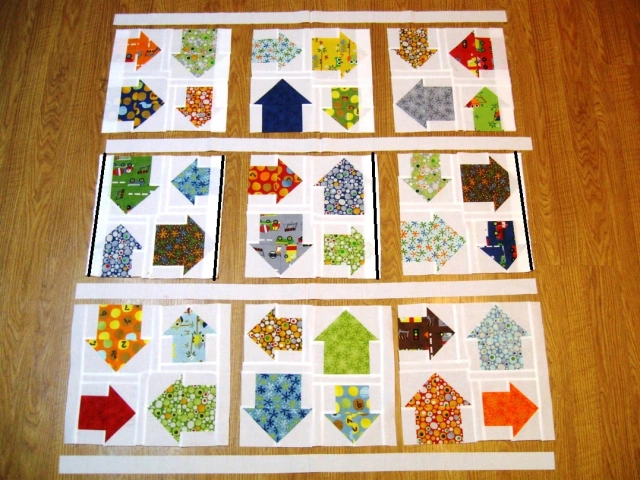
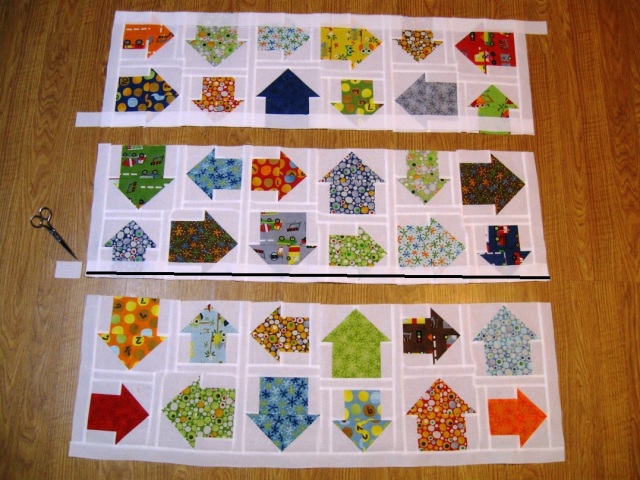
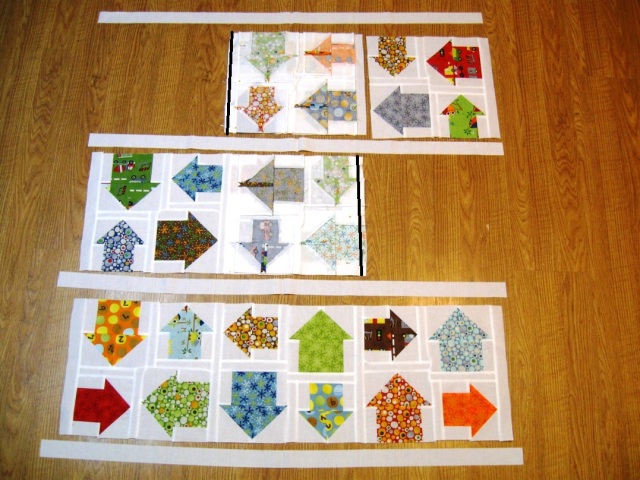
Take your 9 blocks and quilt top sashing pieces (your remaining white cut strips) and lay them out as follows. Play around with the placement of your arrow blocks until you get a look that is pleasing to you.  I find it best to take a picture of my layout that I can refer back to  🙂

For each block, place the small row sashing pieces onto the arrow blocks with right sides together (see row 1).  Pin if you desire.  Stitch a 1/4″ seam along the edges (see row 2).  Press the seams towards the sashing (see row3).

Now to sew the rows together.  For each row,  place block 1 onto block 2 with right sides together.  Pin along edge.  Sew a 1/4″ seam along pinned edge.  (see row 1).  Place block 3 onto your now sewn together block 1 and 2 , pin along the edge, and sew a 1/4″ seam along the pinned edge (see row 2).  Press your seams towards the sashing (see row 3).

And now to add the sashing to the rows.  Same process as before, just on a longer scale.  Place the sashings along the edge of the row with right sides together (see row 1).  Stitch a 1/4″ seam along edge and then trim excess sashing. (see row 2).  Press towards the sashing (see row 3).

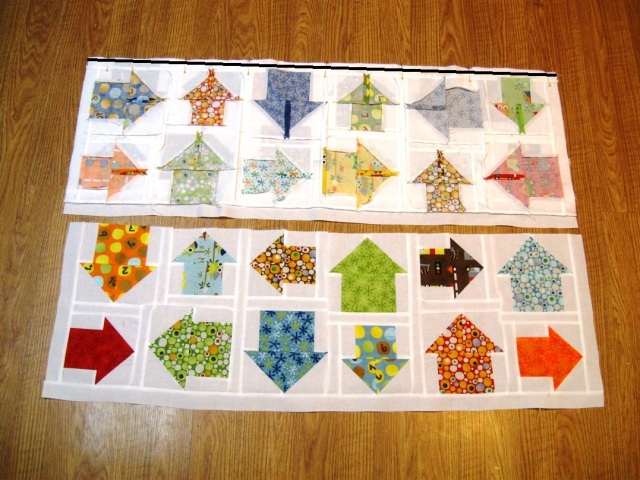
And now finally, just sewing the rows together.  Once again, same as making the rows just on a longer scale.  Place row 1 onto row 2 with right sides together.  Pin along the edge taking care to match up your seams.  Sew a 1/4″ seam along the pinned edge.  Press towards the sashing.  Then repeat the process laying your row 3 onto your now sewn together row 1 and 2, pin, sew, and press.

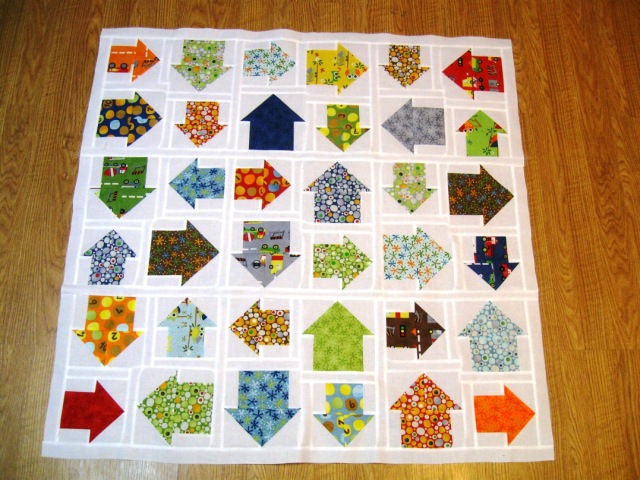
And your top is just about complete.  Doesn’t it just look so fun 🙂  Now you are ready to add the borders so go ahead and grab those 4 3″ border strips you cut.

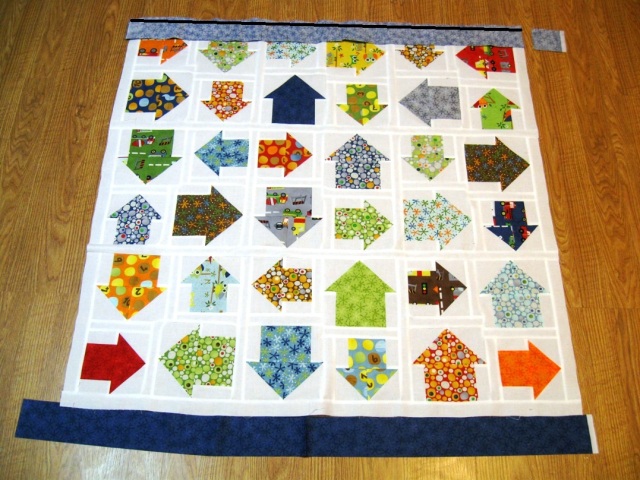
Lay the strips along the top and bottom of the quilt top with right sides together.  Stitch a 1/4″ seam along the edge, (I don’t use pins, I just align as I go) and the trim the excess border fabric.

Repeat the same process for the 2 sides.  And now your quilt top is done 🙂  Yippee Skippee!!!

STEP 5 : MAKING THE PIECED BACKING

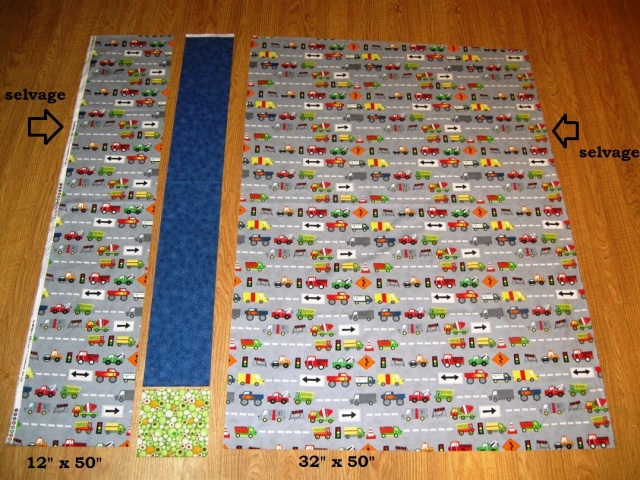
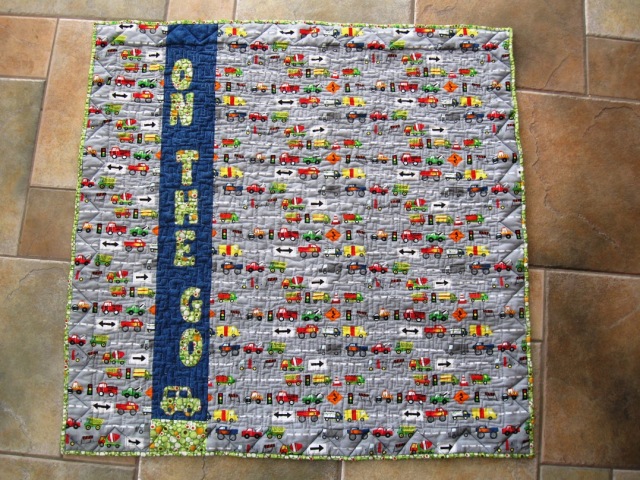
Grab your 1 1/2 yard backing fabric and trim it down to 50″ x Width of fabric.  Then go ahead and subcut it into 2 pieces by cutting off a 12″ strip from the selvage side.  Lay the 2 pieces along with your 6″ x 6″ backing square and your 6″ x WOF pieced backing strip out as follows.

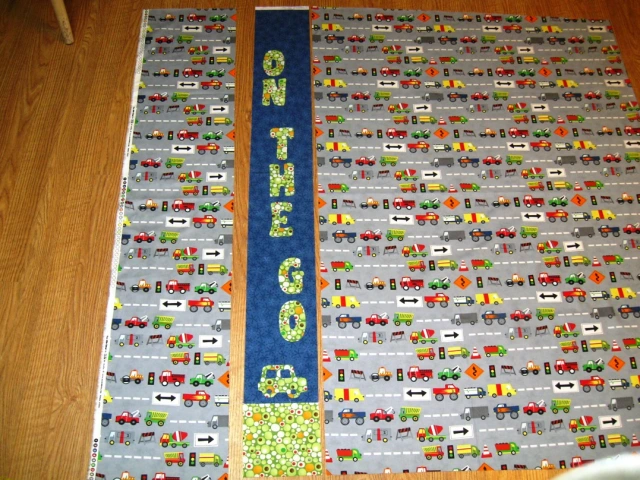
Sew the 6″ square to the bottom of the 6″ x WOF strip to create your applique space.  There is a template in the Printer Friendly Version for the applique designs.  Cut, adhere, and secure stitch your applique.

*Note – If you have not done applique before I would recommend 1 of 2 methods.  The first is using Heat N Bond and the process can be found in Step 5 of this other Bake Shop tutorial I did. The second is using starch and glue and the best tutorial I have seen is Natalia’s (fellow Bake Shop chef) and can be found on her blog here 🙂

Once your applique is done, go ahead and sew the 3 rows of your pieced quilt back together.  You do this the same way you sewed your quilt top rows together only this time it is vertical instead of horizontal 🙂

STEP 6 : FINISHING IT UP

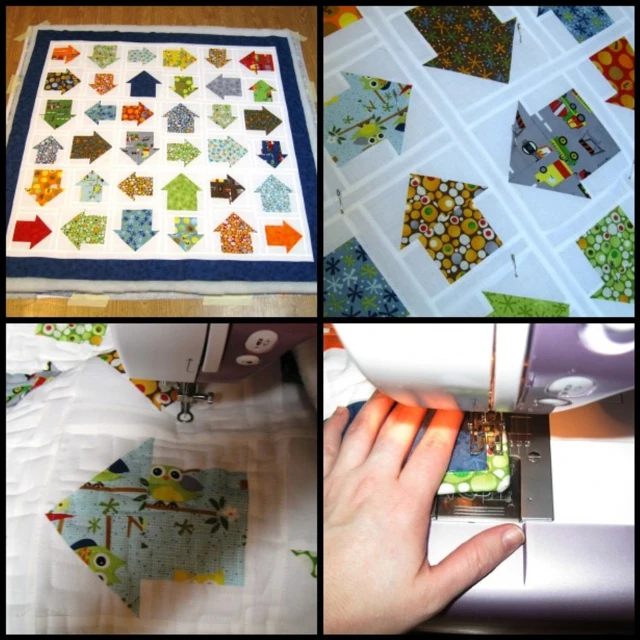
Now you are ready to finish it all up.  Make your quilt sandwich, I like to tape my backing to a hard floor, I find it gives me the best results.  Baste, I use pins but you can also use spray if you desire.  Then go ahead and free motion quilt your sandwich.  I did a straight edge stipple to give it a boy look. (or you can always send it out to a long arm quilter 🙂  And lastly grab those 5 binding strips you cut to make up your binding strip and then bind your quilt. (there is a great tutorial here on how to do that )

And you are done!!!!  And you have One Super Adorable ON THE GO Baby Boy Blanket measuring 46″ x 46″ perfect for a special little guy!!!!

With a totally all boy pieced back that you know they are just going to want to snuggle up with.

Melissa Corry

I Spy Ten Little Things Quilt


My name is Katie Blakesley, and I blog at Swim, Bike, Quilt.  Today I am happy to share a simple, charm pack friendly I-Spy quilt using Jenn Ski’s new line Ten Little Things and Moda’s Half Moon Modern. Ten Little Things works wonderfully for an I-Spy Quilt—in this version, the owls, construction scenes, numbers, and geometric prints are supplemented by oval, scissors, and polka dot prints from Half Moon Modern.


2 or 3 charm packs
Solids jelly roll or assortment of ½ yard and ¼ yard Moda Bella solids as listed below:
½ yard blue solid (9900-138 Sea)
¼ yard red solid (9900-123 Betty’s Red)
¼  yard light blue solid (9900-84 Blue Raspberry)
¼ yard brown solid (9900-106 Earth)
¼ yard yellow solid (9900-131 Lemon)
¼ yard green solid (9900-192 Leaf)
¼ yard orange solid (9900-80 Orange)
2 3/4 yards OR 1 Ten Little Things Panel + 2 1/4 yards solid for backing
52’’ x 54’’ piece of batting
1/3 yard for binding

Cutting Instructions:
For sashing, cut (24) 2’’ x 9 ½’’ strips and (24) 2’’ x 17’’ strips total, as shown in chart below:

There are 42 charms in each Moda charm pack, you need 72 for this quilt. I used 2 Ten Little Things and 1 Half Moon Modern charm packs. Depending on how many charms you choose from each pack, you can make this quilt with 2 charm packs instead of 3.
Assembly Instructions:
1. Choose 72 charms, and divide charms into 12 piles of 6, paying attention to both color and pattern.

2. Arrange the first set of 6 charms in a 2×3 grid as shown; repeat with remaining 11 sets.

3. Using a 1/4” seam allowance, place the top 2 charms right sides together and sew; repeat with the middle 2 and bottom 2 charms.  Tip: Chain stitching the blocks will help you sew more quickly and keep the pairs organized and in the right order. Instead of cutting the thread in between sewing each pair, sew the blocks together in 1 long chain. I sewed all of my pairs together, and then cut them into groups of 3. 
4. Press the seams, alternating direction to allow the seams to lock.  Press the top and bottom row to the left, and the middle row to the right.

 
5. Place the top and middle rows right sides together, pin on either side of the seam, and sew. Next, place the bottom and middle rows right sides together, pin on either side of the seam and sew.  Press seams.  Repeat with the remaining 11 sets of 6 charms.

6. Choose sashing for each block, which now measures 9 ½” x 14”. In the sample quilt, there are 3 blue,  2 red, 2 light blue, 2 brown, 1 yellow, 1 green, and 1 orange sashed blocks.

7. Pin a 2’’ x 9 ½’’ strip to the top and bottom of each set of 6 charms and sew. Press seams.

8. Pin a 2’’ x 17’’ strip to the left and right side of each block and sew. Press seams. The block now measures 12 ½” x 17”.

9. Arrange the 12 blocks together in a 4 x 3 grid as shown.

10. Put the top and center row right sides together. Match seams, and pin on either side of each seam.  Sew rows together and press well.

11. Repeat with the center and bottom rows–match seams, and pin on either side of the seams. Sew rows together and press well. Admire your finished quilt top, which measures 48 1/2” x 50”.

12.  Piece the quilt back.  I chose to use a Ten Little Things panel and added a strip of leftover blue solid on the left side of the panel, a piece of light blue fabric on the right, and a strip of light blue along the bottom, so that the back measured about 54” x 54”.
13. Baste the quilt top, batting, and backing together.
14. Quilt as desired.  I used organic straight lines, and quilted 3 vertical lines in each of the vertical sashing pieces about a ¼’’ apart, and one vertical line in each of the rows of blocks.  I also quilted a ¼’’ above and below each piece of horizontal sashing, and various groups of 3 or 5 lines horizontally throughout the blocks. I find straight line quilting is more effective when the quilting is closer together; this pattern allowed for the look of organic straight line quilting while still ensuring the quilt will remain soft and snuggly.

15. Square the quilt and bind—I bound the quilt in my favorite coordinating solid using the same method as my machine binding tutorial.

Finished Quilt: 48 1/2” x 50” –the perfect size for a preschool aged child to curl up with!  This one is already on its way to Arkansas to a friend who could use a bit of extra love right now.
 
Finally, for more inspiration, here is a picture of a scrappy I-Spy quilt I completed last year, as well as a variation of this quilt– a simple layout that includes the I-Spy element with a more streamlined feel.

I spy quilt

I hope you have as much fun making an I-Spy quilt as I did–if you make one, I’d love to see a picture of it in the Moda Bake Shop Flickr group.

Katie Blakesley
{Swim, Bike, Quilt}

So Soft Washcloths

Hi there!  This is AnneMarie Chany of Gen X Quilters and I am very excited to share an EASY tutorial with you today for these super soft washcloths.  This is a fantastic quick and easy project for a baby or housewarming gift.  Customized washcloths are a great and unique addition to any bathroom.  Have any leftover layer cake squares from another project?  This may be a perfect solution!


1 Layer Cake (10″ squares).  I used Ten Little Things by Jenn Ski
1 yard of 60″ wide minky, terry cloth or flannel for the backing (Makes 12 washcloths)
Coordinating thread


1.  Cut the backing fabric into (12) 10″ squares.

2.  Select your favorite 12 layer cake 10″ squares.  On each individual square, use a glass to trace a line onto the fabric to make a curve at each of the 4 corners.

3.  Place one layer cake square on top of a backing square with right sides together.  Pin in place.  Repeat for all 12 squares.

4.  Using the drawn curved lines, cut both the backing and layer cake square layers to round the corners.

5.  Sew 1/4″ from the edge all the way around the square, leaving a 3″ opening for turning right side out.  Backstitch when starting and stopping stitches.

6.  Turn the layers right sides out and press.

7.  Topstitich 1/8″ from the edge all the way around the rounded square, making sure to catch the opening you left for turning.

8.  (optional)  Add any embellishments, like an embroidered name or monogram at this point if you’d like.

9.  Quilt as desired to secure the top and bottom layers together since these washcloths will repeatedly be wet and washed.  This will help them hold up longer.  I used a random all over stipple on all of my washcloths, but you could really simplify it by making a large X to get the job done.


12 super soft washcloths great for gifting!
(approximately 10″ in size with rounded corners)

AnneMarie Chany