This project has a history… My mom has a set of napkins for the entire family. It came as a solution to the place card dilemma & gave her a reason to use her new embroidery machine. {Apparently as a kid I was obsessed with place cards and would wait to the last minute to make them.} My mom bought a stack of napkins and began to embroider names.
A note from my mom… “I began my plan by embroidering the immediate family members, including our living parents. Then I made them for my sisters and their husbands. I added their children. No one was married when the project began. I made a few “blanks” for significant others and guests. Everyone loved the idea and knew exactly where to sit. The 1st year I had 2 nephews who had their napkins in their back pockets when they were ready to leave our house (they thought it was their party favor) NOT SO MUCH. I told them that they were to “stay” at my house and every year @ Thanksgiving they would get to use the napkin. As years went on some of the “regular” guests wanted to know when they would get a napkin with their name on it. I didn’t jump so fast to embroider the “blanks” I told them that if they were around for a few years (sort of a waiting period) they would get the honor of having a “Herman Thanksgiving Napkin” of their own. Of course the inaugural year, Julie & Brad had napkins, only Julie got to use hers, as Brad lives on the west coast and would spend most Thanksgivings in California. He did finally get to use his “Brad” napkin and I made one for his wife Karin too when one year when they came east for Thanksgiving.”
This “Family Tradition” has continued to grow. Mom has a stack of napkins now that sit out on holidays but aren’t used. Some are for people like my Brother & his wife that are on the west coast, and some are for those family members that are no longer with us. Having their napkins out reminds us of those who are not with us each holiday. This tradition that my mom started inspired me to make a set of napkins for my house. Below are instructions on how to make a set of napkins, napkin rings, coasters & tablecloth.
I hope you enjoy our family traditions & that I can inspire you to create some of your own. Visit my blog to learn more about our history & see the original napkins.

For Napkins, Coasters & Napkin Rings
Rouenneries Woven Fat Quarter Bundle
Rouenneries Jelly Roll
Rouenneries Charm Pack
FQ of Muslin
FQ of Warm & Natural Batting
Disappearing Ink Pen
Assorted Embroidery Floss
Sewing thread to match in red, grey, & off white
For Tablecloth {read tablecloth instructions before buying yardage}
4 yds of 12552-31 – Oyster Stripe {tablecloth main}
4 yds of 12552 35 – Turkey Red Stripe {tablecloth center}

napkin ring tutorial from belle and burger
mod podge
empty paper towel or toilet paper cardboard rolls

NOTE – I did pre-wash my red woven fat quarters that were going to be used for napkins & the red woven for the tablecloth. I do not usually pre-wash my fabric but these are very saturated with color and I wanted to make sure that there was not any color bleeding on the final project.
Napkins
1. Napkin selection – Choose 8 FQs from the bundle to be your napkins. Some of the wovens look very different on the front & back so take this into consideration. With this in mind there is only one {the dot} that won’t work well at all. Other than that all could work. I picked 8 based off of color, weight, & making sure the back did not look too different. {You can make more than 8 but I have written the instructions with 8 in mind.}
2. Trim them square. I did not measure to trim them all to exactly the same size. I like the “handmade” feel that comes with each being a bit different. Mine range from 16”sq to 18”sq
3. Pick 2 corresponding jelly rolls strips for each napkin and piece them on the bias.

4. Cut one end of the strip to be the same bias angle.

5. Fold & iron in half. Open & fold ends in to enclose them and iron again. Now you have your napkin binding.


6. Start by pinning the binding on the right side encasing the napkin inside. Leave the top loose and stitch down the first side. {I used a small zig zag in matching thread} Stop just before the end.

7. Open the binding up and pin it back on top of the part you just sewed. Sew it in place 1/2″ from the edge. Pull the binding around and sew the next side down. Repeat at each corner.


8. When you get to the last side you’ll need to match up the two ends of binding strips. Measure where the bias cut edge lands and mark on the other side with the disappearing ink pen. Cut 1/2″ more to account for the seam allowance on both sides. Match up the cut pieces, sew, & iron seam open.


9. Pin in place & finish sewing the last side of your binding down.

10. Using the disappearing ink pen write the name in one corner. Using a backstitch and whichever floss you want stitch the name. As the backing will show be as neat as you can and tuck your starting & ending threads into your back stitches. {yes i put my name on before the binding in the above pics.. but it was easier to do after the binding was on for the remainder of the napkins.

{If you are not comfortable with your handwriting there are many fonts & templates available.}

11. Repeat for remaining 7 napkins. Keep in mind you can keep some blank without names.
Coasters

1. Select one woven FQ to be the backing for the coasters. Cut up to ten 5″ squares from this FQ. {i did 8}
2. Take Muslin FQ and Warm & Natural FQ and cut 5″ squares to match up with the ones cut in step #1.
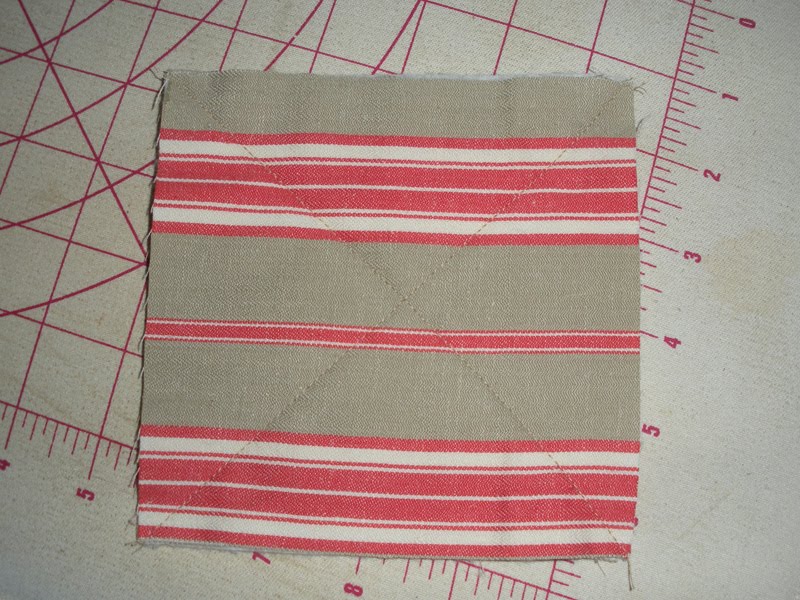
3. Match up squares to make mini quilt sandwiches of woven sq, batting sq, & muslin square with right sides out. Quilt each from corner to corner forming an X with matching thread.

4. Open charm pack and iron each square in half on the diagonal.

5. Select 4 charm triangles and lay them out on top of the coaster base from step #3 with the woven side facing up like this. {Think of it as how you close a cardboard box.} Pin in place.

6. Sew a scant 1/4″ around the entire square. Trim the corners & turn right side out. Poke corners out and you are done!

7. Repeat steps 5 & 6 for the remainder of coasters & you are done!
you can put a glass on your coaster…

or in it! it’s a 2 in 1!!

Napkin Rings
I found a great napkin ring tutorial that creates napkin rings from fabric strips. I took 4 jelly roll strips and trimmed them down to 1 1/2″ wide. {Honeybun strips are perfect but I had leftover JR strips} I then cut them in 1/2 at the fold and used the 20″ length. Other than that I followed the directions and love the result!

Tablecloth
1. Measure your table & determine the size tablecloth you want to make. My table is 42″ x 98″ and my table cloth is 60″ wide and 118” long.
2. The width is determined by how wide of a “stripe” you put in. my “stripe” is 19 1/2” wide which makes my width 60″ total
3. Cut main fabric to length
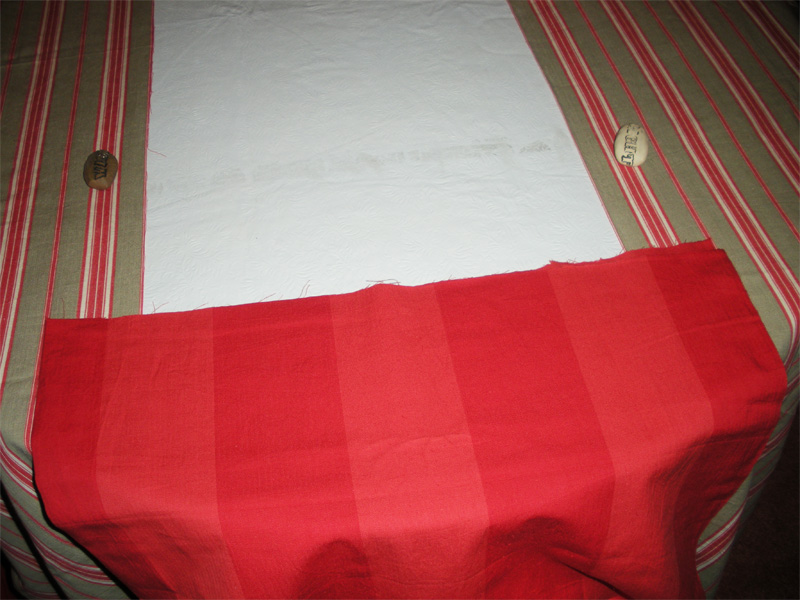
4. Cut in half along the fold { or true ½ if it was not folded well on the bolt} separate on table and confirm middle measurement.

5. Cut middle fabric to desired width & length. Plan for ½” seam allowances.

6. Use a serger or an overcast stitch to finish the raw edges so they do not fray.
7. Stitch the two long seams with a 1/2″ seam allowance. Press open.

8. To finish raw edges fold fabric over 1/2″ & Iron. Repeat to enclose raw edge & stitch in place.


8 Napkins {up to 16}
8 Coasters {up to 10}
8 Napkin Rings {2 for each leftover JR strip}
1 Tablecloth
Countless years of more family traditions!

Enjoy!
by Julie of jaybirdquilts.com!


 pick out 11 of your favorite fat quarters.
 from fat quarter #1:
 from fat quarter #2:
 from fat quarter #3:
 from fat quarter #2:
 from fat quarter #3:
 from fat quarter #4:
 from fat quarter #4:
 from fat quarter #5:
 from fat quarter #5:
 from fat quarter #6:
 from fat quarter #6:
 from fat quarter #7:
 from fat quarters #8-#11:
 take one of your 6 1/2″ square and add two of your 2″ x 6 1/2″ strips to the top & bottom of it.

 you should now have ten completed star point units, like so.
 from fat quarter #7:
 from fat quarters #8-#11:
 you should now have ten completed star point units, like so.
 we will now piece your borders.
 for your two side borders follow this pattern:
 layer, baste, quilt {as desired} & bind.


 we will now piece your borders.
 for your two side borders follow this pattern:
 your quilt top should now be completed and it should look like this.
 layer, baste, quilt {as desired} & bind.
 this little table runner would be perfect in loads of fabric lines.