Trifle Dish: Posies


To make LAYER 6, use jelly roll strips, which is particularly useful when using this block for an entire quilt top. The posies block is very precut friendly and you can substitute almost any other cut – fat eighths, fat quarters, and layer cakes. Note that there are two versions of the block, one with top sashing and one with bottom sashing, which gives the posies movement.

For EACH Posies block, you will need:
Fabric 1/White Solid:

  • (1) 2 ½” squares
  • (2) 2″ squares
  • (1) 1 ½” x 4 ½” rectangle
  • (8) 1 1/4″ squares

Fabric 2/Flower Top:

  • (2) 2″ squares
  • (4) 1 ½” x 2 ½” rectangles

Fabric 3/Flower Bottom (green print):

  • (4) 2″ x 2 1/4″ rectangles
  • (1) 1″ x 3 ½” rectangle

Block Dimensions: 4″ x 8″ (finished) / 4½” w x 8½” h (unfinished)

You will also need (12) 1 ½” x 8 ½” strips (one in between each flower) of background fabric to make the row equal 64″

Suggested precuts: Jelly rolls, fat quarters, fat eighths, layer cakes

 
1.  Use (2) 2″ flower top squares and (2) 2″ white solid squares  to construct 4 HST’.  Trim to 1 ½” square.  Press toward print fabric.

2.  Sew an HST onto each end of a 1 ½” x 2 ½” flower top rectangle as illustrated.  Press toward center.  Make 2.

3.  Sew a 1 ½” x 2 ½” flower top rectangle to each side of a 2 ½” white square as illustrated. Press away from center.  Sew the 2 units made in Step 2 to the top and bottom of the rectangle unit. Press toward center.

4.  Draw a diagonal line across the back of all the (8) 1 1/4″ white squares.  Use the stitch and flip method to sew (1) 1 1/4″ white square onto the lower left and upper right corners of a green 2″ x 2 1/4″ rectangle.  Make 4, taking care with directional fabric.  Press toward the white.

5.  Sew together the dog ear corner units made above. Add 1″ x 3 ½” rectangle between them as the flower stem.

6.  Sew the flower top to the flower bottom.  Press seam toward flower top.   Press toward the white.

Sew the white 1 ½” x 4 ½” rectangle to the top or bottom of the flower (you will alternate to give the flowers movement in the row). The block should measure 4 ½” x 8 ½”

Note:  To complete the strip a total of 13 flowers are needed.  7 of them should have the last white rectangle sewn to the top and 6 should have the rectangle sewn to the bottom.  I used a total of (12) 1 ½” x 8 ½” strips (one in between each flower).


1 row, measuring 64″ x 8″

Block design by Corey Yoder of {Little Miss Shabby}

Trifle Dish: Jewel Block


To make LAYER 5, use fat eighths and layer cakes. For a scrappy version, use a mix of charm square prints for the hourglass and flying geese parts of the block.

For EACH Jewel block, you will need:

Fabric 1/Background:

  • (2) 8½” x 1″ rectangles
  • (2) 9½” x 1″ rectangles
  • (2) 2½” x 2½” squares

Fabric 2/Jewel:

  • (2) 6½” x 2½” rectangles
  • (2) 4½” x 2″ rectangles
  • (2) 2½” x 2½” squares (for HSTs)
  • (4) 2″ x 2″ squares

Fabric 3/Flying Geese: 

  • (2) 3½” x 2″ rectangles

Fabric 4,5/Hourglass:

  • (2) 4½” x 4½” squares

You will also need (2) 2½” x 8½” strips for the ends of the row to make it finish at 64″ wide

Block Dimensions: 10″ w x 8″ h (finished) / 10½” w x 8½” h (unfinished) 

Suggested precuts: Fat eighths, layer cakes OR charm packs

 
Use a scant ¼” on all seam allowances. See the Scant Rant series for details.

1. Make Hourglass/quarter square triangle units with 4½” x 4½” prints. Use (2) 4½” x 4½” print squares to make (2) Hourglass units. (Only one Hourglass unit is needed per block – but the extra Hourglass can be used in the row.) Label one square Fabric A and one square Fabric B. Draw a diagonal line on the wrong side of the Fabric A square. Layer the Fabric A square atop the Fabric B square with right sides together. Sew pairs together, stitching ¼” on each side of the drawn line. Cut the pair apart along the drawn line to make two half-square triangle (HST) units. Without moving the HST units from the mat, cut along the opposite diagonal. Match pairs of triangles together to sew the Hourglass block.

The Hourglass block should be trimmed down to: 3½” x 3½” unfinished.

2. Make Flying Geese Units. Use (2) 2″ x 2″ jewel squares and (1) 3½” x 2″ print rectangle to make (1) Flying Goose unit. Label the squares Fabric A and the rectangle Fabric B. Draw a diagonal line on the wrong side of the Fabric A squares. Layer the Fabric A square atop the Fabric B rectangle with right sides together. Stitch on the drawn line. Cut the excess ¼” away from the drawn line as shown. Press the unit open. Place the remaining Fabric A square atop the unit from the previous step as shown. Sew on the drawn line again. Cut the excess ¼” away from the drawn line as shown. Press that triangle open.

Make 2 Flying Geese Units. Unfinished Block Size: 3½” x 2″ / Finished Block Size: 3″ x 1½”

3. Make four half-square triangle (HST) units by pairing 2 background squares with 2 jewel squares. Draw a diagonal line on the wrong side of the background square. Layer the background square atop the jewel square with right sides together. Sew pairs together, stitching ¼” on each side of the drawn line. Cut the pair apart along the drawn line to make two half-square triangle (HST) units. Repeat the process, pairing the remaining background square with the remaining jewel square. Make 4 HST blocks total. The HSTs should be trimmed down to: 2″ (unfinished size).

4. Layout the Block. Layout the Hourglass unit, 2 Flying Geese units, the 6½” x 2 1/3″ rectangles, the 4 HSTs, and the 4½” x 2″ rectangles as shown.

5. Sew the Flying Geese units to the left and right sides of the Hourglass block. Then sew the HST blocks to the top and bottom of the 4½” x 2″ jewel rectangles.

6. Next sew the 6½” x 2½” jewel rectangles to the top and bottom of the Hourglass unit.

7. Sew the HST/jewel rectangle units to the left and right sides of the unit from step 6 to create the “Jewel” shape.

8. Finally, attach the background border strips by first sewing the 9½” x 1″ strips to the top and bottom of the block. Then sew the 8 1/2″ x 1″ background strips to the left and right sides of the block.

9. Make 6 blocks to complete the row. Add 2½” x 8½” border strips to each end of the row to make it 64″ (finished) wide.


1 row, measuring 64″ x 8″

Block design by AnneMarie Chany of {Gen X Quilters}

Hourglass Star Quilt


Hello!  My name is Erica from Kitchen Table Quilting and I am here to share a quilt made with a fat eighth bundle of  Bonnie and Camille’s beautiful new April Showers collection.  This quilt is really quick to put together and it is a great way to show of some of those pretty fabrics.


1 Fat Eighth Bundle April Showers
2.5 Yards Moda Weave
1/4 Yard Teal Border Fabric
1/2 Yard Umbrella Border Fabric
1/2 Yard Binding Fabric

From your background fabric cut:
4 strips 8″xWOF.  Subcut into 16 blocks 8″x 8″.
4 strips 4.5″xWOF.  Subcut into 32 blocks 4.5″x 4.5″.
10 strips 4″xWOF.  Subcut into 64 blocks 4″x 4″.

Using the prints that will create the most contrast with your background fabric cut:
16 squares 8″x 8″
32 squares 4.5″x 4.5″

Borders:
Cut 3 strips 2.5″x WOF
Cut 3 strips 5.5″x WOF

Binding:
Cut 7 strips 2.5″x WOF

For each block you will need:
1 – 8″x 8″ print
1 – 8″x 8″ background fabric
2 – 4.5″x 4.5″ print
2 – 4.5″ x 4.5″ background fabric
2 – 4″x 4″ background fabric

 Take the 8″x 8″ background fabric square and the 4.5″x 4.5″ background fabric squares and draw a diagonal line using a washable pen onto the wrong side of the fabric.

 Place the background square together with a print square of the same size, right sides together, and sew 1/4″ away from the drawn line on either side.

 Cut along the drawn line.

 Press the seams open.

 Trim the larger blocks down to 7.5″ square and the smaller blocks down to 4″ square.  When trimming line up the diagonal on your ruler with the seam to make sure that your trimmed square will be straight.

 Admire your trimmed block.

 Arrange the blocks like the image below.

 Start by piecing together the smaller squares into pairs.

Piece together the blocks in the order illustrated in the following photos.

 Repeat to make 15 more blocks.

Sew together the border pieces to create 2 pieces 2.5″x 57.5″ for Border A and 2 pieces 5.5″x 57.5″ for Border B.

Arrange the blocks and borders as shown below.  Sew together the blocks into rows and sew the Border A and Border B pieces together.

 Sew the rows and borders together to create the finished quilt top.

Baste, quilt, and bind as desired.

Finished size: 57″x70″

Erica Jackman
{kitchentablequilting.blogspot.com}

Confetti – A Modern Embroidery Applique Quilt


Hi there! It’s Natalia Bonner from Piece N Quilt and I’m excited to share our Confetti quilt here today! As you’ve probably noticed Kathleen and I have gone Machine Embroidery Applique crazy! We love it! Every single project we see we are trying to figure out how we can add machine embroidery applique.

This new quilt was so much fun to make. It’s made from Zen Chic’s new fabric line Barcelona and a little bit of Moda Bella Solids. We call it the darling Confetti quilt! Finished size is 60″x70″

The instructions below are for using a machine embroidery applique technique but you can achieve similar results by outlining the triangles with a satin stitch on any sewing machine.


4 1/4 yards white background fabric OR 6 white charm packs
1 Fat Eighth Bundle Barcelona by Zen Chic for Moda Fabrics
1/4 yard Green Binding
3.8 yards Backing 


Cutting
From background fabric, cut 27 strips measuring 5″ x WOF and 2 strips measuring 2″ x WOF.
Subcut 5″ x WOF strips into:

  •  208 squares measuring 5″ x 5″
  • 16  rectangles measuring 5″ x 2 5/8″

Subcut 2″ x WOF strips into:

  • 58 – 2″ 60 deg white triangles*

From fat eighths, cut:

  • 58 – 4″ 60 deg print triangles*  (we tried to do two from each print)

To cut triangles, use the templates in the Printer Friendly file or use the 60 degree mark on your ruler to cut the correct shape.

    Applique
    The triangle digital machine embroidery applique file is currently available for free! Click {here} to download from our website. Check out all of our other darling Embroidery Appliques while you’re over there.

     **All applique on this quilt is done using embroidery applique, for this technique you will not cut your triangles into triangles at this point. Follow our triangle Machine Embroidery Applique Tutorial {here}.**

    If you are using a satin stitch instead of machine embroidery applique, pin each print triangle to a 5″ square. Outline with a satin stitch using coordinating thread. Repeat for all 58 triangles.

    Layer a 2″ white triangle on top of each print triangle and outline with a satin stitch. Repeat for all 58 white triangles. You  can use a small pair of very sharp scissors to trim out the print fabric behind the white triangle.

    Assemble the Quilt Top

     Confetti is laid out like subway tiles, alternating blocks.

    Refer to quilt layout for exact placement. We rotated our triangle blocks to get a more random look.

    Quilt, bind, and enjoy! The super cool thing about embroidery applique, because it’s done so precisely with a nice satin stitch when washing this applique there will be no fray! The quilt can be washed and washed and it will look nice forever! This quilt is machine quilted with a pantograph pattern designed by Natalia Bonner called Crackle, available {here} in {digital} and {paper} pantograph pattern.

     All of our embroidery applique is done on a Bernina Aurora 440QE with the embroidery module. Batting used is this quilt is Quilters Dream Poly Select.  


    1- 60″x70″ Confetti Quilt

    Natalia Bonner
    {www.piecenquilt.com}

    Cozy Campground Quilt


    Hi, I’m Stacey and I blog at The Tilted Quilt.  Today, I am sharing a Cozy Campground Quilt with you.  I have two young sons and my husband is just dying to begin taking them on camping trips.  From the moment I saw the S’more Love line by Eric and Julie Comstock, I knew I had to have it. It will be a perfect family quilt to take with us to have out in front of the campfire while we are making S’mores.  I made sure to use a dark background and backing since I know this quilt will get lots of outdoor use!


    This is a great pattern if you have not foundation pieced before and you want to dip your toe into this technique. 

    I am going to give away my scraps from this project (including a nice size bundle of 10 leftover fat eights) – just swing by my blog over the next week for a chance to win. 

    Here is a full mock up of the quilt for planning purposes:


    All fabrics in this project are from S’more Love.

    •  Fat Eighth Bundle for blocks (you will use 16 for the blocks – there will be extras which can be used for binding or other projects)
    • 1 yard each of three different backgrounds for the blocks – I used:
      • pond (37075 17)
      • pine (37075 15)
      • campfire (37075 13)
    • 1 1/2 yards of wood grain background for alternating blocks in grizzly bear (37079 19)
    • 4 yards for backing and binding (37074 19)
    • batting
    • 64 sheets foundation paper


    **Update** Thanks to the great feedback in the comments regarding the background fabrics – I have changed my suggested yardage from 3/4 yard to 1 yard.  I used 3/4 yard of the backgrounds plus the additional fat eighth that came in the bundle when needed.  I do tend to cut narrowly, but I should have allowed a teensy bit more wiggle room. I suggest bumping your yardage up to 1 yard for each background. Thanks!!***


    • 6 inch Add-A-Quarter ruler – this is not mandatory, but I couldn’t live without mine. 


    Foundations:


    I use a lightweight paper called vellum for my foundations, but you can use whatever you prefer.  You will need 64 copies of the block pattern (16 blocks x 4 sheets per block). Print at 100% or “actual size” – the pattern block should measure 5 ½ inches on each edge, for a 5” finished size.  I have included a 1″ test square so you can make sure you are printing the correct size.  To be safe, you should print all 64 of your pages at one time – just in case you accidentally change the page layout between printings (I speak from experience here!).

    Download the foundation pattern here.


    Cutting Instructions:


    1. From the brown wood print*, cut

    • Nine 10 ½ inch squares 
    • six 11 inch squares – cut them down the middle on the diagonal to create 12 setting triangles for row ends
    • two 10 1/2 inch squares – cut them down the middle on the diagonal to create 4 setting triangles for corners 
     *If you are using a fabric with a directional print where the orientation of the design matters,  keep in mind as you cut that you will be laying these out on the diagonal. You may want to wait to cut these squares until you lay out the quilt below.

    2.  Choose 16 prints from the fat eighth bundle.

    From each print, cut

    • 4 pieces @ 4”x 6” 


    3. For each block, you will choose a background fabric – from that background:

    • cut 8 pieces @ 3 ½” x 6 ¼ ”  (You will cut a total of 128 pieces this size, using your three different backgrounds)
    • cut 4 pieces @ 3 ½” x 4 ½” (You will cut a total of 64 pieces this size, using your three different backgrounds)

    Sewing Instructions:


    Each 10” finished “X” block is made from four-5” foundation pieced blocks.  Piece 1 is the block print and Pieces 2-4 are  the block background prints. 


    When sewing on a paper foundation, remember that you will be sewing directly on the printed side of the paper with the fabric on the “un printed” side.  Lower your stitch length to 1.6 or 1.8.  For some additional tips on paper piecing, check out this tips post I did earlier this year.  That post also links to a video tutorial using the Add-A-Quarter ruler for trimming.

    To create the block:  Choose a piece from your cut fat eighth stack –  place piece 1 with the right side facing away from the paper so that it covers the center wedge entirely – making sure that there is at least ¼” excess around all of the lines.  You may want to hold it up to a light source to make sure the lines are covered.  I like to put in a pin to make sure this piece stays put.

    Your second piece of fabric is a background piece – it will be placed with the right side of the fabric facing the right side of the first piece of fabric you pinned.  You will be sewing on the line between piece 1 and 2.  Make sure the length of the background fabric extends a full ¼” past the edge of the block on both sides and that, when flipped over, it will cover the full corner of the block, including the ¼” seam allowance.


    Using an open-toe foot (or your regular piecing foot if you don’t have an open-toe foot) begin sewing the line between 1 and 2. Backstitch a few stitches at the beginning and end to lock in your stitch.


    Before you flip over Piece 2, trim the excess away (leaving ¼” seam allowance) by folding back the paper.


    Once you flip over Piece 2, your block should look like this:

    Next, you will want to trim ahead of your next piece to keep that nice ¼” seam.  I really love using an Add-A-Quarter ruler. I will demonstrate how it works.  If you don’t have one, continue to trim as you did in the previous step, after you sew the seam.  

    On the paper side, take a postcard or index card and place it on the line between 1 and 3. 


    Fold the paper back over the postcard creating a stiff edge.


    Place the Add-A-Quarter ruler on the postcard edge.


    Trim to a perfect ¼” seam with your rotary cutter.


    Fold the paper back up and flip the block over.  Now you can line up your next piece directly on the cut fabric, right sides together.

    Flip the block over and sew on the line between 1 and 3. Remember to backstitch at the beginning and the end of the line.

    Flip the fabric over and press.

    Repeat the steps above to trim the line between 1 and 4 with the Add-A-Quarter Ruler.

    Add piece 4 along the cut edge of 1, right sides together.


    Flip block over and sew along the line between 1 and 4.
    Flip the fabric over and press.

    This is what your block should look like now.


    Flip the block over and trim away excess – cut on the OUTER line (this includes a ¼” seam allowance for the blocks).


    Now, you have a trimmed block.

    Create 4 smaller blocks to make one larger x block.


    Switch over to your ¼” foot and increase your stitch length back to 2.5.  Join the bottom two blocks and the top two blocks and then sew the top row and bottom row together for a completed X block.


    Make 16 of these blocks choosing assorted prints from your fat eighth bundle and backgrounds from your three background fabric choices. 

    Lay out the blocks on point, alternating a solid square between each block.  If you are using a fabric where the orientation of the design matters, keep in mind as you cut that you will be laying these out on the diagonal.

    Blocks are now on the bias, so be aware of stretching.


    A design wall is invaluable for a layout like this – I needed to make sure the wood grain on my brown blocks all went the same way.  Now is a good time to cut the wood blocks and setting triangles if you have a directional print that matters for these blocks.  


    I like to cut these blocks a little generous to make sure there is plenty when it comes time to trim them down.


    Here is the corner all trimmed up.


    I embroidered our last name to the quilt – aren’t you supposed to label everything you bring with you when you go camping? 😉

    Make a quilt sandwich with your favorite batting and your backing.  The back will need to be pieced since it is larger than the width of standard fabric.

    Quilt and bind according to your favorite method. I opted for a simple straight line quilting design to mimic the wood grain in the background.


    58″ x 58″ lap size quilt, perfect for snuggling up in front of the fire on your family camping trip!


    Stacey Napier
    {thetiltedquilt.blogspot.com}

    3D Pinwheel Throw Quilt


    Hello Moda Bake Shop readers! I’m Anjeanette and I am so happy to be back with you, sharing this adorable new quilt. Come visit me anytime at byAnjeanette.blogspot.com. When I saw this new line from Bonnie and Camille, I knew it had to be made into something fun and whimsical.  Enter a 3 dimensional pinwheel to fit the bill.


    1 Fat Eight Stack  
    3 3/4 yards Penny White 55065-19
    1 yard Penny Lime 55065-13
    4 yards Hop Navy 55062-17 (Backing)
    1 yard Red 55064-11 (Binding)


    Starch your fabric first. We are sewing on the bias and it will help to keep the fabric stabilized. We are also going to end up with a really dense seam in the pinwheel with all the layers of the fabric. Normally I use a scant seam, or skinnier than 1/4”. But for this throw, I suggest to sew with a larger than 1/4” seam. The seams in the pinwheel have many layers of fabric and I find that it is easier to get a nice flat pressed seam when there is more of a seam to press.

    From the white, cut:
    10 WOF (Width of Fabric) X 6″
                   Sub cut into 6″ squares total of (56) 6″ squares cut in half diagonally

    14 WOF X 5″
                   Sub cut into 5″ squares  total of (112) 5″ squares 

     From the green, cut:
    5 WOF X 6.5″
                     Sub cut into 6.5″ squares total of (28) 6.5″ squares

    From the fat eight stack you will need to cut (28) 9″ squares.

    There are two blocks for this throw, a square in a square, and a dimensional pinwheel.

    To make the square in a square block you will need four white triangles and one green square.

    Fold your green square in half lengthwise and then again in half width wise. Press to get your center markings. Alternately, you could pin the center of each side if you prefer. Fold your triangles in half and press.

      Matching your pressed lines, match two side triangles to the sides of the square and pin in place.

    Sew side seams and press towards the white.

    Flip over and trim off the excess corner points.

    Layer the last two triangles, sew and press towards the white again.

    Trim your square to 9 1/2” There shouldn’t be much to trim off.

    Make 28 of these blocks.

    To make the dimensional pinwheel block:

    Start with two contrasting 9 X 9” squares cut from your fat eight stack. Layer together, right sides together. Draw diagonal lines from corner to corner in an X and then from top to bottom and side to side like a +. Sew 1/4” on both sides of the line from the X. With your rotary cutter, cut directly on the lines of the + from top to bottom and then from side to side. Then cut along the diagonal lines.

    You just made 8 HST or Half Square Triangles.

    Open up your squares and then fold in half with wrong sides facing each other. Topstitch along the folded edge with about 1/8” topstitch. This little step is going to help keep the shape of the pinwheels once you wash your quilt. Trim off the dog ears or the overhanging corners.

    To make your pinwheel block, take four white 5” squares and two sets of triangles.


    Layer your triangles on top and in the corner of each white square. The right side of the white squares should be facing up/the triangles. Pin the right side. Take the bottom of the triangle and fold it over to the right lower corner. Topstitch with 1/8” seam along the right side and the bottom of the triangle.

    Press. I found that I wanted my pinwheel pressed quite flat because it helped when I got to the part with all the layers of fabric.

    Lay out your four squares to make the shape of a pinwheel.

    Sew the top two pieces together (remember we are using a seam that is just a bit bigger than a regular 1/4” seam here.) Press the seam open. It is going to be a chunky/thick seam.

    Sew the bottom two squares the same way and press well.

     
    Layer your top and bottom together, right sides facing. I placed a pin in the center of the top seam and matched it with the bottom seam to hold it in place. Because of the bulk of the fabric, clips like the one you would use to bind, are very helpful to hold the layers together. 

    Sew and press open.


    Make 28 of these blocks.

    Alternate your square in a square blocks with pinwheel blocks. Sew into rows. Sew rows into your top.

    Quilt and bind.

    *Because of the dimension of the pinwheels, when you are quilting you may find it easier to pin each pinwheel flap back.


    My boys think this is the perfect quilt to lay on the grass and read. I think it is the perfect quilt for a picnic.

    Either way, I think the dimension of the pinwheel makes for a fun quilt.

    If you decide to make one too, please remember to share it with me. I’d love to see it!

    I couldn’t resist these piggies next to the dimensional pinwheel. Makes me so happy.


    A roughly 63” X 72” Epic Summer 3 Dimensional Pinwheel Throw

    Anjeanette Klinder
    {byAnjeanette.blogspot.com}

    Fabric Envelopes

    DSC_0155

    Hi There!! I’m Tammy from Karamat back with another quick project. It seems lots of my friends are using a cash budgeting system or putting aside a few dollars here and there for a special trip. So I put together these fun little wallets to keep organized.


    1 Fat Eighth bundle of Salt Air
    Optional: Fusible Interfacing

    DSC_0126


    For each wallet, select 2 pieces of fabric, cutting a 7.5″ x 7.5″ from each piece. For a little extra sturdiness, a piece of fusible interfacing can be fused to the wrong side of the fabric to be used for the exterior of the wallet.

    DSC_0133

    With right sides together, and using a 1/4″ seam, stitch around the squares, leaving an opening for turning.

    DSC_0135

    Turn right side out, and press.

    DSC_0138

    Top stitch the top and bottom of the square with a 1/8″ seam, making sure to close the opening used for turning.

    DSC_0148

    If you would like to add labels to your envelopes, now would be the time. Cut a small piece of neutral fabric (mine is about 1 1/2″ x 2″) and topstitch onto the envelope front. You’ll be able to add your category with a Micron or thin-tip Sharpie pen.

    DSC_0149

    To finish up, fold your fabric in half, with the previous topstitching at the top, and sew together the side seams with a 1/4″ seam.

    DSC_0150

    DSC_0161


    Each Fat Eighth piece will yield 1 envelope.

    DSC_0155

    Tammy Blackburn
    {karamatdesigns.blogspot.com}

    Ruby’s Party Bag


    I’m very excited  to be posting over here at the Moda Bake Shop, it’s been awhile.  I’m so in love with this fabric by Bonnie and Camille, I couldn’t wait to get my hands on it.  Come visit me over at my blog for a chance to win some of this super cute fabric for yourself!  Our Cozy Nest

    3 Fat Eighths  (or 3 –  9″ x 22″ pieces of coordinating fabric)
    1/2 yard of fast to fuse fusible interfacing or a similar stiff interfacing
    Pattern Pieces – included in Printer Friendly Version at bottom of post.


    Step One:  Pick three of your favorite coordinating pieces from your fat eighth bundle. Not easy to do since they are all so dang cute!

    Step two:  Decide which piece of fabric you want to use for the body of your bag.  Iron it onto the fusible interfacing.

    Step three:  Cut out pattern pieces, trace onto fabric, and cut out. You will need to cut two purse pieces.   The pattern for the sides and bottom of the purse will need to be traced and then flipped over and traced again on the other side since the fabric will be too stiff to fold.

    Here is what you should have:

    Step 4 – Do the same thing in step three for the lining of the bag.  Note – Be sure and layout your pattern pieces so you have that extra fabric on the right side.  This piece of fabric will be used for the “binding” at the top of the purse.  You will need to make sure there is 1 1/4″ of extra fabric on the right side.

    Step 5 – Lay one of the purse pattern pieces down with print side up.  Lay your piece for the sides and bottom on top of it with the print side down (like in picture below).  Starting on the right side, begin sewing the two together, making sure to back stitch at the beginning and end.  Note:  Use 1/4″ seam allowance on the entire project unless noted otherwise.  I’m not much of a pinner and honestly this fabric is going to be so stiff, I’m not sure you could pin it.

    I just sew a little at a time, sort of curving the sidepiece to the fabric piece as you go.  I kept my needle down when I lifted up the presser foot to move the fabric.

    Step 6 – Now sew the other side of the purse on starting on the right side again.  Don’t worry too much about having to bend and move the fabric, I just used an iron when I was finished to smooth it out.

    When you’re done sewing the body of the bag together, trim the edges of the bag down to about 1/8″.  
    Follow steps 5 and 6 for the lining of the bag.  Turn your bag (not the lining) right side out and place the lining inside so that wrong sides are together.  Stitch the two together by sewing around the top of your bag using a 1/4″ (or a little less) seam allowance. It’s embarrassing that it took me a while to figure this out, but it’s much easier to do this if you remove the extension table from your machine (that blue plate you see on mine).

    Step 7 – Make the ruffle for the top of the purse.  Out of you third coordinating piece of fabric, cut a strip of fabric that measures 2 1/2″ wide by 22″ long.  Iron the fabric in half with the print on the outside. If the raw edges on the end of the ruffle bother you, just fold it over 1/4″ before ironing it in half lengthwise and stitch. To make the ruffle I just sew along the length  of the fabric (raw edges on the inside) and about every  3/4″ make a pleat by folding the fabric up about 1/4″ inch and then back down again.  The picture below shows it much better than I can explain it.  When you are done making the ruffle, sew it to the top of your bag. Finished off the edges by overlapping the two ends about 1/2″.

    Step 8 – Making the bag handle.  Cut a piece of fabric that is approximately 2″ x 11″ out of the same fabric as your ruffle.  Iron the strip of fabric in half, unfold and then iron the outside edges into the center like pictured below.  Iron back in half (should be 1/2″ wide) and stitch 1/8″ in on both sides.

    Step 9 – Pin handle to purse like pictured below and tack into place.

    Step 10 – Binding around top of bag.  I apologize for this very poor picture, I couldn’t get my flash to work. I did this the same way I would bind a quilt.  This is where you will use that little 1 1/4″ wide piece of fabric that you saved from the lining.  You will need to sew the two pieces together end to end, it should be about 16″ inches long although you wont need nearly that much. Iron fabric in half lengthwise and then unfold and iron one side into the center (just like you did for the handle, but only one side).

    Sew onto the top of your bag by placing the side of the binding that is not folded onto the top of your bag with print side down.  Fold the very edge of the binding over about 1/4″ to give the edge a finished look.  Sew around entire opening of bag and when you get to the end,  overlap the pieces 1/2″ to 1″ folding the very end over 1/4″ before stitching down.  Now the fun part (at least to me).  Fold binding over onto the inside of bag an hand stitch down.  If your bag is wrinkly when you’re done, take a hand towel and wrap it around your hand.  Put your wrapped hand inside of the bag and apply a warm iron to outside of bag until you are happy with how it looks.
     

    One super cute party bag, for your little princess!

    Nicole Willmore

    Framed In Quilt


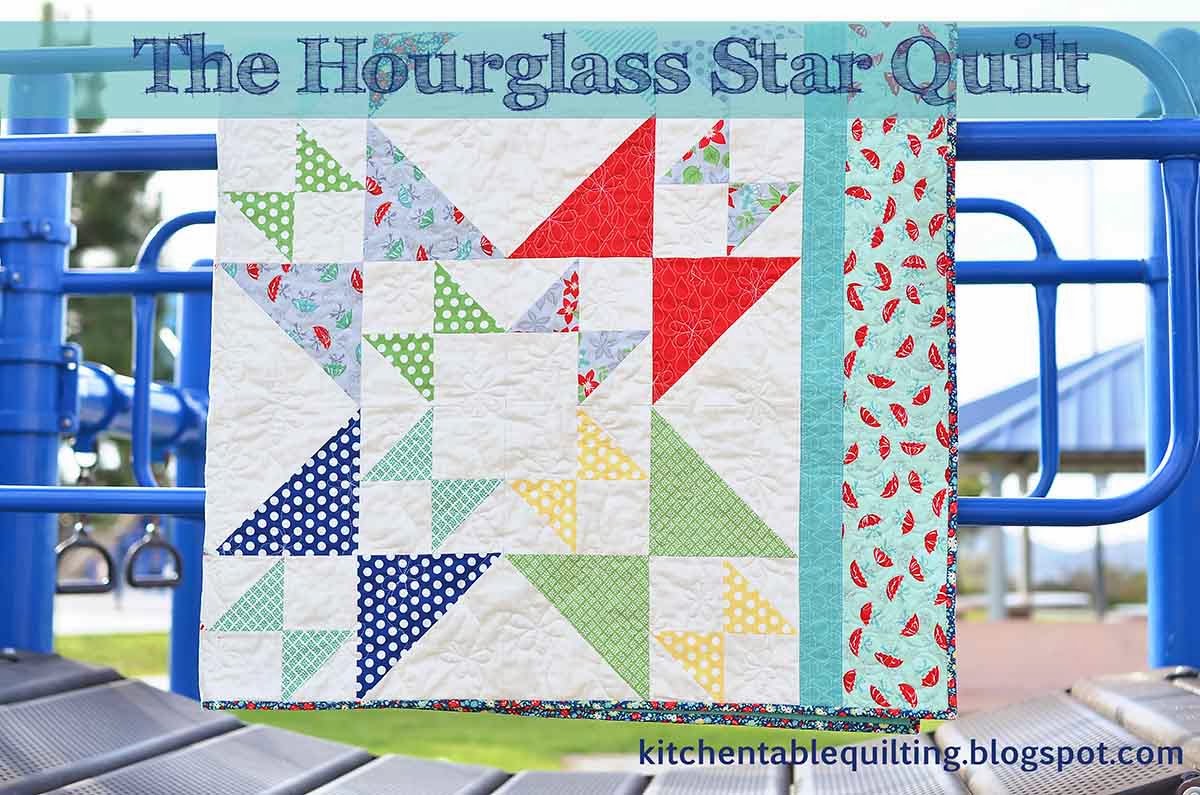
    I can’t tell you how excited I am to be back to share with you all a fun quilt made using none other than the Fig Tree Quilts line of fabric, Strawberry Fields.  I always love Joanna’s lines of fabric for Moda but I’ve gotta admit that this line is one of my favorites!  And I am so in love with this quilt!  At the end of this tutorial I’ll show you two alternate layouts that completely change the look of the quilt–but all three quilts are made using one simple block.

    I am so excited that Leah from Burgundy Buttons is offering an adorable Framed In quilt kit.  We all know how cute these are!  So, if you love this quilt as much as I do be sure to snatch up your kit! =)

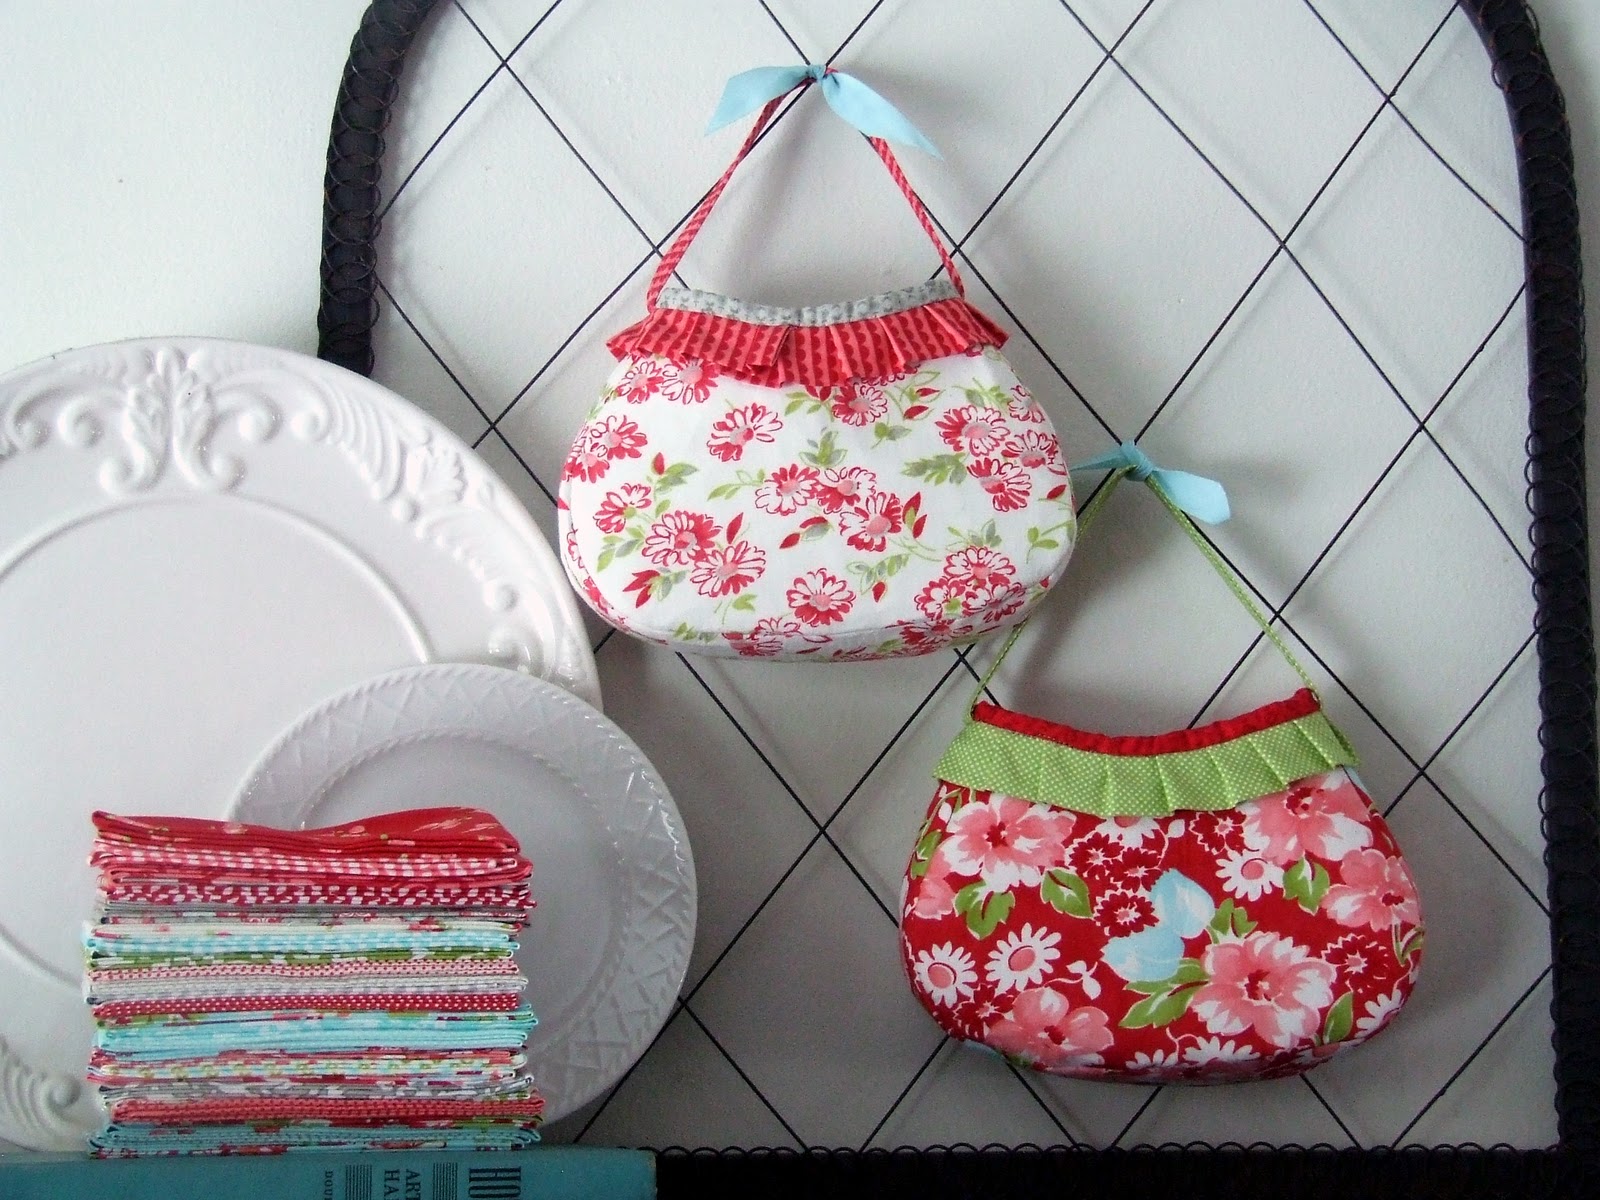
    After you have finished looking over my tutorial,  I would love if you would pop over onto my blog at Little Miss Shabby.  I have another quilt tutorial posted for a great quilt you can make using the leftover fabric from this quilt.  Enjoy!

    1.25 yd. Ivory Beige Polka 20166-15
    1.25 yd. Lg. Floral 20162-13
    .75 yd. Red Gingham 20164-11
    4 yd. Backing 20160-15
    .5 yd. Binding Red Polka 20166-21
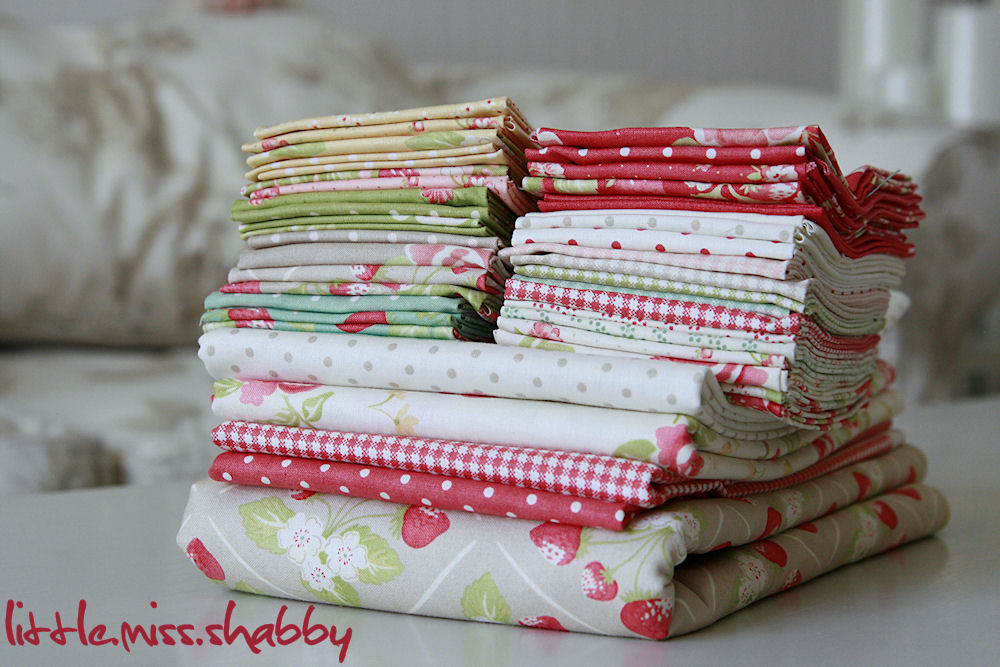
    1 Fat 8th Bundle Strawberry Fields

    -A 9″ Square piece of template plastic to square up your blocks

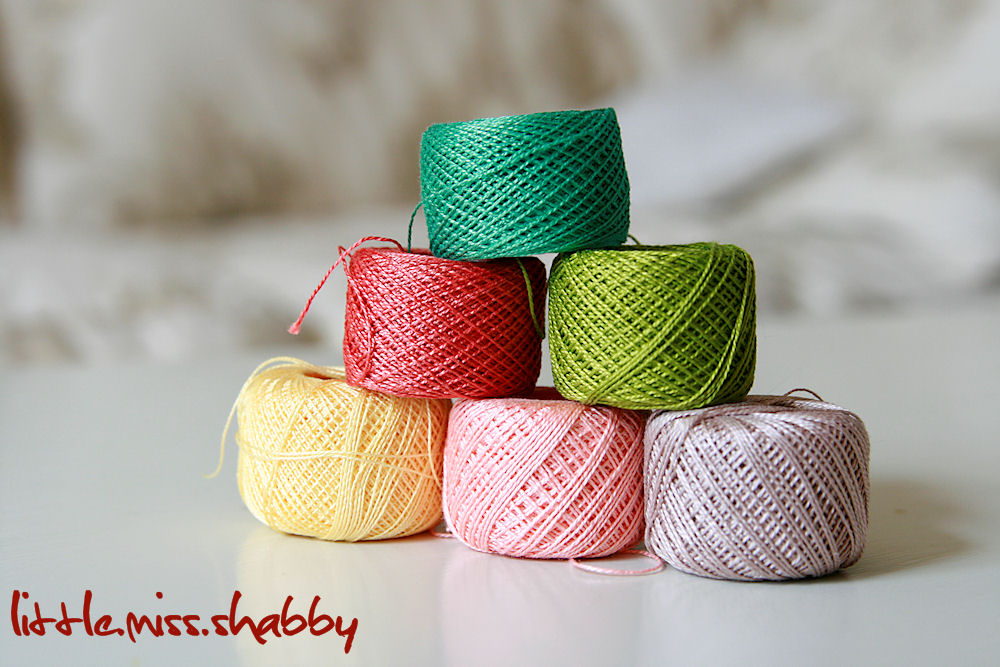
    I chose to hand quilt my quilt–any of the layouts work beautifully for hand quilting.  If you’d like to hand quilt your quilt as well, you may wish to pick up some of the following Finca Perle Cotton (I used size 8).  A 10 gram ball of each is perfect.

    1137–Yellow
    1247–Red
    1474–Pink
    4812–Green
    4350–Aqua
    8017–Taupe

    All seam allowances are 1/4″.
    Begin by giving all of the fabrics in your fat 8th bundle a nice pressing.  Ironing wonderful new fabrics is always so much fun; way better than ironing clothes! =)  It’ll also provide you with better accuracy as you begin cutting the strips for your blocks.
    Now you are ready to begin cutting the strips. 
    We will be cutting the strips along the short side of the fat eighth–so your strips will be 9″ long–do not cut them along the 22″ side.
    Cut the following from each fat eighth:
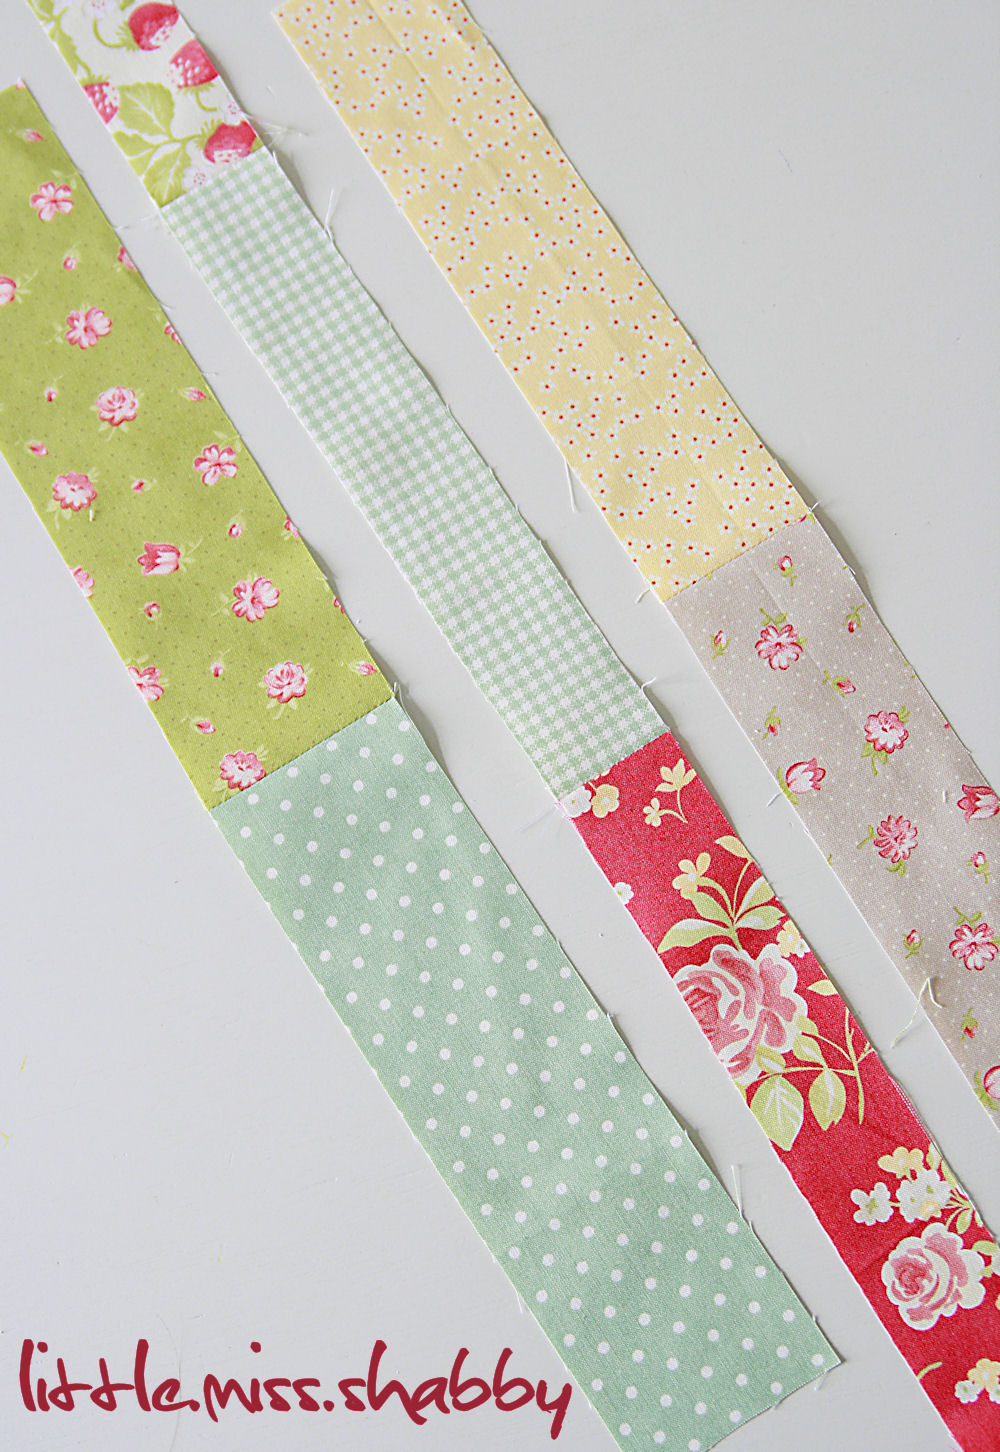
    2 strips 2.5″ x 9″
    2 strips 2″ x 9″
    3 strips 1.5″ x 9″
    Cut the following from the Beige Polka Dot:
    6 strips 5.75 x WOF (width of fabric)
    subcut into (36) 5.75″ squares & then cut in half diagonally once to make 72 triangles

    We are now going to sew our strips together.  First, cut a small amount off of 1 strip of each size–a different amount for each width.  This way we won’t have to worry about our seams lining up when we sew our strip sets together.

    Now we will start sewing together our strips–sewing same width strips to same width strips.
      
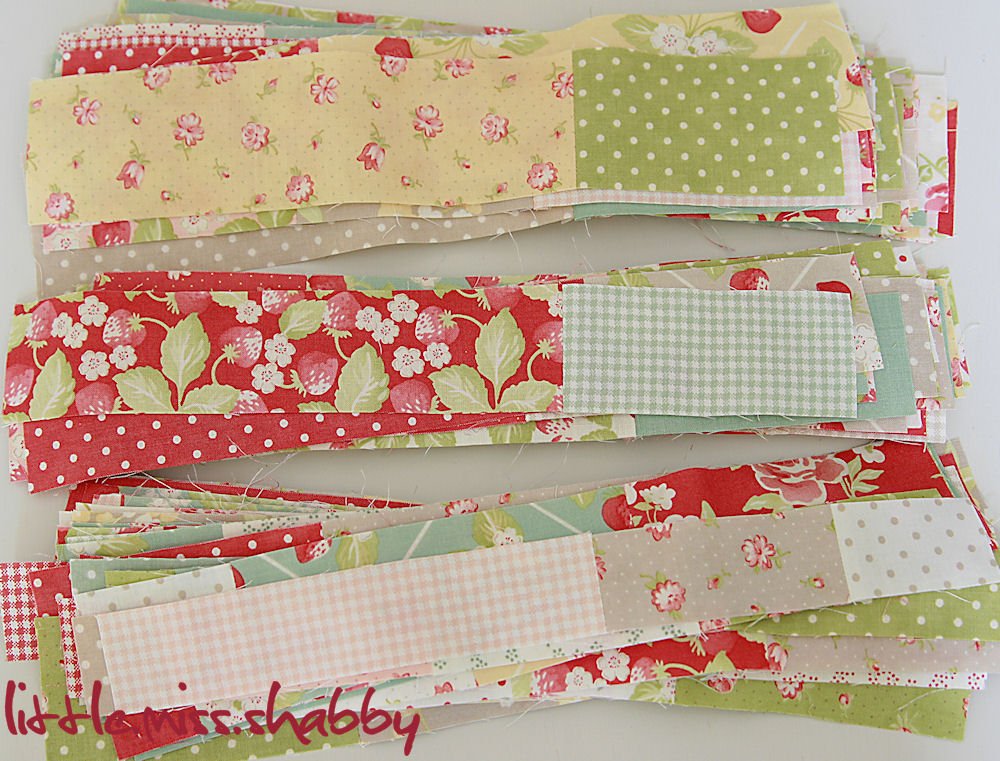
    After sewing together several strips, iron seams to one side and trim the set to 13.25″.  Using the small pieces (you can see them pictured up above on the right side of the cut), continue sewing more strips together, stopping every so often to trim them down to 13.25″ and then keep going–always utilizing the whole strip.
    Continue sewing together the strips and trimming to 13.25″ until you have sewn/trimmed all of the strips.  You will have twice as many 1.5″ strips–you will use two of them per block & only one per block of the 2″ width and 2.5″ width.
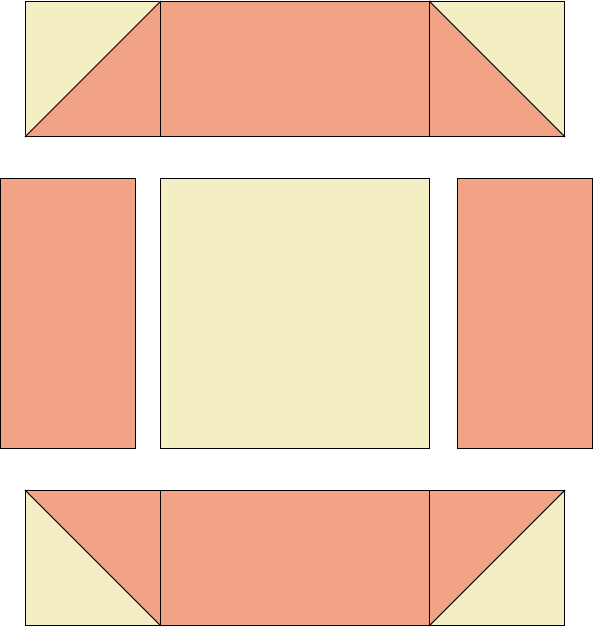
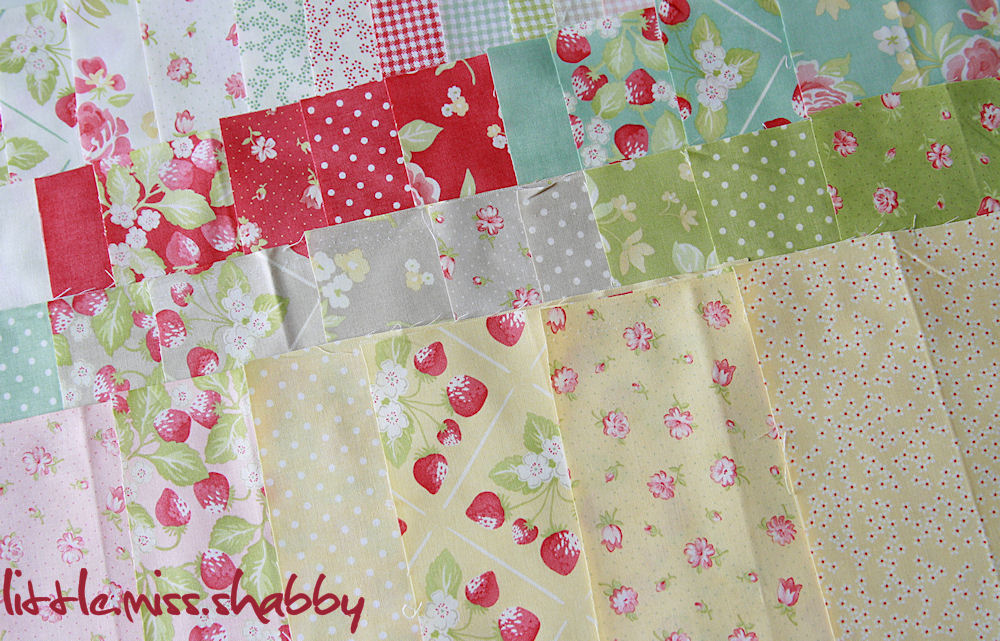
    Now we will sew together four strips to make a rectangle strip set measuring 6″ x 13.25″.  Each rectangle block will consist of (1) 2″ x 13.25″ strip, (1) 2.5″ x 13.25″ strip, & (2) 1.5″ x 13.25″ strip.  Place the different widths randomly within the block.  You want them all to be different, scrappy, and fun.
    Continue sewing together the strips until you have a total of 36.  Press seams to one side.  As you start sewing the last few blocks, you may find that you need a few extra 1.5″ strips–just trim down some of the wider strips as you should have extra of those. =)
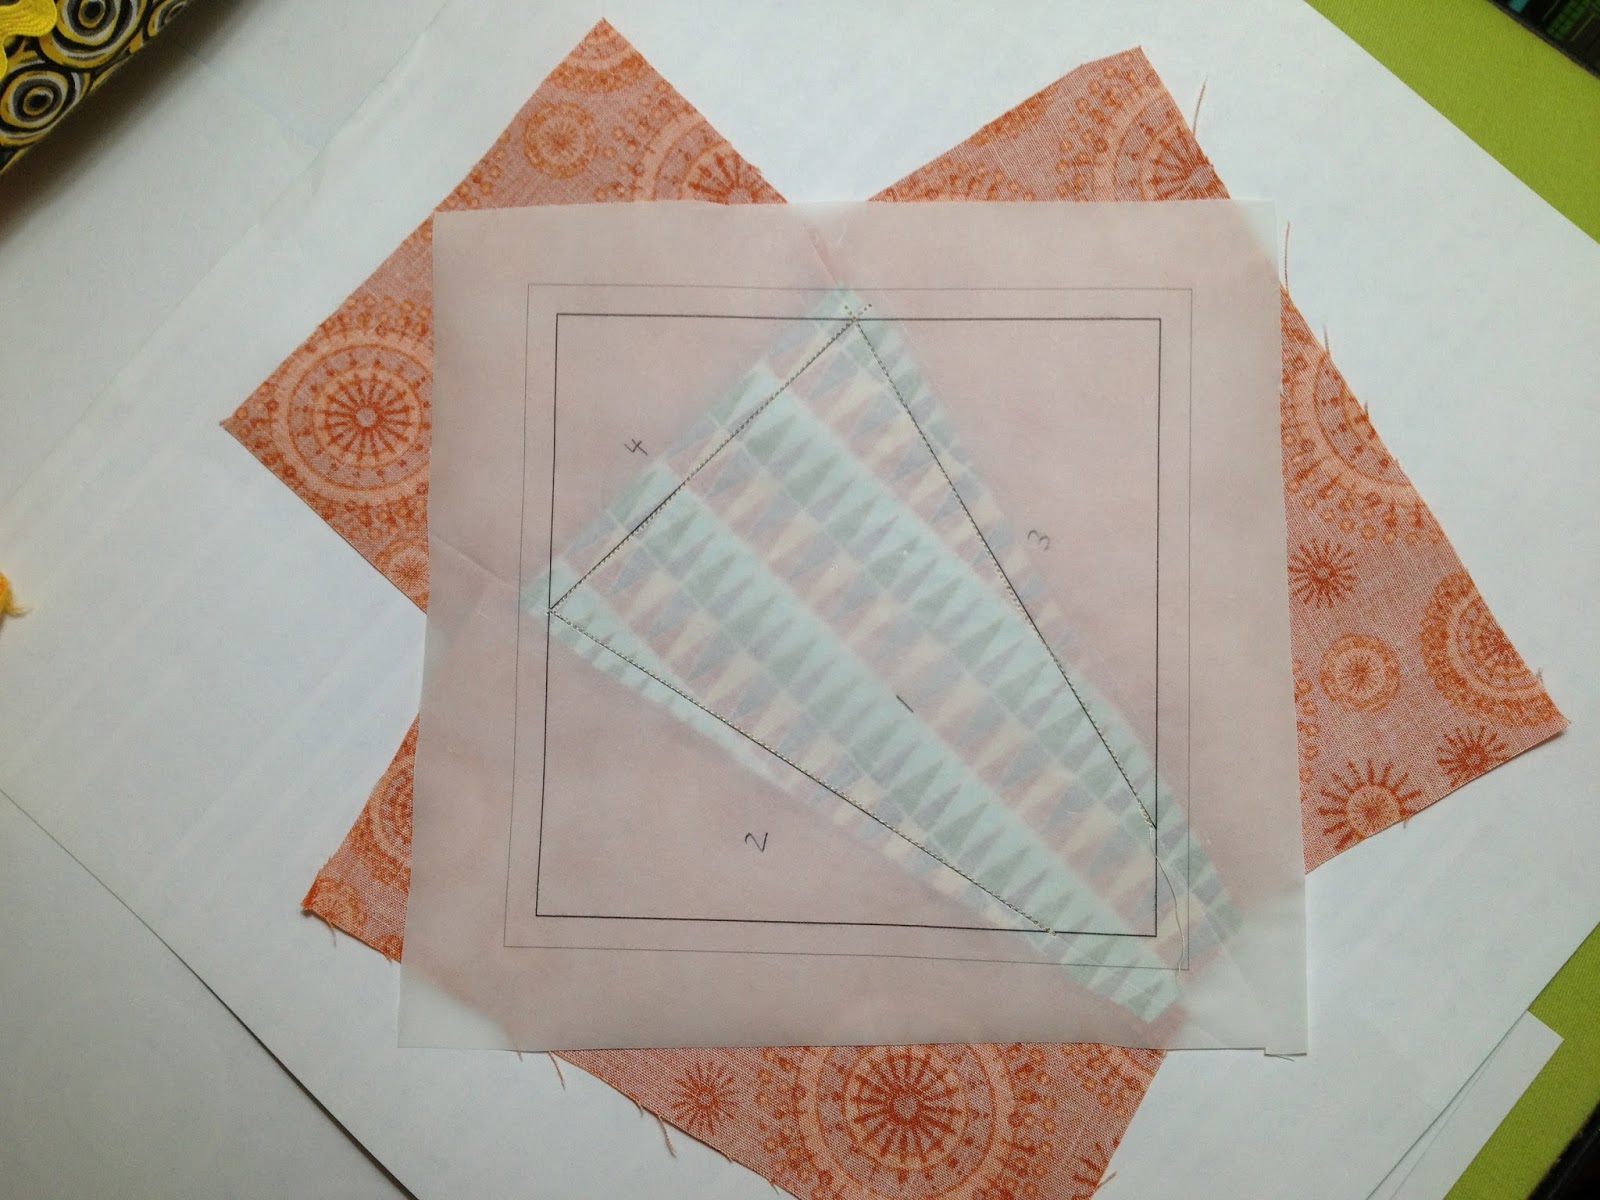
    To make the corner trimming template, cut a paper square 3″ and then cut diagonally once to make a triangle.  Tape the diagonal edge of the paper triangle to your rotary cutter as pictured and trim off each corner of each strip set rectangle.
    We will now sew our corner triangles onto our strip set unit.

    The triangle unit will extend beyond the strip set unit as shown.  Sew together using a 1/4″ seam allowance as pictured.

    Press seams and voila! =)  Continue to finish all 36 blocks.
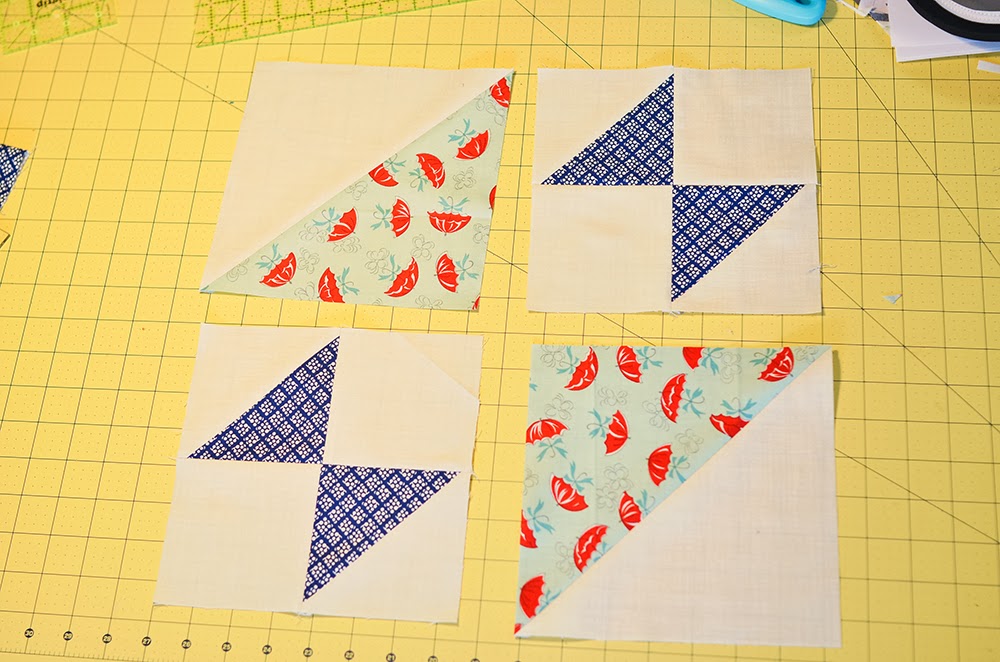
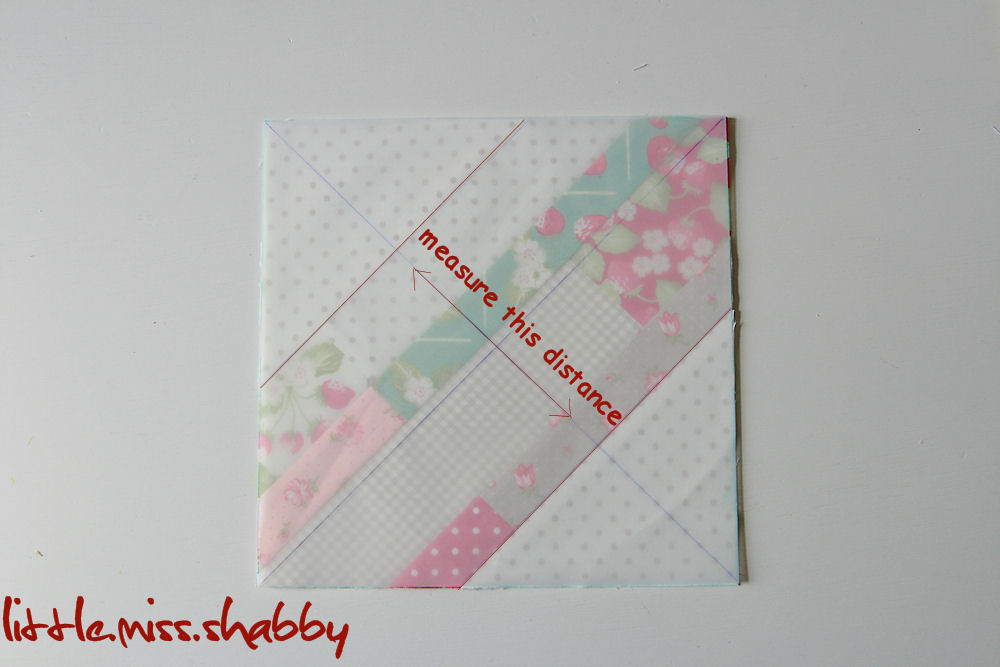
    Now, these are some stretchy little blocks due to all of the bias edges and can very easily get ironed out of whack. =)  Because of this, I chose to square up my blocks before going any further.  To make a great template, take your 9″ piece of template plastic and draw a line diagonally from each corner forming an “x”.  Take a few of your finished quilt blocks and measure the width of the strip set in the middle (it should be 5.5″–if it is slightly larger or smaller, use your measurement).  Divide that measurement in half (if your measurement was 5.5″ that would be 2.75″).  Using this measurement draw a parallel line that distance from each side of one of the diagonals you made on the template initially–for example, 2.75″ on each side of the diagonal. 
    You can use this template to square up all of your blocks–just line up the center strip set with your template and trim. =)  You will now have (36) wonderfully square 9″ blocks.
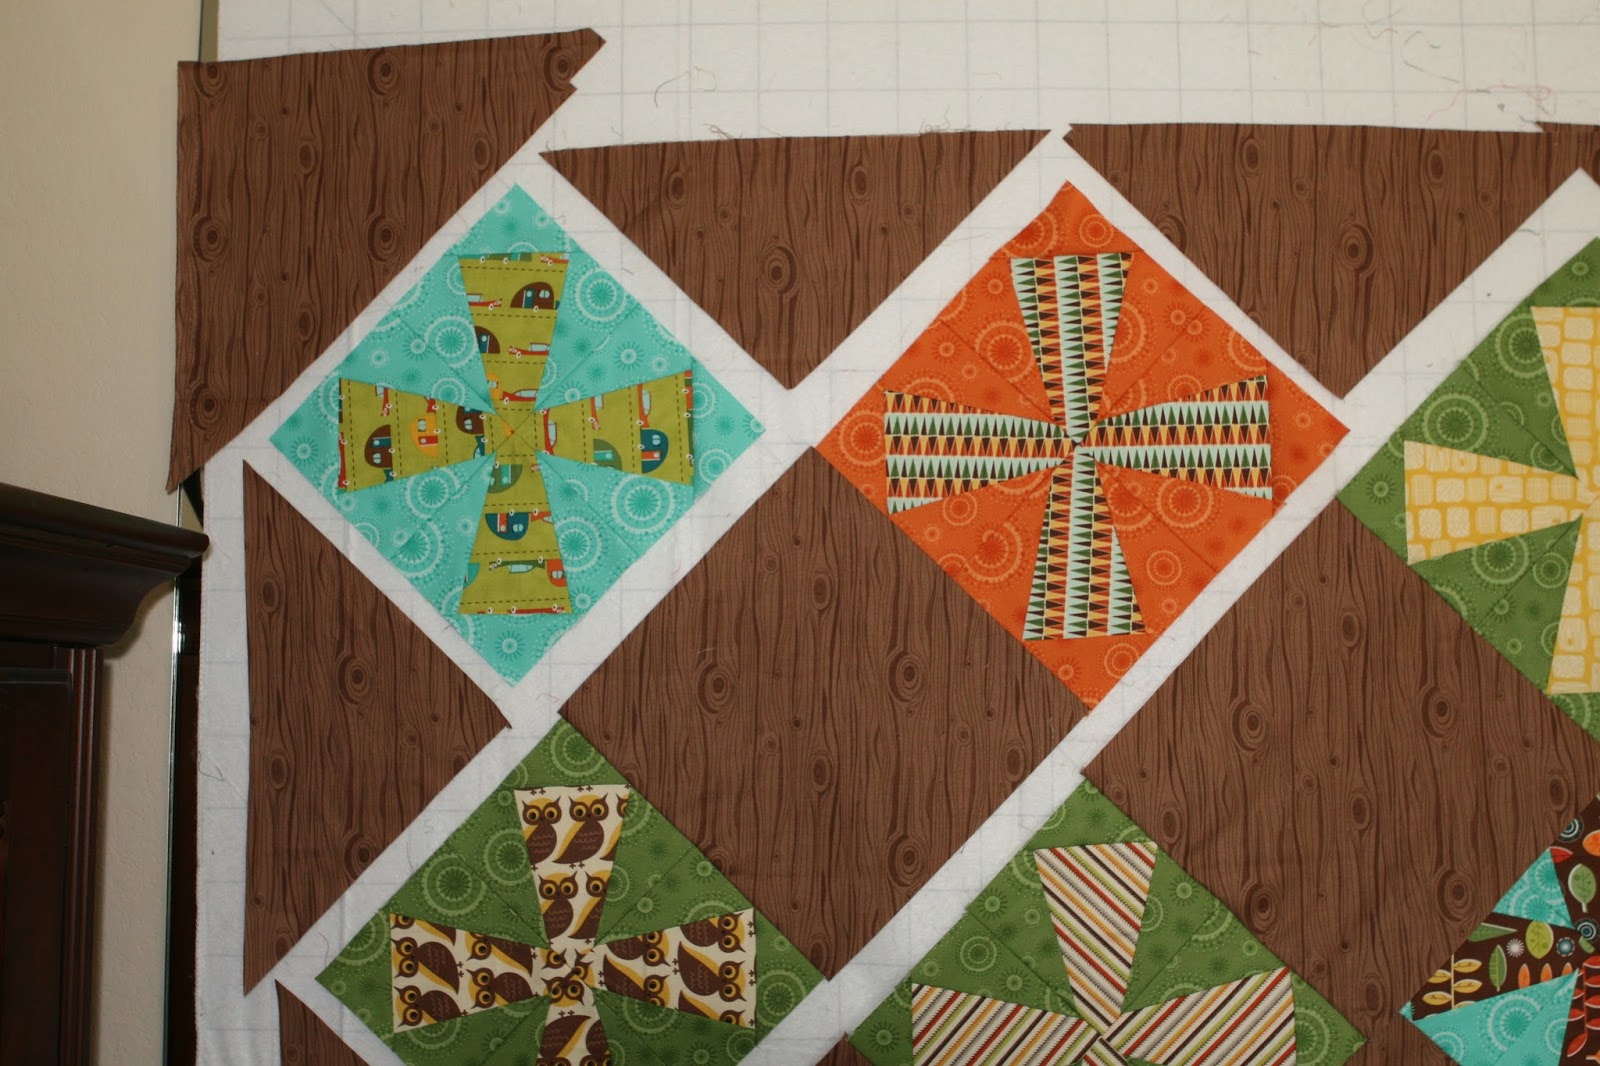
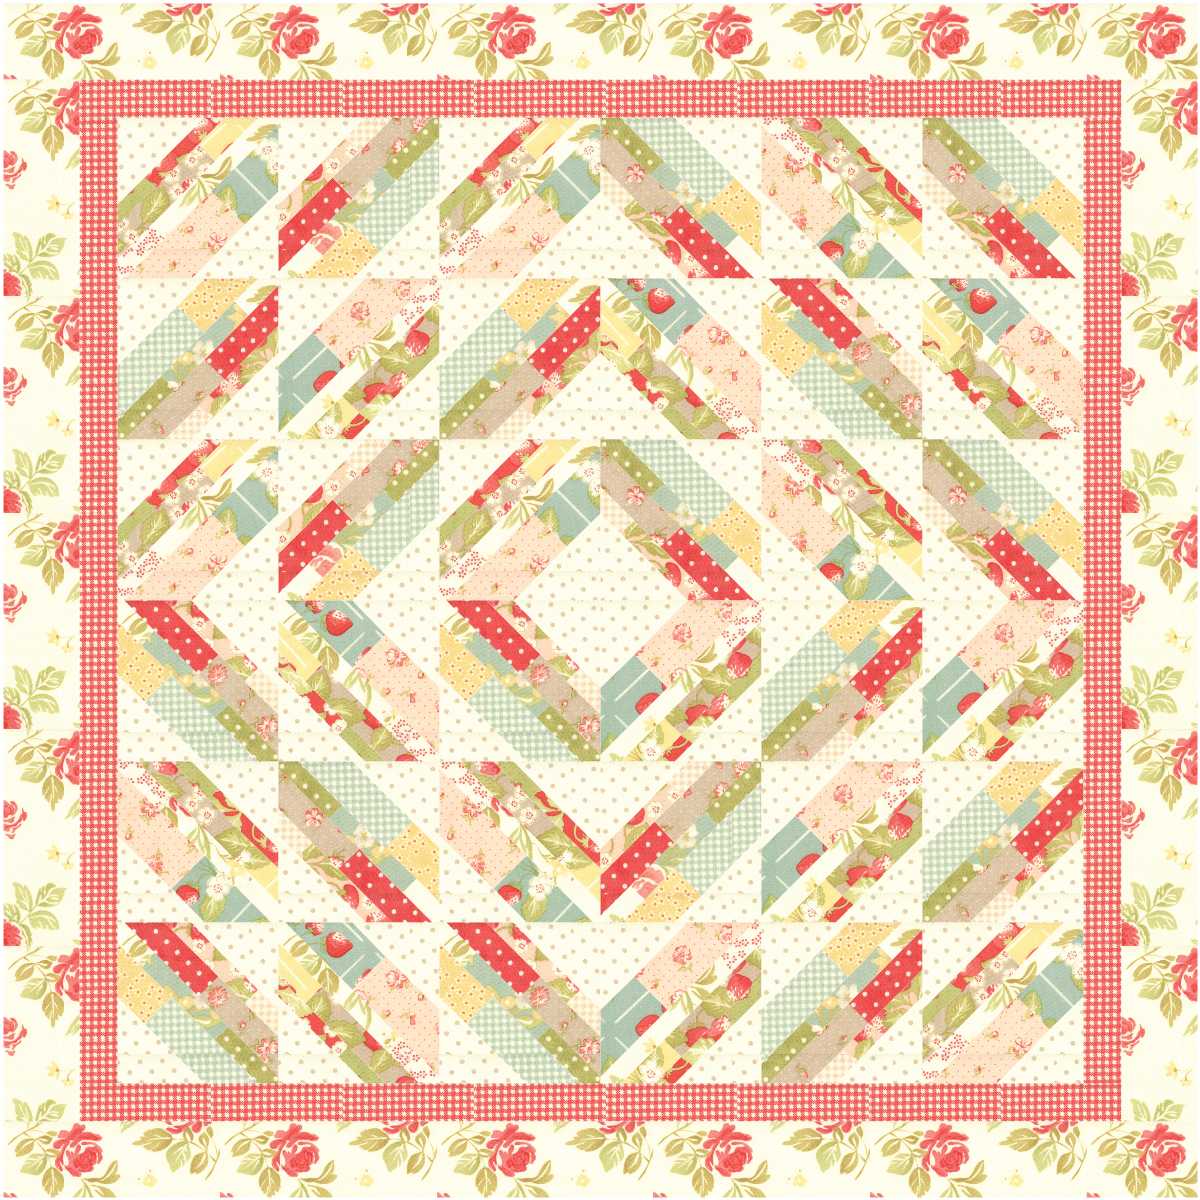
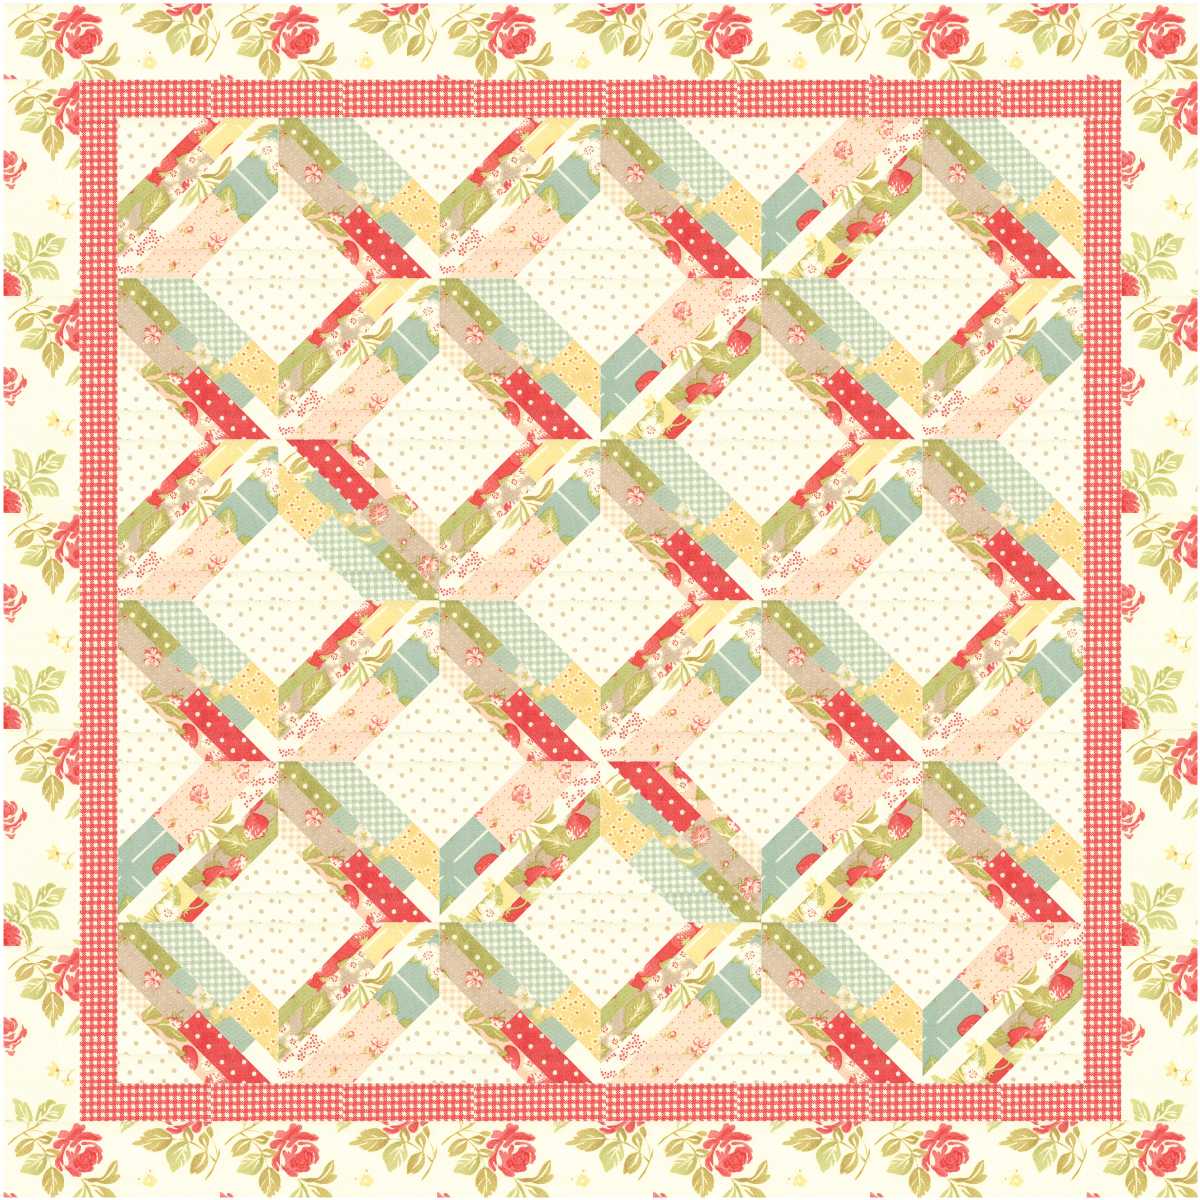
    And now the fun part, deciding which layout you prefer:

    This is the one that I chose–but, you could also go with a fun zig zag:

    Or, this fun little number:

    Once you have decided on your layout, sew together the quilt blocks accordingly.

    Borders:

    From the Red Gingham, cut 6 strips 2.5″ wide x WOF.  Sew the strips together, press seams open and cut two strips 54″ long and two strips 58″ long.  Sew to quilt top.

    From the Floral cut cut 6 strips 4.5″ wide x WOF.  Sew the strips together, press seams open and cut two strips 58″ long and two strips 66″ long.  Sew to quilt top.

    Your quilt is now ready to layer, quilt, and bind. =)  You will have extra fabric leftover–who doesn’t love extra fabric?!?  This quilt would be very easy to make larger if you wanted to by simply adding more quilt blocks or pop on over to my blog for another fun quilt to make with your leftover goodness (sneak peek below).

    One fun, summery, perfect for a picnic, quilt measuring approximately 66″ x 66″.

    Corey Yoder
    {Little Miss Shabby}