Tumbling Around Quilt


Hi there! Konda Luckau from Moose on the Porch Quilts here. I have loved playing around with honeycombs! I have a tumbling block quilt from my grandmother that I love. I have wanted to make one for a very long time. These Honeycombs finally make this quilt easy, and fun, to make! I have a new technique for piecing these blocks by machine – including being able to chain piece the blocks. I have a new book coming out this Spring full of projects using this new technique. Give it a try. You just may like it!

1 25th & Pine Honeycomb
1 1/4 yards White Bella Solid
2/3 yard Honky Tonk Red Plaid
1 1/4 yards Backing
Plastic Hexagon Template from Honeycomb


Cutting Instructions:
1. Take the plastic hexagon template from the honeycomb. Cut it as shown below.

2. Cut the white background fabric into 4 – 2 1/2″ strips, 4 – 4 1/2″ strips, and 3 – 2 5/8″ strips.
3. Using the diamond template, cut 28 diamonds from the 2 5/8″ strips.
4. Cut the red accent and binding fabric into 4 – 1 1/2″ strips and 4 – 2 1/2″ strips.
5. Take 25th & Pine Honeycomb and cut each hexagon into three diamonds as shown below.

Sewing Instructions:
6. Reorganize the diamonds into three stacks according to color.

7. Now for the magic! This is the trick to piecing y-seams on a sewing machine. The difference between my method and traditional machine piecing techniques is that my method can be chain pieced! Chain piecing means it is a lot faster and less thread waste. Refer to the picture below.
    a. Start the seam 1/4″ down from the corner.
    b. Sew 1/4″ into the diamond parallel to the top edge of the diamond.
    c. Sew down the right edge of the diamond with a 1/4″ seam.
    d. Stop 1/4″ from bottom edge.
    e. Sew to the right edge parallel to the bottom edge.
    f. Now it is ready for the next piece!

8. Seams will be pressed clockwise.

9. The bottom diamond is sewed on one seam at a time. Using the same method as above, matching diamond points, sew the right seam.

10. This is what it looks like opened up.

11. Fold hexagon in half matching points and sew the last seam as shown below.

12. Press the seams clockwise opening up the center of the seam allowances into a bitty hexagon.

13. With those three seams, one tumbling block is created! Repeat to make 38 tumbling blocks.

 14. Lay out the center of the quilt as shown below.

15. Using the same machine piecing technique as before, sew the tumbling blocks into rows.

16. Again, using the same machine piecing technique as before, sew the rows together.

17. Trim the left and right sides even. Trim the top and bottom 1/4″ outside of the points. The quilt should now measure about 26″ x 27″. Your measurements may differ slightly because of the many bias edges. Press carefully.

18. Use the 4 – 2 1/2″ white background strips to sew on the first border. Measure carefully before cutting the length of border strips.
19. Use the 4 – 1 1/2″ red accent strips to sew on the second border. Measure carefully before cutting the length of the border strips.
20. Use the 4 – 4 1/2″ white background strips to sew on the third border. Measure carefully before cutting the length of the border strips.
21. Quilt and use the 4 – 2 1/2″ binding strips to bind the quilt.

One fabulous quilt machine pieced tumbling block quilt that measures about 39″ x 40″.

Konda Luckau
{www.moosequilts.com/blog}

Charm Party Baby Quilt + Bonus Pillow


Hi!  I’m Julie from 627handworks.com. Today I’m sharing a Charm Party baby quilt with matching bonus pillow.  I’m someone who likes to get as much as I can out of my fabric. The half square triangles leftover from the quilt top are perfect for creating a bonus project like a pillow or even a doll quilt.  I would love to see your version if you make one!


2 Charm Packs – Print (Chance of Flowers)
1 Charm Pack – Solid (Bella Solid Snow)
1 1/4 Yards for Backing (Chance of Flowers, Cloud Flower Garden)
1/2 Yard for Binding (Chance of Flowers, Cloud Flower Garden) 


To make the 16″ Pillow Cover you’ll need:
2 Yards of Trim
1 Fat Quarter (Chance of Flowers, Rose Sandy’s Solids)
18″ Zipper
Pillow Form

Gather up your fabrics.  How pretty are these?

Pull:

  • 64 Prints for Quilt Blocks
  • 17 Prints for Quilt Border
  • 32 Solid Charms

Choose 4 different charms:

Take 2 of those charms and pair with a solid, right sides facing.  Mark a diagonal line.

Stitch along your mark and sew another line 1/2″ over.

Cut between those lines.  Set the smaller half aside.


 Press open and arrange your HST (half square triangle) with the other 2 charms.

Stitch together.

Make 16 ‘mini-blocks’.

Take 4 mini blocks and form a large block.

Make 4 large blocks.

Sew the 4 large blocks together.

Take the 17 Charms we set aside earlier.

CUT:
1 Charm into quarters (4) 2.5″ squares
16 Charms in half  (32) 2.5″ x 5″ rectangles

Take 8 rectangles and sew end to end creating a border.   Make 4 borders.

Choose 2 of the borders and sew a square onto each end.

Attach the 2 border strips that do not have the square end charms.

Attach the two border strips that have the squares on each end.

You have completed the quilt top!

BONUS PILLOW

(OR you can also use the leftover HST’s to make a matching doll quilt)

Pull 25 HST’s leftover from making the quilt top.

We will be trimming these into 3.75″ squares.
If you don’t have a special HST ruler, you can use this method for trimming your squares.

Using Washi or masking tape, mark a line from corner to corner on the 3.75″ line.
(Make sure you are using the squared end of the ruler and one side isn’t an extra 1/2″ wide)

Lay your HST (still folded in half) with the seam line (NOT the raw edge) along the 3.75″ mark.

Trim

Press open creating a perfect 3.75″ square.  Repeat for the rest of the HST’s.

Stitch together in 5 rows of 5 using any layout you like.  Quilt if desired.  Trim to 16.75″ square.
 

Sew decorative trim along the edge with the decorative part facing the center of the pillow.

Lay your zipper facing down, pillow front facing up, and stitch in place.

Cut your fat quarter into a 16.75″ square (or the exact size of your pillow front).

Lay your back piece facing up (edges aligned with the pillow front edges), zipper facing down, and stitch. 

Open your zipper half way.   Lay your pieces right sides facing.  Pin all around the edges and and stitch, being careful not to catch your trim along the way.  Zig-zag or overlock the raw edges to prevent fraying.

Pillow cover is done!


40″ Square Baby Quilt
16″ Pillow Cover

If you make a quilt I would love to see it!
Julie Hirt
627handworks.com

Bartholo-meow’s Reef Boxes Quilt

Hi, my name is Trish and I blog over at notes of sincerity. Today I have a cute and simple quilt for you, made with Bartholo-meow’s Reef by Tim and Beck.


1 layer cake Bartholo-meow’s Reef (for blocks)
1/2 yard Bartholo-meow’s Reef Coral Glacie (for binding)
1.25 yards Bartholo-meow’s Reef Wave Water (for sashing and borders)
1/8 yard Bartholo-meow’s Reef Deep Water (for 30 corner stones)
4 yards Bartholo-meow’s Reef Deep Water (for backing)

cutting instructions
for corner stones : 
cut two strips measuring 1.5″ x width of fabric
subcut into 30 – 1.5″ squares
for sashing :
cut 18 strips measuring 1.5″ x width of fabric
subcut each strip into 9″ strips you need 71
for borders :
cut 7 strips measuring 1.5″ x width of fabric

for binding :
cut 7 strips measuring 2.5″ x width of fabric  
for backing : 
cut the four yards in half (selvage to selvage)
for blocks :
choose 2 layer cake squares

sewing instructions for blocks :

each square will be cut into fourths (you will have 4-5″ squares)

of those 4 squares, pull one aside, cut one of the squares into fourths (you will have 4-2.5″ squares), cut the last two square in half horizontally (you will have 4-5″x 2.5″ strips)

this is how you will layout your two blocks
sew rows and press to the darker print, then sew those rows together nestling the seams, and press flat
repeat for all remaining blocks 
once you have completed making all the blocks, lay them out in 6 blocks by 7 block rows
sewing instructions for sashing :
sew sashing strips on the right hand side of all the blocks other than the far right exterior blocks – the border fabric will later be sewn there
sew blocks together, into rows
sew sashing and corner stones for center horizontal sashing, press towards corner stones
nestle and pin horizontal sashing to rows, sew
sew rows together and press
sewing instructions for borders : 
1.  cut one 1.5″ x width of fabric strip in half, sew each half end to end with a 1.5″ strip – you will now have two 1.5″ strips – sew each strip to the top and bottom of the quilt top, trim excess and press open
2.  sew remaining 1.5″ x width of fabric strips into two longer strips – sew each strip on either side of the quilt top, trim excess and press open
quilt and bind
 long arm quilting by Kathy Olkowski
 

58″ x 68″ throw quilt

Trish Poolson
{www.notesofsincerity.blogspot.com}

Baby Showers Quilt

Hi there! It is LeAnne Ballard from Everyday Celebrations with a fun baby quilt for you today. Like many, I absolutely adore the new line April Showers and loved making these two baby quilts. The design is the same for both, appliqued raindrops, but the placement is different for each quilt.

I hope you have fun making this quilt! Check out my other recipes here.

Per Quilt

10 fat quarters*
1 1/2 yards background/neutral fabric
1 1/2 yards backing fabric
1/2 yard binding
2 1/4 yards fuisble webbing (I prefer Heat n’ Bond Lite or you can use your preferred applique method.)
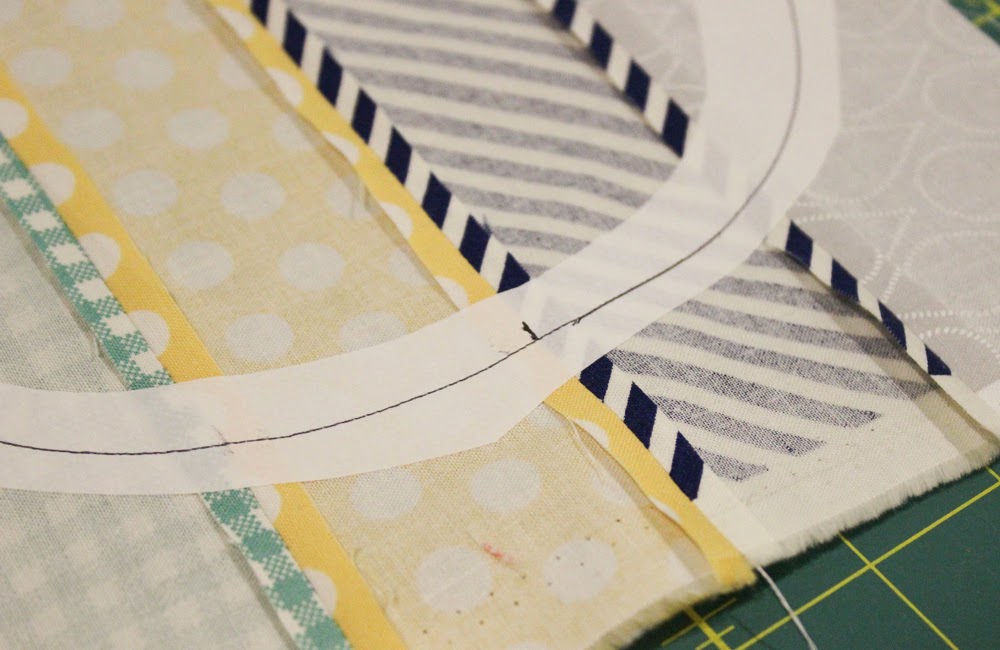
template plastic (Print out raindrop template and trace onto template plastic. Transfer markings from the raindrop onto the template plastic. Cut out template.)
batting

*Note: You could also use jelly roll strips for the scrappy raindrops and fat quarters/fat eighths for the solid raindrops.

Decide whether you want to make the normal or staggered layout:


 *All seams are 1/4″ unless noted.

Cutting

From the 1 1/2 background/neutral cut:
{4} 12.5″ x WOF strips
subcut into {4} 10.5″ x 12.5″ rectangles for a total of {16} rectangles
*Note: If you are making the staggered raindrop quilt, trim {4} of the rectangles to 10.5″ x 12.25″. Place these in a separate pile and label. This is the only cutting difference between the quilts.

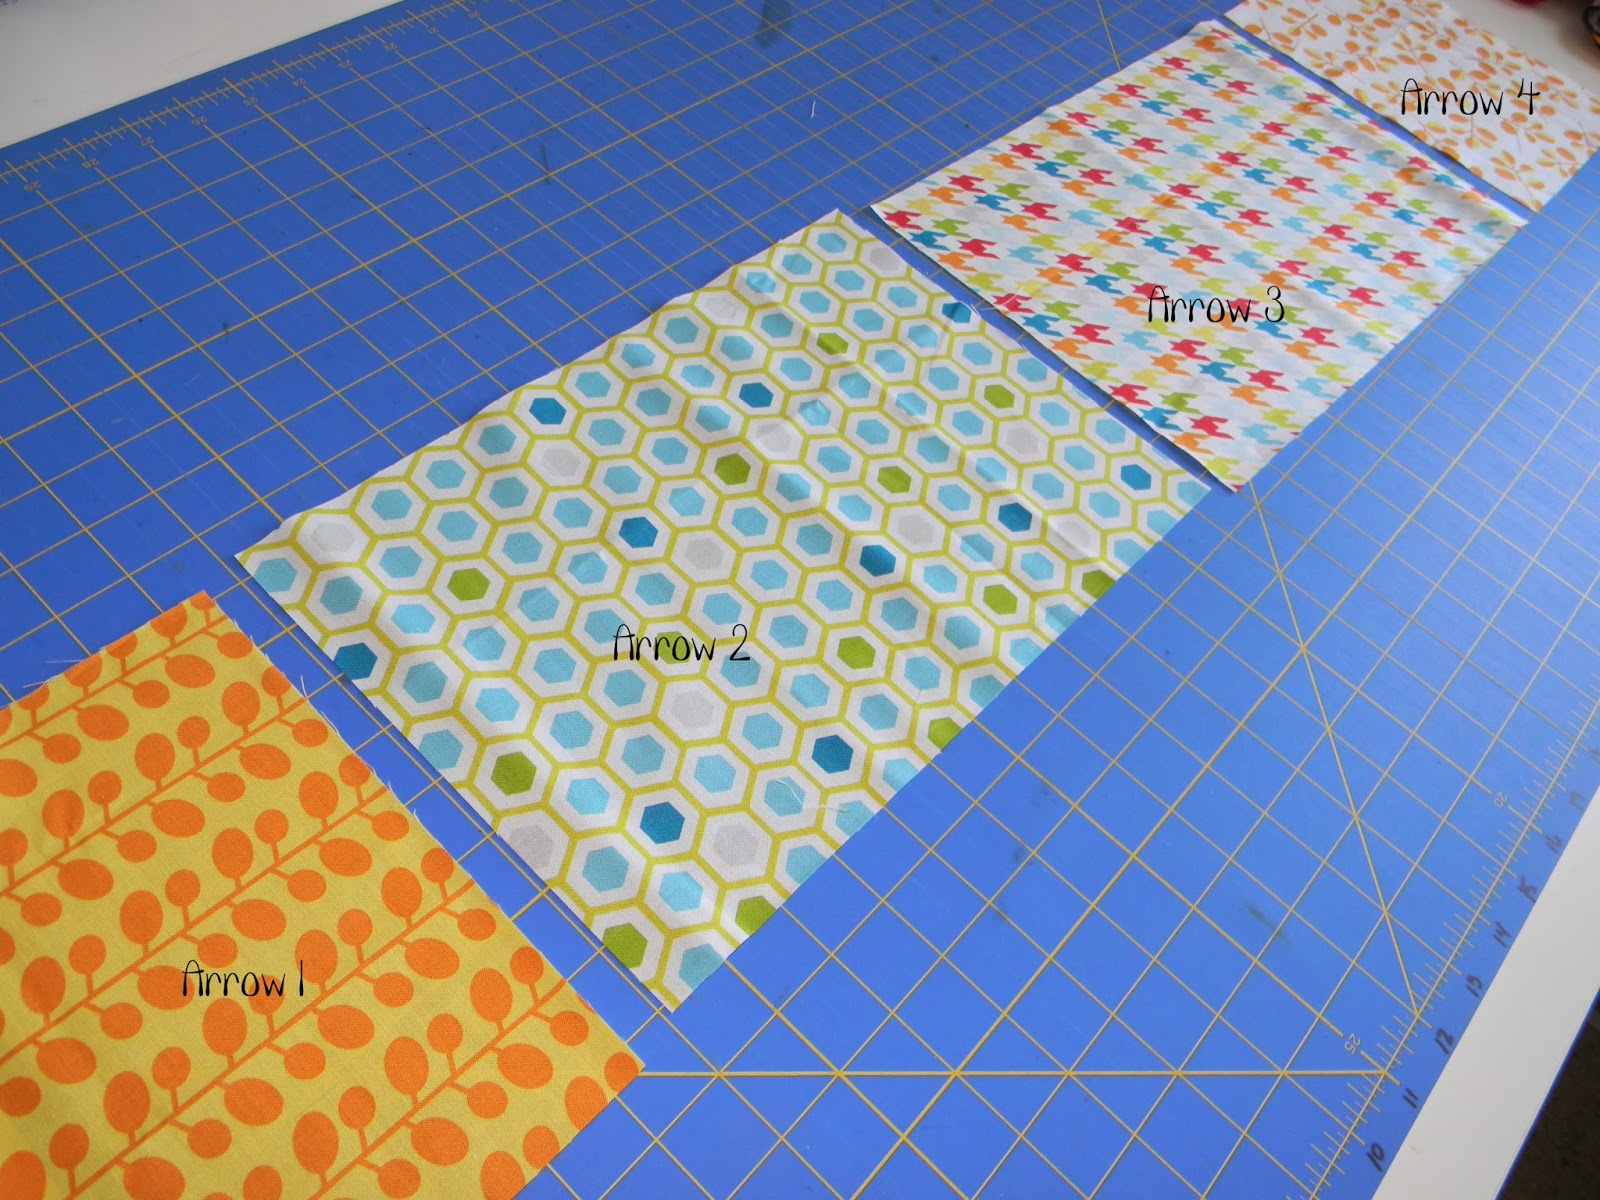
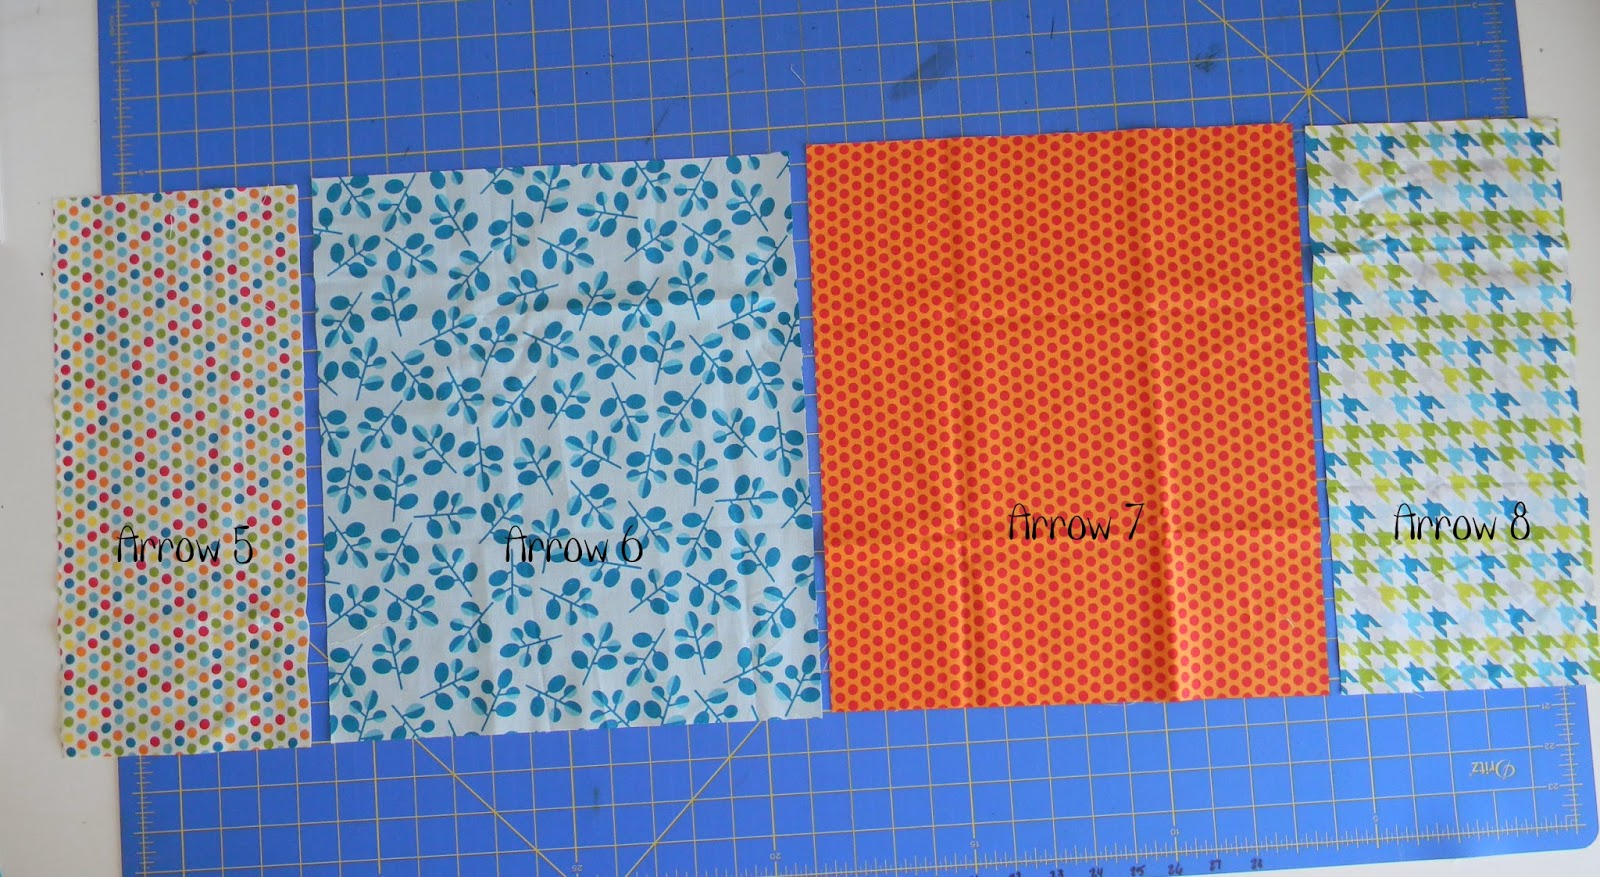
From each fat quarter cut:  the remaining fat quarter will be used for the solid raindrops
{2} 2.5″ x 21″ (or width of the fat quarter) strips
from each strip subcut {1} 9.5″ x 2.5″ and {1} 11.5″ x 2.5″ (I just left the remaining strip. The strip needs to be at least 11.5″.)

Binding
From the 1/2 yard for the binding cut:
{5} 2.5″ x WOF strips

Prepare Applique
Trace {16} raindrops onto the fusible webbing using the raindrop template. Transfer markings onto the fusible webbing. Roughly cut around each raindrop leaving about 1/4″ around each raindrop.  Next, cut out the centers of the raindrops leaving about 1/2″. This will help keep the quilt cuddly and soft instead of stiff from the fusible webbing.
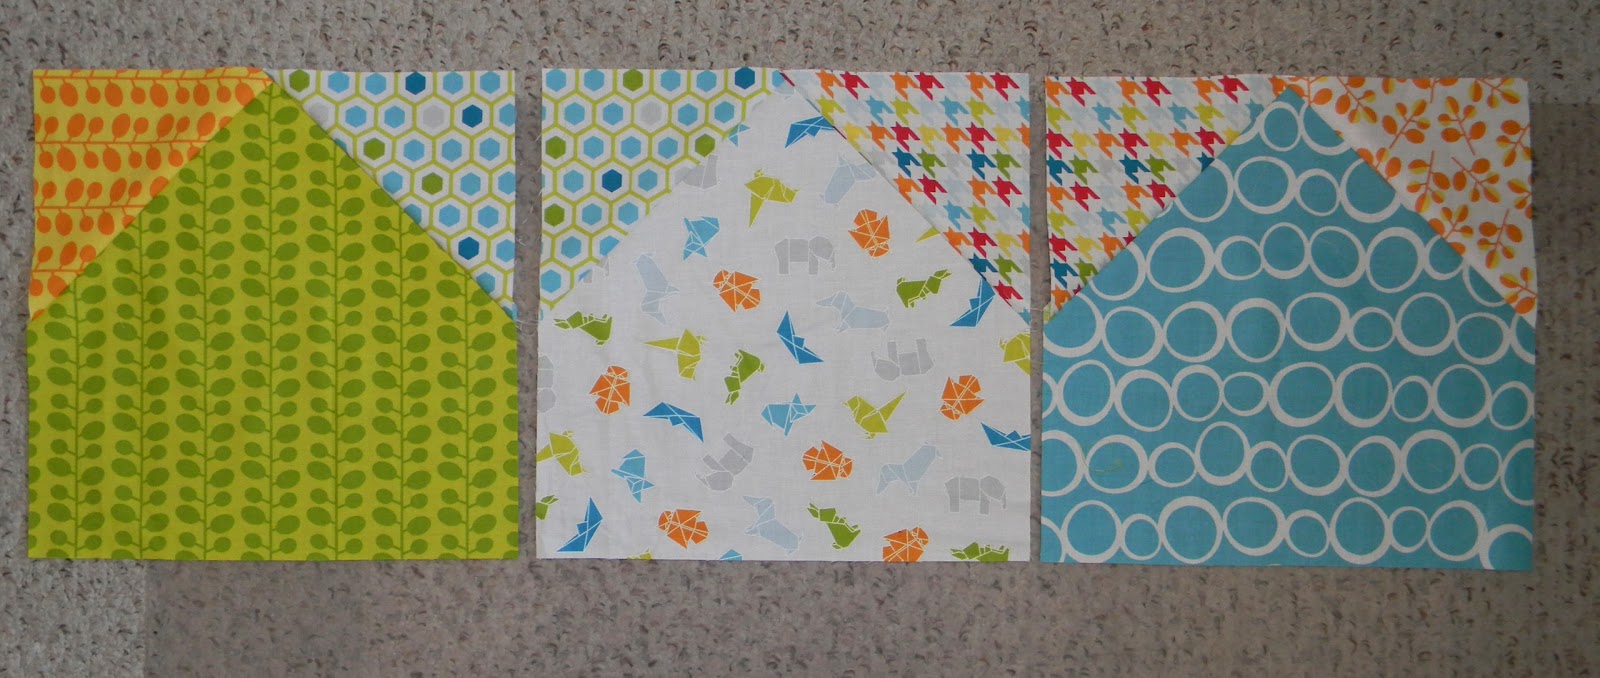
Block Assembly

Vertical Raindrops

1. For each vertical raindrop select {4} 2.5″ x 11.5″ strips.  Arrange as desired and sew.  Press seams OPEN. Make a total of {4} vertical units. (You will have extra of these strips.)

2.   Flip the unit over and line up the mark at the bottom with the center seam as shown below. Line up the tip of the raindrop with the same center seam. Quickly fuse in place. (I found it easier to “baste” the fusible web in place by quickly lifting the iron up and down over the webbing. Then I flipped the unit over to the front and fused as directed by my instructions. Otherwise, it was easy to  mess up the directions of the seams.) 
 
 
3. Cut out the raindrop. Leave paper in place until you are ready to fuse in place. Repeat for {4} vertical raindrops.
Horizontal Raindrops
1.  For each horizontal raindrop select {5} 2.5″ x 9.5″ strips.  Arrange as desired and sew.  Press seams open. Make a total of {4} horizontal units.

2. To line up this raindrop, fold the unit in half and lightly press to create a crease. Fuse the webbing in place just like you did for the vertical raindrops, just use the crease as you guide. Repeat for {4} horizontal raindrops.

 Solid Raindrops

1.  Select {8} of the fat quarters for your solid raindrops. Fuse the raindrop fusible web onto the remaining part of the fat quarter. (Follow the directions for your brand of fusible webbing.)

2.  Allow to cool then cut on tracing line. Repeat for {8} solid raindrops.

Patchwork Raindrop
If you opt to make this block, make in place of one of the solid raindrops.

1. From one of the remaining fat quarters cut {1} 4.75″ x 11″ piece and {1} 3.5″ x 11″ piece. From the leftover 2.5″ strips cut {6} 2.5″ squares.

2. Sew together all the 2.5″ squares. Press seams all one direction. Trim unit to measure 11″ long.  I just trimmed a little off the top and bottom.

3. Sew the pieces cut from the fat quarter to either side of the patchwork unit. Mine didn’t line up exactly which is fine. It doesn’t have to be perfect.

4.  Flip unit over with the patchwork unit to your left.  Line up the mark on the raindrop with the seam line running the length of the patchwork unit. Fuse in place and cut raindrop out.


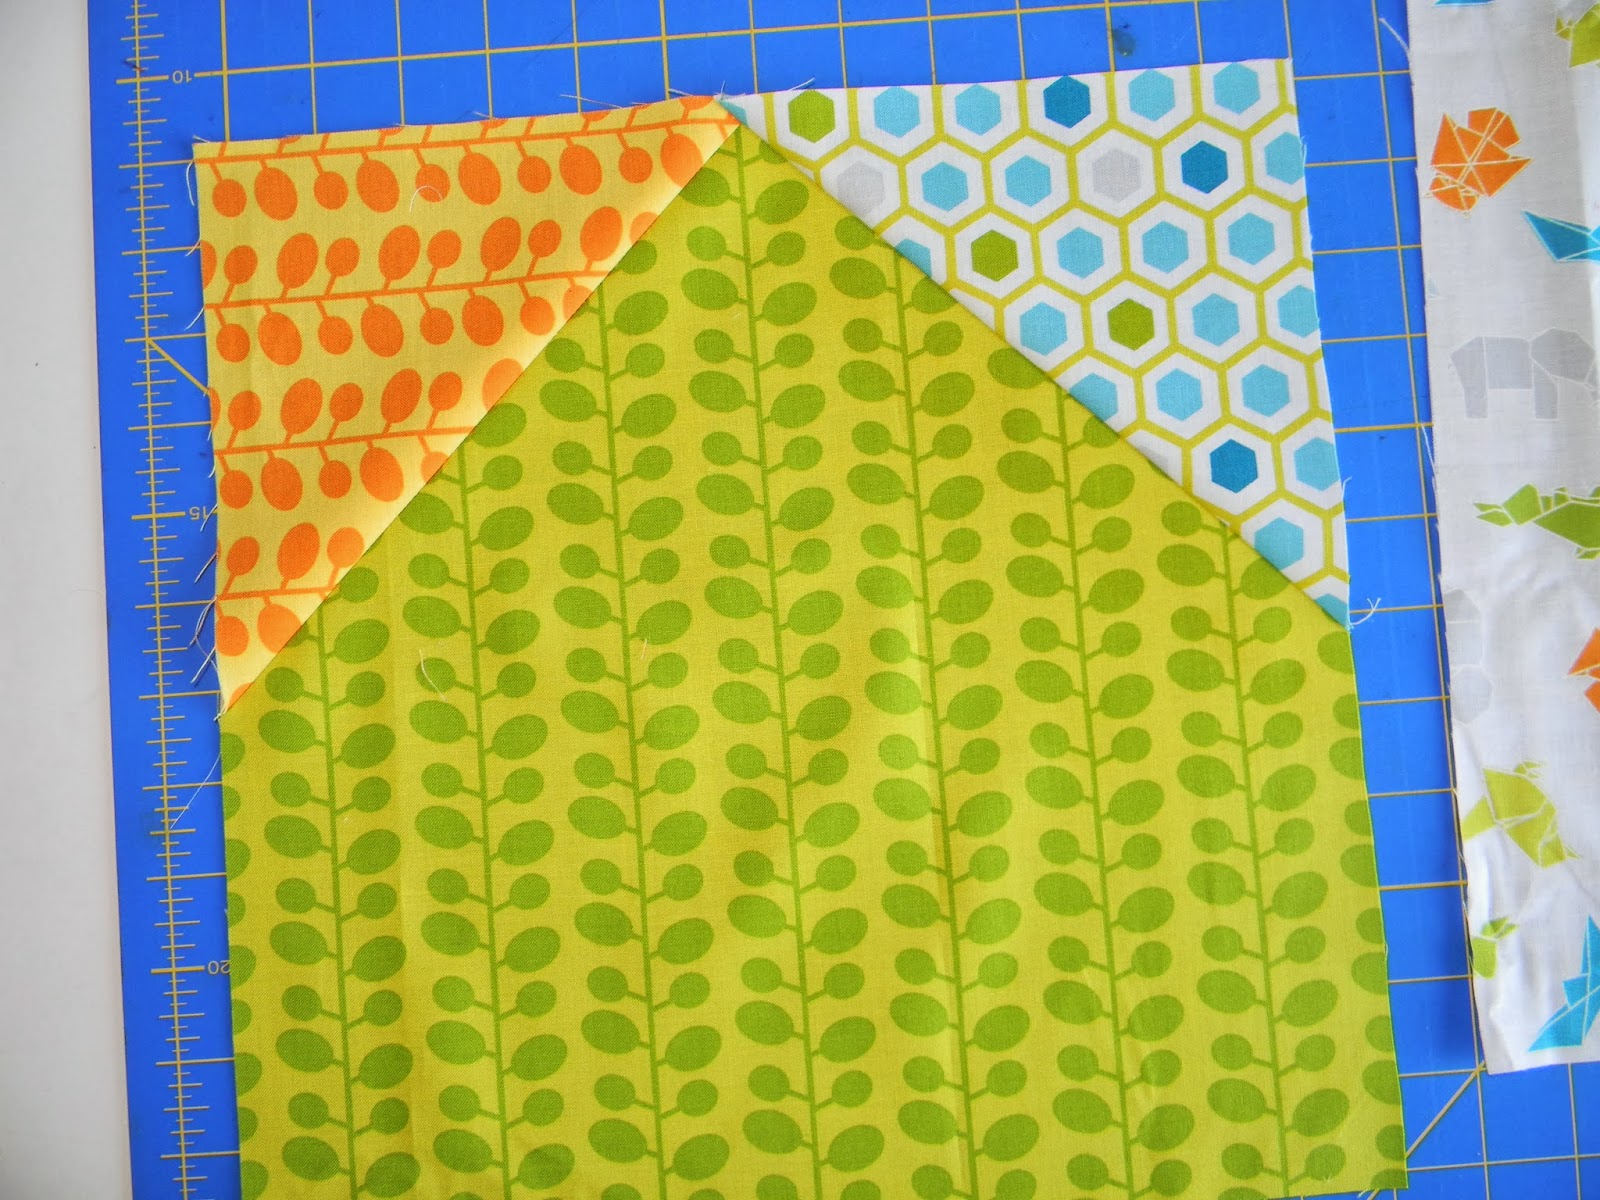
Fuse Raindrops to Background

1. Fold the background rectangles in half lengthwise to create a crease.

2. Remove paper backing and center raindrop onto the rectangle. Raindrop should be about 1.5″ inches from the sides and 1.25″ from the top and bottom.  Fuse in place following webbing directions. Repeat for all raindrops.
*For the staggered layout: Adhere {2} of the SOLID and {2} of the VERTICAL raindrops to the slightly smaller (12.25″ x 10.5″) rectangles. These will go in the positions shown below. (Don’t sew the quilt top together yet, this picture just references where the smaller rectangles will go.)

3. Machine stitch around each raindrop to secure in place. This can be done in a variety of ways. You could use a zig-zag, satin, blanket (if your machine has that option), or a simple straight stitch.  For my quilts I opted to use a blanket stitch and straight stitch. With the straight stitch, I sewed about 1/4″ away from the edge of the raindrop. Note if you choose to use a straight stitch, the raw edges will fray and wear over time. This step is easiest to do BEFORE you sew the quilt top together. 

Quilt Assembly

For the regular layout:
1. Arrange the quilt units in {4} rows of {4} as shown below.

2. Sew units together in rows and press seams one direction, alternating from row to row.  Then sew rows together. Press seams one direction. Press entire quilt top.

For the staggered layout:
3. Cut 2 of the SOLID raindrops in half, NOT the slightly smaller ones. Cut the unit in half to make {2} 6.25″ x 10.5″ units. These will go in the positions below:

4. Sew units together in rows and press seams one direction, alternating from row to row.  Then sew rows together. Press seams one direction. Press entire quilt top.

5. Then baste, quilt, and bind!


 one 40″ x 48″ baby quilt

LeAnne Ballard

Have A Heart Baby Quilt


Hi, my name is Alison Tudor of Sew and Tell Quilts. This is a fun and quick project that could make a wonderful quilt for a baby girl or a large Valentine’s Day wall hanging.


Moda fabric Printemps
Designer 3 Sisters
Materials Needed: 
1 Jelly roll 44030JR 
1-1/2 yards  Printemps Linen 44035-11 for background and border blocks. 
3/8 yd Printemps Primrose 44030-13 for border. 
1/2 yd Printemps Tonal Scarlet 44036-15 for inner border.   
1/8 yd Printemps Scarlet 44037-15
1/4 yd Printemps Tonal Primrose 44036-13
3 yards backing fabric
3/8 yd binding fabric (5 strips 2.5″)


Cutting Directions

Cut 251 2-1/2″ squares of Printemps Linen 44035-11 for the background and border blocks.
Cut 24 2-1/2″ squares of Printemps Tonal Primrose for the inner corners.
Cut 59 2-1/2″ squares of a good mix of light and dark prints from the jelly roll for the heart.
Cut 4 2-1/2″ squares  Printemps Scarlet for the “L” 
Cut 4 2-21/2″ squares Printemps Pond 44031 14 for the “O”
Cut 5 2-1/2″ squares Printemps Scarlet 44037 15 for the “V”
Cut 4 2-1/2″ squares Printemps Buttercup 44034 12 for the “E”
Cut 4 1-1/2″ x WOF strips Printemps Tonal Scarlet 44036-15 for inner border.  
Cut 42 2-1/2″ squares Printemps Primrose 44030-13 for outer border blocks.

From your choice of binding fabric, cut 5 strips measuring 2½” x WOF  

Quilt Assembly

Working in sections, following the sectional layout diagram, sew the 2-1/2″ squares together to construct the rows. Press the seams in opposite directions for each row to help make the seams line up as you build the quilt top. Once all the sections have been completed, stitch the sections together to complete the quilt top center.

Sections Diagram

Making The Borders
 For the inner border, cut two 1-1-2″ strips 38″ long and two 1-1/2″ strips 40-1/2″ long. Sew these to the sides and the top and bottom of the quilt top center.  For the outer border, alternately join pink and cream colored 2-1/2″ border blocks to make a strip.  Two sides should require 20 blocks; 10 of each color measuring 40″. Two sides should require 22 blocks; 11 of each color measuring 44″.  Sew these to the sides and the top and bottom of the quilt to complete the top.

Quilt Layout Diagram

Finished quilt 44″ x 44″

Alison Tudor
{Sew and Tell Quilts}

This Way Up?? Quilt


Hello! This is Margie from Ribbon Candy Quilt Company with an easy, fun project today. Let’s get started.

{Mixed Bag fabrics}

11 Fat Quarters – 3 for the Center diamonds and 8 for the Arrows
¼ yard orange – top block
¼ yard yellow – bottom block
1¾ yard blue for stop border and outer border
⅓ yard each of 4 fabrics for middle border
½ yard orange for binding
4 yards for backing

Here’s what I used:


CUTTING
From each of the 3 fat quarters that you are using for the center diamonds, cut one 12½” x 12½” square

NOTE: Arrows 1-4 point up and arrows 5-8 point down.

For Arrows 1 and 4, cut one 6½” x 8½” rectangle and one 6½” x 6½” square


For Arrows 2 and 3, cut one 8½” x 12½” rectangle and two 6½” x 6½” squares

For Arrows 5 and 8, cut one 6½” x 6½” square and one 6½” x 14½” rectangle


For Arrows 6 and 7, cut one 12½” x 14½” rectangle and two 6½” x 6½” square

PIECING THE ARROWS
Sew Arrow blocks 1 -4 together in a row as shown and press seams to one side.

Sew Bottom Arrows blocks 5 – 8 together in a row as shown and press seams to one side.

Arrow Block sets:

Now to make the Center Diamonds. Place your Center Diamond 12½” x 12½” squares in the order you wish them to appear in your quilt.

Take your Arrow Point  1- 4….6½” x 6½” squares and lay them out as shown above.  Each Center Diamond will have a different fabric in each corner. Using a pencil, draw a diagonal line from point to point on the wrong side of each  6½” x 6½” square.


Line up the raw edges in the top left corner and pin in place.  Sew on the pencil line. Press the Arrow Point square back and trim excess fabric.

Repeat with all top arrow points. Here’s what your Center Diamonds should look like at this point.

We are now going to work on the bottom half of the Diamonds. Lay out the Arrow Points 5 – 8 …. 6½” x 6½” squares as shown. Make sure you have the Arrow Point squares in order or your Arrows will not turn out.

Repeat the process of drawing a diagonal line, sewing on the line, pressing, and trimming as outlined above.

Continue to make your Diamonds and Arrow Points until you have all three Center Diamonds completed.

Sew your Center Diamond blocks together in this order.  Press seams to one side. Layout your Top Arrow Block set and your Center Diamond set. Do you see the Arrows appear? 

Match your seams and pin these sections together. Sew and press seams to one side. The top half is done! Repeat steps to attach the bottom arrow blocks.

BORDERS
For the first border, cut one 8½” x 36½” strip from each of two fabrics.


Sew on the top and bottom borders as shown.  Press seams to one side.

For the second border, cut 5 – 2½” x WOF strips. Set 2 strips aside for top/bottom border. Piece remaining strips end-to-end and cut into 2 strips measuring 50½” long. These are your side borders.

Sew on side borders and press seams. Sew on top and bottom borders and press. At this point the quilt measures 40½”  x 54½”, a great size for a baby, just a thought.)

For the third border, from each 1/3 yard, cut  2 – 6½” x WOF strips. Piece strips together, matching like fabrics. Cut middle borders as follows:

  • Side middle borders measure 6½” x 54½”
  • Top and bottom middle borders are 6½” x 52½”


Sew on side middle borders.  Press seams to border. Sew on top and bottom middle borders.  Press seams to borders.

For the fourth/outer border, cut 8 – 6½” X WOF strips.  Piece strips together end-to-end. Press strip and cut as follows:

  • 2 side outer border strips measuring 6½” x 66½”
  • 2 top/bottom outer border strips measuring 6½” x 64½”

Sew on side outer borders.  Press seams to border. Sew on top and bottom outer borders.  Press seams to border.  DONE!!!

Baste and quilt as desired.  I cut my binding at 2¼” x WOF.  You will need to cut 7 strips for binding.


One Quilt finishes 64½” x 78½”

ENJOY!!!!!

Thanks for stopping by.

Margie Ullery
{ribboncandyquilts.blogspot.com}

Beach Ball Baby Quilt

Hi! This is Jess from The Elven Garden with my first recipe for Moda Bake Shop. I wanted to challenge myself to see if I could make a quilt using just a jelly roll (Sphere by Zen Chic), and I came up with the Beach Ball lap/baby quilt. It does use a fat quarter of background solid as well, but other than that a jelly roll is all you need!

This quilt is made using large equilateral (60 degree) triangles, arranged so they form hexagons across the quilt top. The layout options for the hexagons are unlimited – if you would like to have a play with some other layout options, you can download and print triangular graph paper here. This quilt measures 45″ x 50″, but you could easily make it bigger by using additional jelly rolls.


One Jelly Roll of Sphere by Zen Chic
One Fat Quarter (or quarter yard) of Bella Snow
1/2 Yard Binding fabric
2 1/2 Yards backing fabric
50″ x 55″ piece of batting

All seam allowances throughout the tutorial are a scant quarter inch, and I have pressed my seams open at all stages.

Begin by sorting the jelly roll into colour sets, separating the lighter value prints (in this case the grey and white based prints) from the darker ones.

STEP 2:
Next, split each colour into sets of three strips. Some of my strip sets included one strip with a contrast in colour or value.

STEP 3:
Sew each of these strip sets together along the long edge. For the strip sets with one contrasting strip, make the contrasting strip the central strip in the set, as this will form a continuous ring within the hexagons. Press your seams open.

Each strip set should measure 6.5″ wide by width of fabric.

STEP 4:
Cut each of the strip sets into equilateral triangles using either a 60 degree triangle ruler:

Or using the 60 degree line on your ruler, lining up the line on your ruler with the bottom or top of the strip set.


Continue down the strip set, flipping the strip set or ruler as you go. You will end up with 9 triangles from each strip set.


STEP 5:
To avoid trimming off the sides of the quilt, and losing some of the width of the quilt, I added setting triangles at the end of each row. To make these, cut strips the same width as your strip sets (6.5″) from your fat quarter of background fabric. Make a 60 degree cut with your ruler, and then make a vertical cut, 4″ in along the long edge, and 1/4″ from the shorter side (see below). If you would prefer to give yourself more wiggle room when squaring your quilt, you can make the setting triangles a little wider (4.25″ in from the long side).

Continue along the strip, cutting a total of 16 setting triangles. 


STEP 6:
At this stage, you could lay out your pieces and start piecing the rows together. I found it easier to piece together my darker coloured triangles into half-hexagons first, as it was much easier to switch them around on my design wall until I found a layout I liked. It also makes it easier to keep your triangles in the correct order as you are sewing the rows together. 

Do not sew the light value (grey and white) prints in this way.


When sewing these half hexagons together, match up the seams along one edge and pin at each seam (I pin the side of the seam that will be sewn first). 


You will end up with three half-hexagons from each strip set. Do not trim off the little triangles formed at the outer corners, as these are very useful when aligning your triangles when sewing the rows together.


STEP 7: 
Lay out your pieces into rows according to the photo below, or as desired (here I have 8 rows of 12 triangles, plus a setting triangle at the end of each row). If you place them carefully, the light value triangles will form partial hexagons that appear to be sitting behind the coloured hexagons.


When sewing the triangles into rows, you will need to offset the pieces slightly to account for the seam allowance and produce a straight row. It is helpful to use the little ‘tags’ of fabric produced by pressing your seams open when lining up your pieces. In the photo below, you can see these ‘tags’ on the bottom left and top right of the half-hexagons. 

When the pieces are placed together ready to be sewn, they will cross each other at an angle like so (the seam to be sewn is at the right of the photo):

If we look more closely at these pieces, you can see how the ‘tags’ where the seams have been pressed open allow you to line up the two pieces.


STEP 8:
Once your rows are sewn, sew your rows together in pairs, carefully pinning each of the points where your seams meet, so that your points will meet up. Because there are a lot of bias edge in the quilt top, it is possible to ease (or slightly stretch) some of your pieces to make the points meet.

Continue sewing the rows together in pairs, until you have a complete quilt top. 


STEP 9:
Baste, quilt and bind as desired! To make your backing, cut two 15″ by width of fabric strips from one end of your backing fabric. Join these end to end to make one long 15″ wide strip. Remove the selvedges from the remaining backing fabric, and join the long strip you just made to one side of the backing fabric using a 1/2″ seam. 


One lap quilt, 45″ x 50″

Jess Frost
{theelvengarden.blogspot.com}

Candy Circle Quilt


Hi there, this is Cheryl from Meadow Mist Designs and I am so excited to share my first project for Moda Bake Shop!  I love the cute Moda candy packs and all of Fig Tree & Co.’s fabric lines so I was thrilled to combine them to make the Candy Circle baby quilt.  With just four mini charm packs (or just one charm pack), a focal print fabric, and some background fabric, you can have a cute baby quilt ready to gift.


4 mini charm packs (also called candy packs) or 1 charm pack:  Mirabelle by Fig Tree & Co.

3/4 yard of a focal print: Mirabelle Breeze 20225
5/8 yard of a background fabric (3/4 yard if you include the optional pieced backing): Bella Solids White Bleached
3/8 yard for binding: Mirabelle Bark 20227
1 and 1/4 yards for backing: Bella Solids Green Olive (for a 2″ overhang)


Step One – Cutting the Fabrics
*Note: if you cut each strip in each step you may have a few extra pieces cut.

Candy Squares

1)      If starting with a charm pack, cut each (5” x 5”) charm square into 4 (2.5” x 2.5”) patchwork squares for a total of 168 squares (2.5” x 2.5”) (if starting with candy packs, skip to step 2)

2)      Select 132 of the 168 squares (2.5” x 2.5”) to use in the front of your quilt.  Pick squares with good contrast with the background.  You can use the leftover squares for a pieced backing.


Focal Fabric
1)      Cut 3 strips 4.5” x WOF strips

      a)      Cut each strip into 4.5” x 4.5” squares (9 per strip) for 24 squares (4.5” x 4.5”)
These 4.5” x 4.5” squares are the “full focal blocks”.


2)      Cut 4 strips 2.5” x WOF
a)      Cut 2 strips into 2.5” x 4.5” rectangles (9 per strip) for 12 rectangles (2.5” x 4.5”)
b)   Cut 2 strips into 2.5” x 2.5” squares (16 per strip) for 28 squares (2.5” x 2.5”)
  

Background Fabric (abbreviated bg in this pattern)
1)      Cut 8 strips 2.5” x WOF
a)      Cut 4 strips into 2.5” x 4.5” rectangles (9 per strip) for 28 rectangles (2.5” x 4.5”)

      b)      Cut 4 strips into 2.5” x 2.5” squares (16 per strip) for 64 squares (2.5” x 2.5”)

  
Step Two: Assembling the Blocks

The Candy Circle quilt contains 6 types of blocks.  Using the following amounts of fabric pieces and following the sewing pictures, sew pieces into rows and then rows together into blocks.  Press all seams open.

Full Focal Blocks:
24 focal print squares (4.5″ x 4.5″)

1/4 Focal Blocks
Using 16 bg squares (2.5″ x 2.5″), 16 bg rectangles (2.5″ x 4.5″), and 16 focal print squares (2.5″ x 2.5″), make 16 1/4 Focal Blocks

3/4 Focal Blocks
Using 12 bg squares (2.5″ x 2.5″), 12 focal print squares (2.5″ x 2.5″), and 12 focal print rectangles (2.5″ x 4.5″), make 12 3/4 Focal Blocks

Full Patchwork Blocks:
Using 48 focal print squares (2.5″ x 2.5″), make 12 Full Patchwork Blocks


3/4 Patchwork Blocks
Using 72 patchwork print squares (2.5″ x 2.5″) and 24 bg squares (2.5″ x 2.5″), make 24 3/4 Focal Blocks

1/4 Patchwork Blocks
Using 12 bg squares (2.5″ x 2.5″), 12 bg rectangles (2.5″ x 4.5″), and 12 patchwork squares (2.5″ x 2.5″), make 12 1/4 Patchwork Blocks


Step Three: Assembling the Quilt Sections

The quilt contains 4 quilt sections, each section containing 25 blocks in a 5 rows x 5 columns arrangement.  Each section contains the following number of blocks:


Arrange the 25 blocks in a 5 by 5 block arrangement as shown below:


Sew blocks together into rows (pressing seams open) and then sew rows together pining at each intersecting seam (pressing seams open).


Repeat 3 more times for a total of 4 quilt sections.  (Alternatively, you may layout the full 10 x 10 block arrangement for the whole quilt, sew the blocks into rows, then sew the rows together).

Sew the 4 quilt sections together (pressing seams open).

Optional Pieced Backing

Select 22 patchwork squares
Cut 2 additional strips 2.5″ x WOF of the background fabric

Sew the 22 patchwork squares into a row, then sew the 2.5″ x WOF background strips onto either side of the patchwork row.

Slice the backing yardage (I made my cut about 2/3 of the way across the fabric) and sew the patchwork section into the background yardage.  


Step 4: Finishing the Quilt

1)    Layer the quilt top, batting, and backing and baste the quilt.

2)    Quilt as desired.  I quilted the focal fabric areas in a straight line lattice, quilted the background areas using a small pebble design, and quilted the patchwork squares with straight line quilting.

3)    Bind the quilt using 5 strips 2.5” x WOF (for straight, not bias binding).  More information on binding can be found here.

Thank you so much for joining me in my first Moda Bake Shop tutorial.  I would love to see what you make with the pattern, please add your quilts to the Moda Bake Shop flicker group and the Meadow Mist Designs flicker group.  Visit this page on my blog (www.meadowmistdesigns.blogspot.com) to see the quilt pattern rendered in other colors including a holiday version.

Cheryl Brickey
{
Meadow Mist Designs}


Story Book Star Baby Quilt

 Hey y’all!  This is my first tutorial with Moda Bake Shop, so if you don’t know me yet, I’m Kristan Kremer from Doodle Do Designs.  Pleased to meet you!

I’m going to share a fun and fast baby quilt pattern with you today.  One super-sized block in the center of the quilt makes for a quick but impressive gift for that new little bundle in your life.  Here’s what you’ll need to make this sweet baby quilt.


1 charm pack (I used Story Book by Kate & Birdie Paper Co.) – Note: you only need 36 charms from the pack

1/3 yard fabric for the center star points (I used the tossed birds print from Story Book)
1/4 yard contrast border fabric (I used Bella Solids Sunshine)
7/8 yard background fabric (I used Bella Solids Bleached White) 
1 1/4 yard backing fabric (I used the pirates and planes print from Story Book)
3/8 yard binding (I used the aqua stars print from Story Book)
1 package of crib sized batting
Disappearing ink pen


Use a 1/4 inch seam throughout
RST = Right Sides Together
WOF = Width of Fabric
HST = Half Square Triangles

  • Pick out 4 charms from your charm pack for the center of the star.
Story Book Star Baby Quilt Tutorial | Doodle Do Designs for Moda Bake Shop

  • Pick out 32 charms from your charm pack for the outer borders, and set aside.
    • Note: Put the rest of your charms back in your stash for another project, or use them to make a scrappy pieced back for this quilt.
Story Book Star Baby Quilt Tutorial | Doodle Do Designs for Moda Bake Shop


Cutting

  • From your star points fabric, cut (2) 10″ squares.
  • From your background fabric, cut:
    • (1) 9″ x WOF, then subcut into (4) 9″ squares
    • (1)10″ x WOF, then subcut into (2) 10″ squares
    • (2) 2 3/4″ x 27 1/2″
    • (2) 2 3/4″ x 32″
  • From your contrast border fabric, cut:
    • (2) 1 1/4″ x 26″
    • (2) 1 1/4″ x 27 1/2″

Assembling the quilt top

  • Sew the 4 charms you chose for your star center into a four patch, and trim to measure 9″ square.  Set aside.
Story Book Star Baby Quilt Tutorial | Doodle Do Designs for Moda Bake Shop

  • Using your 10″ squares, place one background fabric and one star point fabric RST.  Draw a diagonal line from one corner to the opposite corner on the back of one of the squares.  Make two sets.  Sew a 1/4″ away from the seam on each side of this line for both sets.  Cut on the line to make four sets of HST blocks.  Press the seams toward the darker fabric.
Story Book Star Baby Quilt Tutorial | Doodle Do Designs for Moda Bake Shop

  • Place two HST blocks RST.  Draw a diagonal line from one corner to the opposite corner on the back of one of the squares.  Sew a 1/4″ away from the seam on each side of this line.  Cut on the line.  Press the seams open.  Trim to 9″ square.  Repeat for the second set.  You should now have four hourglass blocks.
Story Book Star Baby Quilt Tutorial | Doodle Do Designs for Moda Bake Shop

  • Using your four patch, four 9″ squares of background fabric, and four hourglass blocks, arrange in a nine patch as pictured.
Story Book Star Baby Quilt Tutorial | Doodle Do Designs for Moda Bake Shop
  • Sew the units making up each row together, press seams to alternating sides.  Then sew the rows together, nesting your seams.  Press seams open.

  • Sew a 1 1/4″ x 26″ contrast border strip to each side of your large center star.  Press seams toward the darker fabric.  Sew a 1 1/4″ x 27 1/2″ contrast border strip to the top and bottom of your large center star.  Press seams toward the darker fabric.
Story Book Star Baby Quilt Tutorial | Doodle Do Designs for Moda Bake Shop

  • Sew a  2 3/4″ x 27 1/2″ background border strip to each side of your large center star.  Press seams toward the darker fabric.  Sew a 2 3/4″ x 31 1/2″ background border strip to the top and bottom of your large center star.  Press seams toward the darker fabric.
Story Book Star Baby Quilt Tutorial | Doodle Do Designs for Moda Bake Shop

  • Using the 32 charms you set aside earlier, sew together in 2 rows each of 7 charms and 2 rows each of 9 charms.  Press seams to one side.
Story Book Star Baby Quilt Tutorial | Doodle Do Designs for Moda Bake Shop
  • Sew a 7 charm unit to each side of the quilt.  Press seams toward the charm border.  Sew a 9 charm unit to the top and bottom of the quilt.  Press seams toward the charm border.
Story Book Star Baby Quilt Tutorial | Doodle Do Designs for Moda Bake Shop

  • Your quilt top is all finished!  Now just give it a good press, make a quilt sandwich with your batting and backing, and then quilt and bind as desired.  I prefer to use machine binding with baby quilts since they will be getting lots of love and washing.
Story Book Star Baby Quilt Tutorial | Doodle Do Designs for Moda Bake Shop


One 41″ square baby quilt full of love and snuggles.

Story Book Star Baby Quilt Tutorial | Doodle Do Designs for Moda Bake Shop

Kristan Kremer
{doodledodesigns.blogspot.com}

Maritime Baby Quilt

maritime baby quilt

Hi everyone! Looking for a baby quilt that is simple and fairly quick to make?   This project is completed with a beautiful nautical and neutral line of fabric called Hearty Good Wishes by Janet Clare. I also envision this pattern in a fun black and white theme with pops of color in the secondary designs! If you decide to make this quilt, I would love to see your creation!   You can learn more about me and see some of my work on my blog at Urban Quiltworks.


  • 1 jelly roll –  Hearty Good Wishes  by Janet Clare
  • 3/4 yard Hearty Good Wishes – 1357 – Pearl
  • 1/2 yard Hearty Good Wishes – 1357 – Dark Ocean
  • 3.5 yards Hearty Good Wishes – 1352 – Sand


Separate jelly roll into creams, light blues, dark blues, and taupes.

From assorted cream prints cut:

  • 36 – 2.5” x 4.5” strips

From assorted light blue strips cut:

  • 36 – 2.5″ x 2.5” squares
  • 36 – 2.5″ x 4.5″ strips
  • 18 – 2.5″ x 6.5″ strips

Assorted dark blue strips cut:

  • 36 – 2.5″ x 2.5” squares
  • 36  – 2.5″ x 4.5” strips
  • 18 – 2.5″ x 6.5” strips

Assorted taupe strips cut:

  • 36 – 2.5″ x 2.5″ squares

Pearl fabric yardage  – cut 36  –  2.5” x 8.5” strips

*All seams are to be pressed open when assembling blocks. 
**When piecing together blocks, keep in mind that you will be making a total of 18 light blue and 18 dark blue blocks.

Sew cream 4.5” strip to light blue 4.5” strip –  make 18
Sew cream 4.5” strip to dark blue 4.5” strip –  make 18
Set aside.


Sew a  2.5” dark blue square to a 4.5” light blue strip –  make 18
Sew a 2.5” light blue square to a  4.5” dark blue strip – make 18
Set aside.


Sew a 2.5” taupe square to a 2.5” light blue square –  make 18
Sew a 2.5” taupe square to a 2.5” dark blue square –  make 18

Sew 2.5” taupe/light blue pieced strip to 4.5” light blue/cream piece as shown.
(make 18) Make sure taupe coloured square is positioned on the top right corner.    

Sew 2.5” taupe/dark blue pieced strip to 4.5” dark blue/cream piece as shown (make 18).  Make sure taupe coloured square is positioned on the top right corner.

Sew dark blue pieced 6.5” strip to dark blue block(make 18)  as shown:

and light blue pieced 6.5” strip to light blue (make 18)  as shown:


Complete the rectangle shape by sewing the 6.5″ light blue strip to the top of the light blue block, and the 6.5″ dark blue strip to the top of the dark blue block as shown:

Sew one pearl 8.5” strip to the solid blue side of each block (make 18 dark blue, 18 light blue) as shown:

Assemble and sew two light blue blocks with two dark blue blocks as shown, matching seams:

Lay out blocks  in a 3 x 3 order:

Sew blocks and rows together matching seams: 

I quilted this quite heavily, although it can completed more quickly with an allover design:


Bind with the Dark Ocean fabric using your preferred method of binding.


This makes a beautiful baby sized quilt,  48”  x 48”

Andrea Harris
{www.urbanquiltworks.com}