Biscornu Sachets


It’s Casey again, from Casey York Design and the Studiolo blog! I’m so happy to be sharing this easy project on the Moda Bake Shop just in time for the holidays!

I love the idea of making handmade gifts for the holidays, but somehow I never start planning them until the beginning of December (i.e. too late). This year I finally came up with something that I can make quickly and easily enough so that I can produce a bunch for all of the people on my list: Biscornu sachets.

Biscornu are a relatively recently developed needlework form, in which two squares are sewn together with one on point to create a three dimensional shape that looks more complicated than it really is. I love how the interlocking points create visual interest in these little cushions. Because they are constructed from squares of fabric, biscornu are an ideal use for precuts such as charm squares.

I’m not the first to translate the biscornu form for use with quilting fabrics, but most of the tutorials out there are for making pin cushions. This is easy to do by firmly stuffing the sewn biscornu. I discovered that another way to use this form was to make them into scented sachets by  filling them loosely with lavender or other scented materials. If you use a sewing machine, they are so quick to sew up that you can make a set of three in under an hour. Pop a few in a stocking or wrap up a stack to give as quick hand made gifts this year!

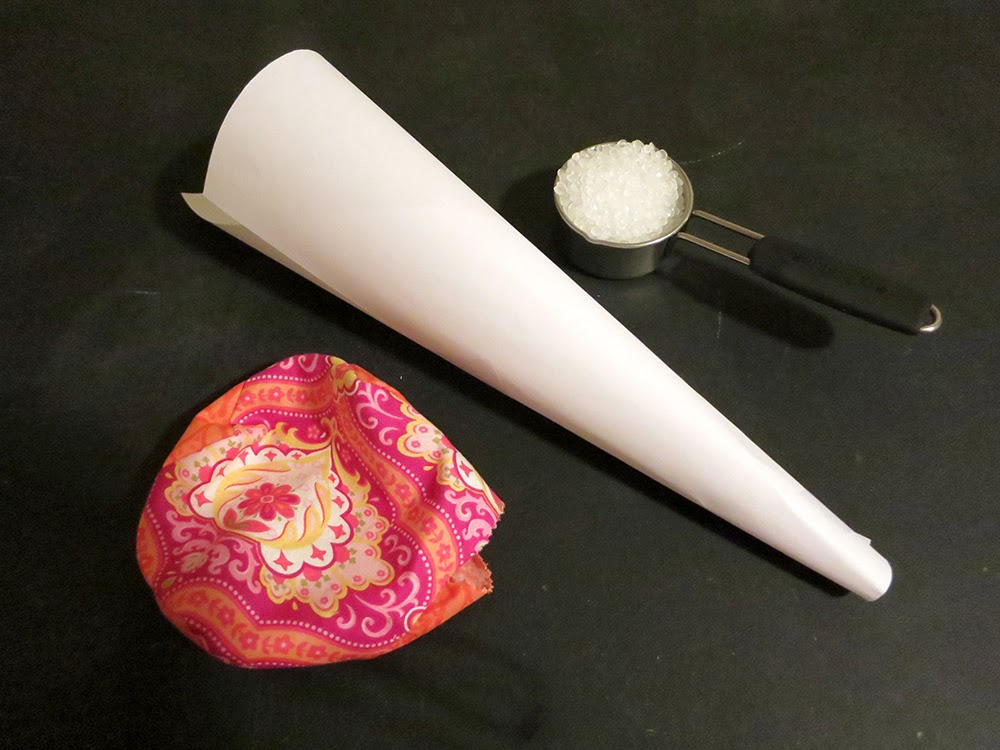
For one biscornu satchet you will need:

  • (2) 5″ charm squares of coordinating fabrics (I like to go through an entire charm pack and match up my squares in advance so I get a good mix of colors and prints throughout the batch of biscornu; a Moda charm pack will yield 21 biscornu, or 7 sets of three)
  • matching sewing thread
  • 3/4 cup small polypropelene stuffing beads (available at major craft retailers)
  • 1/4 cup dried lavender (I got mine on Amazon) or other fragrant dried material
  • hand sewing needle
  • Perle cotton or embroidery floss to coordinate with fabrics
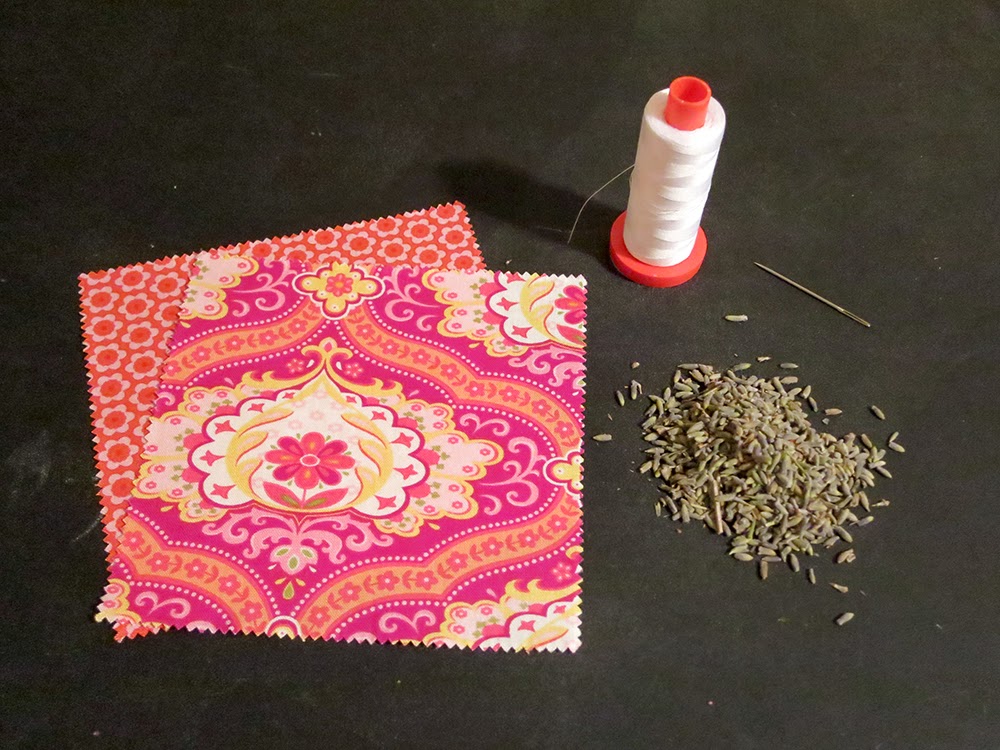
Stuffing beads are not shown

1. fold each square in half lengthwise and widthwise and finger press at the edges to mark the half-way point on each edge

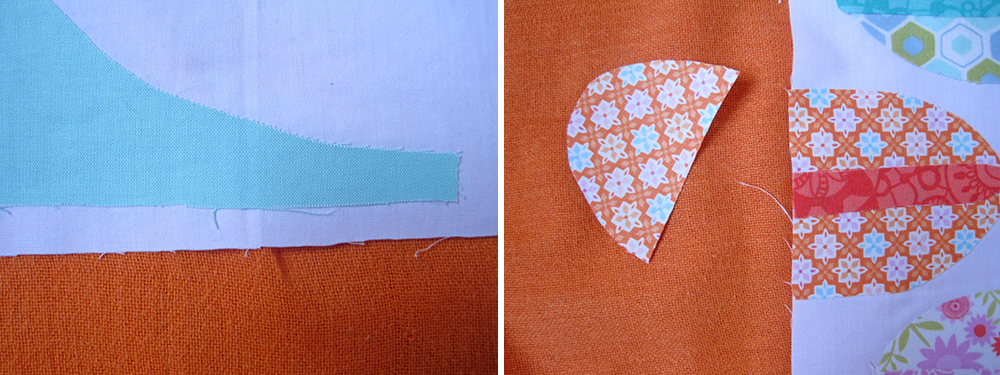
2. With right sides together, place one square on top of the other so that the top square’s side edge is positioned 1/4″ to the left of the half-way mark on the top edge of the lower square. Make sure the parallel raw edges are aligned (they are not aligned in the photo to make it easier to see how to line up the halfway marks and corners).

3. Using a 1/4″ seam allowance, begin stitching at the half-way point of the lower square, moving towards the corner. Stop 1/4″ before you reach the corner of the lower square.

4. Here comes the tricky part. You need to pivot your lower square while keeping the upper square in position, so that the remaining unsewn edge of the top square lines up with the perpendicular edge of the lower square. It helps to think of yourself as holding the top square in position and only pivoting the lower square.

This is how the squares will look after the first pivot

5. When you have lined up your squares, lower your presser foot and continue stitching until you are 1/4″ away from the edge of the top square.

6. Now do step 4 in reverse. Holding the lower square in place, pivot the top square so that the edges of the two squares line up. Lower the presser foot and continue stitching until you are 1/4″ from the edge of the lower square.

7. Repeat steps 3-6 until you have traveled all the way around the squares–you will pivot six times. Leave one length (1/2 of the width of the squares) unsewn for turning and stuffing.

8. Turn the biscornu inside out, using your finger to gently poke out the corners.

9. Fill with 3/4 cup of stuffing beads and 1/4 cup of lavender. It is easiest to fill the sachets by rolling a sheet of paper into a cone and pouring the beads and lavender through this. (I have also seen instructions for filling sachets with rice or flax seed, but I prefer stuffing beads because they won’t attract pests.)

9. Finger press the unsewn edges under 1/4.” Slip stitch the opening closed by hand.

10. Using the embroidery floss or perle cotton, make a couple of tacking stitches in the center of the biscornu to pull the top and bottom layers together.

That’s it–you’ve created a lovely and useful sachet. Although these instructions seem complex written out, you’ll get the hang of stitching these on the machine very quickly and you’ll be able to churn out a charm pack’s worth in no time. (If you make some, consider adding photos to my flickr group! I’d love to see what you make!)


1 biscornu sachet. 1 charm pack will yield 21 sachets.

Casey York
{www.studioloblog.wordpress.com}

Type Geek Pillows


Hi there! It’s Casey from Casey York Design and Studioloblog.wordpress.com, and I’m back to share the pattern for my Type Geek pillows. I am a self-professed type geek, myself, so I couldn’t resist coming up with a project for Typography month on the Moda Bake Shop. These pillows are a perfect way to showcase your favorite fabric collections and fonts. I had so much fun matching typefaces to fabric lines that I couldn’t stop with just one pillow and ended up making three. You can find the templates for these three appliqued words in the Printer Friendly version of this tutorial at the bottom of this page. However, it’s easy to create your own templates, and this project is even more fun if you make up your own fabric-font pairings. I hope you have as much fun with this project as I did, and that you’ll share your finished pillows with me through the Casey York Quilts flickr group!

Front patchwork and back appliqué: one jelly roll (samples show PB&J, Comma, and 2wenty Thr3e)
Pillow back: (1) fat quarter or ¼ yd. solid white fabric (samples show Bella Solids in Porcelain)
Front Appliqué: (1) piece solid white fabric, 12” long X 3” wide
Lightweight, double-sided, paper backed fusible web: (1) 9” X 12” sheet
(1) 18” zipper 

Please note: this pattern uses only (9) jelly roll strips, resulting in a lot of leftover fabric. You may want to plan another project to use the excess—I recommend one of the other wonderful tutorials here on the Moda Bake Shop!


Step 1: Make the pillow front:

Select nine strips from the jelly roll, trim to measure 18” long. Stitch along long sides to form a striped patchwork panel. Trim to measure 17 ½” X 17 ½.”

Tip: For maximum contrast, try to position a darker print or near solid as the second stripe from the bottom. This will ensure that your white appliqués show up well. Reserve the rest of this strip for the appliqués on the back of the pillow, which you will make in Step 2.

Step 2: Make the Appliqués

Print the template for the typeface of your choice—this tutorial features Helvetica, Rockwell, and Playbill. You will only need one template page per pillow. Templates can be found in the printer friendly version of this tutorial linked at the bottom of this page.


Tip: Make your own templates: Select a favorite font from your computer’s word processing program (bold san serif or slab serif fonts work best for this project). Type out the name of the typeface, then enlarge the character size until the letters are approximately 2” tall. This generally works out to be a type size of 180 to 210 pt., although this will differ from typeface to typeface. Print your template; for the pillow front appliqués, reverse the letters by turning the page over and tracing the outlines of the printed characters on the back. Use your templates to make fusible appliqués as follows.

Following the manufacturer’s instructions, trace the templates onto the double-sided light fusible web. Cut out roughly, leaving a ¼” margin around your traced lines; you may want to cut out the entire word rather than cutting out each letter individually. Fuse the letters that appear reversed onto your white appliqué fabric. Fuse the letters that appear correctly oriented onto the wrong side of the jelly roll strip you reserved from Step 1, or a different strip that matches the second stripe from the bottom of your patchwork panel. Make sure to use a pressing cloth between your iron and fabric in order to avoid getting sticky residue on your sole plate.

Step 3: Place the Front Appliques:

Position your white fabric appliqués on the patchwork panel, aligning them with the bottom edge of the second stripe from the bottom. You will want to make sure that the last letter is at least 1 ½” from the right hand edge of the panel to leave room for the seam allowance.

Tip: Begin laying out your letters from the right-most letter and move left (i.e. backwards) towards the left side of the panel. 

When you are satisfied with your layout, fuse the appliqués in place, again using a pressing cloth between fabric and iron. Stitch around the appliqués using your machine or by hand; the samples were stitched by hand using a blanket stitch and a single strand of six-stranded cotton embroidery floss.


Step 4: Make the Pillow back:

From the solid white fabric, cut two rectangles measuring 17 ½” wide X 8 ½” long and 17 ½” wide X 11 ½” long. Fold one long edge of the 17 ½” X 8 ½” rectangle back 1 inch and press well, creating a crease.

Install the zipper: 

Make sure the zipper is zipped. Unfold the crease in the 17 ½” X 8 ½” rectangle and place with the crease facing up; this is the right side of your pillow back. Place zipper face-down along the 17 ½” edge closest to the crease and align long edge of zipper tape with edge of fabric; pin well. Your zipper will be slightly longer than your pillow back is wide; to create a new “stop”, simply stitch back and forth several times across the zipper teeth at the point where the zipper reaches the 8 ½” edge of the fabric. Use your machine’s zipper foot to stitch as close to the zipper teeth as possible. When you approach the zipper pull, lower the needle, raise your presser foot, and carefully unzip the zipper until the pull is behind your needle. Lower the presser foot and continue stitching to the end of the zipper.

Refold crease; stitch along fold as close as possible to the zipper, making sure not to catch the zipper tape in your stitching. This will create a placket to cover the zipper.
 

Unzip the zipper. Place the tape face down against a 17 ½” edge of the 17 ½” X 11 ½” rectangle and pin well. Stitch as close as possible to the zipper teeth. This time, when you reach the zipper pull, carefully zip the zipper until the zipper pull is behind your needle. Continue stitching to the end of the zipper. Zip the zipper, place pillow back right side up, and press well.

You should have a 17 ½” X 17 ½” square (if slightly larger, trim to measure 17 1/2″ X 17 1/2″). Baste along side edges to hold zipper together when you assemble the pillow cover.

Place the appliqués:

Place your pillow front right side up. Place the pillow back on top with the right side facing down, the zipper towards the top edge, and the edges aligned. You should be able to see your front appliqués through the white fabric of the pillow back. Use a removable fabric marker–I recommend a Hera Marker or other creasing tool–and your ruler to trace lines along the bottom and sides of the word on the front of the cover. These will be your guidelines for placing the appliqués on the back. Turn the pillow back right side up and use the guidelines to place your back appliqués; the letters should be backwards. When you are satisfied with your placement, use your iron to fuse them in place. Stitch around appliqués using your machine or by hand.


Tip: If you use a fabric marker or pencil to make your placement guidelines, make sure you remove your markings before you use your iron to fuse the appliques in place! This is why I prefer to use a creasing tool for this step–I don’t need to remove any markings before pressing.

Step 5: Assemble the Pillow Cover:

Place pillow front cover and back cover together, right sides together. Make sure the zipper is unzipped a few inches. Align edges and pin well. Stitch along edges with a ¼” seam allowance. If you wish, finish the edges with a zigzag stitch. Unzip zipper all the way and turn cover right side out. Insert an 18” X 18” pillow form and you’re done!


This pattern will yield one cover for an 18” X 18” pillow. I recommend making several—have fun matching typefaces to the character of different fabric collections!

  Casey York
{www.casey-york.com}

Macarons Lap Quilt

Hello! I’m Casey from Casey York Design and I blog at Studioloblog.wordpress.com. I’m delighted to be publishing my first pattern with Moda Bakeshop. This charm-pack friendly pattern features colorful French macarons, which seem to fit well with the title of this blog. For the quilt pictured, I used Kate Spain’s recently released Honey Honey collection, and I am in love with this line. The colors are so cheerful and springlike and work perfectly for the candy-colored macarons. I hope you enjoy this pattern and that you’ll share your finished quilts with me through the Casey York Quilts flickr group.

If you’d like to see some of my other quilts, many of which I will be releasing patterns for this spring, please stop by my blog and say hi!

(Unless otherwise noted, these requirements refer to 40” 100% cotton quilting fabric)

Macarons appliques: (1) Honey Honey charm pack
Cake Stand applique: ½  yd. fabric for cake stand appliqué (sample shows Bella Solids Aqua)
Background: 1 ½ yds. solid fabric (1 ¼  yds. if fabric is extra wide)
Binding: 1 yd. contrasting fabric for binding (based on 3”wide bias-cut strips; sample shows Lace in Sunset)
Backing: 3 yds. (or multiple fabrics to measure 44″ X 54″ for pieced backing)
Batting: 42″ X 52″ (1 3/4 yds 45+” batting, or one baby-sized package of pre-cut batting)
Lightweight, double-sided, paper backed fusible web : 1 ½ yds. 12” wide web or (6) 9” X 12” sheets


Step 1: Make the Appliqués:

Print the Appliqué Template page, which can be downloaded as a PDF here. Enlarge the Cake Stand template 300% using the settings in the print dialog box that appears when you print the PDF. (The cake stand will print over multiple sheets of paper, which you will then tape together.) The Cookie and Filling templates do not need to be enlarged.
Following manufacturer’s instructions, trace templates onto double-sided paper-backed fusible web. You will need to trace and cut (20) Cookies and Fillings and (1) Cake Stand. The cake stand may need to be traced in multiple sections, as shown below; these will be easy to reassemble when you fuse the web to the fabric in the next steps. As you will be applying these to the wrong side of your fabrics, the templates have already been reversed for you.
Tip: make sure to trace onto the correct side of the fusible web to avoid having to retrace your templates.

Decide which fabrics you want to use for cookies and fillings; I used large scale prints for the cookies and smaller scale or darker value complements for the fillings.
Cut out your traced templates and, following the manufacturer’s instructions, fuse the shapes to the wrong sides of your charm squares and cake stand fabric. Make sure to use a pressing cloth between your iron and fabric in order to avoid getting sticky residue on your sole plate.


Tip: Leaving a small margin around the templates when you cut them from the web is often helpful, but for this type of simple geometric shape I find this unnecessary. For this pattern, I cut the templates out along my tracing lines before fusing to the fabric. This saves my fabric scissors from cutting through extra layers of paper and adhesive, which can dull and gum up the blades. Use whichever method works best for you.
Match up each filling with its corresponding cookie. Although it may be tempting to fuse them together at this point, hold off on this until the next step, otherwise the overhanging portion of the fillings will fuse permanently to your ironing surface. 


Step 2: Assemble the quilt top:

Cut and/or piece your background fabric to measure 40” X 50.”  
Following the placement diagram below (click here for a PDF), arrange you appliqué shapes on the background.  

Position the cookies about one inch apart, and finalize your layout before fusing.  

Make sure to position the cake stand ¼ inch above the bottom edge of the background fabric, so that it is not covered by the binding when the quilt is finished. One cookie will be cut off at the left edge of the quilt—make sure to cut this to fit beforeyou fuse it, to avoid fusing the edge of the cookie to your fusing surface.

Tip: Try to complete this step on the same surface you will be ironing on. Although the unfused web is tacky, it will not necessarily hold the appliqués in place if you move the quilt top.
Appliqué around each shape by hand or with your machine. For this example, I used invisible thread and a zig-zag stitch.

Step 3: Finish the quilt:

Layer your quilt top, batting, and backing; baste and quilt as desired. For the sample, I quilted an allover scroll pattern.

Trim batting and backing even with quilt top. Place a large bowl or plate adjacent to the edges at each corner and trace along its outer curve to mark curved corners. Trim the quilt according to your markings.

Use your contrasting binding fabric to make bias binding and bind using your preferred method.

Tip: bias binding will be easier to sew around the curved corners of the quilt than will straight grain binding.

Have a macaron and admire your finished quilt!


This pattern will yield one 40” X 50” lap quilt, which is my favorite size for brisk late winter days.

Casey York
{studioloblog.wordpress.com}